# Create application beneficiary
Source: https://docs.yapily.com/api-reference/application-beneficiaries/create-application-beneficiary
/openapi-converted.json post /applications/{applicationId}/beneficiaries
Creation of beneficiaries for a given application.
# Delete application beneficiary by id
Source: https://docs.yapily.com/api-reference/application-beneficiaries/delete-application-beneficiary-by-id
/openapi-converted.json delete /applications/{applicationId}/beneficiaries/{beneficiaryId}
Delete application beneficiary.
# Get all application beneficiaries
Source: https://docs.yapily.com/api-reference/application-beneficiaries/get-all-application-beneficiaries
/openapi-converted.json get /applications/{applicationId}/beneficiaries
Get all application beneficiaries from an application.
# Get application beneficiary by id
Source: https://docs.yapily.com/api-reference/application-beneficiaries/get-application-beneficiary-by-id
/openapi-converted.json get /applications/{applicationId}/beneficiaries/{beneficiaryId}
Get user beneficiary by id.
# Create application VRP configuration by Application Id
Source: https://docs.yapily.com/api-reference/application-management/create-application-vrp-configuration-by-application-id
/openapi-converted.json post /applications/{applicationId}/vrp
Create application vrp configuration
# Creates a sub-application for the root application id provided in the authentication token
Source: https://docs.yapily.com/api-reference/application-management/creates-a-sub-application-for-the-root-application-id-provided-in-the-authentication-token
/openapi-converted.json post /applications
Creates a sub-application under the given root application id provided in the authentication token. The sub-application can use the root's credentials to call the API
# Delete an application
Source: https://docs.yapily.com/api-reference/application-management/delete-an-application
/openapi-converted.json delete /applications/{applicationId}
Deletes the application with the given ID in the path
# Get application details
Source: https://docs.yapily.com/api-reference/application-management/get-application-details
/openapi-converted.json get /applications/{applicationId}
Retrieves an application by the id provided in the path
# Get application VRP configuration by Application Id
Source: https://docs.yapily.com/api-reference/application-management/get-application-vrp-configuration-by-application-id
/openapi-converted.json get /applications/{applicationId}/vrp
Get application vrp configuration
# Retrieve sub-applications for the root application provided in the authentication token.
Source: https://docs.yapily.com/api-reference/application-management/retrieve-sub-applications-for-the-root-application-provided-in-the-authentication-token
/openapi-converted.json get /applications
Retrieves sub-applications for the root application provided in the authentication token. If a sub-application is provided in the authentication token, it will return an empty list.
# Update an Application
Source: https://docs.yapily.com/api-reference/application-management/update-an-application
/openapi-converted.json put /applications/{applicationId}
Updates the application properties for the application with the given ID in the path
# Update application VRP configuration by Application Id
Source: https://docs.yapily.com/api-reference/application-management/update-application-vrp-configuration-by-application-id
/openapi-converted.json put /applications/{applicationId}/vrp
Update application vrp configuration
# Authentication
Source: https://docs.yapily.com/api-reference/authentication
Learn how to authenticate with the Yapily API
## Overview
The Yapily API uses **HTTP Basic Authentication**. You authenticate using:
* **Username**: Application ID
* **Password**: Application Secret
For comprehensive setup instructions, see the [API Authentication Guide](/getting-started/integration-setup/api-authentication).
Never commit credentials to version control. Store them securely using environment variables.
## Getting Credentials
1. Log in to [Yapily Console](https://console.yapily.com)
2. Navigate to **Applications**
3. Create or select an application
4. Download your Application ID and Secret
The Application Secret can only be retrieved once. Store it securely.
## Making Authenticated Requests
```bash cURL theme={null}
curl -X GET 'https://api.yapily.com/institutions' \
-u 'YOUR_APPLICATION_ID:YOUR_APPLICATION_SECRET'
```
```python Python theme={null}
import requests
from requests.auth import HTTPBasicAuth
response = requests.get(
'https://api.yapily.com/institutions',
auth=HTTPBasicAuth('YOUR_APPLICATION_ID', 'YOUR_APPLICATION_SECRET')
)
```
```javascript JavaScript theme={null}
const axios = require('axios');
const response = await axios.get('https://api.yapily.com/institutions', {
auth: {
username: 'YOUR_APPLICATION_ID',
password: 'YOUR_APPLICATION_SECRET'
}
});
```
## Using Consent Tokens
After obtaining user consent, pass the consent token in the `consent` header:
```bash theme={null}
curl -X GET 'https://api.yapily.com/accounts' \
-u 'YOUR_APPLICATION_ID:YOUR_APPLICATION_SECRET' \
-H 'consent: USER_CONSENT_TOKEN'
```
## Security Best Practices
* Store credentials in environment variables or secrets managers
* Use HTTPS only (enforced by API)
* Rotate credentials regularly
* Revoke compromised credentials immediately
## Next Steps
Discover available banks.
Request user consent.
# Create Account Authorisation
Source: https://docs.yapily.com/api-reference/authorisations/create-account-authorisation
/openapi-converted.json post /account-auth-requests
Used to initiate the authorisation process and direct users to the login screen of their financial institution in order to give consent to access account data.
Feature: `INITIATE_ACCOUNT_REQUEST`
# Create Bulk Payment Authorisation
Source: https://docs.yapily.com/api-reference/authorisations/create-bulk-payment-authorisation
/openapi-converted.json post /bulk-payment-auth-requests
Used to initiate the authorisation process and direct users to the login screen of their financial Institution in order to give their consent for a bulk payment.
Feature: `INITIATE_BULK_PAYMENT`
# Create Embedded Account Authorisation
Source: https://docs.yapily.com/api-reference/authorisations/create-embedded-account-authorisation
/openapi-converted.json post /embedded-account-auth-requests
Used to initiate the embedded authorisation process for an `Institution` that contains the `INITIATE_EMBEDDED_ACCOUNT_REQUEST` feature in order to obtain the the user's authorisation to access their account information.
Feature: `INITIATE_EMBEDDED_ACCOUNT_REQUEST`
# Create Embedded Bulk Payment Authorisation
Source: https://docs.yapily.com/api-reference/authorisations/create-embedded-bulk-payment-authorisation
/openapi-converted.json post /embedded-bulk-payment-auth-requests
Used to initiate the embedded authorisation process for an `Institution` that contains the `INITIATE_EMBEDDED_BULK_PAYMENT` feature in order to obtain the the user's authorisation for a bulk payment. See [Bulk Payments](/payments/bulk-payments/additional-information) for more information. Feature: `INITIATE_EMBEDDED_BULK_PAYMENT`
# Create Embedded Payment Authorisation
Source: https://docs.yapily.com/api-reference/authorisations/create-embedded-payment-authorisation
/openapi-converted.json post /embedded-payment-auth-requests
Used to initiate the embedded authorisation process for an `Institution` that contains the `INITIATE_EMBEDDED_DOMESTIC_SINGLE_PAYMENT` feature in order to obtain the the user's authorisation for a payment. Feature: `INITIATE_EMBEDDED_DOMESTIC_SINGLE_PAYMENT`
# Create Payment Authorisation
Source: https://docs.yapily.com/api-reference/authorisations/create-payment-authorisation
/openapi-converted.json post /payment-auth-requests
Used to initiate the authorisation process and direct users to the login screen of their financial Institution in order to give their consent for a payment. This endpoint is used to initiate all the different payment listed below. Based on the type of payment you wish to make, you may be required to provide specific properties in [PaymentRequest](/api-reference/createPaymentAuthorisation). First make sure that the payment feature you wish to execute is supported by the bank by checking the features array in [GET Institution](/api-reference/getInstitution).
Features:
- `INITIATE_DOMESTIC_PERIODIC_PAYMENT`
- `INITIATE_DOMESTIC_SCHEDULED_PAYMENT`
- `INITIATE_DOMESTIC_SINGLE_INSTANT_PAYMENT`
- `INITIATE_DOMESTIC_SINGLE_PAYMENT`
- `INITIATE_INTERNATIONAL_PERIODIC_PAYMENT`
- `INITIATE_INTERNATIONAL_SCHEDULED_PAYMENT`
- `INITIATE_INTERNATIONAL_SINGLE_PAYMENT`
# Create Payment Pre-authorisation
Source: https://docs.yapily.com/api-reference/authorisations/create-payment-pre-authorisation
/openapi-converted.json post /payment-pre-auth-requests
Used to initiate the pre-authorisation process for payments for CBI Globe institutions that contain the `INITIATE_ONETIME_PRE_AUTHORISATION_PAYMENTS` feature to authenticate the user.
Feature: `INITIATE_ONETIME_PRE_AUTHORISATION_PAYMENTS`
# Create Pre-authorisation
Source: https://docs.yapily.com/api-reference/authorisations/create-pre-authorisation
/openapi-converted.json post /pre-auth-requests
Used to initiate the pre-authorisation process for any `Institution` that contains the `INITIATE_PRE_AUTHORISATION` feature to authenticate the user.
Feature: `INITIATE_PRE_AUTHORISATION`
# Re-authorise Account Consent
Source: https://docs.yapily.com/api-reference/authorisations/re-authorise-account-consent
/openapi-converted.json patch /account-auth-requests
Used to prompt the account holder for continued access to their financial data. This endpoint should be used when a `Consent` that was previously `AUTHORIZED` can no longer be used to retrieve data.
# Update Account Pre-authorisation
Source: https://docs.yapily.com/api-reference/authorisations/update-account-pre-authorisation
/openapi-converted.json put /account-auth-requests
Used to continue the authorisation process and for any `Institution` that contains the `INITIATE_PRE_AUTHORISATION` feature and direct user to the login screen of their financial institution in order to give consent to access account data.
Features:
- `INITIATE_ACCOUNT_REQUEST`
- `INITIATE_PRE_AUTHORISATION`
# Update Embedded Account Authorisation
Source: https://docs.yapily.com/api-reference/authorisations/update-embedded-account-authorisation
/openapi-converted.json put /embedded-account-auth-requests/{consentId}
Used to pass the SCA Code received from the `Institution` (and the SCA method selected by the user where multiple SCA methods are supported by the `Institution`) in order to complete the embedded authorisation to access the user's financial data.
Feature: `INITIATE_EMBEDDED_ACCOUNT_REQUEST`
# Update Embedded Bulk Payment Authorisation
Source: https://docs.yapily.com/api-reference/authorisations/update-embedded-bulk-payment-authorisation
/openapi-converted.json put /embedded-bulk-payment-auth-requests/{consentId}
Used to pass the SCA Code received from the `Institution` (and the SCA method selected by the user where multiple SCA methods are supported by the `Institution`) in order to complete the embedded authorisation to initiate a bulk payment. See [Bulk Payments](/payments/bulk-payments/additional-information) for more information. Feature: `INITIATE_EMBEDDED_BULK_PAYMENT`
# Update Embedded Payment Authorisation
Source: https://docs.yapily.com/api-reference/authorisations/update-embedded-payment-authorisation
/openapi-converted.json put /embedded-payment-auth-requests/{consentId}
Used to pass the SCA Code received from the `Institution` (and the SCA method selected by the user where multiple SCA methods are supported by the `Institution`) in order to complete the embedded authorisation to initiate a payment. Feature: `INITIATE_EMBEDDED_DOMESTIC_SINGLE_PAYMENT`
# Update Payment Pre-authorisation
Source: https://docs.yapily.com/api-reference/authorisations/update-payment-pre-authorisation
/openapi-converted.json put /payment-auth-requests
Used to continue the authorisation process and for any `Institution` that contains the `INITIATE_PRE_AUTHORISATION` feature and direct user to the login screen of their financial institution in order to give consent to initiate a payment. Feature: `INITIATE_PRE_AUTHORISATION`
# Delete Consent
Source: https://docs.yapily.com/api-reference/consents/delete-consent
/openapi-converted.json delete /consents/{consentId}
Delete a consent using the consent Id
# Exchange OAuth2 Code
Source: https://docs.yapily.com/api-reference/consents/exchange-oauth2-code
/openapi-converted.json post /consent-auth-code
Used to obtain a Yapily Consent object containing the `consentToken` once the user has authenticated and you have an OAuth2 authorisation code `auth-code` and state `auth-state`.
# Exchange One Time Token
Source: https://docs.yapily.com/api-reference/consents/exchange-one-time-token
/openapi-converted.json post /consent-one-time-token
Exchange a One-time-token for the consent token
# Extend Consent
Source: https://docs.yapily.com/api-reference/consents/extend-consent
/openapi-converted.json post /consents/{consentId}/extend
Used to indicate to Yapily that reconfirmation has occurred for a given Consent, and to update lastUpdatedAt and reconfirmBy for that Consent. Returns the Consent.
# Get Consent
Source: https://docs.yapily.com/api-reference/consents/get-consent
/openapi-converted.json get /consents/{consentId}
Get consent using the consent Id
# Get Consents
Source: https://docs.yapily.com/api-reference/consents/get-consents
/openapi-converted.json get /consents
Used to retrieve all the consents created for each user within an application. At least one of the following filters needs to be applied: filter[applicationUserId], filter[userUuid]=, limit=.
# Get Data Constraints Rules
Source: https://docs.yapily.com/api-reference/constraints/get-data-constraints-rules
/openapi-converted.json get /institutions/constraints/data
Get Data Constraints Rules against an Institution for Account Authorisation requests
# Get Payment Constraints Rules
Source: https://docs.yapily.com/api-reference/constraints/get-payment-constraints-rules
/openapi-converted.json get /institutions/constraints/payments
Retrieve institution specific constraints for payment authorisation and submission requests
# Create Categorisation Feedback
Source: https://docs.yapily.com/api-reference/data-plus/create-categorisation-feedback
/openapi-converted.json post /transactions/categorisation/{categorisationId}/feedback
Submit feedback for categorised transactions, by Categorisation ID and Transaction Hashes.
# Enrichment
Source: https://docs.yapily.com/api-reference/data-plus/enrichment
/openapi-converted.json post /transactions/categorisation
Trigger categorisation for transactions provided in the request.
# Get Categorisation Feedback
Source: https://docs.yapily.com/api-reference/data-plus/get-categorisation-feedback
/openapi-converted.json get /transactions/categorisation/{categorisationId}/feedback
Retrieve categorisation feedback submitted on any transactions of the Categorisation ID.
# Get Categorisation Feedback by ID
Source: https://docs.yapily.com/api-reference/data-plus/get-categorisation-feedback-by-id
/openapi-converted.json get /transactions/categorisation/feedback/{feedbackId}
Retrieve categorisation feedback by ID.
# Get Categorised Transactions (Deprecated)
Source: https://docs.yapily.com/api-reference/data-plus/get-categorised-transactions-deprecated
/openapi-converted.json get /accounts/{accountId}/transactions/categorisation/{categorisationId}
__Deprecated__. Retrieve categorised transactions by Categorisation ID.
Use the [other endpoint (`/transactions/categorisation/{categorisationId}`)](#operation/get-transactions-categorised) instead.
# Get Enrichment Labels
Source: https://docs.yapily.com/api-reference/data-plus/get-enrichment-labels
/openapi-converted.json get /transactions/categorisation/categories/{accountType}
Returns the list of categories that can be returned for a specific account type (consumer or business).
# Get Enrichment Results
Source: https://docs.yapily.com/api-reference/data-plus/get-enrichment-results
/openapi-converted.json get /transactions/categorisation/{categorisationId}
Retrieve categorised transactions by Categorisation ID.
Please [use webhooks](/introductionpages/data/data-plus/tutorial-categorisation/) to be notified when your transactions have been categorised and are ready for retrieval.
Note that when using the [Transactions and Categorisation endpoint](/api-reference/post-accounts-accountId-transactions-categorisation) this endpoint may also return any data specified by the [Get Account Transactions endpoint](/api-reference/getTransactions); this endpoint's docs mentions a non-exhaustive subset of such data.
# Transactions and Enrichment
Source: https://docs.yapily.com/api-reference/data-plus/transactions-and-enrichment
/openapi-converted.json post /accounts/{accountId}/transactions/categorisation
Trigger categorisation for transactions from [AIS (see Get Transactions endpoint)](/api-reference/getTransactions) in the specified time range.
# Get Account
Source: https://docs.yapily.com/api-reference/financial-data/get-account
/openapi-converted.json get /accounts/{accountId}
Returns the account and balance information for a user's specified account.
Feature: `ACCOUNT`
# Get Account Balances
Source: https://docs.yapily.com/api-reference/financial-data/get-account-balances
/openapi-converted.json get /accounts/{accountId}/balances
Returns the balance for the end user associated with the presented consent token.
Feature: `ACCOUNT_BALANCES`
# Get Account Beneficiaries
Source: https://docs.yapily.com/api-reference/financial-data/get-account-beneficiaries
/openapi-converted.json get /accounts/{accountId}/beneficiaries
Returns all the beneficiaries of a user's account.
Feature: `ACCOUNT_BENEFICIARIES`
# Get Account Direct Debits
Source: https://docs.yapily.com/api-reference/financial-data/get-account-direct-debits
/openapi-converted.json get /accounts/{accountId}/direct-debits
Returns the list of direct debits for an account.
Feature: `ACCOUNT_DIRECT_DEBITS`
# Get Account Periodic Payments
Source: https://docs.yapily.com/api-reference/financial-data/get-account-periodic-payments
/openapi-converted.json get /accounts/{accountId}/periodic-payments
Returns the list of periodic payments (standing orders in the UK) for an account.
Feature: `ACCOUNT_PERIODIC_PAYMENTS`
# Get Account Scheduled Payments
Source: https://docs.yapily.com/api-reference/financial-data/get-account-scheduled-payments
/openapi-converted.json get /accounts/{accountId}/scheduled-payments
Returns the list of scheduled payments for an account.
Feature: `ACCOUNT_SCHEDULED_PAYMENTS`
# Get Account Statement
Source: https://docs.yapily.com/api-reference/financial-data/get-account-statement
/openapi-converted.json get /accounts/{accountId}/statements/{statementId}
Returns a statement for an account.
Feature: `ACCOUNT_STATEMENT`
# Get Account Statement File
Source: https://docs.yapily.com/api-reference/financial-data/get-account-statement-file
/openapi-converted.json get /accounts/{accountId}/statements/{statementId}/file
Returns a PDF file of a statement for an account.
Feature: `ACCOUNT_STATEMENT_FILE`
# Get Account Statements
Source: https://docs.yapily.com/api-reference/financial-data/get-account-statements
/openapi-converted.json get /accounts/{accountId}/statements
Returns the list of statements for an account.
Feature: `ACCOUNT_STATEMENTS`
# Get Account Transactions
Source: https://docs.yapily.com/api-reference/financial-data/get-account-transactions
/openapi-converted.json get /accounts/{accountId}/transactions
Returns the account transactions for an account.
Feature: `ACCOUNT_TRANSACTIONS`
# Get Accounts
Source: https://docs.yapily.com/api-reference/financial-data/get-accounts
/openapi-converted.json get /accounts
Returns all accounts and balances for the end user associated with the presented consent token.
Feature: `ACCOUNTS`
# Get Identity
Source: https://docs.yapily.com/api-reference/financial-data/get-identity
/openapi-converted.json get /identity
Returns the identity information for an account.
Feature: `IDENTITY`
# Get Real Time Account Transactions
Source: https://docs.yapily.com/api-reference/financial-data/get-real-time-account-transactions
/openapi-converted.json get /accounts/{accountId}/real-time/transactions
Used to get the account transactions for an account in real time with cursor pagination
Feature: `ACCOUNT_TRANSACTIONS`
# Create Hosted Consent Request
Source: https://docs.yapily.com/api-reference/hosted-consent-pages/create-hosted-consent-request
/openapi-converted.json post /hosted/consent-requests
Used to initiate a consent request using Yapily Hosted Pages.
# Get Hosted Consent Request
Source: https://docs.yapily.com/api-reference/hosted-consent-pages/get-hosted-consent-request
/openapi-converted.json get /hosted/consent-requests/{consentRequestId}
Used to get details of a hosted consent request
# Create Hosted payment request
Source: https://docs.yapily.com/api-reference/hosted-payment-pages/create-hosted-payment-request
/openapi-converted.json post /hosted/payment-requests
Used to initiate a payment request using Yapily Hosted Pages.
# Create Pay By Link
Source: https://docs.yapily.com/api-reference/hosted-payment-pages/create-pay-by-link
/openapi-converted.json post /hosted/payment-requests/links
Used to created a long lived payment request for Pay By Link
# Get Hosted payment request
Source: https://docs.yapily.com/api-reference/hosted-payment-pages/get-hosted-payment-request
/openapi-converted.json get /hosted/payment-requests/{paymentRequestId}
Used to get details of a payment request
# Create Hosted Commercial VRP request
Source: https://docs.yapily.com/api-reference/hosted-vrp-pages/create-hosted-commercial-vrp-request
/openapi-converted.json post /hosted/vrp-requests/commercial
Used to initiate a Commercial VRP request using Yapily Hosted Pages.
# Get Hosted Commercial VRP request
Source: https://docs.yapily.com/api-reference/hosted-vrp-pages/get-hosted-commercial-vrp-request
/openapi-converted.json get /hosted/vrp-requests/commercial/{requestId}
Used to get details of a Commercial VRP request
# Get Institution
Source: https://docs.yapily.com/api-reference/institutions/get-institution
/openapi-converted.json get /institutions/{institutionId}
Used to retrieves details of a specific `Institution` within an application
# Get Institutions
Source: https://docs.yapily.com/api-reference/institutions/get-institutions
/openapi-converted.json get /institutions
Used to retrieve all `Institutions` within an application
# API Reference
Source: https://docs.yapily.com/api-reference/introduction
Complete reference for the Yapily API
## Welcome to Yapily API Reference
The Yapily API enables connections between your application and users' banks. This reference provides detailed documentation for all available endpoints.
### Base URL
```
https://api.yapily.com
```
### Authentication
All API requests require Basic Authentication using your Application ID and Application Secret.
```bash theme={null}
curl -u APPLICATION_ID:APPLICATION_SECRET https://api.yapily.com/institutions
```
Learn more in the [Authentication Guide](/api-reference/authentication).
### API Version
Current version: **12.13.0**
### Key Features
Access accounts, transactions, balances, and statements.
Initiate domestic and international payments.
Set up and manage VRP consents and payments.
Discover banks and their supported features.
### Response Format
All responses use JSON with this structure:
```json theme={null}
{
"meta": {
"tracingId": "unique-request-id"
},
"data": {
// Response data
}
}
```
### Error Handling
All API requests may return errors. For comprehensive error handling guidance including error codes, response formats, and troubleshooting:
**[View Error Documentation →](/resources/errors)**
Key points:
* Save the `tracingId` from error responses for support
* Different products use different error formats (see error docs for mapping)
* Include the `tracingId` when [contacting support](/resources/support)
### Need Help?
* [Getting Started Guide](/getting-started/get-started)
* [Sandbox Testing](/resources/sandbox/overview)
* [Support](https://support.yapily.com/hc/en-gb)
# Create Event Subscription
Source: https://docs.yapily.com/api-reference/notifications/create-event-subscription
/openapi-converted.json post /notifications/event-subscriptions
Used to subscribe to notifications relating to a specified event type.
# Delete Event Subscription
Source: https://docs.yapily.com/api-reference/notifications/delete-event-subscription
/openapi-converted.json delete /notifications/event-subscriptions/{eventTypeId}
Used to unsubscribe to notifications relating to a specified event type.
# Get Event Subscription
Source: https://docs.yapily.com/api-reference/notifications/get-event-subscription
/openapi-converted.json get /notifications/event-subscriptions/{eventTypeId}
Used to get details of your subscription to a specified event type.
# Get Event Subscriptions
Source: https://docs.yapily.com/api-reference/notifications/get-event-subscriptions
/openapi-converted.json get /notifications/event-subscriptions
Get all event subscriptions that your application is subscribed to
# Create Bulk Payment
Source: https://docs.yapily.com/api-reference/payments/create-bulk-payment
/openapi-converted.json post /bulk-payments
Creates a bulk payment after obtaining the user's authorisation.
Feature: `CREATE_BULK_PAYMENT`
# Create Payment
Source: https://docs.yapily.com/api-reference/payments/create-payment
/openapi-converted.json post /payments
Creates a payment after obtaining the user's authorisation.
Features:
- `CREATE_DOMESTIC_PERIODIC_PAYMENT`
- `CREATE_DOMESTIC_SCHEDULED_PAYMENT`
- `CREATE_DOMESTIC_SINGLE_INSTANT_PAYMENT`
- `CREATE_DOMESTIC_SINGLE_PAYMENT`
- `CREATE_INTERNATIONAL_PERIODIC_PAYMENT`
- `CREATE_INTERNATIONAL_SCHEDULED_PAYMENT`
- `CREATE_INTERNATIONAL_SINGLE_PAYMENT`
# Get Bulk Payment File Status
Source: https://docs.yapily.com/api-reference/payments/get-bulk-payment-file-status
/openapi-converted.json get /bulk-payments/{bulkPaymentId}
Returns the bulk file status of the bulk payment for given bulkPaymentId
# Get Bulk Payment Status Details
Source: https://docs.yapily.com/api-reference/payments/get-bulk-payment-status-details
/openapi-converted.json get /bulk-payments/{bulkPaymentId}/details
Retrieve details of each payment submitted for a given bulkPaymentId.
Feature: `EXISTING_BULK_PAYMENT_DETAILS`
# Get Payment Details
Source: https://docs.yapily.com/api-reference/payments/get-payment-details
/openapi-converted.json get /payments/{paymentId}/details
Returns the details of a payment.
Most commonly used to check for payment status updates.
Feature: `EXISTING_PAYMENTS_DETAILS`
# Approve Beneficiary
Source: https://docs.yapily.com/api-reference/user-beneficiaries/approve-beneficiary
/openapi-converted.json post /users/{userId}/beneficiaries/{beneficiaryId}/approve
End-user has approved the beneficiary details
# Create Beneficiary
Source: https://docs.yapily.com/api-reference/user-beneficiaries/create-beneficiary
/openapi-converted.json post /users/{userId}/beneficiaries
Creation of beneficiaries for a given application User.
# Delete user beneficiary by id.
Source: https://docs.yapily.com/api-reference/user-beneficiaries/delete-user-beneficiary-by-id
/openapi-converted.json delete /users/{userId}/beneficiaries/{beneficiaryId}
Delete user beneficiary by id.
# Get all users beneficiaries
Source: https://docs.yapily.com/api-reference/user-beneficiaries/get-all-users-beneficiaries
/openapi-converted.json get /users/{userId}/beneficiaries
Get all users beneficiaries from an userId.
# Get beneficiary by id
Source: https://docs.yapily.com/api-reference/user-beneficiaries/get-beneficiary-by-id
/openapi-converted.json get /users/{userId}/beneficiaries/{beneficiaryId}
Get user beneficiary by id.
# Patch User Beneficiary
Source: https://docs.yapily.com/api-reference/user-beneficiaries/patch-user-beneficiary
/openapi-converted.json patch /users/{userId}/beneficiaries/{beneficiaryId}
Patch the beneficiary details for a given application user and beneficiary
# Reject Beneficiary
Source: https://docs.yapily.com/api-reference/user-beneficiaries/reject-beneficiary
/openapi-converted.json post /users/{userId}/beneficiaries/{beneficiaryId}/reject
End-user has rejected the beneficiary details
# Create User
Source: https://docs.yapily.com/api-reference/users/create-user
/openapi-converted.json post /users
Create a new user in your application
# Delete User
Source: https://docs.yapily.com/api-reference/users/delete-user
/openapi-converted.json delete /users/{userUuid}
Delete a user from your application along with any sub-resources (including consent resources on institution APIs if they exist)
# Get User
Source: https://docs.yapily.com/api-reference/users/get-user
/openapi-converted.json get /users/{userUuid}
Get a specific user using the user UUID
# Get Users
Source: https://docs.yapily.com/api-reference/users/get-users
/openapi-converted.json get /users
Retrieves all users created in your application for a specified applicationUserId using the filter[applicationUserId] query parameter. If filter[applicationUserId] is not provided, the response will include up to 50,000 users.
# Update User
Source: https://docs.yapily.com/api-reference/users/update-user
/openapi-converted.json patch /users/{userUuid}
Update the users information
# Confirm Funds for VRP Payment
Source: https://docs.yapily.com/api-reference/variable-recurring-payments/confirm-funds-for-vrp-payment
/openapi-converted.json post /variable-recurring-payments/funds-confirmation
Check whether the requested funds amount is available on the [VRP](/payments/vrps/introduction) consent.
Note that you should not call this before each VRP payment submission because we do it for you.
Required feature: `VARIABLE_RECURRING_PAYMENT_FUNDS_CONFIRMATION`
# Create Sweeping VRP Authorisation
Source: https://docs.yapily.com/api-reference/variable-recurring-payments/create-sweeping-vrp-authorisation
/openapi-converted.json post /variable-recurring-payments/sweeping/consents
Initiate authorisation for a Sweeping [VRP](/payments/vrps/introduction) consent.
The response will contain an Authorisation URL and the associated Consent ID. The user will have to complete authorisation of the consent at their institution via [Redirect Flows](/getting-started/glossary#redirect-flow), after which you will be able to use the authorised consent to create payments.
Feature:
- `INITIATE_DOMESTIC_VARIABLE_RECURRING_PAYMENT_SWEEPING`
# Create VRP Payment
Source: https://docs.yapily.com/api-reference/variable-recurring-payments/create-vrp-payment
/openapi-converted.json post /variable-recurring-payments/payments
Submit payment on the [VRP](/payments/vrps/introduction) consent.
Required feature: `CREATE_DOMESTIC_VARIABLE_RECURRING_PAYMENT_SWEEPING` or `CREATE_DOMESTIC_VARIABLE_RECURRING_PAYMENT_COMMERCIAL`
# Get Commercial VRP Consent Details
Source: https://docs.yapily.com/api-reference/variable-recurring-payments/get-commercial-vrp-consent-details
/openapi-converted.json get /variable-recurring-payments/commercial/consents/{consentId}
Get Commercial [VRP](/payments/vrps/introduction) consent details from the Consent ID.
Feature: `CREATE_DOMESTIC_VARIABLE_RECURRING_PAYMENT_COMMERCIAL`
Note that Commercial VRP authorisation/initiation is currently only available through a Hosted VRP flow (specifically, `POST /hosted/vrp-requests`).
# Get Sweeping VRP Consent Details
Source: https://docs.yapily.com/api-reference/variable-recurring-payments/get-sweeping-vrp-consent-details
/openapi-converted.json get /variable-recurring-payments/sweeping/consents/{consentId}
Get Sweeping [VRP](/payments/vrps/introduction) consent details from the Consent ID.
Feature: `CREATE_DOMESTIC_VARIABLE_RECURRING_PAYMENT_SWEEPING`
# Get VRP Payment Details
Source: https://docs.yapily.com/api-reference/variable-recurring-payments/get-vrp-payment-details
/openapi-converted.json get /variable-recurring-payments/payments/{paymentId}/details
Get [VRP](/payments/vrps/introduction) payment details from the Payment ID.
Features: `CREATE_DOMESTIC_VARIABLE_RECURRING_PAYMENT_SWEEPING` or `CREATE_DOMESTIC_VARIABLE_RECURRING_PAYMENT_COMMERCIAL`
# Delete Webhook Event
Source: https://docs.yapily.com/api-reference/webhooks/delete-webhook-event
/openapi-converted.json delete /webhook/events/{webhook_id}
Delete a webhook event for a specified webhook ID, unregistering it from receiving any further notifications for the subscribed event categories in your application.
# Get Webhook Categories
Source: https://docs.yapily.com/api-reference/webhooks/get-webhook-categories
/openapi-converted.json get /webhook/events/categories
Retrieve a comprehensive list of event categories that can be registered for webhook notifications in your application. These event categories can be used to subscribe a webhook to specific events, enabling your application to receive real-time notifications when these events occur.
# Register Webhook Event
Source: https://docs.yapily.com/api-reference/webhooks/register-webhook-event
/openapi-converted.json post /webhook/events
Register a webhook to one or multiple event categories to receive real-time notifications when specific events occur in your application.
# Reset Webhook Secret
Source: https://docs.yapily.com/api-reference/webhooks/reset-webhook-secret
/openapi-converted.json post /webhook/secrets/{webhook_id}
Reset webhook secret for a webhook that is already registered to your application
# Retrieve All Webhook Events
Source: https://docs.yapily.com/api-reference/webhooks/retrieve-all-webhook-events
/openapi-converted.json get /webhook/events
Retrieve the list of registered webhooks for your application
# Understanding Consents
Source: https://docs.yapily.com/concepts/consent-lifecycle
How consents work in open banking, their lifecycle, status transitions, and management for data access and payments.
## What is a consent?
A consent is the customer's explicit permission for your application to either access their financial data or make a payment from their account. Unlike traditional payment methods that rely on stored credentials, open banking requires explicit, time-bound customer authorisation for each data access or payment interaction.
In Yapily's API, a consent is an object that represents this permission. It has a status, a token, and a scope.
You need a valid `consent-token` before calling any data or payment endpoint. No data or payment endpoint can be accessed without a valid consent token. Pass it in the `Consent` header on each request.
With Hosted Pages, you receive the consent token automatically at the end of the flow. With the Direct API, you manage the consent flow yourself.
## AIS consent vs PIS consent
| | AIS Consent (Data Access) | PIS Consent (Payment) |
| ------------------------ | ------------------------------------------------------------------------ | --------------------------------------------------- |
| **Purpose** | Access accounts, balances, transactions | Execute a payment |
| **Validity** | Reusable for up to 90 days (UK) or 180 days (EEA) | Single-use only |
| **Scope** | Covers multiple API calls to financial data endpoints | Covers one payment execution plus status checks |
| **Reconfirmation** | Required every 90 days in UK (new regulation) | Not applicable |
| **Re-authorisation** | Possible when consent expires or fails | Not applicable. Create a new consent. |
| **Obtaining via Hosted** | Hosted handles the flow, returns consent token | Hosted handles the entire payment including consent |
| **Obtaining via API** | `POST /account-auth-requests` | `POST /payment-auth-requests` |
| **Token used in** | `GET /accounts`, `GET /accounts/{id}/transactions`, enrichment endpoints | `POST /payments`, `GET /payments/{id}` |
Despite the differences, the authorisation flow is the same for both. See [Open Banking 101](/concepts/open-banking-101) for an overview of the flow.
## Consent lifecycle
A consent moves through several stages from creation to completion. The exact statuses differ between AIS and PIS consents and depend on the [authorisation flow](/open-banking-flow/user-authorisation/overview).
Your app requests a consent (for data access or a payment).
The user is redirected to their bank, logs in, and approves. If the
user declines, the consent is rejected. If something goes wrong
during authentication, the consent fails.
On success, you receive a consent token to use in API calls.
Pass the token in the Consent header to access data or execute a payment.
AIS consents expire after 90 days (UK) or 180 days (EEA). PIS consents
are single-use. Users can revoke at any time.
AIS and PIS consents follow different status paths after authorisation. See the detailed lifecycles:
* [Payment Consent lifecycle](/payments/payment-resources/payment-consents#authorisation-status)
* [Data Consent lifecycle](/data/financial-data-resources/financial-data-consents#status-transitions)
### Status reference
| Status | Meaning | What to do |
| -------------------------------------- | -------------------------------------------------------- | --------------------------------------------------------- |
| `AWAITING_AUTHORIZATION` | Consent created, waiting for user to approve at bank | Redirect user to authorisationUrl |
| `AUTHORIZED` | User has approved. Consent token is valid. | Use the token to make API calls |
| `REJECTED` | User declined consent at the bank | Show user-friendly message, offer to retry |
| `FAILED` | Error during authorisation | Check error details, may be retryable |
| `EXPIRED` | Consent has reached its time limit | Request re-authorisation |
| `AWAITING_SCA_CODE` | Embedded flow: waiting for SCA code from user | Submit the code via update endpoint |
| `AWAITING_SCA_METHOD` | Embedded flow: user must select SCA method | Present options, submit selection |
| `AWAITING_DECOUPLING` | Decoupled flow: user must approve on another device | Poll for status change |
| `AWAITING_RE_AUTHORIZATION` | Re-authorisation in progress | Redirect user to the bank to re-authorise |
| `AWAITING_FURTHER_AUTHORIZATION` | Consent is authorised by one of the account holders | Wait for all users complete the flow |
| `AWAITING_DECOUPLED_PRE_AUTHORIZATION` | Decoupled flow: Authentication initiated | Redirect user to the bank |
| `AWAITING_PRE_AUTHORIZATION` | Pre-Auth flow: Authentication initiated | Redirect user to the bank |
| `AWAITING_DECOUPLED_AUTHORIZATION` | Decoupled flow: Authentication initiated | Wait for user to complete the flow on another device |
| `PRE_AUTHORIZED` | Pre-Auth flow: User has approved. Consent token is valid | Continue on the Pre Auth flow steps |
| `CONSUMED` | Payment is executed | This is a terminal state of a payment |
| `INVALID` | Invalid consent | Check the consent details. Create a new consent if needed |
| `REVOKED` | User revoked consent directly at their bank | Cannot be restored. Create a new consent. |
| `UNKNOWN` | Default enum value | Should not occur in normal flows |
If you are using Hosted Pages, status transitions are managed for you. You receive the final outcome (authorised consent token, or a failure status) via webhook or polling.
## Managing AIS consents
### Consent expiry and re-authorisation
AIS consents have limited validity: 90 days in the UK, 180 days in the EEA.
Use the re-authorisation endpoint to request the user re-approve access. Re-auth follows the same redirect flow as the original consent.
**Important:** Re-auth is only supported for redirect flows, not embedded flows.
See: [Re-authorise Account Consent](/api-reference/authorisations/re-authorise-account-consent)
### Reconfirmation (UK only)
FCA regulation requires UK AISPs to reconfirm consent every 90 days. This is separate from re-authorisation. Reconfirmation does not require the user to visit their bank.
**If using Yapily Connect:** Call the Extend Consent endpoint with `lastConfirmedAt` to record when you last confirmed with the user that they still want data access.
**If you are a regulated AISP:** Capture reconfirmation in your own UI (a simple "yes, I still want you to access my data" prompt), then call the same endpoint.
Key fields:
* `lastConfirmedAt`: Timestamp when the user last confirmed
* `reconfirmBy`: Deadline for the next reconfirmation
If reconfirmation is not received by the `reconfirmBy` date, Yapily will block further data access for Yapily Connect customers. Reconfirm before this deadline to avoid interruption.
**Learn more:**
* [Extend Consent](/api-reference/consents/extend-consent)
* [90 Day AIS Consent Changes](/data/financial-data-resources/uk-data-consent-changes)
### Historical data window
Some banks limit historical transaction access to the first 5 minutes after consent creation. This is a bank-level restriction that Yapily cannot override.
**Recommendation:** Retrieve and store historical data immediately after receiving the consent token. Do not wait hours or days to make your first data request if you need historical transactions.
See: [Data Restrictions](/data/financial-data-resources/data-restrictions)
### Revoked consents
Users can revoke consent at their bank at any time, bypassing your application entirely. When this happens, the consent status may still show `AUTHORIZED` in Yapily's system, but API calls will return `403 Forbidden`.
If you get persistent `403` errors on an `AUTHORIZED` consent, the consent has likely been revoked at the bank. You cannot restore a revoked consent. Create a new consent to regain access.
## Managing PIS consents
### Single-use nature
PIS consent tokens are single-use. Once used to execute a payment, the token can only be used to check payment status. You cannot use the same consent token to make another payment.
For each new payment, you need a new consent. This is a regulatory requirement, not a Yapily limitation.
### Multiple authorisations
Some business and joint accounts require more than one person to approve a payment. When this happens, the payment remains in `PENDING` status until all authorisations are received.
The `multiAuthorisationStatus` object on the payment shows progress. You can see how many authorisations are required and how many have been completed.
Additional authorisations happen offline (phone, email, SMS) and are outside Yapily's control. You cannot trigger or expedite these. Monitor via `GET /payments/{paymentId}` or webhooks.
See: [Payment Consents](/payments/payment-resources/payment-consents)
## Consent object key fields
| Field | What it means | When you'll use it |
| ----------------- | ----------------------------------------------------------------- | ----------------------------------------------- |
| `id` | Unique identifier for this consent | Store this to manage the consent lifecycle |
| `consentToken` | The token you pass as the `Consent` header in API calls | Required for every data or payment API call |
| `status` | Current state of the consent (see status table above) | Check before making API calls |
| `institutionId` | The bank this consent is for | A consent is bank-specific, one per institution |
| `featureScope` | What the consent covers (e.g., `ACCOUNT`, `ACCOUNT_TRANSACTIONS`) | Determines which API endpoints you can call |
| `lastConfirmedAt` | (AIS, UK) When the user last reconfirmed consent | Use to manage reconfirmation schedule |
| `reconfirmBy` | (AIS, UK) Deadline for next reconfirmation | Set reminders to avoid access interruption |
| `createdAt` | When the consent was created | Track consent age |
| `expiresAt` | When the consent will expire | Plan re-auth before this date |
For the complete field-by-field schema, see the [Consent object in the API Reference](/api-reference/consents/get-consent).
## Common pitfalls
The following issues are frequently encountered during integration:
* **AUTHORIZED but getting 403 errors:** The consent was likely revoked at the bank. Create a new consent.
* **Cannot retrieve historical transactions:** Many banks limit historical access to 5 minutes after consent creation. Retrieve data immediately.
* **Consent expired unexpectedly:** UK consents last 90 days, EEA 180 days. Re-authorise proactively before expiry.
* **Multiple consent tokens returned:** Some banks return one consent per account. See [Multiple Consents](/open-banking-flow/user-authorisation/multiple-consents).
* **Reconfirmation vs re-authorisation:** Reconfirmation (UK only) does not require bank login. Re-authorisation does.
## Related documentation
* [Financial Data Consents (detailed AIS)](/data/financial-data-resources/financial-data-consents)
* [Payment Consents (detailed PIS)](/payments/payment-resources/payment-consents)
* [User Authorisation Flows](/open-banking-flow/user-authorisation/overview)
* [90 Day AIS Consent Changes (UK)](/data/financial-data-resources/uk-data-consent-changes)
* [Multiple Consents](/open-banking-flow/user-authorisation/multiple-consents)
* [Hosted Pages Data Tutorial](/tools-and-services/hosted-pages/payment-tutorial-hosted-data)
# Hosted Pages vs Direct API
Source: https://docs.yapily.com/concepts/hosted-vs-api
Compare Hosted Pages and the Direct API to find the right integration approach for your use case.
Yapily offers two integration approaches built on the same underlying API infrastructure: **Hosted Pages**, a pre-built web flow, and the **Direct API**, where you build your own UI with full control over the experience.
For most customers, especially those getting started, Hosted Pages is the fastest and lowest-friction way to integrate. It handles the most complex parts of open banking (bank selection, user authorisation, Strong Customer Authentication) so you can focus on your product.
Both integration approaches require licensing and bank registration. See [Licensing & Registration](/concepts/licensing-and-registration) if you have not set this up yet.
## Quick comparison
| | Hosted Pages (recommended for most) | Direct API |
| ---------------------- | ------------------------------------------------------------------------------------------------------------------------------------------------------------------------------------------------------------------------------------------------------ | ----------------------------------------------------------- |
| **Integration time** | Hours to days | Days to weeks |
| **Frontend work** | None for consent and auth flows | You build the entire UI |
| **Auth flow handling** | Fully managed (redirect, embedded, all SCA methods) | You manage redirects, callbacks, consent exchange |
| **Bank selection UI** | Built-in institution picker | You build your own |
| **Payments** | Single payments, VRP | Single, bulk, scheduled, periodic, VRP, international |
| **Data consent** | Handles consent/auth flow, returns consent token | You build the full consent flow |
| **Data retrieval** | Use the API with the Hosted consent token | Use the API with your own consent token |
| **Data+ (enrichment)** | Available (use API with Hosted consent token) | Available |
| **Customisation** | Branding (logo, colours) | Complete control |
| **Delivery** | Web redirect (not embeddable in native apps) | Any platform |
| **Countries** | Hosted Payments: United Kingdom, Germany, Lithuania, Netherlands, Belgium, Spain, France, Austria, Portugal. Hosted Data: United Kingdom, Germany, Lithuania, Netherlands, Belgium, Spain, France, Austria, Portugal, Sweden, Norway, Denmark, Ireland | All supported countries |
| **Best for** | Payment acceptance, data consent flows, quick launches, MVPs | Complex payment types, multi-country custom UX, native apps |
## When to choose Hosted Pages
Choose Hosted Pages when:
* You want to accept payments or obtain data consent and need to go live quickly
* You do not have frontend engineering resource to build authorisation flows
* You are building an MVP or testing open banking for the first time
* Your use case is single payments, VRP, or data access in supported Hosted Pages countries
* You want Yapily to handle the complexity of bank selection, redirects, SCA, and consent management
### How Hosted works for each use case
**For payments:** Hosted manages the entire flow. You create a payment request, receive a URL, redirect your user, and the payment is executed once the user authorises. You receive webhooks on payment status changes.
**For data access:** Hosted manages the consent and authorisation flow. Once the user authorises, you receive a consent token. You then use this token with the Yapily API to call data endpoints: accounts, balances, transactions, and Data+ enrichment.
Hosted Pages is also the safer option for teams new to open banking. It handles SCA edge cases, bank-specific error responses, and auth flow differences across institutions, so you avoid building and maintaining that logic yourself.
**Learn more:**
* [Hosted Pages Overview](/tools-and-services/hosted-pages/overview)
* [Payment Tutorial (Hosted)](/tools-and-services/hosted-pages/payment-tutorial-hosted-pages)
* [Data Tutorial (Hosted)](/tools-and-services/hosted-pages/payment-tutorial-hosted-data)
## When to choose the Direct API
Choose the Direct API when:
* You need payment types not yet supported by Hosted Pages (bulk, scheduled, periodic, international)
* You are operating in countries not yet covered by Hosted Pages
* You need full control over the user experience and want to build a custom UI
* You are building a native mobile app (Hosted Pages is a web redirect experience)
* You have complex requirements such as multi-bank consent management or custom retry logic
Both approaches can be combined within the same product. For example, use Hosted Pages for standard payment collection and data consent, then use the Direct API for specialised payment types or additional data processing.
**Learn more:**
* [Single Payment Tutorial](/payments/tutorial-single-payment)
* [Account Data Tutorial](/data/tutorial-account-and-trans-data)
* [API Reference](/api-reference/introduction)
## Feature availability
| Feature | Hosted Pages | Direct API |
| --------------------------------- | :-------------------------------: | :----------: |
| Single domestic payment | Yes | Yes |
| SEPA / SEPA Instant payment | Yes | Yes |
| International payment | No | Yes |
| Scheduled payment | No | Yes |
| Periodic payment (standing order) | No | Yes |
| Bulk payment | No | Yes |
| Variable Recurring Payment (VRP) | Yes | Yes |
| Pay By Link | Yes | No |
| Data consent (AIS authorisation) | Yes | Yes |
| Account and transaction retrieval | Via API with Hosted consent token | Yes |
| Transaction enrichment (Data+) | Via API with Hosted consent token | Yes |
| Identity verification (Validate) | Via API with Hosted consent token | Yes |
| Custom UI / branding | Limited (logo, colours) | Full control |
| Native app embedding | Not yet supported | Full control |
Hosted Pages coverage is expanding. Check the [Hosted Pages documentation](/tools-and-services/hosted-pages/overview) for the latest supported countries and features.
## Which approach fits your situation?
| Your situation | Recommendation |
| ----------------------------------------------------------- | ------------------------------------------ |
| Payments in a Hosted-supported country, standard UI is fine | Hosted Pages |
| Data consent in a Hosted-supported country | Hosted for consent, API for data retrieval |
| Identity verification | Hosted for consent, API for validation |
| Sweeping VRP in a Hosted-supported country | Hosted Pages |
| Bulk, scheduled, periodic, or international payments | Direct API |
| Country not covered by Hosted | Direct API |
| Native mobile app | Direct API |
| Custom consent or payment UI required | Direct API |
| Standing orders | Direct API |
## Next steps
Get started:
* [Hosted Pages Overview](/tools-and-services/hosted-pages/overview)
* [Payment Tutorial with Hosted Pages](/tools-and-services/hosted-pages/payment-tutorial-hosted-pages)
* [Data Tutorial with Hosted Pages](/tools-and-services/hosted-pages/payment-tutorial-hosted-data)
* [Hosted Pages UI Screens](/tools-and-services/hosted-pages/ui-screens)
Get started:
* [Set Up Your Environment](/getting-started/get-started)
* [Make a Single Payment](/payments/tutorial-single-payment)
* [Access Account Data](/data/tutorial-account-and-trans-data)
* [API Reference](/api-reference/introduction)
A common pattern. Start here:
* [Hosted Pages Overview](/tools-and-services/hosted-pages/overview) for consent and standard payments
* [API Reference](/api-reference/introduction) for data retrieval and specialised payment types
* [Understanding Consents](/concepts/consent-lifecycle) to understand how consent tokens work across both
# Licensing & Registration
Source: https://docs.yapily.com/concepts/licensing-and-registration
TPP licensing options, how bank registration works, and what you need in place before integrating.
Access to bank APIs under open banking regulation is restricted to licensed Third Party Providers (TPPs). This regulatory framework ensures secure, authorised access to financial data and payment initiation. There are two types: AISP (Account Information Service Provider) for accessing account data, and PISP (Payment Initiation Service Provider) for initiating payments. Once licensed, you must also register with each bank you want to connect to. This is a regulatory requirement, not a Yapily limitation.
Yapily offers two licensing paths: use Yapily Connect (where Yapily holds the licence and manages registrations on your behalf) or bring your own TPP licence and manage registrations yourself. Both paths use the same underlying API infrastructure, so your integration approach does not need to change. This also applies regardless of whether you use Hosted Pages or the Direct API. Licensing and registration are prerequisites for all open banking access.
## Your licensing options
| | Yapily Connect (Recommended for most) | Own TPP Licence |
| ----------------------------- | --------------------------------------------------------------- | -------------------------------------------------------------------------------------------- |
| **Who holds the licence** | Yapily | You |
| **Regulatory responsibility** | Yapily manages compliance | You manage compliance |
| **Time to go live** | Days (use Yapily's existing registrations) | Months (apply for licence, register with banks) |
| **Bank registrations** | Yapily manages registrations across 2000+ institutions | You manage registrations yourself, or use Yapily's registration management add-on |
| **Best for** | Companies wanting to launch quickly without regulatory overhead | Regulated entities (banks, e-money institutions) who already hold or are obtaining a licence |
| **Consent branding** | Yapily appears as the TPP on bank consent screens | Your company appears as the TPP |
| **Works with** | Hosted Pages and Direct API | Hosted Pages and Direct API |
Most Yapily customers use Yapily Connect. It removes the regulatory overhead so you can start integrating faster. You can always transition to your own licence later if your needs change.
For full details on the managed licensing service, see [Yapily Connect documentation](/tools-and-services/yapily-connect/overview).
## Bank registration
Even with a TPP licence (your own or via Yapily Connect), you must be registered with each specific bank before you can access it through Yapily. Without it, the bank will reject API requests.
### If you are using Yapily Connect
Yapily maintains registrations across its network of 2000+ institutions. For most institutions, registration is already in place. For institutions that need additional registration, request it through the Console, where you can also check status for any institution.
### If you are using your own licence
You must register with each institution individually. This can take days to weeks depending on the bank and country. Yapily also offers a registration management add-on. [Contact our team](/resources/support) to enable this service. You can also manage registrations yourself. See the [Registrations documentation](/getting-started/integration-setup/registration) for detailed guidance.
You can check registration status for any institution in the [Yapily Console](/getting-started/application-management). Attempting to access an unregistered institution will return an error.
## Before you start building
Yapily Connect for speed and simplicity, or your own licence if you are already regulated or need your branding on consent screens. See the comparison above.
Log into the Console and verify you are registered with the institutions you need. For Yapily Connect customers, most institutions are pre-registered.
Not all institutions support all features or payment types. Use the Console or `GET /institutions` to check capabilities for the banks you plan to support.
Once licensing and registration are in place, decide between [Hosted Pages and the Direct API](/concepts/hosted-vs-api).
Registration is a prerequisite, not a one-time task. When expanding to new countries or institutions, check registration status first. API calls to unregistered institutions will fail.
## Next steps
How Yapily's managed licensing service works.
Detailed guidance on the bank registration process.
Decide between Hosted Pages and the Direct API.
Check registration status and manage your application.
# Open Banking 101
Source: https://docs.yapily.com/concepts/open-banking-101
The fundamentals of open banking, how it works, and what it means for your integration.
## What is open banking?
Banks are required by regulation (PSD2 in Europe, Payment Services Regulations (PSRs) and the “CMA Order” (aka The Retail Banking Market Investigation Order 2017) in the UK) to share customer financial data and accept payment instructions from authorised third parties.
This is done through APIs. Yapily connects to these bank APIs so you don't have to.
The key difference from card payments: money moves directly from bank account to bank account with no card network intermediary. There are no interchange fees and no chargebacks.
The customer must explicitly consent to sharing data or authorising a payment. This is why "consent" is central to everything in open banking.
## Key roles
| Role | Who | Example |
| ------------------------------------------------------ | ---------------------------------------------------------------------- | ------------------------------------- |
| **PSU** (Payment Service User) | The end customer who owns the bank account | Your user making a payment |
| **ASPSP** (Account Servicing Payment Service Provider) | The bank or financial institution | Barclays, Deutsche Bank, BNP Paribas |
| **TPP** (Third Party Provider) | The authorised company connecting to the bank on the customer's behalf | Yapily (or you, if you are regulated) |
| **AISP** | Account Information Service Provider | Yapily for data access |
| **PISP** | Payment Initiation Service Provider | Yapily for payment initiation |
Yapily is regulated as both an AISP and PISP, enabling secure access to financial data and payment initiation across supported markets. If you are using Yapily Connect, Yapily holds the TPP licence on your behalf, reducing regulatory overhead and accelerating time to market.
## How the authorisation flow works
1. Your app asks Yapily to create a consent request (for data access or a payment)
2. The customer is redirected to their bank's login screen
3. The customer authenticates (Strong Customer Authentication) and approves
4. The bank redirects back to your app with an authorisation code
5. You exchange the code for a consent token
6. You use the consent token to access data or execute the payment
```mermaid theme={null}
sequenceDiagram
participant App as Your App
participant Yapily as Yapily API
participant Bank as Customer's Bank
participant User as Customer
App->>Yapily: Create consent request
Yapily-->>App: Authorisation URL
App->>User: Redirect to bank
User->>Bank: Login and approve
Bank-->>App: Redirect with auth code
App->>Yapily: Exchange code for consent token
Yapily-->>App: Consent token
App->>Yapily: Use consent token (get data or make payment)
```
This is the most common flow (redirect). Some banks support alternative flows such as embedded or decoupled authentication. Yapily Hosted Pages handles all of these automatically. If you are using the Direct API, see [User Authorisation Flows](/open-banking-flow/user-authorisation/overview) for details.
## AIS vs PIS
**Account Information Services (AIS):** Accessing financial data such as accounts, balances, and transactions. Consent lasts up to 90 days (UK) or 180 days (EEA). Yapily calls this [Yapily Data](/data/overview).
**Payment Initiation Services (PIS):** Making payments from a customer's account. Consent is single-use. Yapily calls this [Yapily Payments](/payments/overview).
The authorisation pattern is the same for both. The difference is what you do with the consent token after you have it. For AIS, you can make multiple API calls to retrieve different types of data over the consent lifetime. For PIS, you execute a single payment and then monitor its status.
## Standards and why they matter
Open banking is not one global standard. It is a set of regional standards that all implement PSD2 differently.
**UK** has the UK Open Banking Standard (most prescriptive, most consistent between banks). Most of the UK banks (spearheaded by CMA9) implement the same endpoints with the same field requirements.
**Europe** has multiple standards: Berlin Group (NextGenPSD2), STET (France), PolishAPI, CBI Globe (Italy), and others. Each standard has different field requirements, auth flows, and bank behaviours. For example, payer details are typically required in Germany but not in the UK, and IBAN formats differ per country.
**Yapily normalises all of this into a single API.** But some differences still surface, such as which fields are required per country.
For more details on country-specific requirements, see:
* [European Payments](/payments/payment-resources/european-payments)
* [Payment Features](/payments/payment-resources/payment-features)
## What this means for your integration
For UK-only integrations, most banks follow the same standard and the experience is consistent. For multiple European countries, expect variation in required fields and auth flows. You do not need to understand every standard since Yapily handles the translation, but knowing that these differences exist helps you build more robust integrations. If you want to avoid dealing with standard-level differences directly, [Hosted Pages](/concepts/hosted-vs-api) is the recommended starting point.
## Next steps
To access bank APIs, you need regulatory authorisation and bank registrations. If you are using Yapily Connect, these are handled for you. See [Licensing & Registration](/concepts/licensing-and-registration) to understand your setup options.
Choose the right integration approach for your use case.
How consents work, their lifecycle, and management.
Set up your environment and make your first API call.
Look up any term you are unfamiliar with.
# Building a Payment Request
Source: https://docs.yapily.com/concepts/payment-request-anatomy
How to construct payment requests across countries, payment types, and bank requirements.
A PaymentRequest defines who is paying, who is receiving, the amount and how the payment should be processed.
It is used in both the authorisation step (`POST /payment-auth-requests`) and the execution step (`POST /payments`). The object structure is consistent across countries and payment types. However, required fields vary by country, standard and individual institution.
If you are using Hosted Pages, you still provide payee details and payment parameters in the request that creates the Hosted session. Hosted then handles bank selection, payer authorisation, and SCA on the user's side. The field details below apply to both integration approaches.
A UK domestic payment needs a sort code and account number. A German SEPA payment needs an IBAN. Some European banks require payer details, others do not.
## PaymentRequest structure
| Field | Type | Description |
| -------------------------------- | ------ | ---------------------------------------------------------------- |
| `type` | string | Payment type (`DOMESTIC_PAYMENT`, `INTERNATIONAL_PAYMENT`, etc.) |
| `paymentIdempotencyId` | string | Your unique reference. Prevents duplicates. |
| `amount.amount` | number | Payment amount |
| `amount.currency` | string | Three-letter currency code (GBP, EUR) |
| `reference` | string | Payment description visible on bank statements |
| `payee.name` | string | Recipient name |
| `payee.accountIdentifications[]` | array | Recipient account details (SORT\_CODE, IBAN, etc.) |
| `payee.address` | object | Recipient address (sometimes required) |
| `payer.name` | string | Sender name (sometimes required) |
| `payer.accountIdentifications[]` | array | Sender account details (sometimes required) |
| `payer.address` | object | Sender address (sometimes required) |
## Payment types
| Your Scenario | Payment Type | Key Consideration |
| ------------------------------------------- | --------------------------------- | ---------------------------------------------------- |
| UK to UK, standard speed | Single Domestic Payment | Uses Faster Payments |
| EU to EU (same or different country), euros | Single Domestic Payment | Routed via SEPA |
| EU to EU, euros, instant | Single Domestic Instant Payment | SEPA Instant (10 seconds). Bank may charge extra. |
| Cross-border, non-euro or non-SEPA | Single International Payment | Requires BIC. Higher fees, slower. |
| Future-dated payment | Single Domestic Scheduled Payment | Specify execution date |
| Recurring fixed payment | Single Domestic Periodic Payment | Standing order in UK. Specify frequency. |
| Multiple payments at once | Bulk payment | Use separate authorisation endpoint |
| Variable recurring (VRP) | Separate VRP flow | See [VRP documentation](/payments/vrps/introduction) |
Always check the institution's supported features first using `GET /institutions/{id}`. Not all banks support all payment types. See [Payment Features](/payments/payment-resources/payment-features).
For detailed SEPA/domestic/international decision logic, see: [European Payments Guide](/payments/payment-resources/european-payments)
## Payee details by country
| Payer Country | Payee Country | Currency | Payee Account ID Required | Payee Name |
| ------------- | ---------------------- | -------- | ------------------------------ | ---------- |
| UK | UK | GBP | `SORT_CODE` + `ACCOUNT_NUMBER` | Required |
| Any SEPA | Any SEPA | EUR | `IBAN` | Required |
| Any | EU/EEA (international) | Any | `IBAN` + `BIC` | Required |
### Country-specific examples
```json theme={null}
"payee": {
"name": "Jane Smith",
"accountIdentifications": [
{ "type": "SORT_CODE", "identification": "123456" },
{ "type": "ACCOUNT_NUMBER", "identification": "12345678" }
]
}
```
```json theme={null}
"payee": {
"name": "Hans Mueller",
"accountIdentifications": [
{ "type": "IBAN", "identification": "DE89370400440532013000" }
]
}
```
```json theme={null}
"payee": {
"name": "Pierre Dupont",
"accountIdentifications": [
{ "type": "IBAN", "identification": "FR7630006000011234567890189" },
{ "type": "BIC", "identification": "BNPAFRPP" }
]
}
```
## Payer details
Payer requirements vary by country and institution.
**UK:** Payer details are usually not required. The bank knows the payer from the consent.
**Europe (Berlin Group banks):** Payer IBAN is often required. The bank needs to know which account to debit.
**Some European banks also require:** Payer name, payer address.
Payer requirements vary by institution, not just by country. Only request payer details when the institution requires them, as asking for unnecessary information adds friction to the user experience. For returning users, consider saving and pre-populating payer details to streamline subsequent payments. For institution-specific requirements, check the Yapily Console.
### Payer examples
```json theme={null}
// Payer can be omitted for most UK payments.
// The bank determines the payer from the consent.
```
```json theme={null}
"payer": {
"name": "Max Mustermann",
"accountIdentifications": [
{ "type": "IBAN", "identification": "DE89370400440532013000" }
]
}
```
For institution-specific field requirements, log in to the Yapily Console to view detailed constraints.
## Reference field
The `reference` field is the payment description visible on bank statements. This is what your customer will see when they review their transaction history.
Character limits vary by institution, from as low as 18 characters to 140. Some banks silently truncate long references, others reject the payment outright.
**Recommendation:** Keep references under 18 characters for maximum compatibility, or check institution-specific constraints in the Yapily Console.
## Idempotency
The `paymentIdempotencyId` prevents duplicate payments if your request is retried.
**How it works:**
* Must be unique per payment attempt
* If the same ID is sent twice, Yapily returns the existing payment instead of creating a new one
* Generate a UUID for each payment attempt
## Complete examples
```json theme={null}
{
"applicationUserId": "user-123",
"institutionId": "modelo-sandbox",
"callback": "https://your-app.com/callback",
"paymentRequest": {
"type": "DOMESTIC_PAYMENT",
"paymentIdempotencyId": "550e8400-e29b-41d4-a716-446655440000",
"amount": {
"amount": 10.00,
"currency": "GBP"
},
"reference": "Invoice 1234",
"payee": {
"name": "Jane Smith",
"accountIdentifications": [
{ "type": "SORT_CODE", "identification": "123456" },
{ "type": "ACCOUNT_NUMBER", "identification": "12345678" }
]
}
}
}
```
```json theme={null}
{
"applicationUserId": "user-456",
"institutionId": "commerzbank-sandbox",
"callback": "https://your-app.com/callback",
"paymentRequest": {
"type": "DOMESTIC_PAYMENT",
"paymentIdempotencyId": "660e8400-e29b-41d4-a716-446655440001",
"amount": {
"amount": 25.50,
"currency": "EUR"
},
"reference": "Order ABC",
"payer": {
"name": "Max Mustermann",
"accountIdentifications": [
{ "type": "IBAN", "identification": "DE89370400440532013000" }
]
},
"payee": {
"name": "Hans Mueller",
"accountIdentifications": [
{ "type": "IBAN", "identification": "DE44500105175407324931" }
]
}
}
}
```
```json theme={null}
{
"applicationUserId": "user-789",
"institutionId": "barclays-sandbox",
"callback": "https://your-app.com/callback",
"paymentRequest": {
"type": "INTERNATIONAL_PAYMENT",
"paymentIdempotencyId": "770e8400-e29b-41d4-a716-446655440002",
"amount": {
"amount": 100.00,
"currency": "EUR"
},
"reference": "Transfer",
"payee": {
"name": "Pierre Dupont",
"accountIdentifications": [
{ "type": "IBAN", "identification": "FR7630006000011234567890189" },
{ "type": "BIC", "identification": "BNPAFRPP" }
]
}
}
}
```
## Common pitfalls
The following issues are frequently encountered when building payment requests:
* **Payment rejected for missing payer details:** Some European banks require payer IBAN or other details. Check institution requirements in the Yapily Console before building your payment form. Only collect what is needed to minimise friction.
* **Reference too long:** Keep under 18 characters for maximum compatibility across institutions.
* **Wrong payment type for SEPA:** If both accounts are in SEPA countries and currency is EUR, use `DOMESTIC_PAYMENT`, not `INTERNATIONAL_PAYMENT`. Exception: NatWest Group requires `INTERNATIONAL_PAYMENT` for SEPA. See [European Payments](/payments/payment-resources/european-payments).
* **Feature not supported:** Always check `GET /institutions/{id}` features array before initiating. See [Payment Features](/payments/payment-resources/payment-features).
* **IBAN format rejected:** IBAN formats are country-specific (different length and prefix per country). Validate format before sending.
* **Duplicate payment created:** Always include a unique `paymentIdempotencyId`. If you retry without one, you may create duplicate payments.
## Related documentation
* [Introduction to Payment Execution](/payments/payment-resources/intro-to-payment-execution) (detailed account identification reference)
* [European Payments](/payments/payment-resources/european-payments) (SEPA routing logic)
* [Payment Features](/payments/payment-resources/payment-features) (feature checking)
* [Payment Constraints](/payments/payment-resources/payment-constraints) (machine-readable bank requirements, beta)
* [Single Payments](/payments/single-payments) (detailed single payment docs)
* [Payment Consents](/payments/payment-resources/payment-consents) (consent management for payments)
* [Hosted Pages Payment Tutorial](/tools-and-services/hosted-pages/payment-tutorial-hosted-pages) (if you prefer Hosted)
# Categorisation
Source: https://docs.yapily.com/data/data-plus/categorisation
Automatically categorise transactions using Yapily's Categorisation Engine. Assign spending categories for budgeting apps, personal finance management, and financial analysis.
## Background
Yapily provides state-of-the-art categorisation to facilitate the enrichment of PSD2 transaction data. The aim is to enable clients to enhance products in lending, investing, affordability scoring, personal finance management and more.
* A tool built with self-learning models
* Understand financial data at scale, regardless of geography or language
* Enables merchant enrichment, categorisation and a view on whether it is a recurring transaction
* Understanding different types of income and spend
## What is currently supported
### Geographies
* UK
* EU
### Account Types supported
* Business
* Consumer (Retail)
From April 2026, new clients receive categories in a structured format: `tier1 - tier2 - tier3`. Existing clients continue to receive the original category values unchanged. [See the full category reference →](/data/data-plus/categorisation-list)
## Enriched data points
Yapily's categorisation product returns additional information for individual transactions, providing a more detailed summary of each transaction.
Categorisation provides the following additional information for transactions:
| Field | Description |
| ----------------- | ------------------------------------------------------------------------------------------------------------------------------------------------------------------------------------------------------------------------------------------------- |
| Category | A category that our model has predicted best describes the transaction's characteristics. |
| Payment processor | The intermediary merchant of the transaction (i.e The payment processor). |
| Merchant | The normalised merchant name (if a merchant is present). |
| Recurrences Type | Indicates whether a transaction is a one-time transfer, e.g. purchasing a mattress (**one-off**), regularly repeats with personalized pricing, e.g. utilities, mortgage (**recurring**), regularly repeats with fixed pricing (**subscription**). |
## How to enable categorisation
To access the categorisation endpoints, there are additional steps that need to be completed in advance.
* A contractual agreement is in place to cover our Data Plus Categorisation product
* The "**categorisation**" scope is enabled for your application (this can be requested via Support once the contract has been agreed)
* Subscription to receive the Categorisation webhooks
The links to the Categorisation APIs can be found here → [Data Plus APIs](/api-reference/data-plus)
***
## Next steps
* [Try our tutorial to get Categorisation](/data/data-plus/tutorial-categorisation)
* [Read about user consents for accessing financial data](/data/financial-data-resources/financial-data-consents)
# Definition of Categories
Source: https://docs.yapily.com/data/data-plus/categorisation-list
Full reference of all Yapily transaction categories, including both the updated structured format for new clients and the original format for existing integrations.
Yapily uses two category formats depending on when your integration was set up:
* **New clients** (onboarded from April 2026) receive categories in a structured format: `tier1 - tier2 - tier3`
* **Existing clients** continue to receive the original category values unchanged
## Consumer Accounts
| Category | Description |
| ---------------------------------------------------------------- | -------------------------------------------------------------------------------------------------------------------------------------------------------------------------------------------------------------------------------------------------------------------------------------------------- |
| `credit - adjustment - adjustment` | Change made to financial records to correct errors or to accurately reflect transactions resulting in additional funds added. Adjustments can be made for various reasons, such as reconciling accounts, accounting for depreciation, or updating financial statements to comply with regulations. |
| `credit - commerce - cashback and loyalty rewards` | Money received as a rebate or refund from purchases made using a debit or credit card. Cashback is typically a percentage of the purchase amount and is credited back to the cardholder's account. |
| `credit - commerce - chargeback` | Money returned to the account due to a chargeback transaction, which occurs when a customer disputes a charge with their bank or credit card issuer. |
| `credit - commerce - marketplace payout` | Revenue generated from online sales or transactions. This could include payments received from selling products or services through an e-commerce, or streaming platform or website (e.g on ebay). |
| `credit - commerce - refund` | Money returned from a previous purchase, covering all types of refunds and reversals. |
| `credit - credits and loans - grants, stipends and scholarships` | Funds received as grants, stipends, or scholarships for education, research, or financial assistance. |
| `credit - credits and loans - insurance payout` | Money received from an insurance provider as a claim payout for covered losses or damages. Unemployment insurance payout is also covered by this category. |
| `credit - credits and loans - loan disbursement` | Funds received as a loan from a lender — including personal, student loans as well as other types of business loans not specified elsewhere. |
| `credit - gambling - gambling income` | Money obtained from gambling activities such as casino winnings, lottery prizes, or betting earnings. |
| `credit - government - state benefits and allowances` | Payments from government programs — e.g., child benefits, universal credit, jobseeker's allowance, or housing support. |
| `credit - government - tax refund / rebate` | Refund received from overpayment of taxes to government authorities, such as federal or state tax refunds. |
| `credit - government - other` | Any other type of incoming payment from government sources. |
| `credit - income - self-employment and business receipts` | Money earned from self-employment or freelance work. This could include payments received for freelance projects, consulting services, or contract work. |
| `credit - income - salary and wages` | Income earned from employment, including salaries, bonuses, and wages. |
| `credit - income - pension` | Incoming pension, including state, occupational and private pension. |
| `credit - income - property and rental income` | Revenue earned from renting out real estate. |
| `credit - investments - investment income` | Funds withdrawn from investment platforms — includes dividends, investment income, and proceeds from asset sales. |
| `credit - investments - cryptocurrency withdrawals` | Funds withdrawn from crypto platforms — includes dividends, investment income, and proceeds from asset sales. |
| `credit - other - other` | Other or uncategorized income or credit transaction. |
| `credit - transfers and deposits - currency exchange` | Incoming transfers related to currency exchange. |
| `credit - transfers and deposits - cash deposit` | Cash deposited into an account via ATM, post office, or branch. |
| `credit - transfers and deposits - account transfer` | Transfer of funds between personal or external accounts. |
| `credit - transfers and deposits - peer to peer transfer` | Incoming transfers from other individuals via peer-to-peer or mobile payment apps. |
| `credit - transfers and deposits - savings` | Transfer of funds from savings account. |
| Category | Description |
| ------------------------------------------------------------------------ | -------------------------------------------------------------------------------------------------------------------------------------------------------------------------------------------------------------------------------- |
| `debit - culture - courses & certifications` | Online and in-person education providers — e.g., Coursera, Udemy, General Assembly, professional certification fees. |
| `debit - culture - other education` | Other education-related payments such as school materials or uniforms. |
| `debit - culture - education` | Tuition, school fees, and educational materials. |
| `debit - culture - musems` | Entry fees, memberships, or donations to museums or galleries. |
| `debit - donations - charity and non profit organizations` | Donations to charitable organizations such as UNICEF, Oxfam, or Red Cross. |
| `debit - entertainment - streaming platforms and bundles` | Subscriptions to streaming services such as Netflix, Spotify, or Disney+. |
| `debit - entertainment - other entertainment` | Miscellaneous entertainment-related spending. |
| `debit - entertainment - cinemas and theaters` | Tickets for cinema or theatre performances. |
| `debit - entertainment - other leisure activities` | Spending on recreational outings like bowling, karaoke, or escape rooms. |
| `debit - entertainment - theme parks` | Tickets or memberships to theme parks. |
| `debit - entertainment - tickets and events` | Event and concert ticket purchases. |
| `debit - entertainment - video games and inapp purchases` | Console, PC, or mobile game purchases — e.g., PlayStation Store, Xbox Live, Steam. |
| `debit - entertainment - gambling and betting activities` | Gambling expenditures such as betting or lottery tickets. |
| `debit - fees and charges - bank and transaction fees` | Bank service fees including account maintenance and ATM charges as well as transaction fees from payment processors such as Stripe, PayPal, Adyen, or Square. |
| `debit - fees and charges - overdraft fees` | Fees charged for insufficient funds or overdrafts. |
| `debit - fees and charges - late payment and penalties` | Charges applied for late payments or missed loan installments. |
| `debit - financial products and services - credit card` | Payments made toward a credit card balance or annual fee. |
| `debit - financial products and services - bnpl and alternative credit` | Payments for buy-now-pay-later or installment plans. |
| `debit - financial products and services - insurance premium` | Premiums for health, life, home, or auto insurance. |
| `debit - financial products and services - loan repayments` | Payments towards the repayment of loans including personal loans, payday loans, etc. (does not include auto loans, student loans and pawn loans). |
| `debit - financial products and services - auto loan repayments` | Payments towards the repayment of car loans. |
| `debit - financial products and services - student loan repayments` | Payments towards the repayment of student loans. |
| `debit - financial products and services - mortgage` | Payment towards mortgage loans for residential properties. |
| `debit - financial products and services - pension contributions` | Contributions to private or employer pension schemes. |
| `debit - food and drinks - cafes and bakeries` | Food and drink purchases from cafes, coffee shops, or bakeries. |
| `debit - food and drinks - food and drinks` | Meals and drinks at restaurants, bars, or nightclubs. |
| `debit - food and drinks - takeaway and delivery` | Food delivery services. |
| `debit - food and drinks - meal subscriptions` | Food subscriptions. |
| `debit - government - government and local government` | Payments for public services such as visa, passport, unemployment benefit, parking permits. |
| `debit - government - taxes` | Taxes; HMRC payments & Local council taxes, etc. |
| `debit - groceries - supermarkets, convenience and other grocery stores` | Spending on groceries from supermarkets or local convenience stores. |
| `debit - groceries - liquor stores` | Purchases of alcoholic beverages from liquor stores. |
| `debit - health and beauty - nutrition and supplements` | Vitamins, protein powders, diet products — e.g., Holland & Barrett, MyProtein, Bulk, Gymshark Nutrition. |
| `debit - health and beauty - other` | Miscellaneous wellness or beauty purchases. |
| `debit - health and beauty - pharmacies and drugstores` | Purchases of medicine, skincare, or beauty products at pharmacies or drugstores. |
| `debit - health and beauty - healthcare` | Payments for medical, dental, or optical services. |
| `debit - health and beauty - selfcare and wellness` | Hair, beauty, and spa services such as salons, massage, or wellness treatments. |
| `debit - health and beauty - fitness and sports` | Gym memberships, fitness classes, or sporting equipment. |
| `debit - home and utilities - child care` | Nursery, babysitting, or nanny payments. |
| `debit - home and utilities - council tax` | Council tax payments. |
| `debit - home and utilities - home maintenance` | Home repairs, cleaning, gardening, and household hardware purchases. |
| `debit - home and utilities - laundry and cleaning` | Laundry, dry cleaning, or household cleaning services. |
| `debit - home and utilities - rent` | Rent payments for housing, self-storage, or property fees. |
| `debit - home and utilities - electricity, water and gas` | Payments for utility services such as electricity, water, gas, or sewage. |
| `debit - home and utilities - internet, mobile and tv` | Payments for recurring bills for internet, mobile and TV. Not including TV license. |
| `debit - home and utilities - utilities` | Other home-related or utility expenses not categorized elsewhere. |
| `debit - other - other` | Uncategorized or unrecognized debit transactions. |
| `debit - other - prenote` | Test or verification transactions used by banks. |
| `debit - professional services - stationary services` | Office supply and stationery purchases. |
| `debit - professional services - legal activities` | Payments for legal services or notary fees. |
| `debit - professional services - consumer services` | Consumer provided services, such as consultancy, cleaning services, consumer delivery, and other. |
| `debit - shopping - other shopping` | Miscellaneous retail or unidentified shopping. |
| `debit - shopping - furniture and home decor` | Home improvement and decor stores — e.g., IKEA, Dunelm, Habitat, Wayfair, Made.com. |
| `debit - shopping - other stores` | General retail not captured elsewhere — e.g., local shops, markets, or niche specialty stores. |
| `debit - shopping - books and newspapers` | Bookstores, newsstands, and online booksellers (e.g., Waterstones, WHSmith, Kindle, Audible, local press subscriptions). |
| `debit - shopping - clothing, shoes and accessories` | Apparel and footwear retail (e.g., Zara, H\&M, Nike, ASOS, Uniqlo, luxury brands like Gucci or Prada). |
| `debit - shopping - department stores` | Multi-category retail stores such as well as discount stores. |
| `debit - shopping - computers and electronic devices` | Purchases of electronic devices or accessories. |
| `debit - shopping - ecommerce and marketplaces` | E-commerce & marketplace purchases, e.g. on eBay and Amazon. |
| `debit - shopping - gifts` | Gift and flower purchases. |
| `debit - shopping - hardware stores` | DIY or garden supply purchases. |
| `debit - shopping - pet supplies and services` | Pet-related purchases or veterinary costs. |
| `debit - shopping - other recreational goods` | Purchases of toys, hobbies, or tobacco products. |
| `debit - software - subscriptions and apps (consumer saas)` | Consumer subscriptions and one-time purchases for apps or online services — e.g., Google One, iCloud, Canva, ChatGPT Plus, Adobe, Apple Store, Google Play. |
| `debit - transfers and cash - currency exchange` | Transfer to another account resulting in outgoing currency exchange transfer. |
| `debit - transfers and cash - other` | Other cash-related transfers. |
| `debit - transfers and cash - cash withdrawal` | Money withdrawn from an ATM or bank branch. |
| `debit - transfers and cash - savings` | Payments towards saving account. |
| `debit - transfers and cash - account transfer` | Outgoing transfer of funds between the accounts of either different individuals or the same individual. |
| `debit - transfers and cash - investments` | Expenditures made to acquire financial assets or capital goods with the expectation of generating future income or profit. This includes purchases of stocks, bonds, mutual funds, real estate, and other investment vehicles. |
| `debit - transfers and cash - cryptocurrencies` | Transfer of funds from the account holder's bank account to a cryptocurrency broker or exchange platform for purchasing or trading cryptocurrencies. |
| `debit - transfers and cash - peer-to-peer` | Direct transfer of funds between individuals, often facilitated through peer-to-peer payment platforms or mobile apps. |
| `debit - transport - car rental` | Temporary car rental from renting companies. |
| `debit - transport - fuel and charging` | Expenditure on fuel for vehicles including gasoline, diesel, or alternative fuels. |
| `debit - transport - other transport` | Spending on automobiles and other types of transportation such as bicycles, or scooters (rental, maintenance etc). The label also includes parking fees, long-distance touristic bus fees etc. Also Ferry crossings and cruises. |
| `debit - transport - public transport` | Public transport including fares for Metro, Bus and Trains, Ferries. |
| `debit - transport - taxi and rideshare` | Payment for rideshare or taxi services for transportation. |
| `debit - transport - tolls and parkings` | Charges for using toll roads, bridges, or tunnels for transportation as well as parking. |
| `debit - transport - motor vehicles, repairs and accessories` | Vehicle purchase, vehicle maintenance & licensing, as well as lease repayments. |
| `debit - travel - guides and experiences` | Tour guides, excursions, and local experience bookings — e.g., GetYourGuide, Airbnb Experiences, Viator. |
| `debit - travel - other travel` | Miscellaneous travel-related spending such as airport shuttles, luggage services. |
| `debit - travel - airlines` | Purchases from commercial airlines and flight booking platforms — e.g., British Airways, Ryanair, Wizz Air, Lufthansa, EasyJet, Expedia flight bookings. |
| `debit - travel - travel agencies` | Traditional or online travel agencies (e.g., TUI, Expedia, Lastminute.com, Skyscanner, Trip.com). |
| `debit - travel - hotels and accommodation` | Hotel bookings, hostels, Airbnb, Booking.com stays, or serviced apartments. |
## Business Accounts
| Category | Description |
| ---------------------------------------------------------------- | -------------------------------------------------------------------------------------------------------------------------------------------------------------------------------------------------------------------------------------------------------------------------------------------------- |
| `credit - adjustment - adjustment` | Change made to financial records to correct errors or to accurately reflect transactions resulting in additional funds added. Adjustments can be made for various reasons, such as reconciling accounts, accounting for depreciation, or updating financial statements to comply with regulations. |
| `credit - commerce - cashback and loyalty rewards` | Money received as a rebate or refund from purchases made using a debit or credit card. Cashback is typically a percentage of the purchase amount and is credited back to the cardholder's account. |
| `credit - commerce - chargeback` | Money returned to the account due to a chargeback transaction, which occurs when a customer disputes a charge with their bank or credit card issuer. |
| `credit - commerce - marketplace payout` | Revenue generated from online sales or transactions. This could include payments received from selling products or services through an e-commerce, or streaming platform or website (e.g on ebay). |
| `credit - commerce - refund` | Money returned from a previous purchase, covering all types of refunds and reversals. |
| `credit - credits and loans - grants, stipends and scholarships` | Funds received as grants, stipends, or scholarships for education, research, or financial assistance. |
| `credit - credits and loans - insurance payout` | Money received from an insurance provider as a claim payout for covered losses or damages. Unemployment insurance payout is also covered by this category. |
| `credit - credits and loans - bank loan` | Money received from a bank-issued loan or credit facility. |
| `credit - credits and loans - revenue based financing` | Funds received through revenue-based or merchant cash advance financing arrangements. |
| `credit - credits and loans - government loan` | Money received as a government-issued loan or public funding program. |
| `credit - credits and loans - other business loan financing` | Any other type of business loan or external financing arrangement. |
| `credit - gambling - gambling income` | Money obtained from gambling activities such as casino winnings, lottery prizes, or betting earnings. |
| `credit - government - tax refund / rebate` | Refund received from overpayment of taxes to government authorities, such as federal or state tax refunds. |
| `credit - government - other` | Any other type of incoming payment from government sources. |
| `credit - income - business receipts` | Revenue earned from clients coming from business receipts. |
| `credit - investments - investment income` | Funds withdrawn from investment platforms — includes dividends, investment income, and proceeds from asset sales. |
| `credit - investments - cryptocurrency withdrawals` | Funds withdrawn from crypto platforms — includes dividends, investment income, and proceeds from asset sales. |
| `credit - other - other` | Other or uncategorized income or credit transaction. |
| `credit - transfers and deposits - currency exchange` | Incoming transfers related to currency exchange. |
| `credit - transfers and deposits - cash deposit` | Cash deposited into an account via ATM, post office, or branch. |
| `credit - transfers and deposits - account transfer` | Transfer of funds between personal or external accounts. |
| `credit - transfers and deposits - savings` | Transfer of funds from savings account. |
| Category | Description |
| -------------------------------------------------------------------------------- | ------------------------------------------------------------------------------------------------------------------------------------------------------------------------------------------------------------------------------------------------------------------------------------------ |
| `debit - adjustment - adjustment` | Change made to financial records to correct errors or to accurately reflect transactions resulting in funds deducted. Adjustments can be made for various reasons, such as reconciling accounts, accounting for depreciation, or updating financial statements to comply with regulations. |
| `debit - business expenses - customer reimbursements, chargebacks and reversals` | Refunds issued to customers or chargebacks processed through payment providers. |
| `debit - business expenses - compliance licenses and regulatory fees` | Fees for permits, regulatory filings, or compliance costs such as FCA or local licenses. |
| `debit - business expenses - intellectual property` | Expenses related to patents, copyrights, trademarks, or other IP rights. |
| `debit - business expenses - other` | Miscellaneous operational or administrative expenses. |
| `debit - business expenses - electronics and hardware` | Purchases of computers, IT equipment, or business hardware. |
| `debit - business expenses - employee payroll` | Salary or wage payments to employees. |
| `debit - business expenses - employee benefits` | Staff-related benefits such as insurance, pensions, or well-being programs. |
| `debit - business expenses - saas and productivity tools` | Software subscriptions and productivity tools like Notion, Slack, or Jira. |
| `debit - business expenses - payroll tax` | Employer tax withholdings and contributions. |
| `debit - business expenses - utilities - electricity, water and gas` | Utility costs for business premises — electricity, gas, or water. |
| `debit - business expenses - utilities - internet, mobile and tv` | Internet, phone, and TV service costs for business operations. |
| `debit - business expenses - contractors and outsourcing` | Payments to contractors or outsourced service providers. |
| `debit - business expenses - other utilities` | Other operational utility expenses not listed elsewhere. |
| `debit - business expenses - infrastructure and security` | Spending on data storage, hosting, and infrastructure (e.g., AWS, Azure). |
| `debit - business expenses - personnel training and education` | Costs for staff development, training courses, and certifications. |
| `debit - cost of goods sold - supplier payments` | B2B payments for materials, goods, or services. |
| `debit - cost of goods sold - other cost of goods sold` | Other costs associated with Cost of Goods Sold. |
| `debit - cost of goods sold - customer returns` | Costs arising when customers return purchased items, including expenses for handling returns, processing refunds or exchanges, and any related logistics or restocking activities. |
| `debit - cost of goods sold - courier and logistics` | DHL, FedEx, Royal Mail, UPS, or same-day delivery couriers as well as self-storage. |
| `debit - customer acquisition cost - advertising and marketing services` | Agency and PR-related marketing cost as well as digital ad spend via platforms like Meta Ads, Google Ads, or LinkedIn. |
| `debit - customer acquisition cost - other customer acquisition cost` | Other cost associated to marketing and customer acquisition. |
| `debit - donations - charity and non profit organizations` | Donations to charitable organizations such as UNICEF, Oxfam, or Red Cross. |
| `debit - employee spend - entertainment and recreation` | Spending on leisure or recreational activities. |
| `debit - employee spend - eating out and drinks` | Meals and drinks consumed outside of work. |
| `debit - employee spend - takeaway and delivery` | Food ordered via delivery or takeaway services. |
| `debit - employee spend - gambling` | Gambling-related spending. |
| `debit - employee spend - automobile and gas` | Fuel and maintenance expenses for vehicles. |
| `debit - employee spend - gifts` | Purchases of gifts for personal or work purposes. |
| `debit - employee spend - employee reimbursement` | Repayment of expenses made by employees. |
| `debit - employee spend - groceries` | Grocery and supermarket spending. |
| `debit - employee spend - hotels and accommodation` | Hotel or lodging costs related to work or travel. |
| `debit - employee spend - public transport` | Bus, metro, or train fares. |
| `debit - employee spend - taxi and rideshare` | Payments for taxis or ride-hailing services. |
| `debit - employee spend - tolls and parkings` | Toll road or parking expenses. |
| `debit - employee spend - airlines` | Flight bookings for work or travel. |
| `debit - employee spend - car rental` | Temporary car rentals. |
| `debit - employee spend - other transport` | Miscellaneous travel and transportation costs. |
| `debit - employee spend - other employee spend` | Other personal or work-related employee spending. |
| `debit - fees and charges - other fees and charges` | Miscellaneous fees charged by the bank or third parties. |
| `debit - fees and charges - bank and transaction fees` | Bank service fees including account maintenance and ATM charges as well as transaction fees from payment processors such as Stripe, PayPal, Adyen, or Square. |
| `debit - fees and charges - overdraft fees` | Fees charged for insufficient funds or overdrafts. |
| `debit - financial products and services - credit card` | Payments made toward a credit card balance or annual fee. |
| `debit - financial products and services - insurance premium` | Premiums for health, life, home, or auto insurance. |
| `debit - financial products and services - bank loan repayments` | Payments towards business loans from banks. |
| `debit - financial products and services - goverment loan repayments` | Repayments towards government-issued loans or public funding. |
| `debit - financial products and services - revenue based financing repayments` | Payments towards loans coming from revenue based financing. |
| `debit - financial products and services - other business loan repayments` | Other business loan repayments. |
| `debit - financial products and services - mortgage` | Payment towards mortgage loans for residential properties. |
| `debit - government - government and local government` | Payments for public services such as visa, passport, unemployment benefit, parking permits. |
| `debit - government - taxes` | Taxes; HMRC payments & Local council taxes, etc. |
| `debit - other - other` | Uncategorized or unrecognized debit transactions. |
| `debit - professional services - facility maintenance` | Cleaning, maintenance, or repair services. |
| `debit - professional services - hr and recruiting` | Spend on recruitment agencies, HR consultancies, job platforms like LinkedIn or Indeed sponsored posts. Recruitment, onboarding, and HR-related spending. |
| `debit - professional services - office rental` | Costs of co-working spaces or leased offices. |
| `debit - professional services - other professional services` | Other contracted professional services. |
| `debit - professional services - stationary services` | Office supply and stationery purchases. |
| `debit - professional services - legal activities` | Payments for legal services or notary fees. |
| `debit - professional services - consultancy and bookkeeping` | Business, strategy, or management consulting — e.g., Deloitte, Accenture, freelancers. Includes accountants, auditors, and bookkeepers. |
| `debit - transfers and cash - currency exchange` | Transfer to another account resulting in outgoing currency exchange transfer. |
| `debit - transfers and cash - other` | Other cash-related transfers. |
| `debit - transfers and cash - cash withdrawal` | Money withdrawn from an ATM or bank branch. |
| `debit - transfers and cash - savings` | Payments towards saving account. |
| `debit - transfers and cash - account transfer` | Outgoing transfer of funds between the accounts of either different individuals or the same individual. |
| `debit - transfers and cash - investments` | Expenditures made to acquire financial assets or capital goods with the expectation of generating future income or profit. This includes purchases of stocks, bonds, mutual funds, real estate, and other investment vehicles. |
| `debit - transfers and cash - cryptocurrencies` | Transfer of funds from the account holder's bank account to a cryptocurrency broker or exchange platform for purchasing or trading cryptocurrencies. |
## Consumer Accounts
| Category | Definition |
| ---------------------------- | ----------------------------------------------------------------------------------------------------------------------------------------------------------------------------------------------------------------------------- |
| atm/bank deposit | Money deposited into the account via ATM or directly through a bank transaction. |
| benefits | Income received from the government (unemployment benefits, SSA , etc) or employer benefits. |
| cashback | Money received as a rebate or refund from purchases made using a debit or credit card. Cashback is typically a percentage of the purchase amount and is credited back to the cardholder's account. |
| chargeback | Money returned to the account due to a chargeback transaction, which occurs when a customer disputes a charge with their bank or credit card issuer. |
| ecommerce | Revenue generated from online sales or transactions. This could include payments received from selling products or services through an e-commerce platform or website (e.g on ebay). |
| freelance | Money earned from self-employment or freelance work. This could include payments received for freelance projects, consulting services, or contract work. |
| gambling | Money obtained from gambling activities such as casino winnings, lottery prizes, or betting earnings. |
| grants or stipends | Funds received as a grant or stipend for various purposes such as education, research, or financial assistance. |
| insurance | Money received from an insurance provider as a claim payout for covered losses or damages. Unemployment insurance payout is also covered by this category. |
| inter account transfer | Transfer of funds between the accounts of different individuals; or between the accounts of the same individual held in different financial institutions. |
| interest / dividend | Income earned from interest on savings accounts, deposits, or dividends from investments. |
| intra account transfer | Transfer of funds between the accounts of the same person in the same financial institution. |
| loans | Money received as a loan from a lender. This could include personal loans, student loans, short-term loans, cash advances, etc. (does not include pawn loans). |
| not enough information | Transactions for which there is insufficient data to determine the nature of the transaction. |
| other | Transactions that do not fit into any other predefined category (e.g. covers credit card rewards, savings, etc. and other income). |
| pawn loan | Money received from a pawnbroker in exchange for valuable items used as collateral for a short-term loan. |
| paycheck | Salary or wages earned from employment. |
| peer to peer transfer | Direct transfer of funds between individuals, often facilitated through peer-to-peer payment platforms or mobile apps. |
| pension | Regular income received by individuals after retirement, originating from previously made contributions by employers, employees, or both. This encompasses payments from government, private, and occupational pension plans. |
| property rental | Revenue earned from renting out real estate. |
| refund | Money refunded for returned goods or services. This could include refunds from retailers, service providers, or utility companies. |
| reversal / adjustment | Funds reversed/adjusted due to a transaction cancellation or error. |
| rideshare or delivery income | Earnings from providing rideshare services (e.g. Uber, Lyft) or delivery services (e.g. Uber Eats, DoorDash). |
| tax refund | Refund received from overpayment of taxes to government authorities, such as federal or state tax refunds. |
| trading (crypto) | Transfer of funds from a cryptocurrency broker or exchange platform to the account holder's bank account. |
| trading (non-crypto) | Transfer of funds from a stock brokerage account to the account holder's bank account. |
| Category | Definition |
| ------------------------------------------ | ------------------------------------------------------------------------------------------------------------------------------------------------------------------------------------------------------------------------------------------------------------------------------------------------- |
| app stores | Advance payments made to Apple Store and Google Play Market for future purchases of software, music, games, etc. This includes funds added to Apple Wallet and similar platforms, intended for later use in buying digital content and services. |
| atm/bank withdrawal | Money withdrawn from an ATM or bank branch. |
| auto lease payment | Monthly payments made for leasing an automobile. This includes payments for the temporary use of a vehicle under a lease agreement. |
| auto loan repayment | Regular payments made towards the repayment of an auto loan. |
| bank fee | Charges incurred by the bank for various services such as account maintenance fees, ATM usage fees (does not include overdraft/nsf fees), etc. |
| books, newsletters, newspapers | Spending on reading materials such as books, magazines, newspapers, or audiobooks and digital subscriptions. |
| buy now, pay later | Payments made through buy now, pay later services or instalment payment plans. |
| cafes and coffee shops | Spending at coffee shops or cafes for coffee, tea, pastries, or other refreshments. |
| childcare | Expenses related to childcare services such as daycare, babysitting, or after-school care. |
| clothing | Expenditure on clothing items including apparel, footwear, and accessories. |
| contribution to reserve fund | Contributions made to a reserve fund or savings account for future expenses or emergencies. For example, monthly fees paid to a Homeowners Association (HOA) or a condominium complex by members, part of which goes toward a reserve fund to pay for neighbourhood maintenance and improvements. |
| convenience store | Purchases made at convenience stores (these are usually small stores adjacent to the petrol stations). |
| council tax | Council tax (in the UK) is a local taxation system collected by local authorities, applicable to domestic properties. |
| credit card bill | Payment made towards the outstanding balance on a credit card account (covers the credit card fee too). |
| credit card fee | Fees charged by the credit card issuers. |
| credit report | Payment for credit report services or credit monitoring subscriptions. |
| debt collection | Payments made towards debt collection agencies or debt settlement arrangements. |
| department or discount store | Expenses at department and discount retailers. The label covers purchases from a variety stores, thrift stores, and hypermarkets too. |
| digital content / streaming | Payment for digital content or streaming services such as music streaming, video streaming, podcasts or digital subscriptions. |
| donation | Political donations and charitable contributions or donations made to nonprofit organisations or charitable causes. |
| drugstores and pharmacies | Spending at drugstores or pharmacies for prescription medications, over-the-counter drugs, health supplies, or personal care products. Covers purchases from vitamin and supplement stores as well. |
| eCommerce purchase | Purchases made online through e-commerce platforms or websites. |
| education | Spending on educational expenses including tuition fees, school supplies, educational software, and digital courses. The label also covers payments to dancing schools, catering courses, and other occupational training. (learning by agenda). |
| electronics | Expenditure on electronic devices such as smartphones, computers, tablets, televisions, or home appliances. |
| entertainment and recreation | Expenses related to entertainment activities such as movie tickets, concerts, amusement parks, or recreational events. The label also covers digital games and all kinds of related purchases. |
| firearms | Expenses related to the purchase or maintenance of firearms or firearm accessories. |
| food and drink | Payments and purchases made for food and drink, including bakeries, bars, nightclubs, juice bars, restaurants, etc. This also covers food subscriptions, delivery services, and vending machines. |
| fuel | Expenditure on fuel for vehicles including gasoline, diesel, or alternative fuels. |
| funerals and bequests | Expenses related to funeral services, burial expenses, or memorial arrangements. This also covers the transfers of bequests. |
| gambling | Money spent on gambling activities such as casino gambling, lottery tickets, or betting. |
| gifts | Expenses on items from gift shops, flower shops, etc. |
| government | Payments to government agencies or institutions for fines, licences, permits, or government services. |
| groceries | Spending on groceries (from grocery shops, butchers, farm markets, and supermarkets). |
| home improvements and maintenance services | Expenses for home improvement and housekeeping services such as landscaping, pest control, maintenance, alarm security, as well as purchase of household hardware like lumber, flooring and construction materials, paint, etc. |
| hotel or lodging | Payments for hotel accommodations, hostels, airbnb, lodging, or temporary housing. |
| insurance | Payment for insurance coverage such as health insurance, auto insurance, home insurance, or life insurance. |
| inter account transfer | Transfer of funds between the accounts of different individuals; or between the accounts of the same individual held in different financial institutions. |
| interest | Payment of interest on loans. |
| intra account transfer | Transfer of funds within the accounts of the same person in the same financial institution. |
| investment | Expenditures made to acquire financial assets or capital goods with the expectation of generating future income or profit. This includes purchases of stocks, bonds, mutual funds, real estate, and other investment vehicles. |
| laundry | Expenses related to laundry services such as washing, drying, or dry cleaning. |
| legal services | Payment for legal services including attorney fees, legal consultations, or legal representation. |
| liquor | Expenses in the spirits stores on alcoholic beverages such as wine, beer, spirits, or cocktails. |
| loan repayment | Payments towards the repayment of loans including personal loans, payday loans, cash advances, etc. (does not include auto loans, student loans and pawn loans). |
| media | Payments and subscriptions for digital media services, including platforms such as iTunes, Netflix, YouTube, Vimeo, and similar services. |
| medical bill | Expenses related to medical services, healthcare treatments, or medical supplies. |
| mortgage | Payment towards mortgage loans for residential properties. |
| non-sufficient funds / overdraft fee | Fees incurred due to insufficient funds or overdrafts on the account. |
| not enough information | Transactions for which there is insufficient data to determine the nature of the transaction. |
| other consumer services | Payments done to the consumer services providers such as mail and postage, shipping, moving services, self-storages, photography, religious services, etc. |
| other non-essential | Expenses related to goods from printing stores and other non-essential costs. |
| other transport | Spending on automobiles and other types of transportation such as bicycles, or scooters (rental, maintenance etc). The label also includes parking fees, long-distance touristic bus fees etc. |
| pawn shops | Payment to redeem pawned items held as collateral for a loan. |
| peer to peer transfer | Direct transfer of funds between individuals, often facilitated through peer-to-peer payment platforms or mobile apps. |
| pets | Expenses related to pet care including pet food, veterinary services, grooming, or pet supplies. |
| public transport | Expenditure on public transportation services such as buses, trains, subways, or trams. |
| recreational goods | Spending on recreational items such as sports equipment, outdoor gear, hobby supplies, toys, tobacco and vape supplies. |
| rent and property management fee | Payment for renting property such as apartments, houses, or self-storage. This includes property management fees. |
| rent to own | Payments towards rent-to-own agreements where the lessee has the option to purchase the rented item after a certain period. |
| retirement contributions | Contributions towards retirement savings plans such as 401(k), IRA, or pension funds. |
| ridesharing and taxis | Payment for rideshare or taxi services for transportation. |
| saas tools | Payments for software as a service (SaaS) tools or subscriptions such as cloud-based software, online services, or digital tools. |
| self care | Expenses related to personal care products or services including skincare, haircare, beauty products, massages, tattoos etc. |
| sport and fitness | Expenditure related to sports and fitness activities, including gym memberships, fitness classes, sports equipment, or athletic apparel. |
| student loan repayment | Payments made towards the repayment of student loans, including federal or private student loans and education-related personal loans. |
| taxes | Payments made to government authorities for taxes owed, such as income taxes, property taxes etc. |
| toll charge | Charges for using toll roads, bridges, or tunnels for transportation. |
| towing companies | Spending for vehicle towing services. |
| trading (crypto) | Transfer of funds from the account holder's bank account to a cryptocurrency broker or exchange platform for purchasing or trading cryptocurrencies. |
| trading (non-crypto) | Transfer of funds from the account holder's bank account to a stock brokerage account for purchasing or trading stocks, ETFs, or other securities. |
| utilities | Payments for utility services such as electricity, water, gas, or sewage. |
| vehicle maintenance | Expenses for vehicle maintenance and repairs, including oil changes, tyre replacements, or repairs to mechanical or electrical systems. |
| Category | Definition |
| -------- | ------------------------------------------------------------------------------------------------------------------------------------------------------------------------------------------------------------------------------------------------------------------------------------------------------ |
| prenote | Used for transactions that are in a pre-authorization or pending state, awaiting final processing. This label covers 0-amount transactions, and bank account verification fees. Note: When a customer does not provide the amount of the transaction, they will get this label returned automatically. |
## Business Accounts
The categories in the response body (`enrichment.categorisation.categories`) are shown comma-separated instead of hyphen. For example, `financial services - bank verification - trial credit` is returned as:
```json theme={null}
"categories": [
"financial services",
"bank verification",
"trial credit"
]
```
| Category | Definition |
| ------------------------------------------------------ | --------------------------------------------------------------------------------------------------------------------------------------------------------------------------------------------------- |
| client deposit | Payments received in advance from customers for goods or services that will be delivered or rendered at a later date. |
| financial services - ATM deposit | Money deposited into the account via ATM to the business account. |
| financial services - bank deposit | Money deposited into the account directly through a bank transaction. |
| financial services - bank verification - trial credit | Small (less than £1) incoming amount received as part of the verification process for transactions or account setup. |
| financial services - credit card reward | Expenses associated with credit card reward programs, including cashback, points, or other incentives provided to cardholders for using a credit card for purchases. |
| financial services - interest earned | Income generated from interest on deposited funds or savings accounts. |
| government - grant | Funding received from government agencies or programs for specific purposes such as research, development, or community initiatives. |
| government - tax - tax refund | Refund received from tax authorities for overpayment of taxes, such as income tax refunds or sales tax refunds. |
| investment - dividend | Dividends (additional shares) of a company's stock received from existing shareholders as a distribution of profits, typically as a reinvestment of earnings into the company's equity. |
| referral reward | Rewards received for referring new customers, clients, or business opportunities to the other company. |
| refund | Money refunded to the business by the merchants for returned goods or services. |
| revenue | Miscellaneous sources of revenue not covered by specific categories. Acts also as an umbrella label for ecommerce revenue and wholesale revenue, when it's hard to differentiate between those two. |
| revenue - ecommerce | Revenue generated from online sales through the business's ecommerce platform, including sales of products or services. |
| revenue - wholesale | Revenue generated from wholesale transactions, where goods or services are sold in large quantities to retailers or other businesses for resale. |
| financial services - bank adjustment | Adjustments made by the bank to the business account balance, often for reconciling discrepancies or correcting errors. |
| financial services - brokerage/exchange | Transfer of funds to the business bank account from a currency brokerage account, often for trading, investment, or diversification purposes. |
| financial services - chargeback | Chargebacks initiated by the customer through their bank or credit card issuer. |
| financial services - crypto brokerage/exchange | Transfer of funds from a cryptocurrency brokerage account to the business bank account. |
| financial services - intra account transfer - checking | Transfer of funds between the accounts of the same entity in the same financial institution (transfer to/from checking account). |
| financial services - intra account transfer - savings | Transfer of funds between the accounts of the same entity in the same financial institution (transfer from to/from savings account). |
| financial services - loan - bank | Repayment of bank loan. |
| financial services - loan - MCA | Repayment of a Merchant Cash Advance (MCA) loan. |
| financial services - loan - other | Repayment of loans that do not fall under specific loan categories. |
| financial services - loan - revenue based financing | Funding received by the business based on projected future revenues, with repayment tied to a percentage of future revenue. The label also covers repayments for the revenue based financing. |
| financial services - reversal | Reversal of a previous transaction, initiated by either the business or the financial institution, often because of errors or unauthorised activity. |
| financial services - sweeps | Automatic transfer of funds between accounts to maintain target balances or optimise cash flow. |
| government - loan | Government loan payment. |
| investment - equity | Capital invested in the business by external investors in exchange for ownership stake or shares in the company. Also covers cases when the company invests money in the equity of other business. |
| insurance | Payment received from an insurance provider. |
| reimbursement | Reimbursement of expenses incurred by the business on behalf of the merchant, such as shipping costs, warranty repairs, or service-related expenses. |
| Category | Definition |
| ----------------------------------------------------------------- | --------------------------------------------------------------------------------------------------------------------------------------------------------------------------------------------------------------------------------------------------------- |
| cost of goods sold - customer return | Expenses incurred due to customers returning purchased goods, including costs associated with handling returned items, processing refunds or exchanges, and any related logistics or restocking fees. |
| cost of goods sold - logistics - delivery - postage | Expenses of postage for shipping items to customers, including expenses related to purchasing postage stamps, shipping labels, and any other postal charges incurred during the delivery process. |
| cost of goods sold - logistics - delivery - shipping | Expenses associated with shipping goods to customers, including costs related to freight charges, and any other expenses directly related to the transportation of goods. |
| cost of goods sold - logistics - freight - air freight | Expenses for shipping goods via air transportation. |
| cost of goods sold - logistics - freight - sea freight | Expenses for shipping goods via sea or ocean transportation, often used for international trade, import/export, or bulk shipments. |
| cost of goods sold - logistics - information systems | Expenses related to information systems utilised in logistics operations, including costs associated with software for inventory management, order tracking, and other logistical functions. |
| cost of goods sold - logistics - other | Expenses for any other logistics-related expenses not covered by the preceding categories, including miscellaneous costs such as warehousing fees, handling charges, or specialised transportation costs, etc. |
| cost of goods sold - logistics - shipping and packaging materials | Expenses related to shipping and packaging materials, including the cost of boxes, envelopes, packing tape, bubble wrap, and any other materials used for packaging and shipping goods. |
| cost of goods sold - other | Expenses for any other costs of goods sold that do not fit into the specified subcategories. |
| cost of goods sold - supplies - inventory | Expenses related to inventory supplies, including costs associated with purchasing, storing, and managing inventory stock. |
| cost of goods sold - supplies - raw materials | Expenses incurred for raw materials used in production processes. |
| cost of goods sold - supplies - vendor payment | Expenses associated with payments to vendors for supplies, including costs related to purchasing goods or services from external suppliers. |
| customer acquisition cost - advertisements - amazon ads | Expenses associated with payments to the various platforms or channels used for advertising efforts aimed at acquiring customers. Each subcategory covers expenses related to advertising specifically on the respective platform. |
| customer acquisition cost - advertisements - facebook ads | Expenses associated with payments to the various platforms or channels used for advertising efforts aimed at acquiring customers. Each subcategory covers expenses related to advertising specifically on the respective platform. |
| customer acquisition cost - advertisements - google ads | Expenses associated with payments to the various platforms or channels used for advertising efforts aimed at acquiring customers. Each subcategory covers expenses related to advertising specifically on the respective platform. |
| customer acquisition cost - advertisements - media | Expenses associated with payments to the various platforms or channels used for advertising efforts aimed at acquiring customers. Each subcategory covers expenses related to advertising specifically on the respective platform. |
| customer acquisition cost - advertisements - snapchat ads | Expenses associated with payments to the various platforms or channels used for advertising efforts aimed at acquiring customers. Each subcategory covers expenses related to advertising specifically on the respective platform. |
| customer acquisition cost - advertisements - tik tok ads | Expenses associated with payments to the various platforms or channels used for advertising efforts aimed at acquiring customers. Each subcategory covers expenses related to advertising specifically on the respective platform. |
| customer acquisition cost - materials | Expenses related to materials used specifically for customer acquisition purposes, including costs associated with creating marketing materials such as brochures, flyers, banners, and promotional items. |
| customer acquisition cost - other | Expenses for any other customer acquisition costs not covered by the specified subcategories. It may include miscellaneous expenses directly related to acquiring new customers, such as referral program costs or partnership fees. |
| employee spend - entertainment - gambling | Expenses incurred for employee entertainment activities related to gambling, including costs associated with casino outings, poker nights, or any other gambling-related events. |
| employee spend - entertainment and recreation | Expenses related to employee entertainment and recreational activities, including costs associated with team-building events, company outings, recreational facilities, and employee wellness programs. |
| employee spend - food and drink - delivery | Expenses for different types of food and drink for employees. Each subcategory covers expenses related to food delivery services, grocery purchases, and meals at restaurants. |
| employee spend - food and drink - groceries | Expenses for different types of food and drink for employees. Each subcategory covers expenses related to food delivery services, grocery purchases, and meals at restaurants. |
| employee spend - food and drink - restaurants | Expenses for different types of food and drink for employees. Each subcategory covers expenses related to food delivery services, grocery purchases, and meals at restaurants. |
| employee spend - other | Expenses for any other employee-related costs not covered by the specified subcategories. |
| employee spend - travel - airfare | Expenses related to air travel for employees, including costs associated with purchasing airline tickets, baggage fees, and any other expenses incurred during air travel. |
| employee spend - travel - automobile - gas and fuel | Expenses for different types of automobile-related costs for employee travel. Each subcategory covers expenses related to gas and fuel, parking fees, vehicle rentals, and other expenses associated with using automobiles for business travel. |
| employee spend - travel - automobile - other | Expenses for different types of automobile-related costs for employee travel. Each subcategory covers expenses related to gas and fuel, parking fees, vehicle rentals, and other expenses associated with using automobiles for business travel. |
| employee spend - travel - automobile - parking | Expenses for different types of automobile-related costs for employee travel. Each subcategory covers expenses related to gas and fuel, parking fees, vehicle rentals, and other expenses associated with using automobiles for business travel. |
| employee spend - travel - automobile - rentals | Expenses for different types of automobile-related costs for employee travel. Each subcategory covers expenses related to gas and fuel, parking fees, vehicle rentals, and other expenses associated with using automobiles for business travel. |
| employee spend - travel - lodging - hotels | Expenses related to lodging accommodations for employee travel, including costs associated with hotel stays, Airbnb rentals, and other temporary accommodations for business trips. |
| employee spend - travel - other | Expenses for any other travel-related costs not covered by the specified subcategories. |
| employee spend - travel - public transportation | Expenses incurred by employees for using public transportation during business-related travel, including costs associated with fares for buses, trains, subways, trams, ferries, and any other forms of public transportation used for business purposes. |
| employee spend - travel - rideshare and taxis | Expenses incurred by employees for utilising rideshare services such as Uber or local taxi companies during business-related travel. |
| employee spend - travel - tolls and bridges | Expenses related to tolls and bridge crossings incurred by employees during business-related travel, including payments made for toll roads, bridges, tunnels, and other infrastructure where fees are required for passage. |
| employee spend - travel - wifi | Expenses related to Wi-Fi services incurred by employees during business-related travel. |
| facilities - electronics | Expenses for electronic equipment used in business operations, including purchases, maintenance, and repairs of computers, printers, scanners, and other devices. |
| facilities - equipment | Expenses related to the acquisition, maintenance, and upkeep of various equipment used within the business premises. |
| facilities - furniture | Expenses associated with the purchase, maintenance, and upkeep of furniture items used within the office. |
| facilities - maintenance | Expenses related to the upkeep, repairs, and general maintenance of the business premises and its infrastructure. |
| facilities - office rent | Expenses related to the rental or lease of office space for business operations. |
| facilities - office supplies | Expenses related to the procurement of essential supplies used within the office environment for day-to-day operations. |
| facilities - other | Miscellaneous expenses related to facilities management that do not fit into the specified subcategories. |
| facilities - utilities - electricity | Expenses associated with various utility services necessary for business operations. |
| facilities - utilities - gas | Expenses associated with various utility services necessary for business operations. |
| facilities - utilities - internet | Expenses associated with various utility services necessary for business operations. |
| facilities - utilities - other | Expenses associated with various utility services necessary for business operations. |
| facilities - utilities - telecommunications | Expenses associated with various utility services necessary for business operations. |
| fee - banking fee - international transaction fee | Charges incurred for conducting financial transactions across international borders, typically imposed by banks or financial institutions. |
| fee - banking fee - NSF/overdraft fee | Fees charged by the bank/credit card issuer for insufficient funds or overdrawing the account, often incurred when the business attempts to make transactions without sufficient funds available. |
| fee - merchant processing fee | Fee charged by payment processors or merchant service providers for processing credit card transactions, debit card transactions, or other electronic payments. |
| fee - other | Miscellaneous fees not categorised under specific banking or financial transaction types. This category encompasses any additional charges imposed by banks or financial institutions that do not fit into predefined fee categories. |
| fee - payment processor fee | Fee charged by payment processors or payment gateways for processing online transactions, including transaction fees, processing fees, or gateway fees. |
| financial services - ATM withdrawal | Money withdrawn from an ATM. |
| financial services - bank verification - trial debit | Small (less than £1) outgoing amount sent as part of the verification process for transactions or account setup. |
| financial services - bank withdrawal | Withdrawal of funds (cash) from the business bank account (usually in a bank branch). |
| financial services - credit card bill | Payment made to settle outstanding balances on corporate credit cards. |
| financial services - credit card fee | Fees charged by credit card companies for processing transactions, maintaining accounts, or providing rewards programs associated with business credit cards. |
| financial services - interest payment | Payment of interest owed on loans, lines of credit, or other forms of debt financing. |
| financial services - mortgage repayment | Repayment of a mortgage loan used to finance the purchase or construction of commercial real estate, such as office buildings, retail spaces, or industrial properties. |
| financial services - voided fee | Fee for cancellation of the previous transaction. |
| gifts - donations - charity | Contributions made by the business to charitable organisations or causes. |
| gifts - donations - other | Contributions that are not classified under specific donation transaction type. |
| gifts - donations - political | Contributions made by the business to political candidates, parties, campaigns, or advocacy groups. |
| gifts - other | Miscellaneous expenses related to gifts given by the business that do not fall under specific gift categories. This label covers mainly employee appreciation gifts or client thank-you gifts. |
| government - compliance licences and permits | Payments for licences, permits, or regulatory compliance fees required to operate the business legally within a specific jurisdiction or industry. |
| government - other | Various government-related expenses not covered by predefined government expense categories. |
| government - tax - tax payment | Payment of taxes including federal income tax, state income tax, Social Security tax, etc. |
| government - unemployment benefit | Expenses associated with providing unemployment benefits to eligible individuals as mandated by government regulations or programs. |
| infrastructure - cloud operations | Expenses for cloud-based computing services such as web hosting, data storage, etc. |
| infrastructure - manufacturing | Purchases or leases of machinery, equipment, tools, or industrial appliances used in the manufacturing, production, or operation of the business. |
| infrastructure - other | Various infrastructure-related expenses not covered by predefined categories such as manufacturing, servers, or website expenses. |
| infrastructure - servers | Expenses associated with purchasing, leasing, or maintaining server infrastructure, data centres, or hosting services for storing, processing, or managing digital information. |
| infrastructure - website | Expenses associated with domain registration, website design, development, hosting services, security measures, and any other expenses related to the online presence of the business. |
| intellectual property | Expenses associated with acquiring, licensing, protecting, or enforcing intellectual property rights, including patents, trademarks, copyrights, or trade secrets. |
| invalid | Returned when the description contains random characters/numbers (e.g. ffgsrt41258). |
| investment - real estate | Expenses related to the acquisition, management, and maintenance of real estate properties as investments. |
| investment - share repurchase | Buyback of company shares from the open market or existing shareholders, reducing the number of outstanding shares and increasing ownership concentration. |
| personnel - contractors | Expenses related to the payments to contractors. |
| personnel - crowd outsourcing | Fees paid for outsourcing tasks or projects to online crowdsourcing platforms or freelance marketplaces. |
| personnel - employees - benefits - healthcare | Expenses related to providing healthcare benefits to employees, including premiums, contributions, or payments made towards health insurance plans, medical services, prescriptions, and other healthcare-related expenses. |
| personnel - employees - benefits - other | This label encompasses various non-categorized employee benefits, such as wellness programs, tuition assistance, or childcare benefits. |
| personnel - employees - benefits - retirement funds | Expenses associated with providing retirement benefits or contributions to retirement funds for employees, such as pension plans or other retirement savings programs. |
| personnel - employees - payroll - child support | Deducting child support payments from employees' wages as required by court orders or legal agreements. |
| personnel - employees - payroll - fee | Fees associated with payroll processing services or software used to manage employee payroll. |
| personnel - employees - payroll - salary | Expenses specifically related to regular wages or salaries paid to employees for their work, typically on a recurring basis. |
| personnel - employees - payroll - tax | Expenses related to withholding and remitting payroll taxes on behalf of employees, including income taxes, Social Security taxes, Medicare taxes, and any other applicable payroll taxes required by law. |
| personnel - other | This label encompasses various non-categorized personnel expenses, such as employee recognition programs, HR consulting fees, or team-building activities. |
| personnel - recruiting | Payments made to recruitment agencies, headhunters, or hiring platforms for sourcing, screening, or hiring candidates for job vacancies within the company. |
| personnel - reimbursements | Reimbursement of expenses employees incur while performing business tasks for the company. |
| personnel - training and education | Expenses related to providing training and educational opportunities for employees to enhance their skills and knowledge, including costs for workshops, seminars, courses, certifications, or tuition reimbursement programs. |
| professional services - accounting | Expenses for accounting services such as bookkeeping, financial statement preparation, or tax filing services provided by external accounting firms or professionals. |
| professional services - consulting | Expenses for consulting services provided by external consultants or consulting firms, often for specialised expertise or project-based advice. |
| professional services - legal | Expenses for attorneys, law firms, or legal consultants for legal services, advice, representation, litigation, or contract drafting on behalf of the business. |
| professional services - other | Miscellaneous expenses related to professional services that do not fit into specific professional service categories. |
| tools - software and saas | Subscription fees paid for accessing or using Software as a Service (SaaS) applications, platforms, or cloud-based tools. |
| financial services - bank adjustment | Adjustments made by the bank to the business account balance, often for reconciling discrepancies or correcting errors. |
| financial services - brokerage/exchange | Transfer of funds from the business bank account to a currency brokerage account, often for trading, investment, or diversification purposes. |
| financial services - chargeback | Money paid to customers due to customer disputes, fraud, etc. |
| financial services - crypto brokerage/exchange | Transfer of funds to a cryptocurrency brokerage account from the business bank account. |
| financial services - intra account transfer - checking | Transfer of funds between the accounts of the same entity in the same financial institution (transfer to/from checking account). |
| financial services - intra account transfer - savings | Transfer of funds between the accounts of the same entity in the same financial institution (transfer to from savings account). |
| financial services - loan - bank | Disbursement of bank loan. |
| financial services - loan - MCA | Disbursement of a Merchant Cash Advance (MCA) loan. |
| financial services - loan - other | Disbursement of loans that do not fall under specific loan categories in the hierarchy. |
| financial services - loan - revenue based financing | Funding received by the business based on projected future revenues, with repayment tied to a percentage of future revenue. The label also covers repayments for the revenue based financing. |
| financial services - reversal | Reversal of a previous transaction, initiated by either the business or the financial institution, often because of errors or unauthorised activity. |
| financial services - sweeps | Automatic transfer of funds between accounts to maintain target balances or optimise cash flow. |
| government - loan | Government loan disbursement. |
| investment - equity | Capital invested in the business by external investors in exchange for ownership stake or shares in the company. Also covers cases when the company invests money in the equity of other business. |
| insurance | Payment paid to an insurance provider. |
| reimbursement | Reimbursement to the customer. |
| Category | Definition |
| ---------------------- | ------------------------------------------------------------------------------------------------------------------------------------------------------------------------------------------------------------------------------------------------------------------------------------------------------ |
| prenote | Used for transactions that are in a pre-authorization or pending state, awaiting final processing. This label covers 0-amount transactions, and bank account verification fees. Note: When a customer does not provide the amount of the transaction, they will get this label returned automatically. |
| not enough information | Transactions for which there is insufficient data to determine the nature of the transaction. |
# Introduction
Source: https://docs.yapily.com/data/data-plus/overview
Enhance raw financial data with Yapily's Data Plus enrichment features. Get categorised transactions, income insights, balance prediction, and AI-powered financial analysis.
Yapily Data Plus is available as a BETA version.
***
## Introduction
Yapily Data Plus enhances Open Banking transaction data through enrichment. It can supplement standardised data returned by [Yapily Data](/data/overview) or function independently by enriching uploaded transaction data. It enables you to extract more value from your data to build a comprehensive view of your customer's financial profile, behaviour and habits.
You can easily embed Yapily Data Plus into your existing Yapily Data integration to benefit from the advanced insights.
Yapily Data Plus is an add-on to Yapily Data.
***
## Advanced insights
There are 1 advanced insights available with Yapily Data Plus.
### Categorisation
Faster decision making and analysis with automatic data sorting.
Returns a detailed summary for each individual transaction. Information includes the category, merchant, recurrence and payment processor where applicable.
[See more details.](/data/data-plus/categorisation)
***
### Available Flows
**Transactions & Enrichment**
Retrieve consumer or business transaction data through Yapily Data and enhance it with our additional enrichment layer.
**Enrichment Only**
Upload your transaction data directly, bypassing the Yapily Data flow, and receive an output containing the enriched data.
Data+ works with consent tokens from both Hosted Pages and Direct API integrations. See [Hosted vs API](/concepts/hosted-vs-api) for more details.
***
## Coverage
| Insight | Availability | Scope | Business Accounts | Consumer Accounts |
| -------------- | ------------ | --------- | ----------------- | ----------------- |
| Categorisation | Beta | UK and EU | Yes | Yes |
***
## Get started
See our [Categorisation tutorial](/data/data-plus/tutorial-categorisation)
***
## Related resources
### Product Resources
* [Categorisation](/data/data-plus/categorisation) - Automatic transaction categorisation
* [Yapily Data](/data/overview) - Access to account and transaction data
### Implementation Resources
For error handling, retry strategies, webhooks, testing, and support, see our [Developer Resources](/resources/overview) guide.
# Tutorial: Get Transactions and Enrichment
Source: https://docs.yapily.com/data/data-plus/tutorial-categorisation
This tutorial walks you through each of the steps required to obtain Categorisation.
The Yapily Plus categorisation product is available as a BETA version.
***
Before retrieving data from the **Categorised Transactions** endpoints, you will first need to:
1. [Obtain a Consent](/api-reference/authorisations/create-account-authorisation) from the user
2. [Get Accounts](/api-reference/financial-data/get-accounts) for the user
3. [Register a Webhook](/tools-and-services/webhooks/introduction) for notification events when categorisation is done or failed
### Webhook Registration
Please follow our [Webhook Registration Guide](/tools-and-services/webhooks/introduction) in order to register a webhook for your application.
#### Webhook Events
In order to get notified when a categorisation request has finished successfully or failed you will have to subscriber to the following webhook events:
* **transactions.categorisation.completed** - is the event triggered when a categorisation request finishes successfully and the data is ready to be picked up.
* **transactions.categorisation.failed** - is the event triggered when a categorisation request fails to categorise the data successfully.
Categorisation works asynchronously and therefore the flow requires you to have a registered webhook on for your application.
In order to trigger a categorisation process follow the steps:
* Call `POST /accounts/{accountId}/transactions/categorisation` endpoint.
* Define `categorisationType` (consumer or business) according to your use case.
* The response of the endpoint will return a `categorisationId` parameter.
* Store the `categorisationId` since all further API calls will require it.
Please check [API Reference](/api-reference) for an up to date specification of the API.
#### Setting Boundaries for Efficient Data Categorization
To enhance the efficiency of data categorisation requests via the `POST /accounts/{accountId}/transactions/categorisation` endpoint, it is crucial to set specific time frame boundaries using the `from` and `before` query parameters.
This approach helps to minimise system overloads and improve success rates by dividing extensive data requests into smaller, manageable intervals. For instance, to categorise three years of transaction data, we recommend submitting six separate requests, each covering a six-month period.
A webhook event will be sent to registered webhook in all situations, success or failure.
### Categorisation Success Event
When categorisation has finished successfully then an event is triggered on the topic `transactions.categorisation.completed`
```json theme={null}
{
"id": "41285f64-5717-4562-b3fc-2c961236afa6",
"applicationId": "3fa85f64-5717-4562-b3fc-2c963f66afa6",
"type": "transactions.categorisation.completed",
"event": {
"categorisationId": "fae419fc-9cd4-4221-8a7a-72d4bc7a7259"
},
"metadata": {
"tracingId": "6cf5ef06-9f96-4f24-8bab-32ab09128010",
"user": {
"key": "value"
}
}
}
```
| Property | Value Type | Description |
| ---------------------- | ---------- | ----------------------------------------------------------- |
| id | String | The Webhook ID used for delivering the event |
| applicationId | String | The Application ID that registered this webhook |
| type | String | The triggered event's type |
| event.categorisationId | String | The Categorisation ID the event was triggered for |
| metadata.tracingId | String | The Tracing ID of the event |
| metadata.user | String | **Optional.** The metadata provided at Webhook registration |
### Categorisation Fail Event
When categorisation request processing failed then an event is triggered on the topic `transactions.categorisation.failed`
```json theme={null}
{
"id": "41285f64-5717-4562-b3fc-2c961236afa6",
"applicationId": "3fa85f64-5717-4562-b3fc-2c963f66afa6",
"type": "transactions.categorisation.failed",
"event": {
"categorisationId": "fae419fc-9cd4-4221-8a7a-72d4bc7a7259",
"error": {
"issues": [
{
"code": 12345,
"message": "error message"
}
]
}
},
"metadata": {
"tracingId": "6cf5ef06-9f96-4f24-8bab-32ab09128010",
"user": {
"key": "value"
}
}
}
```
| Property | Value Type | Description |
| ----------------------- | ---------- | ----------------------------------------------------------- |
| id | String | The Webhook ID used for delivering the event |
| applicationId | String | The Application ID that registered this webhook |
| type | String | The triggered event's type |
| event.categorisationId | String | The Categorisation ID the event was triggered for |
| error.issues\[].code | Integer | A 5-digit error code pointing to the source of the problem |
| error.issues\[].message | String | The error message describing the issue |
| metadata.tracingId | String | The Tracing ID of the event |
| metadata.user | String | **Optional.** The metadata provided at Webhook registration |
### How to Handle Failure Event
We recommend that you build your app's error handling around [Error Codes](/resources/errors#enhanced-error-format-documentation), which would give you the best explanation of why your request has failed.
In order to retrieve categorised data call `GET /transactions/categorisation/{categorisationId}` endpoint.
Please check [API Reference](/api-reference) for an up to date specification of the API.
The categorised transactions will be available for **30 mins only**. If the transactions are not collected within that time, the categorisation will need to be completed again.
## Elements
Where possible we return the following:
* `categories e.g. childcare`
* `merchantName e.g. Netflix`
* `recurrenceType e.g one-off, subscription, recurring`
* `paymentProcessor e.g. Paypal`
As with categories, the merchant and category of a transaction may change as we improve the accuracy of our merchant service and add new merchants.
## Transaction Categories
To see the latest list of categories, use the `GET /transactions/categorisation/categories/{accountType}` endpoint
### Categories definition
The definition for all the incoming and outgoing categories can be found [here](/data/data-plus/categorisation-list)
Where the model cannot identify a merchant, the merchant field will be returned as **\{null}**.
# Tutorial: Get Enrichment Only
Source: https://docs.yapily.com/data/data-plus/tutorial-enrichment
Step-by-step tutorial for using enrichment with your own transaction data
This tutorial demonstrates how to use Yapily's categorisation feature to enrich your own transaction data. You can provide transaction data from any source, not just data retrieved via Yapily.
Before you start, make sure you have:
* A Yapily application with valid credentials
* Transaction data to categorise (in the correct format)
* [Register a Webhook](/tools-and-services/webhooks/introduction) for notification events when categorisation is done or failed
Categorisation works asynchronously and therefore requires a registered webhook for your application.
Please follow our [Webhook Registration Guide](/tools-and-services/webhooks/introduction) to register a webhook endpoint.
```bash Request theme={null}
curl --request POST \
--url https://api.yapily.com/webhooks/event-subscriptions \
--header 'Authorization: Basic [APPLICATION_SECRET_BASIC_AUTHENTICATION]' \
--header 'Content-Type: application/json' \
--data '{
"eventTypeId": "transactions.categorisation.completed",
"url": "https://yourapp.com/webhooks/categorisation"
}'
```
```json Response theme={null}
{
"data": {
"id": "webhook-subscription-123",
"eventTypeId": "transactions.categorisation.completed",
"url": "https://yourapp.com/webhooks/categorisation",
"status": "ACTIVE",
"createdAt": "2021-07-27T09:30:00Z"
}
}
```
You must also subscribe to the `transactions.categorisation.failed` event to be notified of failures.
Send your transaction data to Yapily for categorisation. Each transaction should include:
* `id`: Unique identifier for the transaction
* `date`: Transaction date
* `description`: Transaction description (used for categorisation)
* `amount`: Transaction amount
* `currency`: Currency code (e.g., GBP, EUR)
* `type`: Transaction type (`DEBIT` or `CREDIT`)
```bash Request theme={null}
curl --request POST \
--url https://api.yapily.com/accounts/{accountId}/transactions/categorisation \
--header 'Authorization: Basic [APPLICATION_SECRET_BASIC_AUTHENTICATION]' \
--header 'Content-Type: application/json' \
--data '{
"transactions": [
{
"id": "txn-001",
"date": "2021-07-20T10:30:00Z",
"description": "TESCO STORES 3297",
"amount": -45.67,
"currency": "GBP",
"type": "DEBIT"
},
{
"id": "txn-002",
"date": "2021-07-21T14:22:00Z",
"description": "AMAZON UK MARKETPLACE",
"amount": -23.99,
"currency": "GBP",
"type": "DEBIT"
},
{
"id": "txn-003",
"date": "2021-07-22T09:15:00Z",
"description": "SPOTIFY P1234567",
"amount": -9.99,
"currency": "GBP",
"type": "DEBIT"
},
{
"id": "txn-004",
"date": "2021-07-23T08:00:00Z",
"description": "SALARY PAYMENT",
"amount": 2500.00,
"currency": "GBP",
"type": "CREDIT"
}
]
}'
```
```json Response theme={null}
{
"data": {
"categorisationId": "fae419fc-9cd4-4221-8a7a-72d4bc7a7259",
"status": "PROCESSING",
"transactionCount": 4,
"createdAt": "2021-07-27T09:35:00Z"
},
"meta": {
"tracingId": "a1b2c3d4-5e6f-7a8b-9c0d-1e2f3a4b5c6d"
}
}
```
Note the `categorisationId` - you'll need this to retrieve the results.
Once the categorisation is submitted, Yapily will send a webhook notification when processing is complete.
### Success event
```json theme={null}
{
"type": "transactions.categorisation.completed",
"event": {
"categorisationId": "fae419fc-9cd4-4221-8a7a-72d4bc7a7259"
},
"timestamp": "2021-07-27T09:36:00Z"
}
```
### Failure event
```json theme={null}
{
"type": "transactions.categorisation.failed",
"event": {
"categorisationId": "fae419fc-9cd4-4221-8a7a-72d4bc7a7259",
"reason": "Invalid transaction format"
},
"timestamp": "2021-07-27T09:36:00Z"
}
```
Categorisation typically completes within a few seconds, but can take up to a few minutes for large batches. Make sure to retrieve the results within 30 minutes, as they are only available for a limited time.
Use the `categorisationId` to retrieve the enriched transaction data with categories.
```bash Request theme={null}
curl --request GET \
--url 'https://api.yapily.com/transactions/categorisation/fae419fc-9cd4-4221-8a7a-72d4bc7a7259' \
--header 'Authorization: Basic [APPLICATION_SECRET_BASIC_AUTHENTICATION]'
```
```json Response theme={null}
{
"data": {
"categorisationId": "fae419fc-9cd4-4221-8a7a-72d4bc7a7259",
"status": "COMPLETED",
"transactions": [
{
"id": "txn-001",
"date": "2021-07-20T10:30:00Z",
"description": "TESCO STORES 3297",
"amount": -45.67,
"currency": "GBP",
"type": "DEBIT",
"enrichment": {
"categorisation": {
"categories": [
"GROCERIES",
"SHOPPING"
],
"category": "GROCERIES"
},
"merchant": {
"name": "Tesco",
"businessName": "Tesco Stores"
}
}
},
{
"id": "txn-002",
"date": "2021-07-21T14:22:00Z",
"description": "AMAZON UK MARKETPLACE",
"amount": -23.99,
"currency": "GBP",
"type": "DEBIT",
"enrichment": {
"categorisation": {
"categories": [
"SHOPPING",
"GENERAL"
],
"category": "SHOPPING"
},
"merchant": {
"name": "Amazon",
"businessName": "Amazon UK"
}
}
},
{
"id": "txn-003",
"date": "2021-07-22T09:15:00Z",
"description": "SPOTIFY P1234567",
"amount": -9.99,
"currency": "GBP",
"type": "DEBIT",
"enrichment": {
"categorisation": {
"categories": [
"ENTERTAINMENT",
"SUBSCRIPTION"
],
"category": "ENTERTAINMENT"
},
"merchant": {
"name": "Spotify",
"businessName": "Spotify Limited"
}
}
},
{
"id": "txn-004",
"date": "2021-07-23T08:00:00Z",
"description": "SALARY PAYMENT",
"amount": 2500.00,
"currency": "GBP",
"type": "CREDIT",
"enrichment": {
"categorisation": {
"categories": [
"INCOME",
"SALARY"
],
"category": "INCOME"
}
}
}
],
"completedAt": "2021-07-27T09:36:00Z"
},
"meta": {
"tracingId": "b2c3d4e5-6f7a-8b9c-0d1e-2f3a4b5c6d7e"
}
}
```
## Understanding the enrichment data
Each categorised transaction includes an `enrichment` object with:
* **categorisation.category**: The primary category assigned to the transaction
* **categorisation.categories**: An array of all applicable categories (ordered by relevance)
* **merchant.name**: The clean merchant name (if identified)
* **merchant.businessName**: The full business name (if identified)
## Available categories
Yapily categorises transactions into the following categories:
* GROCERIES
* SHOPPING
* ENTERTAINMENT
* BILLS
* TRANSPORT
* EATING\_OUT
* INCOME
* SALARY
* CASH
* TRANSFERS
* GENERAL
* And more...
For a complete list of categories, see the [Categorisation documentation](/data/data-plus/categorisation).
## Data retention
Categorised transaction data is available for 30 minutes after completion. Make sure to retrieve the results within this time window. After 30 minutes, the data will be automatically deleted.
## Next steps
* Learn about [Transaction Categorisation](/data/data-plus/categorisation)
* Explore the [Categorisation List](/data/data-plus/categorisation-list)
* See the [Categorisation Tutorial](/data/data-plus/tutorial-categorisation) for categorising Yapily-sourced transactions
# Accounts and Balances
Source: https://docs.yapily.com/data/financial-data-resources/accounts-and-balances
Reference guide for account and balance data returned by Yapily's API. Understand account types, balance fields, currency handling, and institution-specific data variations.
## Balance types
`account/data/accountBalances[]/type`
Yapily has a defined set of Balance Types and those reported for an account will depend on the information shared by the ASPSP.
Each Balance Type has a specific purpose:
| Balance Type | Description |
| -------------------------- | --------------------------------------------------------------------------------------------------------------------------------------------------------------------------------------------------------------------------------------------------------------------------------------------------------------------------------------------------------- |
| CLOSING\_AVAILABLE | Closing balance of amount of money that is at the disposal of the account owner on the date specified |
| CLOSING\_BOOKED | Balance of the account at the end of the pre-agreed account reporting period. It is the sum of the opening booked balance at the beginning of the period and all entries booked to the account during the pre-agreed account reporting period. |
| CLOSING\_CLEARED | Closing balance of amount of money that is cleared on the date specified. |
| EXPECTED | Balance, composed of booked entries and pending items known at the time of calculation, which projects the end of day balance if everything is booked on the account and no other entry is posted. |
| FORWARD\_AVAILABLE | Forward available balance of money that is at the disposal of the account owner on the date specified. |
| INFORMATION | Balance for informational purposes. |
| INTERIM\_AVAILABLE | Available balance calculated in the course of the account servicer's business day, at the time specified, and subject to further changes during the business day. The interim balance is calculated on the basis of booked credit and debit items during the calculation time/period specified. |
| INTERIM\_BOOKED | Balance calculated in the course of the account servicer's business day, at the time specified, and subject to further changes during the business day. The interim balance is calculated on the basis of booked credit and debit items during the calculation time/period specified. |
| INTERIM\_CLEARED | Cleared balance calculated in the course of the account servicer's business day, at the time specified, and subject to further changes during the business day. |
| OPENING\_AVAILABLE | Opening balance of amount of money that is at the disposal of the account owner on the date specified. |
| OPENING\_BOOKED | Book balance of the account at the beginning of the account reporting period. It always equals the closing book balance from the previous report. |
| OPENING\_CLEARED | Opening balance of amount of money that is cleared on the date specified. |
| PREVIOUSLY\_CLOSED\_BOOKED | Balance of the account at the previously closed account reporting period. The opening booked balance for the new period has to be equal to this balance. Usage: the previously booked closing balance should equal (inclusive date) the booked closing balance of the date it references and equal the actual booked opening balance of the current date. |
| OTHER | Used when an unrecognised enum is parsed |
| UNKNOWN | Used as a Yapily default |
## Main balance
`account/data/balance`
We recommend the use of the typed balances (`accountBalances[]`) wherever possible and according to your business needs.
However, the Yapily `account` resource also includes a 'main balance' (`balance`) which may be used as a fallback.
After forming the set of Yapily Balance Types, one of the balances will additionally be mapped to this 'main balance' according to a pre-defined priority (where the first balance that is available from the ASPSP is mapped).
### Standard mapping (in priority order)
* INTERIM\_BOOKED
* OPENING\_BOOKED
* CLOSING\_BOOKED
* EXPECTED
* INTERIM\_AVAILABLE
* OPENING\_AVAILABLE
* CLOSING\_AVAILABLE
* FORWARD\_AVAILABLE
* PREVIOUSLY\_CLOSED\_BOOKED
* INTERIM\_CLEARED
* OPENING\_CLEARED
* CLOSING\_CLEARED
* INFORMATION
* AUTHORISED
* OTHER
* UNKNOWN
### Santander
* INTERIM\_AVAILABLE
* INTERIM\_CLEARED
* INTERIM\_BOOKED
* OPENING\_AVAILABLE
* OPENING\_CLEARED
* OPENING\_BOOKED
* FORWARD\_AVAILABLE
* EXPECTED INFORMATION
* PREVIOUSLY\_CLOSED\_BOOKED
* CLOSING\_AVAILABLE
* CLOSING\_CLEARED
* CLOSING\_BOOKED
### Halifax
* INTERIM\_BOOKED
* INTERIM\_AVAILABLE
* INTERIM\_CLEARED
* OPENING\_BOOKED
* OPENING\_AVAILABLE
* OPENING\_CLEARED
* FORWARD\_AVAILABLE
* EXPECTED
* INFORMATION
* PREVIOUSLY\_CLOSED\_BOOKED
* CLOSING\_BOOKED
* CLOSING\_AVAILABLE
* CLOSING\_CLEARED
## Balance signing
`account/data/balance`
`account/data/accountBalances[]/balanceAmount/amount`
Balance amounts are signed according to whether the associated balance is positive or negative:
* Where a positive number indicates that the customer is holding funds / has funds available to them
* Where negative number indicates that the customer owes funds to the bank
This is true for all product types, including Credit Card accounts.
### For Credit Cards:
* A positive balance indicates that the customer has credit available to them
* A negative balance indicates funds that the customer owes
And as such:
* The available balances (e.g. `INTERIM_AVAILABLE`) are the funds available to the customer, including the credit made available to them
* This is expected to always be a positive amount, unless the customer has exceeded the credit made available to them
* The booked balances (e.g. `INTERIM_BOOKED`) reflect the 'actual' balance of the account - i.e. credit funds used minus repayments made.
* A negative balance reflects that the customer owes funds (i.e. they have used credit that is yet to be repaid)
* A positive balance reflects that the bank is holding funds owed to the customer
**For example**
* An `INTERIM_AVAILABLE` balance of 1000 indicates that a customer has 1000 credit available to them
* An `INTERIM_AVAILABLE` balance of -1000 indicates that the customer has exceeded their available credit by 1000
* An `INTERIM_BOOKED` of -1000 indicates that a customer used 1000 of their credit (and owes this to the bank)
# Data Restrictions
Source: https://docs.yapily.com/data/financial-data-resources/data-restrictions
Known AIS data restrictions imposed by institutions using Yapily's API. Covers limitations on account types, transaction history depth, and data field availability.
## Historical Data
When executing [Get Transactions](/api-reference/financial-data/get-account-transactions), the amount of historical data provided by each `Institution` is ultimately decided by the `Institution`. By default, each `Institution` should provide a minimum of 90 days of historical transactions, however, the amount of transactions available tends to vary across regions e.g. in the UK, it is common to receive several years whereas a European Institution is more likely to only provide 90 days worth of history.
#### CBI Globe Gateway
For institutions accessed via the CBI Globe Gateway, to retrieve historical transactions older than 90 days, an additional consent is needed from the PSU. In the [POST Create Account Authorisation](/api-reference/authorisations/create-account-authorisation) use the `transactionFrom` and `transactionTo` fields from the AccountRequest schema to specify the dates you would like to retrieve transactions for. You can specify a time frame for up to 1 year. Once the consent is authorised, the `consentToken` can be used to retrieve the transactions for this period.
**Note:** The `consentToken` (that can access historical data older than 90 days) can only be used once. If you need to retrieve transactions older than 90 days again, you must follow the same process to create a new consent token.
***
## Institution Restrictions
Some restrictions are not always commonly shared across each region and are more `Institution` specific. One example of this is *Intesa Sanpaolo* which limits the amount of `transactions` you can obtain to a window of 2 weeks at a time. As these `Institution` specific restrictions are less common, Yapily will pass on such restrictions via the API error response.
***
#### UK Banks
For UK institutions, certain endpoints can be accessed once and for a short duration after the consent has been authorised
* /accounts/\{account-id}/beneficiaries
* /accounts/\{account-id}/direct-debits
* /identity
* /accounts/\{account-id}/periodic-payments
* /accounts/\{account-id}/scheduled-payments
To access these endpoints again or after the valid period, you will have to obtain a new consent or reauthorise the existing consent.
***
## Limited Access
As part of the *European Banking Authority's (EBA)* [Regulatory Technical Standards (RTS)](https://www.eba.europa.eu/sites/default/documents/files/documents/10180/1761863/314bd4d5-ccad-47f8-bb11-84933e863944/Final%20draft%20RTS%20on%20SCA%20and%20CSC%20under%20PSD2%20%28EBA-RTS-2017-02%29.pdf), it is in *Article 31(5)* that:
*Account information service providers shall be able to access information from designated payment accounts and associated payment transactions held by account servicing payment service providers for the purposes of performing the account information service... where the payment service user is not actively requesting such information, no more than four times in a 24 hour period, unless a higher frequency is agreed between the account information service provider and the account servicing payment service provider, with the payment service user's consent.*
As a result, without the PSU actively requesting for their information, you should expect an `Institution` to limit the number of times you can call any of the AIS data endpoints to a maximum of four times in a single 24 hour period. This limit is reset at the end of the 24 hour period but subsequent calls after this limit will fail until the next 24 hour period. This will typically apply to EU banks but not UK.
The error message will ultimately depend on the `Institution`, but we will always provide *HTTP response `429`* for this scenario. For instance, Intesa Sanpaolo returns the following error message:
```json theme={null}
{
"code" : "ACCESS_EXCEEDED",
"text" : "The access on the account has been exceeding the consented multiplicity per day.",
"category" : "ERROR"
}
```
# Financial Data Consents
Source: https://docs.yapily.com/data/financial-data-resources/financial-data-consents
Manage AIS consents in Yapily. Learn how to create, renew, and revoke data access consents and understand the consent token lifecycle for financial data retrieval.
For an overview of how consents work across both data access and payments, see [Understanding Consents](/concepts/consent-lifecycle).
## Status transitions
The consent status value for AIS consent depends on:
* the type of authorisation required (dependent on the Institution and PSU) during the authorisation flow - e.g. Redirect, Decoupled or Embedded
* the success or failure of the authorisation process
* the actions that are performed by the TPP, Institution or PSU after an `AUTHORIZED` state has been reached
![]() Status `UNKNOWN`: The default value of the enum.
## Re-authorisation
An AIS `consent-token` is valid for up to 90 days in the UK and 180 days in the EEA before requiring secure customer authentication (SCA) from the user again.
You can request re-authorisation of a consent using the [Re-authorise Account Consent endpoint](/api-reference/authorisations/re-authorise-account-consent).
You should use this:
* when a consent-related failure keeps occurring (e.g. 401 status code) despite it being in `AUTHORIZED` state
* to increase the duration of the consent prior to it expiring while maintaining the original feature scope requested
* to re-authorise a `Consent` in the `EXPIRED` status
* to enable a greater history of financial transactions to be retrieved (i.e. when a bank limits these to the first 5 minutes after consent creation)
**NOTE:** For UK institutions, due to new regulation, you may be able to use [reconfirmation](#reconfirmation-uk-only) instead.
Re-authorisation is only supported for redirect flows, and not embedded flows. See [Account Authorisation Flows](/open-banking-flow/user-authorisation/overview) for more information.
#### Consent status
If re-authorisation is successful, the `status` of the `Consent` will be `AWAITING_RE_AUTHORIZATION`. The `consent-id` and the `consent-token` don't change.
If re-authorisation fails, the `status` will remain as it was.
#### Historical data
Different institutions can enforce their own restrictions on some endpoints when obtaining financial data. The main example is when requesting historical (older than 90 days) transactional data using [GET Transactions](/api-reference/financial-data/get-account-transactions). Institutions can limit the time in which you can make a request for historical data to as little as 5 minutes from when the authorisation was made. After this time, your requests for historical data will be rejected.
We recommend that if you need historical data, that you retrieve and store it in the first 5 minutes of obtaining the `consent-token`.
## Reconfirmation (UK only)
For UK institutions, all regulated AISPs are now responsible for obtaining reconfirmation of consent from their customers every 90 days for continued access to their data. This is part of a [FCA regulatory change for UK institutions](/data/financial-data-resources/uk-data-consent-changes).
You should use this:
* when a consent-related failure keeps occurring (e.g. 403 status code) despite it being in `AUTHORIZED` state
* to extend the duration of the `Consent` when the `User` has provided reconfirmation while maintaining the original feature scope requested
**NOTE:** Banks may still require re-authentication if they haven't implemented reconfirmation yet or at their discretion in specific circumstances.
If you are a regulated AISP (you are operating under your own licence), the reconfirmation of your users' consent needs to be captured as part of your user management. The consent doesn't need to be provided via SCA but it does need to be explicit. For example, a user selects a checkbox to confirm consent. You may want to use Yapily's [consent object fields](#consent-object) to manage user consents.
If you are a **Yapily Connect** customer, Yapily is required to confirm and record the reconfirmation of consent from your users before granting you access to their data. Yapily has built a [new API endpoint](#reconfirmation-of-consent-api-endpoint) that you must call in order to confirm you have received reconfirmation from the user.
### Reconfirmation of consent API endpoint
You must call the [Extend Consent endpoint](/api-reference/consents/extend-consent) to indicate to Yapily that reconfirmation of consent from the user has occurred.
You must include the date and time you collected reconfirmation from the user in the `lastConfirmedAt` field in the request body.
The request will fail when:
* `lastConfirmedAt` is a future date
* `lastConfirmedAt` is earlier or the same as the current date and time for this consent
* consent status is not `AUTHORIZED`
* consent type is not `AIS`
If successful, returns a [consent object](#consent-object).
#### Consent object
There are 2 attributes on the consent object to help manage user consents:
* `lastConfirmedAt` - the date and time that the PSU last confirmed access to their account information, either through full authentication with the institution or through reconfirmation with the AISP
* `reconfirmBy` - the date and time by which consent needs to be reconfirmed in order to ensure continued, uninterrupted access to the account information
These attributes are returned on all API endpoints that return a consent object.
If you don't receive reconfirmation from the user by the `reconfirmBy` date, then Yapily will prevent further access to the user's data. You can still capture reconfirmation after this date to resume data access, but you will not be able to access it in the interim.
**NOTE:** If you are a regulated AISP, you'll still receive these additional attributes in the consent object so you can use Yapily for your consent management. However, Yapily will not prevent access to account information after the `reconfirmBy` date if reconfirmation has not been received.
#### Consent status
If reconfirmation is successful, the `status` of the `Consent` will remain `AUTHORIZED`. The `consent-id` and `consent-token` don't change.
If reconfirmation fails, the `status` will remain as it was.
If the institution has not implemented reconfirmation yet, [re-authorisation](#re-authorisation) is required and the `status` of the `Consent` will be `AWAITING_RE_AUTHORIZATION`.
## Revoked Consents
At any time, the user can revoke their consent directly in the `Institution`, which makes the consent token unusable.
In this case, the `Consent` status may still display as `AUTHORIZED` but will return `403 Forbidden` errors when you attempt to use it to obtain financial data.
To regain access to their account data, you need to create a new consent using the [Create Account Authorisation endpoint](/api-reference/authorisations/create-account-authorisation).
## Deleting Consents
Yapily also provides the means to delete a `Consent` from the api using the [Delete Consent endpoint](/api-reference/consents/delete-consent).
If the user explicitly opt-outs of consent, we strongly recommend you call the endpoint to delete the user's consent. By default, this will attempt to delete the `Consent` both in the Yapily system and from the `Institution`. If this is not supported by the `Institution`, the `Consent` will only be deleted from the Yapily system.
Any access the user's data in the future, will then require the user to submit a new consent.
# Financial Data Features
Source: https://docs.yapily.com/data/financial-data-resources/financial-data-features
Explore the financial data features supported by each institution in Yapily's network. Compare account, transaction, identity, and balance data availability across banks.
## Feature List
The following financial data features are used to create or use an AIS `consent-token`:
| Feature | Description | Endpoint |
| ------------------------------------ | ------------------------------------------------------------------------------------------------------------------------------------------------------------------------------------------------------------------------------------------------------------------- | ----------------------------------------------------------------------------------------------- |
| `ACCOUNT` | Get account information for a single account. Account information includes the account identifications for the account (sort code and bank account or IBAN), the balance information for the account and the account details (bank id, type, currency and names). | [GET Account](/api-reference/financial-data/get-account) |
| `ACCOUNTS` | Get account information for a list of accounts. Account information includes the account identifications for the account (sort code and bank account or IBAN), the balance information for the account and the account details (bank id, type, currency and names). | [GET Accounts](/api-reference/financial-data/get-accounts) |
| `ACCOUNTS_WITHOUT_BALANCE` | Get account information for a list of accounts without any balance information. The balance information is not included in this feature when this is returned by the bank and must be obtained separately in the feature `ACCOUNT_BALANCES`. | [GET Accounts](/api-reference/financial-data/get-accounts) |
| `ACCOUNT_BALANCES` | Get account balance information. This feature requires a separate authorisation in order to obtain the balance information. | [GET Balances](/api-reference/financial-data/get-account-balances) |
| `ACCOUNT_DIRECT_DEBITS` | Get direct debits for an account. | [GET Account Direct Debits](/api-reference/financial-data/get-account-direct-debits) |
| `ACCOUNT_PERIODIC_PAYMENTS` | Get periodic payments for an account. | [GET Account Periodic Payments](/api-reference/financial-data/get-account-periodic-payments) |
| `ACCOUNT_SCHEDULED_PAYMENTS` | Get scheduled payments for an account. | [GET Account Scheduled Payments](/api-reference/financial-data/get-account-scheduled-payments) |
| `ACCOUNT_STATEMENT` | Get an account statement from an account. | [GET Account Statement](/api-reference/financial-data/get-account-statement) |
| `ACCOUNT_STATEMENTS` | Get a list of account statements from an account. | [GET Account Statements](/api-reference/financial-data/get-account-statements) |
| `ACCOUNT_STATEMENT_FILE` | Download an account statement from an account. | [GET Account Statement File](/api-reference/financial-data/get-account-statement-file) |
| `ACCOUNT_TRANSACTIONS` | Get account transactions. | [GET Transactions](/api-reference/financial-data/get-account-transactions) |
| `ACCOUNT_TRANSACTIONS_WITH_MERCHANT` | Get account transaction including the merchant details associated with the transaction if there is any. e.g. Monzo provides merchant details with each transaction. | [GET Transactions](/api-reference/financial-data/get-account-transactions) |
| `ACCOUNT_WITHOUT_BALANCE` | Get account information for a single account without any balance information. The balance information is not included in this feature when this is returned by the bank and must be obtained separately in the feature `ACCOUNT_BALANCES`. | [GET Account](/api-reference/financial-data/get-account) |
| `IDENTITY` | Get identity information from the bank. | [GET Identity](/api-reference/financial-data/get-identity) |
| `INITIATE_ACCOUNT_REQUEST` | Create a request to access a user's financial data from their bank. | [POST Create Account Authorisation](/api-reference/authorisations/create-account-authorisation) |
| `INITIATE_PRE_AUTHORISATION` | Initiate a generic pre-authorisation request | [POST Create Pre-authorisation](/api-reference/authorisations/create-pre-authorisation) |
# Pagination
Source: https://docs.yapily.com/data/financial-data-resources/pagination
Implement pagination for large transaction sets from Yapily's API. Covers cursor-based pagination, configuring page sizes, and handling multi-page transaction retrieval.
## Offset pagination
By default, Yapily limits the maximum amount of transactions returned in one request to [GET Account Transactions](/api-reference/financial-data/get-account-transactions) to 1000. If you request contains more than this limit, you can use pagination access all transactions.
The following fields are used for pagination:
* [`pagination.totalCount`](/api-reference/financial-data/get-account-transactions#response-paging-total-count) - the total number of transactions your query would return
* [`pagination.self.limit`](/api-reference/financial-data/get-account-transactions#parameter-limit) - the value of limit if specified in the request or 1000 if not specified
* [`offset`](/api-reference/financial-data/get-account-transactions#parameter-offset) - the number of transaction records to be skipped
### How it works
1. Send a request to GET Account Transactions. If `pagination.totalCount` is greater than `pagination.self.limit` then you haven't received the full number of transactions for your request.
2. Execute the request again and specify the `offset` property to increment the number by X (where X is the value of `pagination.self.limit`). This will return the next X transactions.
3. Repeat step 2 until `pagination.totalCount` is the same as or less than `pagination.self.limit`.
### Examples
#### No limit specified
For a call to [Get Account Transactions](/api-reference/financial-data/get-account-transactions) that had 6500 transactions without any limit, calling:
* `GET /accounts/{accountId}/transactions` returns transactions 1-1000
* `GET /accounts/{accountId}/transactions?offset=1000` returns transactions 1001-2000
* `GET /accounts/{accountId}/transactions?offset=6000` returns transactions 6001-6500
#### Specifying a limit
For a call to [Get Account Transactions](/api-reference/financial-data/get-account-transactions) that had 467 transactions with a limit=50, calling:
* `GET /accounts/{accountId}/transactions?limit=50` returns transactions 1-50
* `GET /accounts/{accountId}/transactions?limit=50&offset=50` returns transactions 51-100
* `GET /accounts/{accountId}/transactions?limit=50&offset=450` returns transactions 451-467
***
## Cursor-based pagination
Cursor-based pagination feature is currently available as a [Private Beta version](/getting-started/glossary#private-beta).
Please contact your Customer Success Manager if you would like to access it.
Yapily's ['Realtime transactions' API endpoint](/api-reference/financial-data/get-real-time-account-transactions) is used to fetch transactions in real-time using cursor-based pagination.
It accepts `from` and `before` as optional query parameters when sending the initial request, and accepts `cursor` as optional query parameter in subsequent requests.
### How it works
Yapily doesn't set a `limit` for the maximum number of transactions returned per page, but an individual `Institution` can set a limit.
The `meta` object in the response includes `count` that represents the number of transactions in that page, but doesn't return a field for the total number of transactions.
The `data` object in the response contains an array of transactions.
The `links` object in the response returns opaque cursor tokens that can be fed into the subsequent request:
* `first` - a cursor or link to the first page
* `prev` - a cursor or link to the previous page
* `self` - a cursor or link to the current page
* `next` - a cursor or link to the next page
* `last` - a cursor or link to the last page
### Examples
* `GET /accounts/{accountId}/real-time/transactions` to fetch transactions in the first page. Returns `self`, `next` and `last` page cursors:
```json theme={null}
"links": {
"self": "https://api.yapily.com/accounts/{accountId}/real-time/transactions?cursor=aaa",
"next": "https://api.yapily.com/accounts/{accountId}/real-time/transactions?cursor=bbb",
"last": "https://api.yapily.com/accounts/{accountId}/real-time/transactions?cursor=zzz"
}
```
* `GET /accounts/{accountId}/real-time/transactions?cursor=ccc` to fetch transactions in a middle page. Returns `first`, `prev`, `self`, `next` and `last` page cursors:
```json theme={null}
"links": {
"first": "https://api.yapily.com/accounts/{accountId}/real-time/transactions?cursor=aaa",
"prev": "https://api.yapily.com/accounts/{accountId}/real-time/transactions?cursor=bbb",
"self": "https://api.yapily.com/accounts/{accountId}/real-time/transactions?cursor=ccc",
"next": "https://api.yapily.com/accounts/{accountId}/real-time/transactions?cursor=ddd",
"last": "https://api.yapily.com/accounts/{accountId}/real-time/transactions?cursor=zzz"
}
```
* `GET /accounts/{accountId}/real-time/transactions?cursor=zzz` to fetch transactions in the final page. Returns `first`, `prev` and `self` page cursors:
```json theme={null}
"links": {
"first": "https://api.yapily.com/accounts/{accountId}/real-time/transactions?cursor=aaa",
"prev": "https://api.yapily.com/accounts/{accountId}/real-time/transactions?cursor=yyy",
"self": "https://api.yapily.com/accounts/{accountId}/real-time/transactions?cursor=zzz"
}
```
# Transaction Hash
Source: https://docs.yapily.com/data/financial-data-resources/transaction-hash
Learn to use Yapily Transaction Hash
Learn how to use Yapily Transaction Hash
***
Some institutions do not return a unique identifier (i.e. transaction id) for transactions. The transaction hash was introduced to provide an identifier for transactions retrieved via the Yapily API, which may be helpful in cases where a transaction ID is not present.
### Where you can find it
By default, the Yapily Transaction Hash is returned for every transaction and is located within `Enrichment` in the transaction response. You can find an example transaction below:
```json theme={null}
{
"date": "2020-07-31T00:00:00Z",
"bookingDateTime": "2020-07-31T00:00:00Z",
"status": "PENDING",
"amount": -57.87,
"currency": "GBP",
"transactionAmount": {
"amount": -57.87,
"currency": "GBP"
},
"isoBankTransactionCode": {
"domainCode": {
"code": "PMNT",
"name": "Payments"
},
"familyCode": {
"code": "ICDT",
"name": "Issued Credit Transfers"
},
"subFamilyCode": {
"code": "DMCT",
"name": "Domestic Credit Transfer"
}
},
"proprietaryBankTransactionCode": {
"code": "DEB",
"issuer": "LBG"
},
"enrichment": {
"transactionHash": {
"hash": "3c327ac9d43ef541c4dc6d163cf042bc.1"
}
}
```
### How it works
As the name suggests, the transaction hash is generated by hashing a number of fields together from the transaction itself. These fields can be found below:
* Account ID
* Institution ID
* Credit/Debit indicator
* Date
* Amount
* Description
In addition to this, once the hash is generated each transaction is ranked in the context of the API Call. The reason for this is to account for the example where a person may have a transaction with the same description, for the same amount, on the same day, paid for from the same account.
### Limitations
While the ambition of the transaction hash is to consistently provide a unique transaction identifier, there will be instances where the transaction hash may change or the same transaction hash could be assigned to different transactions. This is due to the hash being reliant on live institution data, which could change at any time. Yapily will continue to monitor the performance of the transaction hash and mitigate edge cases where duplications or changes may occur, however it is not possible to guarantee that a transaction hash will be completely unique or immutable.
# 90 Day AIS Consent Changes
Source: https://docs.yapily.com/data/financial-data-resources/uk-data-consent-changes
Understand the 90-day re-authentication requirement for UK AIS consents. Learn how Yapily handles the re-consent flow and what this means for your data integration.
These changes apply to the UK only.
***
## Regulatory change
In the UK, regulations have changed for how users provide consent to Account Information Service Providers (AISPs) in order to access their data.
[The FCA announced in November 2021](https://www.fca.org.uk/publication/policy/ps21-19.pdf) that users are no longer required to re-authenticate every 90 days via Strong Customer Authentication (SCA) with their bank when sharing their account data with AISPs. Instead, the user needs to reconfirm their consent to have their data accessed with the AISP.
Authentication is still required when providing access to a user's data for the first time.
## Yapily Guidelines
### What is the impact of this change?
All regulated AISPs are now responsible for obtaining reconfirmation of consent from their customers every 90 days for continued access to their data.
If you are a regulated AISP (you are operating under your own licence), the reconfirmation of your users' consent needs to be captured as part of your user management. The consent doesn't need to be provided via SCA but it does need to be explicit. For example, a user selects a checkbox to confirm consent. You may want to use Yapily's [consent object fields](/data/financial-data-resources/financial-data-consents#consent-object) to manage user consents.
If you are a **Yapily Connect** customer, Yapily is required to confirm and record the reconfirmation of consent from your users before granting you access to their data. Yapily has implemented a new ['Reconfirmation of Consent' API endpoint](/data/financial-data-resources/financial-data-consents#reconfirmation-of-consent-api-endpoint) to allow for this requirement.
### What actions do you need to take?
#### User reconfirms consent
When the reconfirmation from the user has been received, you must call the [extend consent endpoint](/api-reference/consents/extend-consent) to reconfirm the consent with Yapily. Yapily will capture the date and time of the reconfirmation and you will be able to access the user data for a further 90 days.
#### User retracts consent
If the user explicitly opt-outs of the consent at reconfirmation, we strongly recommend you call the [delete consent endpoint](/api-reference/consents/delete-consent) to delete the user's consent. Any access the user's data in the future, will then require the user to submit consent again.
#### User takes no action
If the user doesn't reconfirm or decline the consent, then after 90 days Yapily will prevent further access to their data until the user takes an action. If you try to access user data, you will receive an error prompting you to get reconfirmation or re-authentication from the user.
If you later receive reconfirmation from the user, access to the user's data can be resumed from this date after you have confirmed to Yapily via the [extend consent endpoint](/api-reference/consents/extend-consent).
If the user later declines the consent, you should call the [delete consent endpoint](/api-reference/consents/delete-consent) to delete the user's consent.
### When is re-authentication required?
UK banks will likely release these changes at different times. If the reconfirmation change has not been implemented yet, re-authentication from the user is still required every 90 days.
There may also be circumstances where the bank requires re-authentication to take place, which is at the discretion of the bank, even if they have implemented the reconfirmation change.
## Implementation timelines
The target for widespread adoption of this change is September 30th 2022. However, banks will likely implement it at different times and so where a bank does not support the new change, re-authentication will still be required every 90 days. Yapily is working with the banks to understand their readiness and thereby ensuring that the customer end-to-end experience is as seamless as possible whether they are going through the reconfirmation or re-authentication journey.
***
If you have any questions or require more information please contact your Customer Success Manager.
# Yapily Data
Source: https://docs.yapily.com/data/overview
Access real-time financial data from banks using Yapily's Open Banking data API. Retrieve accounts, balances, transactions, and identity information with user consent.
***
## Introduction
Yapily Data enables you to access Account Information Services (AIS) for banks across the UK and Europe through a single API integration.
Understanding consents is key to accessing financial data. See [Understanding Consents](/concepts/consent-lifecycle).
AIS allows users to securely provide access to their financial information from multiple accounts to financial service providers in real-time.
Using Yapily's Data API you can access your customers' financial data including account balances, transaction history and account details to create personalised financial products and services. This includes if your customer has a consumer, business or corporate account.
Yapily's Data API normalises all financial data received from banks, returning standardised, consistent data back to you. This enables you to quickly and easily interpret and action the data.
You must be [registered](/getting-started/integration-setup/registration) as an Account Information Service Provider (AISP) to access AIS via Yapily Data API. If you aren't regulated by a central authority, you can use [Yapily Connect](/tools-and-services/yapily-connect/overview) to gain simple, easy and fast access without needing to obtain a Third-Party Provider licence.
***
## Advantages
The 3 main benefits of AIS:
#### 1. Personalised solutions
Gain a complete, unified view across all of your customer's finances to enable you to offer personalised products and services.
#### 2. Proactive customer management
Get access to financial data to gain a deeper understanding of your customer to help anticipate change in consumer behaviour.
#### 3. Accurate data for inclusive decisions
Access financial data to improve risk profiling and affordability models for more informed, inclusive decision making.
***
## Applications
You can use Yapily's Data API to enhance your product offering in many ways.
**Personal finance management:**
Aggregate and link all accounts in one place to build a consolidated financial overview. Enable individuals and businesses to track and manage their spending, set budgets, and make financial plans.
**Account information:**
Securely access business, corporate and personal financial information.
**Financial profiling:**
Analyse and anticipate financial behaviour to make more informed decisions about your customers. Early detection of vulnerable customers and likelihood of missing payments.
**Reconciliation:**
Reconcile bank statements with real time transaction data directly from the bank.
**Credit risk & affordability:**
Make informed lending decisions by getting real-time visibility on an individual's transaction data to accurately assess creditworthiness and affordability. Analyse financial data that isn't typically considered such as rental payments and savings.
Don't see your use case? [Let us know](https://www.yapily.com/company/get-started) how you would like to use Yapily Data.
***
## End user journey
For the user, the journey consists of 3 steps:
1. The end user wants to share their financial data with you.
2. The user selects their bank and completes the data authorisation flow to give their permission for you to access their financial data.
3. The user is directed back to your application on completion.
The data experience can be embedded into any application. You build and self-host the user facing screens, giving you full ownership and control over the experience in your application, with the Yapily Data API powering the data connection behind the scenes.
We recommend you follow our [AIS UX guidelines](/tools-and-services/yapily-connect/yapilyconnect-ux-ais-guidelines) for examples of best practices when building the user facing screens.
Banks use different methods to authenticate and collect consent from users. Yapily supports all [user authorisation flows](/open-banking-flow/user-authorisation/overview) and you may need to implement multiple user authorisation flows depending on which banks you want to integrate with.
***
## Get started
See our [account and transaction data tutorial](/data/tutorial-account-and-trans-data) to explore a sample integration with Yapily Data.
Try our [demo app](https://demo.yapily.com/) to complete the Yapily Data flow for yourself with your real banking credentials.
Looking for further data enrichment? See our [Yapily Data Plus](/data/data-plus/overview) product, which offers advanced data sorting and analysis options. Yapily Data Plus can be easily added to Yapily Data to provide an enhanced view of your customers financial data.
***
## Related resources
### Product Resources
* [Data Plus](/data/data-plus/overview) - Categorisation, balance prediction, and transaction analysis
* [Data Validate](/data/validate/overview) - Verify user identity and account ownership
* [Financial Data Resources](/data/financial-data-resources/financial-data-features) - Data features, consents, and restrictions
### Implementation Resources
For error handling, retry strategies, webhooks, testing, and support, see our [Developer Resources](/resources/overview) guide.
# Tutorial: Get account and transaction data
Source: https://docs.yapily.com/data/tutorial-account-and-trans-data
Step-by-step tutorial for retrieving a user's account and transaction data using the Yapily API. Covers consent, account selection, and pagination of transaction history.
## Introduction
This tutorial explains how to access account and transaction information in the UK with the Modelo Sandbox.
**Note:** All requests made to the Yapily API require [basic authentication](/getting-started/integration-setup/api-authentication).
***
## Overview of steps
The following diagram illustrates how to access account and transaction information in the UK:
Status `UNKNOWN`: The default value of the enum.
## Re-authorisation
An AIS `consent-token` is valid for up to 90 days in the UK and 180 days in the EEA before requiring secure customer authentication (SCA) from the user again.
You can request re-authorisation of a consent using the [Re-authorise Account Consent endpoint](/api-reference/authorisations/re-authorise-account-consent).
You should use this:
* when a consent-related failure keeps occurring (e.g. 401 status code) despite it being in `AUTHORIZED` state
* to increase the duration of the consent prior to it expiring while maintaining the original feature scope requested
* to re-authorise a `Consent` in the `EXPIRED` status
* to enable a greater history of financial transactions to be retrieved (i.e. when a bank limits these to the first 5 minutes after consent creation)
**NOTE:** For UK institutions, due to new regulation, you may be able to use [reconfirmation](#reconfirmation-uk-only) instead.
Re-authorisation is only supported for redirect flows, and not embedded flows. See [Account Authorisation Flows](/open-banking-flow/user-authorisation/overview) for more information.
#### Consent status
If re-authorisation is successful, the `status` of the `Consent` will be `AWAITING_RE_AUTHORIZATION`. The `consent-id` and the `consent-token` don't change.
If re-authorisation fails, the `status` will remain as it was.
#### Historical data
Different institutions can enforce their own restrictions on some endpoints when obtaining financial data. The main example is when requesting historical (older than 90 days) transactional data using [GET Transactions](/api-reference/financial-data/get-account-transactions). Institutions can limit the time in which you can make a request for historical data to as little as 5 minutes from when the authorisation was made. After this time, your requests for historical data will be rejected.
We recommend that if you need historical data, that you retrieve and store it in the first 5 minutes of obtaining the `consent-token`.
## Reconfirmation (UK only)
For UK institutions, all regulated AISPs are now responsible for obtaining reconfirmation of consent from their customers every 90 days for continued access to their data. This is part of a [FCA regulatory change for UK institutions](/data/financial-data-resources/uk-data-consent-changes).
You should use this:
* when a consent-related failure keeps occurring (e.g. 403 status code) despite it being in `AUTHORIZED` state
* to extend the duration of the `Consent` when the `User` has provided reconfirmation while maintaining the original feature scope requested
**NOTE:** Banks may still require re-authentication if they haven't implemented reconfirmation yet or at their discretion in specific circumstances.
If you are a regulated AISP (you are operating under your own licence), the reconfirmation of your users' consent needs to be captured as part of your user management. The consent doesn't need to be provided via SCA but it does need to be explicit. For example, a user selects a checkbox to confirm consent. You may want to use Yapily's [consent object fields](#consent-object) to manage user consents.
If you are a **Yapily Connect** customer, Yapily is required to confirm and record the reconfirmation of consent from your users before granting you access to their data. Yapily has built a [new API endpoint](#reconfirmation-of-consent-api-endpoint) that you must call in order to confirm you have received reconfirmation from the user.
### Reconfirmation of consent API endpoint
You must call the [Extend Consent endpoint](/api-reference/consents/extend-consent) to indicate to Yapily that reconfirmation of consent from the user has occurred.
You must include the date and time you collected reconfirmation from the user in the `lastConfirmedAt` field in the request body.
The request will fail when:
* `lastConfirmedAt` is a future date
* `lastConfirmedAt` is earlier or the same as the current date and time for this consent
* consent status is not `AUTHORIZED`
* consent type is not `AIS`
If successful, returns a [consent object](#consent-object).
#### Consent object
There are 2 attributes on the consent object to help manage user consents:
* `lastConfirmedAt` - the date and time that the PSU last confirmed access to their account information, either through full authentication with the institution or through reconfirmation with the AISP
* `reconfirmBy` - the date and time by which consent needs to be reconfirmed in order to ensure continued, uninterrupted access to the account information
These attributes are returned on all API endpoints that return a consent object.
If you don't receive reconfirmation from the user by the `reconfirmBy` date, then Yapily will prevent further access to the user's data. You can still capture reconfirmation after this date to resume data access, but you will not be able to access it in the interim.
**NOTE:** If you are a regulated AISP, you'll still receive these additional attributes in the consent object so you can use Yapily for your consent management. However, Yapily will not prevent access to account information after the `reconfirmBy` date if reconfirmation has not been received.
#### Consent status
If reconfirmation is successful, the `status` of the `Consent` will remain `AUTHORIZED`. The `consent-id` and `consent-token` don't change.
If reconfirmation fails, the `status` will remain as it was.
If the institution has not implemented reconfirmation yet, [re-authorisation](#re-authorisation) is required and the `status` of the `Consent` will be `AWAITING_RE_AUTHORIZATION`.
## Revoked Consents
At any time, the user can revoke their consent directly in the `Institution`, which makes the consent token unusable.
In this case, the `Consent` status may still display as `AUTHORIZED` but will return `403 Forbidden` errors when you attempt to use it to obtain financial data.
To regain access to their account data, you need to create a new consent using the [Create Account Authorisation endpoint](/api-reference/authorisations/create-account-authorisation).
## Deleting Consents
Yapily also provides the means to delete a `Consent` from the api using the [Delete Consent endpoint](/api-reference/consents/delete-consent).
If the user explicitly opt-outs of consent, we strongly recommend you call the endpoint to delete the user's consent. By default, this will attempt to delete the `Consent` both in the Yapily system and from the `Institution`. If this is not supported by the `Institution`, the `Consent` will only be deleted from the Yapily system.
Any access the user's data in the future, will then require the user to submit a new consent.
# Financial Data Features
Source: https://docs.yapily.com/data/financial-data-resources/financial-data-features
Explore the financial data features supported by each institution in Yapily's network. Compare account, transaction, identity, and balance data availability across banks.
## Feature List
The following financial data features are used to create or use an AIS `consent-token`:
| Feature | Description | Endpoint |
| ------------------------------------ | ------------------------------------------------------------------------------------------------------------------------------------------------------------------------------------------------------------------------------------------------------------------- | ----------------------------------------------------------------------------------------------- |
| `ACCOUNT` | Get account information for a single account. Account information includes the account identifications for the account (sort code and bank account or IBAN), the balance information for the account and the account details (bank id, type, currency and names). | [GET Account](/api-reference/financial-data/get-account) |
| `ACCOUNTS` | Get account information for a list of accounts. Account information includes the account identifications for the account (sort code and bank account or IBAN), the balance information for the account and the account details (bank id, type, currency and names). | [GET Accounts](/api-reference/financial-data/get-accounts) |
| `ACCOUNTS_WITHOUT_BALANCE` | Get account information for a list of accounts without any balance information. The balance information is not included in this feature when this is returned by the bank and must be obtained separately in the feature `ACCOUNT_BALANCES`. | [GET Accounts](/api-reference/financial-data/get-accounts) |
| `ACCOUNT_BALANCES` | Get account balance information. This feature requires a separate authorisation in order to obtain the balance information. | [GET Balances](/api-reference/financial-data/get-account-balances) |
| `ACCOUNT_DIRECT_DEBITS` | Get direct debits for an account. | [GET Account Direct Debits](/api-reference/financial-data/get-account-direct-debits) |
| `ACCOUNT_PERIODIC_PAYMENTS` | Get periodic payments for an account. | [GET Account Periodic Payments](/api-reference/financial-data/get-account-periodic-payments) |
| `ACCOUNT_SCHEDULED_PAYMENTS` | Get scheduled payments for an account. | [GET Account Scheduled Payments](/api-reference/financial-data/get-account-scheduled-payments) |
| `ACCOUNT_STATEMENT` | Get an account statement from an account. | [GET Account Statement](/api-reference/financial-data/get-account-statement) |
| `ACCOUNT_STATEMENTS` | Get a list of account statements from an account. | [GET Account Statements](/api-reference/financial-data/get-account-statements) |
| `ACCOUNT_STATEMENT_FILE` | Download an account statement from an account. | [GET Account Statement File](/api-reference/financial-data/get-account-statement-file) |
| `ACCOUNT_TRANSACTIONS` | Get account transactions. | [GET Transactions](/api-reference/financial-data/get-account-transactions) |
| `ACCOUNT_TRANSACTIONS_WITH_MERCHANT` | Get account transaction including the merchant details associated with the transaction if there is any. e.g. Monzo provides merchant details with each transaction. | [GET Transactions](/api-reference/financial-data/get-account-transactions) |
| `ACCOUNT_WITHOUT_BALANCE` | Get account information for a single account without any balance information. The balance information is not included in this feature when this is returned by the bank and must be obtained separately in the feature `ACCOUNT_BALANCES`. | [GET Account](/api-reference/financial-data/get-account) |
| `IDENTITY` | Get identity information from the bank. | [GET Identity](/api-reference/financial-data/get-identity) |
| `INITIATE_ACCOUNT_REQUEST` | Create a request to access a user's financial data from their bank. | [POST Create Account Authorisation](/api-reference/authorisations/create-account-authorisation) |
| `INITIATE_PRE_AUTHORISATION` | Initiate a generic pre-authorisation request | [POST Create Pre-authorisation](/api-reference/authorisations/create-pre-authorisation) |
# Pagination
Source: https://docs.yapily.com/data/financial-data-resources/pagination
Implement pagination for large transaction sets from Yapily's API. Covers cursor-based pagination, configuring page sizes, and handling multi-page transaction retrieval.
## Offset pagination
By default, Yapily limits the maximum amount of transactions returned in one request to [GET Account Transactions](/api-reference/financial-data/get-account-transactions) to 1000. If you request contains more than this limit, you can use pagination access all transactions.
The following fields are used for pagination:
* [`pagination.totalCount`](/api-reference/financial-data/get-account-transactions#response-paging-total-count) - the total number of transactions your query would return
* [`pagination.self.limit`](/api-reference/financial-data/get-account-transactions#parameter-limit) - the value of limit if specified in the request or 1000 if not specified
* [`offset`](/api-reference/financial-data/get-account-transactions#parameter-offset) - the number of transaction records to be skipped
### How it works
1. Send a request to GET Account Transactions. If `pagination.totalCount` is greater than `pagination.self.limit` then you haven't received the full number of transactions for your request.
2. Execute the request again and specify the `offset` property to increment the number by X (where X is the value of `pagination.self.limit`). This will return the next X transactions.
3. Repeat step 2 until `pagination.totalCount` is the same as or less than `pagination.self.limit`.
### Examples
#### No limit specified
For a call to [Get Account Transactions](/api-reference/financial-data/get-account-transactions) that had 6500 transactions without any limit, calling:
* `GET /accounts/{accountId}/transactions` returns transactions 1-1000
* `GET /accounts/{accountId}/transactions?offset=1000` returns transactions 1001-2000
* `GET /accounts/{accountId}/transactions?offset=6000` returns transactions 6001-6500
#### Specifying a limit
For a call to [Get Account Transactions](/api-reference/financial-data/get-account-transactions) that had 467 transactions with a limit=50, calling:
* `GET /accounts/{accountId}/transactions?limit=50` returns transactions 1-50
* `GET /accounts/{accountId}/transactions?limit=50&offset=50` returns transactions 51-100
* `GET /accounts/{accountId}/transactions?limit=50&offset=450` returns transactions 451-467
***
## Cursor-based pagination
Cursor-based pagination feature is currently available as a [Private Beta version](/getting-started/glossary#private-beta).
Please contact your Customer Success Manager if you would like to access it.
Yapily's ['Realtime transactions' API endpoint](/api-reference/financial-data/get-real-time-account-transactions) is used to fetch transactions in real-time using cursor-based pagination.
It accepts `from` and `before` as optional query parameters when sending the initial request, and accepts `cursor` as optional query parameter in subsequent requests.
### How it works
Yapily doesn't set a `limit` for the maximum number of transactions returned per page, but an individual `Institution` can set a limit.
The `meta` object in the response includes `count` that represents the number of transactions in that page, but doesn't return a field for the total number of transactions.
The `data` object in the response contains an array of transactions.
The `links` object in the response returns opaque cursor tokens that can be fed into the subsequent request:
* `first` - a cursor or link to the first page
* `prev` - a cursor or link to the previous page
* `self` - a cursor or link to the current page
* `next` - a cursor or link to the next page
* `last` - a cursor or link to the last page
### Examples
* `GET /accounts/{accountId}/real-time/transactions` to fetch transactions in the first page. Returns `self`, `next` and `last` page cursors:
```json theme={null}
"links": {
"self": "https://api.yapily.com/accounts/{accountId}/real-time/transactions?cursor=aaa",
"next": "https://api.yapily.com/accounts/{accountId}/real-time/transactions?cursor=bbb",
"last": "https://api.yapily.com/accounts/{accountId}/real-time/transactions?cursor=zzz"
}
```
* `GET /accounts/{accountId}/real-time/transactions?cursor=ccc` to fetch transactions in a middle page. Returns `first`, `prev`, `self`, `next` and `last` page cursors:
```json theme={null}
"links": {
"first": "https://api.yapily.com/accounts/{accountId}/real-time/transactions?cursor=aaa",
"prev": "https://api.yapily.com/accounts/{accountId}/real-time/transactions?cursor=bbb",
"self": "https://api.yapily.com/accounts/{accountId}/real-time/transactions?cursor=ccc",
"next": "https://api.yapily.com/accounts/{accountId}/real-time/transactions?cursor=ddd",
"last": "https://api.yapily.com/accounts/{accountId}/real-time/transactions?cursor=zzz"
}
```
* `GET /accounts/{accountId}/real-time/transactions?cursor=zzz` to fetch transactions in the final page. Returns `first`, `prev` and `self` page cursors:
```json theme={null}
"links": {
"first": "https://api.yapily.com/accounts/{accountId}/real-time/transactions?cursor=aaa",
"prev": "https://api.yapily.com/accounts/{accountId}/real-time/transactions?cursor=yyy",
"self": "https://api.yapily.com/accounts/{accountId}/real-time/transactions?cursor=zzz"
}
```
# Transaction Hash
Source: https://docs.yapily.com/data/financial-data-resources/transaction-hash
Learn to use Yapily Transaction Hash
Learn how to use Yapily Transaction Hash
***
Some institutions do not return a unique identifier (i.e. transaction id) for transactions. The transaction hash was introduced to provide an identifier for transactions retrieved via the Yapily API, which may be helpful in cases where a transaction ID is not present.
### Where you can find it
By default, the Yapily Transaction Hash is returned for every transaction and is located within `Enrichment` in the transaction response. You can find an example transaction below:
```json theme={null}
{
"date": "2020-07-31T00:00:00Z",
"bookingDateTime": "2020-07-31T00:00:00Z",
"status": "PENDING",
"amount": -57.87,
"currency": "GBP",
"transactionAmount": {
"amount": -57.87,
"currency": "GBP"
},
"isoBankTransactionCode": {
"domainCode": {
"code": "PMNT",
"name": "Payments"
},
"familyCode": {
"code": "ICDT",
"name": "Issued Credit Transfers"
},
"subFamilyCode": {
"code": "DMCT",
"name": "Domestic Credit Transfer"
}
},
"proprietaryBankTransactionCode": {
"code": "DEB",
"issuer": "LBG"
},
"enrichment": {
"transactionHash": {
"hash": "3c327ac9d43ef541c4dc6d163cf042bc.1"
}
}
```
### How it works
As the name suggests, the transaction hash is generated by hashing a number of fields together from the transaction itself. These fields can be found below:
* Account ID
* Institution ID
* Credit/Debit indicator
* Date
* Amount
* Description
In addition to this, once the hash is generated each transaction is ranked in the context of the API Call. The reason for this is to account for the example where a person may have a transaction with the same description, for the same amount, on the same day, paid for from the same account.
### Limitations
While the ambition of the transaction hash is to consistently provide a unique transaction identifier, there will be instances where the transaction hash may change or the same transaction hash could be assigned to different transactions. This is due to the hash being reliant on live institution data, which could change at any time. Yapily will continue to monitor the performance of the transaction hash and mitigate edge cases where duplications or changes may occur, however it is not possible to guarantee that a transaction hash will be completely unique or immutable.
# 90 Day AIS Consent Changes
Source: https://docs.yapily.com/data/financial-data-resources/uk-data-consent-changes
Understand the 90-day re-authentication requirement for UK AIS consents. Learn how Yapily handles the re-consent flow and what this means for your data integration.
These changes apply to the UK only.
***
## Regulatory change
In the UK, regulations have changed for how users provide consent to Account Information Service Providers (AISPs) in order to access their data.
[The FCA announced in November 2021](https://www.fca.org.uk/publication/policy/ps21-19.pdf) that users are no longer required to re-authenticate every 90 days via Strong Customer Authentication (SCA) with their bank when sharing their account data with AISPs. Instead, the user needs to reconfirm their consent to have their data accessed with the AISP.
Authentication is still required when providing access to a user's data for the first time.
## Yapily Guidelines
### What is the impact of this change?
All regulated AISPs are now responsible for obtaining reconfirmation of consent from their customers every 90 days for continued access to their data.
If you are a regulated AISP (you are operating under your own licence), the reconfirmation of your users' consent needs to be captured as part of your user management. The consent doesn't need to be provided via SCA but it does need to be explicit. For example, a user selects a checkbox to confirm consent. You may want to use Yapily's [consent object fields](/data/financial-data-resources/financial-data-consents#consent-object) to manage user consents.
If you are a **Yapily Connect** customer, Yapily is required to confirm and record the reconfirmation of consent from your users before granting you access to their data. Yapily has implemented a new ['Reconfirmation of Consent' API endpoint](/data/financial-data-resources/financial-data-consents#reconfirmation-of-consent-api-endpoint) to allow for this requirement.
### What actions do you need to take?
#### User reconfirms consent
When the reconfirmation from the user has been received, you must call the [extend consent endpoint](/api-reference/consents/extend-consent) to reconfirm the consent with Yapily. Yapily will capture the date and time of the reconfirmation and you will be able to access the user data for a further 90 days.
#### User retracts consent
If the user explicitly opt-outs of the consent at reconfirmation, we strongly recommend you call the [delete consent endpoint](/api-reference/consents/delete-consent) to delete the user's consent. Any access the user's data in the future, will then require the user to submit consent again.
#### User takes no action
If the user doesn't reconfirm or decline the consent, then after 90 days Yapily will prevent further access to their data until the user takes an action. If you try to access user data, you will receive an error prompting you to get reconfirmation or re-authentication from the user.
If you later receive reconfirmation from the user, access to the user's data can be resumed from this date after you have confirmed to Yapily via the [extend consent endpoint](/api-reference/consents/extend-consent).
If the user later declines the consent, you should call the [delete consent endpoint](/api-reference/consents/delete-consent) to delete the user's consent.
### When is re-authentication required?
UK banks will likely release these changes at different times. If the reconfirmation change has not been implemented yet, re-authentication from the user is still required every 90 days.
There may also be circumstances where the bank requires re-authentication to take place, which is at the discretion of the bank, even if they have implemented the reconfirmation change.
## Implementation timelines
The target for widespread adoption of this change is September 30th 2022. However, banks will likely implement it at different times and so where a bank does not support the new change, re-authentication will still be required every 90 days. Yapily is working with the banks to understand their readiness and thereby ensuring that the customer end-to-end experience is as seamless as possible whether they are going through the reconfirmation or re-authentication journey.
***
If you have any questions or require more information please contact your Customer Success Manager.
# Yapily Data
Source: https://docs.yapily.com/data/overview
Access real-time financial data from banks using Yapily's Open Banking data API. Retrieve accounts, balances, transactions, and identity information with user consent.
***
## Introduction
Yapily Data enables you to access Account Information Services (AIS) for banks across the UK and Europe through a single API integration.
Understanding consents is key to accessing financial data. See [Understanding Consents](/concepts/consent-lifecycle).
AIS allows users to securely provide access to their financial information from multiple accounts to financial service providers in real-time.
Using Yapily's Data API you can access your customers' financial data including account balances, transaction history and account details to create personalised financial products and services. This includes if your customer has a consumer, business or corporate account.
Yapily's Data API normalises all financial data received from banks, returning standardised, consistent data back to you. This enables you to quickly and easily interpret and action the data.
You must be [registered](/getting-started/integration-setup/registration) as an Account Information Service Provider (AISP) to access AIS via Yapily Data API. If you aren't regulated by a central authority, you can use [Yapily Connect](/tools-and-services/yapily-connect/overview) to gain simple, easy and fast access without needing to obtain a Third-Party Provider licence.
***
## Advantages
The 3 main benefits of AIS:
#### 1. Personalised solutions
Gain a complete, unified view across all of your customer's finances to enable you to offer personalised products and services.
#### 2. Proactive customer management
Get access to financial data to gain a deeper understanding of your customer to help anticipate change in consumer behaviour.
#### 3. Accurate data for inclusive decisions
Access financial data to improve risk profiling and affordability models for more informed, inclusive decision making.
***
## Applications
You can use Yapily's Data API to enhance your product offering in many ways.
**Personal finance management:**
Aggregate and link all accounts in one place to build a consolidated financial overview. Enable individuals and businesses to track and manage their spending, set budgets, and make financial plans.
**Account information:**
Securely access business, corporate and personal financial information.
**Financial profiling:**
Analyse and anticipate financial behaviour to make more informed decisions about your customers. Early detection of vulnerable customers and likelihood of missing payments.
**Reconciliation:**
Reconcile bank statements with real time transaction data directly from the bank.
**Credit risk & affordability:**
Make informed lending decisions by getting real-time visibility on an individual's transaction data to accurately assess creditworthiness and affordability. Analyse financial data that isn't typically considered such as rental payments and savings.
Don't see your use case? [Let us know](https://www.yapily.com/company/get-started) how you would like to use Yapily Data.
***
## End user journey
For the user, the journey consists of 3 steps:
1. The end user wants to share their financial data with you.
2. The user selects their bank and completes the data authorisation flow to give their permission for you to access their financial data.
3. The user is directed back to your application on completion.
The data experience can be embedded into any application. You build and self-host the user facing screens, giving you full ownership and control over the experience in your application, with the Yapily Data API powering the data connection behind the scenes.
We recommend you follow our [AIS UX guidelines](/tools-and-services/yapily-connect/yapilyconnect-ux-ais-guidelines) for examples of best practices when building the user facing screens.
Banks use different methods to authenticate and collect consent from users. Yapily supports all [user authorisation flows](/open-banking-flow/user-authorisation/overview) and you may need to implement multiple user authorisation flows depending on which banks you want to integrate with.
***
## Get started
See our [account and transaction data tutorial](/data/tutorial-account-and-trans-data) to explore a sample integration with Yapily Data.
Try our [demo app](https://demo.yapily.com/) to complete the Yapily Data flow for yourself with your real banking credentials.
Looking for further data enrichment? See our [Yapily Data Plus](/data/data-plus/overview) product, which offers advanced data sorting and analysis options. Yapily Data Plus can be easily added to Yapily Data to provide an enhanced view of your customers financial data.
***
## Related resources
### Product Resources
* [Data Plus](/data/data-plus/overview) - Categorisation, balance prediction, and transaction analysis
* [Data Validate](/data/validate/overview) - Verify user identity and account ownership
* [Financial Data Resources](/data/financial-data-resources/financial-data-features) - Data features, consents, and restrictions
### Implementation Resources
For error handling, retry strategies, webhooks, testing, and support, see our [Developer Resources](/resources/overview) guide.
# Tutorial: Get account and transaction data
Source: https://docs.yapily.com/data/tutorial-account-and-trans-data
Step-by-step tutorial for retrieving a user's account and transaction data using the Yapily API. Covers consent, account selection, and pagination of transaction history.
## Introduction
This tutorial explains how to access account and transaction information in the UK with the Modelo Sandbox.
**Note:** All requests made to the Yapily API require [basic authentication](/getting-started/integration-setup/api-authentication).
***
## Overview of steps
The following diagram illustrates how to access account and transaction information in the UK:
![Access data tutorial steps]() ***
To find which banks support accessing account and transaction information use [GET institutions](/api-reference/institutions/get-institutions) to retrieve the list of your supported institutions.
```bash Request theme={null}
curl -L -X GET 'https://api.yapily.com/institutions' \
-u 'APPLICATION_KEY:APPLICATION_SECRET'
```
```json Response theme={null}
{
"meta": {
"tracingId": "acbb76db4ab8f4ac7f039d000456c13f",
"count": 1
},
"data": [
{
"id": "modelo-sandbox",
"name": "Modelo Sandbox",
"fullName": "Modelo Sandbox",
"countries": [
{
"displayName": "United Kingdom",
"countryCode2": "GB"
}
],
"environmentType": "SANDBOX",
"credentialsType": "OPEN_BANKING_UK_AUTO",
"media": [
{
"source": "https://images.yapily.com/image/ce2bfdbf-1ae2-4919-ab7b-e8b3d5e93b36?size=0",
"type": "icon"
},
{
"source": "https://images.yapily.com/image/ca502f24-d6df-4785-b4b8-1034b100af77?size=0",
"type": "logo"
}
],
"features": [
"INITIATE_ACCOUNT_REQUEST",
"ACCOUNT_REQUEST_DETAILS",
"EXISTING_PAYMENTS_DETAILS",
"ACCOUNT_BALANCES",
"CREATE_BULK_PAYMENT",
"ACCOUNT_PERIODIC_PAYMENTS",
"ACCOUNT_STATEMENTS",
"INITIATE_BULK_PAYMENT",
"ACCOUNT_STATEMENT",
"ACCOUNT",
"INITIATE_DOMESTIC_PERIODIC_PAYMENT",
"INITIATE_SINGLE_PAYMENT_SORTCODE",
"ACCOUNT_DIRECT_DEBITS",
"ACCOUNTS",
"ACCOUNT_TRANSACTIONS",
"EXISTING_PAYMENT_INITIATION_DETAILS",
"CREATE_DOMESTIC_SINGLE_PAYMENT",
"INITIATE_DOMESTIC_SINGLE_PAYMENT",
"ACCOUNT_STATEMENT_FILE",
"CREATE_INTERNATIONAL_SINGLE_PAYMENT",
"IDENTITY",
"CREATE_DOMESTIC_SCHEDULED_PAYMENT",
"INITIATE_DOMESTIC_SCHEDULED_PAYMENT",
"CREATE_SINGLE_PAYMENT_SORTCODE",
"ACCOUNT_TRANSACTIONS_WITH_MERCHANT",
"INITIATE_INTERNATIONAL_SINGLE_PAYMENT",
"PERIODIC_PAYMENT_FREQUENCY_EXTENDED",
"ACCOUNT_SCHEDULED_PAYMENTS",
"CREATE_DOMESTIC_PERIODIC_PAYMENT"
]
}
]
}
```
Filter the list for all institutions that support the `ACCOUNTS` and `ACCOUNT_TRANSACTIONS` features. Then display these institutions in your application so the user can select which bank to share their account information from.
Once the user selects a bank, store the `id` of the institution to use in step 2.
This example uses a single redirect flow using a [callback URL](/open-banking-flow/user-authorisation/single-redirect#callback-url).
Execute [create account authorisation](/api-reference/authorisations/create-account-authorisation), including the institution ID and your callback URL.
```bash Request theme={null}
curl -L -X POST 'https://api.yapily.com/account-auth-requests' \
-H 'Content-Type: application/json' \
-u 'APPLICATION_KEY:APPLICATION_SECRET' \
-d '{
"applicationUserId": "account-data-and-transactions-tutorial",
"institutionId": "modelo-sandbox",
"callback": "https://display-parameters.com/"
}'
```
```json Response theme={null}
{
"meta": {
"tracingId": "ceab45e96f852afdb59ec8eaf8f93594"
},
"data": {
"id": "979f8a58-c955-46b5-b25d-bdc447c28a80",
"userUuid": "c78035e1-3140-44f7-9539-527785069356",
"applicationUserId": "account-data-and-transactions-tutorial",
"institutionId": "modelo-sandbox",
"status": "AWAITING_AUTHORIZATION",
"createdAt": "2021-03-04T11:05:17.234Z",
"featureScope": [
"ACCOUNT_STATEMENT_FILE",
"ACCOUNT_STATEMENTS",
"ACCOUNT_BALANCES",
"ACCOUNT_SCHEDULED_PAYMENTS",
"ACCOUNT_STATEMENT",
"ACCOUNT_TRANSACTIONS_WITH_MERCHANT",
"ACCOUNT_TRANSACTIONS",
"ACCOUNT_DIRECT_DEBITS",
"IDENTITY",
"ACCOUNT",
"ACCOUNTS",
"ACCOUNT_PERIODIC_PAYMENTS"
],
"state": "e539228113de43b3a3d4c3b9944620d3",
"institutionConsentId": "aac-74e55df8-a673-48b4-b8ae-3e8d0e45080f",
"authorisationUrl": "{authorisationUrl}",
"qrCodeUrl": "https://images.yapily.com/image/d4113d96-9d6c-4e69-a840-2e327cff1b1d/1614855917?size=0"
}
}
```
Redirect the user to the `authorisationUrl` returned in the response.
The user is then asked to login and authorise the account sharing request with their bank. The [Modelo sandbox credentials](/resources/sandbox/sandbox-credentials#modelo-sandbox) are: `mits` / `mits`.
Upon completion, the user is redirected back to the callback URL supplied in the request. In this example, the callback is `https://display-parameters.com/` which displays the parameters returned with the redirect.
Store the `consentToken` to use when accessing account information in step 3. The `featureScope` array defines the account features you'll be able to access for each account the user authorises.
**Note:** Access to the user's account information is for a maximum of [90 days](/data/financial-data-resources/uk-data-consent-changes) by default before requiring re-authorisation from the user.
[Retrieve account information](/api-reference/financial-data/get-accounts), specifying the `consentToken` in the header.
```bash Request theme={null}
curl -L -X GET 'https://api.yapily.com/accounts' \
-H 'Consent: {consentToken}' \
-u 'APPLICATION_KEY:APPLICATION_SECRET'
```
```json Response theme={null}
{
"meta": {
"tracingId": "14df65068fd38689b392ad39602143cb",
"count": 1
},
"data": [
{
"id": "700004000000000000000007",
"type": "Personal - Current",
"balance": -99765867307.74,
"currency": "GBP",
"usageType": "PERSONAL",
"accountType": "CURRENT",
"nickname": "xxxx0009",
"accountNames": [
{
"name": "Mr. Mitsuhirato"
}
],
"accountIdentifications": [
{
"type": "PAN",
"identification": "1234000000000001"
}
],
"accountBalances": [
{
"type": "EXPECTED",
"dateTime": "2021-03-04T11:08:39.291Z",
"balanceAmount": {
"amount": -99765867307.74,
"currency": "GBP"
},
"creditLineIncluded": false,
"creditLines": []
}
]
}
]
}
```
The response returns an array of [account objects](/api-reference/financial-data/get-account#response-data) for each account the user has provided consent to share information from. The response from every institution is normalised so you can handle the data consistently.
Display the available accounts to the end user so they can select which account to get transaction data for. Once selected, store the account `id`.
[Get account transactions](/api-reference/financial-data/get-account-transactions#response-data) for a specified account by including the account `id` in the path and the `consentToken` in the header.
```bash Request theme={null}
curl -L -X GET 'https://api.yapily.com/accounts/{accountId}/transactions' \
-H 'Consent: {consentToken}' \
-u 'APPLICATION_KEY:APPLICATION_SECRET'
```
```json Response theme={null}
{
"meta": {
"tracingId": "0d9835a9c83204f8c0607ddfef961bab",
"count": 760,
"pagination": {
"totalCount": 760,
"self": {
"limit": 1000,
"sort": "-date",
"offset": 0
}
}
},
"data": [
{
"id": "15f5b8b3-d8ca-422a-af4e-2538546788e8",
"date": "2021-02-26T11:07:41.79Z",
"bookingDateTime": "2021-02-26T11:07:41.79Z",
"valueDateTime": "2021-02-26T11:07:41.79Z",
"status": "BOOKED",
"amount": -0.99,
"currency": "GBP",
"transactionAmount": {
"amount": -0.99,
"currency": "GBP"
},
"reference": "7",
"description": "Debit for Payment Id: sdp-1-58718033-969e-4941-832b-3ad7b76c3e71",
"transactionInformation": [
"Debit for Payment Id: sdp-1-58718033-969e-4941-832b-3ad7b76c3e71"
],
"isoBankTransactionCode": {
"domainCode": {
"code": "PMNT",
"name": "Payments"
},
"familyCode": {
"code": "ICDT",
"name": "Issued Credit Transfers"
},
"subFamilyCode": {
"code": "DMCT",
"name": "Domestic Credit Transfer"
}
},
"proprietaryBankTransactionCode": {
"code": "PMT",
"issuer": "modelo-sandbox"
},
"balance": {
"type": "CLOSING_AVAILABLE",
"balanceAmount": {
"amount": 99765867307.74,
"currency": "GBP"
}
},
"enrichment": {
"transactionHash": {
"hash": "54be0baf91aaa732cd8b6bacc6396042.1"
}
}
}
],
"links": {
"self": "https://api.yapily.com/accounts/700004000000000000000007/transactions?from&before&limit=1000&sort=-date&offset=0&cursor"
}
}
```
The response returns an array of [transaction objects](/api-reference/financial-data/get-account-transactions#response-data) for the specified account.
You can then display the transaction information to the end user or process the data internally depending on your use case.
**Note:** By default, Yapily limits the results to the most recent 1000 transactions. See [pagination](/data/financial-data-resources/pagination) for more information on how to manage transaction responses that contain more than 1000 transactions.
# Validate Overview
Source: https://docs.yapily.com/data/validate/overview
Verify financial account ownership with Yapily's account validation service. Confirm customer identity and reduce fraud by checking bank account details in real time.
Validate is currently available in Private Beta. See [Glossary](/getting-started/glossary#private-beta) for more information.
***
## Introduction
Yapily Validate enables you to instantly confirm customer details and account ownership across the UK and Europe through a single API integration.
Account information sharing allows users to permit access to their basic account information for the purpose of identity confirmation.
Yapily Validate returns key account information, including the account holder's name and identity information, account numbers, and balance information. The data is returned directly from the bank, and can be from consumer, business and corporate accounts.
By validating account ownership and confirming that the account is real, this provides confidence in your customer's identity and reduces friction in onboarding, as well as meeting compliance requirements.
***
## Advantages
The 3 main advantages of Validate:
#### 1. Reduce fraud
Support regulatory compliance by validating an account is real with information taken directly from the bank.
#### 2. Optimise operations
Reduce operational time and costs with automated account ownership validation.
#### 3. Improve payments
Autofill payment details during onboarding to speed up the process and improve conversion.
Gain confidence that regular payments will be received as account information checks are automated up front.
***
## Applications
Validate can support the following processes:
**Identity and account verification:**
Support KYC and verify account ownership with real-time data shared directly from banks.
**Digital onboarding:**
Allow customers to link their bank account information helping to optimise and automate the onboarding journey for a better customer experience.
**Payment setup:**
Easy payment setup for direct debits or payouts with automated input of account details.
Don't see your use case? [Let us know](https://www.yapily.com/company/get-started) how you would like to use Yapily Validate.
***
## End user journey
The validate experience can be embedded into any application. You build and self-host the user facing screens, giving you full ownership and control over the experience in your application, with the Yapily Validate API powering the data connection behind the scenes.
**Note:** We recommend you follow our [AIS UX guidelines](/tools-and-services/yapily-connect/yapilyconnect-ux-ais-guidelines) for examples of best practices when building the user facing screens.
**Note:** Banks use different methods to authenticate and collect consent from users. Yapily supports all [user authorisation flows](/open-banking-flow/user-authorisation/overview) and you may need to implement multiple user authorisation flows depending on which banks you want to integrate with.
***
## Get started
See our [validate tutorial](/data/validate/tutorial-validate-user) to explore a sample integration with Yapily Validate.
# Tutorial: Validate a user
Source: https://docs.yapily.com/data/validate/tutorial-validate-user
Step-by-step tutorial for validating a user's bank account with Yapily. Initiate validation, handle user consent, and retrieve account ownership verification results.
Validate is currently available in Private Beta. See [Glossary](/getting-started/glossary#private-beta) for more information.
## Introduction
This tutorial explains how to access account information in the UK with the Modelo Sandbox in order to validate a user's identity.
**Note:** All requests made to the Yapily API require [basic authentication](/getting-started/integration-setup/api-authentication).
***
To find which banks support accessing account information use [GET institutions](/api-reference/institutions/get-institutions) to retrieve the list of your supported institutions.
```bash Request theme={null}
curl -L -X GET 'https://api.yapily.com/institutions' \
-u 'APPLICATION_KEY:APPLICATION_SECRET'
```
```json Response theme={null}
{
"meta": {
"tracingId": "acbb76db4ab8f4ac7f039d000456c13f",
"count": 1
},
"data": [
{
"id": "modelo-sandbox",
"name": "Modelo Sandbox",
"fullName": "Modelo Sandbox",
"countries": [
{
"displayName": "United Kingdom",
"countryCode2": "GB"
}
],
"environmentType": "SANDBOX",
"credentialsType": "OPEN_BANKING_UK_AUTO",
"media": [
{
"source": "https://images.yapily.com/image/ce2bfdbf-1ae2-4919-ab7b-e8b3d5e93b36?size=0",
"type": "icon"
},
{
"source": "https://images.yapily.com/image/ca502f24-d6df-4785-b4b8-1034b100af77?size=0",
"type": "logo"
}
],
"features": [
"INITIATE_ACCOUNT_REQUEST",
"ACCOUNT_REQUEST_DETAILS",
"EXISTING_PAYMENTS_DETAILS",
"ACCOUNT_BALANCES",
"CREATE_BULK_PAYMENT",
"ACCOUNT_PERIODIC_PAYMENTS",
"ACCOUNT_STATEMENTS",
"INITIATE_BULK_PAYMENT",
"ACCOUNT_STATEMENT",
"ACCOUNT",
"INITIATE_DOMESTIC_PERIODIC_PAYMENT",
"INITIATE_SINGLE_PAYMENT_SORTCODE",
"ACCOUNT_DIRECT_DEBITS",
"ACCOUNTS",
"ACCOUNT_TRANSACTIONS",
"EXISTING_PAYMENT_INITIATION_DETAILS",
"CREATE_DOMESTIC_SINGLE_PAYMENT",
"INITIATE_DOMESTIC_SINGLE_PAYMENT",
"ACCOUNT_STATEMENT_FILE",
"CREATE_INTERNATIONAL_SINGLE_PAYMENT",
"IDENTITY",
"CREATE_DOMESTIC_SCHEDULED_PAYMENT",
"INITIATE_DOMESTIC_SCHEDULED_PAYMENT",
"CREATE_SINGLE_PAYMENT_SORTCODE",
"ACCOUNT_TRANSACTIONS_WITH_MERCHANT",
"INITIATE_INTERNATIONAL_SINGLE_PAYMENT",
"PERIODIC_PAYMENT_FREQUENCY_EXTENDED",
"ACCOUNT_SCHEDULED_PAYMENTS",
"CREATE_DOMESTIC_PERIODIC_PAYMENT"
]
}
]
}
```
Filter the list for all institutions that support the `ACCOUNTS` feature. Then display these institutions in your application so the user can select which bank to share their account information from.
Once the user selects a bank, store the `id` of the institution to use in step 2.
This example uses a [single redirect flow using a callback URL](/open-banking-flow/user-authorisation/single-redirect#callback-url).
Execute [create account authorisation](/api-reference/authorisations/create-account-authorisation), including the institution ID and your callback URL.
```bash Request theme={null}
curl -L -X POST 'https://api.yapily.com/account-auth-requests' \
-H 'Content-Type: application/json' \
-u 'APPLICATION_KEY:APPLICATION_SECRET' \
-d '{
"applicationUserId": "account-data-and-transactions-tutorial",
"institutionId": "modelo-sandbox",
"callback": "https://display-parameters.com/"
}'
```
```json Response theme={null}
{
"meta": {
"tracingId": "ceab45e96f852afdb59ec8eaf8f93594"
},
"data": {
"id": "979f8a58-c955-46b5-b25d-bdc447c28a80",
"userUuid": "c78035e1-3140-44f7-9539-527785069356",
"applicationUserId": "account-data-and-transactions-tutorial",
"institutionId": "modelo-sandbox",
"status": "AWAITING_AUTHORIZATION",
"createdAt": "2021-03-04T11:05:17.234Z",
"featureScope": [
"ACCOUNT_STATEMENT_FILE",
"ACCOUNT_STATEMENTS",
"ACCOUNT_BALANCES",
"ACCOUNT_SCHEDULED_PAYMENTS",
"ACCOUNT_STATEMENT",
"ACCOUNT_TRANSACTIONS_WITH_MERCHANT",
"ACCOUNT_TRANSACTIONS",
"ACCOUNT_DIRECT_DEBITS",
"IDENTITY",
"ACCOUNT",
"ACCOUNTS",
"ACCOUNT_PERIODIC_PAYMENTS"
],
"state": "e539228113de43b3a3d4c3b9944620d3",
"institutionConsentId": "aac-74e55df8-a673-48b4-b8ae-3e8d0e45080f",
"authorisationUrl": "{authorisationUrl}",
"qrCodeUrl": "https://images.yapily.com/image/d4113d96-9d6c-4e69-a840-2e327cff1b1d/1614855917?size=0"
}
}
```
Redirect the user to the `authorisationUrl` returned in the response.
The user is then asked to login and authorise the account sharing request with their bank. The [Modelo sandbox credentials](/resources/sandbox/overview) are: `mits` / `mits`.
Upon completion, the user is redirected back to the [callback URL](/open-banking-flow/handling-redirects/callback-url) supplied in the request. In this example, the callback is `https://display-parameters.com/` which displays the parameters returned with the redirect.
Store the `consentToken` to use when accessing account information in step 3. The `featureScope` array defines the account features you'll be able to access for each account the user authorises.
**Note:** Access to the user's account information is for [a maximum of 90 days](/data/financial-data-resources/uk-data-consent-changes) by default before requiring re-authorisation from the user.
[Retrieve account information](/api-reference/financial-data/get-accounts), specifying the `consentToken` in the header.
```bash Request theme={null}
curl -L -X GET 'https://api.yapily.com/accounts' \
-H 'Consent: {consentToken}' \
-u 'APPLICATION_KEY:APPLICATION_SECRET'
```
```json Response theme={null}
{
"meta": {
"tracingId": "14df65068fd38689b392ad39602143cb",
"count": 1
},
"data": [
{
"id": "700004000000000000000007",
"type": "Personal - Current",
"balance": -99765867307.74,
"currency": "GBP",
"usageType": "PERSONAL",
"accountType": "CURRENT",
"nickname": "xxxx0009",
"accountNames": [
{
"name": "Mr. Mitsuhirato"
}
],
"accountIdentifications": [
{
"type": "PAN",
"identification": "1234000000000001"
}
],
"accountBalances": [
{
"type": "EXPECTED",
"dateTime": "2021-03-04T11:08:39.291Z",
"balanceAmount": {
"amount": -99765867307.74,
"currency": "GBP"
},
"creditLineIncluded": false,
"creditLines": []
}
]
}
]
}
```
The response returns an array of [account objects](/api-reference) for each account the user has provided consent to share information from. The response from every institution is normalised so you can handle the data consistently.
You can then process this account information to validate your user's identity.
# Application Management
Source: https://docs.yapily.com/getting-started/application-management
Manage Yapily sub-applications for reseller and merchant use cases. Learn how to create, configure, and manage applications in the Yapily dashboard.
# Background
Within the Yapily ecosystem, all interactions with our API are governed and managed via an association with a customer's application. Currently, the only way to create an application is through the Console.
Among our clients, we have seen a growing use-case of our clients operating AIS and PIS activity on behalf of a given merchant.
# Sub-applications
A sub-application is a pseudo-application which operates under the "root" application. The root application stores all bank registrations that can be used by any sub-application that is subordinate to it in the hierarchy. The credentials of the root application are used, along with the sub-application ID in the "**sub-application**" header, to allow the platform to recognize that the API calls are being made on behalf of the sub-application.
The benefits of operating in this model are:
* Enabling a sub-app to automatically share bank registration and product API scopes without needing to duplicate the configuration across each merchant application
* Provides a mechanism to restrict traffic at a merchant level
## Merchant information
As part of the sub-application implementation, we have also introduced additional attributes that can be added to a sub-application. These attributes aim to provide our customers with a mechanism to provide extra information relating to the merchant they are onboarding and using the sub-application for the AIS/PIS activities. These attributes will be:
* **Merchant's full legal entity name**
* The **Merchant Category Code (MCC)** of the merchant
* The **Payment Purpose Code user group**
* Indicate whether they have conducted KYB on the merchant they are onboarding (also known as the **Contract Present Indicator**)
Further information about this attribute can be found below:
### Payment Purpose Code & User Groups
In October 2021, the Bank of England and Pay.UK issued a joint publication recommending Purpose Codes for use across CHAPS and the New Payments Architecture (NPA). Purpose Codes are four-letter codes which are carried across the payment chain, providing information to all users in the payment chain to indicate the reason a payment is being made. Purpose Codes are one of the policy areas of Enhanced Data that can deliver the benefits of the ISO 20022 payment messaging standard.
Given there are many payment purpose codes that apply to a single merchant, we have opted to initially go a level up and look at the Payment Purpose Code User Groups within this article - [Payment Purpose Code & User Groups](https://www.bankofengland.co.uk/-/media/boe/files/payments/rtgs-renewal-programme/iso-20022/uk-recommended-purpose-code-list.pdf)
#### Payment Purpose Code user group
* Wholesale / FI-FI
* Commercial
* Consumer / Goods & Services
* Finance
* Salaries & Incomes
* Government
* Insurance
* Property
* Foreign Exchange
* Investments
* Medical
* Benefit payments
* Pensions
* Tax
* Utilities
### Merchant Category Code (MCC)
Merchant category codes (MCCs) are four-digit numbers that a credit card issuer uses to categorise the transactions consumers complete using a particular card. Payment brands use merchant category codes to classify merchants and businesses by the type of goods or services provided in order to track and restrict transactions.
Payment brands use merchant category codes (MCCs) to classify merchants and businesses by the type of goods or services provided. Payment brands, issuers and acquirers can use MCCs to categorise, track and restrict transactions. MCCs can be used for tax reporting, interchange promotion and gathering information about cardholder purchasing behaviour.
Often, MCCs are recognised by all payment brands; however, not all codes are recognised by all brands. Payment brands frequently add, eliminate or change the codes with regularly scheduled enhancements.
Here's a list of the code ranges for different industries:
* 0001–1499: Agricultural services
* 1500–2999: Contracted services
* 4000–4799: Transportation services
* 4800–4999: Utility services
* 5000–5599: Retail outlet services
* 5600–5699: Clothing stores
* 5700–7299: Miscellaneous stores
* 7300–7999: Business services
* 8000–8999: Professional services and membership organisations
* 9000–9999: Government services
### Contract Present Indicator
The Contract Present Indicator indicates whether the PISP has a contractual relationship with the merchant and has undertaken both validation of the recipient account and due diligence on the merchant.
Possible values are **True or False**
A more granular definition:
| Condition | Definition |
| --------------------------- | ------------------------------------------------------------------------------------------------------------------------------------------------------------------------------------------------------------------------------------------------------------------------------------------------------------------------------------------------------------------------------------------------------------------------------------------------------------------------------------------------------------------------------------------------------------------------------------------------------------------------------------------------------------------- |
| Contractual arrangement | - PISP must have a written agreement with each retailer, firm, or person selling goods or services.
***
To find which banks support accessing account and transaction information use [GET institutions](/api-reference/institutions/get-institutions) to retrieve the list of your supported institutions.
```bash Request theme={null}
curl -L -X GET 'https://api.yapily.com/institutions' \
-u 'APPLICATION_KEY:APPLICATION_SECRET'
```
```json Response theme={null}
{
"meta": {
"tracingId": "acbb76db4ab8f4ac7f039d000456c13f",
"count": 1
},
"data": [
{
"id": "modelo-sandbox",
"name": "Modelo Sandbox",
"fullName": "Modelo Sandbox",
"countries": [
{
"displayName": "United Kingdom",
"countryCode2": "GB"
}
],
"environmentType": "SANDBOX",
"credentialsType": "OPEN_BANKING_UK_AUTO",
"media": [
{
"source": "https://images.yapily.com/image/ce2bfdbf-1ae2-4919-ab7b-e8b3d5e93b36?size=0",
"type": "icon"
},
{
"source": "https://images.yapily.com/image/ca502f24-d6df-4785-b4b8-1034b100af77?size=0",
"type": "logo"
}
],
"features": [
"INITIATE_ACCOUNT_REQUEST",
"ACCOUNT_REQUEST_DETAILS",
"EXISTING_PAYMENTS_DETAILS",
"ACCOUNT_BALANCES",
"CREATE_BULK_PAYMENT",
"ACCOUNT_PERIODIC_PAYMENTS",
"ACCOUNT_STATEMENTS",
"INITIATE_BULK_PAYMENT",
"ACCOUNT_STATEMENT",
"ACCOUNT",
"INITIATE_DOMESTIC_PERIODIC_PAYMENT",
"INITIATE_SINGLE_PAYMENT_SORTCODE",
"ACCOUNT_DIRECT_DEBITS",
"ACCOUNTS",
"ACCOUNT_TRANSACTIONS",
"EXISTING_PAYMENT_INITIATION_DETAILS",
"CREATE_DOMESTIC_SINGLE_PAYMENT",
"INITIATE_DOMESTIC_SINGLE_PAYMENT",
"ACCOUNT_STATEMENT_FILE",
"CREATE_INTERNATIONAL_SINGLE_PAYMENT",
"IDENTITY",
"CREATE_DOMESTIC_SCHEDULED_PAYMENT",
"INITIATE_DOMESTIC_SCHEDULED_PAYMENT",
"CREATE_SINGLE_PAYMENT_SORTCODE",
"ACCOUNT_TRANSACTIONS_WITH_MERCHANT",
"INITIATE_INTERNATIONAL_SINGLE_PAYMENT",
"PERIODIC_PAYMENT_FREQUENCY_EXTENDED",
"ACCOUNT_SCHEDULED_PAYMENTS",
"CREATE_DOMESTIC_PERIODIC_PAYMENT"
]
}
]
}
```
Filter the list for all institutions that support the `ACCOUNTS` and `ACCOUNT_TRANSACTIONS` features. Then display these institutions in your application so the user can select which bank to share their account information from.
Once the user selects a bank, store the `id` of the institution to use in step 2.
This example uses a single redirect flow using a [callback URL](/open-banking-flow/user-authorisation/single-redirect#callback-url).
Execute [create account authorisation](/api-reference/authorisations/create-account-authorisation), including the institution ID and your callback URL.
```bash Request theme={null}
curl -L -X POST 'https://api.yapily.com/account-auth-requests' \
-H 'Content-Type: application/json' \
-u 'APPLICATION_KEY:APPLICATION_SECRET' \
-d '{
"applicationUserId": "account-data-and-transactions-tutorial",
"institutionId": "modelo-sandbox",
"callback": "https://display-parameters.com/"
}'
```
```json Response theme={null}
{
"meta": {
"tracingId": "ceab45e96f852afdb59ec8eaf8f93594"
},
"data": {
"id": "979f8a58-c955-46b5-b25d-bdc447c28a80",
"userUuid": "c78035e1-3140-44f7-9539-527785069356",
"applicationUserId": "account-data-and-transactions-tutorial",
"institutionId": "modelo-sandbox",
"status": "AWAITING_AUTHORIZATION",
"createdAt": "2021-03-04T11:05:17.234Z",
"featureScope": [
"ACCOUNT_STATEMENT_FILE",
"ACCOUNT_STATEMENTS",
"ACCOUNT_BALANCES",
"ACCOUNT_SCHEDULED_PAYMENTS",
"ACCOUNT_STATEMENT",
"ACCOUNT_TRANSACTIONS_WITH_MERCHANT",
"ACCOUNT_TRANSACTIONS",
"ACCOUNT_DIRECT_DEBITS",
"IDENTITY",
"ACCOUNT",
"ACCOUNTS",
"ACCOUNT_PERIODIC_PAYMENTS"
],
"state": "e539228113de43b3a3d4c3b9944620d3",
"institutionConsentId": "aac-74e55df8-a673-48b4-b8ae-3e8d0e45080f",
"authorisationUrl": "{authorisationUrl}",
"qrCodeUrl": "https://images.yapily.com/image/d4113d96-9d6c-4e69-a840-2e327cff1b1d/1614855917?size=0"
}
}
```
Redirect the user to the `authorisationUrl` returned in the response.
The user is then asked to login and authorise the account sharing request with their bank. The [Modelo sandbox credentials](/resources/sandbox/sandbox-credentials#modelo-sandbox) are: `mits` / `mits`.
Upon completion, the user is redirected back to the callback URL supplied in the request. In this example, the callback is `https://display-parameters.com/` which displays the parameters returned with the redirect.
Store the `consentToken` to use when accessing account information in step 3. The `featureScope` array defines the account features you'll be able to access for each account the user authorises.
**Note:** Access to the user's account information is for a maximum of [90 days](/data/financial-data-resources/uk-data-consent-changes) by default before requiring re-authorisation from the user.
[Retrieve account information](/api-reference/financial-data/get-accounts), specifying the `consentToken` in the header.
```bash Request theme={null}
curl -L -X GET 'https://api.yapily.com/accounts' \
-H 'Consent: {consentToken}' \
-u 'APPLICATION_KEY:APPLICATION_SECRET'
```
```json Response theme={null}
{
"meta": {
"tracingId": "14df65068fd38689b392ad39602143cb",
"count": 1
},
"data": [
{
"id": "700004000000000000000007",
"type": "Personal - Current",
"balance": -99765867307.74,
"currency": "GBP",
"usageType": "PERSONAL",
"accountType": "CURRENT",
"nickname": "xxxx0009",
"accountNames": [
{
"name": "Mr. Mitsuhirato"
}
],
"accountIdentifications": [
{
"type": "PAN",
"identification": "1234000000000001"
}
],
"accountBalances": [
{
"type": "EXPECTED",
"dateTime": "2021-03-04T11:08:39.291Z",
"balanceAmount": {
"amount": -99765867307.74,
"currency": "GBP"
},
"creditLineIncluded": false,
"creditLines": []
}
]
}
]
}
```
The response returns an array of [account objects](/api-reference/financial-data/get-account#response-data) for each account the user has provided consent to share information from. The response from every institution is normalised so you can handle the data consistently.
Display the available accounts to the end user so they can select which account to get transaction data for. Once selected, store the account `id`.
[Get account transactions](/api-reference/financial-data/get-account-transactions#response-data) for a specified account by including the account `id` in the path and the `consentToken` in the header.
```bash Request theme={null}
curl -L -X GET 'https://api.yapily.com/accounts/{accountId}/transactions' \
-H 'Consent: {consentToken}' \
-u 'APPLICATION_KEY:APPLICATION_SECRET'
```
```json Response theme={null}
{
"meta": {
"tracingId": "0d9835a9c83204f8c0607ddfef961bab",
"count": 760,
"pagination": {
"totalCount": 760,
"self": {
"limit": 1000,
"sort": "-date",
"offset": 0
}
}
},
"data": [
{
"id": "15f5b8b3-d8ca-422a-af4e-2538546788e8",
"date": "2021-02-26T11:07:41.79Z",
"bookingDateTime": "2021-02-26T11:07:41.79Z",
"valueDateTime": "2021-02-26T11:07:41.79Z",
"status": "BOOKED",
"amount": -0.99,
"currency": "GBP",
"transactionAmount": {
"amount": -0.99,
"currency": "GBP"
},
"reference": "7",
"description": "Debit for Payment Id: sdp-1-58718033-969e-4941-832b-3ad7b76c3e71",
"transactionInformation": [
"Debit for Payment Id: sdp-1-58718033-969e-4941-832b-3ad7b76c3e71"
],
"isoBankTransactionCode": {
"domainCode": {
"code": "PMNT",
"name": "Payments"
},
"familyCode": {
"code": "ICDT",
"name": "Issued Credit Transfers"
},
"subFamilyCode": {
"code": "DMCT",
"name": "Domestic Credit Transfer"
}
},
"proprietaryBankTransactionCode": {
"code": "PMT",
"issuer": "modelo-sandbox"
},
"balance": {
"type": "CLOSING_AVAILABLE",
"balanceAmount": {
"amount": 99765867307.74,
"currency": "GBP"
}
},
"enrichment": {
"transactionHash": {
"hash": "54be0baf91aaa732cd8b6bacc6396042.1"
}
}
}
],
"links": {
"self": "https://api.yapily.com/accounts/700004000000000000000007/transactions?from&before&limit=1000&sort=-date&offset=0&cursor"
}
}
```
The response returns an array of [transaction objects](/api-reference/financial-data/get-account-transactions#response-data) for the specified account.
You can then display the transaction information to the end user or process the data internally depending on your use case.
**Note:** By default, Yapily limits the results to the most recent 1000 transactions. See [pagination](/data/financial-data-resources/pagination) for more information on how to manage transaction responses that contain more than 1000 transactions.
# Validate Overview
Source: https://docs.yapily.com/data/validate/overview
Verify financial account ownership with Yapily's account validation service. Confirm customer identity and reduce fraud by checking bank account details in real time.
Validate is currently available in Private Beta. See [Glossary](/getting-started/glossary#private-beta) for more information.
***
## Introduction
Yapily Validate enables you to instantly confirm customer details and account ownership across the UK and Europe through a single API integration.
Account information sharing allows users to permit access to their basic account information for the purpose of identity confirmation.
Yapily Validate returns key account information, including the account holder's name and identity information, account numbers, and balance information. The data is returned directly from the bank, and can be from consumer, business and corporate accounts.
By validating account ownership and confirming that the account is real, this provides confidence in your customer's identity and reduces friction in onboarding, as well as meeting compliance requirements.
***
## Advantages
The 3 main advantages of Validate:
#### 1. Reduce fraud
Support regulatory compliance by validating an account is real with information taken directly from the bank.
#### 2. Optimise operations
Reduce operational time and costs with automated account ownership validation.
#### 3. Improve payments
Autofill payment details during onboarding to speed up the process and improve conversion.
Gain confidence that regular payments will be received as account information checks are automated up front.
***
## Applications
Validate can support the following processes:
**Identity and account verification:**
Support KYC and verify account ownership with real-time data shared directly from banks.
**Digital onboarding:**
Allow customers to link their bank account information helping to optimise and automate the onboarding journey for a better customer experience.
**Payment setup:**
Easy payment setup for direct debits or payouts with automated input of account details.
Don't see your use case? [Let us know](https://www.yapily.com/company/get-started) how you would like to use Yapily Validate.
***
## End user journey
The validate experience can be embedded into any application. You build and self-host the user facing screens, giving you full ownership and control over the experience in your application, with the Yapily Validate API powering the data connection behind the scenes.
**Note:** We recommend you follow our [AIS UX guidelines](/tools-and-services/yapily-connect/yapilyconnect-ux-ais-guidelines) for examples of best practices when building the user facing screens.
**Note:** Banks use different methods to authenticate and collect consent from users. Yapily supports all [user authorisation flows](/open-banking-flow/user-authorisation/overview) and you may need to implement multiple user authorisation flows depending on which banks you want to integrate with.
***
## Get started
See our [validate tutorial](/data/validate/tutorial-validate-user) to explore a sample integration with Yapily Validate.
# Tutorial: Validate a user
Source: https://docs.yapily.com/data/validate/tutorial-validate-user
Step-by-step tutorial for validating a user's bank account with Yapily. Initiate validation, handle user consent, and retrieve account ownership verification results.
Validate is currently available in Private Beta. See [Glossary](/getting-started/glossary#private-beta) for more information.
## Introduction
This tutorial explains how to access account information in the UK with the Modelo Sandbox in order to validate a user's identity.
**Note:** All requests made to the Yapily API require [basic authentication](/getting-started/integration-setup/api-authentication).
***
To find which banks support accessing account information use [GET institutions](/api-reference/institutions/get-institutions) to retrieve the list of your supported institutions.
```bash Request theme={null}
curl -L -X GET 'https://api.yapily.com/institutions' \
-u 'APPLICATION_KEY:APPLICATION_SECRET'
```
```json Response theme={null}
{
"meta": {
"tracingId": "acbb76db4ab8f4ac7f039d000456c13f",
"count": 1
},
"data": [
{
"id": "modelo-sandbox",
"name": "Modelo Sandbox",
"fullName": "Modelo Sandbox",
"countries": [
{
"displayName": "United Kingdom",
"countryCode2": "GB"
}
],
"environmentType": "SANDBOX",
"credentialsType": "OPEN_BANKING_UK_AUTO",
"media": [
{
"source": "https://images.yapily.com/image/ce2bfdbf-1ae2-4919-ab7b-e8b3d5e93b36?size=0",
"type": "icon"
},
{
"source": "https://images.yapily.com/image/ca502f24-d6df-4785-b4b8-1034b100af77?size=0",
"type": "logo"
}
],
"features": [
"INITIATE_ACCOUNT_REQUEST",
"ACCOUNT_REQUEST_DETAILS",
"EXISTING_PAYMENTS_DETAILS",
"ACCOUNT_BALANCES",
"CREATE_BULK_PAYMENT",
"ACCOUNT_PERIODIC_PAYMENTS",
"ACCOUNT_STATEMENTS",
"INITIATE_BULK_PAYMENT",
"ACCOUNT_STATEMENT",
"ACCOUNT",
"INITIATE_DOMESTIC_PERIODIC_PAYMENT",
"INITIATE_SINGLE_PAYMENT_SORTCODE",
"ACCOUNT_DIRECT_DEBITS",
"ACCOUNTS",
"ACCOUNT_TRANSACTIONS",
"EXISTING_PAYMENT_INITIATION_DETAILS",
"CREATE_DOMESTIC_SINGLE_PAYMENT",
"INITIATE_DOMESTIC_SINGLE_PAYMENT",
"ACCOUNT_STATEMENT_FILE",
"CREATE_INTERNATIONAL_SINGLE_PAYMENT",
"IDENTITY",
"CREATE_DOMESTIC_SCHEDULED_PAYMENT",
"INITIATE_DOMESTIC_SCHEDULED_PAYMENT",
"CREATE_SINGLE_PAYMENT_SORTCODE",
"ACCOUNT_TRANSACTIONS_WITH_MERCHANT",
"INITIATE_INTERNATIONAL_SINGLE_PAYMENT",
"PERIODIC_PAYMENT_FREQUENCY_EXTENDED",
"ACCOUNT_SCHEDULED_PAYMENTS",
"CREATE_DOMESTIC_PERIODIC_PAYMENT"
]
}
]
}
```
Filter the list for all institutions that support the `ACCOUNTS` feature. Then display these institutions in your application so the user can select which bank to share their account information from.
Once the user selects a bank, store the `id` of the institution to use in step 2.
This example uses a [single redirect flow using a callback URL](/open-banking-flow/user-authorisation/single-redirect#callback-url).
Execute [create account authorisation](/api-reference/authorisations/create-account-authorisation), including the institution ID and your callback URL.
```bash Request theme={null}
curl -L -X POST 'https://api.yapily.com/account-auth-requests' \
-H 'Content-Type: application/json' \
-u 'APPLICATION_KEY:APPLICATION_SECRET' \
-d '{
"applicationUserId": "account-data-and-transactions-tutorial",
"institutionId": "modelo-sandbox",
"callback": "https://display-parameters.com/"
}'
```
```json Response theme={null}
{
"meta": {
"tracingId": "ceab45e96f852afdb59ec8eaf8f93594"
},
"data": {
"id": "979f8a58-c955-46b5-b25d-bdc447c28a80",
"userUuid": "c78035e1-3140-44f7-9539-527785069356",
"applicationUserId": "account-data-and-transactions-tutorial",
"institutionId": "modelo-sandbox",
"status": "AWAITING_AUTHORIZATION",
"createdAt": "2021-03-04T11:05:17.234Z",
"featureScope": [
"ACCOUNT_STATEMENT_FILE",
"ACCOUNT_STATEMENTS",
"ACCOUNT_BALANCES",
"ACCOUNT_SCHEDULED_PAYMENTS",
"ACCOUNT_STATEMENT",
"ACCOUNT_TRANSACTIONS_WITH_MERCHANT",
"ACCOUNT_TRANSACTIONS",
"ACCOUNT_DIRECT_DEBITS",
"IDENTITY",
"ACCOUNT",
"ACCOUNTS",
"ACCOUNT_PERIODIC_PAYMENTS"
],
"state": "e539228113de43b3a3d4c3b9944620d3",
"institutionConsentId": "aac-74e55df8-a673-48b4-b8ae-3e8d0e45080f",
"authorisationUrl": "{authorisationUrl}",
"qrCodeUrl": "https://images.yapily.com/image/d4113d96-9d6c-4e69-a840-2e327cff1b1d/1614855917?size=0"
}
}
```
Redirect the user to the `authorisationUrl` returned in the response.
The user is then asked to login and authorise the account sharing request with their bank. The [Modelo sandbox credentials](/resources/sandbox/overview) are: `mits` / `mits`.
Upon completion, the user is redirected back to the [callback URL](/open-banking-flow/handling-redirects/callback-url) supplied in the request. In this example, the callback is `https://display-parameters.com/` which displays the parameters returned with the redirect.
Store the `consentToken` to use when accessing account information in step 3. The `featureScope` array defines the account features you'll be able to access for each account the user authorises.
**Note:** Access to the user's account information is for [a maximum of 90 days](/data/financial-data-resources/uk-data-consent-changes) by default before requiring re-authorisation from the user.
[Retrieve account information](/api-reference/financial-data/get-accounts), specifying the `consentToken` in the header.
```bash Request theme={null}
curl -L -X GET 'https://api.yapily.com/accounts' \
-H 'Consent: {consentToken}' \
-u 'APPLICATION_KEY:APPLICATION_SECRET'
```
```json Response theme={null}
{
"meta": {
"tracingId": "14df65068fd38689b392ad39602143cb",
"count": 1
},
"data": [
{
"id": "700004000000000000000007",
"type": "Personal - Current",
"balance": -99765867307.74,
"currency": "GBP",
"usageType": "PERSONAL",
"accountType": "CURRENT",
"nickname": "xxxx0009",
"accountNames": [
{
"name": "Mr. Mitsuhirato"
}
],
"accountIdentifications": [
{
"type": "PAN",
"identification": "1234000000000001"
}
],
"accountBalances": [
{
"type": "EXPECTED",
"dateTime": "2021-03-04T11:08:39.291Z",
"balanceAmount": {
"amount": -99765867307.74,
"currency": "GBP"
},
"creditLineIncluded": false,
"creditLines": []
}
]
}
]
}
```
The response returns an array of [account objects](/api-reference) for each account the user has provided consent to share information from. The response from every institution is normalised so you can handle the data consistently.
You can then process this account information to validate your user's identity.
# Application Management
Source: https://docs.yapily.com/getting-started/application-management
Manage Yapily sub-applications for reseller and merchant use cases. Learn how to create, configure, and manage applications in the Yapily dashboard.
# Background
Within the Yapily ecosystem, all interactions with our API are governed and managed via an association with a customer's application. Currently, the only way to create an application is through the Console.
Among our clients, we have seen a growing use-case of our clients operating AIS and PIS activity on behalf of a given merchant.
# Sub-applications
A sub-application is a pseudo-application which operates under the "root" application. The root application stores all bank registrations that can be used by any sub-application that is subordinate to it in the hierarchy. The credentials of the root application are used, along with the sub-application ID in the "**sub-application**" header, to allow the platform to recognize that the API calls are being made on behalf of the sub-application.
The benefits of operating in this model are:
* Enabling a sub-app to automatically share bank registration and product API scopes without needing to duplicate the configuration across each merchant application
* Provides a mechanism to restrict traffic at a merchant level
## Merchant information
As part of the sub-application implementation, we have also introduced additional attributes that can be added to a sub-application. These attributes aim to provide our customers with a mechanism to provide extra information relating to the merchant they are onboarding and using the sub-application for the AIS/PIS activities. These attributes will be:
* **Merchant's full legal entity name**
* The **Merchant Category Code (MCC)** of the merchant
* The **Payment Purpose Code user group**
* Indicate whether they have conducted KYB on the merchant they are onboarding (also known as the **Contract Present Indicator**)
Further information about this attribute can be found below:
### Payment Purpose Code & User Groups
In October 2021, the Bank of England and Pay.UK issued a joint publication recommending Purpose Codes for use across CHAPS and the New Payments Architecture (NPA). Purpose Codes are four-letter codes which are carried across the payment chain, providing information to all users in the payment chain to indicate the reason a payment is being made. Purpose Codes are one of the policy areas of Enhanced Data that can deliver the benefits of the ISO 20022 payment messaging standard.
Given there are many payment purpose codes that apply to a single merchant, we have opted to initially go a level up and look at the Payment Purpose Code User Groups within this article - [Payment Purpose Code & User Groups](https://www.bankofengland.co.uk/-/media/boe/files/payments/rtgs-renewal-programme/iso-20022/uk-recommended-purpose-code-list.pdf)
#### Payment Purpose Code user group
* Wholesale / FI-FI
* Commercial
* Consumer / Goods & Services
* Finance
* Salaries & Incomes
* Government
* Insurance
* Property
* Foreign Exchange
* Investments
* Medical
* Benefit payments
* Pensions
* Tax
* Utilities
### Merchant Category Code (MCC)
Merchant category codes (MCCs) are four-digit numbers that a credit card issuer uses to categorise the transactions consumers complete using a particular card. Payment brands use merchant category codes to classify merchants and businesses by the type of goods or services provided in order to track and restrict transactions.
Payment brands use merchant category codes (MCCs) to classify merchants and businesses by the type of goods or services provided. Payment brands, issuers and acquirers can use MCCs to categorise, track and restrict transactions. MCCs can be used for tax reporting, interchange promotion and gathering information about cardholder purchasing behaviour.
Often, MCCs are recognised by all payment brands; however, not all codes are recognised by all brands. Payment brands frequently add, eliminate or change the codes with regularly scheduled enhancements.
Here's a list of the code ranges for different industries:
* 0001–1499: Agricultural services
* 1500–2999: Contracted services
* 4000–4799: Transportation services
* 4800–4999: Utility services
* 5000–5599: Retail outlet services
* 5600–5699: Clothing stores
* 5700–7299: Miscellaneous stores
* 7300–7999: Business services
* 8000–8999: Professional services and membership organisations
* 9000–9999: Government services
### Contract Present Indicator
The Contract Present Indicator indicates whether the PISP has a contractual relationship with the merchant and has undertaken both validation of the recipient account and due diligence on the merchant.
Possible values are **True or False**
A more granular definition:
| Condition | Definition |
| --------------------------- | ------------------------------------------------------------------------------------------------------------------------------------------------------------------------------------------------------------------------------------------------------------------------------------------------------------------------------------------------------------------------------------------------------------------------------------------------------------------------------------------------------------------------------------------------------------------------------------------------------------------------------------------------------------------- |
| Contractual arrangement | - PISP must have a written agreement with each retailer, firm, or person selling goods or services.
- The agreement should set out key responsibilities it must fulfill for management and operating policies relating to open banking payments.
- Alternatively in reseller models, where the PISP does not have a direct contract with the recipient of PIS payments, the PISP must ensure that there is an equivalent provision in the sub-contracts in place in any chain between the PISP and the ultimate payee.
- The PISP must have obtained information on and assess the purpose and nature of the business and the intended transactions. |
| Customer Due Diligence | - PISP must apply customer due diligence (CDD) measures to the payee in line with the Money Laundering and Terrorist Financing (Information on the Payer) Regulations 2017 and validate the client's identity based on a reliable independent source.
- Where there is a payee who is not the client the PISP must:
- Take reasonable measures to verify their identity and to understand the ownership and control structure of that entity and the arrangements between the entity and their client; or
- Ensure that the reseller has reasonable equivalent measures in place. |
| Validation of Payee Account | - The PISP should undertake an effective validation of payee account information (Account title, sort code and account number), either via CoP, AIS-based validation or reliable bank statement evidence. |
# Setting up a sub-application
## Creating a sub-application
* To enable users to manage their applications via an API
### Prerequisite
1. Create an application in the Console for which you will associate all of your bank registrations (Yapily Connect or Direct). This will be your **Root Application**
2. Save the application API credentials (application UUID and secret)
### API Flow
1. Call the **POST /applications** endpoint, using your Root Application credentials.
1. Provide the following attributes
1. Merchant Legal Entity Name → "name"
2. Merchant Category Code → "merchantCategoryCode"
3. Payment Purpose User Group → "ppcUserGroup"
4. Contract Present Indicator → "isContractPresent"
5. Root Application UUID → "rootApplicationId"
2. The response to this call will provide you with a new sub-application ID to be used in the header of all proceeding calls, where the "id" is the sub-application UUID.
Example Request:
```json theme={null}
{
"name": "Sub-Application Name",
"merchantCategoryCode": 7995,
"ppcUserGroup": "Wholesale / FI-FI",
"callbackUrls": [
"https://www.callback-service.com"
],
"isContractPresent": true,
"rootApplicationId": "eb25e1ee-f6af-4131-92fe-748e177bf950"
}
```
Example Response:
```json theme={null}
{
"name": "Merchant Uno",
"merchantCategoryCode": 7995,
"ppcUserGroup": "Wholesale / FI-FI",
"callbackUrls": [
"https://www.callback-service.com"
],
"isContractPresent": true,
"rootApplicationId": "eb25e1ee-f6af-4131-92fe-748e177bf950",
"id": "84b5a72f-e86c-4fca-9993-aebaa9f92edb"
}
```
### Console Flow
1. Open the [Yapily Console](https://console.yapily.com/)
2. Click on Applications
3. Select the application under which you would like to create the sub-application
4. In the application settings page, click on the sub-application tab
5. Click on "**+ Create sub-application**"
6. Complete the sub-application form, including filling all required merchant information. Once completed, click "**Create**"
7. Once the sub-application has been created successfully, you will see the new sub-application listed in the sub-app table
**PLEASE NOTE**: If you need to make changes to an existing sub-application, please click on the edit button on the right side of the sub-application table.
## Using a sub-application on the Yapily AIS / PIS-related flows
Now that the sub-application has been created, it is available to use for any API functions (as you would for a "normal" application). To enable the platform to be aware that the actions are being carried out on behalf of a sub-application, the following steps must be taken:
1. To authenticate, the token must use the application UUID and secret of the Root Application (i.e. the application that the sub-application has been created under)
2. Include a "sub-application" header for all calls, and set it to the sub-application UUID
The API Specification can be found here - [/api-reference/application-management](/api-reference/application-management)
Hosted flows also support **sub-applications**, as mentioned above, and include **additional functionality of customisation at the sub-app level**. Please refer to [this page](/tools-and-services/hosted-pages/ui-screens#ui-customisation) for details on the extended hosted capabilities.
# Set Up Your Environment
Source: https://docs.yapily.com/getting-started/get-started
Getting started with Yapily typically takes just a few minutes. After following these steps, you'll be ready to start your integration.
Follow this guide to get started testing Yapily in a [sandbox environment](/resources/sandbox/overview) against Mock Bank data.
## 1. Create a Yapily Console account
Create a free Yapily Console account [here](https://console.yapily.com/).
If you already have an account, [log in](https://console.yapily.com/).
## 2. Create an Application
In the Console, create an Application:
1. Go to **Applications** and click **Create Application**
2. Choose a name for your application and click **Create application**
3. Click **Download Application ID & Application Secret** to download the json file containing the Application ID (`applicationUuid`) and Application Secret (`secret`)
Ensure you save the Application ID and Application Secret somewhere safe and secure as you need these values to authenticate when accessing Yapily's API. You can't retrieve your Application Secret again, so if you lose it you will need to revoke the secret and create a new one. Revoking the secret will invalidate any requests that are using the old secret.
## 3. Configure sandbox
To test your application you need to configure sandbox in the Console. This allows you perform API requests against a Mock Bank.
We recommend using the preconfigured sandbox Modelo Sandbox, which is provided by the Open Banking regulators and is actively maintained.
1. Go to **Applications** and select your application
2. Select the **Connected Institutions** tab and click **Add Institutions**
3. Search for `modelo-sandbox` and select the tick box. Once selected, click **Add selected**
4. Click **Register**, and select **Yes, Preconfigured Credentials** to register `modelo-sandbox` for your application using Yapily's preconfigured credentials for this institution
Modelo Sandbox will then appear under registered institutions in your application.
You can now use Modelo Sandbox to test your application.
## 4. Make an API request
You can test Yapily's API using an API testing tool, such as Postman, or using cURL.
### Postman
Yapily provides an Open API Spec which you can use to test your integration in Postman.
1. Download Yapily's [Open API Spec](https://openapi.yapily.com/openapi.json)
2. Open Postman, click **Import** and upload the Yapily Open API spec file. Select **Test Suite** from the **Link this collection as** dropdown, then click **Import**
3. Go to **Collections**, and select **Yapily API**
4. Go to the **Authorization** tab, and select **Basic Auth** from the **Type** dropdown
5. Enter your Application ID and Application Secret (provided when you [created an application](#2-create-an-application)) against the Username and Password respectively and click **Save**
6. Select an API request, for example **Get Institutions**, and click **Send**. This will submit an API request, and return a response.
You can now test all of Yapily's API endpoints. For more information on the endpoints please see our [API reference](/api-reference).
### cURL
Execute a cURL command by directly including the Application ID and Application Secret. For example:
```bash theme={null}
curl -u id:secret 'https://api.yapily.com/institutions'
```
Or [generate an authToken](/api-reference/authentication) using the Application ID and Application Secret to authenticate your requests to your application. Then execute a cURL command using the `authToken`. For example:
```bash theme={null}
curl -X GET 'https://api.yapily.com/institutions' \\
-u 'APPLICATION_KEY:APPLICATION_SECRET'
```
You can now test all of Yapily's API endpoints. For more information on the endpoints please see our [API reference](/api-reference).
To use real banking data, please submit our [Contact Form](https://www.yapily.com/get-started/) and we'll contact you, or try out our [demo app](https://demo.yapily.com/).
# Glossary
Source: https://docs.yapily.com/getting-started/glossary
Comprehensive glossary of Open Banking terms, regulatory concepts, and Yapily-specific terminology to help developers understand the open banking ecosystem.
## Overview
This glossary defines key terms used throughout the Yapily documentation. Terms are organised alphabetically for easy reference.
***
## A
### Account Information Service Provider (AISP)
**Definition:** A licensed third-party provider authorised to access customer account and transaction data with explicit consent.
**Context:** If you're building applications that read banking data (e.g., budgeting apps, credit assessment tools), you operate as an AISP. With Yapily Connect, you can use Yapily's AISP license without obtaining your own.
**Related:**
* [Yapily Connect →](/tools-and-services/yapily-connect/overview)
* [Data Access Products →](/data/overview)
***
### Account Information Services (AIS)
**Definition:** Services that retrieve account and transaction data from banks on behalf of customers with their consent.
**Context:** AIS is one of the two main categories of Open Banking services (the other being PIS). Yapily's Data Access and Data Plus products enable you to provide AIS.
**Use Cases:** Account aggregation, transaction categorisation, financial insights, affordability checks
**Related:**
* [Account & Transaction Data →](/data/overview)
* [Data Plus →](/data/data-plus/overview)
***
### Application ID
**Definition:** A unique identifier (UUID format) assigned to your application in the Yapily Console, used for API authentication.
**Context:** Every API request to Yapily requires authentication using your Application ID and Secret. You can create multiple applications for different environments (sandbox, production).
**Example:** `a7f31e45-9c51-4e97-b5e8-8c4d9a7b3f2a`
**Related:**
* [API Authentication →](/getting-started/integration-setup/api-authentication)
* [Application Management →](/getting-started/application-management)
***
### Authentication
**Definition:** The process of verifying a user's identity (proving who you are).
**Context:** In Open Banking, banks authenticate customers using Strong Customer Authentication (SCA) before granting consent to TPPs. Authentication is different from authorisation.
**Example:** Logging into your bank with username, password, and SMS code.
**Related:**
* [Authorisation vs Authentication](#authorisation)
* [Strong Customer Authentication (SCA)](#strong-customer-authentication-sca)
***
### Authorisation
**Definition:** The process of granting permission to access resources or perform actions (proving what you're allowed to do).
**Context:** After authenticating, customers authorise TPPs to access specific data or initiate payments. In Yapily, this involves redirect flows where customers consent at their bank.
**Difference from Authentication:** Authentication proves identity; authorisation grants permissions.
**Related:**
* [User Authorisation Flows →](/open-banking-flow/user-authorisation/overview)
* [Consent](#consent)
***
## B
### Beta
**Definition:** A Beta version of a product or feature provides useful capabilities, but may have limited coverage or functionality or require further work before general release.
**Context:** Beta features are available in production to all customers, but may need minor adjustments or additional features before the final release.
***
### Bulk Payments
**Definition:** A payment type that allows multiple payments to be initiated in a single request.
**Context:** Use bulk payments for scenarios like payroll processing, supplier payments, or refund batches. Bank support for bulk payments varies by institution.
**Related:**
* [Bulk Payments Guide →](/payments/bulk-payments/overview)
***
## C
### Consent
**Definition:** Explicit permission from a customer (PSU) authorizing a TPP to access their account data or initiate payments.
**Context:** Consent is the foundation of Open Banking. Every data access or payment requires customer consent, which can be revoked at any time. Consent has a defined scope (what data/accounts) and duration (how long access lasts).
**Key Requirements:**
* Must be explicit and informed
* Customer must authenticate with bank (SCA)
* Can be revoked at any time
* Has defined scope and expiration
**Related:**
* [Financial Data Consents →](/data/financial-data-resources/financial-data-consents)
* [Payment Consents →](/payments/payment-resources/payment-consents)
***
### Consent Token
**Definition:** A unique token issued by Yapily after successful user authorisation, used to access banking data or execute payments.
**Context:** After a customer authorises access at their bank, Yapily issues a consent token that your application uses in API requests. The token is scoped to specific accounts and permissions.
**Example Usage:**
```bash theme={null}
curl -X GET https://api.yapily.com/accounts \
-H "Authorisation: Bearer YOUR_ACCESS_TOKEN" \
-H "consent: YOUR_CONSENT_TOKEN"
```
**Related:**
* [API Authentication →](/getting-started/integration-setup/api-authentication)
***
## D
### Data Plus
**Definition:** Yapily's suite of data enrichment and insights products that enhance raw banking data.
**Context:** Data Plus includes categorisation, balance prediction, financial profiling, and transaction group analysis. These features help you build smarter financial applications.
**Products:**
* Transaction categorisation
* Merchant name
* Recurring payments
* Payment processor
**Related:**
* [Data Plus Overview →](/data/data-plus/overview)
* [Categorization →](/data/data-plus/categorisation)
***
### Decoupled Authorisation
**Definition:** An authorisation flow where the customer completes authentication on a separate device from where they initiated the request.
**Context:** Some banks support decoupled flows where the customer receives a push notification on their mobile banking app to authorise a request initiated on desktop.
**Example:** Customer initiates payment on laptop, receives push notification on phone, authorises on phone.
**Related:**
* [User Authorisation Overview →](/open-banking-flow/user-authorisation/overview)
***
## E
### Embedded Flow
**Definition:** An authorisation flow where the bank's authentication form is displayed within your application interface, rather than redirecting to the bank's website.
**Context:** Embedded flows provide a more seamless user experience but require implementing the bank's UI within your app. Not all banks support embedded flows.
**Related:**
* [Embedded Flow Guide →](/open-banking-flow/user-authorisation/embedded)
**Note:** Hosted Pages customers don't need to implement embedded flows - Yapily handles this.
***
## H
### Hosted Pages
**Definition:** Yapily's pre-built, compliant user interface for payment and data consent flows.
**Context:** Instead of building your own UI and implementing authorisation flows, use Hosted Pages for faster time-to-market. Yapily handles bank selection, consent screens, and authorisation flows while you focus on your core product.
**What Yapily Handles:**
* Bank selection interface
* Consent screen UI
* Redirect and embedded flows
* SCA handling
* Bank-specific requirements
**What You Still Do:**
* API authentication
* Create payment/consent requests
* Handle callbacks
* Access banking data/payment status
**Related:**
* [Hosted Pages Overview →](/tools-and-services/hosted-pages/overview)
* [UI Screens →](/tools-and-services/hosted-pages/ui-screens)
***
## I
### Idempotency
**Definition:** The property that ensures an operation can be performed multiple times with the same result, preventing duplicate transactions.
**Context:** Yapily payment requests require an idempotency ID to prevent duplicate payments. If you retry a request with the same idempotency ID, you'll get the same result without creating a duplicate payment.
**Example:**
```json theme={null}
{
"paymentIdempotencyId": "payment-12345-20250111",
"amount": { "amount": 100.00, "currency": "GBP" }
}
```
**Related:**
* [Single Payments →](/payments/single-payments)
***
### Institution
**Definition:** A bank or financial institution that provides Open Banking APIs.
**Context:** In Yapily's platform, each bank is represented as an "Institution" with a unique ID (e.g., `hsbc-sandbox`, `barclays-ob`). You select which institution to connect to when creating consent or payment requests.
**Key Properties:**
* Institution ID (unique identifier)
* Supported features (payments, data, VRPs)
* Countries served
* Authorisation flow types supported
**Related:**
* [Institution Configurations →](/institution-configurations/index)
***
## O
### Open Banking
**Definition:** A regulatory framework that allows consumers to grant third-party providers access to their bank account data or initiate payments through secure APIs.
**Context:** Open Banking is the foundation of Yapily's platform. Mandated by PSD2 in Europe, it enables innovation in financial services while maintaining security and regulatory compliance.
**Key Principles:**
* Customer consent required
* Strong customer authentication (SCA)
* Regulatory oversight
* Standardized APIs
* Revocable access
***
### Open Banking Implementation Entity (OBIE)
**Definition:** The UK standards body responsible for defining Open Banking specifications and ensuring consistent implementation across UK banks.
**Context:** OBIE created the UK Open Banking Standard, which UK banks must implement. Yapily complies with OBIE standards when connecting to UK banks.
**Related:**
* [UK Prerequisites →](/getting-started/integration-setup/prerequisites/uk-prereqs)
***
## P
### Payment Initiation Service Provider (PISP)
**Definition:** A licensed third-party provider authorised to initiate payments from customer bank accounts with explicit consent.
**Context:** If you're building applications that initiate payments (e.g., e-commerce checkouts, bill payment services), you operate as a PISP. With Yapily Connect, you can use Yapily's PISP license.
**Related:**
* [Payments Overview →](/payments/overview)
* [Yapily Connect →](/tools-and-services/yapily-connect/overview)
***
### Payment Initiation Services (PIS)
**Definition:** Services that initiate payments directly from customer bank accounts with their consent.
**Context:** PIS is one of the two main categories of Open Banking services (the other being AIS). Yapily's payment products enable you to provide PIS.
**Use Cases:** E-commerce checkout, bill payments, peer-to-peer transfers, recurring subscriptions
**Related:**
* [Payments Overview →](/payments/overview)
* [Single Payments →](/payments/single-payments)
* [VRPs →](/payments/vrps/introduction)
***
### Payment Service User (PSU)
**Definition:** The customer or business that uses payment services - the end user who grants consent to TPPs.
**Context:** In Open Banking flows, the PSU is the person who owns the bank account and authorises data access or payments. Also referred to as "the customer" or "the user."
***
### Pre-Authorisation
**Definition:** An authorisation flow where the customer provides credentials to the TPP before being redirected to the bank.
**Context:** Some banks require pre-authorisation where you collect customer identifiers (e.g., account number, sort code) before initiating the authorisation flow. This is bank-specific.
**Related:**
* [Pre-Authorisation Flow →](/open-banking-flow/user-authorisation/pre-authorisation)
* [User Authorisation Overview →](/open-banking-flow/user-authorisation/overview)
***
### Private Beta
**Definition:** An experimental version of a product or feature available only to invited customers.
**Context:** Private Beta versions can only be accessed by authorised applications. Contact your customer success manager if you're interested in participating in Private Beta programs.
***
### PSD2 (Payment Services Directive 2)
**Definition:** The European Union regulation that mandates Open Banking, requiring banks to provide APIs for licensed third-party providers.
**Context:** PSD2 came into effect in September 2019 and is the legal foundation for Open Banking in Europe. It defines requirements for SCA, data access, payment initiation, and consumer protection.
**Key Requirements:**
* Banks must provide Open Banking APIs
* Strong Customer Authentication (SCA) required
* TPPs must be licensed by regulators
* Customer consent is mandatory
***
## R
### Redirect Flow
**Definition:** An authorisation flow where the customer is redirected to their bank's website or app to authenticate and grant consent.
**Context:** Redirect flow is the most common authorisation method. Your application redirects the customer to the bank, the bank authenticates them (SCA), and the customer is redirected back to your app with consent.
**Flow Steps:**
1. Create payment/consent request with Yapily
2. Receive authorisation URL
3. Redirect customer to authorisation URL (bank website)
4. Customer authenticates at bank (SCA)
5. Customer grants consent
6. Bank redirects customer back to your callback URL
7. Fetch payment status or account data
**Related:**
* [Redirect URL Guide →](/open-banking-flow/handling-redirects/redirect-url)
* [Callback URL Guide →](/open-banking-flow/handling-redirects/callback-url)
* [User Authorisation Overview →](/open-banking-flow/user-authorisation/overview)
***
### Regulatory Technical Standards (RTS)
**Definition:** Detailed technical requirements specifying how PSD2 must be implemented, including Strong Customer Authentication (SCA) rules.
**Context:** RTS defines specific security and technical requirements for Open Banking implementations across the EU.
**Related:**
* [PSD2](#psd2-payment-services-directive-2)
***
## S
### Strong Customer Authentication (SCA)
**Definition:** A security requirement under PSD2 that customers must authenticate using at least two of three factors: knowledge (password), possession (phone/token), inherence (biometrics).
**Context:** Banks enforce SCA during Open Banking authorisation flows to verify customer identity. Common SCA methods include password + SMS code, password + biometric, or mobile app push notifications.
**Three Authentication Factors:**
1. **Knowledge:** Something you know (password, PIN)
2. **Possession:** Something you have (phone, hardware token)
3. **Inherence:** Something you are (fingerprint, face recognition)
***
## T
### Third Party Provider (TPP)
**Definition:** A licensed company authorised to access customer banking data (AISP) or initiate payments (PISP) through Open Banking APIs.
**Context:** Yapily is a TPP aggregator - instead of integrating directly with each bank, you integrate with Yapily and access our network of bank connections. You can either use Yapily's TPP license (Yapily Connect) or your own.
**TPP Types:**
* **AISP:** Account Information Service Provider (data access)
* **PISP:** Payment Initiation Service Provider (payments)
* **AISP + PISP:** Dual license (both data and payments)
**Related:**
* [Yapily Connect →](/tools-and-services/yapily-connect/overview)
***
## U
### User UUID
**Definition:** A unique identifier you assign to each of your users for tracking and managing their Yapily interactions.
**Context:** When creating payment or consent requests, you provide a User UUID to associate the request with a specific user in your system. This helps with auditing, analytics, and managing user consents.
**Example:** `user-12345` or `550e8400-e29b-41d4-a716-446655440000`
**Best Practice:** Use your internal user ID as the User UUID for easy correlation.
**Related:**
* [API Reference →](/api-reference)
***
## V
### Validate
**Definition:** Yapily's identity verification product that confirms a person's identity by matching their name against bank account holder information.
**Context:** Use Validate for KYC (Know Your Customer) requirements, account ownership verification, and fraud prevention. It retrieves account holder identity data and performs name matching.
**Use Cases:**
* Onboarding verification
* Account ownership confirmation
* Anti-fraud checks
* Regulatory KYC compliance
**Related:**
* [Validate Overview →](/data/validate/overview)
***
### Variable Recurring Payments (VRPs)
**Definition:** A payment type that allows you to initiate multiple payments of varying amounts from a customer's account under a single consent (mandate).
**Context:** VRPs enable flexible recurring payments for subscriptions, savings sweeps, loan repayments, or variable bills. Unlike traditional Direct Debits, VRPs are instant and customer-controlled.
**Key Features:**
* Variable payment amounts
* Customer-defined limits
* Instant execution
* Revocable consent
* Currently UK only, limited bank support
**Related:**
* [VRPs Guide →](/payments/vrps/introduction)
* [VRP Coverage →](/payments/vrps/coverage)
***
## W
### Webhook
**Definition:** An HTTP callback that Yapily sends to your server when specific events occur (e.g., payment completed, consent authorised).
**Context:** Instead of polling Yapily's API for status updates, configure webhooks to receive real-time notifications when payment or consent status changes.
**Common Events:**
* `payment.status.updated` - Payment status changed
* `account-authorization.status.updated` - Consent status changed
* `payment.completed` - Payment successfully completed
* `payment.failed` - Payment failed
**Related:**
* [Webhooks Guide →](/tools-and-services/webhooks/introduction)
* [Getting Started with Webhooks →](/tools-and-services/webhooks/get-started)
***
## Y
### Yapily Connect
**Definition:** Yapily's service that allows you to use Yapily's AISP/PISP license instead of obtaining your own, enabling faster time-to-market without regulatory burden.
**Context:** With Yapily Connect, you don't need to register with banks individually or obtain your own Open Banking license. Yapily handles all regulatory requirements. However, consent screens will show Yapily branding alongside yours.
**Benefits:**
* No license procurement needed
* No bank registration required
* Start in days, not months
* Yapily handles compliance
**Trade-offs:**
* Yapily branding in consent screens
* Using Yapily's regulatory relationship
**Related:**
* [Yapily Connect Overview →](/tools-and-services/yapily-connect/overview)
***
## Additional Resources
Begin your integration journey
Complete API documentation
Payment initiation products
Account and transaction data
Get help from our team
Join our developer community
# API Authentication
Source: https://docs.yapily.com/getting-started/integration-setup/api-authentication
Learn how to authenticate requests to the Yapily API using Basic Auth. Understand how to manage application credentials and secure your open banking integration.
Learn how to authenticate with Yapily's API.
***
## Introduction
Yapily's API uses HTTP Basic authentication.
Yapily provides an Application ID and Application Secret pair to authenticate requests. Each Application has its own unique ID and secret.
Credentials are retrieved, viewed and managed in the [Yapily Console](https://console.yapily.com/).
***
## Retrieve credentials
To retrieve your credentials:
1. Go to the [Yapily Console](https://console.yapily.com/)
2. Go to **Applications** and click **Create Application**
3. Choose a name for your application and click **Create application**
4. Click **Download Application ID & Application Secret** to download the json file containing the Application ID (`applicationUuid`) and Application Secret (`secret`)
5. Save the json file
It is important to keep your credentials safe and secure. Do not share your Application Secret in publicly accessible areas such as GitHub or client-side code.
Once created, you're unable to retrieve your Application Secret again.
***
## Authenticate API requests
In the request, your Application ID should be sent as the basic auth `username` and your Application Secret should be sent as the basic auth `password`.
You must submit the correct credentials when making API calls or you will receive a 401 "Unauthorized" error response.
For more information, see our [API reference](/api-reference/authentication).
***
## Revoke Application Secret
If you lose your Application Secret, or it is no longer secure, you need to revoke the secret and create a new one. The Application ID will not change.
Revoking the secret will invalidate any requests that are using the old secret.
To revoke your Application Secret:
1. Go to the [Yapily Console](https://console.yapily.com/)
2. Go to **Applications** and click on your application
3. Under *API credentials* click **Revoke** next to the Application Secret, then click **Revoke and Generate new secret**
4. Download and save the json file containing the new Application Secret
# European Prerequisites
Source: https://docs.yapily.com/getting-started/integration-setup/prerequisites/european-prereqs
European PSD2 prerequisites for regulated AISPs and PISPs using Yapily. Covers eIDAS certificate setup, national competent authority registration, and QWAC configuration.
## Obtaining eIDAS Certificates
For registrations that will be used to connect to any \`Institution\` in Europe, you will need to obtain [eIDAS](https://ico.org.uk/for-organisations/guide-to-eidas/what-is-the-eidas-regulation/) certificates which will be used to identify yourself as a verified AISP and/or PISP. The certificates are otherwise known as the *QWAC* and *QSEAL* certificate types and can be obtained by Qualified Trust Service Providers (QTSPs) within Europe.
See the list of [Trusted QTSPs](https://webgate.ec.europa.eu/tl-browser/#/search/type/1) in your desired countries by checking "Qualified certificate for electronic seal" and "Qualified certificate for website authentication".
Be aware that the issuing of these certificates do come at a financial cost.
## Naming your eIDAS certificates
Before you upload your [eIDAS certificates to the Yapily Console](/getting-started/integration-setup/registration#2-upload-certificates), use the following naming convention to better identify your certificates:
\`\`\`shell
\[cert-type].\[company-name].\[cert-identifier].\[file-extension]
\`\`\`
You should end up with the following four files:
\`\`\`shell
qwac.\[company-name].\[cert-identifier].key
qwac.\[company-name].\[cert-identifier].pem
qseal.\[company-name].\[cert-identifier].key
qseal.\[company-name].\[cert-identifier].pem
\`\`\`
***
Back to [registration](/getting-started/integration-setup/registration)
# UK Prerequisites
Source: https://docs.yapily.com/getting-started/integration-setup/prerequisites/uk-prereqs
UK Open Banking Directory setup guide for regulated AISPs and PISPs. Covers OBIE registration, software statement creation, and transport certificate configuration.
## Access to Open Banking Directory
To begin the process of setting up all that is required for registering each `Institution` in the UK, you will need access to the [Open Banking Directory](https://directory.openbanking.org.uk/s/) where you will be prompted to log in using the PingId authentication mobile application. If you have not already gone through the process of setting this up, you will need to go through their [enrolment process](https://www.openbanking.org.uk/wpcore/wp-content/uploads/Enrolling-Onto-Open-Banking-Guide.pdf) first.
## Entity Selection
Once logged in, you will be able to see your organisation as one of the available entities:
![obd_login_page]() Once choosing your entity, you will then have the ability to go several pages:
* **Contacts**: Manage access to who has access to features in the Open Banking Directory
* **Entity Information**: Here you will have key information about your organisation
* **Directory Sandbox**: Here you can manage the configuration for registering with sandboxes
* **Directory**: Here you can manage the configuration for live banks
To continue, select the *Directory (PSD2)* option:
Once choosing your entity, you will then have the ability to go several pages:
* **Contacts**: Manage access to who has access to features in the Open Banking Directory
* **Entity Information**: Here you will have key information about your organisation
* **Directory Sandbox**: Here you can manage the configuration for registering with sandboxes
* **Directory**: Here you can manage the configuration for live banks
To continue, select the *Directory (PSD2)* option:
![obd_entity_landing_home]() If this option does not appear for you, you will need to speak to someone with the right permissions to give you access.
## Organisation Details Overview
Once logged into the *Directory (PSD2)* of the appropriate entity, you will see an overview of your organisation details.
Take note of the following fields which will be required when creating your certificates:
1. **Business Information Name**: Your registered company name
2. **Business Information Organisation Id**: Your organisation identifier
3. **Competency Authority Claims Registration Id**: The registration identifier from your National Competent Authority (the FCA in the UK)
4. **Competency Authority Claims Authorisations**: Take note of which roles you're approved for e.g. AISP and/or PISP
If this option does not appear for you, you will need to speak to someone with the right permissions to give you access.
## Organisation Details Overview
Once logged into the *Directory (PSD2)* of the appropriate entity, you will see an overview of your organisation details.
Take note of the following fields which will be required when creating your certificates:
1. **Business Information Name**: Your registered company name
2. **Business Information Organisation Id**: Your organisation identifier
3. **Competency Authority Claims Registration Id**: The registration identifier from your National Competent Authority (the FCA in the UK)
4. **Competency Authority Claims Authorisations**: Take note of which roles you're approved for e.g. AISP and/or PISP
![obd_organisational_details_home]() ## Create Certificates
From the *Organisation Details* tab, select the *Certificates* tab and select the *Add New Organisation Certificate* option to create a new set of certificates:
## Create Certificates
From the *Organisation Details* tab, select the *Certificates* tab and select the *Add New Organisation Certificate* option to create a new set of certificates:
![obd_certificates_home]() On this page, you will need to create and upload two new certificates created via the \`openssl\` utility in a shell on your laptop. For the UK, you will need to upload one *OB Seal (Signing)* and one *OB WAC (Transport)* certificate to successful authenticate yourself with each \`Institution\`:
On this page, you will need to create and upload two new certificates created via the \`openssl\` utility in a shell on your laptop. For the UK, you will need to upload one *OB Seal (Signing)* and one *OB WAC (Transport)* certificate to successful authenticate yourself with each \`Institution\`:
![obd_certificates_upload]() In order to create the certificates, you will need the following details listed in the [Organisation Details Overview](#organisation-details-overview). You can use the following [helper repo](https://github.com/yapily/registration-scripts) to walk through the process of creating and uploading the certificates to the Open Banking Directory.
## Create a Software Statement
A software statement is a collection of information that describes the purpose of your Open Banking application for each \`Institution\` in the UK that your customers will be connecting to.
You can have multiple software statements to separate out your different environments or use-cases e.g. your staging application vs your production application or your mobile traffic vs your web traffic.
To create a software statement, from the *Organisation Details* tab, select the *Software Statements* tab and select the *Add new Software Statement* option to create a new software statement:
In order to create the certificates, you will need the following details listed in the [Organisation Details Overview](#organisation-details-overview). You can use the following [helper repo](https://github.com/yapily/registration-scripts) to walk through the process of creating and uploading the certificates to the Open Banking Directory.
## Create a Software Statement
A software statement is a collection of information that describes the purpose of your Open Banking application for each \`Institution\` in the UK that your customers will be connecting to.
You can have multiple software statements to separate out your different environments or use-cases e.g. your staging application vs your production application or your mobile traffic vs your web traffic.
To create a software statement, from the *Organisation Details* tab, select the *Software Statements* tab and select the *Add new Software Statement* option to create a new software statement:
![obd_software_statements_home]() You will then be prompted to fill in some information about your business. The fields that are particularly important are listed below:
* **Client Name**: This is the name of your business that will be visible to the PSU in the \`Institution\`
* **Role**: This defines whether you will be permitted to use AISP and/or PISP functionality with this software statement
* **Policy URI**: A link to your organisation's policies
* **Terms of Service**: A link to your organisation's terms of service
* **Client URI**: A link to your organisation's home page
* **Logo URI**: A link to your organisation's logo
* **Redirect URI**: One or more [redirectUrls](/open-banking-flow/handling-redirects/redirect-url) that your software will use
You will then be prompted to fill in some information about your business. The fields that are particularly important are listed below:
* **Client Name**: This is the name of your business that will be visible to the PSU in the \`Institution\`
* **Role**: This defines whether you will be permitted to use AISP and/or PISP functionality with this software statement
* **Policy URI**: A link to your organisation's policies
* **Terms of Service**: A link to your organisation's terms of service
* **Client URI**: A link to your organisation's home page
* **Logo URI**: A link to your organisation's logo
* **Redirect URI**: One or more [redirectUrls](/open-banking-flow/handling-redirects/redirect-url) that your software will use
![obd_software_statement_details]() After you have filled in all the required fields, select the *Submit* option to persist the changes.
Now the *Client Id* otherwise known as the *Software Statement Id* is available which will later be used as part of the [Bank Registration Process](/getting-started/integration-setup/registration#3-register-institutions):
After you have filled in all the required fields, select the *Submit* option to persist the changes.
Now the *Client Id* otherwise known as the *Software Statement Id* is available which will later be used as part of the [Bank Registration Process](/getting-started/integration-setup/registration#3-register-institutions):
![obd_software_statement_created]() Software statements can not be edited or deleted after creation, however, you have the ability to add more redirects to an existing software statement or to completely add new software statements. Be aware that as you edit or create new software statements, that you will have to go through the process of [Bank Registration](/getting-started/integration-setup/registration#3-register-institutions) again for each \`Institution\`.
## Assigning Certificates to a Software Statement
The last step for finalising the Software Statement is to assign so valid certificates to it. If you scroll to the *Keys/certificates* section, you should be able to see the organisational level OB WAC and OB SEAL certificates you created:
Software statements can not be edited or deleted after creation, however, you have the ability to add more redirects to an existing software statement or to completely add new software statements. Be aware that as you edit or create new software statements, that you will have to go through the process of [Bank Registration](/getting-started/integration-setup/registration#3-register-institutions) again for each \`Institution\`.
## Assigning Certificates to a Software Statement
The last step for finalising the Software Statement is to assign so valid certificates to it. If you scroll to the *Keys/certificates* section, you should be able to see the organisational level OB WAC and OB SEAL certificates you created:
![obd_software_statement_keys_and_certs]() Make sure to check the *Associated* check box in order to assign both certificates to your software statement. If successful, a confirmation pop up should appear to confirm each assignment was successful. If you have multiple software statements, you're able to use the same set of certificates, so in theory, you could only have one set of certificates used across all your Software Statements.
Take note of the expiry date for both of the certificates and set a reminder as when the expiry date for you certificates occur, they will no longer be valid to authenticate requests made to each \`Institution\`. You will need to perform [Certificate Renewals](#certificate-renewals) in good time to prevent any downtime due to expired certificates.
Finally, download the PEM files for both the OB WAC and OB SEAL by clicking on the three dots in each row and selecting the *Get PEM* option:
Make sure to check the *Associated* check box in order to assign both certificates to your software statement. If successful, a confirmation pop up should appear to confirm each assignment was successful. If you have multiple software statements, you're able to use the same set of certificates, so in theory, you could only have one set of certificates used across all your Software Statements.
Take note of the expiry date for both of the certificates and set a reminder as when the expiry date for you certificates occur, they will no longer be valid to authenticate requests made to each \`Institution\`. You will need to perform [Certificate Renewals](#certificate-renewals) in good time to prevent any downtime due to expired certificates.
Finally, download the PEM files for both the OB WAC and OB SEAL by clicking on the three dots in each row and selecting the *Get PEM* option:
![obd_software_statement_key_and_certs_pem]() ## Naming your Open Banking Certificates
Now, you are ready to [upload the certificates to the Yapily Console](/getting-started/integration-setup/registration#2-upload-certificates). In order to help with better identifying your certificates, you can rename each of the files accordingly:
\`\`\`shell
\[cert-type].\[company-name].KID.\[cert-kid].\[file-extension]
\`\`\`
You should end up with the following four files:
\`\`\`shell
obwac.\[company-name].KID.\[obwac-cert-kid].key
obwac.\[company-name].KID.\[obwac-cert-kid].pem
obseal.\[company-name].KID.\[obseal-cert-kid].key
obseal.\[company-name].KID.\[obseal-cert-kid].pem
\`\`\`
## Generating a Software Statement Assertion
For any \`Institution\` that has a [manual registration process](/getting-started/integration-setup/registration#manual-registration), you may be required to provide a *Software Statement Assertion* to the \`Institution\` during the registration. This is token essentially holds all the information about your software statement such as the redirect url to use and is what the \`Institution\` will use to validate any requests that you initiate to the \`Institution\` on the behalf of the PSU.
To generate a *Software Statement Assertion*, scroll to the bottom of the page on the *Software Statement* tab for the intended software statement and select the *Generate* button:
## Naming your Open Banking Certificates
Now, you are ready to [upload the certificates to the Yapily Console](/getting-started/integration-setup/registration#2-upload-certificates). In order to help with better identifying your certificates, you can rename each of the files accordingly:
\`\`\`shell
\[cert-type].\[company-name].KID.\[cert-kid].\[file-extension]
\`\`\`
You should end up with the following four files:
\`\`\`shell
obwac.\[company-name].KID.\[obwac-cert-kid].key
obwac.\[company-name].KID.\[obwac-cert-kid].pem
obseal.\[company-name].KID.\[obseal-cert-kid].key
obseal.\[company-name].KID.\[obseal-cert-kid].pem
\`\`\`
## Generating a Software Statement Assertion
For any \`Institution\` that has a [manual registration process](/getting-started/integration-setup/registration#manual-registration), you may be required to provide a *Software Statement Assertion* to the \`Institution\` during the registration. This is token essentially holds all the information about your software statement such as the redirect url to use and is what the \`Institution\` will use to validate any requests that you initiate to the \`Institution\` on the behalf of the PSU.
To generate a *Software Statement Assertion*, scroll to the bottom of the page on the *Software Statement* tab for the intended software statement and select the *Generate* button:
![obd_software_statement_assertion]() You can then copy the output using the *Copy to clipboard* option as and when needed.
## Certificate Renewals
The only time you should be concerned about creating new certificates is when your certificates are about to expire. You should set a reminder in good time to go through the process of creating new certificates before they expire.
When this time comes, you do not need to go through the full bank registration process, however, you must [create new certificates](#create-certificates) and [assign them to your software statement(s)](#assigning-certificates-to-a-software-statement) and also [add these new certificates to the Yapily Console](/getting-started/integration-setup/registration#2-upload-certificates). Finally, you need to make sure each \`Institution\` registration uses your new certificates on the first page of the \`Institution\` registration in the Yapily Console.
***
Back to [registration](/getting-started/integration-setup/registration)
# Introduction
Source: https://docs.yapily.com/getting-started/integration-setup/registration
Registration is required to access the Open Banking network. Learn about Yapily's two registration options: using Yapily's existing licence or your own permissions.
Learn how to register with institutions to access the open banking network.
For an introduction to why bank registration is required, see [Licensing & Registration](/concepts/licensing-and-registration).
***
## Introduction
Registration with an institution is required before you can use Yapily's API to access data or make payments with that institution. You must register with each institution you wish to connect to.
There are 2 registration options depending on whether you are a regulated entity:
* [Direct registration](#direct-registration):
If you are regulated by a central authority (e.g. the Financial Conduct Authority in the UK), you can register with each institution using your own open banking certificates in the Yapily Console.
* [Delegated registration](#delegated-registration):
If you are unregulated, you can register with each institution using Yapily Connect, Yapily's FCA registered entity. In this case, Yapily will handle all institution registration requirements.
***
## Direct registration
If you already have an AISP and/or PISP license with a central authority, the following steps are required for you to connect to ASPSPs through Yapily.
### 1. Prerequisites
Depending on which regions you want to be an AISP and/or PISP in, you need to first complete the required
prerequisites:
* [European prerequisites](/getting-started/integration-setup/prerequisites/european-prereqs)
* [UK prerequisites](/getting-started/integration-setup/prerequisites/uk-prereqs)
### 2. Upload certificates
Once you have created the required certificates, the next step is to upload the appropriate certificates to the [Yapily Console](https://console.yapily.com/).
1. Log in to the Console
2. Navigate to **Certificates** and select **Upload Certificate**
3. Upload your certificates
You can then copy the output using the *Copy to clipboard* option as and when needed.
## Certificate Renewals
The only time you should be concerned about creating new certificates is when your certificates are about to expire. You should set a reminder in good time to go through the process of creating new certificates before they expire.
When this time comes, you do not need to go through the full bank registration process, however, you must [create new certificates](#create-certificates) and [assign them to your software statement(s)](#assigning-certificates-to-a-software-statement) and also [add these new certificates to the Yapily Console](/getting-started/integration-setup/registration#2-upload-certificates). Finally, you need to make sure each \`Institution\` registration uses your new certificates on the first page of the \`Institution\` registration in the Yapily Console.
***
Back to [registration](/getting-started/integration-setup/registration)
# Introduction
Source: https://docs.yapily.com/getting-started/integration-setup/registration
Registration is required to access the Open Banking network. Learn about Yapily's two registration options: using Yapily's existing licence or your own permissions.
Learn how to register with institutions to access the open banking network.
For an introduction to why bank registration is required, see [Licensing & Registration](/concepts/licensing-and-registration).
***
## Introduction
Registration with an institution is required before you can use Yapily's API to access data or make payments with that institution. You must register with each institution you wish to connect to.
There are 2 registration options depending on whether you are a regulated entity:
* [Direct registration](#direct-registration):
If you are regulated by a central authority (e.g. the Financial Conduct Authority in the UK), you can register with each institution using your own open banking certificates in the Yapily Console.
* [Delegated registration](#delegated-registration):
If you are unregulated, you can register with each institution using Yapily Connect, Yapily's FCA registered entity. In this case, Yapily will handle all institution registration requirements.
***
## Direct registration
If you already have an AISP and/or PISP license with a central authority, the following steps are required for you to connect to ASPSPs through Yapily.
### 1. Prerequisites
Depending on which regions you want to be an AISP and/or PISP in, you need to first complete the required
prerequisites:
* [European prerequisites](/getting-started/integration-setup/prerequisites/european-prereqs)
* [UK prerequisites](/getting-started/integration-setup/prerequisites/uk-prereqs)
### 2. Upload certificates
Once you have created the required certificates, the next step is to upload the appropriate certificates to the [Yapily Console](https://console.yapily.com/).
1. Log in to the Console
2. Navigate to **Certificates** and select **Upload Certificate**
3. Upload your certificates
![Yapily Certificate upload]() You need to go through this process twice; once for the *transport certificate* (OBWAC or QWAC) and once more for the *signing certificate* (OBSeal or QSEAL). You need to upload the appropriate *.pem* file and *.key* file for both certificate types you upload.
If you have followed the naming convention for the appropriate certificates you are uploading
([Naming your Open Banking Certificates](/getting-started/integration-setup/prerequisites/uk-prereqs#naming-your-open-banking-certificates) or
[Naming your eIDAS Certificates](/getting-started/integration-setup/prerequisites/european-prereqs#naming-your-eidas-certificates)), then you should be able to fill in the following fields:
* *Certificate Key Id*: This only applies to OBWAC and OBSeal certificates types and the value to use comes after *KID*
in the file name
* *Type of certificate*: This is indicated by the first value in the file name
* *Alias Name*: Copy the file name without the extension
### 3. Register institutions
Once you have successfully uploaded your certificates, the next step is to register each `Institution` you wish to connect to on the Yapily Console.
There are 3 different types of institution that can be setup:
* `MOCK`
* `SANDBOX`
* `LIVE`
Both `MOCK` and `SANDBOX` are for [sandbox testing](/resources/sandbox/overview). `LIVE` is for connections to real consumer and business accounts.
#### Register an institution:
1. Go to **Applications** and select your application
2. Select the **Connected Institutions** tab
3. Your added institutions appear under *Not Registered*. If you haven't already added an `Institution` to your application, select **Add Institutions** to choose the `Institution` and add it.
4. Click on **Register** next to the `Institution` to begin the registration process.
5. There are multiple ways to register with an institution. See [certificate registration](#certificate-registration), [manual registration](#manual-registration) and [dynamic client registration](#dynamic-client-registration) for further guidance.
6. Once you have provided the required information, click *Register* to complete the registration process. Your registered institutions will appear under *Registered*.
#### Certificate registration
During the registration process, you need to add your signing and transport certificates. This is either your Open Banking certificates (OBWAC and OBSeal) or your eIDAS certificates (QWAC and QSEAL). Depending on which type of certificates you are uploading, the required information may slightly differ.
In addition to the QWAC and QSEAL certificates, you should specify the following:
* *Key*: The username provided on registration of OB compliant software
* *Secret*: The password provided on registration of OB compliant software (N.B. This may not be required / provided for specific banks)
Different banks might require some additional parameters. You can learn more about the registration process of individual banks on the registration form page.
You need to go through this process twice; once for the *transport certificate* (OBWAC or QWAC) and once more for the *signing certificate* (OBSeal or QSEAL). You need to upload the appropriate *.pem* file and *.key* file for both certificate types you upload.
If you have followed the naming convention for the appropriate certificates you are uploading
([Naming your Open Banking Certificates](/getting-started/integration-setup/prerequisites/uk-prereqs#naming-your-open-banking-certificates) or
[Naming your eIDAS Certificates](/getting-started/integration-setup/prerequisites/european-prereqs#naming-your-eidas-certificates)), then you should be able to fill in the following fields:
* *Certificate Key Id*: This only applies to OBWAC and OBSeal certificates types and the value to use comes after *KID*
in the file name
* *Type of certificate*: This is indicated by the first value in the file name
* *Alias Name*: Copy the file name without the extension
### 3. Register institutions
Once you have successfully uploaded your certificates, the next step is to register each `Institution` you wish to connect to on the Yapily Console.
There are 3 different types of institution that can be setup:
* `MOCK`
* `SANDBOX`
* `LIVE`
Both `MOCK` and `SANDBOX` are for [sandbox testing](/resources/sandbox/overview). `LIVE` is for connections to real consumer and business accounts.
#### Register an institution:
1. Go to **Applications** and select your application
2. Select the **Connected Institutions** tab
3. Your added institutions appear under *Not Registered*. If you haven't already added an `Institution` to your application, select **Add Institutions** to choose the `Institution` and add it.
4. Click on **Register** next to the `Institution` to begin the registration process.
5. There are multiple ways to register with an institution. See [certificate registration](#certificate-registration), [manual registration](#manual-registration) and [dynamic client registration](#dynamic-client-registration) for further guidance.
6. Once you have provided the required information, click *Register* to complete the registration process. Your registered institutions will appear under *Registered*.
#### Certificate registration
During the registration process, you need to add your signing and transport certificates. This is either your Open Banking certificates (OBWAC and OBSeal) or your eIDAS certificates (QWAC and QSEAL). Depending on which type of certificates you are uploading, the required information may slightly differ.
In addition to the QWAC and QSEAL certificates, you should specify the following:
* *Key*: The username provided on registration of OB compliant software
* *Secret*: The password provided on registration of OB compliant software (N.B. This may not be required / provided for specific banks)
Different banks might require some additional parameters. You can learn more about the registration process of individual banks on the registration form page.
![Yapily registration EU example]() In addition to the OBWAC and OBSeal certificates, you should specify the following:
* *Organisation Id*: Obtained from the Open Banking Directory. See [Organisation Details Overview](/getting-started/integration-setup/prerequisites/uk-prereqs#organisation-details-overview) to find this value
* *Software Statement Id*: Obtained from the Open Banking Directory. See [Create a Software Statement](/getting-started/integration-setup/prerequisites/uk-prereqs#create-a-software-statement) to find this value
In addition to the OBWAC and OBSeal certificates, you should specify the following:
* *Organisation Id*: Obtained from the Open Banking Directory. See [Organisation Details Overview](/getting-started/integration-setup/prerequisites/uk-prereqs#organisation-details-overview) to find this value
* *Software Statement Id*: Obtained from the Open Banking Directory. See [Create a Software Statement](/getting-started/integration-setup/prerequisites/uk-prereqs#create-a-software-statement) to find this value
![Yapily institution registration UK example]() #### Manual registration
Manual bank registration requires you to register on the institution's developer portal.
Follow the documentation link included in the registration form for the `Institution` to obtain the necessary credentials.
Once you have obtained the credentials and entered them into the relevant fields, you can click the *Register* button to save the completed registration. This should automatically populate `Key` and `Secret` fields.
#### Dynamic client registration
Dynamic client registration (DCR) means you do not need to go through a bespoke registration process for this `Institution`.
In this case, you will be prompted for a `Key` and `Secret` and the *Register* button will be available. To complete the registration, click the *Register* button and if successful, the `Institution` will return a `Key` and optionally a `Secret`.
***
## Delegated registration
If you are using [Yapily Connect](/tools-and-services/yapily-connect/overview), all registration requirements are managed by Yapily.
To add an institution, please contact [Support](/resources/support) including each `Institution` you require. The institutions will be added to your service immediately if available.
***
## Testing registrations
To test an `Institution` registration was successful, execute the appropriate [authorisation](/api-reference) for the `Institution` and verify that you are able to successfully redirect to the `authorisationUrl` (or in the case of an embedded `Institution`, verify that the request executes successfully).
For completeness, for redirect-based flows, you should attempt to log into the `Institution` using real, valid credentials. However, with the difficulty of sourcing accounts, successfully redirecting to the `Institution` log in page without errors is a generally a good indication that the registration was successful.
## Failed registrations
If the registration fails when entering the credentials in the Console as described above, then please contact [Support](/resources/support) including the following information:
* Application ID or name
* Institution name
* Time of registration
* A description of the error message or a screenshot of the failure
If the registration in the Console was successful but there were issues testing the registration,
please contact [Support](/resources/support)
with the following information:
* Application ID or name
* Institution name
* Tracing ID
* A description of the error message or a screenshot of the failure
# Registration Maintenance
Source: https://docs.yapily.com/getting-started/integration-setup/registration-update
Guide for updating and renewing certificates for bank registrations
# Certificate Renewal and Updates
This guide explains how to update and renew certificates for your bank registrations to maintain compliance with Open Banking requirements.
## UK Certificates
**OB\_Seal, OB\_Wac**: These certificates can be generated through the Open Banking portal, provided your organisation is registered within the platform.
## EU Certificates
**Q\_Seal, Q\_Wac**: These certificates must be purchased from a qualified and trusted QTSP (Qualified Trust Service Provider).
Ensuring you have valid and up-to-date certificates is essential for maintaining compliance with PSD2 regulations.
***
## Getting Started
Prior to updating your certificates, we strongly recommend creating a test application within the Yapily Console. This allows you to thoroughly test the registration process for each banking group, minimising the risk of unforeseen impacts on your live application. Testing one institution per banking group is sufficient to ensure a smooth transition and prevent disruptions in your live environment.
Please refer to the registration update process and its impact on consents outlined below for each banking group:
| Country | Bank Group/Institution | Update Process | Downtime | Consent Impact | Bank SLAs if applicable | Developer Portal Link |
| -------------------------- | ------------------------------------------------ | --------------------------------------------------------------------------------------------------------------------------------------------------------------------------------------------------------------------------------------------------------------------------------------------------------------------------------------------------------------------------------------------------------------------------------------------------------------------------------------------------------------------------------------------------------------------------------------------------- | --------------------------------------------------------------------------------------------------------------------------------------------------------- | ------------------------------------------------------------------------------------------------------------------------------------------------------------------------------------------------------------------ | ------------------------------------- | ------------------------------------------------------------------------------------------------------ |
| Germany | N/A | Changing the certificates on Yapily UI is enough, this needs to be done for every institution. Process: Open your application on Yapily Console, find the German institution you want to update and press edit when found, change the certificates by using the dropdown and select the new ones, once done, press save registration. | N/A | No impact, unless the organisation identifier changes due to a re-brand or similar which would require a new registration | N/A | N/A |
| France | BPCE | Changing the certificates on Yapily UI is enough, this needs to be done for every institution from the group manually. Process: Open your application on Yapily Console, find the BPCE institution you want to update and press edit when found, change the certificates by using the dropdown and select the new ones, once done, press save registration. | N/A | No impact, unless the organisation identifier changes due to a re-brand or similar which would require a new registration | N/A | N/A |
| France | Arkea | To renew the certificates, you will need to change them on the Yapily Console UI, and go to the banks developer portal, where you have created applications for each Arkea group institution, there you will need to change the certificate chain for each institution and save, once saved, go to Yapily Console, and change the certificates there, the change should be immediate. **Please keep in mind that there might be some downtime, as when you change the certificates on the developer portal the registration might stop working until you change the certificates on the Yapily UI** | \~15-30 Min downtime, until all the steps are completed, and the changes take effect. | As long as the credentials remain the same there will be no impact to consents. | N/A | [https://getarkea.com/en/](https://getarkea.com/en/) |
| France | Societe Generale | To renew the certificates you will need to login to the developer portal and update the certificates there, once updated go to Yapily Console and change the certificates there for each registration. **please keep in mind that there might be some downtime, as when you change the certificates on the developer portal the registration might stop working until you change the certificates on the Yapily UI** | \~15-30 Min downtime, until all the steps are completed, and the changes take effect. | As long as the credentials remain the same there will be no impact to consents. | N/A | [https://developer.societegenerale.fr/en/sb](https://developer.societegenerale.fr/en/sb) |
| France | Credit Agricole | To renew the certificates you will need to change them on Yapily UI, once the certificates are changed from the dropdown, a re-register button will appear, press it. This will make a PUT call to the bank, and update the certificates. **This re-register button only needs to be done for one institutions from the group, once it is done, proceed with changing the other institutions in the group, but now it is enough to change the certificates, and press the "save existing registration"** | N/A | As long as the credentials remain the same there will be no impact to consents. | N/A | N/A |
| France | LabanquePostale | To renew the certificate, it is enough to change them in the Yapily Console UI, by editing the registration and saving it. You do not have any specific action to deal with La Banque Postale as long as the following elements remain unchanged:
#### Manual registration
Manual bank registration requires you to register on the institution's developer portal.
Follow the documentation link included in the registration form for the `Institution` to obtain the necessary credentials.
Once you have obtained the credentials and entered them into the relevant fields, you can click the *Register* button to save the completed registration. This should automatically populate `Key` and `Secret` fields.
#### Dynamic client registration
Dynamic client registration (DCR) means you do not need to go through a bespoke registration process for this `Institution`.
In this case, you will be prompted for a `Key` and `Secret` and the *Register* button will be available. To complete the registration, click the *Register* button and if successful, the `Institution` will return a `Key` and optionally a `Secret`.
***
## Delegated registration
If you are using [Yapily Connect](/tools-and-services/yapily-connect/overview), all registration requirements are managed by Yapily.
To add an institution, please contact [Support](/resources/support) including each `Institution` you require. The institutions will be added to your service immediately if available.
***
## Testing registrations
To test an `Institution` registration was successful, execute the appropriate [authorisation](/api-reference) for the `Institution` and verify that you are able to successfully redirect to the `authorisationUrl` (or in the case of an embedded `Institution`, verify that the request executes successfully).
For completeness, for redirect-based flows, you should attempt to log into the `Institution` using real, valid credentials. However, with the difficulty of sourcing accounts, successfully redirecting to the `Institution` log in page without errors is a generally a good indication that the registration was successful.
## Failed registrations
If the registration fails when entering the credentials in the Console as described above, then please contact [Support](/resources/support) including the following information:
* Application ID or name
* Institution name
* Time of registration
* A description of the error message or a screenshot of the failure
If the registration in the Console was successful but there were issues testing the registration,
please contact [Support](/resources/support)
with the following information:
* Application ID or name
* Institution name
* Tracing ID
* A description of the error message or a screenshot of the failure
# Registration Maintenance
Source: https://docs.yapily.com/getting-started/integration-setup/registration-update
Guide for updating and renewing certificates for bank registrations
# Certificate Renewal and Updates
This guide explains how to update and renew certificates for your bank registrations to maintain compliance with Open Banking requirements.
## UK Certificates
**OB\_Seal, OB\_Wac**: These certificates can be generated through the Open Banking portal, provided your organisation is registered within the platform.
## EU Certificates
**Q\_Seal, Q\_Wac**: These certificates must be purchased from a qualified and trusted QTSP (Qualified Trust Service Provider).
Ensuring you have valid and up-to-date certificates is essential for maintaining compliance with PSD2 regulations.
***
## Getting Started
Prior to updating your certificates, we strongly recommend creating a test application within the Yapily Console. This allows you to thoroughly test the registration process for each banking group, minimising the risk of unforeseen impacts on your live application. Testing one institution per banking group is sufficient to ensure a smooth transition and prevent disruptions in your live environment.
Please refer to the registration update process and its impact on consents outlined below for each banking group:
| Country | Bank Group/Institution | Update Process | Downtime | Consent Impact | Bank SLAs if applicable | Developer Portal Link |
| -------------------------- | ------------------------------------------------ | --------------------------------------------------------------------------------------------------------------------------------------------------------------------------------------------------------------------------------------------------------------------------------------------------------------------------------------------------------------------------------------------------------------------------------------------------------------------------------------------------------------------------------------------------------------------------------------------------- | --------------------------------------------------------------------------------------------------------------------------------------------------------- | ------------------------------------------------------------------------------------------------------------------------------------------------------------------------------------------------------------------ | ------------------------------------- | ------------------------------------------------------------------------------------------------------ |
| Germany | N/A | Changing the certificates on Yapily UI is enough, this needs to be done for every institution. Process: Open your application on Yapily Console, find the German institution you want to update and press edit when found, change the certificates by using the dropdown and select the new ones, once done, press save registration. | N/A | No impact, unless the organisation identifier changes due to a re-brand or similar which would require a new registration | N/A | N/A |
| France | BPCE | Changing the certificates on Yapily UI is enough, this needs to be done for every institution from the group manually. Process: Open your application on Yapily Console, find the BPCE institution you want to update and press edit when found, change the certificates by using the dropdown and select the new ones, once done, press save registration. | N/A | No impact, unless the organisation identifier changes due to a re-brand or similar which would require a new registration | N/A | N/A |
| France | Arkea | To renew the certificates, you will need to change them on the Yapily Console UI, and go to the banks developer portal, where you have created applications for each Arkea group institution, there you will need to change the certificate chain for each institution and save, once saved, go to Yapily Console, and change the certificates there, the change should be immediate. **Please keep in mind that there might be some downtime, as when you change the certificates on the developer portal the registration might stop working until you change the certificates on the Yapily UI** | \~15-30 Min downtime, until all the steps are completed, and the changes take effect. | As long as the credentials remain the same there will be no impact to consents. | N/A | [https://getarkea.com/en/](https://getarkea.com/en/) |
| France | Societe Generale | To renew the certificates you will need to login to the developer portal and update the certificates there, once updated go to Yapily Console and change the certificates there for each registration. **please keep in mind that there might be some downtime, as when you change the certificates on the developer portal the registration might stop working until you change the certificates on the Yapily UI** | \~15-30 Min downtime, until all the steps are completed, and the changes take effect. | As long as the credentials remain the same there will be no impact to consents. | N/A | [https://developer.societegenerale.fr/en/sb](https://developer.societegenerale.fr/en/sb) |
| France | Credit Agricole | To renew the certificates you will need to change them on Yapily UI, once the certificates are changed from the dropdown, a re-register button will appear, press it. This will make a PUT call to the bank, and update the certificates. **This re-register button only needs to be done for one institutions from the group, once it is done, proceed with changing the other institutions in the group, but now it is enough to change the certificates, and press the "save existing registration"** | N/A | As long as the credentials remain the same there will be no impact to consents. | N/A | N/A |
| France | LabanquePostale | To renew the certificate, it is enough to change them in the Yapily Console UI, by editing the registration and saving it. You do not have any specific action to deal with La Banque Postale as long as the following elements remain unchanged:
- providerLegalId (accreditation number / global URN)
- certificate authority (eIDAS certificate provider) | N/A | No impact to consents if the credentials remain the same and the global URN and certificate provider is the same. | 2-5 days, depending on bank response. | N/A |
| France | BNP | To renew the certificate, it is enough to change them in the Yapily Console UI, by editing the registration, assigning the new certificates, and saving it. | N/A | No impact to consents. If the DN of the new certificate is identical to the DN of the current certificate, the consents granted for AIS will remain valid (until they reach their end-date). | N/A | N/A |
| Austria | N/A | To renew the certificate, it is enough to change them in the Yapily Console UI, by editing the registration, assigning the new certificates, and saving it. | N/A | No impact to consents as long as the Organisation Identifier remains the same. | N/A | N/A |
| Belgium | Belfius | To renew the certificates, you will need to send an email to Belfius and attach the public part of the certificates, they will add it on their side and you will be able to use the old certificates until they expire, and the new ones once they inform you that it has been added on their side. | N/A | No impact to consents. | 1-3 days. | N/A |
| Belgium | KBC Belgium | To renew the certificate, it is enough to change them in the Yapily Console UI, by editing the registration, assigning the new certificates, and saving it. | N/A | No impact to consents. | N/A | N/A |
| Belgium | BNP Paribas | To renew the certificate, it is enough to change them in the Yapily Console UI, by editing the registration, assigning the new certificates, and saving it. | N/A | If the DN of the new certificate is identical to the DN of the current certificate, the consents granted for AIS will remain valid (until they reach their end-date). | N/A | N/A |
| Baltics | SEB Baltics (Estonia, Latvia, Lithuania) | To renew the certificate, it is enough to change them in the Yapily Console UI, by editing the registration, assigning the new certificates, and saving it. | N/A | No impact to consents. | N/A | N/A |
| Ireland | AIB | To renew the certificates, you will need to assign the new certificates in the Open Banking Directory organisation to the used Software Statement for the registration, once they are assigned, you can move forward to the Yapily UI, and change the certificates there on the registration, once done, save the registration. | N/A | No impact to consents if the registration software Statement ID remains the same. | N/A | N/A |
| Ireland | PTSB | To renew the certificates, you will need to assign the new certificates in the Open Banking Directory organisation to the used Software Statement for the registration, once they are assigned, you can move forward to the Yapily UI, and change the certificates there on the registration, once done, save the registration. | N/A | No impact to consents if the registration software Statement ID remains the same. | N/A | N/A |
| Italy | All Groups | To renew the certificate, it is enough to change them in the Yapily Console UI, by editing the registration, assigning the new certificates, and saving it. | N/A | No impact to consents. | N/A | N/A |
| Netherlands | ABN Amro | To renew the certificates you will need to login to the developer portal and raise a ticket with a change request for the certificates, ABN amro will provide a time slot when the certificates will be changed, once confirmation is received and certs are updated from their side go to Yapily Console and change the certificates there for each registration. **please keep in mind that there might be some downtime, as when you change the certificates on the developer portal the registration might stop working until you change the certificates on the Yapily UI** | \~15-30 Min downtime, until all the steps are completed, and the changes take effect. | As long as the credentials remain the same there will be no impact to consents. | N/A | [https://developer.abnamro.com/](https://developer.abnamro.com/) |
| Netherlands | Rabobank | To renew the certificates you will need to login to the developer portal and update the certificates there, once updated go to Yapily Console and change the certificates there for each registration. **please keep in mind that there might be some downtime, as when you change the certificates on the developer portal the registration might stop working until you change the certificates on the Yapily UI** | \~15-30 Min downtime, until all the steps are completed, and the changes take effect. | As long as the credentials remain the same there will be no impact to consents. | N/A | [https://developer.rabobank.nl/](https://developer.rabobank.nl/) |
| Netherlands | Devolksbank | To renew the certificate, it is enough to change them in the Yapily Console UI, by editing the registration, assigning the new certificates, and saving it. | N/A | As long as the credentials remain the same there will be no impact to consents. | N/A | |
| Nordics | BankData | To re-new BankData institutions you will have to send your new QWAC eIDAS to BankDara and schedule a time and date for the change. If your new QWAC eIDAS is issued by another QTSP than your current QWAC eIDAS, please inform them as soon as possible as they might have to install a full certificate chain with their IT partners. Once you receive confirmation from them that the certificate is changed, you will need to change the certificates on the Yapily UI. | \~15-30 Min downtime, until all the steps are completed, and the changes take effect. 1-2 days to get a response from them to schedule the change window. | All consent-tokens will expire. | | Email: [api-dev-support@bankdata.dk](mailto:api-dev-support@bankdata.dk) |
| Nordics | BEC | To renew the certificates for BEC, you will need to enrol with the bank again, by doing a dynamic registration for each institution so that the new certificates are added. Both registrations will work until certificate expiry, but for the new registration, new consents will have to be created, for the old registration, consents will still be active until expiration date. | N/A | New consents will need to be generated for the new registration, active consents will still be usable while using old registration details. | N/A | N/A |
| Nordics | DNB | To renew the certificate, it is enough to change them in the Yapily Console UI, by editing the registration, assigning the new certificates, and saving it. | N/A | No impact to consents. | N/A | N/A |
| Nordics | Luminor | To renew the certificate, it is enough to change them in the Yapily Console UI, by editing the registration, assigning the new certificates, and saving it. | N/A | No impact to consents. | N/A | N/A |
| Nordics | Nordea | To renew the certificate, it is enough to change them in the Yapily Console UI, by editing the registration, assigning the new certificates, and saving it. | N/A | No impact to consents. | N/A | N/A |
| Nordics | SEB Sweden | To renew the certificates, you will need to send an email to SEB and attach the public part of the certificates, they will check on their side if any additional steps are needed, if so will add it on their side. Once confirmation is received from them, you will need to change the certificates on Yapily UI. | Possible \~30 min downtime, from when email is received and the certificates on Yapily UI are changed. | No impact to consents. | 1-3 days. | [openbanking@seb.lt](mailto:openbanking@seb.lt) |
| Nordics | Swedbank (Lithuania, Sweden, Latvia and Estonia) | To renew the certificate, it is enough to change them in the Yapily Console UI, by editing the registration, assigning the new certificates, and saving it. | N/A | No impact to consents. | N/A | N/A |
| Portugal | SIBS | To renew the certificate, it is enough to change them in the Yapily Console UI, by editing the registration, assigning the new certificates, and saving it. | N/A | No impact to consents. | N/A | N/A |
| Spain | Redsys | To renew the certificate, it is enough to change them in the Yapily Console UI, by editing the registration, assigning the new certificates, and saving it. | N/A | No impact to consents. | N/A | N/A |
| Sweden | Skandia | To renew the certificate, it is enough to change them in the Yapily Console UI, by editing the registration, assigning the new certificates, and saving it. | N/A | No impact to consents, unless a new application is created and different credentials used. | N/A | N/A |
| **UK Institutions below:** | | | | | | |
| UK | AIB | To renew the certificates, you will need to upload the new certificates to the Open Banking Directory, and associate them to the currently used Software Statement ID. Once done, it is enough to change them in the Yapily Console UI, by editing the registration, assigning the new certificates, and saving it. | N/A | No impact to consents, unless a new application is created on the developer portal, which would be considered a new registration with new credentials, as the consents and registration is tied to the client\_id. | N/A | [https://developer.aibgb.co.uk/](https://developer.aibgb.co.uk/) |
| UK | Barclays | To renew the certificates, you will need to upload the new certificates to the Open Banking Directory, and associate them to the currently used Software Statement ID. Once done, it is enough to change them in the Yapily Console UI, by editing the registration, assigning the new certificates, and saving it. | N/A | No impact to consents, unless a new application is created on the developer portal, which would be considered a new registration with new credentials, as the consents and registration is tied to the client\_id. | N/A | [https://developer.barclays.com/](https://developer.barclays.com/) |
| UK | BOI | To renew the certificates, you will need to upload the new certificates to the Open Banking Directory, and associate them to the currently used Software Statement ID. Once done, it is enough to change them in the Yapily Console UI, by editing the registration, assigning the new certificates, and saving it. | N/A | No impact to consents, unless a new Software Statement ID is used, which would be considered a new registration with new credentials, as the consents and registration is tied to the Software Statement ID. | N/A | N/A |
| UK | Capital One | To renew the certificates, you will need to upload the new certificates to the Open Banking Directory, and associate them to the currently used Software Statement ID. Once done, it is enough to change them in the Yapily Console UI, by editing the registration, assigning the new certificates, and saving it. | N/A | No impact to consents, unless a new Software Statement ID is used, which would be considered a new registration with new credentials, as the consents and registration is tied to the Software Statement ID. | N/A | N/A |
| UK | Cash Plus | To renew the certificates, you will need to upload the new certificates to the Open Banking Directory, and associate them to the currently used Software Statement ID. Once done, it is enough to change them in the Yapily Console UI, by editing the registration, assigning the new certificates, and saving it. | N/A | No impact to consents, unless a new Software Statement ID is used, which would be considered a new registration with new credentials, as the consents and registration is tied to the Software Statement ID. | N/A | N/A |
| UK | YBS | To renew the certificates, you will need to upload the new certificates to the Open Banking Directory, and associate them to the currently used Software Statement ID. Once done, it is enough to change them in the Yapily Console UI, by editing the registration, assigning the new certificates, and saving it. | N/A | No impact to consents, unless a new Software Statement ID is used, which would be considered a new registration with new credentials, as the consents and registration is tied to the Software Statement ID. | N/A | N/A |
| UK | Cumberland Building Society | To renew the certificates, you will need to upload the new certificates to the Open Banking Directory, and associate them to the currently used Software Statement ID. Once done, it is enough to change them in the Yapily Console UI, by editing the registration, assigning the new certificates, and saving it. | N/A | No impact to consents, unless a new Software Statement ID is used, which would be considered a new registration with new credentials, as the consents and registration is tied to the Software Statement ID. | N/A | N/A |
| UK | CYBG | To renew the certificates, you will need to upload the new certificates to the Open Banking Directory, and associate them to the currently used Software Statement ID. Once done, it is enough to change them in the Yapily Console UI, by editing the registration, assigning the new certificates, and saving it. | N/A | No impact to consents, unless a new Software Statement ID is used, which would be considered a new registration with new credentials, as the consents and registration is tied to the Software Statement ID. | N/A | N/A |
| UK | Danske Bank | To renew the certificates, you will need to upload the new certificates to the Open Banking Directory, and associate them to the currently used Software Statement ID. Once done, it is enough to change them in the Yapily Console UI, by editing the registration, assigning the new certificates, and saving it. | N/A | No impact to consents, unless a new Software Statement ID is used, which would be considered a new registration with new credentials, as the consents and registration is tied to the Software Statement ID. | N/A | N/A |
| UK | Handelsbanken | To renew the certificates, you will need to upload the new certificates to the Open Banking Directory, and associate them to the currently used Software Statement ID. Once done, it is enough to change them in the Yapily Console UI, by editing the registration, assigning the new certificates, and saving it. | N/A | No impact to consents, unless a new Software Statement ID is used, which would be considered a new registration with new credentials, as the consents and registration is tied to the Software Statement ID. | N/A | N/A |
| UK | Hoare | To renew the certificates, you will need to upload the new certificates to the Open Banking Directory, and associate them to the currently used Software Statement ID. Once done, it is enough to change them in the Yapily Console UI, by editing the registration, assigning the new certificates, and saving it. | N/A | No impact to consents, unless a new Software Statement ID is used, which would be considered a new registration with new credentials, as the consents and registration is tied to the Software Statement ID. | N/A | N/A |
| UK | HSBC | To renew the certificates, you will need to upload the new certificates to the Open Banking Directory, and associate them to the currently used Software Statement ID. Once done, it is enough to change them in the Yapily Console UI, by editing the registration, assigning the new certificates, and saving it. | N/A | No impact to consents, unless a new Software Statement ID is used, which would be considered a new registration with new credentials, as the consents and registration is tied to the Software Statement ID. | N/A | N/A |
| UK | Lloyds Banking Group | To renew the certificates, you will need to upload the new certificates to the Open Banking Directory, and associate them to the currently used Software Statement ID. Once done, it is enough to change them in the Yapily Console UI, by editing the registration, assigning the new certificates, and saving it. | N/A | No impact to consents, unless a new Software Statement ID is used, which would be considered a new registration with new credentials, as the consents and registration is tied to the Software Statement ID. | N/A | N/A |
| UK | Monzo | To renew the certificates, you will need to upload the new certificates to the Open Banking Directory, and associate them to the currently used Software Statement ID. Once done, it is enough to change them in the Yapily Console UI, by editing the registration, assigning the new certificates, and saving it. | N/A | No impact to consents, unless a new Software Statement ID is used, which would be considered a new registration with new credentials, as the consents and registration is tied to the Software Statement ID. | N/A | N/A |
| UK | Nationwide Building Society | To renew the certificates, you will need to upload the new certificates to the Open Banking Directory, and associate them to the currently used Software Statement ID. Once done, it is enough to change them in the Yapily Console UI, by editing the registration, assigning the new certificates, and saving it. | N/A | No impact to consents, unless a new Software Statement ID is used, which would be considered a new registration with new credentials, as the consents and registration is tied to the Software Statement ID. | N/A | N/A |
| UK | Payoneer | To renew the certificates, you will need to upload the new certificates to the Open Banking Directory, and associate them to the currently used Software Statement ID. Once done, it is enough to change them in the Yapily Console UI, by editing the registration, assigning the new certificates, and saving it. | N/A | No impact to consents, unless a new application is created on the developer portal, which would be considered a new registration with new credentials, as the consents and registration is tied to the client\_id. | N/A | [https://developer.payoneer.com/psd2/home](https://developer.payoneer.com/psd2/home) |
| UK | PayPal | To renew the certificates, you will need to upload the new certificates to the Open Banking Directory, and associate them to the currently used Software Statement ID. Once done, it is enough to change them in the Yapily Console UI, by editing the registration, assigning the new certificates, and saving it. | N/A | No impact to consents, unless a new application is created on the developer portal, which would be considered a new registration with new credentials, as the consents and registration is tied to the client\_id. | N/A | [https://developer.paypal.com/home/](https://developer.paypal.com/home/) |
| UK | RBSG | To renew the certificates, you will need to upload the new certificates to the Open Banking Directory, and associate them to the currently used Software Statement ID. Once done, it is enough to change them in the Yapily Console UI, by editing the registration, assigning the new certificates, and saving it. | N/A | No impact to consents, unless a new Software Statement ID is used, which would be considered a new registration with new credentials, as the consents and registration is tied to the Software Statement ID. | N/A | N/A |
| UK | Revolut | To renew the certificates, you will need to upload the new certificates to the Open Banking Directory, and associate them to the currently used Software Statement ID. Once done, it is enough to change them in the Yapily Console UI, by editing the registration, assigning the new certificates, and saving it. | N/A | No impact to consents, unless a new Software Statement ID is used, which would be considered a new registration with new credentials, as the consents and registration is tied to the Software Statement ID. | N/A | N/A |
| UK | Sainsbury's Bank PLC | To renew the certificates, you will need to upload the new certificates to the Open Banking Directory, and associate them to the currently used Software Statement ID. Once done, it is enough to change them in the Yapily Console UI, by editing the registration, assigning the new certificates, and saving it. | N/A | No impact to consents, unless a new Software Statement ID is used, which would be considered a new registration with new credentials, as the consents and registration is tied to the Software Statement ID. | N/A | N/A |
| UK | Santander | To renew the certificates, you will need to upload the new certificates to the Open Banking Directory, and associate them to the currently used Software Statement ID. Once done, it is enough to change them in the Yapily Console UI, by editing the registration, assigning the new certificates, and saving it. | N/A | No impact to consents, unless a new application is created on the developer portal, which would be considered a new registration with new credentials, as the consents and registration is tied to the client\_id. | N/A | [https://developer.santander.co.uk/sanuk/external/](https://developer.santander.co.uk/sanuk/external/) |
| UK | Starling Bank | To renew the certificates, you will need to upload the new certificates to the Open Banking Directory, and associate them to the currently used Software Statement ID. Once done, it is enough to change them in the Yapily Console UI, by editing the registration, assigning the new certificates, and saving it. | N/A | No impact to consents, unless a new Software Statement ID is used, which would be considered a new registration with new credentials, as the consents and registration is tied to the Software Statement ID. | N/A | N/A |
| UK | Tesco bank | To renew the certificates, you will need to upload the new certificates to the Open Banking Directory, and associate them to the currently used Software Statement ID. Once done, it is enough to change them in the Yapily Console UI, by editing the registration, assigning the new certificates, and saving it. | N/A | No impact to consents, unless a new Software Statement ID is used, which would be considered a new registration with new credentials, as the consents and registration is tied to the Software Statement ID. | N/A | N/A |
| UK | Amex | To renew the certificates, you will need to upload the new certificates to the Open Banking Directory, and associate them to the currently used Software Statement ID. Once done, it is enough to change them in the Yapily Console UI, by editing the registration, assigning the new certificates, and saving it. | N/A | No impact to consents, unless a new application is created on the developer portal, which would be considered a new registration with new credentials, as the consents and registration is tied to the client\_id. | N/A | [https://developer.americanexpress.com/](https://developer.americanexpress.com/) |
| UK | Think Money | To renew the certificates, you will need to upload the new certificates to the Open Banking Directory, and associate them to the currently used Software Statement ID. Once done, you'll need to login to the developer portal and update the OBSEAL certificate there, the details will remain the same, so no need to change anything in the Yapily Console, but just as a double check, you can compare the details on the developer portal with the details in the Yapily Console to make sure that they are correct. | N/A | Consents are tied to the certificates, but are also validated separately, so there might be a slight chance of consent impact. | N/A | [https://tmg.dashboard.token.io/](https://tmg.dashboard.token.io/) |
| UK | Tide | To renew the certificates, you will need to upload the new certificates to the Open Banking Directory, and associate them to the currently used Software Statement ID. Once done, it is enough to change them in the Yapily Console UI, by editing the registration, assigning the new certificates, and saving it. | N/A | No impact to consents, unless a new Software Statement ID is used, which would be considered a new registration with new credentials, as the consents and registration is tied to the Software Statement ID. | N/A | N/A |
| UK | TSB Bank plc | To renew the certificates, you will need to upload the new certificates to the Open Banking Directory, and associate them to the currently used Software Statement ID. Once done, it is enough to change them in the Yapily Console UI, by editing the registration, assigning the new certificates, and saving it. | N/A | No impact to consents, unless a new Software Statement ID is used, which would be considered a new registration with new credentials, as the consents and registration is tied to the Software Statement ID. | N/A | N/A |
| UK | Unity Trust Bank | To renew the certificates, you will need to upload the new certificates to the Open Banking Directory, and associate them to the currently used Software Statement ID. Once done, you'll need to login to the developer portal and update the OBSEAL certificate there, the details will remain the same, so no need to change anything in the Yapily Console, but just as a double check, you can compare the details on the developer portal with the details in the Yapily Console to make sure that they are correct. | N/A | Consents are tied to the certificates, but are also validated separately, so there might be a slight chance of consent impact. | N/A | [https://unitytrust.dashboard.token.io/](https://unitytrust.dashboard.token.io/) |
| UK | Vanquis Bank | To renew the certificates, you will need to upload the new certificates to the Open Banking Directory, and associate them to the currently used Software Statement ID. Once done, it is enough to change them in the Yapily Console UI, by editing the registration, assigning the new certificates, and saving it. | N/A | No impact to consents, unless a new Software Statement ID is used, which would be considered a new registration with new credentials, as the consents and registration is tied to the Software Statement ID. | N/A | N/A |
| UK | Wise | To renew the certificates, you will need to upload the new certificates to the Open Banking Directory, and associate them to the currently used Software Statement ID. Once done, it is enough to change them in the Yapily Console UI, by editing the registration, assigning the new certificates, and saving it. | N/A | No impact to consents, unless a new registration is created with new credentials, as the consents and registration is tied to the ClientID. | N/A | N/A |
| UK | cooperativebank | To renew the certificates, you will need to upload the new certificates to the Open Banking Directory, and associate them to the currently used Software Statement ID. Once done, you'll need to login to the developer portal and update the OBSEAL certificate there, the details will remain the same, so no need to change anything in the Yapily Console, but just as a double check, you can compare the details on the developer portal with the details in the Yapily Console to make sure that they are correct. | N/A | Consents are tied to the certificates, but are also validated separately, so there might be a slight chance of consent impact. | N/A | [https://coop.dashboard.token.io/signin](https://coop.dashboard.token.io/signin) |
| UK | Soldo | To renew the certificates, you will need to upload the new certificates to the Open Banking Directory, and associate them to the currently used Software Statement ID. Once done, you'll need to login to the developer portal and update the OBSEAL certificate there, the details will remain the same, so no need to change anything in the Yapily Console, but just as a double check, you can compare the details on the developer portal with the details in the Yapily Console to make sure that they are correct. | N/A | Consents are tied to the certificates, but are also validated separately, so there might be a slight chance of consent impact. | N/A | [https://soldo.dashboard.token.io/](https://soldo.dashboard.token.io/) |
| UK | Mettle | To renew the certificates, you will need to upload the new certificates to the Open Banking Directory, and associate them to the currently used Software Statement ID. Once done, it is enough to change them in the Yapily Console UI, by editing the registration, assigning the new certificates, and saving it. | N/A | No impact to consents, unless a new Software Statement ID is used, which would be considered a new registration with new credentials, as the consents and registration is tied to the Software Statement ID. | N/A | N/A |
| UK | Chase UK | To renew the certificates, you will need to upload the new certificates to the Open Banking Directory, and associate them to the currently used Software Statement ID. Once done, it is enough to change them in the Yapily Console UI, by editing the registration, assigning the new certificates, and saving it. | N/A | No impact to consents, unless a new application is created on the developer portal, which would be considered a new registration with new credentials, as the consents and registration is tied to the client\_id. | N/A | [https://developer.openbanking-obie.chase.co.uk/](https://developer.openbanking-obie.chase.co.uk/) |
# Start Here
Source: https://docs.yapily.com/getting-started/overview
Discover Yapily's Open Banking products, compare integration approaches, check institution coverage by country, and find tutorials to start building.
Yapily offers two integration paths. Start with Hosted Pages for the fastest setup, or use the Direct API for full control. If you are new to open banking, read [Core Concepts](/concepts/open-banking-101) first.
## Choose your integration approach
### Fastest way to go live: Hosted Pages
Hosted Pages is a pre-built web flow that handles bank selection, consent, and authorisation for you. For payments, Hosted runs the entire flow end to end. For data, it handles consent and authorisation, then returns a consent token you use with the API to retrieve accounts and transactions.
You generate a URL, redirect your user, and Hosted takes care of SCA, bank redirects, and error handling.
**Key benefits:**
* No frontend engineering required for consent and authorisation flows
* Handles Strong Customer Authentication (SCA) and bank redirects automatically
* Customisable branding (logo and colours)
* Supports both payment and data consent use cases
### For full control: Direct API
The Direct API gives you full control over the payment or data flow. Choose this when you need payment types Hosted does not yet support (bulk, scheduled, periodic, international), when you operate in countries Hosted does not cover, or when you need a fully custom UI.
Not sure which to choose? Most customers start with Hosted Pages and add Direct API integrations for specific use cases later. Read the full [Hosted vs API decision guide](/concepts/hosted-vs-api).
## Before you start
Make sure you have the basics covered before you begin:
* **New to open banking?** Read [Open Banking 101](/concepts/open-banking-101) for background on how open banking works.
* **Licensing and registration:** Check that your [licensing path and bank registrations](/concepts/licensing-and-registration) are in place.
* **API credentials:** Follow [Get Started](/getting-started/get-started) to set up your application and get sandbox access.
## Country coverage
Yapily supports 2000+ institutions across the UK and 20+ European countries including Germany, France, the Netherlands, Italy, Spain, the Nordics, and more. Coverage varies by product and payment type.
For Hosted Pages availability, see the [Hosted Pages documentation](/tools-and-services/hosted-pages/overview). For a full list of supported institutions, see [Institutions](/api-reference/institutions/get-institutions).
Need coverage details for a specific country or institution? [Contact our team](/resources/support) for the latest availability.
## Ready to build?
Get your API credentials and configure your application.
Make a payment using Yapily's pre-built UI.
Access account data using Yapily's pre-built consent flow.
Step-by-step tutorial for a direct API payment.
Retrieve accounts and transactions with the API.
## Already integrating?
Quick links for developers already building with Yapily:
* [Error Handling](/resources/errors)
* [Webhooks](/tools-and-services/webhooks/introduction)
* [Payment Status Monitoring](/payments/payment-resources/payment-status)
* [Consent Management](/concepts/consent-lifecycle)
* [Sandbox and Testing](/resources/sandbox/overview)
* [API Reference](/api-reference/introduction)
* [Changelog](/resources/changelog)
* [Support](/resources/support)
# 3 Banken Gruppe
Source: https://docs.yapily.com/institution-configurations/austria/3-Banken-Gruppe
## Links
* [Technical Support Portal (finAPI)](https://xs2a-support.finapi.io/hc/en-us)
## Scopes
* Account Information 🔒
* Payment Initiation 🔒
## Supported ASPSPs
| ASPSP | Link | Supported | Institution ID |
| -------------- | ---------------------------------------------------------------------------- | --------- | -------------------------------------------------- |
| 3 Banken Group | [Technical Support Portal (finAPI)](https://xs2a-support.finapi.io/hc/en-us) | Yes | oberbank-sandbox
oberbank
btv
bks |
## Accounts Supported
### Accounts
* Accounts
* Balance
* Transactions
### Payments
* Domestic Payments (single, scheduled, periodic)
* International Payments (single, scheduled, periodic)
**Note:**
* **Accounts (AIS) uses embedded account authorisation via /embedded-account-auth-requests**
* **Payments (PIS) uses embedded payment authorisation via /embedded-payment-auth-requests**
## Live Environment
**Precondition**: To connect to Banken Gruppe institutions you need valid eiDAS certificates. Please refer [Banken Gruppe technical information](https://xs2a-support.finapi.io/hc/en-us/articles/360003343480-01-Getting-Started) section for more details.
1. Upload your eiDAS certificates (QWAC and QSEAL) into Yapily's [certificate vault](https://console.yapily.com/certificates).
2. Add a Banken Gruppe institution (Oberbank, BKS, BTV) from the tab to your [Yapily Console](https://console.yapily.com/applications) application.
3. Add this institution into your app from the `Live` tab and configure the institution by selecting the `certificates` from the dropdown.
4. Select your `QSEAL` and `QWAC` certificates from the relevant drop-downs lists then click *Save* to save the certificates.
**Create Embedded Account Consent / Payment Request:** The body must present user credentials, these are used as the PSU-ID header to the bank:
**Account / Payment init Consent**
```json theme={null}
{
"userCredentials" : {
"id": "{{username}}",
"password": "{{password}}"
}
}
```
## Sandbox Environment
Credentials that can be used with the institution **oberbank-sandbox**
| PSU-ID | Password |
| ------ | -------- |
| aspsp1 | aspsp1 |
A full set of sandbox testing information can be found [here](https://xs2a-support.finapi.io/hc/en-us/articles/360003354380-09-Sandbox-Test-Accounts-and-Test-Data)
## Support
If you require technical support with certificate management, please contact [Support](/resources/support).
# BAWAG PSK / Easybank
Source: https://docs.yapily.com/institution-configurations/austria/Easybank
## Links
[https://developer.bawaggroup.com/#/apis/23/136](https://developer.bawaggroup.com/#/apis/23/136)
## Scopes
* Account Information 🔒
* Payment Initiation 🔒
## Supported ASPSPs
| ASPSP | Link | Supported | Institution ID |
| --------------------------- | ------------------------------------------------------------------------------------------------ | --------- | ------------------------ |
| Bawag group and its Sandbox | [https://developer.bawaggroup.com/#/apis/23/136](https://developer.bawaggroup.com/#/apis/23/136) | Yes | bawag
bawag-sandbox |
## Accounts and Payments Supported
### Accounts
* Accounts
* Transactions
### Payments
* Domestic Single Payments
* Domestic Scheduled Payments
* Domestic Periodic Payments
* International Single Payments
* International Scheduled Payments
## Onboarding ASPSP's to Yapily Application
**Precondition**: To connect to Bawag institutions you will need eIDAS certificates. Please refer [European Commission technical information](https://digital-strategy.ec.europa.eu/en/policies/discover-eidas)
1. Upload your eiDAS certificates (QWAC and QSEAL) into Yapily's [certificate vault](https://console.yapily.com/certificates).
2. Add `bawag` institution from the tab to your [Yapily Console](https://console.yapily.com/applications) application.
3. Add this institution into your app from the `Live` tab and configure the institution by selecting the `certificates` from the dropdown.
4. Select your `QSEAL` and `QWAC` certificates from the relevant drop-downs lists then click *Save* to save the certificates.
## Sandbox credentials
| PSU-ID | Password | 2nd Factor (SMS-OTP) | Lastname | Firstname | Bank account 1 | Currency 1 | Bank Account 2 | Currency 2 |
| --------------- | -------- | -------------------- | -------- | --------- | ---------------------- | ---------- | ---------------------- | ---------- |
| demo | 1111 | 1111 | - | - | DE86466500050019001551 | EUR | DE75512108001245126199 | EUR |
| justin-heinrich | 123456 | 123456 | Heinrich | Justin | DE12500105170648489890 | EUR | DE90500105170648489844 | PLN |
| jmaib | 9999 | 9999 | Maibach | Johanna | DE32590500000003001112 | EUR | - | - |
| sandy\_bodas | 1111 | 1111 | - | - | DE26144792004484484484 | EUR | - | - |
## Support
If you require technical support with certificate management, please contact [Support](/resources/support).
# Erste & Sparkassen
Source: https://docs.yapily.com/institution-configurations/austria/Erste-Sparkassen
### Links
* [Erste Bank Developer Portal](https://developers.erstegroup.com/)
* [Erste Bank TPP Registration](https://developers.erstegroup.com/register)
## Scopes
* Account Information 🔒
* Payment Initiation 🔒
## Accounts and Payments Supported
### Accounts
* Accounts
* Balance
* Transactions
### Payments
* Domestic Payments
**Note:**
* **Accounts (AIS) uses normal 1 step authentication via /account-auth-requests**
* **Payments (PIS) uses 2 step requiring pre-authentication passing the scope "PIS" when using /pre-auth-requests**
## Live Environment
**Precondition**: To connect to Erste & Sparkassen. Also, you need a valid eiDAS certificates to connect to Erste Bank `Live` environment. Please refer [Erste Bank technical information](https://developers.erstegroup.com/docs/tutorials) section for more details.
1. Upload your eiDAS certificates (QWAC and QSEAL) into Yapily's [certificate vault](https://console.yapily.com/certificates).
2. Add **Erste Bank Live** from the **Live** tab to your [Yapily Console](https://console.yapily.com/applications) application.
3. Add this institution into your app from the `Live` tab and configure the institution by selecting the `certificates` from the dropdown.
4. Select your `QSEAL` and `QWAC` certificates from the relevant drop-downs lists then click *Save* to save the certificates.
**Create Consent Requests:** For accounts and payments the body request must be present the scope (AIS or PIS):
**Account / Payment init Consent**
```json theme={null}
{
"scope" : "PIS"
}
```
## Support
If you require technical support with certificate management, please contact [Support](/resources/support).
# Raiffeisen Bank
Source: https://docs.yapily.com/institution-configurations/austria/Raiffeisen-Bank
## Links
* [Developer portal](https://developer.raiffeisen.at/en/apis.html)
* [TPP Registration](https://api-dashboard.raiffeisen.at/web/#!/psd2-oauth-flow)
## Scopes
* Account Information 🔒
* Payment Initiation 🔒
## Registration Process
Raiffeisen Austria Supports Dynamic Registration.
## Accounts and Payments Supported
### Accounts
* accounts
* balance
* transactions
### Payments
* Domestic SEPA Payments
* Crossborder payments
* Periodic payments
## Raiffeisen
**Precondition**: To connect to Raiffeisen institution, whether you are accessing account information or initiating payments, your business must have the right permission to access the resource. You need valid eiDAS certificates to connect to the environment.
1. Upload your eiDAS certificates (QWAC and QSEAL) into Yapily's [certificate vault](https://console.yapily.com/certificates).
2. Add raiffeisen\_at **institution** from the **Live** tab to your [Yapily Console](https://console.yapily.com/applications) application.
3. Select your `QSEAL` and `QWAC` certificates from the relevant drop-down lists then click **Next**.
4. Click on Register which will dynamically register with bank and retrieve the response including ClientID
## Support
If you require technical support with certificate management, please contact [Support](/resources/support).
# Volksbank Banks
Source: https://docs.yapily.com/institution-configurations/austria/Volksbank
## Links
[https://xs2a.banking.co.at/psd2/m044/home](https://xs2a.banking.co.at/psd2/m044/home)
## Scopes
* Account Information 🔒
* Payment Initiation 🔒
## Supported ASPSPs
| ASPSP | Institution ID |
| ------------------------------------- | ----------------------------- |
| Volksbank Wien | `volksbank_wien` |
| Volksbank Niederösterreich | `volksbank_niederosterrei` |
| Volksbank Oberösterreich | `volksbank_oberosterreich` |
| Volksbank Steiermark | `volksbank_steiermark` |
| Volksbank Salzburg | `volksbank_salzburg` |
| Volksbank Tirol | `volksbank_tirol` |
| Volksbank Kärnten | `volksbank_karnten` |
| Volksbank Vorarlberg | `volksbank_vorarlberg` |
| Austrian Doctors and Pharmacists Bank | `austrian_docs_n_pharmacists` |
| Spardabank | `spardabank_at` |
| Volksbank Sandbox | `volksbank-sandbox_at` |
## Accounts and Payments Supported
### Accounts
* Accounts
* Balance
* Transactions
### Payments
* Domestic Single Payments
## Onboarding ASPSP's to Yapily Application
**Precondition**: To connect to Volksbank institutions with eIDAS certs a manual registration is needed.
1. Upload your eiDAS certificates (QWAC and QSEAL) into Yapily's [certificate vault](https://console.yapily.com/certificates).
2. Add the ASPSP you want to connect to from the **Live** tab to your [Yapily Console](https://console.yapily.com/applications) application.
3. Add this institution into your app and configure the institution by clicking `register` on the institution in the table.
4. Select your `QSEAL` and `QWAC` certificates from the relevant drop-downs lists then click *Save registration* to save the certificates.
## Support
If you require technical support with certificate management, please contact [Support](/resources/support).
# SEB Baltics (Estonia, Latvia, Lithuania)
Source: https://docs.yapily.com/institution-configurations/baltics/SEB-Baltics
## Links
* [SEB Baltics developer portal](https://developer.sebgroup.com/)
## Scopes
* Account Information 🔒
* Payment Initiation 🔒
## Supported ASPSPs
| ASPSP | Institution ID | BIC |
| -------------- | ----------------------- | -------- |
| SEB Estonia | seb-baltics\_ee | EEUHEE2X |
| SEB Lithuania | seb-baltics\_lt | CBVILT2X |
| SEB Latvia | seb-baltics\_lv | UNLALV2X |
| SEB EE Sandbox | seb-baltics\_ee-sandbox | EEUHEE2X |
## Accounts and Payments Supported
### Accounts
* Accounts
* Account
* Balances
* Transactions
### Payments
* Domestic single payments
* Domestic single instant payments
* Domestic scheduled payments
* International single payments
* International scheduled payments
* Domestic periodic payments
### Frequencies Supported
* DAILY
* EVERY\_WORKING\_DAY
* WEEKLY
* MONTHLY
* QUARTERLY
* SEMIANNUAL
* ANNUAL
## Onboarding ASPSP's to Yapily Application
**Precondition**: To connect to SEB Baltics institutions you will need eIDAS certificates. Please refer [SEB Baltics technical information](https://developer.sebgroup.com/support/psd2)
1. Upload your eiDAS certificates (QWAC and QSEAL) into Yapily's [certificate vault](https://console.yapily.com/certificates).
2. Add any institution from the group of SEB Baltics (for example **seb-baltics\_ee**) from the tab to your [Yapily Console](https://console.yapily.com/applications) application.
3. Add this institution into your app from the `Live` tab and configure the institution by selecting the `certificates` from the dropdown.
4. Select your `QSEAL` and `QWAC` certificates from the relevant drop-downs lists then click *Save* to save the certificates.
## Sandbox credentials
| PSU ID |
| -------- |
| ibsUser1 |
| ibsUser2 |
## Support
If you require technical support with certificate management, please contact [Support](/resources/support).
# BNP Paribas
Source: https://docs.yapily.com/institution-configurations/belgium/BNP-Paribas
## Links
* [BNP Developer portal](https://developer.bnpparibasfortis.com/)
## Scopes
* Account Information 🔒
* Payment Initiation 🔒
## Supported ASPSPs
| ASPSP | Link | Supported | Institution ID |
| ---------------- | -------------------------------------------------------------------------------------------------------------- | --------- | -------------------- |
| Fintro | [https://developer.bnpparibasfortis.com/api-references](https://developer.bnpparibasfortis.com/api-references) | Yes | fintro\_be |
| Fintro Corporate | [https://developer.bnpparibasfortis.com/api-references](https://developer.bnpparibasfortis.com/api-references) | Yes | fintro-corporate\_be |
| HelloBank | [https://developer.bnpparibasfortis.com/api-references](https://developer.bnpparibasfortis.com/api-references) | Yes | hellobank\_be |
| Fortis | [https://developer.bnpparibasfortis.com/api-references](https://developer.bnpparibasfortis.com/api-references) | Yes | fortis\_be |
| Fortis Corporate | [https://developer.bnpparibasfortis.com/api-references](https://developer.bnpparibasfortis.com/api-references) | Yes | fortis-corporate\_be |
Note: BNP Paribas sandboxes are not supported
## Registration Process
BNP Supports Dynamic Registration for all the above institutions, Please note that once a certificate is used for registration, it cannot be used again for performing registration again. Hence one Dynamic registration for any of the banks and the rest of the banks has to be manually registered using the same client credentials
## Accounts and Payments Supported
### Accounts
* accounts
* balance
* transactions
### Payments
* Domestic SEPA Payments
* Domestic SEPA Periodic Payments
* SEPA Instant
* International
### Frequencies Supported
#### Personal
* WEEKLY
* MONTHLY
* QUARTERLY
* SEMIANNUAL
#### Corporate
* WEEKLY
* MONTHLY
* QUARTERLY
* SEMIANNUAL
* EVERY\_TWO\_WEEKS
* EVERY\_TWO\_MONTHS
* ANNUAL
## Onboarding ASPSP's to Yapily Application
**Precondition**: To connect to Live and Sandbox BNP you will need eIDAS certificates. Please refer [European Commission technical information](https://digital-strategy.ec.europa.eu/en/policies/discover-eidas)
1. Upload your eiDAS certificates (QWAC and QSEAL) into Yapily's [certificate vault](https://console.yapily.com/certificates).
2. Add a BNP Paribas institution (for example **fintro\_be**) from the tab to your [Yapily Console](https://console.yapily.com/applications) application.
3. Add this institution into your app from the `Live` tab and configure the institution by selecting the `certificates` from the dropdown.
4. Select your `QSEAL` and `QWAC` certificates from the relevant drop-downs lists and fill your `SSA` token and then click *Save* to save the registration.
## Support
If you require technical support with certificate management, please contact [Support](/resources/support).
# Belfius
Source: https://docs.yapily.com/institution-configurations/belgium/Belfius
## Links
* [Belfius Developer Portal](https://developer.belfius.be/devportal/en/)
## Scopes
* Account Information 🔒
* Payment Initiation 🔒
## Supported ASPSPs
| ASPSP | Link | Supported | Institution ID |
| -------------------- | ---------------------------------------------------------------------------------------------------------------------------------- | --------- | --------------- |
| Belfius Bank | [https://developer.belfius.be/devportal/en/getstarted/index.aspx](https://developer.belfius.be/devportal/en/getstarted/index.aspx) | Yes | belfius |
| Belfius Bank Sandbox | [https://developer.belfius.be/devportal/en/getstarted/index.aspx](https://developer.belfius.be/devportal/en/getstarted/index.aspx) | Yes | belfius-sandbox |
| Banx | [https://developer.belfius.be/devportal/en/getstarted/index.aspx](https://developer.belfius.be/devportal/en/getstarted/index.aspx) | Yes | banx |
## Onboarding ASPSP's to Yapily Application
**Precondition**: To connect to Belfius institutions you will need eIDAS certificates. Please refer [European Commission technical information](https://digital-strategy.ec.europa.eu/en/policies/discover-eidas)
1. Upload your eiDAS certificates (QWAC and QSEAL) into Yapily's [certificate vault](https://console.yapily.com/certificates).
2. Add a Belfius institution (for example **belfius**) from the tab to your [Yapily Console](https://console.yapily.com/applications) application.
3. Add this institution into your app from the `Live` tab and configure the institution by selecting the `certificates` from the dropdown.
4. Select your `QSEAL` and `QWAC` certificates from the relevant drop-downs lists then click *Save* to save the certificates.
## Support
If you require technical support with certificate management, please contact [Support](/resources/support).
# KBC Belgium
Source: https://docs.yapily.com/institution-configurations/belgium/KBC-Belgium
## Links
* [KBC Developer portal](https://developer.kbc.be/)
## Scopes
* Account Information 🔒
* Payment Initiation 🔒
## Supported ASPSPs
| ASPSP | Link | Supported | Institution ID |
| ------------------- | ------------------------------------------------------ | --------- | -------------------- |
| KBC Belgium | [https://developer.kbc.be/](https://developer.kbc.be/) | Yes | kbc\_belgium |
| CBC Belgium | [https://developer.kbc.be/](https://developer.kbc.be/) | Yes | cbc\_belgium |
| KBC BRUSSELS | [https://developer.kbc.be/](https://developer.kbc.be/) | Yes | kbcbrussels\_belgium |
| KBC Belgium Sandbox | [https://developer.kbc.be/](https://developer.kbc.be/) | Yes | kbc\_belgium-sandbox |
## Onboarding ASPSP's to Yapily Application
1. Upload your eiDAS certificates (QWAC and QSEAL) into Yapily's [certificate vault](https://console.yapily.com/certificates).
2. Add a KBC Belgium supported institution (for example **kbc\_belgium**) from the tab to your [Yapily Console](https://console.yapily.com/applications) application.
3. Add this institution into your app from the `Live` tab and configure the institution by selecting the `certificates` from the dropdown.
4. Select your `QSEAL` and `QWAC` certificates from the relevant drop-downs lists then click *Save* to save the certificates.
## Support
If you require technical support with certificate management, please contact [Support](/resources/support).
# SMBC
Source: https://docs.yapily.com/institution-configurations/belgium/SMBC
## Links
[https://developer.smbcdigital.com/api-catalogue](https://developer.smbcdigital.com/api-catalogue)
## Scopes
* Account Information 🔒
* Payment Initiation 🔒
## Supported ASPSPs
| ASPSP | Link | Supported | Institution ID |
| ----- | -------------------------------------------------------------------------------------------------- | --------- | ------------------------------------ |
| SMBC | [https://developer.smbcdigital.com/api-catalogue](https://developer.smbcdigital.com/api-catalogue) | Yes | smbc
smbc\_uk
smbc-sandbox |
## Accounts and Payments Supported
### Accounts
* Accounts
* Transactions
### Payments
* Domestic Single Payments
* Domestic Scheduled Payments
* International Single Payments
* International Scheduled Payments
## Onboarding ASPSP's to Yapily Application
1. Upload your eiDAS certificates (QWAC and QSEAL) into Yapily's [certificate vault](https://console.yapily.com/certificates).
2. Add a SMBC institution from the tab to your [Yapily Console](https://console.yapily.com/applications) application.
3. Add this institution into your app from the `Live` tab and configure the institution by selecting the `certificates` from the dropdown.
4. Select your `QSEAL` and `QWAC` certificates from the relevant drop-downs lists then click *Save* to save the certificates.
## Support
If you require technical support with certificate management, please contact [Support](/resources/support).
# Danske Bank Finland
Source: https://docs.yapily.com/institution-configurations/finland/Danske-Bank-Finland
## Links
[https://developers.danskebank.com/](https://developers.danskebank.com/)
## Scopes
* Account Information 🔒
* Payment Initiation 🔒
## Supported ASPSPs
| ASPSP | Link | Supported | Institution ID |
| ---------------------------- | ------------------------------------------------------------------------ | --------- | ----------------------- |
| Danske bank Finland | [https://developers.danskebank.com/](https://developers.danskebank.com/) | Yes | `danskebank_fi` |
| Danske bank Finland Business | [https://developers.danskebank.com/](https://developers.danskebank.com/) | Yes | `danskebankbusiness_fi` |
## Accounts and Payments Supported
### Accounts
* Accounts
* Transactions
### Payments
* Domestic Single Payments
* Domestic Scheduled Payments
* Domestic Periodic Payments
* International Single Payments
* International Scheduled Payment
* Bulk Payments
## Onboarding ASPSP's to Yapily Application
**Precondition**: To connect to DanskeBank EU institutions with eIDAS certs a dynamic registration is needed.
**Pre-requisites for DCR:**
* Valid QWAC / QSEAL certificates.
* Downloaded SSA that is associated with your eIDAS certs.
### Steps Required for registration
1. Upload the signing (QSEAL) and transport (QWAC) certificates along with the keys into Yapily's [certificate vault](https://console.yapily.com/certificates).
2. Add **Danske Bank Finland** from the **Live** tab to your [Yapily Console](https://console.yapily.com/applications) application.
3. Select your transport (QWAC) and signing (QSEAL) certificates from the relevant drop-downs lists
4. After entering your open banking organization id **Click to register** to auto-register with the bank. If registration is successful, the key and secret will be populated from the institution's response.
5. Make sure to click *Save* in order not to lose these credentials, as a further registration attempt with the same Open Banking software statement is likely to fail.
## Support
If you require technical support with certificate management, please contact [Support](/resources/support).
# Handelsbanken Finland
Source: https://docs.yapily.com/institution-configurations/finland/Handelsbanken-Finland
## Links
[https://developer.handelsbanken.com](https://developer.handelsbanken.com/)
## Scopes
* Account Information 🔒
* Payment Initiation 🔒
## Supported ASPSPs
| ASPSP | Link | Supported | Institution ID |
| ------------------------------ | --------------------------------------------------------------------------- | --------- | -------------------------- |
| Handelsbanken Finland | [https://developer.handelsbanken.com](https://developer.handelsbanken.com/) | Yes | `handelsbanken_fi` |
| Handelsbanken Business Finland | [https://developer.handelsbanken.com](https://developer.handelsbanken.com/) | Yes | `handelsbankenbusiness_fi` |
## Accounts and Payments Supported
### Accounts
* Accounts
* Transactions
### Payments
* Domestic Single Payments
* Domestic Scheduled Payments
* International Single Payments
## Onboarding ASPSP's to Yapily Application
**Precondition**: To connect to Handelsbanken institutions with eIDAS certs a dynamic registration is needed.
**Pre-requisites for DCR:**
* Valid QWAC / QSEAL certificates.
### Steps Required for registration
1. Upload the signing (QSEAL) and transport (QWAC) certificates along with the keys into Yapily's [certificate vault](https://console.yapily.com/certificates).
2. Add **Institution** from the **Live** tab to your [Yapily Console](https://console.yapily.com/applications) application.
3. Select your transport (QWAC) and signing (QSEAL) certificates from the relevant drop-downs lists
4. **Click to register** to auto-register with the bank. If registration is successful, the key and secret will be populated from the institution's response.
5. Make sure to click *Save* in order not to lose these credentials, as a further registration attempt with the same Open Banking software statement is likely to fail.
## Support
If you require technical support with certificate management, please contact [Support](/resources/support).
# Chase UK
Source: https://docs.yapily.com/institution-configurations/finland/OPBank-Finland
**Institution ID**: `opbank_fi`
## Links
* [Developer Portal](https://op-developer.fi/docs)
## Scopes
* Account Information
* Payment Initiation
## Registration Process
OPBank Finland Supports Dynamic Registration.
**Precondition**: To connect to this institution, whether you are accessing account information or initiating payments, your business must have the right permission to access the resource. You need valid eiDAS certificates to connect to the environment.
1. Upload your eiDAS certificates (QWAC and QSEAL) into Yapily's [certificate vault](https://console.yapily.com/certificates).
2. Generate a SSA from the OBIE.
3. Add opbank\_fi **institution** from the **Live** tab to your [Yapily Console](https://console.yapily.com/applications) application.
4. Enter your SSA, then select your `QSEAL` and `QWAC` certificates from the relevant drop-down lists then click **Next**.
5. Click on Register which will dynamically register using the with bank and retrieve the response including ClientID, clientSecret and the API key used.
## Functionality Supported
### Accounts
* accounts - retrieves information about the account authorizing the consent. Will return details about their balances and accountType
* transactions - retrieves information about the transactions executed with the account authorizing the consent. If there's a card linked to this account, will retrieve card transactions too.
### Payments
* Domestic SEPA Payments - both in Finland and within the SEPA zone
* Periodic payments - both in Finland and within the SEPA zone
* Scheduled payments - both in Finland and within the SEPA zone
## Support
If you require technical support with certificate management, please contact [Support](/resources/support).
# Arkea Group
Source: https://docs.yapily.com/institution-configurations/france/Arkea-Group
All the supported institutions are built in the Yapily P2 environment and currently, the dashboard is not available yet hence all the registrations need to be performed in the backend. The technical support team will be able to assist in this process
## Links
* [Arkea](https://developer.arkea.com/apis)
## Scopes
* Account Information 🔒
* Payment Initiation 🔒
## Supported ASPSPs
| ASPSP | Supported | Institution ID | Type Supported |
| --------------------------------------------------- | --------- | ------------------------ | -------------- |
| Crédit Mutuel de Bretagne \[CMB] | Yes | `creditmutuel-bertagne` | Personal |
| Crédit Mutuel du Sud-Ouest \[CMSO] | Yes | `creditmutuel-sud-ouest` | Personal |
| Fortuneo | Yes | `fortuneo` | Personal |
| Max | Yes | `max-bank` | Personal |
| Arkéa Banque Privée \[ABP] | Yes | `arkea-personal` | Personal |
| Arkéa Banque Entreprises et Institutionnels \[ABEI] | Yes | `arkea-corporate` | Business |
| Arkéa Banking Services \[ABS] | Yes | `arkea-banking` | Personal |
| BPE | Yes | `bpe-personal` | Personal |
| Allianz Banque | Yes | `allianz_fr` | Personal |
## Registration Process
Arkea Supports only Manual registration and this is briefed [here](https://developer.arkea.com/get-started)
* Create a login for the Arkea developer [portal](https://developer.arkea.com/connect)
* Ensure you have a valid QSEAL, QWAC certificates along with CA(intermediate and root) as this needs to be uploaded back to back ( see below example ) in their portal
* Complete registration in their portal online and submit the form
Example certificate to be uploaded
Certificates have to be appended in the format as QSEAL/QWAC → Intermediate CA → Root CA
```
-----BEGIN CERTIFICATE-----
MIIHfDCCBWSgAwIBAgIUYImxnz9CjSlR4qjWEwkWHfeBH6kwDQYJKoZIhvcNAQEL
<..and so on...>
19elYPNdZhl1pCxAy8dduotshRw2ONI16f8DFSRYmwY/mWCh1oFqEsXoT0mxxYaj
-----END CERTIFICATE-----
-----BEGIN CERTIFICATE-----
MIIHszCCBZugAwIBAgIUNgYGCneQH5TiHtlT8u0h6XcfdmEwDQYJKoZIhvcNAQEL
<..and so on...>
BkqPNd/MXEMJGdVMKAeNncbqNeAUt13MUNn1NE0G+TQu4aVkYOJfq42gUfJu5ejz
05T1O2pMrA==
-----END CERTIFICATE-----
-----BEGIN CERTIFICATE-----
MIIF1jCCA76gAwIBAgIUXPhoWe8aK2+a26ov44mnhAwDA6EwDQYJKoZIhvcNAQEL
<..and so on...>
2zEVJK4Az1nljA9vTY2dZFNDOSzVK84cio4jQkB1SuTDwL/0a5urw3fUIJgz7YI9
P92ky9jdw1v9Ow==
-----END CERTIFICATE-----
```
## Accounts and Payments Supported
### Accounts
* accounts
* balance
* transactions
* identity
### Payments
* Domestic SEPA Payments
* Domestic SEPA Instant
* Periodic Payments
* Frequencies supported
* Daily
* Weekly
* EveryTwoWeeks
* Monthly
* EveryTwoMonths
* Quarterly
* SemiAnnual
* Annual
## Onboarding ASPSP's to Yapily Application
### **LIVE & SANDBOX:**
**Precondition**: To connect to Live Arkea supported ASPSP, whether you are accessing account information or initiating payments, your business must have the right permission to access the resource. You need valid eiDAS certificates to connect. Please refer to the ASPSP link given above for more details.
Below steps need to be performed for registration until our Dashboard is integrated with V2 .
**Pre-requisites:**
* eiDAS certificates
* Complete manual registration in Arkea portal as explained above
Steps Required for registration
1. Upload your eiDAS certificates (QWAC and QSEAL) into Yapily's [certificate vault](https://console.yapily.com/certificates).
2. Add **Institution** from the **Live** tab to your [Yapily Console](https://console.yapily.com/applications) application.
3. Add this institution into your app from the **Live** tab and configure the institution by adding `Client Uri` and `Terms of Service Uri`& selecting the `certificates`from the dropdown.
4. Select your `QSEAL`and `QWAC`certificates from the relevant drop-downs lists then click **Next**.
5. Add `client Id`and `secret` which you have received after registering your eiDAS certificates with Arkea portal.
6. Make sure to click **Save** in order not to lose these credentials.
## Support
If you require technical support with certificate management, please contact [Support](/resources/support)
# BNP
Source: https://docs.yapily.com/institution-configurations/france/BNP
All of the supported institutions are built in the Yapily P2 environment and currently, the dashboard is not available yet hence all the registrations need to be performed in the backend. The technical support team will be able to assist in this process
## Links
* [BNP API Store](https://apistore.bnpparibas/en/home)
* [TPP Registration](https://api-nav-psd2.bddf.bnpparibas/as/psd2/swagger/register.html)
## Scopes
* Account Information 🔒
* Payment Initiation 🔒
## Supported ASPSPs
| ASPSP | Link | Supported | Institution ID |
| ---------------------------------- | ------------------------------------------------------------------------------------------------------------------------------------------------------------------------------------------------------------------------------------------------------------ | --------- | -------------------------------------------------------- |
| Mabanque and its Sandbox | [AISP](https://apistore.bnpparibas/en/marketplace/AISP-Mabanque-France/10f548ff-9de3-457f-8019-bc0fe084c336/true)
[PISP](https://apistore.bnpparibas/en/marketplace/PISP-MaBanque-France/3e234ab1-651d-4f65-85a4-835d549091a9/true) | Yes | `mabanque`
`mabanque-sandbox` |
| Mabanque Corporate and its Sandbox | [AISP](https://apistore.bnpparibas/en/marketplace/AISP-MaBanqueEntreprise-France/516938ab-5cf4-4971-8777-8add5fb812b8/true)
[PISP](https://apistore.bnpparibas/en/marketplace/PISP-MaBanqueEntreprise-France/fe923655-4d98-480e-b83e-600bd80e18d9/true) | Yes | `mabanque-corporate`
`mabanque-corporate-sandbox` |
| HelloBank and its Sandbox | [AISP](https://apistore.bnpparibas/en/marketplace/AISP-Hello-bank-France/c4052e24-1f12-4fb8-84b7-1558ceaeb11a/true)
[PISP](https://apistore.bnpparibas/en/marketplace/PISP-Hello-Bank-France/fc87a099-db6c-40ca-ac88-22a76c1b8514/true) | Yes | `hellobank_fr`
`hellobank_fr-sandbox` |
## Registration Process
BNP Supports Dynamic Registration for all the above institutions, Please note that once a certificate is used for registration, it cannot be used again for performing registration again as it's not idempotent.
## Accounts and Payments Supported
### Accounts
* accounts
* balance
* transactions
* identity
### Payments
* Domestic SEPA Payments
## Onboarding ASPSP's to Yapily Application
### **LIVE & SANDBOX:**
**Precondition**: To connect to Live and Sandbox BNP supported ASPSP, whether you are accessing account information or initiating payments, your business must have the right permission to access the resource. You need valid eiDAS certificates to connect. Please refer to the respective ASPSPs link given above for more details.
Below steps need to be performed for registration until our Dashboard is integrated with V2 .
**Pre-requisites:**
* eiDAS certificates
Steps Required for registration
1. Upload the signing (QSEAL) and transport (QWAC) certificates along with the keys into Yapily's [certificate vault](https://console.yapily.com/certificates).
2. Add **Institution** from the **Live** tab to your [Yapily Console](https://console.yapily.com/applications) application.
3. Select your transport (QWAC) and signing (QSEAL) certificates from the relevant drop-downs lists
4. After entering contact email address, **Click to register** to auto-register with the bank. If registration is successful, the key and secret will be populated from the institution's response.
5. Make sure to click *Save* in order not to lose these credentials, as a further registration attempt with the same Open Banking software statement is likely to fail.
## Support
If you require technical support with certificate management, please contact [Support](/resources/support).
# BPCE
Source: https://docs.yapily.com/institution-configurations/france/BPCE
## Links
* [BPCE Portal](https://developer.bpce.fr/)
## Scopes
* Account Information 🔒
* Payment Initiation 🔒
## Supported ASPSPs
| Institution Group | Institution Sub Group | Institution Code | Institution Name | Institution ID |
| ----------------- | --------------------------- | ---------------- | ------------------------------------------- | ------------------------------------------------- |
| BPCE | Banque BCP | 12579 | Banque BCP | `banque-bcp` |
| BPCE | Banque Populaire | 10807 | B.P Bourgogne Franche Comté | `bp-bourgogne-franche-comte` |
| BPCE | Banque Populaire | 16807 | B.P Auvergne et Rhône-Alpes | `bp-auvergne-et-rhone-alpes` |
| BPCE | Banque Populaire | 10207 | B.P RIves de Paris + BICS | `bp-rlves-de-paris-bics` |
| BPCE | Banque Populaire | 18707 | B.P Val de France | `bp-val-de-france` |
| BPCE | Banque Populaire | 13507 | B.P du Nord | `bp-du-nord` |
| BPCE | Banque Populaire | 16607 | B.P Sud | `bp-sud` |
| BPCE | Banque Populaire | 10907 | B.P Aquitaine Centre Atlantique | `bp-aquitane-centre-atlantique` |
| BPCE | Banque Populaire | 10907 | CMM Littoral du Sud Ouest | `cmm-littoral-du-sud-ouest` |
| BPCE | Banque Populaire | 14707 | B.P Alsace Lorraine Champagne | `bp-alsace-lorraine-champagne` |
| BPCE | Banque Populaire | 17807 | B.P Occitane | `bp-occitane` |
| BPCE | Banque Populaire | 13807 | B.P Grand Ouest | `bp-grand-ouest` |
| BPCE | Banque Populaire | 13807 | CMM Grand Ouest | `cmm-grand-ouest` |
| BPCE | Banque Populaire | 14607 | B.P Méditerranée | `bp-mediterranee` |
| BPCE | Banque Populaire | 10548 | Banque de Savoie | `banque-de-savoie` |
| BPCE | Banque Populaire | 40978 | Banque Palatine | `banque-palatine` |
| BPCE | Caisse d'Epargne | 11315 | Caisse d'Epargne Provence Alpes Corse | `caisse-d-epargne-provence-alpes-corse` |
| BPCE | Caisse d'Epargne | 11425 | Caisse d'Epargne Normandie | `caisse-d-epargne-normandie` |
| BPCE | Caisse d'Epargne | 12135 | Caisse d'Epargne Bourgogne Franche-Comté | `caisse-d-epargne-bourgogne-franche-comte` |
| BPCE | Caisse d'Epargne | 14445 | Caisse d'Epargne Bretagne-Pays De Loire | `caisse-d-epargne-bretagne-pays-de-loire` |
| BPCE | Caisse d'Epargne | 13135 | Caisse d'Epargne Midi-Pyrénées | `caisse-d-epargne-midi-pyrenees` |
| BPCE | Caisse d'Epargne | 13335 | Caisse d'Epargne Aquitaine Poitou-Charentes | `caisse-d-epargne-aquitaine-poitou-charentes` |
| BPCE | Caisse d'Epargne | 13485 | Caisse d'Epargne Languedoc-Roussillon | `caisse-d-epargne-languedoc-roussillon` |
| BPCE | Caisse d'Epargne | 13825 | Caisse d'Epargne Rhône Alpes | `caisse-d-epargne-rhone-alpes` |
| BPCE | Caisse d'Epargne | 14265 | Caisse d'Epargne Loire Drôme Ardèche | `caisse-d-epargne-loire-drome-ardeche` |
| BPCE | Caisse d'Epargne | 14505 | Caisse d'Epargne Loire-Centre | `caisse-d-epargne-loire-centre` |
| BPCE | Caisse d'Epargne | 17515 | Caisse d'Epargne Ile De France | `caisse-d-epargne-lle-de-france` |
| BPCE | Caisse d'Epargne | 18315 | Caisse d'Epargne Côte d'Azur | `caisse-d-epargne-cote-d-azur` |
| BPCE | Caisse d'Epargne | 18715 | Caisse d'Epargne Auvergne et Limousin | `caisse-d-epargne-auvergne-et-limousin` |
| BPCE | Caisse d'Epargne | 15135 | Caisse d'Epargne Grand Est Europe | `caisse-d-epargne-grand-est-europe` |
| BPCE | Caisse d'Epargne | 16275 | Caisse d'Epargne Hauts de France | `caisse-d-epargne-hauts-de-france` |
| BPCE | Credit Cooperatif | 42559 | Crédit Coopératif | `credit-cooperatif` |
| BPCE | Natixis | 30007 | BQGTB (ex-TTS) | `natixis-global-trade-ex-trade-treasure-solution` |
| BPCE | Natixis( Wealth Management) | 18919 | WMN | `natixis-wealth-management-france` |
## Registration Process
BPCE Supports Dynamic Registration for all the above institutions, Please note that once a certificate is used for registration, it cannot be used again for performing registration(One registration per certificate).
## Accounts and Payments Supported
### Accounts
* accounts
* balance
* transactions
* identity
### Payments
* Domestic SEPA Payments
## Onboarding ASPSP's to Yapily Application
### **LIVE & SANDBOX:**
**Precondition**: To connect to Live and Sandbox BPCE supported ASPSP, whether you are accessing account information or initiating payments, your business must have the right permission to access the resource. You need valid eiDAS certificates to connect. Please refer to the respective ASPSPs link given above for more details.
Below steps need to be performed for registration until our Dashboard is integrated with V2 .
**Pre-requisites:**
* eiDAS certificates
* SSA (downloaded manually from OBIE directory)
Steps Required for registration
1. Upload the signing (QSEAL) and transport (QWAC) certificates along with the keys into Yapily's [certificate vault](https://console.yapily.com/certificates).
2. Add **Institution** from the **Live** tab to your [Yapily Console](https://console.yapily.com/applications) application.
3. Select your transport (QWAC) and signing (QSEAL) certificates from the relevant drop-downs lists
4. After entering your `SSA` token, contact email address, phone number, and name, **Click to register** to auto-register with the bank. If registration is successful, the key and secret will be populated from the institution's response.
5. Make sure to click *Save* in order not to lose these credentials, as a further registration attempt with the same Open Banking software statement is likely to fail.
## Support
If you require technical support with certificate management, please contact [Support](/resources/support)
# Boursorama
Source: https://docs.yapily.com/institution-configurations/france/Boursorama
## Links
[https://developer.boursorama.com/dsp2/api](https://developer.boursorama.com/dsp2/api)
## Scopes
* Account Information 🔒
* Payment Initiation 🔒
## Supported ASPSPs
| ASPSP | Link | Supported | Institution ID |
| -------------------------- | -------------------------------------------------------------------------------------- | --------- | ---------------------------------------- |
| Boursorama and its Sandbox | [https://developer.boursorama.com/dsp2/api](https://developer.boursorama.com/dsp2/api) | Yes | `boursorama`
`boursorama-sandbox` |
## Registration Process
Boursorama supports registration for the above institutions. See the below onboarding section.
## Accounts and Payments Supported
### Accounts
* Accounts
* Balances
* Transactions
* Identity
### Payments
* Domestic Single Payments
* Domestic Single Instant Payments
* Domestic Scheduled Payments
* Domestic Periodic Payments
## Onboarding ASPSP's to Yapily Application
### **LIVE & SANDBOX:**
**Precondition**: To connect to the Boursorama institution a registration request is needed.
**Pre-requisites for registration:**
* Valid set of eiDAS certificates (QWAC and QSEAL)
Steps Required for registration
1. Upload the signing (QSEAL) and transport (QWAC) certificates along with the keys into Yapily's [certificate vault](https://console.yapily.com/certificates).
2. Add **Institution** from the **Live** tab to your [Yapily Console](https://console.yapily.com/applications) application.
3. Select your transport (QWAC) and signing (QSEAL) certificates from the relevant drop-downs lists
4. After entering contact email address, **Click to register** to auto-register with the bank. If registration is successful, the key and secret will be populated from the institution's response.
5. Make sure to click *Save* in order not to lose these credentials, as a further registration attempt with the same Open Banking software statement is likely to fail.
## Support
If you require technical support with certificate management, please contact [Support](/resources/support)
# CIC
Source: https://docs.yapily.com/institution-configurations/france/CIC
Please also see the [Credit Mutuel](/institution-configurations/france/CreditMutuel) configuration.
## Links
* [CIC Dev Portal](https://www.cic.fr/oauth2/en/devportal/index.html)
* [TPP Registration](https://www.cic.fr/oauth2/en/devportal/oauth2-spec-v1.html)
## Scopes
* Account Information 🔒
* Payment Initiation 🔒
## Supported ASPSPs
| ASPSP | Link | Supported | Institution ID |
| ------------------- | ------------------------------------------------------------------------------------------------------------------------------------------------------------------------------------ | --------- | -------------------------- |
| CIC and its Sandbox | [https://www.cic.fr/oauth2/en/devportal/stetpsd2-spec-v2.1.html#/PISP/paymentRequestsPost](https://www.cic.fr/oauth2/en/devportal/stetpsd2-spec-v2.1.html#/PISP/paymentRequestsPost) | Yes | `cic`
`cic-sandbox` |
## Registration Process
CIC Supports Dynamic Registration for all the above institutions, Please note that once a certificate is used for registration, it cannot be used again for performing registration again as it's not idempotent (One registration per certificate).
## Accounts and Payments Supported
### Accounts
* accounts
* balance
* transactions
* identity
### Payments
* Domestic SEPA Payments
* Periodic Payments
* Monthly
* EveryTwoMonths
* Quarterly
* SemiAnnual
* Annual
## Onboarding ASPSP's to Yapily Application
### **LIVE & SANDBOX:**
**Precondition**: To connect to Live and Sandbox CIC supported ASPSP, whether you are accessing account information or initiating payments, your business must have the right permission to access the resource. You need valid eiDAS certificates to connect. Please refer to the respective ASPSPs link given above for more details.
**Pre-requisites:**
* eiDAS certificates
Steps Required for registration
1. Upload the signing (QSEAL) and transport (QWAC) certificates along with the keys into Yapily's [certificate vault](https://console.yapily.com/certificates).
2. Add **Institution** from the **Live** tab to your [Yapily Console](https://console.yapily.com/applications) application.
3. Select your transport (QWAC) and signing (QSEAL) certificates from the relevant drop-downs lists
4. After entering your contact email address, **Click to register** to auto-register with the bank. If registration is successful, the key and secret will be populated from the institution's response.
5. Make sure to click *Save* in order not to lose these credentials, as a further registration attempt with the same Open Banking software statement is likely to fail.
## Support
If you require technical support with certificate management, please contact [Support](/resources/support)
# Credit Du Nord
Source: https://docs.yapily.com/institution-configurations/france/Credit-Du-Nord
## Links
* [Credit Du Nord Developer Portal](https://developer.groupe-credit-du-nord.com/en/sb)
* Support email : [support-api-groupe-sg.fr@socgen.com](mailto:support-api-groupe-sg.fr@socgen.com)
## Scopes
* Account Information 🔒
* Payment Initiation 🔒
## Supported ASPSPs
| ASPSP | Link | Supported | Institution ID |
| --------------------------------------- | -------------------------------------------------------------------------------------------------------------------------------------------------------------------------------------------------------------- | --------- | -------------------------------------------------------------------------------- |
| Courtois Bank and its Sandbox | [AIS](https://developer.groupe-credit-du-nord.com/en/sb/api/psd2-aspsp-services-for-aisp:1.4.2.17.9)
[PIS](https://developer.groupe-credit-du-nord.com/en/sb/api/psd2-aspsp-services-for-pisp:1.4.2.17.4) | Yes | `courtois`
`courtois-sandbox` |
| Kolb Bank and its sandbox | [AIS](https://developer.groupe-credit-du-nord.com/en/sb/api/psd2-aspsp-services-for-aisp:1.4.2.17.9)
[PIS](https://developer.groupe-credit-du-nord.com/en/sb/api/psd2-aspsp-services-for-pisp:1.4.2.17.4) | Yes | `kolb`
`kolb-sandbox` |
| Nuger Bank and its sandbox | [AIS](https://developer.groupe-credit-du-nord.com/en/sb/api/psd2-aspsp-services-for-aisp:1.4.2.17.9)
[PIS](https://developer.groupe-credit-du-nord.com/en/sb/api/psd2-aspsp-services-for-pisp:1.4.2.17.4) | Yes | `nuger`
`nuger-sandbox` |
| Credit Du Nord and its sandbox | [AIS](https://developer.groupe-credit-du-nord.com/en/sb/api/psd2-aspsp-services-for-aisp:1.4.2.17.9)
[PIS](https://developer.groupe-credit-du-nord.com/en/sb/api/psd2-aspsp-services-for-pisp:1.4.2.17.4) | Yes | `credit-du-nord`
`credit-du-nord-sandbox` |
| Bank Laydernier and its sandbox | [AIS](https://developer.groupe-credit-du-nord.com/en/sb/api/psd2-aspsp-services-for-aisp:1.4.2.17.9)
[PIS](https://developer.groupe-credit-du-nord.com/en/sb/api/psd2-aspsp-services-for-pisp:1.4.2.17.4) | Yes | `laydernier`
`laydernier-sandbox` |
| Monaco Bank Corporation and its Sandbox | [AIS](https://developer.groupe-credit-du-nord.com/en/sb/api/psd2-aspsp-services-for-aisp:1.4.2.17.9)
[PIS](https://developer.groupe-credit-du-nord.com/en/sb/api/psd2-aspsp-services-for-pisp:1.4.2.17.4) | Yes | `societe-de-banque-monaco`
`societe-de-banque-monaco-sandbox` |
| Rhone Alpes and its sandbox | [AIS](https://developer.groupe-credit-du-nord.com/en/sb/api/psd2-aspsp-services-for-aisp:1.4.2.17.9)
[PIS](https://developer.groupe-credit-du-nord.com/en/sb/api/psd2-aspsp-services-for-pisp:1.4.2.17.4) | Yes | `rhone-alpes`
`rhone-alpes-sandbox` |
| Tarneaud Bank | [AIS](https://developer.groupe-credit-du-nord.com/en/sb/api/psd2-aspsp-services-for-aisp:1.4.2.17.9)
[PIS](https://developer.groupe-credit-du-nord.com/en/sb/api/psd2-aspsp-services-for-pisp:1.4.2.17.4) | Yes | `tarneaud`
`tarneaud-sandbox` |
| Marseille Credit Company | [AIS](https://developer.groupe-credit-du-nord.com/en/sb/api/psd2-aspsp-services-for-aisp:1.4.2.17.9)
[PIS](https://developer.groupe-credit-du-nord.com/en/sb/api/psd2-aspsp-services-for-pisp:1.4.2.17.4) | Yes | `societe-marseillaise-de-credit`
`societe-marseillaise-de-credit-sandbox` |
## Registration Process
Credit Du Nord Supports only manual Registration for all the above institutions
* Create an account on [https://developer.groupe-credit-du-nord.com/en/sb](https://developer.groupe-credit-du-nord.com/en/sb) by navigating to Sign up
* Once the account is activated(you will receive an email from the institution), create a new customer organization
* Once your new live catalog consumer organization is created and active, you can create a new application for access to the Credit Du Nord API and generate client-id and client-secret
* After creating a new application with the relevant redirect URIs, PEM file of transport QWAC certificate and other required details you can now subscribe to the APIs
* AISP: [https://developer.groupe-credit-du-nord.com/en/sb/api/psd2-aspsp-services-for-aisp:1.4.2.17.9](https://developer.groupe-credit-du-nord.com/en/sb/api/psd2-aspsp-services-for-aisp:1.4.2.17.9)
* PISP: [https://developer.groupe-credit-du-nord.com/en/sb/api/psd2-aspsp-services-for-pisp:1.4.2.17.4](https://developer.groupe-credit-du-nord.com/en/sb/api/psd2-aspsp-services-for-pisp:1.4.2.17.4)
## Accounts and Payments Supported
### Accounts
* accounts
* balance
* transactions
* identity
* beneficiaries
### Payments
* Domestic SEPA Payments
## Onboarding ASPSP's to Yapily Application
### **LIVE & SANDBOX:**
**Precondition**: To connect to Live and Sandbox Credit Du Nord supported ASPSP, whether you are accessing account information or initiating payments, your business must have the right permission to access the resource. You need valid eiDAS certificates to connect. Please refer to the respective ASPSPs link given above for more details.
Below steps need to be performed for registration until our Dashboard is integrated with V2 .
**Pre-requisites:**
* eiDAS certificates
Steps Required for registration
1. Upload your eiDAS certificates (QWAC and QSEAL) into Yapily's [certificate vault](https://console.yapily.com/certificates).
2. Add **Institution** from the **Live** tab to your [Yapily Console](https://console.yapily.com/applications) application.
3. Add this institution into your app from the **Live** tab and configure the institution by adding `Client Uri` and `Terms of Service Uri`& selecting the `certificates`from the dropdown.
4. Select your `QSEAL`and `QWAC`certificates from the relevant drop-downs lists then click **Next**.
5. Add `client Id`and `secret` which you have received after registering your eiDAS certificates with *Credit Du Nord Group* portal.
6. Make sure to click **Save** in order not to lose these credentials.
## Support
If you require technical support with certificate management, please contact [Support](/resources/support)
# Credit Lyonnais
Source: https://docs.yapily.com/institution-configurations/france/Credit-Lyonnais
## Links
* [Credit Lyonnais Developer Portal](https://developer.lcl.fr/get-started)
* Support email : [contact-api-dsp2@lcl.fr](mailto:contact-api-dsp2@lcl.fr)
## Scopes
* Account Information 🔒
* Payment Initiation 🔒
## Supported ASPSPs
| ASPSP | Link | Supported | Institution ID |
| ----------------------- | -------------------------------------------------------------------------- | --------- | ------------------------ |
| Credit Lyonnais | [https://psd.lcl.fr/aisp/1.1](https://psd.lcl.fr/aisp/1.1) | Yes | `creditlyonnais` |
| Credit Lyonnais Sandbox | [https://sandbox-psd.lcl.fr/aisp/1.1](https://sandbox-psd.lcl.fr/aisp/1.1) | Yes | `creditlyonnais-sandbox` |
## Registration Process
Credit Lyonnais Dynamic Registration for all the above institutions, Please note that once a certificate is used for registration, it cannot be used again for performing registration again as it's not idempotent (One registration per certificate).
## Accounts and Payments Supported
### Accounts
* accounts
* account
* transactions
* identity
### Payments
* Domestic SEPA Payments
* Domestic Instant Payments
* International Single Payments
## Sandbox Credentials
User Identity : Loïc LEBRETON
Login ID : 1234500001
Login password : 000000
SCA Télephone Number : The box will be pre-populated with a number - use it. (06 XX XX XX 01)
SCA OTP Code (SMS Code) : 00 00 00
## Onboarding ASPSP's to Yapily Application
### **LIVE & SANDBOX:**
**Precondition**: To connect to Live and Sandbox Credit Lyonnais supported ASPSP, whether you are accessing account information or initiating payments, your business must have the right permission to access the resource. You need valid eiDAS certificates to connect. Please refer to the respective ASPSPs link given above for more details.
Below steps need to be performed for registration until our Dashboard is integrated with V2 .
**Pre-requisites:**
* eiDAS certificates
Steps Required for registration
1. Upload the signing (QSEAL) and transport (QWAC) certificates along with the keys into Yapily's [certificate vault](https://console.yapily.com/certificates).
2. Add **Institution** from the **Live** tab to your [Yapily Console](https://console.yapily.com/applications) application.
3. Select your transport (QWAC) and signing (QSEAL) certificates from the relevant drop-downs lists
4. After entering your client id, **Click to register** to auto-register with the bank. If registration is successful, the key and secret will be populated from the institution's response.
5. Make sure to click *Save* in order not to lose these credentials, as a further registration attempt with the same Open Banking software statement is likely to fail.
## Support
If you require technical support with certificate management, please contact [Support](/resources/support)
# Credit Lyonnais Business
Source: https://docs.yapily.com/institution-configurations/france/Credit-Lyonnais-Business
## Links
* [Credit Lyonnais Developer Portal](https://developer.lcl.fr/get-started)
* Support email : [contact-api-dsp2@lcl.fr](mailto:contact-api-dsp2@lcl.fr)
## Scopes
* Account Information 🔒
* Payment Initiation 🔒
## Supported ASPSPs
| ASPSP | Link | Supported | Institution ID |
| -------------------------------- | -------------------------------------------------------------------------------- | --------- | --------------------------------- |
| Credit Lyonnais Business | [https://psd.lcl.fr/aisp/proent/1.0](https://psd.lcl.fr/aisp/proent/1.0) | Yes | `creditlyonnais-business` |
| Credit Lyonnais Business Sandbox | [https://sandbox-psd.lcl.fr/aisp/proent](https://sandbox-psd.lcl.fr/aisp/proent) | Yes | `creditlyonnais-business-sandbox` |
## Registration Process
Credit Lyonnais Business Dynamic Registration for all the above institutions, Please note that once a certificate is used for registration, it cannot be used again for performing registration again as it's not idempotent (One registration per certificate).
## Accounts and Payments Supported
### Accounts
* accounts
* account
* transactions
* identity
### Payments
* Domestic SEPA Payments
* Domestic Instant Payments
* International Single Payments
## Sandbox Credentials
User Identity : Marcelo AMADINNI
Login ID : MAMADI0001
Login password : 000000
SCA Télephone Number : Click on the Phone icon - that's all you need to do.
## Onboarding ASPSP's to Yapily Application
### **LIVE & SANDBOX:**
**Precondition**: To connect to Live and Sandbox Credit Lyonnais supported ASPSP, whether you are accessing account information or initiating payments, your business must have the right permission to access the resource. You need valid eiDAS certificates to connect. Please refer to the respective ASPSPs link given above for more details.
Below steps need to be performed for registration until our Dashboard is integrated with V2 .
**Pre-requisites:**
* eiDAS certificates
Steps Required for registration
1. Upload the signing (QSEAL) and transport (QWAC) certificates along with the keys into Yapily's [certificate vault](https://console.yapily.com/certificates).
2. Add **Institution** from the **Live** tab to your [Yapily Console](https://console.yapily.com/applications) application.
3. Select your transport (QWAC) and signing (QSEAL) certificates from the relevant drop-downs lists
4. After entering your client id, **Click to register** to auto-register with the bank. If registration is successful, the key and secret will be populated from the institution's response.
5. Make sure to click *Save* in order not to lose these credentials, as a further registration attempt with the same Open Banking software statement is likely to fail.
## Support
If you require technical support with certificate management, please contact [Support](/resources/support)
# Credit Agricole
Source: https://docs.yapily.com/institution-configurations/france/CreditAgricole
Read this page for information on how to register with Credit Agricole in your Yapily Application.
## Links
* [Credit Agricole Developer Portal](https://developer.credit-agricole.fr/store/)
## Scopes
* Account Information 🔒
* Payment Initiation 🔒
## Supported ASPSPs
The following institutions are supported as part of Credit Agricole bank:
| ASPSP | Institution ID |
| --------------------------------------------- | ----------------------- |
| Crédit Agricole | `credit_agricole_paris` |
| Crédit Agricole Alpes Provence | `ca_alpesprovence` |
| Crédit Agricole Alsace Vosges | `ca_alsace_vosges` |
| Crédit Agricole Atlantique Vendée | `ca_atlantique_vendee` |
| Crédit Agricole Brie Picardie | `ca_briepicardie` |
| Crédit Agricole Champagne-Bourgogne | `ca_cb` |
| Crédit Agricole Charente Périgord | `ca_charente_perigord` |
| Crédit Agricole Charente-Maritime Deux-Sèvres | `ca_cmds` |
| Crédit Agricole Nord Midi-Pyrénées | `ca_nmp` |
| Crédit Agricole du Nord Est | `ca_nord_est` |
| Crédit Agricole de Nord De France | `ca_norddefrance` |
| Crédit Agricole de Normandie | `ca_normandie` |
| Crédit Agricole de Normandie-Seine | `ca_normandie_seine` |
| Crédit Agricole de Provence Côtes d'Azur | `ca_pca` |
| Crédit Agricole Pyrénées Gascogne | `ca_pyrenees_gascogne` |
| Crédit Agricole de la Réunion | `ca_reunion ` |
| Crédit Agricole Sud Méditerranée | `ca_sudmed` |
| Crédit Agricole Sud Rhône-Alpes | `ca_sudrhonealpes` |
| Crédit Agricole Toulouse31 | `ca_toulouse31` |
| Crédit Agricole de la Touraine et du Poitou | `ca_tourainepoitou` |
| Crédit Agricole Val De France | `ca_valdefrance` |
## Registration Process
Credit Agricole supports Dynamic Client Registration (DCR).
### Live environment
Follow the instructions below to connect the required institutions to your Yapily Application.
**Prerequisites:** You must have an accreditation from ACPR or any other European Union banking authority, and you must own an eIDAS certificate delivered by a trusted authority.
**Steps:**
1. Upload your eiDAS certificates (QWAC and QSEAL) to Yapily's [certificate vault](https://console.yapily.com/certificates).
2. Add `credit_agricole_paris` institution from the **Live** tab to your [Yapily application](https://console.yapily.com/applications).
3. Select your `QSEAL` and `QWAC` certificates from the relevant dropdown lists then click **Next**.
4. Click on **Register** which dynamically registers with the bank and retrieves the response including the `ClientID`.
You will be able to share your registration between each institution via manual registration, so it is not necessary to perform multiple DCR requests.
## Update signing certificate
1. Open your application and navigate to registration.
2. Change/update the certificate details as required.
3. A re-register button will appear (see screenshot below) - this will allow you to update the certificate details and retain your `ClientID`.
![]() ## Accounts and Payments Supported
### Accounts
* Account
* Accounts
* Account Balance
* Account Transactions
* Identity
### Payments
* Domestic single payments
* Bulk payments
## Support
If you require technical support with certificate management, please contact [Support](/resources/support).
# CreditMutuel
Source: https://docs.yapily.com/institution-configurations/france/CreditMutuel
## Links
* [Credit Mutuel Portal](https://www.creditmutuel.fr/oauth2/en/devportal/index.html)
* [TPP Registration](https://www.creditmutuel.fr/oauth2/en/devportal/oauth2-spec-v1.html)
## Scopes
* Account Information 🔒
* Payment Initiation 🔒
## Supported ASPSPs
| ASPSP | Link | Supported | Institution ID |
| ---------------------------- | ------------------------------------------------------------------------------------------------------------------------------------------------------------------------------------------------------ | --------- | ---------------------------------------- |
| CreditMutuel and its Sandbox | [https://www.creditmutuel.fr/oauth2/en/devportal/stetpsd2-spec-v1.1.html#/PISP/paymentRequestsPost](https://www.creditmutuel.fr/oauth2/en/devportal/stetpsd2-spec-v1.1.html#/PISP/paymentRequestsPost) | Yes | `creditmutuel`
## Accounts and Payments Supported
### Accounts
* Account
* Accounts
* Account Balance
* Account Transactions
* Identity
### Payments
* Domestic single payments
* Bulk payments
## Support
If you require technical support with certificate management, please contact [Support](/resources/support).
# CreditMutuel
Source: https://docs.yapily.com/institution-configurations/france/CreditMutuel
## Links
* [Credit Mutuel Portal](https://www.creditmutuel.fr/oauth2/en/devportal/index.html)
* [TPP Registration](https://www.creditmutuel.fr/oauth2/en/devportal/oauth2-spec-v1.html)
## Scopes
* Account Information 🔒
* Payment Initiation 🔒
## Supported ASPSPs
| ASPSP | Link | Supported | Institution ID |
| ---------------------------- | ------------------------------------------------------------------------------------------------------------------------------------------------------------------------------------------------------ | --------- | ---------------------------------------- |
| CreditMutuel and its Sandbox | [https://www.creditmutuel.fr/oauth2/en/devportal/stetpsd2-spec-v1.1.html#/PISP/paymentRequestsPost](https://www.creditmutuel.fr/oauth2/en/devportal/stetpsd2-spec-v1.1.html#/PISP/paymentRequestsPost) | Yes | `creditmutuel`
`credmutuel-sandbox` |
## Registration Process
Credit Mutuel Supports Dynamic Registration for all the above institutions, Please note that once a certificate is used for registration, it cannot be used again for performing registration again as it's not idempotent (One registration per certificate).
## Accounts and Payments Supported
### Accounts
* accounts
* balance
* transactions
* identity
### Payments
* Domestic SEPA Payments
* Periodic Payments
* Monthly
* EveryTwoMonths
* Quarterly
* SemiAnnual
* Annual
## Onboarding ASPSP's to Yapily Application
### **LIVE & SANDBOX:**
**Precondition**: To connect to Live and Sandbox Credit Mutuel supported ASPSP, whether you are accessing account information or initiating payments, your business must have the right permission to access the resource. You need valid eiDAS certificates to connect. Please refer to the respective ASPSPs link given above for more details.
Below steps need to be performed for registration until our Dashboard is integrated with V2 .
**Pre-requisites:**
* eiDAS certificates
Steps Required for registration
1. Upload the signing (QSEAL) and transport (QWAC) certificates along with the keys into Yapily's [certificate vault](https://console.yapily.com/certificates).
2. Add **Institution** from the **Live** tab to your [Yapily Console](https://console.yapily.com/applications) application.
3. Select your transport (QWAC) and signing (QSEAL) certificates from the relevant drop-downs lists
4. After entering your contact email address, **Click to register** to auto-register with the bank. If registration is successful, the key and secret will be populated from the institution's response.
5. Make sure to click *Save* in order not to lose these credentials, as a further registration attempt with the same Open Banking software statement is likely to fail.
## Support
If you require technical support with certificate management, please contact [Support](/resources/support)
# LabanquePostale
Source: https://docs.yapily.com/institution-configurations/france/LabanquePostale
## Links
* [LabanquePostale Developer Portal](https://developer.labanquepostale.com)
## Scopes
* Account Information 🔒
* Payment Initiation 🔒
## Supported ASPSPs
| ASPSP | Link | Supported | Institution ID |
| ------------------------------- | ------------------------------------------------------------------------------------------------------------------------------------------------- | --------- | ------------------------------------------------- |
| LabanquePostale and its Sandbox | [https://developer.labanquepostale.com/product](https://developer.labanquepostale.com/product) (Please create a login to view the APIs available) | Yes | `labanquepostale`
`labanquepostale-sandbox` |
## Registration Process
LabanquePostale Supports Dynamic Registration for all the above institutions, Please note that once a certificate is used for registration, it cannot be used again for performing registration again as it's not idempotent (One registration per certificate). Please note that LabanquePostale requires the developer portal user id and password to be used for DCR and this functionality is not yet available in Yapily API. Hence this can be performed manually using a postman collection. Kindly get in touch with us to assist with the registration
## Accounts and Payments Supported
### Accounts
* accounts
* balance
* transactions
* identity
### Payments
* Domestic Instant SEPA Payments
## Onboarding ASPSP's to Yapily Application
### **LIVE & SANDBOX:**
**Precondition**: To connect to Live and Sandbox Labanque Postale supported ASPSP, whether you are accessing account information or initiating payments, your business must have the right permission to access the resource. You need valid eiDAS certificates to connect. Please refer to the respective ASPSPs link given above for more details.
Below steps need to be performed for registration until our Dashboard is integrated with V2 .
**Pre-requisites:**
* eiDAS certificates
Steps Required for registration
1. Upload the signing (QSEAL) and transport (QWAC) certificates along with the keys into Yapily's [certificate vault](https://console.yapily.com/certificates).
2. Add **Institution** from the **Live** tab to your [Yapily Console](https://console.yapily.com/applications) application.
3. Select your transport (QWAC) and signing (QSEAL) certificates from the relevant drop-downs lists
4. After entering your client id, **Click to register** to auto-register with the bank. If registration is successful, the key and secret will be populated from the institution's response.
5. Make sure to click *Save* in order not to lose these credentials, as a further registration attempt with the same Open Banking software statement is likely to fail.
## Support
If you require technical support with certificate management, please contact [Support](/resources/support)
# Qonto
Source: https://docs.yapily.com/institution-configurations/france/Qonto
## Links
[https://api-doc.qonto.com/](https://api-doc.qonto.com/)
## Scopes
* Account Information 🔒
## Supported ASPSPs
| ASPSP | Link | Supported | Institution ID |
| ----- | -------------------------------------------------------- | --------- | -------------- |
| Qonto | [https://api-doc.qonto.com/](https://api-doc.qonto.com/) | Yes | `qonto` |
## Registration Process
Qonto only supports manual registration. See the below onboarding section.
## Accounts Supported
### Accounts
* accounts
* balance
* transactions
## Onboarding ASPSP's to Yapily Application
### **LIVE:**
**Precondition**: To connect to the Qonto institution manual registration is needed.
**Pre-requisites for registration:**
* Valid set of eiDAS certificates (QWAC and QSEAL)
Steps Required for registration
1. Upload your eiDAS certificates (QWAC and QSEAL) into Yapily's [certificate vault](https://console.yapily.com/certificates).
2. Add **Institution** from the **Live** tab to your [Yapily Console](https://console.yapily.com/applications) application.
3. Add this institution into your app from the **Live** tab and configure the institution by adding `Client Uri` and `Terms of Service Uri`& selecting the `certificates`from the dropdown.
4. Select your `QSEAL`and `QWAC`certificates from the relevant drop-downs lists then click **Next**.
5. Add `client Id`and `secret` which you have received after registering your eiDAS certificates.
6. Make sure to click **Save** in order not to lose these credentials.
## Support
If you require technical support with certificate management, please contact [Support](/resources/support)
# SocieteGenerale
Source: https://docs.yapily.com/institution-configurations/france/SocieteGenerale
## Links
* Societe Generale Developer Portal
## Scopes
* Account Information 🔒
* Payment Initiation 🔒
## Supported ASPSPs
| ASPSP | Link | Supported | Institution ID |
| --------------------------------------------------------- | -------------------------------------------------------------------------------------------------------------------------------------------------------------------------- | --------- | ---------------------------------------------------- |
| Societe General Personal and its Sandbox | [AIS](https://developer.societegenerale.fr/en/live/api/accounts-pri:1.4.2.17.3)
[PIS](https://developer.societegenerale.fr/en/live/api/payment-requests-pri:1.4.2.27) | Yes | `soc-gen-personal`
`soc-gen-personal-sandbox` |
| Societe Generale Professional ( Business) and its sandbox | [AIS](https://developer.societegenerale.fr/en/live/api/accounts-pro:1.4.2.4.7)
[PIS](https://developer.societegenerale.fr/en/live/api/payment-requests-pro:1.4.2.27) | Yes | `soc-gen-business`
`soc-gen-business-sandbox` |
| Societe Generale Enterprise ( Corporate ) and its sandbox | [AIS](https://developer.societegenerale.fr/en/live/api/accounts-ent:1.4.2.4.8)
[PIS](https://developer.societegenerale.fr/en/live/api/payment-requests-ent:1.4.2.27) | Yes | `soc-gen-corporate`
`soc-gen-corporate-sandbox` |
### Sandbox SCA Login
| User | Pass | Scope |
| -------------- | ------------ | ----- |
| User: 55000002 | pass: 111111 | AIS |
| User: 55000001 | pass: 111111 | PIS |
## Registration Process
Soc Gen Supports only manual Registration for all the above institutions
* Create an account on [https://sg-signin.societegenerale.fr/#/auth/sign-up](https://sg-signin.societegenerale.fr/#/auth/sign-up)
* Once the account is activated(you will receive an email from the institution), create a new customer organization ([https://developer.societegenerale.fr/en/sb/new\_co](https://developer.societegenerale.fr/en/sb/new_co))
* You can only create a customer organization using this link/method on the Sandbox Catalog
* To create a new customer organization on the live catalog, email your eIDAS QWAC to [support-api-groupe-sg.fr@socgen.com](mailto:support-api-groupe-sg.fr@socgen.com) along with a contact email address and organization agreement number (PSDXX-XXXX-XXXXX)
* Once your new live catalog consumer organization is created and active, you can create a new application for access to the Societe Generale API and generate client-id and client-secret
* After creating a new application with the relevant redirect URIs and other required details you can now subscribe to the APIs
* AISP: [https://developer.societegenerale.fr/en/sb/prod/api-aisp:1.1.5](https://developer.societegenerale.fr/en/sb/prod/api-aisp:1.1.5)
* PISP: [https://developer.societegenerale.fr/en/sb/prod/api-pisp:1.1.5](https://developer.societegenerale.fr/en/sb/prod/api-aisp:1.1.5)
## Accounts and Payments Supported
### Accounts
* accounts
* balance
* transactions
* identity
### Payments
* Domestic SEPA Payments
## Key Points to Note
1. Societe Generale access tokens for AIS are all valid for 30 mins (applies to personal, professional, and enterprise accounts)
2. For the personal account AIS, the refresh token is valid for 90 days - also every time you refresh the access token, a new refresh token is generated
3. For enterprise accounts they don't currently support refresh token at all - hence the consent is only valid for as long as the access token (30 mins)
4. For enterprise accounts, they are working on a solution that will provide refresh token but with a validity of 24 hours (same as BNP enterprise)
5. When implemented, each enterprise refresh token will only provide 4 access tokens - therefore only 2 hours access per 24 hours split into 30 minute chunks
## Onboarding ASPSP's to Yapily Application
### **LIVE & SANDBOX:**
**Precondition**: To connect to Live and Sandbox Credit Mutuel supported ASPSP, whether you are accessing account information or initiating payments, your business must have the right permission to access the resource. You need valid eiDAS certificates to connect. Please refer to the respective ASPSPs link given above for more details.
Below steps need to be performed for registration until our Dashboard is integrated with V2 .
**Pre-requisites:**
* eiDAS certificates
Steps Required for registration
1. Upload your eiDAS certificates (QWAC and QSEAL) into Yapily's [certificate vault](https://console.yapily.com/certificates).
2. Add **Institution** from the **Live** tab to your [Yapily Console](https://console.yapily.com/applications) application.
3. Add this institution into your app from the **Live** tab and configure the institution by adding `Client Uri` and `Terms of Service Uri`& selecting the `certificates`from the dropdown.
4. Select your `QSEAL`and `QWAC`certificates from the relevant drop-downs lists then click **Next**.
5. Add `client Id`and `secret` which you have received after registering your eiDAS certificates.
6. Make sure to click **Save** in order not to lose these credentials.
## Support
If you require technical support with certificate management, please contact [Support](/resources/support)
# Bank fur Sozialwirtschaft
Source: https://docs.yapily.com/institution-configurations/germany/Bank-fur-Sozialwirtschaft
## Links
* [Developer Portal](https://developers.sozialbank.de/#/apis/22/136)
## Scopes
* AIS
* PIS
## Sandbox Environment
1. Upload your eiDAS certificates (QWAC and QSEAL) into Yapily's [certificate vault](https://console.yapily.com/certificates).
2. Add **Sozialwirtschaft Sandbox** from the **Sandbox** tab to your [Yapily Console](https://console.yapily.com/applications) application.
3. Add this institution into your app from the `Sandbox` tab and configure the institution by selecting the `certificates` from the dropdown.
4. Select your `QSEAL` and `QWAC` certificates from the relevant drop-downs lists then click *Save registration* to save the certificates.
See [accessing the APIs](https://developers.sozialbank.de/#/apis/22/136#accessing-the-ap-is) for sandbox login details.
## Live Environment
1. Upload your eiDAS certificates (QWAC and QSEAL) into Yapily's [certificate vault](https://console.yapily.com/certificates).
2. Add **Sozialwirtschaft** from the **Live** tab to your [Yapily Console](https://console.yapily.com/applications) application.
3. Add this institution into your app from the `Live` tab and configure the institution by selecting the `certificates` from the dropdown.
4. Select your `QSEAL` and `QWAC` certificates from the relevant drop-downs lists then click *Save registration* to save the certificates.
## Registration
Sozialwirtschaft requires *manual registration*, which does not require a Client ID or Secret. Only a `signingKeyId` and `transportKeyId` are required.
## Account Information Service
### Supported Features
* Account
* Accounts
* Account Transactions
* Account Balances
* Account Request Details
### Transactions
In the **sandbox**, in the banks response, not all transactions are given a `bookingDate`. To account for this, for transactions that do not have the `bookingDate` field, we are adding the current date (which is mapped to `bookingDateTime` in our API response).
In the **sandbox**, transactions are not filtered correctly when provided with the `from=` query parameters. Transactions before the supplied date will be in the response. This is an issue on the banks side.
## Payment Information Service
### Supported Features
* Domestic Single Payment
* International Single Payment
* Payment Request Details
## Support
If you require technical support with certificate management, please contact [Support](/resources/support).
# C24
Source: https://docs.yapily.com/institution-configurations/germany/C24
## Links
* [C24 Developer Portal](https://aws01-xs2a-live.finapi.io/api-docs/index.html#overview)
## Scopes
* Account Information
* Payment Initiation
## Supported Accounts and Payments Features
### Accounts
* Accounts
* Balance
* Transactions
### Payments
* Domestic SEPA Payments
* Domestic SEPA Instant Payments
## C24 Live Environment
**Precondition**: To connect to C24, whether you are accessing account information or initiating payments, your business must have the right permission to access the resource. You need valid eiDAS certificates to connect to the environment.
1. Upload your eiDAS certificates (QWAC and QSEAL) into Yapily's [certificate vault](https://console.yapily.com/certificates).
2. Add **C24** from the **Live** tab to your [Yapily Console](https://console.yapily.com/applications) application.
3. Add this institution into your app from the **Live** tab and configure the institution by selecting the certificates from the dropdown.
4. Select your **QSEAL** and **QWAC** certificates from the relevant drop-down lists, then click **Save** to save the certificates.
## Support
If you require technical support with certificate management, please contact [Support](/resources/support).
# Commerzbank AG
Source: https://docs.yapily.com/institution-configurations/germany/Commerzbank-AG
## Links
* [CommerzBank Developer Portal](https://psd2.developer.commerzbank.com/howto)
## Scopes
* Account Information 🔒
* Payment Initiation 🔒
## Sandbox Environment
**Precondition**: To connect to CommerzBank Sandbox. You need a valid eiDAS certificates to connect to CommerzBank AG `Sandbox` environment. Please refer [CommerzBank technical information](https://developer.commerzbank.com/psd2) section for more details.
1. Upload your eiDAS certificates (QWAC and QSEAL) into Yapily's [certificate vault](https://console.yapily.com/certificates).
2. Add **CommerzBank AG Sandbox** from the **Sanbox** tab to your [Yapily Console](https://console.yapily.com/applications) application.
3. Add this institution into your app from the `Sandbox` tab and configure the institution by selecting the `certificates` from the dropdown.
4. Select your `QSEAL` and `QWAC` certificates from the relevant drop-downs lists then click *Save registration* to save the certificates.
Once you get the authorisation URL for **AIS** or **PIS**:
1. On the SCA screen, click on the `SCA_OK` button to generate a consent token for a valid authorisation
2. Then click on **close** to get the Yapily consent token
If you have any concerns, you can also check the [Implementation Sandbox Guide](https://psd2.developer.commerzbank.com/content/howto/specific-implementation).
**Note:** Domestic, Periodic, and International Payments are available.
## Commerzbank AG Live Environment
**Precondition**: To connect to CommerzBank AG. Also, you need a valid eiDAS certificates to connect to CommerzBank AG `Live` environment. Please refer [CommerzBank technical information](https://developer.commerzbank.com/psd2) section for more details.
1. Upload your eiDAS certificates (QWAC and QSEAL) into Yapily's [certificate vault](https://console.yapily.com/certificates).
2. Add **CommerzBank AG Live** from the **Live** tab to your [Yapily Console](https://console.yapily.com/applications) application.
3. Add this institution into your app from the `Live` tab and configure the institution by selecting the `certificates` from the dropdown.
4. Select your `QSEAL` and `QWAC` certificates from the relevant drop-downs lists then click *Save registration* to save the certificates.
**Important:** In the consent creation request, after the successful login, in the last screen, you have to click on the yellow button `Close` or similar text (Device OTP auth could be requested).
**Note:** Domestic, Periodic, and International Payments are available. International Payments, the Payee supports IBAN or BBAN. The BIC must be specified also e.g:
```json theme={null}
"accountIdentifications": [
{
"type": "IBAN",
"identification": "{{IBAN}}"
},
{
"type": "BIC",
"identification": "{{BIC}}"
}
]
```
**Transactions Older than 90 days**: You need to create a specific consent for that. In the `POST /account-auth-requests` body JSON you have to specify the `transactionFrom` date older than 90 days e.g.
```json theme={null}
{
"applicationUserId": "25bcc520-f2a6-7f1f-eced-4c228d66134a",
"accountRequest": {
"transactionFrom" : "2017-03-01T00:00Z"
}
}
```
**This is a commerzbank one-time-consent. So, one-time means that you can access just once chance per day.** More info: [CommerzBank Faq](https://developer.commerzbank.com/psd2#faq)
## Support
If you require technical support with certificate management, please contact [Support](/resources/support).
# Consors Bank
Source: https://docs.yapily.com/institution-configurations/germany/Consors-Bank
## Links
* [Developer Portal](https://www.consorsbank.de/ev/Service-Beratung/xs2a)
## Scopes
* Account Information 🔒
* Payment Initiation 🔒
## Consors Bank (BNP Paribas Wealth Management - Private Banking) - Live Environment
**Precondition**: To connect to Consors Bank. Also, you need a valid eiDAS certificates to connect to Consors Bank `Live` environment. Please refer [Consors Bank technical information](https://www.consorsbank.de/ev/Service-Beratung/xs2a#2) section for more details.
1. Upload your eiDAS certificates (QWAC and QSEAL) into Yapily's [certificate vault](https://console.yapily.com/certificates).
2. Add **Consors Bank Live** from the **Live** tab to your [Yapily Console](https://console.yapily.com/applications) application.
3. Add this institution into your app from the `Live` tab and configure the institution by selecting the `certificates` from the dropdown.
4. Select your `QSEAL` and `QWAC` certificates from the relevant drop-downs lists then click *Save registration* to save the certificates.
**Note:** Domestic Payments and Domestic Periodic Payments are available. Domestic Instant Payments, International Payments, and Bulk Payments are NOT available.
## DAB Bank - Live Environment
Coming soon...
## Support
If you require technical support with certificate management, please contact [Support](/resources/support).
# DKB
Source: https://docs.yapily.com/institution-configurations/germany/DKB
## Links
* [DKB Developer Portal](https://api.dkb.de/store/site/pages/list-apis.jag)
## Scopes
* Account Information 🔒
* Payment Initiation 🔒
## DKB Live Environment
**Precondition**: To connect to DKB. Also, you need a valid eiDAS certificates to connect to DKB.
DKB Dashboard:
1. Select **APPLICATIONS** from the menu
2. Select **create new application** or use the default one.
Take note of the 'Production Keys':
* `Consumer Key`
* `Consumer Secret`
3. In the section **TPP-MANAGEMENT** add your production certificate and take note of the ID and Secret:
* `TPP-ID`
* `TPP-SECRET`
Yapily Dashboard:
1. Upload your eiDAS certificates (QWAC and QSEAL) into Yapily's [certificate vault](https://console.yapily.com/certificates).
2. Add **DKB Live** from the **Live** tab to your [Yapily Console](https://console.yapily.com/applications) application.
3. Add this institution into your app from the `Live` tab and configure the institution by selecting the `certificates` from the dropdown.
4. Select your `QSEAL` and `QWAC` certificates from the relevant drop-downs and provide the list of credentials you obtained from DKB dashboard:
* `Consumer Key`
* `Consumer Secret`
* `TPP-ID`
* `TPP-Secret`
5. Click *Save registration* to save the certificates.
## Support
If you require technical support with certificate management, please contact [Support](/resources/support).
# Deutsche Bank
Source: https://docs.yapily.com/institution-configurations/germany/Deutsche-Bank
## Links
* [Deutsche Bank Developer Portal](https://developer.db.com)
* [Deutsche Bank TPP Registration](https://developer.db.com/registration)
## Scopes
* Account Information 🔒
* Payment Initiation 🔒
## Sandbox Environment
1. Upload your eiDAS certificates (QWAC and QSEAL) into Yapily's [certificate vault](https://console.yapily.com/certificates).
2. Add **Deutsche Bank Sandbox** from the **Sandbox** tab to your [Yapily Console](https://console.yapily.com/applications) application.
3. Add this institution into your app from the `Sandbox` tab and configure the institution by selecting the `certificates` from the dropdown.
4. Select your `QSEAL` and `QWAC` certificates from the relevant drop-downs lists then click *Save* to save the certificates.
See [Sandbox Credentials](/resources/sandbox/sandbox-credentials) for login information
If you see this error in the response:
```json theme={null}
{
"tppMessages": [
{
"code": "Unauthorized",
"text": "This TPP is not registered.",
"category": "ERROR"
}
],
"transactionStatus": "RJCT"
}
```
You have to do the registration onboarding process here: [Deutsche Sandbox Onboarding](https://developer.db.com/products/psd2#techdocs)
**Note:** Domestic, Periodic, and International Payments are available.
## Deutsche Bank AG Live Environment
**Precondition**: To connect to Deutsche Bank AG. Also, you need a valid eiDAS certificates to connect to Deutsche Bank `Live` environment. Please refer [Deutsche Bank technical information](https://developer.db.com/products/psd2#techdocs) section for more details.
1. Upload your eiDAS certificates (QWAC and QSEAL) into Yapily's [certificate vault](https://console.yapily.com/certificates).
2. Add **Deutsche Bank Live** from the **Live** tab to your [Yapily Console](https://console.yapily.com/applications) application.
3. Add this institution into your app from the `Live` tab and configure the institution by selecting the `certificates` from the dropdown.
4. Select your `QSEAL` and `QWAC` certificates from the relevant drop-downs lists then click *Save* to save the certificates.
The productive API's can be accessed by any valid eIDAS certificate and there is no other prerequisites unlike sandbox (registration).
**Create Consent Requests:** As the same as Sandbox, for accounts and payments in the headers must be present:
* **psu-id** = `VALID_PSU_ID`
**Re-authorise Consent (PATCH):** Same as above, **psu-id** must be included.
For Live version, the **psu-id** format is FKDN (without subaccount number): 3 digit branch number + 7 digit customer number
Pattern: **\[0-9] \[0-9]**
**Important:** In the consent creation request, after the successful login, in the last screen, you have to click on the green button `Continue with 3rd Provider` or similar text (Device OTP auth could be requested).
**Note:**
* Domestic, Periodic, and International Payments are available.
* Deutsche bank does not update the payment status once the funds are received by the creditor and so the status of the payment will not update from `PENDING`.
## Norisbank GmbH Live Environment
All the above steps detailed in **Deutsche Bank AG Live Environment** section.
## GTB Cashmanager/dbdi
Only supported for Italy, Spain, Germany and GTB (EU/Corporate).
Coming soon...
## Support
If you require technical support with certificate management, please contact [Support](/resources/support).
# Deutsche Handelsbank
Source: https://docs.yapily.com/institution-configurations/germany/Deutsche-Handelsbank
## Links
* [Deutsche Handelsbank Developer Portal](https://developer.handelsbanken.com/)
* [Deutsche Handelsbank TPP Registration](https://developer.handelsbanken.com/user/register)
## Scopes
* Account Information 🔒
* Payment Initiation 🔒
## Sandbox Environment
...coming soon
## Deutsche Handelsbank Live Environment
**Precondition**: To connect to live Open Banking entities, whether you are accessing account information or initiating payments, your business must have the right regulatory permissions as per the [Open Banking Guide](/tools-and-services/open-banking/enrolment-guide).
...coming soon
## Support
If you require technical support with certificate management, please contact [Support](/resources/support).
# Fiducia and Gad IT
Source: https://docs.yapily.com/institution-configurations/germany/Fiducia-and-Gad-IT
## Links
* [Fiducia Developer Documentation](https://p1.xs2a-doc.atruvia.de/swagger-ui/index.html?configUrl=/v3/api-docs/swagger-config)
* [Fiducia Additional Documentation](https://atruvia.de/uploads/files/sandbox-nextgen/TPP-Sandbox-Documentation.zip) (contains test credentials)
## Scopes
* Account Information 🔒
* Payment Initiation 🔒
## Supported list of Institutions
[![]()Xs2aApiDirectory.json](https://atruvia.de/uploads/files/Xs2aApiDirectory.json)
## Sandbox Environment Registration
1. Upload your eiDAS certificates (QWAC and QSEAL) into Yapily's [certificate vault](https://console.yapily.com/certificates).
2. Add **Fiducia** **Sandbox** from the **Sandbox** tab to your [Yapily Console](https://console.yapily.com/applications) application.
3. Add this institution into your app from the `Sandbox` tab and configure the institution by selecting the `certificates` from the dropdown.
4. Select your `QSEAL` and `QWAC` certificates from the relevant drop-downs lists then click *Save* to save the certificates.
**Create Consent Requests:** user credentials must be present in the body request. e.g:
**Account / Payment init Consent**
```json theme={null}
"userCredentials" : {
"id" : "VRK1234567890ALL"
"password" : "password"
}
```
Note: No registration required, but must use eIDAS certificate
## Live Environment
1. Upload your eiDAS certificates (QWAC and QSEAL) into Yapily's [certificate vault](https://console.yapily.com/certificates).
2. Add the ASPSP you want to connect to from the **Live** tab to your [Yapily Console](https://console.yapily.com/applications) application.
3. Add this institution into your app from the `Live` tab and configure the institution by selecting the `certificates` from the dropdown.
4. Select your `QSEAL` and `QWAC` certificates from the relevant drop-downs lists then click *Save* to save the certificates.
Note: No registration required, but must use eIDAS certificate
## Support
If you require technical support with certificate management, please contact [Support](/resources/support).
# N26
Source: https://docs.yapily.com/institution-configurations/germany/N26
## Links
* [N26 Open Banking Support](https://support.n26.com/en-eu/security/open-banking-psd2/psd2-open-banking-for-third-party-providers)
## Scopes
* Account Information 🔒
* Payment Initiation 🔒
## Preconditions
* Access requires active eIDAS Certificates to be uploaded to dashboard
1. Upload your eiDAS certificates (QWAC and QSEAL) into Yapily's [certificate vault](https://console.yapily.com/certificates).
2. Add **N26** from the **Live** tab to your [Yapily Console](https://console.yapily.com/applications) application.
3. Add this institution into your app from the `Live` tab and configure the institution by selecting the `certificates` from the dropdown.
4. Select your `QSEAL` and `QWAC` certificates from the relevant drop-downs lists then click *Save registration* to save the certificates.
See [accessing the APIs](https://developers.sozialbank.de/#/apis/22/136#accessing-the-ap-is) for sandbox login details.
## Notes
* N26 only support European-destined SEPA payments. International, Periodic or Scheduled payments are not available at this time.
### AIS
For the accounts flow we are using [Pre-Auth Decoupled](/open-banking-flow/user-authorisation/pre-authorisation). After a call to [POST Create Account Pre-authorisation Request](/api-reference/authorisations/create-pre-authorisation), the Consent needs to be updated with the [PUT Create Account Authorisation Request](/api-reference/authorisations/update-account-pre-authorisation). For N26, a call to this PUT endpoint will give an authorisation status of `AWAITING_DECOUPLED_AUTHORIZATION`. This is to inform the TPP that the user must authenticate on their device rather than following a second redirect URL. To check on the status of this SCA, the [GET Get Consent](/api-reference/consents/get-consent) endpoint can be queried; the status will update to `AUTHORIZED` once the consent is approved.
### PIS
For the payments flow we are also using [Pre-Auth Decoupled](/open-banking-flow/user-authorisation/pre-authorisation). After a call to [POST Create Payment Pre-authorisation Request](/api-reference/authorisations/create-payment-pre-authorisation), the Consent needs to be updated with the [PUT Create Payment Authorisation Request](/api-reference/authorisations/update-payment-pre-authorisation). For N26, a call to this PUT endpoint will give an authorisation status of `AWAITING_DECOUPLED_AUTHORIZATION`. This is to inform the TPP that the user must authenticate on their device rather than following a second redirect URL. To check on the status of this SCA, the [GET Get Consent](/api-reference/consents/get-consent) endpoint can be queried; the status will update to `AUTHORIZED` once the consent is approved. There are no refresh tokens allocated for PIS and each access token is tied to a single payment. This means that after access token expiry (currently 15 minutes), the payment details will not be able to be retrieved (this is a restriction from N26).
## Payments
* SEPA Instant payment rail is supported
* For Hosted SEPA Instant payments PSU is required to accept the T\&C on the app which appear when during the first submission of a manual SEPA instant Payment
* IBAN is required for domestic single payment
**Note**: International, Periodic and Scheduled payments are not supported by N26 at this time
## Support
If you require technical support with certificate management, please contact [Support](/resources/support).
# N26 Token IO
Source: https://docs.yapily.com/institution-configurations/germany/N26-Token-IO
N26 Token IO integration will soon be deprecated by N26. Please use the newer [N26 integration](/institution-configurations/germany/N26) that connects with their Berlin Group compliant API.
## Links
* [Developer Portal](https://n26.dashboard.token.io/signin)
## Scopes
* Account Information 🔒
* Payment Initiation 🔒
## Preconditions
* Access to the N26 Sandbox environment must be requested and granted **before** requesting access to the N26 Production environment
* N26 Production environment requires manual registration with the [N26 Token Production Dashboard](https://n26.dashboard.token.io/signin)
* Production access requires active eIDAS Certificates
## Live Environment
1. From the [N26 Sandbox Token Dashboard](https://n26.dashboard.sandbox.token.io/signin), select `Go Live`. You will be prompted to log in or create an account for the N26 Production environment dashboard.
2. Upload your *Live* eIDAS transport and signing certificates (PEMs) on the N26 Token Production Dashboard.
3. Once your certificates have been approved by Token, you will be granted a `Member ID` and `Alias`, found on the N26 Token Dashboard under `Settings` -> `Member Information`. Following this, you will need to generate an API key, which can be done under `Settings` -> `Authentication Keys`. Save this key.
4. Add *N26* from the *Live* tab on your Yapily Dashboard application then click **Next**.
5. Configure *N26* by selecting the **edit icon**.
6. Add your N26 `Member ID`, `Alias`, and `API Key` retrieved in step 3 above. Click **Save** to complete registration and preserve these credentials.
## Notes
* Support for N26 is provided by Token via their [support desk](https://tokenio.atlassian.net/servicedesk/customer/portals).
* N26 only support European-destined SEPA payments. International payments are not available at this time.
* No support for SEPA Instant payment rail
* Both IBAN and BIC are required for domestic single payment and domestic periodic payment
* International payments are not supported.
## Support
If you require technical support with certificate management, please contact [Support](/resources/support).
# Postbank
Source: https://docs.yapily.com/institution-configurations/germany/Postbank
## Links
* [Deutsche Bank Developer Portal](https://developer.db.com)
* [Deutsche Bank TPP Registration](https://developer.db.com/registration)
## Scopes
* Account Information 🔒
* Payment Initiation 🔒
## Sandbox Environment
1. Upload your eiDAS certificates (QWAC and QSEAL) into Yapily's [certificate vault](https://console.yapily.com/certificates).
2. Add **Postbank Sandbox** from the **Sandbox** tab to your [Yapily Console](https://console.yapily.com/applications) application.
3. Add this institution into your app from the `Sandbox` tab and configure the institution by selecting the `certificates` from the dropdown.
4. Select your `QSEAL` and `QWAC` certificates from the relevant drop-downs lists then click *Save* to save the certificates.
See [Sandbox Credentials](/resources/sandbox/sandbox-credentials) for login information
**Create Consent Requests:** user credentials must be present in the body request. e.g:
**Account / Payment init Consent**
```json theme={null}
"userCredentials" : {
"id" : "6154057725"
"password" : "PISPWD12"
}
```
If you see this error in the response:
```json theme={null}
{
"tppMessages": [
{
"code": "Unauthorized",
"text": "This TPP is not registered.",
"category": "ERROR"
}
],
"transactionStatus": "RJCT"
}
```
You have to do the registration onboarding process here: [Deutsche Sandbox Onboarding](https://developer.db.com/products/psd2#techdocs)
**Note:** Only Domestic Payments are available.
## Postbank Live Environment
**Precondition**: To connect to Deutsche Postbank. Also, you need a valid eiDAS certificates to connect to Postbank `Live` environment. Please refer [Deutsche Bank technical information](https://developer.db.com/products/psd2#techdocs) section for more details.
1. Upload your eiDAS certificates (QWAC and QSEAL) into Yapily's [certificate vault](https://console.yapily.com/certificates).
2. Add **Postbank Live** from the **Live** tab to your [Yapily Console](https://console.yapily.com/applications) application.
3. Add this institution into your app from the `Live` tab and configure the institution by selecting the `certificates` from the dropdown.
4. Select your `QSEAL` and `QWAC` certificates from the relevant drop-downs lists then click *Save* to save the certificates.
The productive API's can be accessed by any valid eIDAS certificate and there is no other prerequisites unlike sandbox (registration).
**Create Consent Requests:** As the same as Sandbox, for accounts and payments in the headers must be present:
* **psu-id** = `VALID_PSU_ID`
**Re-authorise Consent (PATCH):** Same as above, **psu-id** must be included.
For Live version, the **psu-id** format is FKDN (without subaccount number): 3 digit branch number + 7 digit customer number
Pattern: **\[0-9] \[0-9]**
**Notes:**
* **Only Domestic Payments are available.**
* Postbank does not update the payment status once the funds are received by the creditor and so the status of the payment will not update from `PENDING`.
* Postbank are migrating customer accounts to Deutsche Bank systems - the Embedded Authorisation approach will no longer be supported by Postbank and the default authentication will be handled by a [redirect to the bank followed by a callback to your registered redirectUrl](/open-banking-flow/user-authorisation/single-redirect).
## Support
If you require technical support with certificate management, please contact [Support](/resources/support).
# Solaris
Source: https://docs.yapily.com/institution-configurations/germany/Solaris
## Links
[Solaris Developer Portal](https://xs2a-portal.solaris-sandbox.de/#/)
## Scopes
* Account Information 🔒
* Payment Initiation 🔒
## Supported ASPSPs
| ASPSP | Supported | Institution ID |
| ----------------- | --------- | -------------- |
| Clanq | Yes | `clanq_de` |
| Finom Germany | Yes | `finom_de` |
| Finom Italy | Yes | `finom_it` |
| Grover | Yes | `grover_de` |
| Helios | Yes | `helios_de` |
| Kontist | Yes | `kontist_de` |
| Tomorrow Bank | Yes | `tomorrow_de` |
| Woolsocks France | Yes | `woolsocks_fr` |
| Woolsocks Germany | Yes | `woolsocks_de` |
| Woolsocks Ireland | Yes | `woolsocks_ie` |
| Woolsocks Italy | Yes | `woolsocks_it` |
| Woolsocks Spain | Yes | `woolsocks_es` |
## Registration Process
Solaris Bank partners don't have a registration process
## Onboarding ASPSP's to Yapily Application
### **LIVE:**
**Precondition**: To connect to Live Solaris supported ASPSP, whether you are accessing account information or
initiating payments, your business must have the right permission to access the resource. You need valid eiDAS certificates
to connect
Below steps need to be performed for registration until our Dashboard is integrated with V2 .
**Pre-requisites:**
* eiDAS certificates
### Steps Required for registration
1. Upload your eiDAS certificates (QWAC and QSEAL) into Yapily's [certificate vault](https://console.yapily.com/certificates).
2. Add this institution into your app tab and configure the institution by selecting the `certificates` from the dropdown.
3. Select your `QSEAL` and `QWAC` certificates from the relevant drop-downs lists then click *Save registration* to save the certificates.
See [accessing the APIs](https://developers.sozialbank.de/#/apis/22/136#accessing-the-ap-is) for sandbox login details.
This step requires the below inputs
`SigningKeyId` (get from Step 1)
`TransportKeyId` (get from Step 1)
`ClientID` (This should be the organization identifier for eg`PSDDE-NDGIT-TPP_ID`)
`institution Id` ( refer to Supported ASPSP table)
1. Please note only 4 times within a given day, AIS services can be used as Solaris partners have a restriction on this
2. PSU IP Address is mandatory for initiate account and payment auth requests, In case if not provided an appropriate error will be shown
3. Solaris doesn't support bulk payments on a specific date, They execute as the request is received. From Yapily API perspective, we need any future requested execution date
## Support
If you require technical support with certificate management, please contact [Support](/resources/support).
# Sparda Banks
Source: https://docs.yapily.com/institution-configurations/germany/Sparda-Banks
## Links
[https://store.sparda.de/store/apis/info?name=Sparda\_XS2A-API\&version=3.0.0\&provider=u002705#/](https://store.sparda.de/store/apis/info?name=Sparda_XS2A-API\&version=3.0.0\&provider=u002705#/)
## Scopes
* Account Information 🔒
* Payment Initiation 🔒
## Supported ASPSPs
| ASPSP | Institution ID |
| ----------------------------------- | -------------------------- |
| Sparda-Bank München | `spardabankmunchen` |
| Sparda-Bank Nürnberg | `spardabanknurnberg` |
| Sparda-Bank Augsburg | `spardabankaugsburg` |
| Sparda-Bank Ostbayern | `spardabankostbayern` |
| Sparda-Bank Hessen | `spardabankhessen` |
| Sparda-Bank West - Wuppertal | `spardabankwest-wuppertal` |
| Sparda-Bank West - Essen | `spardabankwest-essen` |
| Sparda-Bank West - Koeln | `spardabankwest-koeln` |
| Sparda-Bank West - Muenster (Westf) | `spardabankwest-muenster` |
| Sparda-Bank Baden-Württemberg | `spardabankbaden` |
| Spardabank Sandbox | `spardabank-sandbox` |
## Accounts and Payments Supported
### Accounts
* Accounts
* Balance
* Transactions
### Payments
* Domestic Single Payments
* Domestic Periodic Payments
* Frequencies supported (P.s. startDate, day of execution and endDate must have the same Day)
* Quarterly
* Monthly
* BiMonthly
* SemiAnnual
* Annual
## Onboarding ASPSP's to Yapily Application
**Precondition**: To connect to Sparda Bank institutions with eIDAS certs a manual registration is needed.
1. Upload your eiDAS certificates (QWAC and QSEAL) into Yapily's [certificate vault](https://console.yapily.com/certificates).
2. Add the ASPSP you want to connect to from the from the **Live** tab to your [Yapily Console](https://console.yapily.com/applications) application.
3. Add this institution into your app from the `Sandbox` tab and configure the institution by selecting the `certificates` from the dropdown.
4. Select your `QSEAL` and `QWAC` certificates from the relevant drop-downs lists then click *Save registration* to save the certificates.
## Support
If you require technical support with certificate management, please contact [Support](/resources/support).
# Sparkassen
Source: https://docs.yapily.com/institution-configurations/germany/Sparkassen
## Links
[https://xs2a.sparkassen-hub.com/home](https://xs2a.sparkassen-hub.com/home) – all info
[https://xs2a.sparkassen-hub.com/production](https://xs2a.sparkassen-hub.com/production) – production walkthrough
[xs2a.support@starfinanz.de](mailto:xs2a.support@starfinanz.de) – support email
## Scopes
* Account Information 🔒
* Payment Initiation 🔒
## Live Environment
1. Upload your eiDAS certificates (QWAC and QSEAL) into Yapily's [certificate vault](https://console.yapily.com/certificates).
2. Add the ASPSP you want to connect to from the **Live** tab to your [Yapily Console](https://console.yapily.com/applications) application.
3. Add this institution into your app from the `Live` tab and configure the institution by selecting the `certificates` from the dropdown.
4. Select your `QSEAL` and `QWAC` certificates from the relevant drop-downs lists then click *Save registration* to save the certificates.
### Note
No registration required, but must use eIDAS certificate
## Support
If you require technical support with certificate management, please contact [Support](/resources/support).
# Institution configurations
Source: https://docs.yapily.com/institution-configurations/index
How to register each institution or institution group in each country
Looking for a specific bank or country? Beta institutions aren't listed here. [Get in touch with our team](/resources/support) for the full picture.
## Regulated AISP or PISP
If you're a Direct Customer who is regulated as an AISP or PISP in the UK or Europe and you wish to use your own certificates to register each institution, please use the navigation to find instructions on how to register each institution or institution group in each country.
If you haven't uploaded your certificates to the Yapily vault please see the [Registration Guide](/getting-started/integration-setup/registration#direct-registration).
## Unregulated
If you're not regulated as an AISP or PISP in the UK or Europe and you wish to use [Yapily Connect](/getting-started/overview#yapily-connect) as your TPP licence, please see our guide on [delegated registration](/getting-started/integration-setup/registration#delegated-registration) to learn how to access each live institution.
# Allied Irish Bank
Source: https://docs.yapily.com/institution-configurations/ireland/Allied-Irish-Bank
## Links
* [Developer Console](https://developer.aibgb.co.uk/)
## Scopes
* Account Information 🔒
* Payment Initiation 🔒
## Live Environment
**Precondition**: To connect to live Open Banking entities, whether you are accessing account information or initiating payments, your business must have the right regulatory permissions as per the [Open Banking Guide](/tools-and-services/open-banking/enrolment-guide).
1. Upload your transport and signing certificates (PEMs) created in the Open Banking directory, along with the keys into Yapily's [certificate vault](https://console.yapily.com/certificates).
2. Add **AIB** from the **Live** tab to your Dashboard application and add your `Signing key Id`, which can be obtained from the Open Banking Directory.
3. Select your Open Banking transport and signing certificates from the relevant drop-downs lists then click *Next*.
4. Log in to AIB: [https://developer.aibgb.co.uk/user/login](https://developer.aibgb.co.uk/user/login)
5. Select 'Add new Production app'. Complete the form by selecting the relevant TPP roles. Click 'Create App'. Once done, you will need to wait for the app to be approved.
6. Copy the credentials for this app from the AIB developer portal into the credentials view for AIB GB in the Yapily dashboard. Add the obtained *`consumer key`* as **Key** and the *`consumer secret`* as **Secret**. Click 'Next' to save.
## Support
If you require technical support with certificate management, please contact [Support](/resources/support).
## Sandbox Environment
To connect to the Allied Irish Bank sandbox, follow the above steps while selecting **Allied Irish Bank** from the sandbox tab in step 2. The institution Id for this is `aibgb-sandbox`.
**Note:** This Sandbox environment has the following issues:
* The PSU access-token has a short expiration time (some minutes) and they do not support refreshing.
* The transactions filtering is not working
* On the second account the next link is broken and throws an error.
# Danske Bank Ireland Business
Source: https://docs.yapily.com/institution-configurations/ireland/Danske-Bank-Ireland-Business
## Links
[Developer Portal](https://developers.danskebank.com/)
## Scopes
* Account Information 🔒
* Payment Initiation 🔒
## Supported ASPSPs
| ASPSP | Link | Supported | Institution ID |
| ---------------------------- | ------------------------------------------------------------------------ | --------- | ----------------------- |
| Danske bank Ireland Business | [https://developers.danskebank.com/](https://developers.danskebank.com/) | Yes | `danskebankbusiness_ie` |
## Accounts and Payments Supported
### Accounts
* Accounts
* Transactions
### Payments
* Domestic Single Payments
* Domestic Scheduled Payments
* Domestic Periodic Payments
* International Single Payments
* International Scheduled Payment
* Bulk Payments
## Onboarding ASPSP's to Yapily Application
**Precondition**:To connect to DanskeBank EU institutions with eIDAS certs a dynamic registration is needed.
**Pre-requisites for DCR:**
* Valid QWAC / QSEAL certificates.
* Downloaded SSA that is associated with your eIDAS certs.
## Danske Bank Ireland Business
1. Upload the signing (QSEAL) and transport (QWAC) certificates along with the keys into Yapily's [certificate vault](https://console.yapily.com/certificates).
2. Add **Danske Bank Business Ireland** from the **Live** tab to your [Yapily Console](https://console.yapily.com/applications) application.
3. Select your transport (QWAC) and signing (QSEAL) certificates from the relevant drop-downs lists
4. After entering your open banking organization id **Click to register** to auto-register with the bank. If registration is successful, the key and secret will be populated from the institution's response.
5. Make sure to click *Save* in order not to lose these credentials, as a further registration attempt with the same Open Banking software statement is likely to fail.
## Support
If you require technical support with certificate management, please contact [Support](/resources/support).
# Permanent TSB
Source: https://docs.yapily.com/institution-configurations/ireland/Permanent-TSB
## Links
[https://www.permanenttsb.ie/developer-portal/tpp-developer-portal/](https://www.permanenttsb.ie/developer-portal/tpp-developer-portal/)
## Scopes
* Account Information 🔒
* Payment Initiation 🔒
## Supported ASPSPs
| ASPSP | Link | Supported | Institution ID |
| ------------- | ---------------------------------------------------------------------------------------------------------------------------------------- | --------- | --------------- |
| Permanent TSB | [https://www.permanenttsb.ie/developer-portal/tpp-developer-portal/](https://www.permanenttsb.ie/developer-portal/tpp-developer-portal/) | Yes | `permanent-tsb` |
## Registration Process
Permanent TSB supports Dynamic Registration for the above mentioned institution. See the below onboarding section.
## Accounts and Payments Supported
### Accounts
* accounts
* balance
* transactions
### Payments
* Domestic Single Payments
## Onboarding ASPSP's to Yapily Application
### **LIVE:**
**Precondition**: To connect to the Permanent TSB institution a dynamic registration request (DCR) is needed.
**Pre-requisites for registration:**
* Valid set of eiDAS certificates (QWAC and QSEAL)
* SSA (downloaded manually from OBIE directory)
### Steps Required for registration
1. Upload the signing (QSEAL) and transport (QWAC) certificates along with the keys into Yapily's [certificate vault](https://console.yapily.com/certificates).
2. Add **Permanent TSB** from the **Live** tab to your [Yapily Console](https://console.yapily.com/applications) application.
3. Select your transport (QWAC) and signing (QSEAL) certificates from the relevant drop-downs lists
4. After entering software statement id and your open banking organization id **Click to register** to auto-register with the bank. If registration is successful, the key and secret will be populated from the institution's response.
5. Make sure to click *Save* in order not to lose these credentials, as a further registration attempt with the same Open Banking software statement is likely to fail.
## Support
If you require technical support with certificate management, please contact [Support](/resources/support).
# Banca BNL
Source: https://docs.yapily.com/institution-configurations/italy/Banca-BNL
## Links
* [CBI GLOBE Home](https://www.cbiglobe.com/Home-Page)
* [TPP Login/Register](https://www.cbiglobe.com/Login-Register)
* [Wiki](https://www.cbiglobe.com/Wiki/index.php/Main_Page)
## Scopes
* Account Information 🔒
* Payment Initiation 🔒
## Banca BNL (CBI GLOBE)
**Precondition**: To connect to CBI GLOBE, whether you are accessing account information or initiating payments, your business must have the right permission to access the resource. You need valid eiDAS certificates to connect. Please refer to the respective CBI GLOBE documentation for more details.
1. Upload your eiDAS certificates (QWAC and QSEAL) into Yapily's [certificate vault](https://console.yapily.com/certificates).
2. Add **Banca BNL** from the **Live** tab to your [Yapily Console](https://console.yapily.com/applications) application.
3. Add this institution into your app from the **Live** tab and configure the institution by adding `Client Uri` and `Terms of Service Uri` & selecting the `certificates` from the dropdown.
4. Select your `QSEAL` and `QWAC` certificates from the relevant drop-downs lists then click **Next**.
5. Add `key` and `secret` which you have received after registering your eiDAS certificates with CBI GLOBE.
6. Make sure to click **Save** in order not to lose these credentials.
## Support
If you require technical support with certificate management, please contact [Support](/resources/support)
# Banca Monte dei Paschi Di SIENA
Source: https://docs.yapily.com/institution-configurations/italy/Banca-Monte-dei-Paschi-Di-SIENA
## Links
* [CBI GLOBE Home](https://www.cbiglobe.com/Home-Page)
* [TPP Login/Register](https://www.cbiglobe.com/Login-Register)
* [Wiki](https://www.cbiglobe.com/Wiki/index.php/Main_Page)
## Scopes
* Account Information 🔒
* Payment Initiation 🔒
## Banca Monte dei Paschi Di SIENA (CBI GLOBE)
**Precondition**: To connect to the CBI GLOBE, whether you are accessing account information or initiating payments, your business must have the right permission to access the resource. Please refer to the [CBI GLOBE](https://www.cbiglobe.com/Subscription-TPP) subscription page to subscribe and upload your eiDAS certificates.
1. Upload your eiDAS certificates (QWAC and QSEAL) into Yapily's [certificate vault](https://console.yapily.com/certificates).
2. Add **Banco Di Sardegna** from the **Live** tab to your [Yapily Console](https://console.yapily.com/applications) application.
3. Add this institution into your app from the **Live** tab and configure the institution by adding `Client Uri` and `Terms of Service Uri` & selecting the `certificates` from the dropdown.
4. Select your `QSEAL` and `QWAC` certificates from the relevant drop-downs lists then click **Next**.
5. Add `key` and `secret` which you have received after registering your eiDAS certificates with CBI GLOBE.
6. Make sure to click **Save** in order not to lose these credentials.
## Support
If you require technical support with certificate management, please contact [Support](/resources/support)
# Banca Popolare - Volksbank
Source: https://docs.yapily.com/institution-configurations/italy/Banca-Popolare-Volksbank
## Links
* [CBI GLOBE Home](https://www.cbiglobe.com/Home-Page)
* [TPP Login/Register](https://www.cbiglobe.com/Login-Register)
* [Wiki](https://www.cbiglobe.com/Wiki/index.php/Main_Page)
## Scopes
* Account Information 🔒
* Payment Initiation 🔒
## Supported ASPSPs
| ASPSP | Supported | Institution ID | Institution name |
| ----- | --------- | ----------------------------------- | ------------------------- |
| - | Yes | `banca_popolare_vb_personal` | Volksbank Personal |
| - | Yes | `banca_popolare_vb_card` | Volksbank Card |
| - | Yes | `banca_popolare_vb_german_personal` | Volksbank Personal-German |
| - | Yes | `banca_popolare_vb_germancard` | Volksbank Card-German |
## Onboarding ASPSP's to Yapily Application
**Precondition**: To connect to the CBI GLOBE, whether you are accessing account information or initiating payments, your business must have the right permission to access the resource. Please refer to the[CBI GLOBE](https://www.cbiglobe.com/Subscription-TPP) subscription page to subscribe and upload your eiDAS certificates.
1. Upload your eiDAS certificates (QWAC and QSEAL) into Yapily's [certificate vault](https://console.yapily.com/certificates).
2. Add **Institution** from the **Live** tab to your [Yapily Console](https://console.yapily.com/applications) application.
3. Add this institution into your app from the **Live** tab and configure the institution by adding `Client Uri` and `Terms of Service Uri`& selecting the `certificates`from the dropdown.
4. Select your `QSEAL`and `QWAC`certificates from the relevant drop-downs lists then click **Next**.
5. Add `key`and `secret`which you have received after registering your eiDAS certificates with CBI GLOBE.
6. Make sure to click **Save** in order not to lose these credentials.
## Support
If you require technical support with certificate management, please contact [Support](/resources/support)
# Banco BPM
Source: https://docs.yapily.com/institution-configurations/italy/Banco-BPM
## Links
* [CBI GLOBE Home](https://www.cbiglobe.com/Home-Page)
* [TPP Login/Register](https://www.cbiglobe.com/Login-Register)
* [Wiki](https://www.cbiglobe.com/Wiki/index.php/Main_Page)
## Scopes
* Account Information 🔒
* Payment Initiation 🔒
## Banco BPM (CBI GLOBE)
**Precondition**: To connect to the CBI GLOBE, whether you are accessing account information or initiating payments, your business must have the right permission to access the resource. Please refer to the [CBI GLOBE](https://www.cbiglobe.com/Subscription-TPP) subscription page to subscribe and upload your eiDAS certificates.
1. Upload your eiDAS certificates (QWAC and QSEAL) into Yapily's [certificate vault](https://console.yapily.com/certificates).
2. Add **Banco BPM** from the **Live** tab to your [Yapily Console](https://console.yapily.com/applications) application.
3. Add this institution into your app from the **Live** tab and configure the institution by adding `Client Uri` and `Terms of Service Uri` & selecting the `certificates` from the dropdown.
4. Select your `QSEAL` and `QWAC` certificates from the relevant drop-downs lists then click **Next**.
5. Add `key` and `secret` which you have received after registering your eiDAS certificates with CBI GLOBE.
6. Make sure to click **Save** in order not to lose these credentials.
## Support
If you require technical support with certificate management, please contact [Support](/resources/support)
# CBI Globe Allitude
Source: https://docs.yapily.com/institution-configurations/italy/CBI-Globe-Allitude
## Links
* [CBI Globe Portal](https://www.cbiglobe.com/)
## Accounts and Payments Supported
### Accounts
* Accounts
* Transactions
### Payments
* Domestic Single Payments
* Domestic Scheduled Payments
## Supported ASPSPs
| ASPSP | Supported | Institution ID |
| -------- | --------- | ------------------------------------------------------------------------------------------------------------------------------------------------------------------------------------------------------------------------------------------------------------------------------------------------------------------------------------------------------------------------------------------------------------------------------------------------------------------------------------------------------------------------------------------------------------------------------------------------------------------------------------------------------------------------------------------------------------------------------------------------------------------------------------------------------------------------------------------------------------------------------------------------------------------------------------------------------------------------------------------------------------------------------------------------------------------------------------------------------------------------------------------------------------------------------------------------------------------------------------------------------------------------------------------------------------------------------------------------------------------------------------------------------------------------------------------------------------------------------------------------------------------------------------------------------------------------------------------------------------------------------------------------------------------------------------------------------------------------------------------------------------------------------------------------------------------------------------------------------------------------------------------------------------------------------------------------------------------------------------------------------------------------------------------------------------------------------------------------------------------------------------------------------------------------------------------------------------------------------------------------------------------------------------------------------------------------------------------------------------------------------------------------------------------------------------------------------------------------------------------------------------------------------------------------------------------------------------------------------------------------------------------------------------------------------------------------------------------------------------------------------------------------------------------------------------------------------------------------------------------------------------------------------------------------------------------------------------------------------------------------------------------------------------------------------------------------------------------ |
| Allitude | Yes | `bcc_sudtirol`
`bcc_adria_colli_euganei`
`bcc_schio_pedemonte_roana`
`bcc_centro_emilia`
`bcc_centro_lazio`
`bcc_gran_sasso`
`bcc_territorio_lombardo`
`bcc_bologna`
`bcc_caraglio_cuneese_della_riviera `
`bcc_bergamasca_orobica`
`cr_bcc_valfiemme`
`bcc_castelli_e_degli_iblei`
`bcc_castelli_romani`
`bcc_circeo_privernate`
`bcc_friuli_centrale`
`bcc_velino`
`bcc_della_romagna_occidentale`
`bcc_alta_murgia`
`bcc_alto_tirreno_calabria_verbicaro`
`bcc_prealpi`
`bcc_alberobello_sammichelebari`
`bcc_anagni`
`bcc_aquara`
`bcc_barlassina`
`bcc_brescia`
`bcc_casalgrasso_albano_stura`
`bcc_cassano_murge_tolve`
`bcc_castagneto_carducci_per_azioni`
`bcc_cherasco`
`bcc_conversano`
`bcc_flumeri`
`cr_bcc_artigiana_locorotondo`
`bcc_monopoli`
`bcc_pianfei_rocca_baldi`
`bcc_san_giovanni_rotondo`
`bcc_san_marzanosan_giuseppe`
`bcc_sarsina`
`bcc_spello_bettona`
`bcc_turriaco`
`bcc_la_riscossaregalbuto`
`bcc_laudense_lodi`
`bcc_monte_prunoroscigno_elaurino`
`bcc_sangro_taetinaatessa_castiglione_giuliano`
`bcc_valdostana`
`bcc_galileo`
`bcc_galileo_spa`
`bcc_lazio_nord_per_azioni`
`bcc_malatestiana`
`bcc_mediocreditofriuli_venezia_giulia_spa`
`bcc_cassinate_azioni`
`bcc_provincie_molisane`
`bcc_cortona_per_azioni`
`bcc_lajatico`
`bcc_vesuviana`
`bcc_promos`
`bcc_biagioveneto_orientale`
`bcc_sicanasommatino_serradifalco`
`bcc_bancater_fvg`
`bcc_marchigiano`
`bcc_felsinea_dal_1902`
`bcc_bene_vagienna`
`bcc_cassa_centrale`
`bcc_cassa_padana`
`bcc_cassa_raiffeisensan_martino_in_passiria`
`cr_bcc_adamello_brenta`
`cr_bcc_alta_vallagarinabesenello`
`cr_bcc_alta_valsugana`
`cr_bcc_alto_garda`
`cr_bcc_della_bassa_valsugana`
`cr_bcc_ledro`
`cr_bcc_lizzana`
`cr_bcc_rovereto`
`cr_bcc_trento`
`cr_bcc_dolomitifassa_primiero_belluno`
`cr_bcc_ed_artigianaboves`
`cr_bcc_ed_artigianacortina_ampezzo`
`cr_bcc_ed_artigianavestenanova`
`cr_bcc_giudicarie_valsabbia_paganella`
`cr_bcc_lavis_vallecembra`
`cr_bcc_novella_e_alta_anaunia`
`cr_bcc_pinzolo`
`cr_bcc_renon`
`cr_bcc_rotaliana_giovo`
`cr_bcc_valnon`
`cr_bcc_valsole`
`cr_bcc_val_rendena`
`cr_bcc_vallagarina`
`bcc_centroveneto_bassano`
`cr_bcc_artigianafriuli_venezia_giulia`
`bcc_centro_calabria`
`bcc_credito_lombardo_veneto`
`bcc_friulovest_banca`
`bcc_guber`
`bcc_hypo_tirol`
`bcc_romagna`
`bcc_rovigo`
`bcc_zkb_zadruzna_kraska`
`cr_bcc_trento-sandbox` |
## Onboarding ASPSP's to Yapily Application
### **LIVE:**
**Precondition**: To connect to the CBI GLOBE, whether you are accessing account information or initiating payments, your business must have the right permission to access the resource. Please refer to the [CBI GLOBE](https://www.cbiglobe.com/Subscription-TPP) subscription page to subscribe and upload your eiDAS certificates.
1. Upload your eiDAS certificates (QWAC and QSEAL) into Yapily's [certificate vault](https://console.yapily.com/certificates).
2. Add **Institution** from the **Live** tab to your [Yapily Console](https://console.yapily.com/applications) application.
3. Add this institution into your app from the **Live** tab and configure the institution by adding `Client Uri` and `Terms of Service Uri`& selecting the `certificates`from the dropdown.
4. Select your `QSEAL`and `QWAC`certificates from the relevant drop-downs lists then click **Next**.
5. Add `key`and `secret`which you have received after registering your eiDAS certificates with CBI GLOBE.
6. Make sure to click **Save** in order not to lose these credentials.
## SANDBOX
**Precondition**:
The same **Registration** steps are detailed in the above **LIVE** section.
Supported ASPSPs:
| ASPSP | Institution ID | SCA credentials | PISS IBAN |
| ---------------- | ----------------------- | ---------------------------------------------------- | ----------------------------------------------------------------------------------- |
| Trento - Sandbox | `cr_bcc_trento-sandbox` | **user:** 34710938
**password:** Test34710938 | **Payer:** IT91E0830434600000000030586
**Payee:** IT91P0200823001000003222905 |
## Support
If you require technical support with certificate management, please contact [Support](/resources/support)
# CBI Globe BCC
Source: https://docs.yapily.com/institution-configurations/italy/CBI-Globe-BCC
## Links
* [CBI Globe Portal](https://www.cbiglobe.com/)
## Scopes
* Account Information 🔒
* Payment Initiation 🔒
## Supported ASPSPs
| ASPSP | Supported | Institution ID |
| --------- | --------- | ------------------------------------------------------------------------------------------------------------------------------------------------------------------------------------------------------------------------------------------------------------------------------------------------------------------------------------------------------------------------------------------------------------------------------------------------------------------------------------------------------------------------------------------------------------------------------------------------------------------------------------------------------------------------------------------------------------------------------------------------------------------------------------------------------------------------------------------------------------------------------------------------------------------------------------------------------------------------------------------------------------------------------------------------------------------------------------------------------------------------------------------------------------------------------------------------------------------------------------------------------------------------------------------------------------------------------------------------------------------------------------------------------------------------------------------------------------------------------------------------------------------------------------------------------------------------------------------------------------------------------------------------------------------------------------------------------------------------------------------------------------------------------------------------------------------------------------------------------------------------------------------------------------------------------------------------------------------------------------------------------------------------------------------------------------------------------------------------------------------------------------------------------------------------------------------------------------------------------------------------------------------------------------------------------------------------------------------------------------------------------------------------------------------------------------------------------------------------------------------------------------------------------------------------------------------------------------------------------------------------------------------------------------------------------------------------------------------------------------------------------------------------------------------------------------------------------------------------------------------------------------------------------------------------------------------------------------------------------------------------------------------------------------------------------------------------------------------------------------------------------------------------------------------------------------------------------------------------------------------------------------------------------------------------------------------------------------------------------------------------------------------------------------------------------------------------------------------------------------------------------------------------------------------------------------------------------------------------------------------------------------------------------------------------------------------------------ |
| BCC Group | Yes | `credito_coop_del_cilento_lucania`
`banca_alpi_marittime_credit_coop_carru_azioni`
`banca_alta_toscana_credito_coop`
`bcc_centropadana`
`bcc_cremasca_mantovana`
`bcc_sibillini`
`bcc_catanzarese`
`bcc_crotonese`
`bcc_piceno`
`bcc_vadarno`
`bcc_la_marca`
`bcc_la_valsassina`
`bcc_le_terre_venete`
`bcc_elba`
`bcc_ancona_falconara`
`bcc_andria`
`bcc_anghiari`
`bcc_gtoniolo_san_cataldo`
`bcc_abruzzese`
`bcc_agrigentino`
`bcc_bergamo`
`bcc_brianza`
`bcc_degli_ulivi`
`bcc_colli_albani`
`bcc_basso_sebino`
`bcc_metauro`
`bcc_la_valle_trigno`
`bcc_adriatico_teramano`
`bcc_agro_bresciano`
`bcc_oglio_e_serio`
`bcc_altofonte_caccamo`
`bcc_arborea`
`bcc_avetrana`
`bcc_bari`
`bcc_basciano`
`bcc_bellegra`
`bcc_borghetto_logiano`
`bcc_buccino_e_comuni_cilentani`
`bcc_banca1897`
`bcc_cagliari`
`bcc_canosaloconia`
`bcc_capaccio_paestum`
`bcc_carate_brianza`
`bcc_castiglione`
`bcc_cittanova`
`bcc_fano`
`bcc_fornacette`
`bcc_gambatesa`
`bcc_gauano_lavello`
`bcc_leverano`
`bcc_lezzeno`
`bcc_marina_ginosa`
`bcc_massafra`
`bcc_milano`
`bcc_montecatini`
`bcc_montepaone`
`bcc_mozzanica`
`bcc_napoli`
`bcc_nettuno`
`bcc_oppido_ripacanda`
`bcc_ostra_morro`
`bcc_ostra_vetere`
`bcc_ostuni`
`bcc_pachino`
`bcc_pergola_corinaldo`
`bcc_piove_sacco`
`bcc_pontassieve`
`bcc_pratola_peligna`
`bcc_putignano`
`bcc_recanati_colmurano`
`bcc_riano`
`bcc_ripatransone_fermano`
`bcc_roma`
`bcc_san_calogero`
`bcc_spinazzola`
`bcc_staranzano_villesse`
`bcc_terra_d_otranto`
`bcc_valle_lambro`
`bcc_gangi`
`bcc_pordenonese`
`bcc_san_michele_caltanissetta`
`bcc_san_giuseppe`
`bcc_terra_lavoro`
`bcc_valle_torto`
`bcc_vicentino_pojana_maggiore`
`bcc_filottrano`
`bcc_pesaro`
`bcc_pescia_cascina`
`bcc_taranto`
`bcc_une`
`bcc_verona_vicenza`
`bcc_don_rizzo`
`bcc_san_francesco`
`bcc_sviluppo_spa`
`bcc_valchiana_chiusi_montepulciano`
`bcc_veronese_concamarise`
`bcc_versilia_lunigiana_garfagnana`
`bcc_fiorentino_mugello_impruneta`
`bcc_garda_colli_morenici`
`bcc_longi_valle_fitalia`
`bcc_umbria`
`cr_bcc_treviglio`
`cr_bcc_battipaglia_montecorvino_rovella`
`cr_bcc_agro_pontino`
`cr_bcc_binasco`
`cr_bcc_cantu`
`cr_bcccastellana_grotte`
`cr_bcc_rivarolo_mantovano`
`bcc_centromarca_treviso`
`bcc_cerea1897`
`cr_bcc_paliano`
`cr_bcc_erchie_br`
`bcc_caravaggio_cremasco`
`bcc_meocrati`
`bcc_valdarno_fiorentino_cascia`
`bcc_creto_padano`
`bcc_iccrea`
`bcc_terre_etrusche_maremma`
`bcc_valpolicella_benaco`
`bcc_annia_cartura_polesine`
`bcc_friuli`
`bcc_emil`
`bcc_romagnolo_bcccesena_gatteo`
`bcc_basilicata_laurenzana_comuni_lucani`
`bcc_marco_cavoti_esanniocalvi`
`bcc_santeramo_in_colle`
`bcc_ravennate_forlivese_imolese`
`bcc_scafati_cetara`
`bcc_chiantibanca`
`bcc_riminirimini_valmarecchia` |
## Accounts and Payments Supported
### Accounts
* Accounts
* Transactions
### Payments
* Domestic Single Payments (Embedded)
## Onboarding ASPSP's to Yapily Application
### **LIVE:**
**Precondition**: To connect to the CBI GLOBE, whether you are accessing account information or initiating payments, your business must have the right permission to access the resource. Please refer to the [CBI GLOBE](https://www.cbiglobe.com/Subscription-TPP) subscription page to subscribe and upload your eiDAS certificates.
1. Upload your eiDAS certificates (QWAC and QSEAL) into Yapily's [certificate vault](https://console.yapily.com/certificates).
2. Add **Institution** from the **Live** tab to your [Yapily Console](https://console.yapily.com/applications) application.
3. Add this institution into your app from the **Live** tab and configure the institution by adding `Client Uri` and `Terms of Service Uri`& selecting the `certificates`from the dropdown.
4. Select your `QSEAL`and `QWAC`certificates from the relevant drop-downs lists then click **Next**.
5. Add `key`and `secret`which you have received after registering your eiDAS certificates with CBI GLOBE.
6. Make sure to click **Save** in order not to lose these credentials.
## SANDBOX
**Precondition** :
The same **Registration** steps are detailed in the above **LIVE** section.
Supported ASPSPs:
| ASPSP | ASPSP CODE | PRODUCT CODE | Yapily institution id | SCA Credentials |
| ------------------------------------------------------------------------------- | ---------- | ------------ | ---------------------------- | ------------------------------------------------------------------------------------------------------------------------------ |
| Cassa Rurale - Banca di Credito Cooperativo di Treviglio - Societa' Cooperative | 08899 | relax | `cr_bcc_di_treiglio-sandbox` | **USERNAME:** "psd2.testfam"
**PASSWORD:** "111111111111111"
**SCA SMS code:** "87654321" (Embedded Coupled Flow) |
## Support
If you require technical support with certificate management, please contact [Support](/resources/support)
# CBI Globe BPER
Source: https://docs.yapily.com/institution-configurations/italy/CBI-Globe-BPER
## Accounts and Payments Supported
### Accounts
* Accounts
* Transactions
### Payments
* Domestic Single Payments
* Domestic Scheduled Payments
## Supported ASPSPs
| ASPSP | Supported | Institution ID |
| ----- | --------- | -------------------------------------------------------------------------------------------------------------------------------------------------------------------------------------------------- |
| BPER | Yes | `bper`
`bper_corporate`
`bper_card`
`banco_di_sardegna` (P1 will be on P2 soon)
`banco_di_sardegna_corporate`
`banco_di_sardegna_card`
`bibanca`
`bper-sandbox` |
## Onboarding ASPSP's to Yapily Application
### **LIVE:**
**Precondition**: To connect to the CBI GLOBE, whether you are accessing account information or initiating payments, your business must have the right permission to access the resource. Please refer to the[CBI GLOBE](https://www.cbiglobe.com/Subscription-TPP) subscription page to subscribe and upload your eiDAS certificates.
1. Upload your eiDAS certificates (QWAC and QSEAL) into Yapily's [certificate vault](https://console.yapily.com/certificates).
2. Add **Institution** from the **Live** tab to your [Yapily Console](https://console.yapily.com/applications) application.
3. Add this institution into your app from the **Live** tab and configure the institution by adding `Client Uri` and `Terms of Service Uri`& selecting the `certificates`from the dropdown.
4. Select your `QSEAL`and `QWAC`certificates from the relevant drop-downs lists then click **Next**.
5. Add `key`and `secret`which you have received after registering your eiDAS certificates with CBI GLOBE.
6. Make sure to click **Save** in order not to lose these credentials.
## SANDBOX
**Precondition** :
The same **Registration** steps are detailed in the above **LIVE** section.
Supported ASPSPs:
| ASPSP | ASPSP CODE | PRODUCT CODE | Institution ID | SCA credentials |
| -------------------------- | ---------- | ------------ | -------------- | ---------------------------------------------------------------------------------------- |
| BPER Banca S.p.A - Sandbox | 05387 | SMART | `bper-sandbox` | USERNAME: "65561693"
PASSWORD: "65561693"
SCA SMS code: no SCA needed |
## Support
If you require technical support with certificate management, please contact [Support](/resources/support)
# CBI Globe Credit Agricole
Source: https://docs.yapily.com/institution-configurations/italy/CBI-Globe-Credit-Agricole
## Links
[https://cbiglobeopenbankingapiportal.nexi.it/en/cbi-globe/overview](https://cbiglobeopenbankingapiportal.nexi.it/en/cbi-globe/overview)
## Scopes
* Account Information 🔒
## Accounts and Payments Supported
### Accounts
* Accounts
* Transactions
### Payments
* Not available yet
## LIVE
### Supported ASPSPs:
| ASPSP | Supported | Institution ID | Institution name |
| --------------------- | --------- | --------------------------------------- | ---------------------------------------------------- |
| Credit Agricole Italy | Yes | `ca_cariparma_spa` | Crédit Agricole Cariparma Spa |
| Credit Agricole Italy | Yes | `ca_cariparma_spa-business` | Crédit Agricole Cariparma Spa - Business |
| Credit Agricole Italy | Yes | `ca_cariparma_spa-nowbanking_corporate` | Crédit Agricole Cariparma Spa - Nowbanking Corporate |
| Credit Agricole Italy | Yes | `ca_cariparma_spa-net2_corporate` | Crédit Agricole Cariparma Spa - Net2 Corporate |
| Credit Agricole Italy | Yes | `ca_friuladria` | Crédit Agricole FriulAdria |
| Credit Agricole Italy | Yes | `ca_friuladria-business` | Crédit Agricole FriulAdria - Business |
| Credit Agricole Italy | Yes | `ca_friuladria-nowbanking_corporate` | Crédit Agricole FriulAdria - Nowbanking Corporate |
| Credit Agricole Italy | Yes | `ca_friuladria-net2_corporate` | Crédit Agricole FriulAdria - Net2 Corporate |
**Precondition**: To connect to Credit Agricole Italy Group, an application needs to be created. Once the application is created a **client\_id** and **client\_secret** are generated.
1. Upload your eiDAS certificates (QWAC and QSEAL) into Yapily's [certificate vault](https://console.yapily.com/certificates).
2. Add **Institution** from the **Live** tab to your [Yapily Console](https://console.yapily.com/applications) application.
3. Add this institution into your app from the **Live** tab and configure the institution by adding `Client Uri` and `Terms of Service Uri`& selecting the `certificates`from the dropdown.
4. Select your `QSEAL`and `QWAC`certificates from the relevant drop-downs lists then click **Next**.
5. Add `key`and `secret`which you have received after registering your eiDAS certificates with CBI GLOBE.
6. Make sure to click **Save** in order not to lose these credentials.
## SANDBOX
**Pre-requisites for Registration:** The same **Registration** steps are detailed in the above **LIVE** section. Only the difference is that the below Credit Agricole Italy Sandbox certificates should be used instead of any other certificates.
**Sandbox certificates:**
Supported ASPSPs:
| ASPSP | Yapily institution id | SCA Credentials |
| ---------------------------------- | ----------------------- | ------------------------------------------------------------------------------ |
| Crédit Agricole FriulAdria Sandbox | `ca_friuladria-sandbox` | **user:** 400280876
**key date:** 01-01-2001
**OTP code:** 101010 |
## Support
If you require technical support with certificate management, please contact [Support](/resources/support)
# CEDACRI and Banca Mediolanum
Source: https://docs.yapily.com/institution-configurations/italy/CEDACRI-and-Banca-Mediolanum
## Scopes
* Account Information 🔒
* Payment Initiation 🔒
| Group | ASPSP | Yapily Institution Id | ASPSP CODE | Developer Portal |
| ---------- | ---------------------------------------------------------------- | ---------------------------- | ---------- | ------------------------------------------------------------------------------------------------------------------------------------- |
| Mediolanum | Banca Mediolanum | `bancamediolanum_it` | 03062 | [https://portal.mediolanum.it/documentation](https://portal.mediolanum.it/documentation "https://portal.mediolanum.it/documentation") |
| Cedacri | Cassa di Risparmio di Bolzano | `cassa_risparmio_bolzano` | 06045 | [https://developer.cedacri.it/it/documentation](https://developer.cedacri.it/it/documentation) |
| - | Banca del Piemonte | `bancadelpiemonte_it` | 03048 | - |
| - | BARCLAYS BANK IRELAND PLC SEDE SECONDARIA Volkswagen Bank | `bbiplcvolkswagenbank_it` | 03051 | - |
| - | Banca del Fucino | `bancadelfucino_it` | 03124 | - |
| - | Mediobanca Banca di Credito Finanziario S.p.A. Banca Ifis S.p.A. | `mediobancafinanziario_it` | 03183 | - |
| - | IBL Banca | `iblbanca_it` | 03263 - | |
| - | Rbc Investor Service Bank SA | `rbcinvestor_it` | 03321 | - |
| - | Banca del Sud | `bancadelsud_it` | 03353 | - |
| - | Banco delle Tre Venezie | `bancotrevenezie_it` | 03365 | - |
| - | Banque Chaabi du Maroc | `banquechaabi_it` | 03387 | - |
| - | Banca Stabiese | `bancastabiese_it` | 03388 | - |
| - | Banco di Desio e della Brianza | `bancobrianza_it` | 03440 | - |
| - | Cassa Lombarda | `cassalombarda_it` | 03488 | - |
| - | Banca Ubae S.p.A. | `bancaubae_it` | 03598 | - |
| - | Banca Progetto S.p.A | `bancaprogetto_it` | 05015 | - |
| - | Banca Valsabbina | `bancavalsabbina_it` | 05116 | - |
| - | Banca Popolare di Puglia e Basilicata | `bancapopolarebasilicata_it` | 05385 | - |
| - | Banca Popolare di Bari | `bancapopolarebari_it` | 05424 | - |
| - | Cassa di Sovvenzioni e Risparmio | `cassasovvenzioni_it` | 05824 | - |
| - | Cassa di Risparmio di Asti | `risparmioasti_it` | 06085 | - |
| - | Cassa di Risparmio di Fossano S.p.A. | `risparmiofossano_it` | 06170 | - |
| - | Cassa di risparmio di Orvieto | `risparmioorvieto_it` | 06220 | - |
| - | Cassa di Risparmio di Volterra | `risparmiovolterra_it` | 06370 | - |
| - | Istituto per il Credito Sportivo | `creditosportivo_it` | 10630 | - |
| - | Banca del Mezzogiorno – MedioCredito Centrale S.p.A. | `mediocreditocentrale_it` | 10680 | - |
| - | Volkswagen Bank | `volkswagenbank_it` | 03105 | - |
| - | Banca Ifis S.p.A. | `bancaifis_it` | 03205 | - |
## Registration Process
Banca Mediolanum & CEDACRI Group Supports Dynamic Registration for all the above institutions. Please note that once a certificate is used for registration, it cannot be used again for performing registration (One registration per certificate).
✅ Create, Update & Delete Dynamic Registration are supported:
* Register again, if the new certificate contains a different AN.
* Perform the update, if the new certificate contains the same AN.
* Execute delete to unregister the current onboarded certificate.
ℹ️ Dynamic Registration Response:
* Registration yields a separate client ID and secret for Accounts and Payments.
* Registration UUID unique value is provided (Necessary to perform update or delete registration if desired).
❗**Important Notes:**
* **Register:** Once Dynamic Registration is executed for one bank in the group listed above, then it is not necessary to register for the rest of the banks (One registration per Certificate).
* **Unregister:** It will trigger Delete Registration for the existing Registration against the institution server. Once it's done, the existing client ID and secret will not work for any of the institutions in the Cedacri group. Be sure before you proceed with this action.
## Onboarding ASPSP's to Yapily Application
### **LIVE:**
**Precondition**: To connect to Live Banca Mediolanum & CEDACRI Group supported ASPSP, whether you are accessing account information or initiating payments, your business must have the right permission to access the resource. You need valid eiDAS certificates to connect. Please refer to the respective ASPSPs developer portal links provided above.
To perform Dynamic Registration using Yapily Console, please follow these steps:
1. Add any Cedacri institution listed above to your [Yapily Console](https://console.yapily.com/applications) application using `+Add Institution` Button. Then in the table below (`Not Registered` tab), click on `Register` over the new institution added.
2. At the `Combined AIS/PIS` tab, Select your `QSEAL` and `QWAC` certificates from the relevant drop-downs lists.
3. Introduce a valid `Email` address contact from your company, and a valid `Redirect URI` otherwise by default will be `https://auth.yapily.com/`.
4. Finally, click on `Register` button. After the page is refreshed, the `Combined AIS/PIS` tab should disappear and Cedacri Group Credentials should be visible on `AIS`, `PIS` tabs separately.
**Important Note**: Unregister will perform Delete Registration against the institution. That means client credentials will be useless for the whole Cedacri institutions. Be sure before proceed with this action.
## Support
If you require technical support with certificate management, please contact [Support](/resources/support)
# Credito Emiliano
Source: https://docs.yapily.com/institution-configurations/italy/Credito-Emiliano
## Links
* [CBI GLOBE Home](https://www.cbiglobe.com/Home-Page)
* [TPP Login/Register](https://www.cbiglobe.com/Login-Register)
* [Wiki](https://www.cbiglobe.com/Wiki/index.php/Main_Page)
## Scopes
* Account Information 🔒
* Payment Initiation 🔒
## Credito Emiliano (CBI GLOBE)
**Precondition**: To connect to the CBI GLOBE, whether you are accessing account information or initiating payments, your business must have the right permission to access the resource. Please refer to the [CBI GLOBE](https://www.cbiglobe.com/Subscription-TPP) subscription page to subscribe and upload your eiDAS certificates.
1. Upload your eiDAS certificates (QWAC and QSEAL) into Yapily's [certificate vault](https://console.yapily.com/certificates).
2. Add **Credito Emiliano** from the **Live** tab to your [Yapily Console](https://console.yapily.com/applications) application.
3. Add this institution into your app from the **Live** tab and configure the institution by adding `Client Uri` and `Terms of Service Uri` & selecting the `certificates` from the dropdown.
4. Select your `QSEAL` and `QWAC` certificates from the relevant drop-downs lists then click **Next**.
5. Add `key` and `secret` which you have received after registering your eiDAS certificates with CBI GLOBE.
6. Make sure to click **Save** in order not to lose these credentials.
## Support
If you require technical support with certificate management, please contact [Support](/resources/support)
# Fineco
Source: https://docs.yapily.com/institution-configurations/italy/Fineco
## Links
* [Fineco Developer Portal](https://devportal.finecobank.com/)
* [Fineco TPP Registration](https://devportal.finecobank.com/registration)
## Scopes
* Account Information 🔒
* Payment Initiation 🔒
## Fineco
**Precondition**: To connect to Fineco, whether you are accessing account information or initiating payments, your business must have the right permission to access the resource. You need valid eiDAS certificates to connect to Fineco `Live` environment. Please refer [Fineco technical information](https://devportal.finecobank.com/technical-information) section for more details.
1. Upload your eiDAS certificates (QWAC and QSEAL) into Yapily's [certificate vault](https://console.yapily.com/certificates).
2. Add **Fineco** from the **Live** tab to your [Yapily Console](https://console.yapily.com/applications) application.
3. Add this institution into your app from the **Live** tab and configure the institution by adding `Client Uri` and `Terms of Service Uri` & selecting the `certificates` from the dropdown.
4. Select your `QSEAL` and `QWAC` certificates from the relevant drop-downs lists then click **Next**.
5. Add `key` and `secret` which you have received after registering your eiDAS certificates with CBI GLOBE.
6. Make sure to click **Save** in order not to lose these credentials.
## Support
If you require technical support with certificate management, please contact [Support](/resources/support)
# Intesa Sanpaolo
Source: https://docs.yapily.com/institution-configurations/italy/Intesa-Sanpaolo
## Links
* [CBI GLOBE Home](https://www.cbiglobe.com/Home-Page)
* [TPP Login/Register](https://www.cbiglobe.com/Login-Register)
* [Wiki](https://www.cbiglobe.com/Wiki/index.php/Main_Page)
## Scopes
* Account Information 🔒
* Payment Initiation 🔒
## Intesa Sanpaolo (CBI GLOBE)
**Precondition**: To connect to the CBI GLOBE, whether you are accessing account information or initiating payments, your business must have the right permission to access the resource. Please refer to the [CBI GLOBE](https://www.cbiglobe.com/Subscription-TPP) subscription page to subscribe and upload your eiDAS certificates.
1. Upload your eiDAS certificates (QWAC and QSEAL) into Yapily's [certificate vault](https://console.yapily.com/certificates).
2. Add **Intesa Sanpaolo** from the **Live** tab to your [Yapily Console](https://console.yapily.com/applications) application.
3. Add this institution into your app from the **Live** tab and configure the institution by adding `Client Uri` and `Terms of Service Uri` & selecting the `certificates` from the dropdown.
4. Select your `QSEAL` and `QWAC` certificates from the relevant drop-downs lists then click **Next**.
5. Add `key` and `secret` which you have received after registering your eiDAS certificates with CBI GLOBE.
6. Make sure to click **Save** in order not to lose these credentials.
## Support
If you require technical support with certificate management, please contact [Support](/resources/support)
# Poste Italiane
Source: https://docs.yapily.com/institution-configurations/italy/Poste-Italiane
## Links
* [CBI GLOBE Home](https://www.cbiglobe.com/Home-Page)
* [TPP Login/Register](https://www.cbiglobe.com/Login-Register)
* [Wiki](https://www.cbiglobe.com/Wiki/index.php/Main_Page)
## Scopes
* Account Information 🔒
* Payment Initiation 🔒
## Poste Italiane (CBI GLOBE)
**Precondition**: To connect to the CBI GLOBE, whether you are accessing account information or initiating payments, your business must have the right permission to access the resource. Please refer to the [CBI GLOBE](https://www.cbiglobe.com/Subscription-TPP) subscription page to subscribe and upload your eiDAS certificates.
1. Upload your eiDAS certificates (QWAC and QSEAL) into Yapily's [certificate vault](https://console.yapily.com/certificates).
2. Add **Poste Italiane** from the **Live** tab to your [Yapily Console](https://console.yapily.com/applications) application.
3. Add this institution into your app from the **Live** tab and configure the institution by adding `Client Uri` and `Terms of Service Uri` & selecting the `certificates` from the dropdown.
4. Select your `QSEAL` and `QWAC` certificates from the relevant drop-downs lists then click **Next**.
5. Add `key` and `secret` which you have received after registering your eiDAS certificates with CBI GLOBE.
6. Make sure to click **Save** in order not to lose these credentials.
## Support
If you require technical support with certificate management, please contact [Support](/resources/support)
# Raiffeisen Italy - Casa Centrale
Source: https://docs.yapily.com/institution-configurations/italy/Raiffeisen-Italy-Casa-Centrale
## Links
The below table represents the list of institutions covered under Raiffeisen Italy
| Institution Code | Institution Name | Institution Id | Institution Full Name | Institution Developer Portal |
| ---------------- | -------------------------------------------- | --------------------------- | --------------------------------------------------------------------------------------- | ------------------------------------------------------------------------------------------------ |
| **3493** | CASSA CENTRALE RAIFFEISEN DELL ALTO ADIGE | `dell-alto-adige` | RAIFFEISEN LANDESBANK SUEDTIROL CASSA CENTRALE RAIFFEISEN DELL ALTO | [https://raiffeisen-03493-psd2.obp.sia.eu/sapr/](https://raiffeisen-03493-psd2.obp.sia.eu/sapr/) |
| **3134** | ALPENBANK | `alpenbank` | ALPENBANK | [https://raiffeisen-03134-psd2.obp.sia.eu/sapr/](https://raiffeisen-03134-psd2.obp.sia.eu/sapr/) |
| **8010** | CASSA RAIFFEISEN VAL BADIA | `val-badia` | RAIFFEISENKASSE VAL BADIA CASSA RAIFFEISEN VAL BADIA | [https://raiffeisen-08010-psd2.obp.sia.eu/sapr/](https://raiffeisen-08010-psd2.obp.sia.eu/sapr/) |
| **8020** | CASSA RAIFFEISEN ALTA PUSTERIA | `alta-pusteria` | RAIFFEISENKASSE HOCHPUSTERTAL CASSA RAIFFEISEN ALTA PUSTERIA | [https://raiffeisen-08020-psd2.obp.sia.eu/sapr/](https://raiffeisen-08020-psd2.obp.sia.eu/sapr/) |
| **8035** | CASSA RAIFFEISEN DI BRUNICO | `di-brunico` | RAIFFEISENKASSE BRUNECK CASSA RAIFFEISEN DI BRUNICO | [https://raiffeisen-08035-psd2.obp.sia.eu/sapr/](https://raiffeisen-08035-psd2.obp.sia.eu/sapr/) |
| **8056** | CASSA RAIFFEISEN CASTELROTTO-ORTISEI | `castelrotto-ortisei` | RAIFFEISENKASSE KASTELRUTH-ST ULRICH CASSA RAIFFEISEN CASTELROTTO-ORTISEI | [https://raiffeisen-08056-psd2.obp.sia.eu/sapr/](https://raiffeisen-08056-psd2.obp.sia.eu/sapr/) |
| **8065** | CASSA RAIFFEISEN SCHLERN-ROSENGARTEN | `schlern-rosengarten` | RAIFFEISENKASSE SCHLERN-ROSENGARTEN CASSA RAIFFEISEN SCHLERN-ROSENGARTEN | [https://raiffeisen-08065-psd2.obp.sia.eu/sapr/](https://raiffeisen-08065-psd2.obp.sia.eu/sapr/) |
| **8066** | CASSA RAIFFEISEN ALTA VENOSTA | `alta-venosta` | RAIFFEISENKASSE OBERVINSCHGAU CASSA RAIFFEISEN ALTA VENOSTA | [https://raiffeisen-08066-psd2.obp.sia.eu/sapr/](https://raiffeisen-08066-psd2.obp.sia.eu/sapr/) |
| **8080** | CASSA RAIFFEISEN DI DOBBIACO | `di-dobbiaco` | RAIFFEISENKASSE TOBLACH CASSA RAIFFEISEN DI DOBBIACO | [https://raiffeisen-08080-psd2.obp.sia.eu/sapr/](https://raiffeisen-08080-psd2.obp.sia.eu/sapr/) |
| **8081** | CASSA RURALE DI BOLZANO | `di-bolzano` | RAIFFEISENKASSE BOZEN CASSA RURALE DI BOLZANO | [https://raiffeisen-08081-psd2.obp.sia.eu/sapr/](https://raiffeisen-08081-psd2.obp.sia.eu/sapr/) |
| **8094** | CASSA RAIFFEISEN DI FUNES | `di-funes` | RAIFFEISENKASSE VILLNOSS CASSA RAIFFEISEN DI FUNES | [https://raiffeisen-08094-psd2.obp.sia.eu/sapr/](https://raiffeisen-08094-psd2.obp.sia.eu/sapr/) |
| **8110** | CASSA RAIFFEISEN LACES | `lances` | RAIFFEISENKASSE LATSCH CASSA RAIFFEISEN LACES | [https://raiffeisen-08110-psd2.obp.sia.eu/sapr/](https://raiffeisen-08110-psd2.obp.sia.eu/sapr/) |
| **8112** | CASSA RAIFFEISEN DI LAGUNDO | `di-lagundo` | RAIFFEISENKASSE ALGUND CASSA RAIFFEISEN DI LAGUNDO | [https://raiffeisen-08112-psd2.obp.sia.eu/sapr/](https://raiffeisen-08112-psd2.obp.sia.eu/sapr/) |
| **8113** | CASSA RAIFFFEISEN BASSA VALL ISARCO | `bassa-vall-isarco` | RAIFFEISENKASSE UNTEREISACKTAL CASSA RAIFFFEISEN BASSA VALL ISARCO | [https://raiffeisen-08113-psd2.obp.sia.eu/sapr/](https://raiffeisen-08113-psd2.obp.sia.eu/sapr/) |
| **8114** | CASSA RAIFFEISEN BASSA ATESINA | `bassa-atseina` | RAIFFEISENKASSE UNTERLAND CASSA RAIFFEISEN BASSA ATESINA | [https://raiffeisen-08114-psd2.obp.sia.eu/sapr/](https://raiffeisen-08114-psd2.obp.sia.eu/sapr/) |
| **8115** | CASSA RAIFFEISEN LANA | `lana` | RAIFFEISENKASSE LANA CASSA RAIFFEISEN LANA | [https://raiffeisen-08115-psd2.obp.sia.eu/sapr/](https://raiffeisen-08115-psd2.obp.sia.eu/sapr/) |
| **8117** | CASSA RAIFFEISEN DI LASA | `lasa` | RAIFFEISENKASSE LAAS CASSA RAIFFEISEN DI LASA | [https://raiffeisen-08117-psd2.obp.sia.eu/sapr/](https://raiffeisen-08117-psd2.obp.sia.eu/sapr/) |
| **8133** | CASSA RAIFFEISEN DI MERANO | `di-merano` | RAIFFEISENKASSE MERAN CASSA RAIFFEISEN DI MERANO | [https://raiffeisen-08133-psd2.obp.sia.eu/sapr/](https://raiffeisen-08133-psd2.obp.sia.eu/sapr/) |
| **8134** | CASSA RAIFFEISEN DI MARLENGO | `di-marlengo` | RAIFFEISENKASSE MARLING CASSA RAIFFEISEN DI MARLENGO | [https://raiffeisen-08134-psd2.obp.sia.eu/sapr/](https://raiffeisen-08134-psd2.obp.sia.eu/sapr/) |
| **8148** | CASSA RAIFFEISEN MONGUELFO-CASIESTESIDO | `monguelfo-casiestesido` | RAIFFEISENKASSE WELSBERG-GSIES TAISTEN CASSA RAIFFEISEN MONGUELFO-CASIESTESIDO | [https://raiffeisen-08148-psd2.obp.sia.eu/sapr/](https://raiffeisen-08148-psd2.obp.sia.eu/sapr/) |
| **8157** | CASSA RAIFFEISEN BASSA VENOSTA | `bassa-venosta` | RAIFFEISENKASSE UNTERVINSCHGAU CASSA RAIFFEISEN BASSA VENOSTA | [https://raiffeisen-08157-psd2.obp.sia.eu/sapr/](https://raiffeisen-08157-psd2.obp.sia.eu/sapr/) |
| **8162** | CASSA RAIFFEISEN DI NOVA PONENTE ALDINO | `di-nova-ponente-aldino` | RAIFFEISENKASSE DEUTSCHNOFEN-ALDEIN CASSA RAIFFEISEN DI NOVA PONENTE ALDINO | [https://raiffeisen-08162-psd2.obp.sia.eu/sapr/](https://raiffeisen-08162-psd2.obp.sia.eu/sapr/) |
| **8175** | CASSA RAIFFEISEN DI PARCINES | `di-parcines` | RAIFFEISENKASSE PARTSCHINS CASSA RAIFFEISEN DI PARCINES | [https://raiffeisen-08175-psd2.obp.sia.eu/sapr/](https://raiffeisen-08175-psd2.obp.sia.eu/sapr/) |
| **8182** | CASSA RAIFFEISEN WIPPTAL | `wipptal` | RAIFFEISENKASSE WIPPTAL CASSA RAIFFEISEN WIPPTAL | [https://raiffeisen-08182-psd2.obp.sia.eu/sapr/](https://raiffeisen-08182-psd2.obp.sia.eu/sapr/) |
| **8183** | CASSA RAIFFEISEN PRATO-TUBRE | `prato-tubre` | RAIFFEISENKASSE PRAD-TAUFERS CASSA RAIFFEISEN PRATO-TUBRE | [https://raiffeisen-08183-psd2.obp.sia.eu/sapr/](https://raiffeisen-08183-psd2.obp.sia.eu/sapr/) |
| **8220** | CASSA RURALE DI SALORNO | `di-salorno` | RAIFFEISENKASSE SALURN CASSA RURALE DI SALORNO | [https://raiffeisen-08220-psd2.obp.sia.eu/sapr/](https://raiffeisen-08220-psd2.obp.sia.eu/sapr/) |
| **8231** | CASSA RAIFFEISEN ULTIMO S.PANCRAZIO-LAUREGNO | `ultimo-pancrazio-lauregno` | RAIFFEISENKASSE ULTEN-ST.PANKRAZ LAUREIN - CASSA RAIFFEISEN ULTIMO S.PANCRAZIO-LAUREGNO | [https://raiffeisen-08231-psd2.obp.sia.eu/sapr/](https://raiffeisen-08231-psd2.obp.sia.eu/sapr/) |
| **8233** | CASSA RAIFFEISEN VAL SARENTINO | `val-sarentino` | RAIFFEISENKASSE SARNTAL CASSA RAIFFEISEN VAL SARENTINO | [https://raiffeisen-08233-psd2.obp.sia.eu/sapr/](https://raiffeisen-08233-psd2.obp.sia.eu/sapr/) |
| **8234** | CASSA RAIFFEISEN DI SCENA | `di-scena` | RAIFFEISENKASSE SCHENNA CASSA RAIFFEISEN DI SCENA | [https://raiffeisen-08234-psd2.obp.sia.eu/sapr/](https://raiffeisen-08234-psd2.obp.sia.eu/sapr/) |
| **8238** | CASSA RAIFFEISEN GHERDEINA | `gherdeina` | RAIFFEISENKASSE GRODEN CASSA RAIFFEISEN GHERDEINA | [https://raiffeisen-08238-psd2.obp.sia.eu/sapr/](https://raiffeisen-08238-psd2.obp.sia.eu/sapr/) |
| **8244** | CASSA RAIFFEISEN SILANDRO | `silandro` | RAIFFEISENKASSE SCHLANDERS CASSA RAIFFEISEN SILANDRO | [https://raiffeisen-08244-psd2.obp.sia.eu/sapr/](https://raiffeisen-08244-psd2.obp.sia.eu/sapr/) |
| **8249** | CASSA RAIFFEISEN CAMPO DI TRENS | `campo-di-trens` | RAIFFEISENKASSE FREIENFELD CASSA RAIFFEISEN CAMPO DI TRENS | [https://raiffeisen-08249-psd2.obp.sia.eu/sapr/](https://raiffeisen-08249-psd2.obp.sia.eu/sapr/) |
| **8255** | CASSA RAIFFEISEN OLTRADIGE | `oltradige` | RAIFFEISENKASSE UBERETSCH CASSA RAIFFEISEN OLTRADIGE | [https://raiffeisen-08255-psd2.obp.sia.eu/sapr/](https://raiffeisen-08255-psd2.obp.sia.eu/sapr/) |
| **8269** | CASSA RAIFFEISEN ETSCHTAL | `etschtal` | RAIFFEISENKASSE ETSCHTAL CASSA RAIFFEISEN ETSCHTAL | [https://raiffeisen-08269-psd2.obp.sia.eu/sapr/](https://raiffeisen-08269-psd2.obp.sia.eu/sapr/) |
| **8273** | CASSA RAIFFEISEN DI TESIMO | `di-tesimo` | RAIFFEISENKASSE TISENS CASSA RAIFFEISEN DI TESIMO | [https://raiffeisen-08273-psd2.obp.sia.eu/sapr/](https://raiffeisen-08273-psd2.obp.sia.eu/sapr/) |
| **8278** | CASSA RAIFFEISEN TIROLO | `tirolo` | RAIFFEISENKASSE TIROL CASSA RAIFFEISEN TIROLO | [https://raiffeisen-08278-psd2.obp.sia.eu/sapr/](https://raiffeisen-08278-psd2.obp.sia.eu/sapr/) |
| **8285** | CASSA RAIFFEISEN TURES-AURINA | `tures-aurina` | RAIFFEISENKASSE TAUFERER-ARNTHAL CASSA RAIFFEISEN TURES-AURINA | [https://raiffeisen-08285-psd2.obp.sia.eu/sapr/](https://raiffeisen-08285-psd2.obp.sia.eu/sapr/) |
| **8295** | CASSA RAIFFEISEN VANDOIES | `vandoies` | RAIFFEISENKASSE VINTL CASSA RAIFFEISEN VANDOIES | [https://raiffeisen-08295-psd2.obp.sia.eu/sapr/](https://raiffeisen-08295-psd2.obp.sia.eu/sapr/) |
| **8302** | CASSA RAIFFEISEN DI VILLABASSA | `di-villabassa` | RAIFFEISENKASSE NIEDERDORF CASSA RAIFFEISEN DI VILLABASSA | [https://raiffeisen-08302-psd2.obp.sia.eu/sapr/](https://raiffeisen-08302-psd2.obp.sia.eu/sapr/) |
| **8307** | CASSA RAIFFEISEN DELLA VALLE ISARCO | `della-valle-isarco` | RAIFFEISENKASSE EISACKTAL CASSA RAIFFEISEN DELLA VALLE ISARCO | [https://raiffeisen-08307-psd2.obp.sia.eu/sapr/](https://raiffeisen-08307-psd2.obp.sia.eu/sapr/) |
| **8998** | CASSA RAIFFEISEN DELLA VAL PASSIRIA | `della-val-passiria` | RAIFFEISENKASSE PASSEIER CASSA RAIFFEISEN DELLA VAL PASSIRIA | [https://raiffeisen-08998-psd2.obp.sia.eu/sapr/](https://raiffeisen-08998-psd2.obp.sia.eu/sapr/) |
## Scopes
* Account Information 🔒
* Payment Initiation 🔒
## Flow
Raiffeisen API supports both Redirect and Decoupled flow and the SCA method is decided by Institution based on the PSU-ID (mandatory input in request). Both the flows are described below
1. TPP initiates account auth request with a valid PSU ID
2. Depending on the PSU ID, the bank decides to use redirect / decoupled approach
* Redirect -
* Authorization URL will be returned to the user
* Consent will be in AWAITING\_AUTHORIZATION status
* PSU can navigate to the URL and provide authorization
* Upon successful completion of authorization, the user will be redirected back to Yapily and consent can be accessed through the consent endpoint
* Consent will be moved to AUTHORIZED status
* Decoupled -
* Consent will be moved to AWAITING\_DECOUPLED\_AUTHORIZATION status and consent ID can be used to poll for further status changes (AWAITING\_DECOUPLED\_AUTHORIZATION to AUTHORIZED/FAILED/REVOKED) in case of accounts flow
* Consent will be moved to AWAITING\_DECOUPLED\_AUTHORIZATION status in case of Payments flow, there is no consent associated with the payments(from an institution perspective)
* The user gets the notification in their device to confirm the Authorization of access (This happens in parallel in moving status to AWAITING\_DECOUPLED\_AUTHORIZATION)
* Consent endpoint can be used to access the latest status if it changes to AUTHORIZED, TPP can access account, balance, transactions and payment details
## Raiffeisen Italy - All Institutions
**Precondition**: To connect to Raiffeisen Italy institutions, whether you are accessing account information or initiating payments, your business must have the right permission to access the resource. You need a valid eiDAS certificates to connect to the environment.
1. Upload your eiDAS certificates (QWAC and QSEAL) into Yapily's [certificate vault](https://console.yapily.com/certificates).
2. Add **institutions from the above list** from the **Live** tab to your [Yapily Console](https://console.yapily.com/applications) application.
3. Add this institution into your app from the **Live** tab.
4. Select your `QSEAL` and `QWAC` certificates from the relevant drop-down lists then click **Save**.
Please note there is no clientId/secret required for Raiffeisen Italy institutions.
## Support
If you require technical support with certificate management, please contact [Support](/resources/support)
# Soldo
Source: https://docs.yapily.com/institution-configurations/italy/Soldo
Soldo uses **Fabrick Gateway** to expose Account Information APIs. Soldo **does not** support Payments. Fabrick Gateway allows payments creation and consents management with PSD2 compliant logic.
## Links
* [Fabrick Home (PSD2)](https://www.fabrick.com/it/psd2/gateway)
* [TPP Register](https://onboarding.fabrick.com/fbkonb/home)
* [Fabrick APIs](https://docs.fabrick.com/psd2/apis)
* [Fabrick Developer Manual (PDF)](https://docs.fabrick.com/psd2/manuals/OperationalGuidelinesForTPP.pdf)
## Scopes
* Account Information 🔒
## Registration
1. Click the link [TPP Register](https://onboarding.fabrick.com/fbkonb/home).
2. Fill the details required in the form and submit.
3. An email will be sent to the provided email with further instructions on how to access their **Sandbox** or **Development** or **Live** environment.
4. Refer the sample email from Fabrick:
To get access to these environments you have to execute two different API calls.
Also, we warmly suggest you to provide two different certificates to enable the **DEVELOPMENT** and **LIVE** environment.
## Development
These steps will allow you to successfully register in the Fabrick **DEVELOPMENT** environment.
**Note:** You must present a valid X.509 certificate (for mutual authentication) to be granted access to the Fabrick **DEVELOPMENT** environment.
* Execute the following API call:
**Endpoint URL:** [https://sandbox-psdgw-onboarding.fabrick.com/api/fabrick/psd2/v1/onboarding/cf0775e414391a4?token=eyJhbGciOiJIUzI1NiJ9.eyJzdWIiOiJmYWJyaWNrIiwiZGF0YSI6eyJndWlkIjoiY2YwNzc1ZTQxNDM5MWE0In19.ySi0\_8OD651OcYJCvmSKOYaMvxKpQlC8auzO3AVOtg4](https://sandbox-psdgw-onboarding.fabrick.com/api/fabrick/psd2/v1/onboarding/cf0775e414391a4?token=eyJhbGciOiJIUzI1NiJ9.eyJzdWIiOiJmYWJyaWNrIiwiZGF0YSI6eyJndWlkIjoiY2YwNzc1ZTQxNDM5MWE0In19.ySi0_8OD651OcYJCvmSKOYaMvxKpQlC8auzO3AVOtg4)
**HTTP Method:** POST\*\*Request Headers
\*\*'Content-Type' (valid value: 'application/json')
'X-Request-ID' (ID of the request, unique to this call)
**Request body**
```curl theme={null}
{
"aisp": true | false,
"piisp": true | false,
"pisp": true | false
}
```
* You can set either "true "or "false" for each role (aisp, pisp, piisp) in order to enable or disable the access to the related APIs.
* You will receive a confirmation email as soon as our operator validates your certificates
* If you have to update the certificate to access to the **DEVELOPMENT** environment and/or you need to modify the PSD2 role, you can do it through the following API call:
**Endpoint URL:** [https://sandbox-psdgw-onboarding.fabrick.com/api/fabrick/psd2/v1/onboarding/cf0775e414391a4?token=eyJhbGciOiJIUzI1NiJ9.eyJzdWIiOiJmYWJyaWNrIiwiZGF0YSI6eyJndWlkIjoiY2YwNzc1ZTQxNDM5MWE0In19.ySi0\_8OD651OcYJCvmSKOYaMvxKpQlC8auzO3AVOtg4](https://sandbox-psdgw-onboarding.fabrick.com/api/fabrick/psd2/v1/onboarding/cf0775e414391a4?token=eyJhbGciOiJIUzI1NiJ9.eyJzdWIiOiJmYWJyaWNrIiwiZGF0YSI6eyJndWlkIjoiY2YwNzc1ZTQxNDM5MWE0In19.ySi0_8OD651OcYJCvmSKOYaMvxKpQlC8auzO3AVOtg4)
**HTTP Method:** PUT\*\*Request Headers:
\*\*'Content-Type' (valid value: 'application/json')
'X-Request-ID' (ID of the request, unique to this call)
**Request body:**
```curl theme={null}
{
"aisp": true | false,
"piisp": true | false,
"pisp": true | false
}
```
## Live
These steps will allow you to successfully register in the Fabrick **LIVE** environment.
**Note:** You must present a valid X.509 certificate (for mutual authentication) to be granted access to the Fabrick **LIVE** environment.
* Execute the following API call:
**Endpoint URL:** [https://psdgw-onboarding.fabrick.com/api/fabrick/psd2/v1/onboarding/cf0775e414391a4?token=eyJhbGciOiJIUzI1NiJ9.eyJzdWIiOiJmYWJyaWNrIiwiZGF0YSI6eyJndWlkIjoiY2YwNzc1ZTQxNDM5MWE0In19.ySi0\_8OD651OcYJCvmSKOYaMvxKpQlC8auzO3AVOtg4](https://psdgw-onboarding.fabrick.com/api/fabrick/psd2/v1/onboarding/cf0775e414391a4?token=eyJhbGciOiJIUzI1NiJ9.eyJzdWIiOiJmYWJyaWNrIiwiZGF0YSI6eyJndWlkIjoiY2YwNzc1ZTQxNDM5MWE0In19.ySi0_8OD651OcYJCvmSKOYaMvxKpQlC8auzO3AVOtg4)
**HTTP Method:** POST
\*\*Request Headers:
\*\*'Content-Type' (valid value: 'application/json')
'X-Request-ID' (ID of the request, unique to this call)
**Request body:** `{}`
* You will receive a confirmation email as soon as our operator validates your certificates
5. Use the details provided in the email to send your certificates along with the POST request. Once the certificates are validated you will receive a confirmation email.
## Soldo
After the completion of Registration process above, the following steps are required to be performed on Yapily Dashboard:
1. Upload your eiDAS certificates (QWAC and QSEAL) into Yapily's [certificate vault](https://console.yapily.com/certificates).
2. Add Soldo from the **Live** tab to your [Yapily Console](https://console.yapily.com/applications) application.
3. Add this institution into your app from the **Live** tab and configure the institution by selecting the `certificates` from the dropdown.
4. Select your `QSEAL` and `QWAC` certificates from the relevant drop-downs lists then click **Next**.
5. Make sure to click **Save** in order not to lose these credentials.
## Support
If you require technical support with certificate management, please contact [Support](/resources/support)
# Unicredit
Source: https://docs.yapily.com/institution-configurations/italy/Unicredit
## Links
* [Unicredit developer portal](https://developer.unicredit.eu)
## Scopes
* Account Information 🔒
* Payment Initiation 🔒
## Unicredit
**Precondition**: To connect to Unicredit, whether you are accessing account information or initiating payments, your business must have the right permission to access the resource. You need valid eIDAS certificates to connect to Unicredit `Live` environment.
1. Upload your eIDAS certificates (QWAC and QSEAL) into Yapily's [certificate vault](https://console.yapily.com/certificates).
2. Add **unicredit** from the **Live** tab to your [Yapily Console](https://console.yapily.com/applications) application.
3. Select your `QSEAL` and `QWAC` certificates from the relevant drop-downs lists then click **Save**.
## Notes
* Unicredit only requires eIDAS certificates, no additional registration is needed hence **no** keys/secrets are required..
## Support
If you require technical support with certificate management, please contact [Support](/resources/support)
# ABN AMRO
Source: https://docs.yapily.com/institution-configurations/netherlands/ABN-AMRO
## Links
[https://developer.abnamro.com/api-products](https://developer.abnamro.com/api-products)
## Scopes
* Account Information 🔒
* Payment Initiation 🔒
## Supported ASPSPs
| ASPSP | Supported | Institution ID |
| -------------------------- | --------- | ----------------------------------------------------------------------------------------- |
| ABN AMRO Group and sandbox | Yes | `abn-amro-nl`
`abn-amro-sandbox`
`abn-amro-be-asset`
`abn-amro-be-private` |
| Institution Id | Institution Code | Countries | Type |
| --------------------- | ---------------- | -------------- | --------------------------------------------------------------------------------------------- |
| `abn-amro-nl` | NLAA01 | NL, BE, GB, DE | All business accounts, in NL all type of accounts |
| `abn-amro-be-private` | BEPB01 | BE | Accounts for clients who have a private banker. Business/personal differ only by client group |
| `abn-amro-be-asset` | BEPB02 | BE | Accounts for clients who have a Independent Asset manager |
## Accounts and Payments Supported
### Accounts
* Accounts
* Balance
* Transactions
* from 18 months
### Payments
* Domestic Single Payments
* Domestic Periodic Payments - Not released
* International Single Payments - Not released
### Frequencies Supported
* DAILY
* WEEKLY
* EVERY\_TWO\_WEEKS
* MONTHLY
* EVERY\_TWO\_MONTHS
* QUARTERLY
* SEMIANNUAL
* ANNUAL
## Onboarding ASPSP's to Yapily Application
**Precondition**: To connect to ABN AMRO institutions you need valid eiDAS certificates, the `Client Id` and the `API key` from the [developer portal](https://developer.abnamro.com/).
Please refer [European Commission technical information](https://digital-strategy.ec.europa.eu/en/policies/discover-eidas) for more information regarding eIDAS certificates.
1. Upload your eiDAS certificates (QWAC and QSEAL) into Yapily's [certificate vault](https://console.yapily.com/certificates).
2. Add an ABN AMRO institution (for example **abn-amro-nl**) from the tab to your [Yapily Console](https://console.yapily.com/applications) application.
3. Add this institution into your app from the `Live` tab and configure the institution by selecting the `certificates` from the dropdown.
4. Select your `QSEAL` and `QWAC` certificates from the relevant drop-downs lists and fill your `API Key` and `Client Id` and then click *Save* to save the registration.
## Support
If you require technical support with certificate management, please contact [Support](/resources/support).
# Bunq
Source: https://docs.yapily.com/institution-configurations/netherlands/Bunq
## Links
* [Bunq Developer Portal](https://doc.bunq.com/getting-started/tools/developers-portal)
* [Account Information Service Provider (AISP)](https://doc.bunq.com/psd2/account-information-service-provider-aisp)
## Scopes
* Account Information 🔒
## Supported ASPSPs
Bunq is implemented country-wise for the following:
Austria, Belgium, Denmark, Estonia, Finland, France, Germany, Ireland, Italy, Latvia, Lithuania, Luxembourg, Netherlands, Portugal, Spain, Sweden
| ASPSP | Supported | Institution ID |
| ---------------- | --------- | -------------- |
| Bunq Austria | Yes | `bunq_at` |
| Bunq Belgium | Yes | `bunq_be` |
| Bunq Denmark | Yes | `bunq_dk` |
| Bunq Estonia | Yes | `bunq_ee` |
| Bunq Finland | Yes | `bunq_fi` |
| Bunq France | Yes | `bunq_fr` |
| Bunq Germany | Yes | `bunq_de` |
| Bunq Ireland | Yes | `bunq_ie` |
| Bunq Italy | Yes | `bunq_it` |
| Bunq Latvia | Yes | `bunq_lv` |
| Bunq Lithuania | Yes | `bunq_lt` |
| Bunq Luxembourg | Yes | `bunq_lu` |
| Bunq Netherlands | Yes | `bunq_nl` |
| Bunq Portugal | Yes | `bunq_pt` |
| Bunq Spain | Yes | `bunq_es` |
| Bunq Sweden | Yes | `bunq_se` |
## Registration Process
Bunq Bank supports Dynamic Registration for any of the above institutions using a **Custom multi-step DCR flow** (installation + device + OAuth client setup).
## Accounts Supported
### Accounts
* Accounts
* Balance
* Transactions
## Onboarding ASPSP's to Yapily Application
### Live
**Precondition**: To connect to Live Bunq Bank, if you are accessing account information, your business must have the right permission to access the resource. You need valid eiDAS certificates to connect. Please refer to the respective ASPSPs link given above for more details.
Registering with one Bunq institution will automatically register you across all Bunq countries. For example, registering with `bunq_nl` will register for all Bunq institutions.
1. **Upload Certificates:** Upload the certificates & keys (transport, signing) from Open Banking into Yapily's [certificate vault](https://console.yapily.com/certificates).
2. **Add Institution:** Add one of the institutions from the above list into your [Yapily Console](https://console.yapily.com/applications) application and configure the institution by adding the Signing Key ID from Open Banking & selecting the certificates from the dropdown, then press *Next*.
3. **Multi-Country Auto-Registration:** Click *Register* to auto-register to the bank and across all countries via Yapily and auto-populate the key & secret, then press *Save*.
## Support
If you require technical support with certificate management, please contact [Support](/resources/support).
# Devolksbank Group
Source: https://docs.yapily.com/institution-configurations/netherlands/Devolksbank-Group
## Links
[https://developer.devolksbank.nl/admin/login](https://developer.devolksbank.nl/admin/login)
## Scopes
* Account Information 🔒
* Payment Initiation 🔒
## Supported ASPSPs
| ASPSP | Link | Supported | Institution ID |
| ------------------------ | -------------------------------------------------------------------------------------------- | --------- | -------------------------------- |
| ASN Bank | [https://developer.devolksbank.nl/admin/login](https://developer.devolksbank.nl/admin/login) | Yes | `asnbank` |
| Regio Bank | [https://developer.devolksbank.nl/admin/login](https://developer.devolksbank.nl/admin/login) | Yes | `regiobank` |
| SNS Bank and its Sandbox | [https://developer.devolksbank.nl/admin/login](https://developer.devolksbank.nl/admin/login) | Yes | `snsbank`
`snsbank-sandbox` |
## Accounts and Payments Supported
### Accounts
* Accounts
* Transactions
### Payments
* Domestic Single Payments
* Domestic Scheduled Payments
* Domestic Periodic Payments
## Onboarding ASPSP's to Yapily Application
**Precondition**: To connect to Devolksbank institutions you need valid eiDAS certificates and your `Client Id` and `API key` from the
[developer portal](https://developer.devolksbank.nl/admin/login). Please refer [European Commission technical information](https://digital-strategy.ec.europa.eu/en/policies/discover-eidas) for more information regarding eIDAS certificates.
1. Upload your eiDAS certificates (QWAC and QSEAL) into Yapily's [certificate vault](https://console.yapily.com/certificates).
2. Add a Devolksbank Group institution (for example **asnbank**) from the tab to your [Yapily Console](https://console.yapily.com/applications) application.
3. Add this institution into your app from the `Live` tab and configure the institution by selecting the `certificates` from the dropdown.
4. Select your `QSEAL` and `QWAC` certificates from the relevant drop-downs lists and fill your `API Key` and `Client Id` and then click *Save* to save the registration.
## Support
If you require technical support with certificate management, please contact [Support](/resources/support).
# Handelsbanken Netherlands
Source: https://docs.yapily.com/institution-configurations/netherlands/Handelsbanken-Netherlands
## Links
[https://developer.handelsbanken.com](https://developer.handelsbanken.com/)
## Scopes
* Account Information 🔒
* Payment Initiation 🔒
## Supported ASPSPs
| ASPSP | Link | Supported | Institution ID |
| ---------------------------------- | --------------------------------------------------------------------------- | --------- | -------------------------- |
| Handelsbanken Netherlands | [https://developer.handelsbanken.com](https://developer.handelsbanken.com/) | Yes | `handelsbanken_nl` |
| Handelsbanken Business Netherlands | [https://developer.handelsbanken.com](https://developer.handelsbanken.com/) | Yes | `handelsbankenbusiness_nl` |
## Accounts and Payments Supported
### Accounts
* Accounts
* Transactions
### Payments
* Domestic Single Payments
* International Single Payments
## Onboarding ASPSP's to Yapily Application
**Precondition**: To connect to Handelsbanken institution you need valid eiDAS certificates. Please refer [European Commission technical information](https://digital-strategy.ec.europa.eu/en/policies/discover-eidas) for more information regarding eIDAS certificates.
1. Upload your eiDAS certificates (QWAC and QSEAL) into Yapily's [certificate vault](https://console.yapily.com/certificates).
2. Add a Handelsbanken institution (for example **handelsbanken\_nl**) from the tab to your [Yapily Console](https://console.yapily.com/applications) application.
3. Add this institution into your app from the `Live` tab and configure the institution by selecting the `certificates` from the dropdown.
4. Select your `QSEAL` and `QWAC` certificates from the relevant drop-downs lists and then click *Save* to save the registration.
## Support
If you require technical support with certificate management, please contact [Support](/resources/support).
# Knab
Source: https://docs.yapily.com/institution-configurations/netherlands/Knab
## Links
[https://developer.knab.nl/](https://developer.knab.nl/)
## Scopes
* Account Information 🔒
* Payment Initiation 🔒
## Supported ASPSPs
| ASPSP | Link | Supported | Institution ID |
| ------------ | ------------------------------------------------------ | --------- | -------------- |
| Knab | [https://developer.knab.nl](https://developer.knab.nl) | Yes | `knab` |
| Knab Sandbox | [https://developer.knab.nl](https://developer.knab.nl) | Yes | `knab-sandbox` |
## Accounts and Payments Supported
### Accounts
* Accounts
* Transactions
### Payments
* Domestic Single Payments
* Domestic Bulk Payments
* Domestic Periodic Payments
* International Single Payments
* International Bulk Payments
* International Periodic Payments
## Onboarding ASPSP's to Yapily Application
### Production
**Precondition**: To connect with Knab, send an e-mail to [openbanking@knab.nl](mailto:openbanking@knab.nl) with the following information:
* Call back URL (must be https, you can deliver more URLs)
* Company name, which should be exactly the same as on the license/ eIDAS
* Name contact person and contact details including mobile phone number (for sending credentials)
They will check our eIDAS QWAC certificate when calling their APIs. They have not yet implemented the Qseal certificate.
* Attach the public part of your company's eIDAS certificate
* License number
* Name and link to the QTSP where your eIDAS certificate is issued
* Licensed PSD2 roles
Knab will then email you your `client-id` and `client-secret`
Please refer [European Commission technical information](https://digital-strategy.ec.europa.eu/en/policies/discover-eidas) for more information regarding eIDAS certificates.
1. Upload your eiDAS certificates (QWAC and QSEAL) into Yapily's [certificate vault](https://console.yapily.com/certificates).
2. Add a Knab institution (for example **knab**) from the tab to your [Yapily Console](https://console.yapily.com/applications) application.
3. Add this institution into your app from the `Live` tab and configure the institution by selecting the `certificates` from the dropdown.
4. Select your `QSEAL` and `QWAC` certificates from the relevant drop-downs lists
5. Select the certificates you uploaded in Step 1, and fill in the rest of the form with credentials obtained from the bank in **Prerequisite** step.
6. Click **Save Registration**.
### Sandbox
**Precondition**: Register with: [https://developer.knab.nl/sandbox/get-access](https://developer.knab.nl/sandbox/get-access)
* In the form we have to send our company name and a contact e-mail. Also an oAuth2 redirect URI. They will whitelist our redirect URI in their systems. In the form on the page, enter the address you"d like to whitelist. Note that this redirect URI will be coupled to the client\_id.
* In the next step we will be able to obtain the sandbox client ID and secret. Note: We will only get our credentials once.
* Download the certificates: The sandbox simulates PSD2 APIs. As such, it requires the use of certificates. In the last step of the form we will be able to download certificates: one set of certificates for signing requests, and one set of certificates for two-way TLS. (Please note that two-way TLS is currently disabled on the sandbox, and only one-way TLS is applicable for now. You still need to sign your requests.)
1. Upload your eiDAS certificates (QWAC and QSEAL) into Yapily's [certificate vault](https://console.yapily.com/certificates).
2. Add a Knab institution (for example **knab-sandbox**) from the tab to your [Yapily Console](https://console.yapily.com/applications) application.
3. Add this institution into your app from the `Live` tab and configure the institution by selecting the `certificates` from the dropdown.
4. Select your `QSEAL` and `QWAC` certificates from the relevant drop-downs lists
5. Select the certificates you uploaded in Step 1, and fill in the rest of the form with credentials obtained from the bank in **Prerequisite** step.
6. Click **Save Registration**.
## Support
If you require technical support with certificate management, please contact [Support](/resources/support).
# Rabobank
Source: https://docs.yapily.com/institution-configurations/netherlands/Rabobank
## Links
[https://developer.rabobank.nl/api-documentation](https://developer.rabobank.nl/api-documentation)
## Scopes
* Account Information 🔒
* Payment Initiation 🔒
## Supported ASPSPs
| ASPSP | Link | Supported | Institution ID |
| -------- | -------------------------------------------------------------------------------------------------- | --------- | -------------- |
| Rabobank | [https://developer.rabobank.nl/api-documentation](https://developer.rabobank.nl/api-documentation) | Yes | `rabobank` |
## Accounts and Payments Supported
### Accounts
* Accounts
* Transactions
### Payments
* Domestic Single Payments
* Domestic Scheduled Payments
* Domestic Periodic Payments
* International Single Payments
* International Scheduled Payments
* International Periodic Payments
## Onboarding ASPSP's to Yapily Application
**Precondition**: To connect to the Rabobank institution with eIDAS certificates a dynamic registration is needed while passing a client ID, client secret and business contact email.
Please refer [European Commission technical information](https://digital-strategy.ec.europa.eu/en/policies/discover-eidas) for more information regarding eIDAS certificates.
1. Upload your eiDAS certificates (QWAC and QSEAL) into Yapily's [certificate vault](https://console.yapily.com/certificates).
2. Add a Rabobank institution (for example **rabobank**) from the tab to your [Yapily Console](https://console.yapily.com/applications) application.
3. Add this institution into your app from the `Live` tab and configure the institution by selecting the `certificates` from the dropdown.
4. Select your `QSEAL` and `QWAC` certificates from the relevant drop-downs lists
5. Complete the business `Email` , the `Client Id` and `Client Secret` and then click *Register* to start the registration.
## Support
If you require technical support with certificate management, please contact [Support](/resources/support).
# BEC
Source: https://docs.yapily.com/institution-configurations/nordics/BEC
## Links
[https://apiportal.prod.bec.dk/openbanking/sandbox/](https://apiportal.prod.bec.dk/openbanking/sandbox/)
## Scopes
* Account Information 🔒
* Payment Initiation 🔒
## Supported ASPSPs
| ASPSP | Supported | Institution ID |
| ------------------------------------ | --------- | ----------------------------------------------------------------------------------------------------------------------------------------------------------------------------------------------------------------------------------------------------------------------------------------------------------------------------------------------------------------------------------------------------------------------------------------------------------------------------------------------------------------------------------------------------------------------------------------------------------------------------------------------------------------------------------------------------------------------------------------------------------------------------------------------------------------------------------------------------------------------------------------------------------------------------------------------------------------------------------------------------------------------------------- |
| BEC group institutions and sandboxes | Yes | `vestjysk_dk`
`vestjysk-sandbox_dk`
`arbejdernes_dk`
`arbejdernes-sandbox_dk`
`hvidbjerg_dk`
`hvidbjerg-sandbox_dk`
`salling_dk`
`salling-sandbox_dk`
`pensam_dk`
`pensam-sandbox_dk`
`laegernes_dk`
`laegernes-sandbox_dk`
`nykredit_dk`
`nykredit-sandbox_dk`
`handelsbanken_dk`
`handelsbanken-sandbox_dk`
`faelleskassen_dk`
`faelleskassen-sandbox_dk`
`skandinaviska_dk`
`skandinaviska-sandbox_dk`
`bil_dk`
`bil-sandbox_dk`
`mons_dk`
`mons-sandbox_dk`
`froslev_dk`
`froslev-sandbox_dk`
`frorup_dk`
`frorup-sandbox_dk`
`faster_dk`
`faster-sandbox_dk`
`merkur_dk`
`merkur-sandbox_dk`
`totalbanken_dk`
`totalbanken-sandbox_dk`
`lollands_dk`
`lollands-sandbox_dk`
`fynske_dk`
`fynske-sandbox_dk`
`sparnord_dk`
`sparnord-sandbox_dk`
`maj_dk`
`maj-sandbox_dk`
`coop_dk`
`coop-sandbox_dk` |
## Accounts and Payments Supported
### Accounts
* Accounts
* Transactions
### Payments
* Domestic Single Payments
* Domestic Periodic Payments
* Domestic Scheduled Payments
* Domestic Instant Payments
* International Single Payments (this uses BEC's `sepa-credit-transfers` product for EUR payments and BEC's `cross-border-credit-transfers` product for all other international payments)
* International Scheduled Payments (this uses BEC's `sepa-credit-transfers` product for EUR payments and BEC's `cross-border-credit-transfers` product for all other international payments)
* Bulk Payments (this uses BEC's `domestic-credit-transfers` product)
## Onboarding ASPSP's to Yapily Application
**Precondition**: To connect to BEC you need valid eiDAS certificates. Please refer [European Commission technical information](https://digital-strategy.ec.europa.eu/en/policies/discover-eidas) for more information regarding eIDAS certificates.
1. Upload your eiDAS certificates (QWAC and QSEAL) into Yapily's [certificate vault](https://console.yapily.com/certificates).
2. Add a BEC institution (for example **vestjysk\_dk**) from the tab to your [Yapily Console](https://console.yapily.com/applications) application.
3. Add this institution into your app from the `Live` tab and configure the institution by selecting the `certificates` from the dropdown.
4. Select your `QSEAL`and `QWAC` certificates from the relevant drop-downs lists and then click *Register* to complete the registration.
## Support
If you require technical support with certificate management, please contact [Support](/resources/support)
# BankData
Source: https://docs.yapily.com/institution-configurations/nordics/BankData
## Links
Developer portal: [https://www.bankdata.dk/developers](https://www.bankdata.dk/developers)
## Scopes
* Account Information 🔒
* Payment Initiation 🔒
## Supported ASPSPs
| ASPSP | Supported | Institution ID |
| ----------------------------------- | --------- | -------------------------------------------------------------------------------------------------------------------------------------------------------------------------------------------------------------------------------------------------------------------------------------------------------------------------------------------------------------------------------------- |
| BankData institutions and sandboxes | Yes | `djurslands`
`djurslands-sandbox`
`jyske`
`jyske-sandbox`
`kreditbanken`
`kreditbanken-sandbox`
`nordfyns`
`nordfyns-sandbox`
`ringkjobing-landbobank`
`ringkjobing-landbobank-sandbox`
`skjern`
`skjern-sandbox`
`sparekassen-sjalland-fyn`
`sparekassen-sjalland-fyn-sandbox`
`sydbank`
`sydbank-sandbox` |
## Accounts and Payments Supported
### Accounts
* Accounts
* Account
* Balances
* Transactions
### Payments
* Domestic Single Payments
* Domestic Scheduled Payments
## Onboarding ASPSP's to Yapily Application
**Precondition**: To connect to BankData, you will need to complete this form [https://developers.bankdata.dk/user/register](https://developers.bankdata.dk/user/register), once bank reaches out supply the eiDAS certificates and redirect.
Please refer [European Commission technical information](https://digital-strategy.ec.europa.eu/en/policies/discover-eidas) for more information regarding eIDAS certificates.
1. Upload your eiDAS certificates (QWAC and QSEAL) into Yapily's [certificate vault](https://console.yapily.com/certificates).
2. Add a BankData institution (for example **djurslands**) from the tab to your [Yapily Console](https://console.yapily.com/applications) application.
3. Add this institution into your app from the `Live` tab and configure the institution by selecting the `certificates` from the dropdown.
4. Select your `QSEAL`and `QWAC` certificates from the relevant drop-downs lists and then click *Save* to save the registration.
## Support
If you require technical support with certificate management, please contact [Support](/resources/support)
# DNB
Source: https://docs.yapily.com/institution-configurations/nordics/DNB
## Links
[https://developer.dnb.no/api-explorer](https://developer.dnb.no/api-explorer)
## Scopes
* Account Information 🔒
* Payment Initiation 🔒
## Supported ASPSPs
| ASPSP | Supported | Institution ID |
| --------------------- | --------- | -------------- |
| DNB group institution | Yes | `dnb` |
## Accounts and Payments Supported
### Accounts
* Accounts
* Transactions
### Payments
* Domestic Single Payments (this uses DNB's `sepa-credit-transfers` product for EUR payments and DNB's `norwegian-domestic-credit-transfers` product for all other domestic payments)
* Domestic Periodic Payments (this feature is currently broken on DNB's side as they only support requests using BBAN instead of IBAN as account identifiers, which we generally do not support. Therefore this feature has been switched off with a feature toggle `` `int.dnb.domestic.periodic.payment.feature.disabled.p2` ``)
* Domestic Instant Payments
* International Single Payments (this is not working because the only payment rail that DNB supports for international payments are SWIFT payments, which we do not support)
* Corporate payments are currently not supported
## Onboarding ASPSP's to Yapily Application
**Precondition**: To connect to DNB, an application needs to be created and v. Once the application is created a client\_id is generated.
1. Upload your eiDAS certificates (QWAC and QSEAL) into Yapily's [certificate vault](https://console.yapily.com/certificates).
2. Add a DNB institution from the tab to your [Yapily Console](https://console.yapily.com/applications) application.
3. Add this institution into your app from the `Live` tab and configure the institution by selecting the `certificates` from the dropdown.
4. Select your `QSEAL`and `QWAC` certificates from the relevant drop-downs lists and then click *Save* to save the registration.
## Support
If you require technical support with certificate management, please contact [Support](/resources/support)
# Danske Bank Denmark
Source: https://docs.yapily.com/institution-configurations/nordics/Danske-Bank-Denmark
## Links
[https://developers.danskebank.com/](https://developers.danskebank.com/)
## Scopes
* Account Information 🔒
* Payment Initiation 🔒
## Supported ASPSPs
| ASPSP | Link | Supported | Institution ID |
| ---------------------------- | ------------------------------------------------------------------------ | --------- | ----------------------- |
| Danske bank Denmark | [https://developers.danskebank.com/](https://developers.danskebank.com/) | Yes | `danskebank_dk` |
| Danske bank Denmark Business | [https://developers.danskebank.com/](https://developers.danskebank.com/) | Yes | `danskebankbusiness_dk` |
## Accounts and Payments Supported
### Accounts
* Accounts
* Transactions
### Payments
* Domestic Single Payments
* Domestic Scheduled Payments
* Domestic Periodic Payments
* International Single Payments
* International Scheduled Payment
* Bulk Payments
## Onboarding ASPSP's to Yapily Application
**Precondition**: To connect to DanskeBank EU institutions you need eIDAS certificates. Please refer [European Commission technical information](https://digital-strategy.ec.europa.eu/en/policies/discover-eidas) for more information regarding eIDAS certificates.
1. Upload your eiDAS certificates (QWAC and QSEAL) into Yapily's [certificate vault](https://console.yapily.com/certificates).
2. Add a Danske Bank institution (for example **danskebank\_dk**) from the tab to your [Yapily Console](https://console.yapily.com/applications) application.
3. Add this institution into your app from the `Live` tab and configure the institution by selecting the `certificates` from the dropdown.
4. Select your `QSEAL`and `QWAC` certificates from the relevant drop-downs lists and then click *Register* to complete the registration.
## Support
If you require technical support with certificate management, please contact [Support](/resources/support)
# Danske Bank Norway
Source: https://docs.yapily.com/institution-configurations/nordics/Danske-Bank-Norway
## Links
[https://developers.danskebank.com/](https://developers.danskebank.com/)
## Scopes
* Account Information 🔒
* Payment Initiation 🔒
## Supported ASPSPs
| ASPSP | Link | Supported | Institution ID |
| --------------------------- | ------------------------------------------------------------------------ | --------- | ----------------------- |
| Danske bank Norway | [https://developers.danskebank.com/](https://developers.danskebank.com/) | Yes | `danskebank_no` |
| Danske bank Norway Business | [https://developers.danskebank.com/](https://developers.danskebank.com/) | Yes | `danskebankbusiness_no` |
## Accounts and Payments Supported
### Accounts
* Accounts
* Transactions
### Payments
* Domestic Single Payments
* Domestic Scheduled Payments
* Domestic Periodic Payments
* International Single Payments
* International Scheduled Payment
* Bulk Payments
## Onboarding ASPSP's to Yapily Application
**Precondition**: To connect to DanskeBank EU institutions with eIDAS certs a dynamic registration is needed.
1. Upload your eiDAS certificates (QWAC and QSEAL) into Yapily's [certificate vault](https://console.yapily.com/certificates).
2. Add a Danske Bank institution (for example **danskebank\_no**) from the tab to your [Yapily Console](https://console.yapily.com/applications) application.
3. Add this institution into your app from the `Live` tab and configure the institution by selecting the `certificates` from the dropdown.
4. Select your `QSEAL`and `QWAC` certificates from the relevant drop-downs lists and then click *Register* to complete the registration.
## Notes
* For domestic and domestic scheduled payments, only supply the `reference` field if you're making a payment that required a KID. If this is the case then put in the `reference` field. A validation error will be returned if this reference field is not a number.
## Support
If you require technical support with certificate management, please contact [Support](/resources/support)
# Danske Bank Sweden
Source: https://docs.yapily.com/institution-configurations/nordics/Danske-Bank-Sweden
## Links
[https://developers.danskebank.com/](https://developers.danskebank.com/)
## Scopes
* Account Information 🔒
* Payment Initiation 🔒
## Supported ASPSPs
| ASPSP | Link | Supported | Institution ID |
| --------------------------- | ------------------------------------------------------------------------ | --------- | ----------------------- |
| Danske bank Sweden | [https://developers.danskebank.com/](https://developers.danskebank.com/) | Yes | `danskebank_se` |
| Danske bank Sweden Business | [https://developers.danskebank.com/](https://developers.danskebank.com/) | Yes | `danskebankbusiness_se` |
## Accounts and Payments Supported
### Accounts
* Accounts
* Transactions
### Payments
* Domestic Single Payments
* Domestic Scheduled Payments
* Domestic Periodic Payments
* International Single Payments
* International Scheduled Payment
* Bulk Payments
## Onboarding ASPSP's to Yapily Application
**Precondition**: To connect to DanskeBank EU institutions with eIDAS certs a dynamic registration is needed.
Please refer [European Commission technical information](https://digital-strategy.ec.europa.eu/en/policies/discover-eidas) for more information regarding eIDAS certificates.
1. Upload your eiDAS certificates (QWAC and QSEAL) into Yapily's [certificate vault](https://console.yapily.com/certificates).
2. Add a Danske Bank institution (for example **danskebank\_se**) from the tab to your [Yapily Console](https://console.yapily.com/applications) application.
3. Add this institution into your app from the `Live` tab and configure the institution by selecting the `certificates` from the dropdown.
4. Select your `QSEAL`and `QWAC` certificates from the relevant drop-downs lists and then click *Register* to complete the registration.
## Support
If you require technical support with certificate management, please contact [Support](/resources/support)
# Handelsbanken Finland
Source: https://docs.yapily.com/institution-configurations/nordics/Handelsbanken-Finland
## Links
[https://developer.handelsbanken.com](https://developer.handelsbanken.com/)
## Scopes
* Account Information 🔒
* Payment Initiation 🔒
## Supported ASPSPs
| ASPSP | Link | Supported | Institution ID |
| ------------------------------ | --------------------------------------------------------------------------- | --------- | -------------------------- |
| Handelsbanken Finland | [https://developer.handelsbanken.com](https://developer.handelsbanken.com/) | Yes | `handelsbanken_fi` |
| Handelsbanken Business Finland | [https://developer.handelsbanken.com](https://developer.handelsbanken.com/) | Yes | `handelsbankenbusiness_fi` |
## Accounts and Payments Supported
### Accounts
* Accounts
* Transactions
### Payments
* Domestic Single Payments
* Domestic Scheduled Payments
* International Single Payments
## Onboarding ASPSP's to Yapily Application
**Precondition**: To connect to Handelsbanken institutions you need eIDAS certificates.
Please refer [European Commission technical information](https://digital-strategy.ec.europa.eu/en/policies/discover-eidas) for more information regarding eIDAS certificates.
1. Upload your eiDAS certificates (QWAC and QSEAL) into Yapily's [certificate vault](https://console.yapily.com/certificates).
2. Add a Handelsbanken institution (for example **handelsbanken\_fi**) from the tab to your [Yapily Console](https://console.yapily.com/applications) application.
3. Add this institution into your app from the `Live` tab and configure the institution by selecting the `certificates` from the dropdown.
4. Select your `QSEAL`and `QWAC` certificates from the relevant drop-downs lists and then click *Register* to complete the registration.
## Support
If you require technical support with certificate management, please contact [Support](/resources/support)
# Handelsbanken Sweden
Source: https://docs.yapily.com/institution-configurations/nordics/Handelsbanken-Sweden
## Links
[https://developer.handelsbanken.com](https://developer.handelsbanken.com)
## Scopes
* Account Information 🔒
* Payment Initiation 🔒
## Supported ASPSPs
| ASPSP | Link | Supported | Institution ID |
| ----------------------------- | -------------------------------------------------------------------------- | --------- | -------------------------- |
| Handelsbanken Sweden | [https://developer.handelsbanken.com](https://developer.handelsbanken.com) | Yes | `handelsbanken_se` |
| Handelsbanken Business Sweden | [https://developer.handelsbanken.com](https://developer.handelsbanken.com) | Yes | `handelsbankenbusiness_se` |
| Handelsbanken Sweden Sandbox | [https://developer.handelsbanken.com](https://developer.handelsbanken.com) | Yes | `handelsbanken-sandbox_se` |
## Accounts and Payments Supported
### Accounts
* Accounts
* Transactions
### Payments
* Domestic Single Payments
* International Single Payments
## Onboarding ASPSP's to Yapily Application
**Precondition**: To connect to Handelsbanken production institutions you need eIDAS certificates.
Please refer [European Commission technical information](https://digital-strategy.ec.europa.eu/en/policies/discover-eidas) for more information regarding eIDAS certificates.
1. Upload your eiDAS certificates (QWAC and QSEAL) into Yapily's [certificate vault](https://console.yapily.com/certificates).
2. Add a Handelsbanken institution (for example **handelsbanken\_se**) from the tab to your [Yapily Console](https://console.yapily.com/applications) application.
3. Add this institution into your app from the `Live` tab and configure the institution by selecting the `certificates` from the dropdown.
4. Select your `QSEAL`and `QWAC` certificates from the relevant drop-downs lists and then click *Register* to complete the registration.
## PIS Notes
* For Handelsbanken Sweden Business Domestic payments, if the currency is SEK then the local payment method (swedish domestic) will be used. If the currency is EUR then Sepa payment will be used.
* When using Swedish domestic payment method, the Payer account identification is supplied as a BBAN in the form of the SHB account number. The Payee account identifications are also a BBAN in the form of the SHB number, and an ACCOUNT\_NUMBER that represents the SESBA clearing number.
## Support
If you require technical support with certificate management, please contact [Support](/resources/support)
# Luminor
Source: https://docs.yapily.com/institution-configurations/nordics/Luminor
(Lithuania, Latvia and Estonia)
## Links
[https://developer.luminoropenbanking.com/#/](https://developer.luminoropenbanking.com/#/)
## Scopes
* Account Information 🔒
* Payment Initiation 🔒
## Supported ASPSPs
| ASPSP | Supported | Institution ID |
| ------------------------- | --------- | ----------------------------------------------------------------------- |
| Luminor Group and Sandbox | Yes | `luminor-sandbox`
`luminor_lt`
`luminor_lv`
`luminor_ee` |
## Accounts and Payments Supported
### Accounts
* Accounts
* Transactions
### Payments
* Domestic Single Payments
## Onboarding ASPSP's to Yapily Application
**Precondition**: To connect to Luminor, an application needs to be created. Once the application is created a client\_id is generated.
1. Upload your eiDAS certificates (QWAC and QSEAL) into Yapily's [certificate vault](https://console.yapily.com/certificates).
2. Add a Luminor institution (for example **luminor\_lt**) from the tab to your [Yapily Console](https://console.yapily.com/applications) application.
3. Add this institution into your app from the `Live` tab and configure the institution by selecting the `certificates` from the dropdown.
4. Select your `QSEAL`and `QWAC` certificates from the relevant drop-downs lists
5. Add a contact email address and click *Register* to complete the registration.
Note that all the parameters above are required. Luminor's response to this request will include a clientId, which Yapily will store alongside the registration details. This clientId can also be found in the Yapily dashboard.
Once the request was successfully made, an email can be sent to [OpenBanking@luminorgroup.com](mailto:OpenBanking@luminorgroup.com) and [Aleksis.Andersons@luminorgroup.com](mailto:Aleksis.Andersons@luminorgroup.com) (including the clientId from the dashboard) to get the registration process going,
because Luminor will need to do some additional steps on their side before the registration details can be used for AIS/PIS services.
## Support
If you require technical support with certificate management, please contact [Support](/resources/support)
# Nordea
Source: https://docs.yapily.com/institution-configurations/nordics/Nordea
## Links
[https://developer.nordeaopenbanking.com/](https://developer.nordeaopenbanking.com/)
## Scopes
* Account Information 🔒
* Payment Initiation 🔒
## Supported ASPSPs
| ASPSP | Supported | Institution ID |
| ------------------------ | --------- | -------------------------------------------------------------------------------------------------------------------------------------------------------------------------------------------------------------------------------- |
| Nordea group and sandbox | Yes | `nordea-sandbox`
`nordea-personal_se`
`nordea-personal_no`
`nordea-personal_dk`
`nordea-personal_fi`
`nordea-business_se`
`nordea-business_no`
`nordea-business_dk`
`nordea-business_fi` |
| Institution Id | Institution Code | Countries | Type |
| ----------------------------- | ---------------- | ------------------------------- | ---- |
| `nordea-personal_se/no/dk/fi` | SE, NO, DK, FI | All personal accounts and cards | |
| `nordea-business_se/no/dj/fi` | SE, NO, DK, FI | All business accounts and cards | |
## Accounts and Payments Supported
### Accounts
* Accounts
* Balance
* Transactions
* maximum 12 months
### Payments
* Domestic Single Payments
* Domestic Periodic Payments
* Frequencies supported
* Weekly
* Monthly
* Domestic Scheduled Payments
## Onboarding ASPSP's to Yapily Application
**Precondition**: To connect to Nordea institutions you need valid eIDAS certificates.
Please refer [European Commission technical information](https://digital-strategy.ec.europa.eu/en/policies/discover-eidas) for more information regarding eIDAS certificates.
1. Upload your eiDAS certificates (QWAC and QSEAL) into Yapily's [certificate vault](https://console.yapily.com/certificates).
2. Add a Nordea Group institution (for example **nordea-personal\_se**) from the tab to your [Yapily Console](https://console.yapily.com/applications) application.
3. Add this institution into your app from the `Live` tab and configure the institution by selecting the `certificates` from the dropdown.
4. Select your `QSEAL`and `QWAC` certificates from the relevant drop-downs lists and then click *Save* to save the registration.
## Support
If you require technical support with certificate management, please contact [Support](/resources/support)
# SEB Sweden
Source: https://docs.yapily.com/institution-configurations/nordics/SEB-Sweden
## Links
[https://developer.sebgroup.com](https://developer.sebgroup.com)
## Supported ASPSPs
| ASPSP | Link | Supported | Institution ID |
| ------------------ | ---------------------------------------------------------------- | --------- | --------------------- |
| SEB Sweden | [https://developer.sebgroup.com](https://developer.sebgroup.com) | Yes | `seb-sweden` |
| SEB Sweden Sandbox | [https://developer.sebgroup.com](https://developer.sebgroup.com) | Yes | `seb-swedent-sandbox` |
## Scopes
* Account Information 🔒
* Payment Initiation 🔒
## Onboarding ASPSP's to Yapily Application
**Precondition**: To connect to SEB Sweden institutions you need valid eIDAS certificates.
1. Upload your eiDAS certificates (QWAC and QSEAL) into Yapily's [certificate vault](https://console.yapily.com/certificates).
2. Add a SEB sweden institution (for example **seb-sweden**) from the tab to your [Yapily Console](https://console.yapily.com/applications) application.
3. Add this institution into your app from the `Live` tab and configure the institution by selecting the `certificates` from the dropdown.
4. Select your `QSEAL`and `QWAC` certificates from the relevant drop-downs lists and then click *Save* to save the registration.
## Sandbox PSU credentials
9311219639
9311219589
8811215477
8811212862
8311211356
## Support
If you require technical support with certificate management, please contact [Support](/resources/support)
# Swedbank (Lithuania, Sweden, Latvia and Estonia)
Source: https://docs.yapily.com/institution-configurations/nordics/Swedbank
## Links
Sign Up: [https://developer.swedbank.com/admin/app/registration](https://developer.swedbank.com/admin/app/registration)
New Application on Portal: [https://developer.swedbank.com/admin/app/applications](https://developer.swedbank.com/admin/app/applications)
## Supported ASPSPs
| ASPSP | Link | Supported | Institution ID |
| ------------------ | ---------------------------------------------------------------- | --------- | -------------- |
| Swedbank Estonia | [https://developer.swedbank.com](https://developer.swedbank.com) | Yes | `swedbank_ee` |
| Swedbank Latvia | [https://developer.swedbank.com](https://developer.swedbank.com) | Yes | `swedbank_lv` |
| Swedbank Lithuania | [https://developer.swedbank.com](https://developer.swedbank.com) | Yes | `swedbank_lt` |
| Swedbank Sweden | [https://developer.swedbank.com](https://developer.swedbank.com) | Yes | `swedbank_se` |
## Scopes
* Account Information 🔒
* Payment Initiation 🔒
## Onboarding ASPSP's to Yapily Application
**Precondition**: To connect to Swedbank, an application needs to be created by filling the form [https://developer.swedbank.com/admin/app/registration](https://developer.swedbank.com/admin/app/registration).
Once the application is created a `Client Id` and `Client Secret` is generated and need to be provided.
1. Upload your eiDAS certificates (QWAC and QSEAL) into Yapily's [certificate vault](https://console.yapily.com/certificates).
2. Add a Swedbank Group institution (for example **swedbank\_dk**) from the tab to your [Yapily Console](https://console.yapily.com/applications) application.
3. Add this institution into your app from the `Live` tab and configure the institution by selecting the `certificates` from the dropdown.
4. Select your `QSEAL`and `QWAC` certificates from the relevant drop-downs lists and then click *Save* to save the registration.
## Support
If you require technical support with certificate management, please contact [Support](/resources/support)
# SIBS
Source: https://docs.yapily.com/institution-configurations/portugal/SIBS
All of the supported institutions are built in the Yapily P2 environment and currently, the dashboard is not available yet hence all the registrations need to be performed in the backend. The technical support team will be able to assist in this process
## Links
* [SIBS](https://developer.sibsapimarket.com/live/product)
## Scopes
* Account Information 🔒
* Payment Initiation 🔒
## Supported ASPSPs
| **Institution Name** | **ASPSP Code** | **Institution Id** | **SEPA CT** | **SCT Inst** | **Cross Border** | **Scheduled Payments** | **Periodic Payments** | **Bulk Payments** |
| ------------------------------------------------------------ | -------------- | -------------------------------------------------------------------------------------------------------------------------- | ----------- | ------------ | ---------------- | ---------------------- | --------------------- | ------------------------------ |
| BANCO ACTIVOBANK, SA | ABPT | `banco-activobank-sa`
`banco-activobank-sa-sandbox` | Y | Y | Y | Y | Y | N |
| BANCO ATLANTICO EUROPA, SA | ATLEU | `banco-atlantico-europa`
`banco-atlantico-europa-sandbox` | Y | Y | Y | Y | Y | N |
| BANKINTER, SA - SUCURSAL EM PORTUGAL | BNKI | `bankinter-sa-sucursal-em-portugal`
`bankinter-sa-sucursal-em-portugal-sandbox` | Y | Y | Y | Y | Y | Y (domestic) |
| BANCO DE INVESTIMENTO GLOBAL, SA | BIG | `banco-de-investimento-global-sa`
`banco-de-investimento-global-sa-sandbox` | Y | N | N | Y | Y | N |
| BANCO DE INVESTIMENTO GLOBAL ESPANHA, SA | BIGES | `banco-de-investimento-global-espanha`
`banco-de-investimento-global-espanha-sandbox` | Y | N | N | N | N | N |
| BANCO BPI, SA | BBPI | `banco-bpi-sa`
`banco-bpi-sa-sandbox` | Y | Y | Y | Y | Y | Y (domestic) |
| BANCO PORTUGUES DE GESTAO, SA | BPG | `banco-portugues-de-gestao`
`banco-portugues-de-gestao-sandbox` | Y | N | N | Y | Y | N |
| CAIXA CENTRAL - CAIXA CENTRAL DE CREDITO AGRICOLA MUTUO, CRL | GCA | `caixa-central-de-credito-agricola-mutuo`
`caixa-central-de-credito-agricola-mutuo-sandbox` | Y | Y | Y | Y | Y | Y(Domestic,International,Inst) |
| CAIXA DE CREDITO AGRICOLA MUTUO DE LEIRIA, CRL | CCAML | `caixa-de-credito-agricola-mutuo-de-leriria-crl`
`caixa-de-credito-agricola-mutuo-de-leriria-crl-sandbox` | Y | N | N | Y | N | Y (domestic) |
| Caixa De Credito Agricola Mutuo De Bombarral Crl | CABOM | `caixa-de-credito-agricola-mutuo-de-bombarral`
`caixa-de-credito-agricola-mutuo-de-bombarral-sandbox` | Y | N | N | Y | Y | N |
| Caixa De Credito Agricola Mutuo Da Chamusca, C.r.l | CACHM | `caixa-de-credito-agricola-mutuo-da-chamusca`
`caixa-de-credito-agricola-mutuo-da-chamusca-sandbox` | Y | N | N | Y | Y | N |
| Caixa De Credito Agricola Mutuo De Mafra, C.R.L. | CAMAF | `caixa-de-credito-agricola-mutuo-de-mafra`
`caixa-de-credito-agricola-mutuo-de-mafra-sandbox` | Y | N | N | Y | N | N |
| Caixa De Credito Agricola Mutuo De Torres Vedras,c.r.l | CATV | `caixa-de-credito-agricola-mutuo-de-torres-vedras`
`caixa-de-credito-agricola-mutuo-de-torres-vedras-sandbox` | Y | N | N | Y | Y | N |
| CAIXA ECONOMICA DA MISERICORDIA DE ANGRA DO HEROISMO | CEMAH | `caixa-economica-da-misericordia-de-angra-do-heroismo`
`caixa-economica-da-misericordia-de-angra-do-heroismo-sandbox` | Y | N | N | Y | Y | Y (domestic) |
| CAIXA GERAL DE DEPOSITOS FRANCE | CGDFR | `caixa-geral-de-depositos-france`
`caixa-geral-de-depositos-france-sandbox` | Y | N | N | Y | N | N |
| COFIDIS | COF | `cofidis`
`cofidis-sandbox` | Y | N | N | N | N | N |
| CAIXA ECONOMICA MONTEPIO GERAL | CEMG | `caixa-economica-montepio-geral`
`caixa-economica-montepio-geral-sandbox` | Y | Y | Y | Y | Y | Y (domestic) |
| NOVO BANCO, SA | NVB | `novo-banco-sa`
`novo-banco-sa-sandbox` | Y | Y | Y | Y | Y | Y (domestic) |
| NOVO BANCO DOS ACORES, SA | NVBA | `novo-banco-dos-acores-sa`
`novo-banco-dos-acores-sa-sandbox` | Y | Y | N | Y | Y | Y (domestic) |
| BANCO SANTANDER TOTTA, SA | BST | `banco-santander-totta-sa`
`banco-santander-totta-sa-sandbox` | Y | Y | Y | Y | Y | Y (domestic, int) |
| Unicre - Instituição Financeira de Crédito S.A | UNICR | `unicre-instituicao-financeira-de-credito-sa`
`unicre-instituicao-financeira-de-credito-sa-sandbox` | N | N | N | N | N | N |
| CAIXA GERAL DE DEPOSITOS, SA | CGDPT | `caixa-geral-de-depositos`
`caixa-geral-de-depositos-sandbox` | Y | Y | Y | Y | Y | Y (domestic, int, inst) |
| BANCO COMERCIAL PORTUGUES, SA | BCPPT | `banco-comercial-portugues-sa`
`banco-comercial-portugues-sa-sandbox` | Y | Y | Y | Y | Y | Y(domestic, int, inst) |
| BANCO BIC PORTUGUES, SA | BIC | `banco-bic-portugues-sa`
`banco-bic-portugues-sa-sandbox` | Y | Y | Y | Y | Y | Y (domestic) |
## Registration Process
SIBS Supports only Manual registration.
## Accounts and Payments Supported
### Accounts
* accounts
* balance
* transactions
### Payments
* Domestic SEPA Payments
* Domestic SEPA Instant
* Periodic Payments
* Bulk Payments
* International Payments
## Onboarding ASPSP's to Yapily Application
### **LIVE & SANDBOX:**
**Precondition**: To connect to Live SIBS supported ASPSP, whether you are accessing account information or initiating payments, your business must have the right to permission to access the resource. You need valid eiDAS certificates to connect. Please refer to the ASPSP link given above for more details.
1. Upload the certificates & keys (transport, signing) from Open Banking into Yapily's [certificate vault](https://console.yapily.com/certificates)
2. Add one of the institutions from the above list into your dashboard [app](https://console.yapily.com/applications) and configure the institution by adding `Signing Key ID` from Open Banking & selecting the `certificates` from the drop-down. Then *press next*
3. `Click to register` to auto-register to the bank via Yapily and auto-populate the key & secret; *press save*
Note above ID, this will be the clientId which can be further used to Get, Modify, Delete registrations with Yapily
## Support
If you require technical support with certificate management, please contact [Support](/resources/support).
# Redsys
Source: https://docs.yapily.com/institution-configurations/spain/Redsys
## Links
* [Redsys Home](http://www.redsys.es/en/psd2.html)
* [TPP Login/Register](https://market.apis-i.redsys.es/psd2/xs2a/user/register)
## Scopes
* Account Information 🔒
* Payment Initiation 🔒
## Supported ASPSPs
| ASPSP Name | Institution ID | Documentation Link |
| ----------------------------------------------- | ------------------------------------- | --------------------------------------------------------------------- |
| ANDBANK | `andbank` | [Link](https://market.apis-i.redsys.es/psd2/xs2a/nodos/AndBank) |
| Banca March | `banca_march` | [Link](https://market.apis-i.redsys.es/psd2/xs2a/nodos/bancamarch) |
| Banco Mediolanum | `banco_mediolanum` | [Link](https://market.apis-i.redsys.es/psd2/xs2a/nodos/mediolanum) |
| Banco Pichincha | `banco_pichincha` | [Link](https://market.apis-i.redsys.es/psd2/xs2a/nodos/pichincha) |
| Banco Sabadell | `banco_sabadell` | [Link](https://market.apis-i.redsys.es/psd2/xs2a/nodos/sabadell) |
| Banco Santander | `banco_santander` | [Link](https://market.apis-i.redsys.es/psd2/xs2a/nodos/santander) |
| Bankinter | `bankinter` | [Link](https://market.apis-i.redsys.es/psd2/xs2a/nodos/bankinter) |
| BBVA | `bbva_es` | [Link](https://market.apis-i.redsys.es/psd2/xs2a/nodos/bbva) |
| Caixabank | `caixabank` | [Link](https://market.apis-i.redsys.es/psd2/xs2a/nodos/caixabank) |
| Colonya | `colonya` | [Link](https://market.apis-i.redsys.es/psd2/xs2a/nodos/colonya) |
| Eurocaja Rural | `eurocajarural` | [Link](https://market.apis-i.redsys.es/psd2/xs2a/nodos/eurocajarural) |
| EVO Banco | `evobanco` | [Link](https://market.apis-i.redsys.es/psd2/xs2a/nodos/evobanco) |
| Fiare Bancaetica | `fiare` | [Link](https://market.apis-i.redsys.es/psd2/xs2a/nodos/fiare) |
| Ibercaja | `ibercaja` | [Link](https://market.apis-i.redsys.es/psd2/xs2a/nodos/ibercaja) |
| Imagin | `imagin` | [Link](https://market.apis-i.redsys.es/psd2/xs2a/nodos/Imaginersgen) |
| Inversis | `inversis` | [Link](https://market.apis-i.redsys.es/psd2/xs2a/nodos/inversis) |
| Kutxabank | `kutxabank` | [Link](https://market.apis-i.redsys.es/psd2/xs2a/nodos/kutxabank) |
| Laboral Kutxa | `laboral_kutxa` | [Link](https://market.apis-i.redsys.es/psd2/xs2a/nodos/laboralkutxa) |
| Openbank | `openbank` | [Link](https://market.apis-i.redsys.es/psd2/xs2a/nodos/openbank) |
| Renta4 | `renta4_banco` | [Link](https://market.apis-i.redsys.es/psd2/xs2a/nodos/renta4) |
| Self Bank | `selfbank` | [Link](https://market.apis-i.redsys.es/psd2/xs2a/nodos/selfbank) |
| Unicaja Banco | `unicaja_banco` | [Link](https://market.apis-i.redsys.es/psd2/xs2a/nodos/unicajabanco) |
| ALBAL (Caja Rural) | `cr_albal` | [Link](https://market.apis-i.redsys.es/psd2/xs2a/nodos/cajarural) |
| ALGEMESI (Caja Rural) | `cr_algemesi` | [Link](https://market.apis-i.redsys.es/psd2/xs2a/nodos/cajarural) |
| ASTURIAS (Caja Rural) | `cr_asturias` | [Link](https://market.apis-i.redsys.es/psd2/xs2a/nodos/cajarural) |
| CAIXA POPULAR (Caja Rural) | `cr_caixapopular` | [Link](https://market.apis-i.redsys.es/psd2/xs2a/nodos/cajarural) |
| CAJAVIVA (Caja Rural) | `cr_cajaviva` | [Link](https://market.apis-i.redsys.es/psd2/xs2a/nodos/cajarural) |
| CASAS IBAÑEZ (Caja Rural) | `cr_casasibanez` | [Link](https://market.apis-i.redsys.es/psd2/xs2a/nodos/cajarural) |
| CAIXA RURAL GALLEGA (Caja Rural) | `cr_caxiaruralgalega` | [Link](https://market.apis-i.redsys.es/psd2/xs2a/nodos/cajarural) |
| DEL SUR (Caja Rural) | `cr_delsur` | [Link](https://market.apis-i.redsys.es/psd2/xs2a/nodos/cajarural) |
| EXTREMADURA (Caja Rural) | `cr_extremadura` | [Link](https://market.apis-i.redsys.es/psd2/xs2a/nodos/cajarural) |
| GIJON (Caja Rural) | `cr_gijon` | [Link](https://market.apis-i.redsys.es/psd2/xs2a/nodos/cajarural) |
| GLOBALCAJA (Caja Rural) | `cr_globalcaja` | [Link](https://market.apis-i.redsys.es/psd2/xs2a/nodos/cajarural) |
| GRANADA (Caja Rural) | `cr_granada` | [Link](https://market.apis-i.redsys.es/psd2/xs2a/nodos/cajarural) |
| JAEN (Caja Rural) | `cr_jaen` | [Link](https://market.apis-i.redsys.es/psd2/xs2a/nodos/cajarural) |
| L´ALCUDIA (Caja Rural) | `cr_lalcudia` | [Link](https://market.apis-i.redsys.es/psd2/xs2a/nodos/cajarural) |
| NAVARRA (Caja Rural) | `cr_navarra` | [Link](https://market.apis-i.redsys.es/psd2/xs2a/nodos/cajarural) |
| RURALNOSTRA (Caja Rural) | `cr_ruralnosta` | [Link](https://market.apis-i.redsys.es/psd2/xs2a/nodos/cajarural) |
| SALAMANCA (Caja Rural) | `cr_salamanca` | [Link](https://market.apis-i.redsys.es/psd2/xs2a/nodos/cajarural) |
| SAN ISIDRO LESCOVES
VINROMA (Caja Rural) | `cr_sanisidrolescovesvinnorma` | [Link](https://market.apis-i.redsys.es/psd2/xs2a/nodos/cajarural) |
| SAN JOSE ALCORA (Caja Rural) | `cr_sanjosealcora` | [Link](https://market.apis-i.redsys.es/psd2/xs2a/nodos/cajarural) |
| SAN JOSE DE
ALMASSORA (Caja Rural) | `cr_sanjosedealmassoracr_casasibanez` | [Link](https://market.apis-i.redsys.es/psd2/xs2a/nodos/cajarural) |
| SORIA (Caja Rural) | `cr_soria` | [Link](https://market.apis-i.redsys.es/psd2/xs2a/nodos/cajarural) |
| TERUEL (Caja Rural) | `cr_teruel` | [Link](https://market.apis-i.redsys.es/psd2/xs2a/nodos/cajarural) |
| VILLAMALEA (Caja Rural) | `cr_villamalea` | [Link](https://market.apis-i.redsys.es/psd2/xs2a/nodos/cajarural) |
| ZAMORA (Caja Rural) | `cr_zamora` | [Link](https://market.apis-i.redsys.es/psd2/xs2a/nodos/cajarural) |
### **SANDBOXES**
| ASPSP Name | Institution ID | Documentation Link |
| --------------------- | ---------------------- | -------------------------------------------------------------------- |
| Unicaja Banco Sandbox | `unicajabanco-sandbox` | [Link](https://market.apis-i.redsys.es/psd2/xs2a/nodos/unicajabanco) |
## Onboarding ASPSP's to Yapily Application
### **LIVE & SANDBOX**
**Precondition**: To connect to Redsys Group, an application needs to be created. Once the application is created a **client\_id** and **client\_secret** are generated.
1. Upload your eiDAS certificates (QWAC and QSEAL) into Yapily's [certificate vault](https://console.yapily.com/certificates).
2. Add one of the institutions from the above list into your [Yapily Console](https://console.yapily.com/applications) application.
3. Select your `QSEAL` and `QWAC` certificates from the relevant drop-downs lists
4. Add the **Client Id** and **Client Secret** from the ASPSP's portal and click *Save*
## Support
If you require technical support with certificate management, please contact [Support](/resources/support).
# Skandia
Source: https://docs.yapily.com/institution-configurations/sweden/Skandia
## Links
[Skandia Developer Portal](https://developer.skandia.se/open-banking/core-bank/)
## Scopes
* Account Information 🔒
* Payment Initiation 🔒
## Supported ASPSPs
| ASPSP | Link | Supported | Institution ID |
| --------------- | ------------------------------------------------------------------------ | --------- | ----------------- |
| Skandia | [https://www.skandia.se/openbanking](https://www.skandia.se/openbanking) | Yes | `skandia` |
| Skandia Sandbox | [https://www.skandia.se/openbanking](https://www.skandia.se/openbanking) | Yes | `skandia-sandbox` |
## Registration Process
Sandia Bank doesn't support a dynamic registration process, we need to manually register using their developer portal by providing certificates, redirect URLs and subscribe to their APIs. There is a manual step required by the institution to approve the subscription to access the API. Once clientId and secret is obtained please follow steps in Onboarding ASPSP's to Yapily application , Below are the steps detailed in institution developer portal for registration
1. Get an approval from a local NCA (Finansinspektionen in Sweden) as an AISP or PISP. If you are a bank you already have an approval.
2. Obtain a production eIDAS-certificate from a QTSP. QWAC is required. a. Note 1: you cannot use a CA root certificate b. Note 2: you cannot use a test certificate
3. Register in our portal and create apps and subscriptions. You will need the public key of your production eIDAS QWAC certificate in this process.
4. When you add a subscription to an app there will be a manual step for us to grant your app access. You will receive an e-mail when your app is granted access. 5. You can access the APIs (AIS and/or PIS) your certificate allows you to invoke
## Accounts and Payments Supported
### Skandia follows pre-auth flow for PIS requests and normal auth flow for AIS requests
### Accounts
* accounts
* balance
* transactions
### Payments
* Domestic Credit Payments
* Periodic Domestic Credit Payments
* International Payments
## Onboarding ASPSP's to Yapily Application
### **LIVE & SANDBOX:**
**Precondition**: To connect to Live and Sandbox Skandia supported ASPSP, whether you are accessing account information or initiating payments, your business must have the right permission to access the resource. You need valid eiDAS certificates to connect
1. Upload the certificates & keys (transport, signing) from Open Banking into Yapily's [certificate vault](https://console.yapily.com/certificates)
2. Add one of the institutions from the above list into your dashboard [app](https://console.yapily.com/applications) and configure the institution by adding `Signing Key ID` from Open Banking & selecting the `certificates` from the drop-down. Then *press next*
3. `Click to register` to auto-register to the bank via Yapily and auto-populate the key & secret; *press save*
## Support
If you require technical support with certificate management, please contact [Support](/resources/support).
# AMEX
Source: https://docs.yapily.com/institution-configurations/uk/AMEX
## Links
* [Developer Console](https://developer.americanexpress.com/)
## Scopes
* Account Information 🔒
**Preconditions**:
* American Express requires manual registration for each application with [Amex for Developers](https://developer.americanexpress.com/)
* Production access requires Active eIDAS Certificates.
***
| Name | Yapily Institution ID | Countries | DCR Supported? |
| ------------------------ | --------------------- | ----------------------------------------------- | -------------- |
| American Express UK | `amex-ob_uk` | United Kingdom | NO |
| American Express Europe | `amex-ob_eu` | Norway, France, Sweden, Finland | NO |
| American Express Sandbox | `amex-ob-sandbox` | United Kingdom, Norway, France, Sweden, Finland | NO |
**Consents**
* Multiple consents are not supported
* Amex deem each main Card to be an Account and require separate consents; this means they must be consented under separate consent journeys.
* Additional/Supplemental Cards cannot be separately consented; they are consented by the main Account holder.
* You may only have one active consent per Account and `Client ID`.
* A consent is valid for a single Account only (holders with multiple Accounts should consent each Account separately).
* If a consent is lost the Account holder must login to Amex Online and remove the Partner link.
* The access privileges for consents are fixed as Accounts, Balances and Transactions (by Amex); any access scopes provided to Yapily will be ignored.
***
**Transactions**
* By default, Amex returns the last 90 days transactions for an account.
* To obtain transactions made outside the last 90 days, a `from` and `before` date must be passed as parameters.
* If only a `from` date is passed, the `before` date will default to today's date.
* If only a `before` date is passed, the Amex default of last 90 days transactions will be returned.
## Live Environment
**Step 1: Upload the eIDAS signing and transport certificates into V2 services**
**Request**
```shell theme={null}
curl --location --request POST 'https://api.yapily.com/certificates/keys/' \
--header 'Authorization: Basic YOUR_APPLICATION_CREDENTIALS_AS_BASIC_AUTH' \
--header 'Content-Type: application/json' \
--data-raw '[{
"pem": "$YOUR_PUBLIC_KEY_AS_PEM",
"key": "$YOUR_PRIVATE_KEY",
"kid" : "$CERT_KID",
"name" : "$CERTIFICATE_NAME"
}]'
```
**Response**
```json theme={null}
{
"id": "d16f87d3-4222-4173-b8b9-44aeccacae7d",
....
}
```
Save the id and remember for which kind of key it corresponds:
e.g. `SIGNING_KEY_UUID = d16f87d3-4222-4173-b8b9-44aeccacae7d`
Once you have done it for the signing key, do the same request for your transport key.
***
### Step 2: Call the MANUAL registration endpoint
The final step is to call the Manual registration endpoint with the certificate UUIDs and the `clientId` and `clientSecret` obtained from the Amex Onboarding process (see Notes below):
Please use **amex-ob\_uk or amex-ob\_eu** as institution id based on the desired country.
**Request**
Go to Manual register V2 endpoint.
```shell theme={null}
curl --location --request POST 'https://api.yapily.com/institutions/amex-ob_uk/manual/register' \
--header 'Content-Type: application/json' \
--header 'Authorization: Bearer YOUR_APPLICATION_CREDENTIALS_AS_BASIC_AUTH' \
--data-raw '{
"signingKeyID": "$SIGNING_KEY_UUID",
"transportKeyID": "$TRANSPORT_KEY_UUID"
"apiTypes": [ "AISP", "PISP" ],
"clientId": "$CLIENT_ID_FROM_AMEX_ONBOARDING",
"clientSecret": "$CLIENT_SECRET_FROM_AMEX_ONBOARDING"
}'
```
**Response**
```json theme={null}
{
"id": "a0460a91-4b4c-422a-bbe6-bebe0b92e308"
}
```
Note the above ID, this will be the clientId which can be further used to Get, Modify, Delete registrations with Yapily
## Sandbox Environment
Same steps as Live Environment, please use **amex-ob-sandbox** as institution id.
**Notes:**
* Sign up for access at [Create an Account](https://developer.americanexpress.com/register); Group emails are not accepted.
* Make records of your signup details; these cannot be accessed or edited once entered (they can be modified by support ticket at a 7 - 14 day turnaround).
* Support is by web form [Contact Us](https://developer.americanexpress.com/support).
* Request access to `Account Financials European Union (EU)` for Open Banking; FCA registration details are required.
* Model and API are proprietary with sparse information.
* Sandbox and QA are granted immediately.
* Production access requires a further request fulfilled by email exchange and takes 14 days typically.
* Amex will email for Production Callback URL, Signing and Transport certificates; once again be careful to record this interaction as these cannot be accessed or edited other than by support request.
* Access Keys are provided in \[Amex for Developers -> My Keys -> Credentials] ([https://developer.americanexpress.com/apps/dashboard](https://developer.americanexpress.com/apps/dashboard)) once approved.
* The Sandbox environment is actually the American Express QA environment and has similar functionality to Production.
## Support
If you require technical support with certificate management, please contact [Support](/resources/support).
# Airwallex
Source: https://docs.yapily.com/institution-configurations/uk/Airwallex
## Links
* [Developer Portal](https://developer.token.io/airwallex_rest_api_doc/content/e-rest/dashboard-intro.htm)
## Scopes
* Account Information 🔒
## Preconditions
* Access to the Airwallex Sandbox environment must be requested and granted **before** requesting access to the Airwallex Production environment
* Airwallex Sandbox environment requires manual registration with the [Airwallex Token Sandbox Dashboard](https://airwallex.dashboard.sandbox.token.io)
* Airwallex Production environment requires manual registration with the [Airwallex Token Production Dashboard](https://airwallex.dashboard.token.io)
* Both Sandbox and Production access requires active eIDAS Certificates
## Sandbox Environment
1. Create an account on the [Airwallex Token Sandbox Dashboard](https://airwallex.dashboard.sandbox.token.io)
2. Upload your *Live* eIDAS transport and signing certificates (PEMs) on the Airwallex Sandbox Token Dashboard.
3. Your dashboard should now show that your access permissions are under review. Once approved, you will be able to select `Go Live` to request production access.
## Live Environment
1. From the [Airwallex Token Production Dashboard](https://airwallex.dashboard.token.io), select `Go Live`. You will be prompted to log in or create an account for the [Airwallex Token Production Dashboard](https://airwallex.dashboard.token.io)
2. Upload your *Live* eIDAS transport and signing certificates (PEMs) on the Airwallex Token Production Dashboard.
3. Once your certificates have been approved by Token, you will be granted a `Member ID` and `Alias`, found on the Airwallex Token Dashboard under `Settings` -> `Member Information`. Following this, you will need to generate an API key, which can be done under `Settings` -> `Authentication Keys`. Save this key.
4. Add Airwallex from the *Live* tab on your Yapily Dashboard application then click **Next**.
5. Configure Airwallex by selecting the **edit icon**.
6. Add your Airwallex `Member ID`, `Alias`, and `API Key` retrieved in step 3 above. Click **Save** to complete registration and preserve these credentials.
## Notes
* Support for Airwallex is provided by Token via their [support desk](https://tokenio.atlassian.net/servicedesk/customer/portals).
## Support
If you require technical support with certificate management, please contact [Support](/resources/support).
# Allica Bank
Source: https://docs.yapily.com/institution-configurations/uk/Allica-Bank
## Links
* [Developer Portal](https://developer.api.ob.allica.bank/perry/developer/welcome)
## Scopes
* Account Information 🔒
## Live Environment
**Precondition**: To connect to live Open Banking entities, whether you are accessing account information, your business must have the right regulatory permissions as per the [Open Banking Guide](/tools-and-services/open-banking/enrolment-guide).
1. Upload your transport and signing certificates (PEMs), along with the keys into Yapily's certificate vault.
2. Add Allica Bank from the Live tab to your Dashboard application and add your Signing key Id, which can be obtained from the Open Banking Directory.
3. Select your Open Banking transport and signing certificates from the relevant drop-downs lists then click Next.
4. Add the Software Statement Assertion (SSA) used for obtaining key & secret (The SSA is obtained from OB Directory) This is the token that the Open Banking UK institutions will use during registration to verify your enrolment and possibly create your application.
5. Click 'Complete Bank Registration' to auto register with the bank.
6. If the registration is successful, a clientID and Secret will be generated
In the event unacceptable certificates are presented the error message will contain "*Access was denied by security policy: 003*".
## Sandbox Environment
**Precondition**: Use certificates and Software Statements from OB Directory (Sandbox Environment)
Same steps as Live Environment
## Support
If you require technical support with certificate management, please contact [Support](/resources/support).
Allica Bank support email: [openbanking-dev@allica.bank](mailto:openbanking-dev@allica.bank)
# Allied Irish Bank
Source: https://docs.yapily.com/institution-configurations/uk/Allied-Irish-Bank
## Links
* [Developer Console](https://developer.aibgb.co.uk/)
## Scopes
* Account Information 🔒
* Payment Initiation 🔒
## Live Environment
**Precondition**: To connect to live Open Banking entities, whether you are accessing account information or initiating payments, your business must have the right regulatory permissions as per the [Open Banking Guide](/tools-and-services/open-banking/enrolment-guide).
1. Upload your transport and signing certificates (PEMs) created in the Open Banking directory, along with the keys into Yapily's [certificate vault](https://console.yapily.com/certificates).
2. Add **AIB** from the **Live** tab to your Dashboard application and add your `Signing key Id`, which can be obtained from the Open Banking Directory.
3. Select your Open Banking transport and signing certificates from the relevant drop-downs lists then click *Next*.
4. Log in to AIB: [https://developer.aibgb.co.uk/user/login](https://developer.aibgb.co.uk/user/login)
5. Select 'Add new Production app'. Complete the form by selecting the relevant TPP roles. Click 'Create App'. Once done, you will need to wait for the app to be approved.
6. Copy the credentials for this app from the AIB developer portal into the credentials view for AIB GB in the Yapily dashboard. Add the obtained *`consumer key`* as **Key** and the *`consumer secret`* as **Secret**. Click 'Next' to save.
## Support
If you require technical support with certificate management, please contact [Support](/resources/support).
## Sandbox Environment
To connect to the Allied Irish Bank sandbox, follow the above steps while selecting **Allied Irish Bank** from the sandbox tab in step 2. The institution Id for this is `aibgb-sandbox`.
**Note:** This Sandbox environment has the following issues:
* The PSU access-token has a short expiration time (some minutes) and they do not support refreshing.
* The transactions filtering is not working
* On the second account the next link is broken and throws an error.
# Bank of Ireland
Source: https://docs.yapily.com/institution-configurations/uk/Bank-of-Ireland
## Links
* [Developer Portal](https://developer.bankofireland.com/)
## Scopes
* Account Information 🔒
* Payment Initiation 🔒
**Precondition**:
To connect to live Open Banking entities, whether you are accessing account information or initiating payments, your business must have the right regulatory permissions as per the [Open Banking Guide](/tools-and-services/open-banking/enrolment-guide).
1. Upload your transport and signing certificates (PEMs) created in the Open Banking directory, along with the keys into Yapily's [certificate vault](https://console.yapily.com/certificates).
2. Add **Bank of Ireland** from the **Live** tab to your Dashboard application and add your `Signing key Id`, which can be obtained from the Open Banking Directory.
3. Add this institution into your app from the `Live` tab and configure the institution by adding `Signing Key ID` from Open Banking & selecting the `certificates` from the dropdown, press **Next**
4. Select your Open Banking transport and signing certificates from the relevant drop-downs lists then click *Next*.
5. **Click to register** to auto-register with the bank. If registration is successful, the key and secret will be populated from the institution's response.
6. Make sure to click *Save* in order not to lose these credentials, as a further registration attempt with the same Open Banking software statement is likely to fail.
**Note:** For Bank of Ireland business UK select it like in step 2. above and then just copy the credentials from Bank of Ireland.
## Bank of Ireland (Ireland)
1. Upload your QWAC and QSEAL eIDAS certificates (PEMs) to an SSA in the Open Banking directory, then upload the (PEMs) along with their private keys into Yapily's [certificate vault](https://console.yapily.com/certificates).
2. Add *Bank of Ireland* from the *Live* tab to your Dashboard application and add your `QSEAL key Id`, which can be obtained from the Open Banking Directory. Then follow the same steps as above uploading your SAA to register.
## Support
If you require technical support with certificate management, please contact [Support](/resources/support).
# Bank of Scotland
Source: https://docs.yapily.com/institution-configurations/uk/Bank-of-Scotland
## Links
* [Developer Portal](https://developer.lloydsbanking.com/)
## Scopes
* Account Information 🔒
* Payment Initiation 🔒
* VRP 🔒
[Bank of Scotland](https://www1.firstdirect.com/) is a subsidiary of Lloyds Banking Group.
## Live Environment
If you have completed the steps below for any of the other institutions in the Lloyds Banking Group (`lloyds`, `lloydsbusiness`, `halifax`) then you can use their existing registration credentials and jump to Step 7 for both `bankofscotland` and `bankofscotlandbusiness`.
**Precondition**: To connect to live Open Banking entities, whether you are accessing account information or initiating payments, your business must have the right regulatory permissions as per the [Open Banking Guide](/tools-and-services/open-banking/enrolment-guide).
1. Upload your transport and signing certificates (PEMs) created in the Open Banking directory, along with the keys into Yapily's [certificate vault](https://console.yapily.com/#!certificates).
2. Add **Bank of Scotland** from the **Live** tab to your Dashboard application and add your `Signing key Id`, which can be obtained from the Open Banking Directory.
3. Select your Open Banking transport and signing certificates from the relevant drop-downs lists then click *Next*.
4. Click the 'download the SSA' button to download your Software Statement Assertion from the Open Banking Directory. This is the token that the Open Banking UK institutions will use during registration to verify your enrolment and possibly create your application.
5. Log in to the developer portal: [https://developer.lloydsbanking.com](https://developer.lloydsbanking.com/)
6. Create an app using the SSA to get *`Client ID`* and *`Client secret`*
7. Copy the credentials for this app from the Bank of Scotland (Lloyd's) developer portal into the credentials view for Bank of Scotland in the Yapily dashboard. Add the obtained *`Client ID`* as **Key** and the *`Client secret`* as **Secret**. Click 'Next' to save.
## VRP Sweeping Access
In order to access the VRP endpoints we have to grant your Yapily application additional scopes. If you do not have these scopes then please contact your customer success manager to get them added.
The following steps are not intended for Yapily Connect customers.
Precondition: To use VRP on `bankofscotland` and `bankofscotlandbusiness` a manual registration via API is required.
Pre-requisites for Manual registration:
* Valid OBWAC / OBSEAL certificates
* PIS registration details for `bankofscotland` and `bankofscotlandbusiness`
You can use existing PIS registration details for this institution to gain VRP sweeping access. The registration details can be found on the Yapily Console for the given application. If a new registration is required (e.g. if you are using a new redirectUri for VRP and it is not covered in the existing registration) then you will have to manage your applications on the institution developer portal. Ensure that the application is subscribed to the latest API version on the institution portal. The existing or new registration credentials from the Yapily Console will be used in the steps below.
### Steps Required for Manual registration
1. Upload the signing (OBSEAL) and transport (OBWAC) certificates if not already present
You can check if the certificate is present already by navigating to the Console -> Certificates. If absent please upload the certificate.
Once confirmed, we need the UUID of the certificate which can be found in the Console -> Certificates -> Certificate; the UUID will appear in the browser URL bar as follows:
`https://console.yapily.com/certificates/`
Save the `UUID` and remember for which kind of key it corresponds to:
e.g. `SIGNING_KEY_UUID = d16f87d3-4222-4173-b8b9-44aeccacae7d`
Once you have done it for the signing key, repeat the process for your transport certificate.
2. Call the manual registration endpoint
The final step is to call the manual registration endpoint with the certificate UUIDs and credentials from your application created on the portal.
The `apiTypes` field in the example has both types but if the registration in question grants PIS access only then only provide `PISP`.
If a custom redirect URI (not Yapily's) is used for the registration then you can provide it in the `redirectUri` field.
The `clientId` field corresponds to the `key` field on the Yapily Console.
Request
```shell theme={null}
curl --location --request POST 'https://api.yapily.com/institutions/bankofscotland/manual/register' \
--header 'Content-Type: application/json' \
--header 'Authorization: Basic ...' \
--data-raw '{
"signingKeyID": "$SIGNING_KEY_UUID",
"transportKeyID": "$TRANSPORT_KEY_UUID",
"clientId": "$CLIENT_ID",
"softwareStatementId": "$SSA_ID",
"organisationId": "$ORGANISATION_ID",
"apiTypes" : ["AISP", "PISP"],
"redirectUri" : ""
}'
```
Response
```shell theme={null}
{
"id": "a0460a91-4b4c-422a-bbe6-bebe0b92e308"
}
```
This is the Yapily registration `id` which can be used to Get, Modify, Delete the registration.
## Support
If you require technical support with certificate management, please contact [Support](/resources/support).
## Sandbox Environment
To connect to the Bank of Scotland Sandbox, select *Bank of Scotland Sandbox* from the pre-configured institutions.
Or if you like to register with your own credentials, please follow the steps below:
1. Upload your transport and signing certificates (PEMs) created in the Open Banking directory, along with the keys into Yapily's [certificate vault](https://console.yapily.com/certificates).
2. Add **Bank of Scotland Sandbox** from the **Sandbox** tab to your Dashboard application and add your `Signing key Id`, which can be obtained from the Open Banking Directory.
3. Select your Open Banking transport and signing certificates from the relevant drop-downs lists then click *Next*.
4. Click the 'download the SSA' button to download your Software Statement Assertion from the Open Banking Directory. This is the token that the Open Banking UK institutions will use during registration to verify your enrolment and possibly create your application.
5. Log in to the developer portal: ([https://register.sandbox.lloydsbanking.com](https://register.sandbox.lloydsbanking.com/)) following the instructions found on this [Guide](https://developer.lloydsbanking.com/sites/developer.lloydsbanking.com/files/support/LBG_Sandbox_Developers_Guide.pdf)
6. Create an app using the SSA you downloaded in the previous step to get *`Client ID`* and *`Client secret`*
7. Copy the credentials for this app from the Lloyds developer portal into the credentials view for Lloyds in the Yapily dashboard. Add the obtained *`Client ID`* as **Key** and the *`Client secret`* as **Secret**. Click 'Next' to save.
# Barclays
Source: https://docs.yapily.com/institution-configurations/uk/Barclays
## Links
* [Developer Portal](https://developer.barclays.com/)
## Scopes
* Open Data 🌐
* Account Information 🔒
* Payment Initiation 🔒
* VRP 🔒
## Live Environment
**Precondition**: To connect to live Open Banking entities, whether you are accessing account information or initiating payments, your business must have the right regulatory permissions as per the [Open Banking Guide](/tools-and-services/open-banking/enrolment-guide).
1. Upload your transport and signing certificates (PEMs) created in the Open Banking directory, along with the keys into Yapily's [certificate vault](https://console.yapily.com/#!certificates).
2. Add **Barclays** from the **Live** tab to your Dashboard application and add your `Signing key Id`, which can be obtained from the Open Banking Directory.
3. Select your Open Banking transport and signing certificates from the relevant drop-downs lists then click *Next*.
4. Click the 'download the SSA' button to download your Software Statement Assertion from the Open Banking Directory. This is the token that the Open Banking UK institutions will use during registration to verify your enrolment and possibly create your application.
5. Log in to the developer portal: [https://developer.barclays.com](https://developer.barclays.com/)
6. Create an app using the SSA to get *`Client ID`* and *`Client secret`*
7. Copy the credentials for this app from the Barclays developer portal into the credentials view for Barclays in the Yapily dashboard. Add the obtained *`Client ID`* as **Key** and the *`Client secret`* as **Secret**. Click 'Next' to save.
## Payments
### Bulk Payments
* Domestic payments and Scheduled Payments are supported
* Maximum 500 payments per request
* Minimum total payments amount is £0.01 (1p)
* Maximum total payments amount would be determined by the account limits on the specific accounts being used.
* The property `requestedExecutionDateTime` is not supported for this bank
* A reference for every payment is required
* One payer must be specified
## VRP Sweeping Access
In order to access the VRP endpoints we have to grant your Yapily application additional scopes. If you do not have these scopes then please contact your customer success manager to get them added.
> **The following steps are not intended for Yapily Connect customers**
Precondition: To use VRP on `barclays` or `barclaysbusiness_uk` a manual registration via API is required.
Pre-requisites for Manual registration:
* Valid OBWAC / OBSEAL certificates
* PIS registration details for `barclays` or `barclaysbusiness_uk`
You can use existing PIS registration details for this institution to gain VRP sweeping access. The registration details can be found on the Yapily Console for the given application. If a new registration is required (e.g. if you are using a new redirectUri for VRP and it is not covered in the existing registration) then you will have to manage your applications on the institution developer portal. Ensure that the application is subscribed to the latest API version on the institution portal. The existing or new registration credentials from the Yapily Console will be used in the steps below.
### Steps Required for Manual registration
1. Upload the signing (OBSEAL) and transport (OBWAC) certificates if not already present
You can check if the certificate is present already by navigating to the Console -> Certificates. If absent please upload the certificate.
Once confirmed, we need the UUID of the certificate which can be found in the Console -> Certificates -> Certificate; the UUID will appear in the browser URL bar as follows:
`https://console.yapily.com/certificates/`
Save the `UUID` and remember for which kind of key it corresponds to:
e.g. `SIGNING_KEY_UUID = d16f87d3-4222-4173-b8b9-44aeccacae7d`
Once you have done it for the signing key, repeat the process for your transport certificate.
2. Call the manual registration endpoint
The final step is to call the manual registration endpoint with the certificate UUIDs and credentials from your application created on the portal.
The `apiTypes` field in the example has both types but if the registration in question grants PIS access only then only provide `PISP`.
If a custom redirect URI (not Yapily's) is used for the registration then you can provide it in the `redirectUri` field.
The `clientId` field corresponds to the `key` field on the Yapily Console.
Request
```shell theme={null}
curl --location --request POST 'https://api.yapily.com/institutions/barclays/manual/register' \
--header 'Content-Type: application/json' \
--header 'Authorization: Basic ...' \
--data-raw '{
"signingKeyID": "$SIGNING_KEY_UUID",
"transportKeyID": "$TRANSPORT_KEY_UUID",
"clientId": "$CLIENT_ID",
"softwareStatementId": "$SSA_ID",
"organisationId": "$ORGANISATION_ID",
"apiTypes" : ["AISP", "PISP"],
"redirectUri" : ""
}'
```
Response
```shell theme={null}
{
"id": "a0460a91-4b4c-422a-bbe6-bebe0b92e308"
}
```
This is the Yapily registration `id` which can be used to Get, Modify, Delete the registration.
### Considerations for Barclays VRP
#### PeriodicLimits for Barclays VRP consent
Barclays requires `PeriodicLimits` to be populated in the VRP consent request.
There are 3 types of Period (periodicType) allowed by Barclays: `Day`, `Fortnight`, `Month`.
**Note:** You can specify 2 of the 3 allowed periods at the same time.
Example request payload for VRP:
```json theme={null}
{
"applicationUserId": "user-234562290",
"institutionId": "barclays",
"callback": "https://display-parameters.com",
"oneTimeToken": false,
"controlParameters": {
"periodicLimits": [
{
"periodType": "Day",
"periodAlignment": "Consent",
"amount": 100,
"currency": "GBP"
},
{
"periodType": "Month",
"periodAlignment": "Consent",
"amount": 500,
"currency": "GBP"
}
],
"validFromDateTime": "2022-11-28T00:00:00.000Z",
"validToDateTime": "2023-11-28T23:59:59.000Z",
"maximumIndividualAmount": {
"amount": 50,
"currency": "GBP"
}
}
}
```
#### Sweeping - Identification
Barclays checks whether creditor account identification is the same as the one specified in the consent during payment creation. The following applies:
* If `identification` is specified in VRP consent request (in `initiation`), then the same `identification` needs to be provided in the VRP payment request during payment initiation.
* If it is not specified in VRP consent request then it is optional to provide it in the VRP payment request, but if you do then it will be validated by Barclays.
Example VRP consent request payload with specified identification:
```json theme={null}
{
"applicationUserId": "user-234562290",
"institutionId": "barclays",
"callback": "https://display-parameters.com",
"oneTimeToken": false,
"controlParameters": {
"periodicLimits": [
{
"periodType": "Day",
"periodAlignment": "Consent",
"amount": 100,
"currency": "GBP"
}
],
"validFromDateTime": "2022-11-28T00:00:00.000Z",
"validToDateTime": "2023-11-28T23:59:59.000Z",
"maximumIndividualAmount": {
"amount": 50,
"currency": "GBP"
}
},
"initiation": {
"debtorAccount": {
"identification": "12345678",
"schemeName": "SortCodeAccountNumber"
},
"creditorAccount": {
"identification": "87654321",
"schemeName": "SortCodeAccountNumber"
}
}
}
```
## Sandbox Environment
To connect to the Barclays Sandbox, select *Barclays Sandbox* from the pre-configured institutions.
Or if you like to register with your own credentials, please follow the steps below:
1. Upload your transport and signing certificates (PEMs) created in the Open Banking directory, along with the keys into Yapily's [certificate vault](https://console.yapily.com/certificates).
2. Add **Barclays Sandbox** from the **Sandbox** tab to your Dashboard application and add your `Signing key Id`, which can be obtained from the Open Banking Directory.
3. Select your Open Banking transport and signing certificates from the relevant drop-downs lists then click *Next*.
4. Click the 'download the SSA' button to download your Software Statement Assertion from the Open Banking Directory. This is the token that the Open Banking UK institutions will use during registration to verify your enrolment and possibly create your application.
5. Log in to the developer portal: [https://developer.barclays.com](https://developer.barclays.com/)
6. Create an app using the SSA you downloaded in the previous step to get *`Client ID`* and *`Client secret`*
7. Copy the credentials for this app from the Barclays developer portal into the credentials view for Barclays in the Yapily dashboard. Add the obtained *`Client ID`* as **Key** and the *`Client secret`* as **Secret**. Click 'Next' to save.
## Support
If you require technical support with certificate management, please contact [Support](/resources/support).
# Capital On Tap
Source: https://docs.yapily.com/institution-configurations/uk/Capital-On-Tap
**Institution ID**: `capitalontap`
## Links
* [Developer Portal](https://developer.api-ob.capitalontap.com/perry/developer/documentation?resource=ukhub-cot-portal\&document=docs/30-production.md)
## Scopes
* Open Data 🌐
* Account Information 🔒
## Live Environment
**Precondition**: To connect to live Open Banking entities, whether you are accessing account information or initiating payments, your business must have the right regulatory permissions as per the [Open Banking Guide](/tools-and-services/open-banking/enrolment-guide).
1. Upload your transport and signing certificates (PEMs) created in the Open Banking directory, along with the keys into Yapily's [certificate vault](https://console.yapily.com/certificates).
2. Add **Capital On Tap** from the **Live** tab to your Dashboard application and add your `Signing key Id`, which can be obtained from the Open Banking Directory.
3. Select your Open Banking transport and signing certificates from the relevant drop-downs lists then click *Next*.
4. **Click to register** to auto-register with the bank. If registration is successful, the key and secret will be populated from the institution's response.
5. Make sure to click *Save* in order not to lose these credentials, as a further registration attempt with the same Open Banking software statement is likely to fail.
## Support
If you require technical support with certificate management, please contact [Support](/resources/support).
# Capital One
Source: https://docs.yapily.com/institution-configurations/uk/Capital-One
## Links
* [Developer Portal](https://developer.capitalone.com/)
## Scopes
* Open Data 🌐
* Account Information 🔒
* Payment Initiation 🔒
## Live Environment
**Precondition**: To connect to live Open Banking entities, whether you are accessing account information or initiating payments, your business must have the right regulatory permissions as per the [Open Banking Guide](/tools-and-services/open-banking/enrolment-guide).
1. Upload your transport and signing certificates (PEMs) created in the Open Banking directory, along with the keys into Yapily's [certificate vault](https://console.yapily.com/certificates).
2. Add **Capital One** from the **Live** tab to your Dashboard application and add your `Signing key Id`, which can be obtained from the Open Banking Directory.
3. Select your Open Banking transport and signing certificates from the relevant drop-downs lists then click *Next*.
4. **Click to register** to auto-register with the bank. If registration is successful, the key and secret will be populated from the institution's response.
5. Make sure to click *Save* in order not to lose these credentials, as a further registration attempt with the same Open Banking software statement is likely to fail.
## Support
If you require technical support with certificate management, please contact [Support](/resources/support).
## Sandbox Environment
To connect to the Capital One Sandbox, select **Capital One Sandbox** from the **pre-configured** institutions.
Or if you like to register with your own credentials, please follow the steps above while selecting Capital One from the sandbox tab in step 2.
# Cash Plus
Source: https://docs.yapily.com/institution-configurations/uk/Cash-Plus
## Links
* [Developer Portal](https://developer.cashplus.com/)
## Scopes
* Account Information 🔒
* Payment Initiation 🔒
## Live Environment
**Preconditions**:
* To connect to *Live* Open Banking entities, whether you are accessing account information or initiating payments, your business must have the right regulatory permissions as per the [Open Banking Guide](/tools-and-services/open-banking/enrolment-guide).
* Cashplus whitelist the IP addresses of servers connecting to their *Live* environment. If you are using Yapily hosting to connect this has all ready been provided; if you are hosting your own Yapily software you must contact [api@cashplus.com](mailto:api@cashplus.com) and arrange whitelisting before you attempt registration.
1. Upload your *Live* transport and signing certificates (PEMs) created in the Open Banking directory, along with the keys into Yapily's [certificate vault](https://console.yapily.com/certificates).
2. Add **Cashplus** from the **Live** tab to your Dashboard application then click **Next**.
3. Configure *Cashplus* by selecting the **edit icon**.
4. Add your *Live* `Signing Key ID` from Open Banking and select the matching Open Banking transport and signing certificates from the relevant drop-downs lists then click **Next**.
5. **Click to register** to auto-register with the bank. If registration is successful, the Key will be populated from the *Cashplus* response. *Make a note of this **Key** for future reference*.
6. Click **Save** to complete registration and preserve these credentials; any further registration attempt with the same Open Banking software statement is likely to fail.
## Support
If you require technical support with certificate management, please contact [Support](/resources/support).
## Sandbox Environment
1. Upload your *Sandbox* transport and signing certificates (PEMs) created in the Open Banking directory, along with the keys into Yapily's [certificate vault](https://console.yapily.com/certificates).
2. Add **Cashplus Sandbox** from the **Sandbox** tab to your Dashboard application then click **Next**.
3. Configure *Cashplus Sandbox* by selecting the **edit icon**.
4. Add your *Sandbox* `Signing Key ID` from Open Banking and select the matching Open Banking transport and signing certificates from the relevant drop-downs lists then click **Next**.
5. **Click to register** to auto-register with the bank. If registration is successful, the Key will be populated from the *Cashplus* response. *Make a note of this **Key** for future reference*.
6. Click **Save** to complete registration and preserve these credentials.
For test account credentials, see the [Sandbox Credentials](/resources/sandbox/sandbox-credentials) page.
# Cater Allen
Source: https://docs.yapily.com/institution-configurations/uk/Cater-Allen
## Links
* [Developer Portal](https://developer.caterallen.co.uk)
## Scopes
* Account Information 🔒
* Payment Initiation 🔒
## Live Environment
**Precondition**: To connect to live Open Banking entities, whether you are accessing account information or initiating payments, your business must have the right regulatory permissions as per the [Open Banking Guide](/tools-and-services/open-banking/enrolment-guide).
1. Upload your transport and signing certificates (PEMs) created in the Open Banking directory, along with the keys into Yapily's [certificate vault](https://console.yapily.com/certificates).
2. Add **Cater Allen** from the **Live** environments to your Dashboard application and add your `Signing key Id`, which can be obtained from the Open Banking Directory.
3. Select your Open Banking transport and signing certificates from the relevant drop-downs lists then click *Next*.
4. **Click to register** to auto-register with *Tide* API. If the registration is successful, the key will be populated from the institution's response.
5. Make sure to click *Save* in order not to lose these credentials, as a further registration attempt with the same Open Banking software statement is likely to fail.
## Support
If you require technical support with certificate management, please contact [Support](/resources/support).
# Chase UK
Source: https://docs.yapily.com/institution-configurations/uk/Chase-UK
**Institution ID**: `chase_uk`
## Links
* [Developer Portal](https://developer.openbanking-obie.chase.co.uk/)
## Scopes
* Account Information🔒
* Payment Initiation🔒
## Live Environment
**Precondition**: To connect to Chase Bank, an application needs to be created with the bank. Registration with the bank is a manual process; email with details of TPP authorisation needs to be sent to chase requesting registration for Chase Bank.
1. Upload your OBWAC (Transport) and OBSEAL (Signing) certificates created in the Open Banking directory, along with the private keys into Yapily's [certificate vault](https://console.yapily.com/#!certificates).
2. Navigate to your application's **Connected Institutions** tab and click **Add institutions**.
3. Add **Chase UK** from the **Live** tab to your Dashboard application and add your `Signing key Id`, which can be obtained from the Open Banking Directory.
4. In your application's **Not registered** tab, you should now see **chase\_uk**. Click on **Register**.
5. Select the certificates you uploaded in Step 1, and fill in the rest of the form with credentials obtained from the bank in **Prerequisite** step.
6. Click **Save Registration**.
## Sandbox Environment
Not available at the moment.
## Support
If you require technical support with certificate management, please contact [Support](/resources/support).
# Chelsea Building Society
Source: https://docs.yapily.com/institution-configurations/uk/Chelsea-Building-Society
## Links
* [Developer Portal](https://developers.ybs.co.uk/)
## Scopes
* Account Information 🔒
* Payment Initiation 🔒
## Live Environment
**Precondition**: To connect to live Open Banking entities, whether you are accessing account information or initiating payments, your business must have the right regulatory permissions as per the [Open Banking Guide](/tools-and-services/open-banking/enrolment-guide).
1. Upload your transport and signing certificates (PEMs) created in the Open Banking directory, along with the keys into Yapily's [certificate vault](https://console.yapily.com/certificates).
2. Add **Chelsea Building Society** from the **Live** tab to your Dashboard application and add your `Signing key Id`, which can be obtained from the Open Banking Directory.
3. Select your Open Banking transport and signing certificates from the relevant drop-downs lists then click *Next*.
4. **Click to register** to auto-register with the bank. If registration is successful, the key and secret will be populated from the institution's response.
5. Make sure to click *Save* in order not to lose these credentials, as a further registration attempt with the same Open Banking software statement is likely to fail.
**Note:** If you first register with *Yorkshire Building Society* use the same credentials to connect to *Chelsea Building Society* by just coping the key and secret
## Support
If you require technical support with certificate management, please contact [Support](/resources/support).
# Clydesdale Bank
Source: https://docs.yapily.com/institution-configurations/uk/Clydesdale-Bank
## Links
* [Developer Portal](https://developer.cybonline.co.uk/)
## Scopes
* Open Data 🌐
* Account Information 🔒
* Payment Initiation 🔒
## Live Environment
**Precondition**: To connect to live Open Banking entities, whether you are accessing account information or initiating payments, your business must have the right regulatory permissions as per the [Open Banking Guide](/tools-and-services/open-banking/enrolment-guide).
**Note:** Clydesdale Bank requires eIDAS (QWAC/QSEAL) certificates in an Open Banking Software Statement and no longer accepts OBIE certificates. In the event unacceptable certificates are presented the error message will contain "*Access was denied by security policy: 003*".
1. Upload your transport and signing certificates (PEMs) created in the Open Banking directory, along with the keys into Yapily's [certificate vault](https://console.yapily.com/certificates).
2. Add **Clydesdale Bank** from the **Live** tab to your Dashboard application and add your `Signing key Id`, which can be obtained from the Open Banking Directory.
3. Select your Open Banking transport and signing certificates from the relevant drop-downs lists then click *Next*.
4. **Click to register** to auto-register with the bank. If registration is successful, the key and secret will be populated from the institution's response.
5. Make sure to click *Save* in order not to lose these credentials, as a further registration attempt with the same Open Banking software statement is likely to fail.
## Support
If you require technical support with certificate management, please contact [Support](/resources/support).
# Cumberland Building Society
Source: https://docs.yapily.com/institution-configurations/uk/Cumberland-Building-Society
## Links
* [Developer Portal](https://www.cumberland.co.uk/developers)
## Scopes
* Account Information 🔒
* Payment Initiation 🔒
## Live Environment
**Precondition**: To connect to live Open Banking entities, whether you are accessing account information or initiating payments, your business must have the right regulatory permissions as per the [Open Banking Guide](/tools-and-services/open-banking/enrolment-guide).
1. Upload your transport and signing certificates (PEMs) created in the Open Banking directory, along with the keys into Yapily's [certificate vault](https://console.yapily.com/certificates).
2. Add **Cumberland Building Society** to your Dashboard application and add your `Signing key Id`, which can be obtained from the Open Banking Directory.
3. Select your Open Banking transport and signing certificates from the relevant drop-downs lists then click *Next*.
4. **Click to register** to auto-register with the bank. If registration is successful, the key and secret will be populated from the institution's response.
5. Make sure to click *Save* in order not to lose these credentials, as a further registration attempt with the same Open Banking software statement is likely to fail.
## Support
If you require technical support with certificate management, please contact [Support](/resources/support).
## Sandbox Environment
To connect to the Cumberland Building Society sandbox, follow the above steps while selecting *Cumberland Building Society* from the sandbox tab in step 2 or select it from the pre-configured institutions. The institution Id for this is `cumberlandbuildingsociety-sandbox`
For test user accounts, see the [Sandbox Credentials](/resources/sandbox/sandbox-credentials) page.
# Danske Bank UK
Source: https://docs.yapily.com/institution-configurations/uk/Danske-Bank-UK
## Links
* [Developer Portal](https://danskebank.com/openbanking)
## Scopes
* Open Data 🌐
* Account Information 🔒
* Payment Initiation 🔒
**Note:** Danske Bank personal and business share the same `client_id` and `client_secret`
## Live Environment
**Precondition**: To connect to live Open Banking entities, whether you are accessing account information or initiating payments, your business must have the right regulatory permissions as per the [Open Banking Guide](/tools-and-services/open-banking/enrolment-guide).
1. Upload your transport and signing certificates (PEMs) created in the Open Banking directory, along with the keys into Yapily's [certificate vault](https://console.yapily.com/certificates).
2. Add **Danske Bank** from the **Live** tab to your Dashboard application and add your `Signing key Id`, which can be obtained from the Open Banking Directory.
3. Add this institution into your app from the `Live` tab and configure the institution by adding `Signing Key ID` from Open Banking & selecting the `certificates` from the dropdown, press next [https://console.yapily.com/applications](https://console.yapily.com/applications)
4. Select your Open Banking transport and signing certificates from the relevant drop-downs lists then click *Next*.
5. **Click to register** to auto-register with the bank. If registration is successful, the key and secret will be populated from the institution's response.
6. Make sure to click *Save* in order not to lose these credentials, as a further registration attempt with the same Open Banking software statement is likely to fail.
## Support
If you require technical support with certificate management, please contact [Support](/resources/support).
# Engage Bank
Source: https://docs.yapily.com/institution-configurations/uk/Engage-Bank
## Links
* [Developer Portal](https://engage.dashboard.token.io/)
## Scopes
* Account Information 🔒
* Payment Information 🔒
## Preconditions
* Access to the Engage Sandbox environment must be requested and granted **before** requesting access to the Engage Production environment
* Engage Sandbox environment requires manual registration with the [Engage Token Sandbox Dashboard](https://engage.dashboard.sandbox.token.io/)
* Engage Production environment requires manual registration with the [Engage Token Production Dashboard](https://engage.dashboard.token.io/)
* Both Sandbox and Production access requires active eIDAS Certificates
## Sandbox Environment
1. Create an account on the [Engage Sandbox Token Dashboard](https://engage.dashboard.sandbox.token.io/).
2. Upload your *Live* eIDAS transport and signing certificates (PEMs) on the Engage Sandbox Token Dashboard.
3. Your dashboard should now show that your access permissions are under review. Once approved, you will be able to select `Go Live` to request production access.
## Live Environment
1. From the [Engage Sandbox Token Dashboard](https://engage.dashboard.sandbox.token.io/), select `Go Live`. You will be prompted to log in or create an account for the [Engage Token Production Dashboard](https://engage.dashboard.token.io/).
2. Upload your *Live* eIDAS transport and signing certificates (PEMs) on the Engage Token Production Dashboard.
3. Once your certificates have been approved by Token, you will be granted a `Member ID` and `Alias`, found on the Engage Token Dashboard under `Settings` -> `Member Information`. Following this, you will need to generate an API key, which can be done under `Settings` -> `Authentication Keys`. Save this key.
4. Add *Engage Bank* from the *Live* tab on your Yapily Dashboard application then click **Next**.
5. Configure *Engage Bank* by selecting the **edit icon**.
6. Add your Engage `Member ID`, `Alias`, and `API Key` retrieved in step 3 above. Click **Save** to complete registration and preserve these credentials.
## Notes
* Support for Engage Bank is provided by Token via their [support desk](https://tokenio.atlassian.net/servicedesk/customer/portals).
* The Engage Sandbox environment is inconsistent with the performance of the Engage Production environment. Therefore, Yapily has elected not to support the sandbox environment. However, you must still register for the Engage Sandbox environment in order to be granted access to the production environment, as outlined above.
* International payments are not available at this time.
## Support
If you require technical support with certificate management, please contact [Support](/resources/support).
# First Direct
Source: https://docs.yapily.com/institution-configurations/uk/First-Direct
## Links
* [Developer Portal](http://developer.hsbc.com/)
## Scopes
* Open Data 🌐
* Account Information 🔒
* Payment Initiation 🔒
* VRP 🔒
## Live Environment
**Precondition**: To connect to live Open Banking entities, whether you are accessing account information or initiating payments, your business must have the right regulatory permissions as per the [Open Banking Guide](/tools-and-services/open-banking/enrolment-guide).
1. Upload your transport and signing certificates (PEMs) created in the Open Banking directory, along with the keys into Yapily's [certificate vault](https://console.yapily.com/certificates).
2. Add ***First Direct*** from the **Live** tab to your Dashboard application and add your `Signing key Id`, which can be obtained from the Open Banking Directory.
3. Select your Open Banking transport and signing certificates from the relevant drop-downs lists then click *Next*.
4. **Click to register** to auto-register with the bank. If registration is successful, the key and secret will be populated from the institution's response.
5. Make sure to click *Save* in order not to lose these credentials, as a further registration attempt with the same Open Banking software statement is likely to fail.
## Migration to 3.1.1
**Update:** 20/02/2020 HSBC Group ASPSPs (HSBC, First Direct and M\&S Bank) will terminate the current AIS 2.0 and 1.1 PIS API versions. To ensure you are running on version 3.1.1 for both AIS and PIS, you will need to have a valid eIDAS QWAC and QSEAL certificates, and go through our registration process again before the 28th February 2020. All of your consents from the old version will migrate to updated version.
Steps on how to do this are outlined below:
1. Upload your public eIDAS certificates into OBIE Directory's SSA and copy the *QSEAL kId*.
2. Upload your public and private eIDAS into Yapily's [certificate vault](https://console.yapily.com/certificates)
3. Go to your application's institution tab and edit *first direct* change the Signing KeyId to the QSEAL kId you copied from OBIE Directory. Select the QSEAL and QWAC you uploaded in 2. and press next
4. Press "Download and Register", wait until the registration process is done, then click save.
5. Make sure to click *Save* in order not to lose these credentials, as a further registration attempt with the same Open Banking software statement is likely to fail.
## VRP Sweeping Access
In order to access the VRP endpoints we have to grant your Yapily application additional scopes. If you do not have these scopes then please contact your customer success manager to get them added.
The following steps are not intended for Yapily Connect customers.
Precondition: To use VRP on `firstdirect` a manual registration via API is required.
Pre-requisites for Manual registration:
* Valid OBWAC / OBSEAL certificates
* PIS registration details for `firstdirect`
You can use existing PIS registration details for this institution to gain VRP sweeping access. The registration details can be found on the Yapily Console for the given application. If a new registration is required (e.g. if you are using a new redirectUri for VRP and it is not covered in the existing registration) then you can perform a DCR request using the steps outlined in `Live Environment`. The existing or new registration credentials from the Yapily Console will be used in the steps below.
### Steps Required for Manual registration
1. Upload the signing (OBSEAL) and transport (OBWAC) certificates if not already present
You can check if the certificate is present already by navigating to the Console -> Certificates. If absent please upload the certificate.
Once confirmed, we need the UUID of the certificate which can be found in the Console -> Certificates -> Certificate; the UUID will appear in the browser URL bar as follows:
`https://console.yapily.com/certificates/`
Save the `UUID` and remember for which kind of key it corresponds to:
e.g. `SIGNING_KEY_UUID = d16f87d3-4222-4173-b8b9-44aeccacae7d`
Once you have done it for the signing key, repeat the process for your transport certificate.
2. Call the manual registration endpoint
The final step is to call the manual registration endpoint with the certificate UUIDs and credentials from your application created on the portal.
The `apiTypes` field in the example has both types but if the registration in question grants PIS access only then only provide `PISP`.
If a custom redirect URI (not Yapily's) is used for the registration then you can provide it in the `redirectUri` field.
The `clientId` field corresponds to the `key` field on the Yapily Console.
Request
```shell theme={null}
curl --location --request POST 'https://api.yapily.com/institutions/firstdirect/manual/register' \
--header 'Content-Type: application/json' \
--header 'Authorization: Basic ...' \
--data-raw '{
"signingKeyID": "$SIGNING_KEY_UUID",
"transportKeyID": "$TRANSPORT_KEY_UUID",
"clientId": "$CLIENT_ID",
"softwareStatementId": "$SSA_ID",
"organisationId": "$ORGANISATION_ID",
"apiTypes" : ["AISP", "PISP"],
"redirectUri" : ""
}'
```
Response
```shell theme={null}
{
"id": "a0460a91-4b4c-422a-bbe6-bebe0b92e308"
}
```
This is the Yapily registration `id` which can be used to Get, Modify, Delete the registration.
## Support
If you require technical support with certificate management, please contact [Support](/resources/support).
# First Trust Bank
Source: https://docs.yapily.com/institution-configurations/uk/First-Trust-Bank
## Links
* [Developer Portal](https://developer.firsttrustbank.co.uk/)
## Scopes
* Open Data 🌐
* Account Information 🔒
* Payment Initiation 🔒
## Live Environment
**Precondition**: To connect to live Open Banking entities, whether you are accessing account information or initiating payments, your business must have the right regulatory permissions as per the [Open Banking Guide](/tools-and-services/open-banking/enrolment-guide).
1. Upload your transport and signing certificates (PEMs) created in the Open Banking directory, along with the keys into Yapily's [certificate vault](https://console.yapily.com/certificates).
2. Add **First Trust Bank** from the **Live** tab to your Dashboard application and add your `Signing key Id`, which can be obtained from the Open Banking Directory.
3. Select your Open Banking transport and signing certificates from the relevant drop-downs lists then click *Next*.
4. Click the 'download the SSA' button to download your Software Statement Assertion from the Open Banking Directory. This is the token that the Open Banking UK institutions will use during registration to verify your enrolment and possibly create your application.
5. Log in to First Trust Bank: [https://developer.firsttrustbank.co.uk](https://developer.firsttrustbank.co.uk/)
6. Select 'Add new Production app'. Complete the form by pasting the downloaded SSA into the SSA form field and selecting the relevant TPP roles. Click 'Create App'. Once done, you will need to wait for the app to be approved.
7. Copy the credentials for this app from the First Trust Bank developer portal into the credentials view for First Trust in the Yapily dashboard. Add the obtained *`consumer key`* as **Key** and the *`consumer secret`* as **Secret**. Click 'Next' to save.
## Support
If you require technical support with certificate management, please contact [Support](/resources/support).
## Sandbox Environment
To connect to the First Trust Bank sandbox, follow the above steps while selecting First Trust Bank from the sandbox tab in step 2. The institution Id for this is `firsttrustbank-sandbox`.
**Notes:** This Sandbox environment has the following issues:
* The authorisation page uses a self signed certificate thus most browsers will prevent you from visiting.
* The PSU access-token has a short expiration time (some minutes) and they do not support refreshing.
* The transactions filtering is not working
* On the second account the next link is broken and throws an error.
# Forgerock Open Banking Sandbox
Source: https://docs.yapily.com/institution-configurations/uk/Forgerock-Open-Banking-Sandbox
## Links
* [Developer Portal](https://directory.ob.forgerock.financial/register)
## Scopes
* Account Information 🔒
* Payment Initiation 🔒
## Sandbox Environment
The Forgerock sandbox is a mock institution registered in the [Open Banking Directory sandbox](https://www.openbanking.org.uk/providers/directory/) as an ASPSP to facilitate testing for third party providers (TPPs).
In order to connect to this sandbox institution, you will need to enrol with the Open Banking institution as a TPP.
1. Upload your transport and signing certificates (PEMs) created in the Open Banking directory, along with the keys into Yapily's [certificate vault](https://console.yapily.com/certificates).
2. Add **Forgerock sandbox** from the **Sandbox** tab to your Dashboard application and add your `Signing key Id`, which can be obtained from the Open Banking Directory.
3. Select your Open Banking transport and signing certificates from the relevant drop-downs lists then click *Next*.
4. **Click to register** to auto-register with the bank. If registration is successful, the key and secret will be populated from the institution's response.
5. Make sure to click *Save* in order not to lose these credentials, as a further registration attempt with the same Open Banking software statement is likely to fail.
Alternatively, you can use this sandbox via Yapily's preconfigured tab. Learn more about [Yapily Preconfigured Sandboxes here](/resources/sandbox/sandbox-credentials).
## Support
If you require technical support with certificate management, please contact [Support](/resources/support).
# HSBC Corporate
Source: https://docs.yapily.com/institution-configurations/uk/HSBC-Corporate
## Links
* [Developer Portal](http://developer.hsbc.com/)
## Scopes
| Institution Id | Scopes | Supported Countries |
| ----------------- | ------------------------------------------------------------------- | --------------------------------------------------------------------------------------------------------------------------------------------------------------------------------------------------------------------------------------- |
| hsbccorporate | Open Data 🌐
Account Information 🔒
Payment Initiation 🔒 | UK 🇬🇧 |
| hsbccorporate\_eu | Open Data 🌐
Account Information 🔒 | France 🇫🇷
Malta 🇲🇹
Malta 🇲🇹
Germany 🇩🇪
Belgium 🇧🇪
Netherlands 🇳🇱
Poland 🇵🇱
Greece 🇬🇷
Czech Republic 🇨🇿
Ireland 🇮🇪
Italy 🇮🇹
Luxembourg 🇱🇺
Spain 🇪🇸 |
## Registration Process
HSBC Supports Dynamic Registration. Please note that once a certificate is used for registration, it cannot be used again for performing registration (One registration per certificate).
## Onboarding ASPSP's to Yapily Application
### OB Certificates
**Precondition**: To connect to Hsbc institutions with OB certs a dynamic registration request (DCR) is needed.
**Pre-requisites for DCR:**
* Valid OBWAC / OBSEAL certificates
* SSA (downloaded from OBIE directory)
### Steps Required for DCR registration
1. **Download your SSA from the OBIE directory**
Open the OBIE Directory for your organisation, navigate to the SSA you want to use for the registration and generate the SSA. The downloaded SSA has to be passed as is to the registration endpoint; **do not alter the contents or format**.
2. Upload the signing (OBSEAL) and transport (OBWAC) certificates into V2 services
**Request**
```shell theme={null}
curl --location --request POST 'https://api.yapily.com/certificates/keys/' \
--header 'Authorization: Basic YOUR_APPLICATION_CREDENTIALS_AS_BASIC_AUTH' \
--header 'Content-Type: application/json' \
--data-raw '[{
"pem": "$YOUR_PUBLIC_KEY_AS_PEM",
"key": "$YOUR_PRIVATE_KEY",
"kid" : "$CERT_KID",
"name" : "$CERTIFICATE_NAME"
}]'
```
**Response**
```json theme={null}
{
"id": "d16f87d3-4222-4173-b8b9-44aeccacae7d",
....
}
```
Save the id and remember for which kind of key it corresponds:
e.g. `SIGNING_KEY_UUID = d16f87d3-4222-4173-b8b9-44aeccacae7d`
Once you have done it for the signing key, do the same request for your transport key.
3. **Call the registration endpoint**
The final step is to call the registration endpoint with the certificate UUIDs and the downloaded SSA:
**Request**
Do not alter the downloaded SSA. Pass directly to the register endpoint in its JWS format.
```shell theme={null}
curl --location --request POST 'https://api.yapily.com/institutions/hsbccorporate/register' \
--header 'Content-Type: application/json' \
--header 'Authorization: Bearer YOUR_APPLICATION_CREDENTIALS_AS_BASIC_AUTH' \
--data-raw '{
"signingKeyID": "$SIGNING_KEY_UUID",
"transportKeyID": "$TRANSPORT_KEY_UUID"
"ssa": "$DOWNLOADED_SSA"
}'
```
**Response**
```json theme={null}
{
"id": "a0460a91-4b4c-422a-bbe6-bebe0b92e308"
}
```
Note above ID, this will be the clientId which can be further used to Get, Modify, Delete registrations with Yapily
## Support
If you require technical support with certificate management, please contact [Support](/resources/support).
# HSBC Kinetic
Source: https://docs.yapily.com/institution-configurations/uk/HSBC-Kinetic
## Links
* [Developer Portal](http://developer.hsbc.com/)
## Scopes
* Open Data 🌐
* Account Information 🔒
* Payment Initiation 🔒
## Registration Process
HSBC Supports Dynamic Registration. Please note that once a certificate is used for registration, it cannot be used again for performing registration (One registration per certificate).
## Onboarding ASPSP's to Yapily Application
### OB Certificates
**Precondition**: To connect to Hsbc institutions with OB certs a dynamic registration request (DCR) is needed.
**Pre-requisites for DCR:**
* Valid OBWAC / OBSEAL certificates
* SSA (downloaded from OBIE directory)
### Steps Required for DCR registration
1. **Download your SSA from the OBIE directory**
Open the OBIE Directory for your organisation, navigate to the SSA you want to use for the registration and generate the SSA. The downloaded SSA has to be passed as is to the registration endpoint; **do not alter the contents or format**.
2. Upload the signing (OBSEAL) and transport (OBWAC) certificates into V2 services
**Request**
```shell theme={null}
curl --location --request POST 'https://api.yapily.com/certificates/keys/' \
--header 'Authorization: Basic YOUR_APPLICATION_CREDENTIALS_AS_BASIC_AUTH' \
--header 'Content-Type: application/json' \
--data-raw '[{
"pem": "$YOUR_PUBLIC_KEY_AS_PEM",
"key": "$YOUR_PRIVATE_KEY",
"kid" : "$CERT_KID",
"name" : "$CERTIFICATE_NAME"
}]'
```
**Response**
```json theme={null}
{
"id": "d16f87d3-4222-4173-b8b9-44aeccacae7d",
....
}
```
Save the id and remember for which kind of key it corresponds:
e.g. `SIGNING_KEY_UUID = d16f87d3-4222-4173-b8b9-44aeccacae7d`
Once you have done it for the signing key, do the same request for your transport key.
3. **Call the registration endpoint**
The final step is to call the registration endpoint with the certificate UUIDs and the downloaded SSA:
**Request**
Do not alter the downloaded SSA. Pass directly to the register endpoint in its JWS format.
```shell theme={null}
curl --location --request POST 'https://api.yapily.com/institutions/hsbckinetic/register' \
--header 'Content-Type: application/json' \
--header 'Authorization: Bearer YOUR_APPLICATION_CREDENTIALS_AS_BASIC_AUTH' \
--data-raw '{
"signingKeyID": "$SIGNING_KEY_UUID",
"transportKeyID": "$TRANSPORT_KEY_UUID"
"ssa": "$DOWNLOADED_SSA"
}'
```
**Response**
```json theme={null}
{
"id": "a0460a91-4b4c-422a-bbe6-bebe0b92e308"
}
```
Note above ID, this will be the clientId which can be further used to Get, Modify, Delete registrations with Yapily
## Support
If you require technical support with certificate management, please contact [Support](/resources/support).
# HSBC UK
Source: https://docs.yapily.com/institution-configurations/uk/HSBC-UK
## Links
* [Developer Portal](http://developer.hsbc.com/)
## Scopes
* Open Data 🌐
* Account Information 🔒
* Payment Initiation 🔒
* VRP 🔒
## Live Environment
### HSBC UK Personal
**Precondition**: To connect to live Open Banking entities, whether you are accessing account information or initiating payments, your business must have the right regulatory permissions as per the [Open Banking Guide](/tools-and-services/open-banking/enrolment-guide).
1. Upload your OBTransport and OBSigning certificates (PEMs) created in the Open Banking directory, along with the private keys into Yapily's [certificate vault](https://console.yapily.com/#!certificates).
2. Add **HSBC UK** from the **Live** tab to your Dashboard application and add your `Signing key Id`, which can be obtained from the Open Banking Directory.
3. Select your Open Banking transport and signing certificates from the relevant drop-downs lists then click *Next*.
4. **Click to register** to auto-register with the bank. If registration is successful, the key and secret will be populated from the institution's response.
5. Make sure to click *Save* in order not to lose these credentials, as a further registration attempt with the same Open Banking software statement is likely to fail.
### HSBC UK Business
**Precondition**: To connect to live Open Banking entities, whether you are accessing account information or initiating payments, your business must have the right regulatory permissions as per the [Open Banking Guide](/tools-and-services/open-banking/enrolment-guide).
You must repeat the process outlined above (under HSBC personal) using a different SSA ID.
## VRP Sweeping Access
In order to access the VRP endpoints we have to grant your Yapily application additional scopes. If you do not have these scopes then please contact your customer success manager to get them added.
The following steps are not intended for Yapily Connect customers.
Precondition: To use VRP on `hsbc_uk` and `hsbcbusiness_uk` a manual registration via API is required.
Pre-requisites for Manual registration:
* Valid OBWAC / OBSEAL certificates
* PIS registration details for `hsbc_uk` and `hsbcbusiness_uk`
You can use existing PIS registration details for this institution to gain VRP sweeping access. The registration details can be found on the Yapily Console for the given application. If a new registration is required (e.g. if you are using a new redirectUri for VRP and it is not covered in the existing registration) then you can perform a DCR request using the steps outlined in `Live Environment`. The existing or new registration credentials from the Yapily Console will be used in the steps below.
### Steps Required for Manual registration
1. Upload the signing (OBSEAL) and transport (OBWAC) certificates if not already present
You can check if the certificate is present already by navigating to the Console -> Certificates. If absent please upload the certificate.
Once confirmed, we need the UUID of the certificate which can be found in the Console -> Certificates -> Certificate; the UUID will appear in the browser URL bar as follows:
`https://console.yapily.com/certificates/`
Save the `UUID` and remember for which kind of key it corresponds to:
e.g. `SIGNING_KEY_UUID = d16f87d3-4222-4173-b8b9-44aeccacae7d`
Once you have done it for the signing key, repeat the process for your transport certificate.
2. Call the manual registration endpoint
The final step is to call the manual registration endpoint with the certificate UUIDs and credentials from your application created on the portal.
The `apiTypes` field in the example has both types but if the registration in question grants PIS access only then only provide `PISP`.
If a custom redirect URI (not Yapily's) is used for the registration then you can provide it in the `redirectUri` field.
The `clientId` field corresponds to the `key` field on the Yapily Console.
Request
```shell theme={null}
curl --location --request POST 'https://api.yapily.com/institutions/hsbc_uk/manual/register' \
--header 'Content-Type: application/json' \
--header 'Authorization: Basic ...' \
--data-raw '{
"signingKeyID": "$SIGNING_KEY_UUID",
"transportKeyID": "$TRANSPORT_KEY_UUID",
"clientId": "$CLIENT_ID",
"softwareStatementId": "$SSA_ID",
"organisationId": "$ORGANISATION_ID",
"apiTypes" : ["AISP", "PISP"],
"redirectUri" : ""
}'
```
Response
```shell theme={null}
{
"id": "a0460a91-4b4c-422a-bbe6-bebe0b92e308"
}
```
This is the Yapily registration `id` which can be used to Get, Modify, Delete the registration.
## Support
If you require technical support with certificate management, please contact [Support](/resources/support).
# Halifax
Source: https://docs.yapily.com/institution-configurations/uk/Halifax
## Links
* [Developer Portal](https://developer.lloydsbanking.com/)
## Scopes
* Open Data 🌐
* Account Information 🔒
* Payment Initiation 🔒
* VRP 🔒
[Halifax](https://www.halifax.co.uk/) is a subsidiary of Lloyds Banking Group.
## Live Environment
If you have completed the steps below for any of the other institutions in the Lloyds Banking Group (`lloyds`, `lloydsbusiness`, `bankofscotland`, `bankofscotlandbusiness`) then you can use their existing registration credentials and jump to Step 7.
**Precondition**: To connect to live Open Banking entities, whether you are accessing account information or initiating payments, your business must have the right regulatory permissions as per the [Open Banking Guide](/tools-and-services/open-banking/enrolment-guide).
1. Upload your transport and signing certificates (PEMs) created in the Open Banking directory, along with the keys into Yapily's [certificate vault](https://console.yapily.com/#!certificates).
2. Add **Halifax** from the **Live** tab to your Dashboard application and add your `Signing key Id`, which can be obtained from the Open Banking Directory.
3. Select your Open Banking transport and signing certificates from the relevant drop-downs lists then click *Next*.
4. Click the 'download the SSA' button to download your Software Statement Assertion from the Open Banking Directory. This is the token that the Open Banking UK institutions will use during registration to verify your enrolment and possibly create your application.
5. Log in to the developer portal: [https://developer.lloydsbanking.com](https://developer.lloydsbanking.com/)
6. Create an app using the SSA to get *`Client ID`* and *`Client secret`*
7. Copy the credentials for this app from the Halifax (Lloyds) developer portal into the credentials view for Halifax in the Yapily dashboard. Add the obtained *`Client ID`* as **Key** and the *`Client secret`* as **Secret**. Click 'Next' to save.
## VRP Sweeping Access
In order to access the VRP endpoints we have to grant your Yapily application additional scopes. If you do not have these scopes then please contact your customer success manager to get them added.
The following steps are not intended for Yapily Connect customers.
Precondition: To use VRP on `halifax` a manual registration via API is required.
Pre-requisites for Manual registration:
* Valid OBWAC / OBSEAL certificates
* PIS registration details for `halifax`
You can use existing PIS registration details for this institution to gain VRP sweeping access. The registration details can be found on the Yapily Console for the given application. If a new registration is required (e.g. if you are using a new redirectUri for VRP and it is not covered in the existing registration) then you will have to manage your applications on the institution developer portal. Ensure that the application is subscribed to the latest API version on the institution portal. The existing or new registration credentials from the Yapily Console will be used in the steps below.
### Steps Required for Manual registration
1. Upload the signing (OBSEAL) and transport (OBWAC) certificates if not already present
You can check if the certificate is present already by navigating to the Console -> Certificates. If absent please upload the certificate.
Once confirmed, we need the UUID of the certificate which can be found in the Console -> Certificates -> Certificate; the UUID will appear in the browser URL bar as follows:
`https://console.yapily.com/certificates/`
Save the `UUID` and remember for which kind of key it corresponds to:
e.g. `SIGNING_KEY_UUID = d16f87d3-4222-4173-b8b9-44aeccacae7d`
Once you have done it for the signing key, repeat the process for your transport certificate.
2. Call the manual registration endpoint
The final step is to call the manual registration endpoint with the certificate UUIDs and credentials from your application created on the portal.
The `apiTypes` field in the example has both types but if the registration in question grants PIS access only then only provide `PISP`.
If a custom redirect URI (not Yapily's) is used for the registration then you can provide it in the `redirectUri` field.
The `clientId` field corresponds to the `key` field on the Yapily Console.
Request
```shell theme={null}
curl --location --request POST 'https://api.yapily.com/institutions/halifax/manual/register' \
--header 'Content-Type: application/json' \
--header 'Authorization: Basic ...' \
--data-raw '{
"signingKeyID": "$SIGNING_KEY_UUID",
"transportKeyID": "$TRANSPORT_KEY_UUID",
"clientId": "$CLIENT_ID",
"softwareStatementId": "$SSA_ID",
"organisationId": "$ORGANISATION_ID",
"apiTypes" : ["AISP", "PISP"],
"redirectUri" : ""
}'
```
Response
```shell theme={null}
{
"id": "a0460a91-4b4c-422a-bbe6-bebe0b92e308"
}
```
This is the Yapily registration `id` which can be used to Get, Modify, Delete the registration.
## Support
If you require technical support with certificate management, please contact [Support](/resources/support).
## Sandbox Environment
To connect to the Halifax Sandbox, select *Halifax Sandbox* from the pre-configured institutions.
Or if you like to register with your own credentials, please follow the steps below:
**Precondition**: To connect to live Open Banking entities, whether you are accessing account information or initiating payments, your business must have the right regulatory permissions as per the [Open Banking Guide](/tools-and-services/open-banking/enrolment-guide).
1. Upload your transport and signing certificates (PEMs) created in the Open Banking directory, along with the keys into Yapily's [certificate vault](https://console.yapily.com/certificates).
2. Add **Halifax Sandbox** from the **Sandbox** tab to your Dashboard application and add your `Signing key Id`, which can be obtained from the Open Banking Directory.
3. Select your Open Banking transport and signing certificates from the relevant drop-downs lists then click *Next*.
4. Click the 'download the SSA' button to download your Software Statement Assertion from the Open Banking Directory. This is the token that the Open Banking UK institutions will use during registration to verify your enrolment and possibly create your application.
5. Log in to the developer portal: ([https://register.sandbox.lloydsbanking.com](https://register.sandbox.lloydsbanking.com/)) following the instructions found on this [Guide](https://developer.lloydsbanking.com/sites/developer.lloydsbanking.com/files/support/LBG_Sandbox_Developers_Guide.pdf)
6. Create an app using the SSA you downloaded in the previous step to get *`Client ID`* and *`Client secret`*
7. Copy the credentials for this app from the Lloyds developer portal into the credentials view for Lloyds in the Yapily dashboard. Add the obtained *`Client ID`* as **Key** and the *`Client secret`* as **Secret**. Click 'Next' to save.
**Note**: *MBNA Sandbox*, *Lloyds Bank Sandbox*, *Halifax Sandbox* and *Bank of Scotland* are using the same *Lloyds Banking Group* API. If you have already register with one of the above institutions just copy the credentials (**key** and **secret**) to this one and you are ready to go.
# Handelsbanken UK
Source: https://docs.yapily.com/institution-configurations/uk/Handelsbanken-UK
## Links
* [Developer Portal](https://developer.handelsbanken.com)
## Platform V1
### Scopes
* Account Information 🔒
### Live Environment
**Precondition**: To connect to live Open Banking entities, whether you are accessing account information or initiating payments, your business must have the right regulatory permissions as per the [Open Banking Guide](/tools-and-services/open-banking/enrolment-guide).
1. Upload your QWAC/OBWAC and QSEAL/OBSEAL certificates (PEMs), along with the keys into Yapily's [certificate vault](https://console.yapily.com/certificates).
2. Add **Handelsbank UK** from the **Live** tab to your Dashboard application and add your `Client Uri` and `Terms of Service Uri`.
3. Select your QWAC/OBWAC and QSEAL/OBSEAL certificates from the relevant drop-downs lists then click *Next*.
4. On the next Page, Click the 'Register' button to Register your certificates to Handlesbank UK. If successful it will generate *`Client ID`* along with whole registration response. Click 'Save' to save the response.
## Platform V2
#### For our platform V2 offering there are a few differences:
* The institutions now include PIS.
* There is a new sandbox that can be integrated with.
* The AIS includes credit card accounts.
### Scopes
* Account Information 🔒
### Supported ASPSPs
| ASPSP | Link | Supported | Institution ID |
| ------------------------- | -------------------------------------------------------------------------- | --------- | -------------------------- |
| Handelsbanken UK | [https://developer.handelsbanken.com](https://developer.handelsbanken.com) | Yes | `handelsbanken_uk` |
| Handelsbanken Business UK | [https://developer.handelsbanken.com](https://developer.handelsbanken.com) | Yes | `handelsbankenbusiness_uk` |
| Handelsbanken UK Sandbox | [https://developer.handelsbanken.com](https://developer.handelsbanken.com) | Yes | `handelsbanken-sandbox_uk` |
### Accounts Currently Supported - Payments Soon to Come
#### Accounts
* Accounts
* Transactions
### Onboarding ASPSP's to Yapily Application
**Precondition**: To connect to Handelsbanken institutions with eIDAS/OB certs a dynamic registration is needed.
Even if you have pre-existing credentials that are being used for V1, please re-register as the V2 integration requires additional subscriptions (e.g. for payments and card-acounts).
**Pre-requisites for DCR:**
* Valid QWAC / QSEAL certificates.
1. Upload the signing (OBSEAL/QSEAL) and transport (OBWAC/QWAC) certificates into V2 services
1. For the transport certificate upload with the following request. If it already uploaded, then note down its UUID which can be retrieved from the [`GET 'https://api.yapily.com/certificates/keys/'`](https://api.yapily.com/certificates/keys/) endpoint.
**Request**
```shell theme={null}
curl --location --request POST 'https://api.yapily.com/certificates/keys/' \
--header 'Authorization: Basic YOUR_APPLICATION_CREDENTIALS_AS_BASIC_AUTH' \
--header 'Content-Type: application/json' \
--data-raw '[{
"pem": "$YOUR_PUBLIC_KEY_AS_PEM",
"key": "$YOUR_PRIVATE_KEY",
"kid" : "$CERT_KID",
"name" : "$CERTIFICATE_NAME"
}]'
```
**Response**
```json theme={null}
{
"id": "d16f87d3-4222-4173-b8b9-44aeccacae7d",
....
}
```
Save the id and remember for which kind of key it corresponds:
e.g. `TRANSPORT_KEY_UUID = d16f87d3-4222-4173-b8b9-44aeccacae7d`
2. Call the registration endpoint with the certificate UUIDs:
**Request**
```shell theme={null}
curl --location --request POST 'https://api.yapily.com/institutions/handelsbanken_uk/register' \
--header 'Content-Type: application/json' \
--header 'Authorization: Bearer YOUR_APPLICATION_CREDENTIALS_AS_BASIC_AUTH' \
--data-raw '{
"signingKeyID": "$SIGNING_KEY_UUID",
"transportKeyID": "$TRANSPORT_KEY_UUID"
}'
```
**Response**
```json theme={null}
{
"id": "a0460a91-4b4c-422a-bbe6-bebe0b92e308"
}
```
Note above ID, this will be the clientId which can be further used to Get, Modify, Delete registrations with Yapily.
## Sandbox institution
**Precondition**: To connect to Handelsbanken sandbox institution with eIDAS certs a manual registration is needed.
**Pre-requisites for Manual Reg:**
* We must create an app with on the developer portal to obtain the client ID. Make sure we have added the following subscriptions for the app:
![handelsbanken_subscriptions]() 1. Call the manual registration endpoint with the certificate UUIDs and the client ID:
**Request**
```shell theme={null}
curl --location --request POST 'https://api.yapily.com/institutions/handelsbanken-sandbox_uk/manual/register' \
--header 'Content-Type: application/json' \
--header 'Authorization: Bearer YOUR_APPLICATION_CREDENTIALS_AS_BASIC_AUTH' \
--data-raw '{
"signingKeyID": "$SIGNING_KEY_UUID",
"transportKeyID": "$TRANSPORT_KEY_UUID",
"clientId" : "$CLIENT_ID"
}'
```
**Response**
```json theme={null}
{
"id": "a0460a91-4b4c-422a-bbe6-bebe0b92e308"
}
```
## Support
If you require technical support with certificate management, please contact [Support](/resources/support).
# Hellenic Bank
Source: https://docs.yapily.com/institution-configurations/uk/Hellenic-Bank
## Links
* [Developer Portal](https://openapis.hellenicbank.com/)
## Scopes
* Account Information 🔒
* Payment Initiation 🔒
## Live Environment
**Precondition**: To connect to Hellenic Group, an application needs to be created. Once the application is created a **client\_id** and **client\_secret** are generated.
**Pre-requisites for Registration:**
1. Valid QWAC / QSEAL certificates.
2. Upload the signing (QSEAL) and transport (QWAC) certificates into V2 services
* For the signing and transport certificate (QSEAL & QWAC) upload use the following request twice for each upload changing, preferentially you can specify the type of the certificate adding: (`"type": "Q_SEAL"` for signing and `"type": "Q_WAC"` for transport) **This field is not mandatory.**
**Request format:**
```shell theme={null}
curl --location --request POST 'https://api.yapily.com/certificates/keys/' \
--header 'Authorization: Basic YOUR_APPLICATION_CREDENTIALS_AS_BASIC_AUTH' \
--header 'Content-Type: application/json' \
--data-raw '[{
"pem": "$YOUR_PUBLIC_KEY_AS_PEM",
"key": "$YOUR_PRIVATE_KEY",
"kid": "$CERT_KID",
"name" : "$CERTIFICATE_NAME",
"type": "Q_WAC"
}]'
```
* Where pem and key need to be in the following format:
`-----BEGIN PRIVATE KEY-----\n
KEY_HASH\n
MORE_KEY_HASH\n
SOME_MORE_KEY_HASH\n -----END PRIVATE KEY-----`
**Please note:**
1. Spaces between "begin/end private key" words are respected.
2. Begin/End Private Key are included in the value for the pem and key properties.
3. Every line break is escaped with a "\n".
4. There is NO "\n" at the end.
**Response format:**
* Once you have uploaded your certificates successfully, you will receive a response containing an "id". Please make sure that you save them and note to which certificates they belong.
```json theme={null}
{
"id": "d16f87d3-4222-4173-b8b9-44aeccacae7d",
....
}
```
**If the Certificates have already been uploaded:**
Then, it can be retrieved from the endpoint:
[`GET 'https://api.yapily.com/certificates/keys/'`](https://api.yapily.com/certificates/keys/)
**Response format:**
```json theme={null}
{
"id": "d16f87d3-4222-4173-b8b9-44aeccacae7d",
"type": "Q_SEAL",
.....
},
{
"id": "76b453ea-9e41-42e0-a357-d6d7980bf02b",
"type": "Q_WAC",
.....
}
```
## Registration
* Use the following request to register any **Hellenic** institution with Yapily:
```shell theme={null}
curl --location --request POST 'https://api.yapily.com/institutions/{{INSTITUTION_ID}}/manual/register' \
--header 'Content-Type: application/json' \
--header 'x-yapily-force-platform: {{platform_version}}' \
--header 'Authorization: Bearer {{token}}' \
--data-raw '{
"signingKeyID": "{{SIGNING_KEY_UUID}}",
"transportKeyID": "{{TRANSPORT_KEY_UUID}}",
"clientId": "{{client_id_from_created_application}}",
"clientSecret": "{{client_secret_from_created_application}}",
"apiTypes" : ["AISP", "PISP"]
}'
```
**Where:**
* `INSTITUTION_ID` is the Yapily institution id.
* `SIGNING_KEY_UUID` and `TRANSPORT_KEY_UUID` are the "ids" that you saved before when uploading the certificates (**signing** and **transport**).
* `client_id_from_created_application` and `client_secret_from_created_application` are valid credentials for the Hellenic developer portal.
**Response format:**
* The response from the registration call should also contain an "id", which would mean that the registration was successful. Please save that "id" and note to which bank it belongs.
```json theme={null}
{
"id": "d16f87d3-4222-4173-b8b9-44aeccacae7d",
....
}
```
## Sandbox Environment
1. [Register a new account](https://openapis.hellenicbank.com/user/registration) on the platform
2. [Create an application](https://openapis.hellenicbank.com/sandbox/client)
1. Name your application
2. Add a description for your application (optional)
3. Ensure that at least the 'AccountReporting API' is selected
4. Add [https://auth.yapily.com/](https://auth.yapily.com/) as a redirect URL
5. Click 'Add Application'
3. Select 'Manage my products' from the navigation menu on the left and click the 'edit' button next to your newly created application
4. Add the *Client ID* as **Key** and *Client Secret* as **Secret** to your application in the [Yapily Console](https://console.yapily.com/)
## Support
If you require technical support with certificate management, please contact [Support](/resources/support).
# Hoares Bank
Source: https://docs.yapily.com/institution-configurations/uk/Hoares-Bank
## Links
* Developer Portal [https://developer.tell.money/private/hoaresbank/](https://developer.tell.money/private/hoaresbank/)
## Scopes
* Open Data 🌐
* Account Information 🔒
* Payment Initiation 🔒
## Supported ASPSPs
| ASPSP | Link | Supported | Institution ID |
| ------------------- | ---------------------------------------------------------------------------------------------------- | --------- | -------------------- |
| Haores-Bank | [https://developer.tell.money/private/hoaresbank/](https://developer.tell.money/private/hoaresbank/) | Yes | `hoaresbank` |
| Haores-Bank Sandbox | [https://developer.tell.money/private/hoaresbank/](https://developer.tell.money/private/hoaresbank/) | Yes | `hoaresbank-sandbox` |
## Accounts and Payments Supported
### Accounts
* Accounts
* Transactions
### Payments
* Domestic Single Payments
* Domestic Periodic Payments
* Domestic Standing Orders Payments
* International Single Payments
* International Periodic Payments
## Live Environment
**Prerequisites**:
* You must have registered as a TPP on the OB Directory.
* The TPP must have a software statement created on the OB Directory.
* Any scopes requested by the TPP must have been authorised by OBIE and must be found in the OBIE issued software statement supplied in the registration request object.
* The TPP must use an OB issued (OBWAC) transport certificate for MTLS.
* The TPPs registration request object must be signed by an OB issued signing certificate (OBSeal).
**Precondition**: To connect to live Open Banking entities, whether you are accessing account information or initiating payments, your business must have the right regulatory permissions as per the [Open Banking Guide](/tools-and-services/open-banking/enrolment-guide).
1. Upload your transport and signing certificates (PEMs) created in the Open Banking directory, along with the keys into Yapily's certificate vault.
2. Add Hoares Bank from the Live tab to your Dashboard application and add your Signing key Id , which can be obtained from the Open Banking Directory.
3. Select your Open Banking transport and signing certificates from the relevant drop-downs lists then click Next.
4. Click to register to auto-register with the bank. If registration is successful, the key and secret will be populated from the institution's response.
5. Make sure to click Save in order not to lose these credentials, as a further registration attempt with the same Open Banking software statement is likely to fail.
In the event unacceptable certificates are presented the error message will contain "*Access was denied by security policy: 003*".
## Sandbox Environment
To connect to the Hoares Bank sandbox, follow the above steps while selecting *Hoares Bank* from the sandbox tab in step 2. The institution Id for this is `hoaresbank-sandbox`.
## Support
If you require technical support with certificate management, please contact [Support](/resources/support).
# IBM Open Banking Sandbox
Source: https://docs.yapily.com/institution-configurations/uk/IBM-Open-Banking-Sandbox
## Links
* [Developer Portal](https://open-banking-sandbox.developer.eu.apiconnect.ibmcloud.com/)
## Scopes
* Account Information 🔒
* Payment Initiation 🔒
* Open Data 🌐
## Sandbox Environment
### Registration
1. [Register a new account](https://open-banking-sandbox.developer.eu.apiconnect.ibmcloud.com/user/register) on the platform
2. [Create an application](https://open-banking-sandbox.developer.eu.apiconnect.ibmcloud.com/application) in the Apps menu
1. Name your application
2. Give your application a description (optional)
3. Add SSA (optional)
4. Set the OAuth Redirect URI to [https://auth.yapily.com/](https://auth.yapily.com/)
5. Click Submit
3. Take a note of your **Client ID and Client Secret** (use these to authenticate your Yapily app connection to the bank)
### Feature Subscription
1. Under the navigation item 'API Products', select 'Account Information'
2. (Optional) 'Open Data Aggregator' can be selected if required.
3. Subscribe to the Default Plan using your newly created application
## Support
If you require technical support with certificate management, please contact [Support](/resources/support).
# ING Bank
Source: https://docs.yapily.com/institution-configurations/uk/ING-Bank
## Links
* [Developer Portal](https://developer.ing.com/openbanking)
## Scopes
* Account Information 🔒
* Payment Initiation 🔒
## Live Environment
**Precondition**: To connect to live Open Banking entities, whether you are accessing account information or initiating payments, your business must have the right regulatory permissions as per the [Open Banking Guide](/tools-and-services/open-banking/enrolment-guide).
1. Upload your certificates (eIDAS QWAC, eIDAS QSEALS) into [Yapily's certificate vault](https://console.yapily.com/certificates)
2. Add ING Live institution into your dashboard app and configure the institution by selecting these certificates - eIDAS QWAC, eIDAS QSEALS from the drop-down. Then press next
3. Click to register to auto-register to the bank via Yapily and auto-populate the key; press save
## Support
If you require technical support with certificate management, please contact [Support](/resources/support).
## Sandbox Environment
**Precondition**: To connect to live Open Banking entities, whether you are accessing account information or initiating payments, your business must have the right regulatory permissions as per the [Open Banking Guide](/tools-and-services/open-banking/enrolment-guide).
1. Upload the certificates & keys (QSEAL, QWAC) from [ING Development Portal](https://developer.ing.com/openbanking/get-started) into [Yapily's certificate vault](https://console.yapily.com/certificates)
2. Add this institution into your app from the `Sandbox` tab and configure the institution by selecting the `certificates` from the dropdown, press next [https://console.yapily.com/applications](https://console.yapily.com/applications)
3. `Click to register` to auto-register to the bank via Yapily and auto-populate the key; *press save*
## Support
If you require technical support with certificate management, please contact [Support](/resources/support).
# Lloyds
Source: https://docs.yapily.com/institution-configurations/uk/Lloyds
## Links
* [Lloyds Banking Group Developer Portal](https://developer.lloydsbanking.com/)
## Scopes
* Open Data 🌐
* Account Information 🔒
* Payment Initiation 🔒
* VRP 🔒
## Live Environment
If you have completed the steps below for any of the other institutions in the Lloyds Banking Group (`halifax`, `bankofscotland`, `bankofscotlandbusiness`) then you can use their existing registration credentials and jump to Step 7 for both `lloyds` and `lloydsbusiness`.
**Precondition**: To connect to live Open Banking entities, whether you are accessing account information or initiating payments, your business must have the right regulatory permissions as per the [Open Banking Guide](/tools-and-services/open-banking/enrolment-guide).
1. Upload your transport and signing certificates (PEMs) created in the Open Banking directory, along with the keys into Yapily's [certificate vault](https://console.yapily.com/#!certificates).
2. Add **Lloyds** from the **Live** tab to your Dashboard application and add your `Signing key Id`, which can be obtained from the Open Banking Directory.
3. Select your Open Banking transport and signing certificates from the relevant drop-downs lists then click *Next*.
4. Click the 'download the SSA' button to download your Software Statement Assertion from the Open Banking Directory. This is the token that the Open Banking UK institutions will use during registration to verify your enrolment and possibly create your application.
5. Log in to the developer portal: [https://developer.lloydsbanking.com](https://developer.lloydsbanking.com/)
6. Create an app using the SSA to get *`Client ID`* and *`Client secret`*
7. Copy the credentials for this app from the Lloyds developer portal into the credentials view for Lloyds in the Yapily dashboard. Add the obtained *`Client ID`* as **Key** and the *`Client secret`* as **Secret**. Click 'Next' to save.
## Payments
### Bulk Payments
* Domestic payments and Scheduled Payments are supported
* Maximum 25 payments per request
* Minimum total payments amount is £0.01 (1p)
* Maximum total payments amount would be determined by the account limits on the specific accounts being used.
* The property `requestedExecutionDateTime` is not supported for this bank
* A reference for every payment is required
* One payer must be specified
## VRP Sweeping Access
In order to access the VRP endpoints we have to grant your Yapily application additional scopes. If you do not have these scopes then please contact your customer success manager to get them added.
> **The following steps are not intended for Yapily Connect customers**
Precondition: To use VRP on `lloyds` or `lloydsbusiness` a manual registration via API is required.
Pre-requisites for Manual registration:
* Valid OBWAC / OBSEAL certificates
* PIS registration details for `lloyds` or `lloydsbusiness`
You can use existing PIS registration details for this institution to gain VRP sweeping access. The registration details can be found on the Yapily Console for the given application. If a new registration is required (e.g. if you are using a new redirectUri for VRP and it is not covered in the existing registration) then you will have to manage your applications on the institution developer portal. Ensure that the application is subscribed to the latest API version on the institution portal. The existing or new registration credentials from the Yapily Console will be used in the steps below.
### Steps Required for Manual registration
1. Upload the signing (OBSEAL) and transport (OBWAC) certificates if not already present
You can check if the certificate is present already by navigating to the Console -> Certificates. If absent please upload the certificate.
Once confirmed, we need the UUID of the certificate which can be found in the Console -> Certificates -> Certificate; the UUID will appear in the browser URL bar as follows:
`https://console.yapily.com/certificates/`
Save the `UUID` and remember for which kind of key it corresponds to:
e.g. `SIGNING_KEY_UUID = d16f87d3-4222-4173-b8b9-44aeccacae7d`
Once you have done it for the signing key, repeat the process for your transport certificate.
2. Call the manual registration endpoint
The final step is to call the manual registration endpoint with the certificate UUIDs and credentials from your application created on the portal.
The `apiTypes` field in the example has both types but if the registration in question grants PIS access only then only provide `PISP`.
If a custom redirect URI (not Yapily's) is used for the registration then you can provide it in the `redirectUri` field.
The `clientId` field corresponds to the `key` field on the Yapily Console.
Request
```shell theme={null}
curl --location --request POST 'https://api.yapily.com/institutions/lloyds/manual/register' \
--header 'Content-Type: application/json' \
--header 'Authorization: Basic ...' \
--data-raw '{
"signingKeyID": "$SIGNING_KEY_UUID",
"transportKeyID": "$TRANSPORT_KEY_UUID",
"clientId": "$CLIENT_ID",
"softwareStatementId": "$SSA_ID",
"organisationId": "$ORGANISATION_ID",
"apiTypes" : ["AISP", "PISP"],
"redirectUri" : ""
}'
```
Response
```shell theme={null}
{
"id": "a0460a91-4b4c-422a-bbe6-bebe0b92e308"
}
```
This is the Yapily registration `id` which can be used to Get, Modify, Delete the registration.
## Sandbox Environment
To connect to the Lloyds Sandbox, select *Lloyds Sandbox* from the pre-configured institutions.
Or if you like to register with your own credentials, please follow the steps below:
1. Upload your transport and signing certificates (PEMs) created in the Open Banking directory, along with the keys into Yapily's [certificate vault](https://console.yapily.com/certificates).
2. Add **Lloyds Sandbox** from the **Sandbox** tab to your Dashboard application and add your `Signing key Id`, which can be obtained from the Open Banking Directory.
3. Select your Open Banking transport and signing certificates from the relevant drop-downs lists then click *Next*.
4. Click the 'download the SSA' button to download your Software Statement Assertion from the Open Banking Directory. This is the token that the Open Banking UK institutions will use during registration to verify your enrolment and possibly create your application.
5. For sandbox setup and registration instructions, see the [Lloyds Banking Group Sandbox Support Guide](https://developer.lloydsbanking.com/prod01/lbg/lbg-support#sandbox)
6. Create an app using the SSA you downloaded in the previous step to get *`Client ID`* and *`Client secret`*
7. Copy the credentials for this app from the Lloyds developer portal into the credentials view for Lloyds in the Yapily dashboard. Add the obtained *`Client ID`* as **Key** and the *`Client secret`* as **Secret**. Click 'Next' to save.
Note: Halifax Sandbox, MBNA Bank Sandbox and Lloyds are using the same Lloyds Banking Group API. If you have already register with one of the above institutions just copy the credentials (key and secret) to this one and you are ready to go.
## Support
If you require technical support with certificate management, please contact [Support](/resources/support).
# MBNA
Source: https://docs.yapily.com/institution-configurations/uk/MBNA
## Links
* [Developer Portal](https://developer.lloydsbanking.com/)
## Scopes
* Account Information 🔒
* Payment Initiation 🔒
## Live and Sandbox Environment
To connect to the MBNA Sandbox, select **MBNA Sandbox** from the pre-configured institutions.
Or if you like to register with your own credentials, please follow the steps below:
**Precondition**: To connect to live Open Banking entities, whether you are accessing account information or initiating payments, your business must have the right regulatory permissions as per the [Open Banking Guide](/tools-and-services/open-banking/enrolment-guide).
1. Upload your transport and signing certificates (PEMs) created in the Open Banking directory, along with the keys into Yapily's [certificate vault](https://console.yapily.com/certificates).
2. Add **MBNA Bank Sandbox** from the **Sandbox** tab to your Dashboard application and add your `Signing key Id`, which can be obtained from the Open Banking Directory.
3. Select your Open Banking transport and signing certificates from the relevant drop-downs lists then click *Next*.
4. Click the 'download the SSA' button to download your Software Statement Assertion from the Open Banking Directory. This is the token that the Open Banking UK institutions will use during registration to verify your enrolment and possibly create your application.
5. Log in to the developer portal: ([https://register.sandbox.lloydsbanking.com](https://register.sandbox.lloydsbanking.com/)) following the instructions found on this [Guide](https://developer.lloydsbanking.com/sites/developer.lloydsbanking.com/files/support/LBG_Sandbox_Developers_Guide.pdf)
6. Create an app using the SSA you downloaded in the previous step to get *`Client ID`* and *`Client secret`*
7. Copy the credentials for this app from the Lloyds developer portal into the credentials view for Lloyds in the Yapily dashboard. Add the obtained *`Client ID`* as **Key** and the *`Client secret`* as **Secret**. Click 'Next' to save.
**Note**: *Halifax Sandbox*, *MBNA Bank Sandbox* and *Bank of Scotland* are using the same *Lloyds Banking Group* API. If you have already register with one of the above institutions just copy the credentials (**key** and **secret**) to this one and you are ready to go. The same process is valid for **Halifax**, **Lloyds Bank** and **Bank of Scotland** **Live** institutions
## Payments
MBNA is a credit card only brand so payments can only be made as Money Transfer requests from an MBNA credit card to another Lloyds account that the user owns. Otherwise, payments are not supported for MBNA.
## Support
If you require technical support with certificate management, please contact [Support](/resources/support).
# M&S Bank
Source: https://docs.yapily.com/institution-configurations/uk/M_S-Bank
## Links
* [Developer Portal](http://developer.hsbc.com/)
## Scopes
* Open Data 🌐
* Account Information 🔒
* **Payment Initiation is no longer available!**
M\&S Bank is a subsidiary of HSBC
## Live Environment
**Precondition**: To connect to live Open Banking entities, whether you are accessing account information, your business must have the right regulatory permissions as per the [Open Banking Guide](/tools-and-services/open-banking/enrolment-guide).
1. Upload your transport and signing certificates (PEMs) created in the Open Banking directory, along with the keys into Yapily's [certificate vault](https://console.yapily.com/certificates).
2. Add **M\&S *Bank*** from the **Live** tab to your Dashboard application and add your `Signing key Id`, which can be obtained from the Open Banking Directory.
3. Select your Open Banking transport and signing certificates from the relevant drop-downs lists then click *Next*.
4. **Click to register** to auto-register with the bank. If registration is successful, the key and secret will be populated from the institution's response.
## Migration to 3.1.1
**Update**: 20/02/2020 HSBC Group ASPSPs (HSBC, First Direct and M\&S Bank) will terminate the current AIS 2.0 API versions. To ensure you are running on version 3.1.1 for AIS you will need to have valid eIDAS QWAC and QSEAL certificates, and go through our registration process again before the 28th February 2020. All of your consents from the old version will migrate to updated version.
Steps on how to do this are outlined below:
1. Upload your public eIDAS certificates into OBIE Directory's SSA and copy the *QSEAL kId*.
2. Upload your public and private eIDAS into Yapily's [certificate vault](https://console.yapily.com/certificates)
3. Go to your application's institution tab and edit *M\&S Bank* change the Signing KeyId to the QSEAL kId you copied from OBIE Directory. Select the QSEAL and QWAC you uploaded in 2. and press next
4. Press "Download and Register", wait until the registration process is done, then click save.
5. Make sure to click *Save* in order not to lose these credentials, as a further registration attempt with the same Open Banking software statement is likely to fail.
## Support
If you require technical support with certificate management, please contact [Support](/resources/support).
# Metro
Source: https://docs.yapily.com/institution-configurations/uk/Metro
## Links
* [Metro Bank Developer Portal](https://developer.metrobankonline.co.uk/)
**Institution ID**: `metro`
## Scopes
* Account Information🔒
## Live Environment
**Precondition**: To connect to Metro Bank, an application needs to be created with the bank. Registration with the bank is a manual process; email: [api\_team@metrobank.plc.uk](mailto:api_team@metrobank.plc.uk?subject=Registration%20Query) with details of TPP authorisation needs to be sent to metro requesting registration for Metro Bank.
1. Upload your OBWAC (Transport) and OBSEAL (Signing) certificates created in the Open Banking directory into Yapily's [certificate vault](https://console.yapily.com/#!certificates).
2. Navigate to your application's **Connected Institutions** tab and click **Add institutions**.
3. Select **metro**, then click **Add selected**.
4. In your application's **Not registered** tab, you should now see **metro**. Click on **Register**.
5. Select the certificates you uploaded in Step 1, and fill in the rest of the form with credentials obtained from the bank in **Prerequisite** step.
6. Click **Save Registration**.
## Sandbox Environment
Not available at the moment.
## Support
If you require technical support with certificate management, please contact [Support](/resources/support).
# METTLE
Source: https://docs.yapily.com/institution-configurations/uk/Mettle
## Links
* [Developer Portal](https://developer.lloydsbanking.com/)
## Scopes
* Account Information🔒
* Payment Initiation🔒
## Live Environment
**Precondition**:To connect to Mettle Bank, an application needs to be created. Once the application is created a **client\_id** and **client\_secret** are generated.
**Pre-requisites for Registration:**
1. Valid QWAC / QSEAL certificates.
2. Upload the signing (QSEAL) and transport (QWAC) certificates into V2 services
**Request format:**
```shell theme={null}
curl --location --request POST 'https://api.yapily.com/certificates/keys/' \
--header 'Authorization: Basic YOUR_APPLICATION_CREDENTIALS_AS_BASIC_AUTH' \
--header 'Content-Type: application/json' \
--data-raw '[{
"pem": "$YOUR_PUBLIC_KEY_AS_PEM",
"key": "$YOUR_PRIVATE_KEY",
"kid": "$CERT_KID",
"name" : "$CERTIFICATE_NAME",
"type": "Q_WAC"
}]'
```
* Where pem and key need to be in the following format:
`-----BEGIN PRIVATE KEY-----\n
KEY_HASH\n
MORE_KEY_HASH\n
SOME_MORE_KEY_HASH\n -----END PRIVATE KEY-----`
**Please note:**
1. Spaces between "begin/end private key" words are respected.
2. Begin/End Private Key are included in the value for thepemandkeyproperties.
3. Every line break is escaped with a "\n".
4. There is NO "\n" at the end.
**Response format:**
* Once you have uploaded your certificates successfully, you will receive a response containing an "id". Please make sure that you save them and note to which certificates they belong.
```json theme={null}
{
"id": "d16f87d3-4222-4173-b8b9-44aeccacae7d",
....
}
```
**If the Certificates have already been uploaded:**
Then, it can be retrieved from the endpoint:
[`GET 'https://api.yapily.com/certificates/keys/'`](https://api.yapily.com/certificates/keys/)
**Response format:**
```json theme={null}
{
"id": "d16f87d3-4222-4173-b8b9-44aeccacae7d",
"type": "Q_SEAL",
.....
},
{
"id": "76b453ea-9e41-42e0-a357-d6d7980bf02b",
"type": "Q_WAC",
.....
}
```
## Registration
* Use the following request to register any **Mettle** institution with Yapily.
```shell theme={null}
curl --location --request POST'https://api.yapily.com/institutions/{{INSTITUTION_ID}}/manual/register'\
--header'Content-Type: application/json'\
--header'x-yapily-force-platform: {{platform_version}}'\
--header'Authorization: Bearer {{token}}'\
--data-raw'{
"signingKeyID":"{{SIGNING_KEY_UUID}}",
"transportKeyID":"{{TRANSPORT_KEY_UUID}}",
"clientId": "{{client_id_from_created_application}}",
"clientSecret": "{{client_secret_from_created_application}}",
"apiTypes": ["AISP", "PISP"]
}'
```
**Where:**
* `INSTITUTION_ID` is the Yapily institution id.
* `SIGNING_KEY_UUID` and `TRANSPORT_KEY_UUID` are the "ids" that you saved before when uploading the certificates (**signing** and **transport**).
* `client_id_from_created_application` and `client_secret_from_created_application` are valid credentials for the Mettle developer portal.
**Response format:**
* The response from the registration call should also contain an "id", which would mean that the registration was successful. Please save that "id" and note to which bank it belongs.
```json theme={null}
{
"id": "d16f87d3-4222-4173-b8b9-44aeccacae7d",
....
}
```
## Sandbox Environment
Not available at the moment
## Support
If you require technical support with certificate management, please contact [Support](/resources/support).
# Modelo Sandbox
Source: https://docs.yapily.com/institution-configurations/uk/Modelo-Sandbox
## Links
* [Open Banking Directory](https://directory.openbanking.org.uk/)
## Scopes
* Open Data 🌐
* Account Information 🔒
* Payment Initiation 🔒
* VRP 🔒
## Live Environment
**Precondition**: To connect to live Open Banking entities, whether you are accessing account information or initiating payments, your business must have the right regulatory permissions as per the [Open Banking Guide](/tools-and-services/open-banking/enrolment-guide).
1. Upload your OBTransport and OBSigning certificates (PEMs) created in the Open Banking directory, along with the private keys into Yapily's [certificate vault](https://console.yapily.com/#!certificates).
2. Add **Modelo Sandbox** from the **Live** tab to your Dashboard application and add your `Signing key Id`, which can be obtained from the Open Banking Directory.
3. Select your Open Banking transport and signing certificates from the relevant drop-downs lists then click *Next*.
4. **Click to register** to auto-register with the bank. If registration is successful, the key and secret will be populated from the institution's response.
5. Make sure to click *Save* in order not to lose these credentials, as a further registration attempt with the same Open Banking software statement is likely to fail.
## VRP Sweeping Access
In order to access the VRP endpoints we have to grant your Yapily application additional scopes. If you do not have these scopes then please contact your customer success manager to get them added.
The following steps are not intended for Yapily Connect customers.
Precondition: To use VRP on `modelo-sandbox` a manual registration via API is required.
Pre-requisites for Manual registration:
* Valid OBWAC / OBSEAL certificates
* PIS registration details for` modelo-sandbox`
You can use existing PIS registration details for this institution to gain VRP sweeping access. The registration details can be found on the Yapily Console for the given application. If a new registration is required (e.g. if you are using a new redirectUri for VRP and it is not covered in the existing registration) then you can perform a DCR request using the steps outlined in `Live Environment`. The existing or new registration credentials from the Yapily Console will be used in the steps below.
### Steps Required for Manual registration
1. Upload the signing (OBSEAL) and transport (OBWAC) certificates if not already present
You can check if the certificate is present already by navigating to the Console -> Certificates. If absent please upload the certificate.
Once confirmed, we need the UUID of the certificate which can be found in the Console -> Certificates -> Certificate; the UUID will appear in the browser URL bar as follows:
`https://console.yapily.com/certificates/`
Save the `UUID` and remember for which kind of key it corresponds to:
e.g. `SIGNING_KEY_UUID = d16f87d3-4222-4173-b8b9-44aeccacae7d`
Once you have done it for the signing key, repeat the process for your transport certificate.
2. Call the manual registration endpoint
The final step is to call the manual registration endpoint with the certificate UUIDs and credentials from your application created on the portal.
The `apiTypes` field in the example has both types but if the registration in question grants PIS access only then only provide `PISP`.
If a custom redirect URI (not Yapily's) is used for the registration then you can provide it in the `redirectUri` field.
The `clientId` field corresponds to the `key` field on the Yapily Console.
Request
```shell theme={null}
curl --location --request POST 'https://api.yapily.com/institutions/modelo-sandbox/manual/register' \
--header 'Content-Type: application/json' \
--header 'Authorization: Basic ...' \
--data-raw '{
"signingKeyID": "$SIGNING_KEY_UUID",
"transportKeyID": "$TRANSPORT_KEY_UUID",
"clientId": "$CLIENT_ID",
"softwareStatementId": "$SSA_ID",
"organisationId": "$ORGANISATION_ID",
"apiTypes" : ["AISP", "PISP"],
"redirectUri" : ""
}'
```
Response
```shell theme={null}
{
"id": "a0460a91-4b4c-422a-bbe6-bebe0b92e308"
}
```
This is the Yapily registration `id` which can be used to Get, Modify, Delete the registration.
## Sandbox Environment
To connect to the Modelo Sandbox, select Modelo Sandbox from the pre-configured institutions.
Or if you like to register with your own credentials, please follow the steps below:
The Ozone is a mock of an ASPSP registered to the Open Banking Sandbox directory.
In order to access this mock sandbox financial institution, you have to enrol with the Open Banking institution as a TPP.
Please see [Modelo Sandbox Credentials](/resources/sandbox/sandbox-credentials#modelo-sandbox)
## Support
If you require technical support with certificate management, please contact [Support](/resources/support).
# Monzo Bank
Source: https://docs.yapily.com/institution-configurations/uk/Monzo-Bank
## Links
* [Developer Portal](https://developers.monzo.com/)
## Scopes
* Open Data 🌐
* Account Information 🔒
* Payment Initiation 🔒
## Live Environment
**Precondition**: To connect to live Open Banking entities, whether you are accessing account information or initiating payments, your business must have the right regulatory permissions as per the [Open Banking Guide](/tools-and-services/open-banking/enrolment-guide).
1. Upload your transport and signing certificates (PEMs) created in the Open Banking directory, along with the keys into Yapily's [certificate vault](https://console.yapily.com/certificates).
2. Add **Monzo** from the **Live** tab to your Dashboard application and add your `Signing key Id`, which can be obtained from the Open Banking Directory.
3. Select your Open Banking transport and signing certificates from the relevant drop-downs lists then click *Next*.
4. **Click to register** to auto-register with the bank. If registration is successful, the key and secret will be populated from the institution's response.
5. Make sure to click *Save* in order not to lose these credentials, as a further registration attempt with the same Open Banking software statement is likely to fail.
## Support
If you require technical support with certificate management, please contact [Support](/resources/support).
# Nationwide
Source: https://docs.yapily.com/institution-configurations/uk/Nationwide
## Links
* [Developer Portal](https://www.nationwide.co.uk/developer)
## Scopes
* Open Data 🌐
* Account Information 🔒
* Payment Initiation 🔒
* VRP 🔒
## Live Environment
**Precondition**: To connect to live Open Banking entities, whether you are accessing account information or initiating payments, your business must have the right regulatory permissions as per the [Open Banking Guide](/tools-and-services/open-banking/enrolment-guide).
1. Upload your transport and signing certificates (PEMs) created in the Open Banking directory, along with the keys into Yapily's [certificate vault](https://console.yapily.com/#!certificates).
2. Add **Nationwide** from the **Live** tab to your Dashboard application and add your `Signing key Id`, which can be obtained from the Open Banking Directory.
3. Select your Open Banking transport and signing certificates from the relevant drop-downs lists then click *Next*.
4. **Click to register** to auto-register with the bank. If registration is successful, the key and secret will be populated from the institution's response.
5. Make sure to click *Save* in order not to lose these credentials, as a further registration attempt with the same Open Banking software statement is likely to fail.
## VRP Sweeping Access
In order to access the VRP endpoints we have to grant your Yapily application additional scopes. If you do not have these scopes then please contact your customer success manager to get them added.
The following steps are not intended for Yapily Connect customers.
Precondition: To use VRP on `nationwide` a manual registration via API is required.
Pre-requisites for Manual registration:
* Valid OBWAC / OBSEAL certificates
* PIS registration details for `nationwide`
You can use existing PIS registration details for this institution to gain VRP sweeping access. The registration details can be found on the Yapily Console for the given application. If a new registration is required (e.g. if you are using a new redirectUri for VRP and it is not covered in the existing registration) then you can perform a DCR request using the steps outlined in `Live Environment`. The existing or new registration credentials from the Yapily Console will be used in the steps below.
### Steps Required for Manual registration
1. Upload the signing (OBSEAL) and transport (OBWAC) certificates if not already present
You can check if the certificate is present already by navigating to the Console -> Certificates. If absent please upload the certificate.
Once confirmed, we need the UUID of the certificate which can be found in the Console -> Certificates -> Certificate; the UUID will appear in the browser URL bar as follows:
`https://console.yapily.com/certificates/`
Save the `UUID` and remember for which kind of key it corresponds to:
e.g. `SIGNING_KEY_UUID = d16f87d3-4222-4173-b8b9-44aeccacae7d`
Once you have done it for the signing key, repeat the process for your transport certificate.
2. Call the manual registration endpoint
The final step is to call the manual registration endpoint with the certificate UUIDs and credentials from your application created on the portal.
The `apiTypes` field in the example has both types but if the registration in question grants PIS access only then only provide `PISP`.
If a custom redirect URI (not Yapily's) is used for the registration then you can provide it in the `redirectUri` field.
The `clientId` field corresponds to the `key` field on the Yapily Console.
Request
```shell theme={null}
curl --location --request POST 'https://api.yapily.com/institutions/nationwide/manual/register' \
--header 'Content-Type: application/json' \
--header 'Authorization: Basic ...' \
--data-raw '{
"signingKeyID": "$SIGNING_KEY_UUID",
"transportKeyID": "$TRANSPORT_KEY_UUID",
"clientId": "$CLIENT_ID",
"softwareStatementId": "$SSA_ID",
"organisationId": "$ORGANISATION_ID",
"apiTypes" : ["AISP", "PISP"],
"redirectUri" : ""
}'
```
Response
```shell theme={null}
{
"id": "a0460a91-4b4c-422a-bbe6-bebe0b92e308"
}
```
This is the Yapily registration `id` which can be used to Get, Modify, Delete the registration.
## Support
If you require technical support with certificate management, please contact [Support](/resources/support).
# Natwest
Source: https://docs.yapily.com/institution-configurations/uk/Natwest
## Links
* [Developer Portal](https://www.bankofapis.com/)
## Scopes
* Open Data 🌐
* Account Information 🔒
* Payment Initiation 🔒
## Institutions
* `natwest`
* `natwest-sandbox`
* `natwestbusiness`
* `natwest-clearspend`
* `natwest-sandbox-vrp`
## Live Environment
If you have completed the steps below for any of the other institutions in Natwest Group (`rbs`, `rbsbusiness`, `ulsterbank_uk`) then you can use their existing registration credentials and manually copy them on the Yapily Console.
**Precondition**: To connect to live Open Banking entities, whether you are accessing account information or initiating payments, your business must have the right regulatory permissions as per the [Open Banking Guide](/tools-and-services/open-banking/enrolment-guide).
1. Upload the certificates & keys (transport, signing) from Open Banking into Yapily's [certificate vault](https://console.yapily.com/certificates)
2. Add one of the institutions from the above list into your dashboard [app](https://console.yapily.com/applications) and configure the institution by adding `Signing Key ID` from Open Banking & selecting the `certificates` from the drop-down. Then *press next*
3. `Click to register` to auto-register to the bank via Yapily and auto-populate the key & secret; *press save*
## Sandbox Environment
To connect to the Natwest Sandbox, select **Natwest Sandbox** from the pre-configured institutions.
Or if you like to register with your own credentials, please follow the steps below:
**Steps:**
1. Register on the [Natwest developer portal](https://developer.natwest.useinfinite.io/).
2. Select your teams and enter your open banking organisation ID.
3. Please create the application on the portal using client-secret authentication and assign any redirect URLS that are needed. If you require access to VRP then you need to make sure your natwest portal application has the VRP product assigned.
After creating your application, you can now copy the credentials from the institution portal to the Yapily Console.
[Test Account Credentials](/resources/sandbox/sandbox-credentials)
## VRP Sweeping Access
In order to access the VRP endpoints we have to grant your Yapily application additional scopes. If you do not have these scopes then please contact your customer success manager to get them added.
The following steps are not intended for Yapily Connect customers.
You don't need to follow the below steps to access the **sweeping** feature for `natwest-sandbox-vrp` - the registration on Yapily Console will grant access.
Precondition: To use VRP on `natwest` a manual registration via API is required.
Pre-requisites for Manual registration:
* Valid OBWAC / OBSEAL certificates
* PIS registration credentials for `natwest`
You can use existing PIS registration details for this institution to gain VRP sweeping access. The registration details can be found on the Yapily Console for the given application. If a new registration is required (e.g. if you are using a new redirectUri for VRP and it is not covered in the existing registration) then you can perform a DCR request using the steps outlined in `Live Environment`. The existing or new registration credentials from the Yapily Console will be used in the steps below.
### Steps Required for Manual registration
1. Upload the signing (OBSEAL) and transport (OBWAC) certificates if not already present.
You can check if the certificate is present already by navigating to the Console -> Certificates. If absent please upload the certificate.
Once confirmed, we need the UUID of the certificate which can be found in the Console -> Certificates -> Certificate; the UUID will appear in the browser URL bar as follows:
`https://console.yapily.com/certificates/`
Save the `UUID` and remember for which kind of key it corresponds to:
e.g. `SIGNING_KEY_UUID = d16f87d3-4222-4173-b8b9-44aeccacae7d`
Once you have done it for the signing key, repeat the process for your transport certificate.
2. Call the manual registration endpoint
The final step is to call the manual registration endpoint with the certificate UUIDs and credentials from your PIS registration.
The `apiTypes` field in the example has both types but if the registration in question grants PIS access only then only provide `PISP`.
If a custom redirect URI (not Yapily's) is used for the registration then you can provide it in the `redirectUri` field.
The `clientId` field corresponds to the `key` field on the Yapily Console.
Request
```shell theme={null}
curl --location --request POST 'https://api.yapily.com/institutions/natwest/manual/register' \
--header 'Content-Type: application/json' \
--header 'Authorization: Basic ...' \
--data-raw '{
"signingKeyID": "$SIGNING_KEY_UUID",
"transportKeyID": "$TRANSPORT_KEY_UUID",
"clientId": "$CLIENT_ID",
"softwareStatementId": "$SSA_ID",
"organisationId": "$ORGANISATION_ID",
"apiTypes" : ["AISP", "PISP"],
"redirectUri" : ""
}'
```
Response
```shell theme={null}
{
"id": "a0460a91-4b4c-422a-bbe6-bebe0b92e308"
}
```
This is the Yapily registration `id` which can be used to Get, Modify, Delete the registration.
## Payments
### Bulk Payments
* Domestic and Scheduled payments are supported
* Maximum 15 payments per request
* The payments should be of the same type in a request
* Only accepts bulk payments where all creditors are trusted beneficiaries
## Support
If you require technical support with certificate management, please contact [Support](/resources/support).
# PayPal
Source: https://docs.yapily.com/institution-configurations/uk/PayPal
## Links
* [Developer Portal](https://developer.paypal.com/)
## Scopes
* Open Data 🌐
* Account Information 🔒
## Live Environment
**Precondition**: To connect to live Open Banking entities, whether you are accessing account information or initiating payments, your business must have the right regulatory permissions as per the [Open Banking Guide](/tools-and-services/open-banking/enrolment-guide).
1. [Register a new account](https://www.paypal.com/partnerexp/tppLanding) on the platform
2. Add the *Client ID* as **Key** and *Client Secret* as **Secret** to your application in the [Yapily Console](https://console.yapily.com/)
**Note:**
* Can only access up to the last 90 days for Transactions.
* This is subject to change due Paypal improvements of their API.
## Support
If you require technical support with certificate management, please contact [Support](/resources/support).
## Sandbox Environment
1. [Register a new account](https://www.sandbox.paypal.com/partnerexp/tppLanding) on the platform
2. Add the *Client ID* as **Key** and *Client Secret* as **Secret** to your application in the [Yapily Console](https://console.yapily.com/)
# Payoneer
Source: https://docs.yapily.com/institution-configurations/uk/Payoneer
## Links
* [Developer Portal](https://developer.payoneer.com/psd2/)
## Scopes
* Account Information 🔒
## Live Environment
### Payoneer (For UK-only registrations)
**Precondition**: To connect to Payoneer - UK, an application needs to be created with the bank. Registration with the bank is a manual process; email with details of TPP authorisation needs to be sent to Payoneer - UK, requesting registration for Payoneer - UK.
1. Upload your OBWAC (Transport) and OBSEAL (Signing) certificates created in the Open Banking directory, along with the private keys into Yapily's [certificate vault](https://console.yapily.com/#!certificates).
2. Navigate to your application's **Connected Institutions** tab and click **Add institutions**.
3. Add **Payoneer - UK** from the **Live** tab to your Dashboard application and add your `Signing key Id`, which can be obtained from the Open Banking Directory.
4. In your application's **Not registered** tab, you should now see **payoneer\_uk**. Click on **Register**.
5. Select the certificates you uploaded in Step 1, and fill in the rest of the form with credentials obtained from the bank in **Prerequisite** step.
6. Click **Save Registration**.
### Payoneer (For EU accounts)
**Precondition**: To connect to Payoneer - EU, an application needs to be created with the bank. Registration with the bank is a manual process; email with details of TPP authorisation needs to be sent to Payoneer - EU, requesting registration for Payoneer - EU.
1. Upload your QWAC (Transport) and QSEAL (Signing) certificates created in the Open Banking directory, along with the private keys into Yapily's [certificate vault](https://console.yapily.com/#!certificates).
2. Navigate to your application's **Connected Institutions** tab and click **Add institutions**.
3. Add **Payoneer - EU** from the **Live** tab to your Dashboard application and add your `Signing key Id`, which can be obtained from the Open Banking Directory.
4. In your application's **Not registered** tab, you should now see **payoneer**. Click on **Register**.
5. Select the certificates you uploaded in Step 1, and fill in the rest of the form with credentials obtained from the bank in **Prerequisite** step.
6. Click **Save Registration**.
## Sandbox Environment
Not available at the moment.
## Support
If you require technical support with certificate management, please contact [Support](/resources/support).
# Revolut
Source: https://docs.yapily.com/institution-configurations/uk/Revolut
## Links
* [Developer Portal](https://developers.revolut.com/)
## Scopes
* Account Information 🔒
* Payment Initiation 🔒
## Live Environment
### Retail + Business Accounts
#### Revolut (For UK-only registrations)
**Precondition**: To connect to live Open Banking entities, whether you are accessing account information or initiating payments, your business must have the right regulatory permissions and go through the process to obtain Open Banking Certificates as per the [UK Prerequisites](/getting-started/integration-setup/registration).
1. [Upload your ***OB WAC*** (transport) and ***OB SEAL*** (signing) certificates (PEMs) created in the Open Banking directory](/getting-started/integration-setup/registration), along with the keys into Yapily's [certificate vault](https://console.yapily.com/certificates).
2. Add **Revolut** to your Dashboard application and add your `Organisation Id`, `Software Statement Id`, `Signing key Id` which can be obtained from the Open Banking Directory
3. Select your ***OB WAC*** (transport) and ***OB SEAL*** (signing) from the relevant drop-downs lists then click *Next*.
4. Login/register at [https://developers.revolut.com/apps](https://developers.revolut.com/apps) and add your Open Banking Organisation ID to your 'Profile'.
5. **Click to register** to auto-register with the bank. If registration is successful, the `key` and `secret` will be populated from the institution's response.
6. Make sure to click *Save* in order to preserve these credentials, as a further registration attempt with the same Open Banking software statement is likely to fail.
#### Revolut EU (For EU accounts)
**Precondition**: To connect to live Open Banking institutions, whether you are accessing account information or initiating payments, your business must have the right regulatory permissions and go through the process to obtain eIDAS Certificates as per the [European Prerequisites](/getting-started/integration-setup/registration).
1. En-roll with [Open Banking Directory](/getting-started/integration-setup/registration) if not already done
2. Ensure you have and [select the entity in the Open Banking directory](/getting-started/integration-setup/registration) for your **European** AISP/PISP (You may need to request this to be done, or access from the Primary Technical Contact in the Open Banking Directory)
3. Upload your [eIDAS certificates to the Open Banking Directory](/getting-started/integration-setup/registration) - this is your **QWAC** (transport) and your **QSEAL** (signing) files
4. Create [a new software statement](/getting-started/integration-setup/registration) in the Open Banking Directory
5. Assign [your eIDAS certificates to the software statement](/getting-started/integration-setup/registration) in the Open Banking Directory
6. [Upload your **Q\_WAC\_** (transport) and **Q\_SEAL\_** (signing) certificates (PEMs) issued by your QTSP](/getting-started/integration-setup/registration), along with the keys into Yapily's [certificate vault](https://console.yapily.com/certificates).
7. Add **Revolut** to your Dashboard application and supply your `Organisation Id`, `Software Statement Id`, `Signing key Id` which can be obtained from the Open Banking Directory.
8. Login/register at [https://developers.revolut.com/apps](https://developers.revolut.com/apps) and add your Open Banking Organisation ID to your 'Profile'.
9. **Click to register** to auto-register with the bank. If registration is successful, the `key` and `secret` will be populated from the institution's response.
10. Make sure to click *Save* in order to preserve these credentials, as a further registration attempt with the same Open Banking software statement is likely to fail.
**Note**: It is possible to use a self-signed software statement to register Revolut instead of the one issued by Open Banking Directory **for EU registrations with eIDAS** certificates however, Yapily will not be able to support customers who choose to register with Revolut in this way. See the following [guide](https://developer.revolut.com/docs/build-banking-apps/register-your-application-using-dcr/register-your-application-using-dcr) from Revolut for more information.
## Sandbox Environment
### Retail + Business Accounts
To connect to the Revolut sandbox, follow the above steps while selecting **Revolut** from the **sandbox** tab in step 2. The institution Id for this is `revolut-sandbox`.
## Payments
### Payment Types
#### DOMESTIC PAYMENTS
The following scenarios will require you to initiate a Yapily payment with the `paymentType` as a `DOMESTIC_PAYMENT`:
* Revolut EUR Pocket → Revolut EUR Pocket
* Revolut GBP Pocket → Non-Revolut UK GBP Account
#### INTERNATIONAL PAYMENTS
The following scenarios will require you to initiate a Yapily payment with the `paymentType` as an `INTERNATIONAL_PAYMENT`:
* Revolut EUR Pocket → Italian EUR Account (We use `INTERNATIONAL_PAYMENT` because it is dependent on whether the bank supports SEPA or not)
* Revolut EUR Pocket → UK GBP Account
* Revolut Account → any other currency account (non EUR and non GBP)
When making a payment, if you use `EUR` as the currency you wish to pay for then the payee account identification needs to be `IBAN` e.g.
The payment authorisation request body for a DOMESTIC PAYMENT in Euros:
```json theme={null}
{
"applicationUserId": "Yapily Italy Payment",
"institutionId": "revolut",
"paymentRequest": {
"paymentIdempotencyId": "e8de92dfb82f46948db502abdbe3452",
"amount": {
"amount": "0.10",
"currency": "EUR"
},
"reference": "Yapily Test",
"type": "DOMESTIC_PAYMENT",
"payee": {
"name": "Joao Martins",
"address": {
"country": "GB"
},
"accountIdentifications": [
{
"type": "IBAN",
"identification": "GB19 REVO 0099 7071 1390 49"
}
]
}
}
}
```
## Support
If you require technical support with certificate management, please contact [Support](/resources/support).
# Royal Bank of Scotland
Source: https://docs.yapily.com/institution-configurations/uk/Royal-Bank-of-Scotland
## Links
* [Developer Portal](https://www.bankofapis.com/)
## Scopes
* Open Data 🌐
* Account Information 🔒
* Payment Initiation 🔒
* VRP 🔒
## Institutions
* `rbs`
* `rbs-sandbox`
* `rbsbusiness`
* `rbs-clearspend`
* `rbsinternational-clearspend`
## Live Environment
If you have completed the steps below for any of the other institutions in Natwest Group (`natwest`, `natwestbusiness`, `ulsterbank_uk`) then you can use their existing registration credentials and manually copy them on the Yapily Console for all RBS institutions listed above (excluding the sandbox).
**Precondition**: To connect to live Open Banking entities, whether you are accessing account information or initiating payments, your business must have the right regulatory permissions as per the [Open Banking Guide](/tools-and-services/open-banking/enrolment-guide).
1. Upload your transport and signing certificates (PEMs) created in the Open Banking directory, along with the keys into Yapily's [certificate vault](https://console.yapily.com/#!certificates).
2. Add one of the institutions from the above list from the **Live** tab to your Dashboard application and add your `Signing key Id`, which can be obtained from the Open Banking Directory.
3. Select your Open Banking transport and signing certificates from the relevant drop-downs lists then click *Next*.
4. **Click to register** to auto-register with the bank. If registration is successful, the key and secret will be populated from the institution's response.
5. Make sure to click *Save* in order not to lose these credentials, as a further registration attempt with the same Open Banking software statement is likely to fail.
## Payments
### Bulk Payments
* Domestic and Scheduled payments are supported
* Maximum 15 payments per request
* The payments should be of the same type in a request
* RBS only accepts bulk payments where all the creditors are trusted beneficiaries
## VRP Sweeping Access
In order to access the VRP endpoints we have to grant your Yapily application additional scopes. If you do not have these scopes then please contact your customer success manager to get them added.
The following steps are not intended for Yapily Connect customers.
Precondition: To use VRP on `rbs` a manual registration via API is required.
Pre-requisites for Manual registration:
* Valid OBWAC / OBSEAL certificates
* PIS registration details for `rbs`
You can use existing PIS registration details for this institution to gain VRP sweeping access. The registration details can be found on the Yapily Console for the given application. If a new registration is required (e.g. if you are using a new redirectUri for VRP and it is not covered in the existing registration) then you can perform a DCR request using the steps outlined in `Live Environment`. The existing or new registration credentials from the Yapily Console will be used in the steps below.
### Steps Required for Manual registration
1. Upload the signing (OBSEAL) and transport (OBWAC) certificates if not already present
You can check if the certificate is present already by navigating to the Console -> Certificates. If absent please upload the certificate.
Once confirmed, we need the UUID of the certificate which can be found in the Console -> Certificates -> Certificate; the UUID will appear in the browser URL bar as follows:
`https://console.yapily.com/certificates/`
Save the `UUID` and remember for which kind of key it corresponds to:
e.g. `SIGNING_KEY_UUID = d16f87d3-4222-4173-b8b9-44aeccacae7d`
Once you have done it for the signing key, repeat the process for your transport certificate.
2. Call the manual registration endpoint
The final step is to call the manual registration endpoint with the certificate UUIDs and credentials from your application created on the portal.
The `apiTypes` field in the example has both types but if the registration in question grants PIS access only then only provide `PISP`.
If a custom redirect URI (not Yapily's) is used for the registration then you can provide it in the `redirectUri` field.
The `clientId` field corresponds to the `key` field on the Yapily Console.
Request
```shell theme={null}
curl --location --request POST 'https://api.yapily.com/institutions/rbs/manual/register' \
--header 'Content-Type: application/json' \
--header 'Authorization: Basic ...' \
--data-raw '{
"signingKeyID": "$SIGNING_KEY_UUID",
"transportKeyID": "$TRANSPORT_KEY_UUID",
"clientId": "$CLIENT_ID",
"softwareStatementId": "$SSA_ID",
"organisationId": "$ORGANISATION_ID",
"apiTypes" : ["AISP", "PISP"],
"redirectUri" : ""
}'
```
Response
```shell theme={null}
{
"id": "a0460a91-4b4c-422a-bbe6-bebe0b92e308"
}
```
This is the Yapily registration `id` which can be used to Get, Modify, Delete the registration.
## Sandbox Environment
To connect to the Royal Bank of Scotland Sandbox, select **Royal Bank of Scotland Sandbox** from the pre-configured institutions.
Or if you like to register with your own credentials, please follow the steps below:
### Prerequisite
1. Register on the [RBS developer portal](https://developer.rbs.useinfinite.io/).
2. Select your teams and enter your open banking organisation ID.
After entering your open banking organisation ID, you can now follow the same steps above of the live environment.
[Test Account Credentials](/resources/sandbox/overview#rbs-group-sandboxes)
## Support
If you require technical support with certificate management, please contact [Support](/resources/support).
# Sainsburys Bank
Source: https://docs.yapily.com/institution-configurations/uk/Sainsburys-Bank
## Links
* [Developer Portal](https://developer.sainsburysbank.co.uk/overview)
## Scopes
* Account Information 🔒
## Live Environment
**Precondition**: To connect to live Open Banking entities, whether you are accessing account information or initiating payments, your business must have the right regulatory permissions as per the [Open Banking Guide](/tools-and-services/open-banking/enrolment-guide).
1. Upload the certificates & keys (transport, signing) from Open Banking into [Yapily's certificate vault](https://console.yapily.com/certificates)
2. Add **Sainsbury's Bank** institution into your dashboard [app](https://console.yapily.com/applications) and configure the institution by adding `Signing Key ID` from Open Banking & selecting the `certificates` from the drop-down. Then *press next*
3. `Click to register` to auto-register to the bank via Yapily and auto-populate the key & secret; *press save*
## Support
If you require technical support with certificate management, please contact [Support](/resources/support).
## Sandbox Environment
To connect to the Sainsbury's Bank Sandbox, select **Sainsbury's Bank** from the pre-configured institutions.
Or if you like to register with your own credentials, please follow the steps above.
[Test Account Credentials](/resources/sandbox/sandbox-credentials)
# Santander Bank
Source: https://docs.yapily.com/institution-configurations/uk/Santander-Bank
## Links
* [Developer Portal](https://developer.santander.co.uk/sanuk/external)
## Scopes
* Open Data 🌐
* Account Information 🔒
* Payment Initiation 🔒
* VRP 🔒
## Institutions
* santander-personal\_uk
* santander-business\_uk
* santander-corporate\_uk
## Live Environment
**Precondition**: To connect to live Open Banking entities, whether you are accessing account information or initiating payments, your business must have the right regulatory permissions as per the [Open Banking Guide](/tools-and-services/open-banking/enrolment-guide).
1. Upload your transport and signing certificates (PEMs) created in the Open Banking directory, along with the keys into Yapily's [certificate vault](https://console.yapily.com/certificates).
2. Add **Santander** from the **Live** tab to your Dashboard application and add your `Signing key Id`, which can be obtained from the Open Banking Directory.
3. Select your Open Banking transport and signing certificates from the relevant drop-downs lists then click *Next*.
4. Click the 'download the SSA' button to download your Software Statement Assertion from the Open Banking Directory. This is the token that the Open Banking UK institutions will use during registration to verify your enrolment and possibly create your application.
5. Log in to [Santander's developer portal](https://developer.santander.co.uk/sanuk/external/ibm_apim/oidc/openbanking) using Open Banking SSO
6. Create a new production app using the downloaded SSA. Set the appropriate organisation role.
7. Copy the credentials for this app from the Santander developer portal into the credentials view for Santander in the Yapily dashboard. Add the obtained *`Client ID`* as **Key** and the *`Client secret`* as **Secret**. Click 'Next' to save.
## VRP Sweeping Access
In order to access the VRP endpoints we have to grant your Yapily application additional scopes. If you do not have these scopes then please contact your customer success manager to get them added.
The following steps are not intended for Yapily Connect customers.
Precondition: To use VRP on any of the listed Santander institutions, a manual registration via API is required.
Pre-requisites for Manual registration:
* Valid OBWAC / OBSEAL certificates
* PIS registration details for the intended Santander institution
You can use existing PIS registration details for this institution to gain VRP sweeping access. The registration details can be found on the Yapily Console for the given application. If a new registration is required (e.g. if you are using a new redirectUri for VRP and it is not covered in the existing registration) then you will have to manage your applications on the institution developer portal. Ensure that the application is subscribed to the latest API version on the institution portal. The existing or new registration credentials from the Yapily Console will be used in the steps below.
### Steps Required for Manual registration
1. Upload the signing (OBSEAL) and transport (OBWAC) certificates if not already present
You can check if the certificate is present already by navigating to the Console -> Certificates. If absent please upload the certificate.
Once confirmed, we need the UUID of the certificate which can be found in the Console -> Certificates -> Certificate; the UUID will appear in the browser URL bar as follows:
`https://console.yapily.com/certificates/`
Save the `UUID` and remember for which kind of key it corresponds to:
e.g. `SIGNING_KEY_UUID = d16f87d3-4222-4173-b8b9-44aeccacae7d`
Once you have done it for the signing key, repeat the process for your transport certificate.
2. Call the manual registration endpoint
The final step is to call the manual registration endpoint with the certificate UUIDs and credentials from your application created on the portal.
The `apiTypes` field in the example has both types but if the registration in question grants PIS access only then only provide `PISP`.
If a custom redirect URI (not Yapily's) is used for the registration then you can provide it in the `redirectUri` field.
The `clientId` field corresponds to the `key` field on the Yapily Console.
The `clientSecret` corresponds to the `secret` field on the Yapily Console.
Request
```shell theme={null}
curl --location --request POST 'https://api.yapily.com/institutions/santander-personal_uk/manual/register' \
--header 'Content-Type: application/json' \
--header 'Authorization: Basic ...' \
--data-raw '{
"signingKeyID": "$SIGNING_KEY_UUID",
"transportKeyID": "$TRANSPORT_KEY_UUID",
"clientId": "$CLIENT_ID",
"clientSecret" : "$OPTIONAL_CLIENT_SECRET",
"softwareStatementId": "$SSA_ID",
"organisationId": "$ORGANISATION_ID",
"apiTypes" : ["AISP", "PISP"],
"redirectUri" : ""
}'
```
Response
```shell theme={null}
{
"id": "a0460a91-4b4c-422a-bbe6-bebe0b92e308"
}
```
This is the Yapily registration `id` which can be used to Get, Modify, Delete the registration.
## Payments
### Bulk Payments
* Domestic and Scheduled payments are supported
* Maximum 3500 payments per request
* For every payment the same payer must be specified
* Only accepts bulk payments where all creditors are trusted beneficiaries
## Support
If you require technical support with certificate management, please contact [Support](/resources/support).
# Silicon Valley Bank
Source: https://docs.yapily.com/institution-configurations/uk/Silicon-Valley-Bank
## Links
[https://developer.svb.com](https://developer.svb.com/)
## Scopes
* Account Information🔒
* Payment Initiation🔒
## Supported ASPSPs
| ASPSP | Link | Supported | Institution ID |
| ----------------------------------- | ------------------------------------------------------ | --------- | ---------------------------------------------------- |
| Silicon Valley Bank and its Sandbox | [https://developer.svb.com](https://developer.svb.com) | Yes | `siliconvalleybank`
1. Call the manual registration endpoint with the certificate UUIDs and the client ID:
**Request**
```shell theme={null}
curl --location --request POST 'https://api.yapily.com/institutions/handelsbanken-sandbox_uk/manual/register' \
--header 'Content-Type: application/json' \
--header 'Authorization: Bearer YOUR_APPLICATION_CREDENTIALS_AS_BASIC_AUTH' \
--data-raw '{
"signingKeyID": "$SIGNING_KEY_UUID",
"transportKeyID": "$TRANSPORT_KEY_UUID",
"clientId" : "$CLIENT_ID"
}'
```
**Response**
```json theme={null}
{
"id": "a0460a91-4b4c-422a-bbe6-bebe0b92e308"
}
```
## Support
If you require technical support with certificate management, please contact [Support](/resources/support).
# Hellenic Bank
Source: https://docs.yapily.com/institution-configurations/uk/Hellenic-Bank
## Links
* [Developer Portal](https://openapis.hellenicbank.com/)
## Scopes
* Account Information 🔒
* Payment Initiation 🔒
## Live Environment
**Precondition**: To connect to Hellenic Group, an application needs to be created. Once the application is created a **client\_id** and **client\_secret** are generated.
**Pre-requisites for Registration:**
1. Valid QWAC / QSEAL certificates.
2. Upload the signing (QSEAL) and transport (QWAC) certificates into V2 services
* For the signing and transport certificate (QSEAL & QWAC) upload use the following request twice for each upload changing, preferentially you can specify the type of the certificate adding: (`"type": "Q_SEAL"` for signing and `"type": "Q_WAC"` for transport) **This field is not mandatory.**
**Request format:**
```shell theme={null}
curl --location --request POST 'https://api.yapily.com/certificates/keys/' \
--header 'Authorization: Basic YOUR_APPLICATION_CREDENTIALS_AS_BASIC_AUTH' \
--header 'Content-Type: application/json' \
--data-raw '[{
"pem": "$YOUR_PUBLIC_KEY_AS_PEM",
"key": "$YOUR_PRIVATE_KEY",
"kid": "$CERT_KID",
"name" : "$CERTIFICATE_NAME",
"type": "Q_WAC"
}]'
```
* Where pem and key need to be in the following format:
`-----BEGIN PRIVATE KEY-----\n
KEY_HASH\n
MORE_KEY_HASH\n
SOME_MORE_KEY_HASH\n -----END PRIVATE KEY-----`
**Please note:**
1. Spaces between "begin/end private key" words are respected.
2. Begin/End Private Key are included in the value for the pem and key properties.
3. Every line break is escaped with a "\n".
4. There is NO "\n" at the end.
**Response format:**
* Once you have uploaded your certificates successfully, you will receive a response containing an "id". Please make sure that you save them and note to which certificates they belong.
```json theme={null}
{
"id": "d16f87d3-4222-4173-b8b9-44aeccacae7d",
....
}
```
**If the Certificates have already been uploaded:**
Then, it can be retrieved from the endpoint:
[`GET 'https://api.yapily.com/certificates/keys/'`](https://api.yapily.com/certificates/keys/)
**Response format:**
```json theme={null}
{
"id": "d16f87d3-4222-4173-b8b9-44aeccacae7d",
"type": "Q_SEAL",
.....
},
{
"id": "76b453ea-9e41-42e0-a357-d6d7980bf02b",
"type": "Q_WAC",
.....
}
```
## Registration
* Use the following request to register any **Hellenic** institution with Yapily:
```shell theme={null}
curl --location --request POST 'https://api.yapily.com/institutions/{{INSTITUTION_ID}}/manual/register' \
--header 'Content-Type: application/json' \
--header 'x-yapily-force-platform: {{platform_version}}' \
--header 'Authorization: Bearer {{token}}' \
--data-raw '{
"signingKeyID": "{{SIGNING_KEY_UUID}}",
"transportKeyID": "{{TRANSPORT_KEY_UUID}}",
"clientId": "{{client_id_from_created_application}}",
"clientSecret": "{{client_secret_from_created_application}}",
"apiTypes" : ["AISP", "PISP"]
}'
```
**Where:**
* `INSTITUTION_ID` is the Yapily institution id.
* `SIGNING_KEY_UUID` and `TRANSPORT_KEY_UUID` are the "ids" that you saved before when uploading the certificates (**signing** and **transport**).
* `client_id_from_created_application` and `client_secret_from_created_application` are valid credentials for the Hellenic developer portal.
**Response format:**
* The response from the registration call should also contain an "id", which would mean that the registration was successful. Please save that "id" and note to which bank it belongs.
```json theme={null}
{
"id": "d16f87d3-4222-4173-b8b9-44aeccacae7d",
....
}
```
## Sandbox Environment
1. [Register a new account](https://openapis.hellenicbank.com/user/registration) on the platform
2. [Create an application](https://openapis.hellenicbank.com/sandbox/client)
1. Name your application
2. Add a description for your application (optional)
3. Ensure that at least the 'AccountReporting API' is selected
4. Add [https://auth.yapily.com/](https://auth.yapily.com/) as a redirect URL
5. Click 'Add Application'
3. Select 'Manage my products' from the navigation menu on the left and click the 'edit' button next to your newly created application
4. Add the *Client ID* as **Key** and *Client Secret* as **Secret** to your application in the [Yapily Console](https://console.yapily.com/)
## Support
If you require technical support with certificate management, please contact [Support](/resources/support).
# Hoares Bank
Source: https://docs.yapily.com/institution-configurations/uk/Hoares-Bank
## Links
* Developer Portal [https://developer.tell.money/private/hoaresbank/](https://developer.tell.money/private/hoaresbank/)
## Scopes
* Open Data 🌐
* Account Information 🔒
* Payment Initiation 🔒
## Supported ASPSPs
| ASPSP | Link | Supported | Institution ID |
| ------------------- | ---------------------------------------------------------------------------------------------------- | --------- | -------------------- |
| Haores-Bank | [https://developer.tell.money/private/hoaresbank/](https://developer.tell.money/private/hoaresbank/) | Yes | `hoaresbank` |
| Haores-Bank Sandbox | [https://developer.tell.money/private/hoaresbank/](https://developer.tell.money/private/hoaresbank/) | Yes | `hoaresbank-sandbox` |
## Accounts and Payments Supported
### Accounts
* Accounts
* Transactions
### Payments
* Domestic Single Payments
* Domestic Periodic Payments
* Domestic Standing Orders Payments
* International Single Payments
* International Periodic Payments
## Live Environment
**Prerequisites**:
* You must have registered as a TPP on the OB Directory.
* The TPP must have a software statement created on the OB Directory.
* Any scopes requested by the TPP must have been authorised by OBIE and must be found in the OBIE issued software statement supplied in the registration request object.
* The TPP must use an OB issued (OBWAC) transport certificate for MTLS.
* The TPPs registration request object must be signed by an OB issued signing certificate (OBSeal).
**Precondition**: To connect to live Open Banking entities, whether you are accessing account information or initiating payments, your business must have the right regulatory permissions as per the [Open Banking Guide](/tools-and-services/open-banking/enrolment-guide).
1. Upload your transport and signing certificates (PEMs) created in the Open Banking directory, along with the keys into Yapily's certificate vault.
2. Add Hoares Bank from the Live tab to your Dashboard application and add your Signing key Id , which can be obtained from the Open Banking Directory.
3. Select your Open Banking transport and signing certificates from the relevant drop-downs lists then click Next.
4. Click to register to auto-register with the bank. If registration is successful, the key and secret will be populated from the institution's response.
5. Make sure to click Save in order not to lose these credentials, as a further registration attempt with the same Open Banking software statement is likely to fail.
In the event unacceptable certificates are presented the error message will contain "*Access was denied by security policy: 003*".
## Sandbox Environment
To connect to the Hoares Bank sandbox, follow the above steps while selecting *Hoares Bank* from the sandbox tab in step 2. The institution Id for this is `hoaresbank-sandbox`.
## Support
If you require technical support with certificate management, please contact [Support](/resources/support).
# IBM Open Banking Sandbox
Source: https://docs.yapily.com/institution-configurations/uk/IBM-Open-Banking-Sandbox
## Links
* [Developer Portal](https://open-banking-sandbox.developer.eu.apiconnect.ibmcloud.com/)
## Scopes
* Account Information 🔒
* Payment Initiation 🔒
* Open Data 🌐
## Sandbox Environment
### Registration
1. [Register a new account](https://open-banking-sandbox.developer.eu.apiconnect.ibmcloud.com/user/register) on the platform
2. [Create an application](https://open-banking-sandbox.developer.eu.apiconnect.ibmcloud.com/application) in the Apps menu
1. Name your application
2. Give your application a description (optional)
3. Add SSA (optional)
4. Set the OAuth Redirect URI to [https://auth.yapily.com/](https://auth.yapily.com/)
5. Click Submit
3. Take a note of your **Client ID and Client Secret** (use these to authenticate your Yapily app connection to the bank)
### Feature Subscription
1. Under the navigation item 'API Products', select 'Account Information'
2. (Optional) 'Open Data Aggregator' can be selected if required.
3. Subscribe to the Default Plan using your newly created application
## Support
If you require technical support with certificate management, please contact [Support](/resources/support).
# ING Bank
Source: https://docs.yapily.com/institution-configurations/uk/ING-Bank
## Links
* [Developer Portal](https://developer.ing.com/openbanking)
## Scopes
* Account Information 🔒
* Payment Initiation 🔒
## Live Environment
**Precondition**: To connect to live Open Banking entities, whether you are accessing account information or initiating payments, your business must have the right regulatory permissions as per the [Open Banking Guide](/tools-and-services/open-banking/enrolment-guide).
1. Upload your certificates (eIDAS QWAC, eIDAS QSEALS) into [Yapily's certificate vault](https://console.yapily.com/certificates)
2. Add ING Live institution into your dashboard app and configure the institution by selecting these certificates - eIDAS QWAC, eIDAS QSEALS from the drop-down. Then press next
3. Click to register to auto-register to the bank via Yapily and auto-populate the key; press save
## Support
If you require technical support with certificate management, please contact [Support](/resources/support).
## Sandbox Environment
**Precondition**: To connect to live Open Banking entities, whether you are accessing account information or initiating payments, your business must have the right regulatory permissions as per the [Open Banking Guide](/tools-and-services/open-banking/enrolment-guide).
1. Upload the certificates & keys (QSEAL, QWAC) from [ING Development Portal](https://developer.ing.com/openbanking/get-started) into [Yapily's certificate vault](https://console.yapily.com/certificates)
2. Add this institution into your app from the `Sandbox` tab and configure the institution by selecting the `certificates` from the dropdown, press next [https://console.yapily.com/applications](https://console.yapily.com/applications)
3. `Click to register` to auto-register to the bank via Yapily and auto-populate the key; *press save*
## Support
If you require technical support with certificate management, please contact [Support](/resources/support).
# Lloyds
Source: https://docs.yapily.com/institution-configurations/uk/Lloyds
## Links
* [Lloyds Banking Group Developer Portal](https://developer.lloydsbanking.com/)
## Scopes
* Open Data 🌐
* Account Information 🔒
* Payment Initiation 🔒
* VRP 🔒
## Live Environment
If you have completed the steps below for any of the other institutions in the Lloyds Banking Group (`halifax`, `bankofscotland`, `bankofscotlandbusiness`) then you can use their existing registration credentials and jump to Step 7 for both `lloyds` and `lloydsbusiness`.
**Precondition**: To connect to live Open Banking entities, whether you are accessing account information or initiating payments, your business must have the right regulatory permissions as per the [Open Banking Guide](/tools-and-services/open-banking/enrolment-guide).
1. Upload your transport and signing certificates (PEMs) created in the Open Banking directory, along with the keys into Yapily's [certificate vault](https://console.yapily.com/#!certificates).
2. Add **Lloyds** from the **Live** tab to your Dashboard application and add your `Signing key Id`, which can be obtained from the Open Banking Directory.
3. Select your Open Banking transport and signing certificates from the relevant drop-downs lists then click *Next*.
4. Click the 'download the SSA' button to download your Software Statement Assertion from the Open Banking Directory. This is the token that the Open Banking UK institutions will use during registration to verify your enrolment and possibly create your application.
5. Log in to the developer portal: [https://developer.lloydsbanking.com](https://developer.lloydsbanking.com/)
6. Create an app using the SSA to get *`Client ID`* and *`Client secret`*
7. Copy the credentials for this app from the Lloyds developer portal into the credentials view for Lloyds in the Yapily dashboard. Add the obtained *`Client ID`* as **Key** and the *`Client secret`* as **Secret**. Click 'Next' to save.
## Payments
### Bulk Payments
* Domestic payments and Scheduled Payments are supported
* Maximum 25 payments per request
* Minimum total payments amount is £0.01 (1p)
* Maximum total payments amount would be determined by the account limits on the specific accounts being used.
* The property `requestedExecutionDateTime` is not supported for this bank
* A reference for every payment is required
* One payer must be specified
## VRP Sweeping Access
In order to access the VRP endpoints we have to grant your Yapily application additional scopes. If you do not have these scopes then please contact your customer success manager to get them added.
> **The following steps are not intended for Yapily Connect customers**
Precondition: To use VRP on `lloyds` or `lloydsbusiness` a manual registration via API is required.
Pre-requisites for Manual registration:
* Valid OBWAC / OBSEAL certificates
* PIS registration details for `lloyds` or `lloydsbusiness`
You can use existing PIS registration details for this institution to gain VRP sweeping access. The registration details can be found on the Yapily Console for the given application. If a new registration is required (e.g. if you are using a new redirectUri for VRP and it is not covered in the existing registration) then you will have to manage your applications on the institution developer portal. Ensure that the application is subscribed to the latest API version on the institution portal. The existing or new registration credentials from the Yapily Console will be used in the steps below.
### Steps Required for Manual registration
1. Upload the signing (OBSEAL) and transport (OBWAC) certificates if not already present
You can check if the certificate is present already by navigating to the Console -> Certificates. If absent please upload the certificate.
Once confirmed, we need the UUID of the certificate which can be found in the Console -> Certificates -> Certificate; the UUID will appear in the browser URL bar as follows:
`https://console.yapily.com/certificates/`
Save the `UUID` and remember for which kind of key it corresponds to:
e.g. `SIGNING_KEY_UUID = d16f87d3-4222-4173-b8b9-44aeccacae7d`
Once you have done it for the signing key, repeat the process for your transport certificate.
2. Call the manual registration endpoint
The final step is to call the manual registration endpoint with the certificate UUIDs and credentials from your application created on the portal.
The `apiTypes` field in the example has both types but if the registration in question grants PIS access only then only provide `PISP`.
If a custom redirect URI (not Yapily's) is used for the registration then you can provide it in the `redirectUri` field.
The `clientId` field corresponds to the `key` field on the Yapily Console.
Request
```shell theme={null}
curl --location --request POST 'https://api.yapily.com/institutions/lloyds/manual/register' \
--header 'Content-Type: application/json' \
--header 'Authorization: Basic ...' \
--data-raw '{
"signingKeyID": "$SIGNING_KEY_UUID",
"transportKeyID": "$TRANSPORT_KEY_UUID",
"clientId": "$CLIENT_ID",
"softwareStatementId": "$SSA_ID",
"organisationId": "$ORGANISATION_ID",
"apiTypes" : ["AISP", "PISP"],
"redirectUri" : ""
}'
```
Response
```shell theme={null}
{
"id": "a0460a91-4b4c-422a-bbe6-bebe0b92e308"
}
```
This is the Yapily registration `id` which can be used to Get, Modify, Delete the registration.
## Sandbox Environment
To connect to the Lloyds Sandbox, select *Lloyds Sandbox* from the pre-configured institutions.
Or if you like to register with your own credentials, please follow the steps below:
1. Upload your transport and signing certificates (PEMs) created in the Open Banking directory, along with the keys into Yapily's [certificate vault](https://console.yapily.com/certificates).
2. Add **Lloyds Sandbox** from the **Sandbox** tab to your Dashboard application and add your `Signing key Id`, which can be obtained from the Open Banking Directory.
3. Select your Open Banking transport and signing certificates from the relevant drop-downs lists then click *Next*.
4. Click the 'download the SSA' button to download your Software Statement Assertion from the Open Banking Directory. This is the token that the Open Banking UK institutions will use during registration to verify your enrolment and possibly create your application.
5. For sandbox setup and registration instructions, see the [Lloyds Banking Group Sandbox Support Guide](https://developer.lloydsbanking.com/prod01/lbg/lbg-support#sandbox)
6. Create an app using the SSA you downloaded in the previous step to get *`Client ID`* and *`Client secret`*
7. Copy the credentials for this app from the Lloyds developer portal into the credentials view for Lloyds in the Yapily dashboard. Add the obtained *`Client ID`* as **Key** and the *`Client secret`* as **Secret**. Click 'Next' to save.
Note: Halifax Sandbox, MBNA Bank Sandbox and Lloyds are using the same Lloyds Banking Group API. If you have already register with one of the above institutions just copy the credentials (key and secret) to this one and you are ready to go.
## Support
If you require technical support with certificate management, please contact [Support](/resources/support).
# MBNA
Source: https://docs.yapily.com/institution-configurations/uk/MBNA
## Links
* [Developer Portal](https://developer.lloydsbanking.com/)
## Scopes
* Account Information 🔒
* Payment Initiation 🔒
## Live and Sandbox Environment
To connect to the MBNA Sandbox, select **MBNA Sandbox** from the pre-configured institutions.
Or if you like to register with your own credentials, please follow the steps below:
**Precondition**: To connect to live Open Banking entities, whether you are accessing account information or initiating payments, your business must have the right regulatory permissions as per the [Open Banking Guide](/tools-and-services/open-banking/enrolment-guide).
1. Upload your transport and signing certificates (PEMs) created in the Open Banking directory, along with the keys into Yapily's [certificate vault](https://console.yapily.com/certificates).
2. Add **MBNA Bank Sandbox** from the **Sandbox** tab to your Dashboard application and add your `Signing key Id`, which can be obtained from the Open Banking Directory.
3. Select your Open Banking transport and signing certificates from the relevant drop-downs lists then click *Next*.
4. Click the 'download the SSA' button to download your Software Statement Assertion from the Open Banking Directory. This is the token that the Open Banking UK institutions will use during registration to verify your enrolment and possibly create your application.
5. Log in to the developer portal: ([https://register.sandbox.lloydsbanking.com](https://register.sandbox.lloydsbanking.com/)) following the instructions found on this [Guide](https://developer.lloydsbanking.com/sites/developer.lloydsbanking.com/files/support/LBG_Sandbox_Developers_Guide.pdf)
6. Create an app using the SSA you downloaded in the previous step to get *`Client ID`* and *`Client secret`*
7. Copy the credentials for this app from the Lloyds developer portal into the credentials view for Lloyds in the Yapily dashboard. Add the obtained *`Client ID`* as **Key** and the *`Client secret`* as **Secret**. Click 'Next' to save.
**Note**: *Halifax Sandbox*, *MBNA Bank Sandbox* and *Bank of Scotland* are using the same *Lloyds Banking Group* API. If you have already register with one of the above institutions just copy the credentials (**key** and **secret**) to this one and you are ready to go. The same process is valid for **Halifax**, **Lloyds Bank** and **Bank of Scotland** **Live** institutions
## Payments
MBNA is a credit card only brand so payments can only be made as Money Transfer requests from an MBNA credit card to another Lloyds account that the user owns. Otherwise, payments are not supported for MBNA.
## Support
If you require technical support with certificate management, please contact [Support](/resources/support).
# M&S Bank
Source: https://docs.yapily.com/institution-configurations/uk/M_S-Bank
## Links
* [Developer Portal](http://developer.hsbc.com/)
## Scopes
* Open Data 🌐
* Account Information 🔒
* **Payment Initiation is no longer available!**
M\&S Bank is a subsidiary of HSBC
## Live Environment
**Precondition**: To connect to live Open Banking entities, whether you are accessing account information, your business must have the right regulatory permissions as per the [Open Banking Guide](/tools-and-services/open-banking/enrolment-guide).
1. Upload your transport and signing certificates (PEMs) created in the Open Banking directory, along with the keys into Yapily's [certificate vault](https://console.yapily.com/certificates).
2. Add **M\&S *Bank*** from the **Live** tab to your Dashboard application and add your `Signing key Id`, which can be obtained from the Open Banking Directory.
3. Select your Open Banking transport and signing certificates from the relevant drop-downs lists then click *Next*.
4. **Click to register** to auto-register with the bank. If registration is successful, the key and secret will be populated from the institution's response.
## Migration to 3.1.1
**Update**: 20/02/2020 HSBC Group ASPSPs (HSBC, First Direct and M\&S Bank) will terminate the current AIS 2.0 API versions. To ensure you are running on version 3.1.1 for AIS you will need to have valid eIDAS QWAC and QSEAL certificates, and go through our registration process again before the 28th February 2020. All of your consents from the old version will migrate to updated version.
Steps on how to do this are outlined below:
1. Upload your public eIDAS certificates into OBIE Directory's SSA and copy the *QSEAL kId*.
2. Upload your public and private eIDAS into Yapily's [certificate vault](https://console.yapily.com/certificates)
3. Go to your application's institution tab and edit *M\&S Bank* change the Signing KeyId to the QSEAL kId you copied from OBIE Directory. Select the QSEAL and QWAC you uploaded in 2. and press next
4. Press "Download and Register", wait until the registration process is done, then click save.
5. Make sure to click *Save* in order not to lose these credentials, as a further registration attempt with the same Open Banking software statement is likely to fail.
## Support
If you require technical support with certificate management, please contact [Support](/resources/support).
# Metro
Source: https://docs.yapily.com/institution-configurations/uk/Metro
## Links
* [Metro Bank Developer Portal](https://developer.metrobankonline.co.uk/)
**Institution ID**: `metro`
## Scopes
* Account Information🔒
## Live Environment
**Precondition**: To connect to Metro Bank, an application needs to be created with the bank. Registration with the bank is a manual process; email: [api\_team@metrobank.plc.uk](mailto:api_team@metrobank.plc.uk?subject=Registration%20Query) with details of TPP authorisation needs to be sent to metro requesting registration for Metro Bank.
1. Upload your OBWAC (Transport) and OBSEAL (Signing) certificates created in the Open Banking directory into Yapily's [certificate vault](https://console.yapily.com/#!certificates).
2. Navigate to your application's **Connected Institutions** tab and click **Add institutions**.
3. Select **metro**, then click **Add selected**.
4. In your application's **Not registered** tab, you should now see **metro**. Click on **Register**.
5. Select the certificates you uploaded in Step 1, and fill in the rest of the form with credentials obtained from the bank in **Prerequisite** step.
6. Click **Save Registration**.
## Sandbox Environment
Not available at the moment.
## Support
If you require technical support with certificate management, please contact [Support](/resources/support).
# METTLE
Source: https://docs.yapily.com/institution-configurations/uk/Mettle
## Links
* [Developer Portal](https://developer.lloydsbanking.com/)
## Scopes
* Account Information🔒
* Payment Initiation🔒
## Live Environment
**Precondition**:To connect to Mettle Bank, an application needs to be created. Once the application is created a **client\_id** and **client\_secret** are generated.
**Pre-requisites for Registration:**
1. Valid QWAC / QSEAL certificates.
2. Upload the signing (QSEAL) and transport (QWAC) certificates into V2 services
**Request format:**
```shell theme={null}
curl --location --request POST 'https://api.yapily.com/certificates/keys/' \
--header 'Authorization: Basic YOUR_APPLICATION_CREDENTIALS_AS_BASIC_AUTH' \
--header 'Content-Type: application/json' \
--data-raw '[{
"pem": "$YOUR_PUBLIC_KEY_AS_PEM",
"key": "$YOUR_PRIVATE_KEY",
"kid": "$CERT_KID",
"name" : "$CERTIFICATE_NAME",
"type": "Q_WAC"
}]'
```
* Where pem and key need to be in the following format:
`-----BEGIN PRIVATE KEY-----\n
KEY_HASH\n
MORE_KEY_HASH\n
SOME_MORE_KEY_HASH\n -----END PRIVATE KEY-----`
**Please note:**
1. Spaces between "begin/end private key" words are respected.
2. Begin/End Private Key are included in the value for thepemandkeyproperties.
3. Every line break is escaped with a "\n".
4. There is NO "\n" at the end.
**Response format:**
* Once you have uploaded your certificates successfully, you will receive a response containing an "id". Please make sure that you save them and note to which certificates they belong.
```json theme={null}
{
"id": "d16f87d3-4222-4173-b8b9-44aeccacae7d",
....
}
```
**If the Certificates have already been uploaded:**
Then, it can be retrieved from the endpoint:
[`GET 'https://api.yapily.com/certificates/keys/'`](https://api.yapily.com/certificates/keys/)
**Response format:**
```json theme={null}
{
"id": "d16f87d3-4222-4173-b8b9-44aeccacae7d",
"type": "Q_SEAL",
.....
},
{
"id": "76b453ea-9e41-42e0-a357-d6d7980bf02b",
"type": "Q_WAC",
.....
}
```
## Registration
* Use the following request to register any **Mettle** institution with Yapily.
```shell theme={null}
curl --location --request POST'https://api.yapily.com/institutions/{{INSTITUTION_ID}}/manual/register'\
--header'Content-Type: application/json'\
--header'x-yapily-force-platform: {{platform_version}}'\
--header'Authorization: Bearer {{token}}'\
--data-raw'{
"signingKeyID":"{{SIGNING_KEY_UUID}}",
"transportKeyID":"{{TRANSPORT_KEY_UUID}}",
"clientId": "{{client_id_from_created_application}}",
"clientSecret": "{{client_secret_from_created_application}}",
"apiTypes": ["AISP", "PISP"]
}'
```
**Where:**
* `INSTITUTION_ID` is the Yapily institution id.
* `SIGNING_KEY_UUID` and `TRANSPORT_KEY_UUID` are the "ids" that you saved before when uploading the certificates (**signing** and **transport**).
* `client_id_from_created_application` and `client_secret_from_created_application` are valid credentials for the Mettle developer portal.
**Response format:**
* The response from the registration call should also contain an "id", which would mean that the registration was successful. Please save that "id" and note to which bank it belongs.
```json theme={null}
{
"id": "d16f87d3-4222-4173-b8b9-44aeccacae7d",
....
}
```
## Sandbox Environment
Not available at the moment
## Support
If you require technical support with certificate management, please contact [Support](/resources/support).
# Modelo Sandbox
Source: https://docs.yapily.com/institution-configurations/uk/Modelo-Sandbox
## Links
* [Open Banking Directory](https://directory.openbanking.org.uk/)
## Scopes
* Open Data 🌐
* Account Information 🔒
* Payment Initiation 🔒
* VRP 🔒
## Live Environment
**Precondition**: To connect to live Open Banking entities, whether you are accessing account information or initiating payments, your business must have the right regulatory permissions as per the [Open Banking Guide](/tools-and-services/open-banking/enrolment-guide).
1. Upload your OBTransport and OBSigning certificates (PEMs) created in the Open Banking directory, along with the private keys into Yapily's [certificate vault](https://console.yapily.com/#!certificates).
2. Add **Modelo Sandbox** from the **Live** tab to your Dashboard application and add your `Signing key Id`, which can be obtained from the Open Banking Directory.
3. Select your Open Banking transport and signing certificates from the relevant drop-downs lists then click *Next*.
4. **Click to register** to auto-register with the bank. If registration is successful, the key and secret will be populated from the institution's response.
5. Make sure to click *Save* in order not to lose these credentials, as a further registration attempt with the same Open Banking software statement is likely to fail.
## VRP Sweeping Access
In order to access the VRP endpoints we have to grant your Yapily application additional scopes. If you do not have these scopes then please contact your customer success manager to get them added.
The following steps are not intended for Yapily Connect customers.
Precondition: To use VRP on `modelo-sandbox` a manual registration via API is required.
Pre-requisites for Manual registration:
* Valid OBWAC / OBSEAL certificates
* PIS registration details for` modelo-sandbox`
You can use existing PIS registration details for this institution to gain VRP sweeping access. The registration details can be found on the Yapily Console for the given application. If a new registration is required (e.g. if you are using a new redirectUri for VRP and it is not covered in the existing registration) then you can perform a DCR request using the steps outlined in `Live Environment`. The existing or new registration credentials from the Yapily Console will be used in the steps below.
### Steps Required for Manual registration
1. Upload the signing (OBSEAL) and transport (OBWAC) certificates if not already present
You can check if the certificate is present already by navigating to the Console -> Certificates. If absent please upload the certificate.
Once confirmed, we need the UUID of the certificate which can be found in the Console -> Certificates -> Certificate; the UUID will appear in the browser URL bar as follows:
`https://console.yapily.com/certificates/`
Save the `UUID` and remember for which kind of key it corresponds to:
e.g. `SIGNING_KEY_UUID = d16f87d3-4222-4173-b8b9-44aeccacae7d`
Once you have done it for the signing key, repeat the process for your transport certificate.
2. Call the manual registration endpoint
The final step is to call the manual registration endpoint with the certificate UUIDs and credentials from your application created on the portal.
The `apiTypes` field in the example has both types but if the registration in question grants PIS access only then only provide `PISP`.
If a custom redirect URI (not Yapily's) is used for the registration then you can provide it in the `redirectUri` field.
The `clientId` field corresponds to the `key` field on the Yapily Console.
Request
```shell theme={null}
curl --location --request POST 'https://api.yapily.com/institutions/modelo-sandbox/manual/register' \
--header 'Content-Type: application/json' \
--header 'Authorization: Basic ...' \
--data-raw '{
"signingKeyID": "$SIGNING_KEY_UUID",
"transportKeyID": "$TRANSPORT_KEY_UUID",
"clientId": "$CLIENT_ID",
"softwareStatementId": "$SSA_ID",
"organisationId": "$ORGANISATION_ID",
"apiTypes" : ["AISP", "PISP"],
"redirectUri" : ""
}'
```
Response
```shell theme={null}
{
"id": "a0460a91-4b4c-422a-bbe6-bebe0b92e308"
}
```
This is the Yapily registration `id` which can be used to Get, Modify, Delete the registration.
## Sandbox Environment
To connect to the Modelo Sandbox, select Modelo Sandbox from the pre-configured institutions.
Or if you like to register with your own credentials, please follow the steps below:
The Ozone is a mock of an ASPSP registered to the Open Banking Sandbox directory.
In order to access this mock sandbox financial institution, you have to enrol with the Open Banking institution as a TPP.
Please see [Modelo Sandbox Credentials](/resources/sandbox/sandbox-credentials#modelo-sandbox)
## Support
If you require technical support with certificate management, please contact [Support](/resources/support).
# Monzo Bank
Source: https://docs.yapily.com/institution-configurations/uk/Monzo-Bank
## Links
* [Developer Portal](https://developers.monzo.com/)
## Scopes
* Open Data 🌐
* Account Information 🔒
* Payment Initiation 🔒
## Live Environment
**Precondition**: To connect to live Open Banking entities, whether you are accessing account information or initiating payments, your business must have the right regulatory permissions as per the [Open Banking Guide](/tools-and-services/open-banking/enrolment-guide).
1. Upload your transport and signing certificates (PEMs) created in the Open Banking directory, along with the keys into Yapily's [certificate vault](https://console.yapily.com/certificates).
2. Add **Monzo** from the **Live** tab to your Dashboard application and add your `Signing key Id`, which can be obtained from the Open Banking Directory.
3. Select your Open Banking transport and signing certificates from the relevant drop-downs lists then click *Next*.
4. **Click to register** to auto-register with the bank. If registration is successful, the key and secret will be populated from the institution's response.
5. Make sure to click *Save* in order not to lose these credentials, as a further registration attempt with the same Open Banking software statement is likely to fail.
## Support
If you require technical support with certificate management, please contact [Support](/resources/support).
# Nationwide
Source: https://docs.yapily.com/institution-configurations/uk/Nationwide
## Links
* [Developer Portal](https://www.nationwide.co.uk/developer)
## Scopes
* Open Data 🌐
* Account Information 🔒
* Payment Initiation 🔒
* VRP 🔒
## Live Environment
**Precondition**: To connect to live Open Banking entities, whether you are accessing account information or initiating payments, your business must have the right regulatory permissions as per the [Open Banking Guide](/tools-and-services/open-banking/enrolment-guide).
1. Upload your transport and signing certificates (PEMs) created in the Open Banking directory, along with the keys into Yapily's [certificate vault](https://console.yapily.com/#!certificates).
2. Add **Nationwide** from the **Live** tab to your Dashboard application and add your `Signing key Id`, which can be obtained from the Open Banking Directory.
3. Select your Open Banking transport and signing certificates from the relevant drop-downs lists then click *Next*.
4. **Click to register** to auto-register with the bank. If registration is successful, the key and secret will be populated from the institution's response.
5. Make sure to click *Save* in order not to lose these credentials, as a further registration attempt with the same Open Banking software statement is likely to fail.
## VRP Sweeping Access
In order to access the VRP endpoints we have to grant your Yapily application additional scopes. If you do not have these scopes then please contact your customer success manager to get them added.
The following steps are not intended for Yapily Connect customers.
Precondition: To use VRP on `nationwide` a manual registration via API is required.
Pre-requisites for Manual registration:
* Valid OBWAC / OBSEAL certificates
* PIS registration details for `nationwide`
You can use existing PIS registration details for this institution to gain VRP sweeping access. The registration details can be found on the Yapily Console for the given application. If a new registration is required (e.g. if you are using a new redirectUri for VRP and it is not covered in the existing registration) then you can perform a DCR request using the steps outlined in `Live Environment`. The existing or new registration credentials from the Yapily Console will be used in the steps below.
### Steps Required for Manual registration
1. Upload the signing (OBSEAL) and transport (OBWAC) certificates if not already present
You can check if the certificate is present already by navigating to the Console -> Certificates. If absent please upload the certificate.
Once confirmed, we need the UUID of the certificate which can be found in the Console -> Certificates -> Certificate; the UUID will appear in the browser URL bar as follows:
`https://console.yapily.com/certificates/`
Save the `UUID` and remember for which kind of key it corresponds to:
e.g. `SIGNING_KEY_UUID = d16f87d3-4222-4173-b8b9-44aeccacae7d`
Once you have done it for the signing key, repeat the process for your transport certificate.
2. Call the manual registration endpoint
The final step is to call the manual registration endpoint with the certificate UUIDs and credentials from your application created on the portal.
The `apiTypes` field in the example has both types but if the registration in question grants PIS access only then only provide `PISP`.
If a custom redirect URI (not Yapily's) is used for the registration then you can provide it in the `redirectUri` field.
The `clientId` field corresponds to the `key` field on the Yapily Console.
Request
```shell theme={null}
curl --location --request POST 'https://api.yapily.com/institutions/nationwide/manual/register' \
--header 'Content-Type: application/json' \
--header 'Authorization: Basic ...' \
--data-raw '{
"signingKeyID": "$SIGNING_KEY_UUID",
"transportKeyID": "$TRANSPORT_KEY_UUID",
"clientId": "$CLIENT_ID",
"softwareStatementId": "$SSA_ID",
"organisationId": "$ORGANISATION_ID",
"apiTypes" : ["AISP", "PISP"],
"redirectUri" : ""
}'
```
Response
```shell theme={null}
{
"id": "a0460a91-4b4c-422a-bbe6-bebe0b92e308"
}
```
This is the Yapily registration `id` which can be used to Get, Modify, Delete the registration.
## Support
If you require technical support with certificate management, please contact [Support](/resources/support).
# Natwest
Source: https://docs.yapily.com/institution-configurations/uk/Natwest
## Links
* [Developer Portal](https://www.bankofapis.com/)
## Scopes
* Open Data 🌐
* Account Information 🔒
* Payment Initiation 🔒
## Institutions
* `natwest`
* `natwest-sandbox`
* `natwestbusiness`
* `natwest-clearspend`
* `natwest-sandbox-vrp`
## Live Environment
If you have completed the steps below for any of the other institutions in Natwest Group (`rbs`, `rbsbusiness`, `ulsterbank_uk`) then you can use their existing registration credentials and manually copy them on the Yapily Console.
**Precondition**: To connect to live Open Banking entities, whether you are accessing account information or initiating payments, your business must have the right regulatory permissions as per the [Open Banking Guide](/tools-and-services/open-banking/enrolment-guide).
1. Upload the certificates & keys (transport, signing) from Open Banking into Yapily's [certificate vault](https://console.yapily.com/certificates)
2. Add one of the institutions from the above list into your dashboard [app](https://console.yapily.com/applications) and configure the institution by adding `Signing Key ID` from Open Banking & selecting the `certificates` from the drop-down. Then *press next*
3. `Click to register` to auto-register to the bank via Yapily and auto-populate the key & secret; *press save*
## Sandbox Environment
To connect to the Natwest Sandbox, select **Natwest Sandbox** from the pre-configured institutions.
Or if you like to register with your own credentials, please follow the steps below:
**Steps:**
1. Register on the [Natwest developer portal](https://developer.natwest.useinfinite.io/).
2. Select your teams and enter your open banking organisation ID.
3. Please create the application on the portal using client-secret authentication and assign any redirect URLS that are needed. If you require access to VRP then you need to make sure your natwest portal application has the VRP product assigned.
After creating your application, you can now copy the credentials from the institution portal to the Yapily Console.
[Test Account Credentials](/resources/sandbox/sandbox-credentials)
## VRP Sweeping Access
In order to access the VRP endpoints we have to grant your Yapily application additional scopes. If you do not have these scopes then please contact your customer success manager to get them added.
The following steps are not intended for Yapily Connect customers.
You don't need to follow the below steps to access the **sweeping** feature for `natwest-sandbox-vrp` - the registration on Yapily Console will grant access.
Precondition: To use VRP on `natwest` a manual registration via API is required.
Pre-requisites for Manual registration:
* Valid OBWAC / OBSEAL certificates
* PIS registration credentials for `natwest`
You can use existing PIS registration details for this institution to gain VRP sweeping access. The registration details can be found on the Yapily Console for the given application. If a new registration is required (e.g. if you are using a new redirectUri for VRP and it is not covered in the existing registration) then you can perform a DCR request using the steps outlined in `Live Environment`. The existing or new registration credentials from the Yapily Console will be used in the steps below.
### Steps Required for Manual registration
1. Upload the signing (OBSEAL) and transport (OBWAC) certificates if not already present.
You can check if the certificate is present already by navigating to the Console -> Certificates. If absent please upload the certificate.
Once confirmed, we need the UUID of the certificate which can be found in the Console -> Certificates -> Certificate; the UUID will appear in the browser URL bar as follows:
`https://console.yapily.com/certificates/`
Save the `UUID` and remember for which kind of key it corresponds to:
e.g. `SIGNING_KEY_UUID = d16f87d3-4222-4173-b8b9-44aeccacae7d`
Once you have done it for the signing key, repeat the process for your transport certificate.
2. Call the manual registration endpoint
The final step is to call the manual registration endpoint with the certificate UUIDs and credentials from your PIS registration.
The `apiTypes` field in the example has both types but if the registration in question grants PIS access only then only provide `PISP`.
If a custom redirect URI (not Yapily's) is used for the registration then you can provide it in the `redirectUri` field.
The `clientId` field corresponds to the `key` field on the Yapily Console.
Request
```shell theme={null}
curl --location --request POST 'https://api.yapily.com/institutions/natwest/manual/register' \
--header 'Content-Type: application/json' \
--header 'Authorization: Basic ...' \
--data-raw '{
"signingKeyID": "$SIGNING_KEY_UUID",
"transportKeyID": "$TRANSPORT_KEY_UUID",
"clientId": "$CLIENT_ID",
"softwareStatementId": "$SSA_ID",
"organisationId": "$ORGANISATION_ID",
"apiTypes" : ["AISP", "PISP"],
"redirectUri" : ""
}'
```
Response
```shell theme={null}
{
"id": "a0460a91-4b4c-422a-bbe6-bebe0b92e308"
}
```
This is the Yapily registration `id` which can be used to Get, Modify, Delete the registration.
## Payments
### Bulk Payments
* Domestic and Scheduled payments are supported
* Maximum 15 payments per request
* The payments should be of the same type in a request
* Only accepts bulk payments where all creditors are trusted beneficiaries
## Support
If you require technical support with certificate management, please contact [Support](/resources/support).
# PayPal
Source: https://docs.yapily.com/institution-configurations/uk/PayPal
## Links
* [Developer Portal](https://developer.paypal.com/)
## Scopes
* Open Data 🌐
* Account Information 🔒
## Live Environment
**Precondition**: To connect to live Open Banking entities, whether you are accessing account information or initiating payments, your business must have the right regulatory permissions as per the [Open Banking Guide](/tools-and-services/open-banking/enrolment-guide).
1. [Register a new account](https://www.paypal.com/partnerexp/tppLanding) on the platform
2. Add the *Client ID* as **Key** and *Client Secret* as **Secret** to your application in the [Yapily Console](https://console.yapily.com/)
**Note:**
* Can only access up to the last 90 days for Transactions.
* This is subject to change due Paypal improvements of their API.
## Support
If you require technical support with certificate management, please contact [Support](/resources/support).
## Sandbox Environment
1. [Register a new account](https://www.sandbox.paypal.com/partnerexp/tppLanding) on the platform
2. Add the *Client ID* as **Key** and *Client Secret* as **Secret** to your application in the [Yapily Console](https://console.yapily.com/)
# Payoneer
Source: https://docs.yapily.com/institution-configurations/uk/Payoneer
## Links
* [Developer Portal](https://developer.payoneer.com/psd2/)
## Scopes
* Account Information 🔒
## Live Environment
### Payoneer (For UK-only registrations)
**Precondition**: To connect to Payoneer - UK, an application needs to be created with the bank. Registration with the bank is a manual process; email with details of TPP authorisation needs to be sent to Payoneer - UK, requesting registration for Payoneer - UK.
1. Upload your OBWAC (Transport) and OBSEAL (Signing) certificates created in the Open Banking directory, along with the private keys into Yapily's [certificate vault](https://console.yapily.com/#!certificates).
2. Navigate to your application's **Connected Institutions** tab and click **Add institutions**.
3. Add **Payoneer - UK** from the **Live** tab to your Dashboard application and add your `Signing key Id`, which can be obtained from the Open Banking Directory.
4. In your application's **Not registered** tab, you should now see **payoneer\_uk**. Click on **Register**.
5. Select the certificates you uploaded in Step 1, and fill in the rest of the form with credentials obtained from the bank in **Prerequisite** step.
6. Click **Save Registration**.
### Payoneer (For EU accounts)
**Precondition**: To connect to Payoneer - EU, an application needs to be created with the bank. Registration with the bank is a manual process; email with details of TPP authorisation needs to be sent to Payoneer - EU, requesting registration for Payoneer - EU.
1. Upload your QWAC (Transport) and QSEAL (Signing) certificates created in the Open Banking directory, along with the private keys into Yapily's [certificate vault](https://console.yapily.com/#!certificates).
2. Navigate to your application's **Connected Institutions** tab and click **Add institutions**.
3. Add **Payoneer - EU** from the **Live** tab to your Dashboard application and add your `Signing key Id`, which can be obtained from the Open Banking Directory.
4. In your application's **Not registered** tab, you should now see **payoneer**. Click on **Register**.
5. Select the certificates you uploaded in Step 1, and fill in the rest of the form with credentials obtained from the bank in **Prerequisite** step.
6. Click **Save Registration**.
## Sandbox Environment
Not available at the moment.
## Support
If you require technical support with certificate management, please contact [Support](/resources/support).
# Revolut
Source: https://docs.yapily.com/institution-configurations/uk/Revolut
## Links
* [Developer Portal](https://developers.revolut.com/)
## Scopes
* Account Information 🔒
* Payment Initiation 🔒
## Live Environment
### Retail + Business Accounts
#### Revolut (For UK-only registrations)
**Precondition**: To connect to live Open Banking entities, whether you are accessing account information or initiating payments, your business must have the right regulatory permissions and go through the process to obtain Open Banking Certificates as per the [UK Prerequisites](/getting-started/integration-setup/registration).
1. [Upload your ***OB WAC*** (transport) and ***OB SEAL*** (signing) certificates (PEMs) created in the Open Banking directory](/getting-started/integration-setup/registration), along with the keys into Yapily's [certificate vault](https://console.yapily.com/certificates).
2. Add **Revolut** to your Dashboard application and add your `Organisation Id`, `Software Statement Id`, `Signing key Id` which can be obtained from the Open Banking Directory
3. Select your ***OB WAC*** (transport) and ***OB SEAL*** (signing) from the relevant drop-downs lists then click *Next*.
4. Login/register at [https://developers.revolut.com/apps](https://developers.revolut.com/apps) and add your Open Banking Organisation ID to your 'Profile'.
5. **Click to register** to auto-register with the bank. If registration is successful, the `key` and `secret` will be populated from the institution's response.
6. Make sure to click *Save* in order to preserve these credentials, as a further registration attempt with the same Open Banking software statement is likely to fail.
#### Revolut EU (For EU accounts)
**Precondition**: To connect to live Open Banking institutions, whether you are accessing account information or initiating payments, your business must have the right regulatory permissions and go through the process to obtain eIDAS Certificates as per the [European Prerequisites](/getting-started/integration-setup/registration).
1. En-roll with [Open Banking Directory](/getting-started/integration-setup/registration) if not already done
2. Ensure you have and [select the entity in the Open Banking directory](/getting-started/integration-setup/registration) for your **European** AISP/PISP (You may need to request this to be done, or access from the Primary Technical Contact in the Open Banking Directory)
3. Upload your [eIDAS certificates to the Open Banking Directory](/getting-started/integration-setup/registration) - this is your **QWAC** (transport) and your **QSEAL** (signing) files
4. Create [a new software statement](/getting-started/integration-setup/registration) in the Open Banking Directory
5. Assign [your eIDAS certificates to the software statement](/getting-started/integration-setup/registration) in the Open Banking Directory
6. [Upload your **Q\_WAC\_** (transport) and **Q\_SEAL\_** (signing) certificates (PEMs) issued by your QTSP](/getting-started/integration-setup/registration), along with the keys into Yapily's [certificate vault](https://console.yapily.com/certificates).
7. Add **Revolut** to your Dashboard application and supply your `Organisation Id`, `Software Statement Id`, `Signing key Id` which can be obtained from the Open Banking Directory.
8. Login/register at [https://developers.revolut.com/apps](https://developers.revolut.com/apps) and add your Open Banking Organisation ID to your 'Profile'.
9. **Click to register** to auto-register with the bank. If registration is successful, the `key` and `secret` will be populated from the institution's response.
10. Make sure to click *Save* in order to preserve these credentials, as a further registration attempt with the same Open Banking software statement is likely to fail.
**Note**: It is possible to use a self-signed software statement to register Revolut instead of the one issued by Open Banking Directory **for EU registrations with eIDAS** certificates however, Yapily will not be able to support customers who choose to register with Revolut in this way. See the following [guide](https://developer.revolut.com/docs/build-banking-apps/register-your-application-using-dcr/register-your-application-using-dcr) from Revolut for more information.
## Sandbox Environment
### Retail + Business Accounts
To connect to the Revolut sandbox, follow the above steps while selecting **Revolut** from the **sandbox** tab in step 2. The institution Id for this is `revolut-sandbox`.
## Payments
### Payment Types
#### DOMESTIC PAYMENTS
The following scenarios will require you to initiate a Yapily payment with the `paymentType` as a `DOMESTIC_PAYMENT`:
* Revolut EUR Pocket → Revolut EUR Pocket
* Revolut GBP Pocket → Non-Revolut UK GBP Account
#### INTERNATIONAL PAYMENTS
The following scenarios will require you to initiate a Yapily payment with the `paymentType` as an `INTERNATIONAL_PAYMENT`:
* Revolut EUR Pocket → Italian EUR Account (We use `INTERNATIONAL_PAYMENT` because it is dependent on whether the bank supports SEPA or not)
* Revolut EUR Pocket → UK GBP Account
* Revolut Account → any other currency account (non EUR and non GBP)
When making a payment, if you use `EUR` as the currency you wish to pay for then the payee account identification needs to be `IBAN` e.g.
The payment authorisation request body for a DOMESTIC PAYMENT in Euros:
```json theme={null}
{
"applicationUserId": "Yapily Italy Payment",
"institutionId": "revolut",
"paymentRequest": {
"paymentIdempotencyId": "e8de92dfb82f46948db502abdbe3452",
"amount": {
"amount": "0.10",
"currency": "EUR"
},
"reference": "Yapily Test",
"type": "DOMESTIC_PAYMENT",
"payee": {
"name": "Joao Martins",
"address": {
"country": "GB"
},
"accountIdentifications": [
{
"type": "IBAN",
"identification": "GB19 REVO 0099 7071 1390 49"
}
]
}
}
}
```
## Support
If you require technical support with certificate management, please contact [Support](/resources/support).
# Royal Bank of Scotland
Source: https://docs.yapily.com/institution-configurations/uk/Royal-Bank-of-Scotland
## Links
* [Developer Portal](https://www.bankofapis.com/)
## Scopes
* Open Data 🌐
* Account Information 🔒
* Payment Initiation 🔒
* VRP 🔒
## Institutions
* `rbs`
* `rbs-sandbox`
* `rbsbusiness`
* `rbs-clearspend`
* `rbsinternational-clearspend`
## Live Environment
If you have completed the steps below for any of the other institutions in Natwest Group (`natwest`, `natwestbusiness`, `ulsterbank_uk`) then you can use their existing registration credentials and manually copy them on the Yapily Console for all RBS institutions listed above (excluding the sandbox).
**Precondition**: To connect to live Open Banking entities, whether you are accessing account information or initiating payments, your business must have the right regulatory permissions as per the [Open Banking Guide](/tools-and-services/open-banking/enrolment-guide).
1. Upload your transport and signing certificates (PEMs) created in the Open Banking directory, along with the keys into Yapily's [certificate vault](https://console.yapily.com/#!certificates).
2. Add one of the institutions from the above list from the **Live** tab to your Dashboard application and add your `Signing key Id`, which can be obtained from the Open Banking Directory.
3. Select your Open Banking transport and signing certificates from the relevant drop-downs lists then click *Next*.
4. **Click to register** to auto-register with the bank. If registration is successful, the key and secret will be populated from the institution's response.
5. Make sure to click *Save* in order not to lose these credentials, as a further registration attempt with the same Open Banking software statement is likely to fail.
## Payments
### Bulk Payments
* Domestic and Scheduled payments are supported
* Maximum 15 payments per request
* The payments should be of the same type in a request
* RBS only accepts bulk payments where all the creditors are trusted beneficiaries
## VRP Sweeping Access
In order to access the VRP endpoints we have to grant your Yapily application additional scopes. If you do not have these scopes then please contact your customer success manager to get them added.
The following steps are not intended for Yapily Connect customers.
Precondition: To use VRP on `rbs` a manual registration via API is required.
Pre-requisites for Manual registration:
* Valid OBWAC / OBSEAL certificates
* PIS registration details for `rbs`
You can use existing PIS registration details for this institution to gain VRP sweeping access. The registration details can be found on the Yapily Console for the given application. If a new registration is required (e.g. if you are using a new redirectUri for VRP and it is not covered in the existing registration) then you can perform a DCR request using the steps outlined in `Live Environment`. The existing or new registration credentials from the Yapily Console will be used in the steps below.
### Steps Required for Manual registration
1. Upload the signing (OBSEAL) and transport (OBWAC) certificates if not already present
You can check if the certificate is present already by navigating to the Console -> Certificates. If absent please upload the certificate.
Once confirmed, we need the UUID of the certificate which can be found in the Console -> Certificates -> Certificate; the UUID will appear in the browser URL bar as follows:
`https://console.yapily.com/certificates/`
Save the `UUID` and remember for which kind of key it corresponds to:
e.g. `SIGNING_KEY_UUID = d16f87d3-4222-4173-b8b9-44aeccacae7d`
Once you have done it for the signing key, repeat the process for your transport certificate.
2. Call the manual registration endpoint
The final step is to call the manual registration endpoint with the certificate UUIDs and credentials from your application created on the portal.
The `apiTypes` field in the example has both types but if the registration in question grants PIS access only then only provide `PISP`.
If a custom redirect URI (not Yapily's) is used for the registration then you can provide it in the `redirectUri` field.
The `clientId` field corresponds to the `key` field on the Yapily Console.
Request
```shell theme={null}
curl --location --request POST 'https://api.yapily.com/institutions/rbs/manual/register' \
--header 'Content-Type: application/json' \
--header 'Authorization: Basic ...' \
--data-raw '{
"signingKeyID": "$SIGNING_KEY_UUID",
"transportKeyID": "$TRANSPORT_KEY_UUID",
"clientId": "$CLIENT_ID",
"softwareStatementId": "$SSA_ID",
"organisationId": "$ORGANISATION_ID",
"apiTypes" : ["AISP", "PISP"],
"redirectUri" : ""
}'
```
Response
```shell theme={null}
{
"id": "a0460a91-4b4c-422a-bbe6-bebe0b92e308"
}
```
This is the Yapily registration `id` which can be used to Get, Modify, Delete the registration.
## Sandbox Environment
To connect to the Royal Bank of Scotland Sandbox, select **Royal Bank of Scotland Sandbox** from the pre-configured institutions.
Or if you like to register with your own credentials, please follow the steps below:
### Prerequisite
1. Register on the [RBS developer portal](https://developer.rbs.useinfinite.io/).
2. Select your teams and enter your open banking organisation ID.
After entering your open banking organisation ID, you can now follow the same steps above of the live environment.
[Test Account Credentials](/resources/sandbox/overview#rbs-group-sandboxes)
## Support
If you require technical support with certificate management, please contact [Support](/resources/support).
# Sainsburys Bank
Source: https://docs.yapily.com/institution-configurations/uk/Sainsburys-Bank
## Links
* [Developer Portal](https://developer.sainsburysbank.co.uk/overview)
## Scopes
* Account Information 🔒
## Live Environment
**Precondition**: To connect to live Open Banking entities, whether you are accessing account information or initiating payments, your business must have the right regulatory permissions as per the [Open Banking Guide](/tools-and-services/open-banking/enrolment-guide).
1. Upload the certificates & keys (transport, signing) from Open Banking into [Yapily's certificate vault](https://console.yapily.com/certificates)
2. Add **Sainsbury's Bank** institution into your dashboard [app](https://console.yapily.com/applications) and configure the institution by adding `Signing Key ID` from Open Banking & selecting the `certificates` from the drop-down. Then *press next*
3. `Click to register` to auto-register to the bank via Yapily and auto-populate the key & secret; *press save*
## Support
If you require technical support with certificate management, please contact [Support](/resources/support).
## Sandbox Environment
To connect to the Sainsbury's Bank Sandbox, select **Sainsbury's Bank** from the pre-configured institutions.
Or if you like to register with your own credentials, please follow the steps above.
[Test Account Credentials](/resources/sandbox/sandbox-credentials)
# Santander Bank
Source: https://docs.yapily.com/institution-configurations/uk/Santander-Bank
## Links
* [Developer Portal](https://developer.santander.co.uk/sanuk/external)
## Scopes
* Open Data 🌐
* Account Information 🔒
* Payment Initiation 🔒
* VRP 🔒
## Institutions
* santander-personal\_uk
* santander-business\_uk
* santander-corporate\_uk
## Live Environment
**Precondition**: To connect to live Open Banking entities, whether you are accessing account information or initiating payments, your business must have the right regulatory permissions as per the [Open Banking Guide](/tools-and-services/open-banking/enrolment-guide).
1. Upload your transport and signing certificates (PEMs) created in the Open Banking directory, along with the keys into Yapily's [certificate vault](https://console.yapily.com/certificates).
2. Add **Santander** from the **Live** tab to your Dashboard application and add your `Signing key Id`, which can be obtained from the Open Banking Directory.
3. Select your Open Banking transport and signing certificates from the relevant drop-downs lists then click *Next*.
4. Click the 'download the SSA' button to download your Software Statement Assertion from the Open Banking Directory. This is the token that the Open Banking UK institutions will use during registration to verify your enrolment and possibly create your application.
5. Log in to [Santander's developer portal](https://developer.santander.co.uk/sanuk/external/ibm_apim/oidc/openbanking) using Open Banking SSO
6. Create a new production app using the downloaded SSA. Set the appropriate organisation role.
7. Copy the credentials for this app from the Santander developer portal into the credentials view for Santander in the Yapily dashboard. Add the obtained *`Client ID`* as **Key** and the *`Client secret`* as **Secret**. Click 'Next' to save.
## VRP Sweeping Access
In order to access the VRP endpoints we have to grant your Yapily application additional scopes. If you do not have these scopes then please contact your customer success manager to get them added.
The following steps are not intended for Yapily Connect customers.
Precondition: To use VRP on any of the listed Santander institutions, a manual registration via API is required.
Pre-requisites for Manual registration:
* Valid OBWAC / OBSEAL certificates
* PIS registration details for the intended Santander institution
You can use existing PIS registration details for this institution to gain VRP sweeping access. The registration details can be found on the Yapily Console for the given application. If a new registration is required (e.g. if you are using a new redirectUri for VRP and it is not covered in the existing registration) then you will have to manage your applications on the institution developer portal. Ensure that the application is subscribed to the latest API version on the institution portal. The existing or new registration credentials from the Yapily Console will be used in the steps below.
### Steps Required for Manual registration
1. Upload the signing (OBSEAL) and transport (OBWAC) certificates if not already present
You can check if the certificate is present already by navigating to the Console -> Certificates. If absent please upload the certificate.
Once confirmed, we need the UUID of the certificate which can be found in the Console -> Certificates -> Certificate; the UUID will appear in the browser URL bar as follows:
`https://console.yapily.com/certificates/`
Save the `UUID` and remember for which kind of key it corresponds to:
e.g. `SIGNING_KEY_UUID = d16f87d3-4222-4173-b8b9-44aeccacae7d`
Once you have done it for the signing key, repeat the process for your transport certificate.
2. Call the manual registration endpoint
The final step is to call the manual registration endpoint with the certificate UUIDs and credentials from your application created on the portal.
The `apiTypes` field in the example has both types but if the registration in question grants PIS access only then only provide `PISP`.
If a custom redirect URI (not Yapily's) is used for the registration then you can provide it in the `redirectUri` field.
The `clientId` field corresponds to the `key` field on the Yapily Console.
The `clientSecret` corresponds to the `secret` field on the Yapily Console.
Request
```shell theme={null}
curl --location --request POST 'https://api.yapily.com/institutions/santander-personal_uk/manual/register' \
--header 'Content-Type: application/json' \
--header 'Authorization: Basic ...' \
--data-raw '{
"signingKeyID": "$SIGNING_KEY_UUID",
"transportKeyID": "$TRANSPORT_KEY_UUID",
"clientId": "$CLIENT_ID",
"clientSecret" : "$OPTIONAL_CLIENT_SECRET",
"softwareStatementId": "$SSA_ID",
"organisationId": "$ORGANISATION_ID",
"apiTypes" : ["AISP", "PISP"],
"redirectUri" : ""
}'
```
Response
```shell theme={null}
{
"id": "a0460a91-4b4c-422a-bbe6-bebe0b92e308"
}
```
This is the Yapily registration `id` which can be used to Get, Modify, Delete the registration.
## Payments
### Bulk Payments
* Domestic and Scheduled payments are supported
* Maximum 3500 payments per request
* For every payment the same payer must be specified
* Only accepts bulk payments where all creditors are trusted beneficiaries
## Support
If you require technical support with certificate management, please contact [Support](/resources/support).
# Silicon Valley Bank
Source: https://docs.yapily.com/institution-configurations/uk/Silicon-Valley-Bank
## Links
[https://developer.svb.com](https://developer.svb.com/)
## Scopes
* Account Information🔒
* Payment Initiation🔒
## Supported ASPSPs
| ASPSP | Link | Supported | Institution ID |
| ----------------------------------- | ------------------------------------------------------ | --------- | ---------------------------------------------------- |
| Silicon Valley Bank and its Sandbox | [https://developer.svb.com](https://developer.svb.com) | Yes | `siliconvalleybank`
`siliconvalleybank-sandbox` |
## Registration Process
Silicon Valley Bank Supports Dynamic Registration for the above institutions. See the below onboarding section.
## Accounts and Payments Supported
### Accounts
* accounts
* balance
* transactions
### Payments
* Domestic Single Payments
* Domestic Scheduled Payments
* Domestic Periodic Payments
* Bulk Payments
* International Single Payments
## Onboarding ASPSP's to Yapily Application
### **LIVE & SANDBOX:**
**Precondition**: To connect to Live and Sandbox Silicon Valley Bank institutions a dynamic registration request (DCR) is needed.
**Pre-requisites for registration:**
* Valid OBWAC / OBSEAL certificates
* SSA (downloaded from OBIE directory) - ***Optional***
### Steps Required for registration
1. **Download your SSA from the OBIE directory if you desire (optional - see step 3.)**
Open the OBIE Directory for your organisation, navigate to the SSA you want to use for the registration and generate the SSA. The downloaded SSA has to be passed as is to the registration endpoint; **do not alter the contents or format**.
2. Upload the signing (OBSEAL) and transport (OBWAC) certificates into V2 services
**Request**
```shell theme={null}
curl --location --request POST 'https://api.yapily.com/certificates/keys/' \
--header 'Authorization: Basic YOUR_APPLICATION_CREDENTIALS_AS_BASIC_AUTH' \
--header 'Content-Type: application/json' \
--data-raw '[{
"pem": "$YOUR_PUBLIC_KEY_AS_PEM",
"key": "$YOUR_PRIVATE_KEY",
"kid" : "$CERT_KID",
"name" : "$CERTIFICATE_NAME"
}]'
```
**Response**
```json theme={null}
{
"id": "d16f87d3-4222-4173-b8b9-44aeccacae7d",
....
}
```
Save the id and remember for which kind of key it corresponds:
e.g. `SIGNING_KEY_UUID = d16f87d3-4222-4173-b8b9-44aeccacae7d`
Once you have done it for the signing key, do the same request for your transport key.
## Support
If you require technical support with certificate management, please contact [Support](/resources/support).
3. **Call the registration endpoint**
The final step is to call the registration endpoint with the certificate UUIDs and the downloaded SSA if manually supplying:
**Request**
Do not alter the downloaded SSA. Pass directly to the register endpoint in its JWS format.
```shell theme={null}
curl --location --request POST 'https://api.yapily.com/institutions/siliconvalleybank/register' \
--header 'Content-Type: application/json' \
--header 'Authorization: Bearer YOUR_APPLICATION_CREDENTIALS_AS_BASIC_AUTH' \
--data-raw '{
"signingKeyID": "$SIGNING_KEY_UUID",
"transportKeyID": "$TRANSPORT_KEY_UUID",
"apiTypes": ["AISP","PISP"],
"ssa": "$DOWNLOADED_SSA"
}'
```
If you are not manually supplying the SSA, then you will need to add two additional request body parameters; `softwareStatementId` and `organisationId` - these must match the JWKS URL that corresponds to your OB certificates :
```shell theme={null}
curl --location --request POST 'https://api.yapily.com/institutions/siliconvalleybank/register' \
--header 'Content-Type: application/json' \
--header 'Authorization: Bearer YOUR_APPLICATION_CREDENTIALS_AS_BASIC_AUTH' \
--data-raw '{
"signingKeyID": "$SIGNING_KEY_UUID",
"transportKeyID": "$TRANSPORT_KEY_UUID",
"apiTypes": ["AISP","PISP"],
"softwareStatementId : "N7i....",
"organisationId : "14000...."
}'
```
**Response**
```json theme={null}
{
"id": "a0460a91-4b4c-422a-bbe6-bebe0b92e308"
}
```
Note above ID, this will be the clientId which can be further used to Get, Modify, Delete registrations with Yapily
## Support
If you require technical support with certificate management, please contact [Support](/resources/support).
# Soldo Bank
Source: https://docs.yapily.com/institution-configurations/uk/Soldo-Bank
## Links
* [Developer Portal](https://soldo.dashboard.token.io/signin)
## Institutions
* Soldo Uk
* Soldo Uk Sandbox
* Soldo Ireland
* Soldo Ireland Sandbox
## Scopes
* Account Information 🔒
* Accounts
* Account Balances
* Account Transactions
## Preconditions
* Access to the Soldo Sandbox environment must be requested and granted **before** requesting access to the Soldo Production environment
* Soldo Sandbox environment requires manual registration with the [Soldo Token Sandbox Dashboard](https://soldo.dashboard.sandbox.token.io/signin)
* Soldo Production environment requires manual registration with the [Soldo Token Production Dashboard](https://soldo.dashboard.token.io/signin)
* Both Sandbox and Production access requires active eIDAS Certificates
## Sandbox Environment
1. Create an account on the [Soldo Sandbox Token Dashboard](https://soldo.dashboard.sandbox.token.io/signin).
2. Upload your *Live* eIDAS transport and signing certificates (PEMs) on the Soldo Sandbox Token Dashboard.
3. Your dashboard should now show that your access permissions are under review. Once approved, you will be able to select `Go Live` to request production access.
## Live Environment
1. From the [Soldo Sandbox Token Dashboard](https://soldo.dashboard.sandbox.token.io/signin), select `Go Live`. You will be prompted to log in or create an account for the [Soldo Production environment dashboard](https://soldo.dashboard.token.io/signin).
2. Upload your *Live* eIDAS transport and signing certificates (PEMs) on the Soldo Token Production Dashboard.
3. Once your certificates have been approved by Token, you will be granted a `Member ID` and `Alias`, found on the Soldo Token Dashboard under `Settings` -> `Member Information`. Following this, you will need to generate an API key, which can be done under `Settings` -> `Authentication Keys`. Save this key.
4. Add one of the *Soldo* banks from the *Live* tab on your Yapily Dashboard application then click **Next**.
5. Configure one of the *Soldo* banks by selecting the **edit icon**.
6. Add your *Soldo* `Member ID`, `Alias`, and `API Key` retrieved in step 3 above. Click **Save** to complete registration and preserve these credentials.
## Notes
* Support for Soldo is provided by Token via their [support desk](https://tokenio.atlassian.net/servicedesk/customer/portals).
* The Soldo Sandbox environment is inconsistent with the performance of the Soldo Production environment. Therefore, Yapily has elected not to support the sandbox environment. However, you must still register for the Soldo Sandbox environment in order to be granted access to the production environment, as outlined above.
* International payments are not available at this time.
## Support
If you require technical support with certificate management, please contact [Support](/resources/support).
# Starling Bank
Source: https://docs.yapily.com/institution-configurations/uk/Starling-Bank
## Links
* [Developer Portal](https://developer.starlingbank.com/)
## Custom API
starling, starling-sandbox
## Scopes
* Account Information 🔒
* Payment Initiation 🔒
### Live and Sandbox Environment (AIS)
1. [Register a new account](https://developer.starlingbank.com/signup) on the platform
2. [Create an application](https://developer.starlingbank.com/application/new)
1. Name your application
2. Give your application a description, homepage url and redirect url
3. Set the 'Redirect' to [https://auth.yapily.com/](https://auth.yapily.com/)
4. Submit
3. Take a note of your **Client ID** and **Client Secret**
4. Add the *Client ID* as **Key** and *Client Secret* as **Secret** to your application in the [Yapily Console](https://console.yapily.com/)
**Note**: to upgrade your application to **Live** please refer to the **Going Live** section of the [Get Started](https://developer.starlingbank.com/get-started)
### Live Personal Accounts (AIS Only)
1. [Register for a new Starling developer account](https://developer.starlingbank.com/signup) on their website
2. [Create a Starling application](https://developer.starlingbank.com/application/new)
1. Name your application
2. Give your application a description, homepage url and redirect url
3. Go to [Personal Access Token](https://developer.starlingbank.com/personal/list) tab and click on 'Connect Accounts'
4. Follow the instructions on the screen in order to connect your account
5. Go back to the [Personal Access](https://developer.starlingbank.com/personal/list) tab and click on 'Create Token' add a token name and select the following scopes: `account:read`, `balance:read`, `address:read`, `customer:read`, `transaction:read`
6. Copy the token and make a POST request to the Yapily API endpoint [http://api.yapily.com/users/\{user-uuid}/consents](http://api.yapily.com/users/%7Buser-uuid%7D/consents) to add the token to create a consent resource for your application user
3. Use the Yapily consent token to sign requests for users' [financial data](/data/overview)
### Live and Sandbox Environment (PISP)
1. [Register for a new Starling developer account](https://developer.starlingbank.com/signup) on their website
2. [Create a Starling application](https://developer.starlingbank.com/application/new)
1. Name your application
2. Give your application a description, homepage url and redirect url
3. Set the 'Redirect' to [https://auth.yapily.com/](https://auth.yapily.com/)
4. Add Logo to your application.(It is required if permission upgrade for an application is to be requested.)
5. Submit
3. Take a note of your **Client ID** and **Client Secret**.
4. Upload your KEYS:
1. Create two pairs of public/private keys (Please refer \[Generate Key Pair Section below]). One pair is used to sign the API request and other pair is used as a rotation key which is used to sign new key uploads.
2. Store the keys securely.
3. Upload the public key part of the signing key pair to your application in the [Starling Developer Portal](https://developer.starlingbank.com/application/list) and generate **Key Uid**.
4. Take a note of generated **Key Uid**.
5. Click next to upload the public key part of the rotation key pair.
6. The private key part of the signing key pair is to be uploaded in your application in the [Yapily Console](https://console.yapily.com/).
7. The private key part of the rotation key pair is to be used to sign the new public key (the key used to sign the API). This is required only when an old signing key is to be replaced with new one.
5. Add the *Client ID* as **Key**, *Client Secret* as **Secret**, *Key Uid* as **Signing Key id** and private key part of signing key pair as **Private key** to your application in the [Yapily Console](https://console.yapily.com/). The private key should either be:
1. A complete private key, across new lines and with headers and footers, such as -----BEGIN RSA PRIVATE KEY-----\` or
2. A single line for the whole body of the signature without headers and footers.
**Note**:
* To upgrade your application to **Live** please refer to the **Going Live** section of the [Get Started](https://developer.starlingbank.com/get-started)
* PISPs need to apply for a scope upgrade to have Payment Initiation Service permissions. They can apply upgrade via the [Starling Developer Portal - Partners](https://developer.starlingbank.com/partner).
1. Read the **Permission Upgrade Guide**
2. Click the **Upgrade permissions** button.
3. Select an application for which upgrade is required from the list. It will take you to the *Application Preview* page.
4. Click next to go to the *Permissions* page.
5. Select following permissions (or scopes) on the page: `account:read`, `balance:read`, `confirmation-of-funds:read`,address:read`, `payee:read`, `transaction:read`, `pay-local:read`, `mandate:read`, `standing-order:read`, `account-identifier:read`, `account-holder-name:read`, `account-holder-type:read`, `customer:read`, `customer:read`, `payee:create`, `pay-local:create`, `pay-local-once:create`, `pay-foreign:create`, `standing-order:create\`.
6. Next, select the regulated status of your company.
7. Download the **Partner Application Form**. Complete the form and upload it on the link provided on the same page.
8. Click Next and provide your company details and submit the request.
### Generate Key Pair
The key requirements for Starling are as follows:
* Keys must be either RSA or ECDSA keys.
* RSA keys should have a length of either 2048 or 4096.
* ECDSA keys should have a length of 256.
* RSA keys should not be SSH keys. All valid RSA key bodies will start with MII.
The above requirement can be met as follows:
OpenSSL - Generate ECDSA or RSA pair using either of the following code snippets
#### RSA:
1. Create a 2048 bit key pair:
`openssl genrsa -out private_signing.key.pem 2048`
`openssl genrsa -out private_rotation.key.pem 2048`
2. Extract public key
`openssl rsa -in private_signing.key.pem -out public_signing.key -pubout`
`openssl rsa -in private_rotation.key.pem -out public_rotation.key -pubout`
#### ECDSA:
1. Create a key pair:
`openssl ecparam -genkey -name prime256v1 -noout -out private_signing.key.pem`
`openssl ecparam -genkey -name prime256v1 -noout -out private_rotation.key.pem`
2. Extract public key
`openssl ecparam -in private_signing.key.pem -out public_signing.key -pubout`
`openssl ecparam -in private_rotation.key.pem -out public_rotation.key -pubout`
Java - Generate ECDSA or RSA pair using either of the following code snippets
#### RSA:
`KeyPairGenerator keyPairGenerator = KeyPairGenerator.getInstance("RSA");
keyPairGenerator.initialize(2048, new SecureRandom());
KeyPair signingKey = keyPairGenerator.generateKeyPair();`
`String publicSigningKey = new String(Base64.getEncoder().encode(signingKey.getPublic().getEncoded()));
String privateSigningKey = new String(Base64.getEncoder().encode(signingKey.getPrivate().getEncoded()));`
`KeyPair rotationKey = keyPairGenerator.generateKeyPair();`
`String publicRotationKey = new String(Base64.getEncoder().encode(rotationKey.getPublic().getEncoded()));
String privateRotationKey = new String(Base64.getEncoder().encode(rotationKey.getPrivate().getEncoded()));`
#### ECDSA:
`KeyPairGenerator keyPairGenerator = KeyPairGenerator.getInstance("EC");
keyPairGenerator.initialize(256);
KeyPair signingKey = keyPairGenerator.generateKeyPair();`
`String publicKey = new String(Base64.getEncoder().encode(signingKey.getPublic().getEncoded()));
String privateKey = new String(Base64.getEncoder().encode(signingKey.getPrivate().getEncoded()));`
`KeyPair rotationKey = keyPairGenerator.generateKeyPair();`
`String publicRotationKey = new String(Base64.getEncoder().encode(rotationKey.getPublic().getEncoded()));
String privateRotationKey = new String(Base64.getEncoder().encode(rotationKey.getPrivate().getEncoded()));`
## OpenBanking API
`starling_ob`, `starling_ob-sandbox`
### Links
* [Developer Portal](https://developer.starlingbank.com/docs/open-banking)
### Scopes
* Account Information 🔒
### Onboarding ASPSP's to Yapily Application
#### **OB Certificates**
**Precondition**: To connect to Starling OB institutions with OB certs a dynamic registration request (DCR) is needed.
**Pre-requisites for DCR:**
* Valid OBWAC / OBSEAL certificates
* SSA (downloaded from OBIE directory) - ***Optional***
#### Steps Required for DCR registration
1. **Download your SSA from the OBIE directory (optional - see step 3)**
Open the OBIE Directory for your organisation, navigate to the SSA you want to use for the registration and generate the SSA. The downloaded SSA has to be passed as is to the registration endpoint; **do not alter the contents or format**.
2. Upload the signing (OBSEAL) and transport (OBWAC) certificates into V2 services
**Request**
```shell theme={null}
curl --location --request POST '[https://api.yapily.com/certificates/keys/](https://api.yapily.com/certificates/keys/)' \
--header 'Authorization: Basic YOUR_APPLICATION_CREDENTIALS_AS_BASIC_AUTH' \
--header 'Content-Type: application/json' \
--data-raw '[{
"pem": "$YOUR_PUBLIC_KEY_AS_PEM",
"key": "$YOUR_PRIVATE_KEY",
"kid" : "$CERT_KID",
"name" : "$CERTIFICATE_NAME"
}]'
```
**Response**
```json theme={null}
{
"id": "d16f87d3-4222-4173-b8b9-44aeccacae7d",
....
}
```
Save the id and remember for which kind of key it corresponds:
e.g. `SIGNING_KEY_UUID = d16f87d3-4222-4173-b8b9-44aeccacae7d`
Once you have done it for the signing key, do the same request for your transport key.
3. **Call the registration endpoint**
The final step is to call the registration endpoint with the certificate UUIDs and the downloaded SSA:
**Request**
Do not alter the downloaded SSA. Pass directly to the register endpoint in its JWS format.
```shell theme={null}
curl --location --request POST 'https://api.yapily.com/institutions/starling_ob/register' \
--header 'Content-Type: application/json' \
--header 'Authorization: Bearer YOUR_APPLICATION_CREDENTIALS_AS_BASIC_AUTH' \
--data-raw '{
"signingKeyID": "$SIGNING_KEY_UUID",
"transportKeyID": "$TRANSPORT_KEY_UUID",
"ssa": "$DOWNLOADED_SSA"
}'
```
If you are not manually supplying the SSA, then you will need to add two additional request body parameters; `softwareStatementId` and `organisationId` - these must match the JWKS URL that corresponds to your OB certificates :
```shell theme={null}
curl --location --request POST 'https://api.yapily.com/institutions/starling_ob/register' \
--header 'Content-Type: application/json' \
--header 'Authorization: Bearer YOUR_APPLICATION_CREDENTIALS_AS_BASIC_AUTH' \
--data-raw '{
"signingKeyID": "$SIGNING_KEY_UUID",
"transportKeyID": "$TRANSPORT_KEY_UUID",
"softwareStatementId" : "N7i....",
"organisationId" : "0014H...."
}'
```
**Response**
```json theme={null}
{
"id": "a0460a91-4b4c-422a-bbe6-bebe0b92e308"
}
```
Note above ID, this will be the clientId which can be further used to Get, Modify, Delete registrations with Yapily
## Support
If you require technical support with certificate management, please contact [Support](/resources/support).
# TSB Bank
Source: https://docs.yapily.com/institution-configurations/uk/TSB-Bank
## Links
* [Developer Portal](https://apis.developer.tsb.co.uk/)
## Scopes
* Account Information 🔒
* Payment Initiation 🔒
## Live Environment
**Precondition**: To connect to live Open Banking entities, whether you are accessing account information or initiating payments, your business must have the right regulatory permissions as per the [Open Banking Guide](/tools-and-services/open-banking/enrolment-guide).
1. Upload your transport and signing certificates (PEMs) created in the Open Banking directory, along with the keys into Yapily's [certificate vault](https://console.yapily.com/certificates).
2. Add **TSB Sandbox** from the **Live** tab to your Dashboard application and add your `Signing key Id`, which can be obtained from the Open Banking Directory.
3. Select your Open Banking transport and signing certificates from the relevant drop-downs lists then click *Next*.
4. **Click to register** to auto-register with the bank. If registration is successful, the key and secret will be populated from the institution's response.
5. Make sure to click *Save* in order not to lose these credentials, as a further registration attempt with the same Open Banking software statement is likely to fail.
**Note:** Once the SCA is performed to retrieve all data, user is allowed AIS services for 90 days(validity period of the generated consent). TSB Bank returns only booked transactions, no other status transactions are returned by the Bank.
## Support
If you require technical support with certificate management, please contact [Support](/resources/support).
## Sandbox Environment
* You can also add TSB Sandbox to your application from our Preconfigured institutions. No credentials needed.
* Despite being able to register dynamically through our dashboard, TSB still needs to approve your application after the registration, but you don't have to do anything else. Applications are reviewed Monday to Friday between 8am and 5pm, you can log in to the [TSB developer portal](https://developer.tsb.co.uk) using your Open Banking directory credentials to check the status of your application
**Note**: The TSB Sandbox authorisation page does not use a valid TLS certificate which is causing it to malfunction in the Chrome browser. If possible, use Firefox to test the TSB sandbox.
# TellMoney (Tell Connect) ASPSPs
Source: https://docs.yapily.com/institution-configurations/uk/Tell-Money
## Links
* [TellMoney Developer Portal](https://developer.tell.money/tell-connect-obie/apis)
TellMoney operates Tell Connect, an Open Banking gateway that provides access to multiple ASPSPs through a single integration. Registering with Tell Connect is the first step to accessing any of the institutions below.
## Supported ASPSPs
| Institution | Institution ID | Type |
| ----------- | -------------- | ---- |
| Anna Money | `annamoney` | live |
| Yonder | `yonder` | live |
## Scopes
* Account Information 🔒
## Onboarding ASPSP's to Yapily Application
**Precondition**: To connect to live Open Banking entities, your business must have the right regulatory permissions as per the [Open Banking Guide](/tools-and-services/open-banking/enrolment-guide).
A single Tell Connect registration gives access to all the institutions above — you do not need a separate registration for each one. Add all of the Tell Connect institutions to your Dashboard application before registering. Registering on any one of them automatically registers all the others.
1. Upload your transport and signing certificates (PEMs) created in the Open Banking directory, along with the keys into Yapily's [certificate vault](https://console.yapily.com/certificates).
2. Add the Tell Connect institution(s) from the **Live** tab to your Dashboard application and add your `Signing key Id`, which can be obtained from the Open Banking Directory.
3. Select your Open Banking transport and signing certificates from the relevant drop-down lists then click *Next*.
4. **Click to register** to auto-register with Tell Connect. If registration is successful, the key and secret will be populated from the hub's response. All other Tell Connect institutions you selected will be registered at the same time.
5. Make sure to click *Save* in order not to lose these credentials, as a further registration attempt with the same Open Banking software statement is likely to fail.
6. Once all the Tell Connect institutions are registered, you can remove those you don't want to use now and add them later when needed.
**Activation**: New dynamic registrations are not immediately active on TellMoney's platform. Once registration is completed on Yapily's platform, send an email to [support@tell.money](mailto:support@tell.money) with the clientId from Yapily's console to request activation. The connection will not work until TellMoney confirms the registration is active.
## Support
If you require technical support with certificate management, please contact [Support](/resources/support).
# Tesco Bank
Source: https://docs.yapily.com/institution-configurations/uk/Tesco-Bank
## Links
* [Developer Portal](https://www.tescobank.com/developer/)
## Scopes
* Account Information 🔒
* Payment Initiation 🔒
## Live Environment
**Precondition**: To connect to live Open Banking entities, whether you are accessing account information or initiating payments, your business must have the right regulatory permissions as per the [Open Banking Guide](/tools-and-services/open-banking/enrolment-guide).
1. Upload your transport and signing certificates (PEMs) created in the Open Banking directory, along with the keys into Yapily's [certificate vault](https://console.yapily.com/certificates).
2. Add *Tesco Bank* to your Dashboard application and add your `Signing key Id`, which can be obtained from the Open Banking Directory.
3. Select your Open Banking transport and signing certificates from the relevant drop-downs lists then click *Next*.
4. **Click to register** to auto-register with the bank. If registration is successful, the key and secret will be populated from the institution's response.
5. Make sure to click *Save* in order not to lose these credentials, as a further registration attempt with the same Open Banking software statement is likely to fail. If you require technical support with certificate management, feel free to contact us at [developers@yapily.com](mailto:developers@yapily.com)
**Note:** The TPP has 5 minutes from when SCA is performed to retrieve all data within the consent. The exceptions to this are the balance and the last 90 days of transactions, which Tesco would return even if SCA hadn't been done in the last 5 minutes. (Tesco would ask for authentication for balance and 90 days of transactions if it was the first time they were requested, or if no SCA had been done for 90 days.)
## Sandbox Environment
To connect to the Tesco Bank sandbox, follow the above steps while selecting *Tesco Bank* from the sandbox tab in step 2. The institution Id for this is `tescobank-sandbox`.
[Test Account Credentials](/resources/sandbox/sandbox-credentials)
## Support
If you require technical support with certificate management, please contact [Support](/resources/support).
# The Cooperative Bank
Source: https://docs.yapily.com/institution-configurations/uk/The-Cooperative-Bank
## Links
* [Developer Portal](https://developer.token.io/coop_rest_api_doc/content/e-rest/dashboard-intro.htm)
## Scopes
* Account Information 🔒
## Preconditions
* Access to the Cooperative Bank Sandbox environment must be requested and granted **before** requesting access to the Cooperative Bank Production environment
* Cooperative Bank Sandbox environment requires manual registration with the [Cooperative Bank Token Sandbox Dashboard](https://coop.dashboard.sandbox.token.io)
* Cooperative Bank Production environment requires manual registration with the [Cooperative Bank Token Production Dashboard](https://coop.dashboard.token.io)
* Both Sandbox and Production access requires active eIDAS Certificates
## Sandbox Environment
1. Create an account on the [Cooperative Bank Token Sandbox Dashboard](https://coop.dashboard.sandbox.token.io)
2. Upload your *Live* eIDAS transport and signing certificates (PEMs) on the Cooperative Bank Sandbox Token Dashboard.
3. Your dashboard should now show that your access permissions are under review. Once approved, you will be able to select `Go Live` to request production access.
## Live Environment
1. From the [Cooperative Bank Token Production Dashboard](https://coop.dashboard.token.io), select `Go Live`. You will be prompted to log in or create an account for the [Cooperative Bank Token Production Dashboard](https://coop.dashboard.token.io)
2. Upload your *Live* eIDAS transport and signing certificates (PEMs) on the Cooperative Bank Token Production Dashboard.
3. Once your certificates have been approved by Token, you will be granted a `Member ID` and `Alias`, found on the Cooperative Bank Token Dashboard under `Settings` -> `Member Information`. Following this, you will need to generate an API key, which can be done under `Settings` -> `Authentication Keys`. Save this key.
4. Add Cooperative Bank from the *Live* tab on your Yapily Dashboard application then click **Next**.
5. Configure Cooperative Bank by selecting the **edit icon**.
6. Add your Cooperative Bank `Member ID`, `Alias`, and `API Key` retrieved in step 3 above. Click **Save** to complete registration and preserve these credentials.
## Notes
* Support for Cooperative Bank is provided by Token via their [support desk](https://tokenio.atlassian.net/servicedesk/customer/portals).
## Support
If you require technical support with certificate management, please contact [Support](/resources/support).
***
# Cooperative Personal
**Institution ID**: `cooperative-personal`
## Links
* [Developer Portal](https://www.developer.co-operativebank.co.uk/)
## Scopes
* Account Information🔒
## Live Environment
**Precondition**: To connect to Cooperative Personal Bank, an application needs to be created with the bank. Registration with the bank is a manual process; email with details of TPP authorisation needs to be sent to cooperative requesting registration for Cooperative Personal Bank.
1. Upload your OBWAC (Transport) and OBSEAL (Signing) certificates created in the Open Banking directory, along with the private keys into Yapily's [certificate vault](https://console.yapily.com/#!certificates).
2. Navigate to your application's **Connected Institutions** tab and click **Add institutions**.
3. Add **Cooperative Personal** from the **Live** tab to your Dashboard application and add your `Signing key Id`, which can be obtained from the Open Banking Directory.
4. In your application's **Not registered** tab, you should now see **cooperative-personal**. Click on **Register**.
5. Select the certificates you uploaded in Step 1, and fill in the rest of the form with credentials obtained from the bank in **Prerequisite** step.
6. Click **Save Registration**.
## Sandbox Environment
**Precondition**: To connect to Cooperative Personal Sandbox Bank, an application needs to be created with the bank. Registration with the bank is a manual process; email with details of TPP authorisation needs to be sent to cooperative requesting registration for Cooperative Personal Sandbox Bank.
1. Upload your OBWAC (Transport) and OBSEAL (Signing) certificates created in the Open Banking directory, along with the private keys into Yapily's [certificate vault](https://console.yapily.com/#!certificates).
2. Navigate to your application's **Connected Institutions** tab and click **Add institutions**.
3. Add **Cooperative Personal Sandbox** from the **Live** tab to your Dashboard application and add your `Signing key Id`, which can be obtained from the Open Banking Directory.
4. In your application's **Not registered** tab, you should now see **cooperative-personal-sandbox**. Click on **Register**.
5. Select the certificates you uploaded in Step 1, and fill in the rest of the form with credentials obtained from the bank in **Prerequisite** step.
6. Click **Save Registration**.
## Support
If you require technical support with certificate management, please contact [Support](/resources/support).
***
# Cooperative Smile
**Institution ID**: `cooperative-smile`
## Links
* [Developer Portal](https://www.developer.co-operativebank.co.uk/)
## Scopes
* Account Information🔒
## Live Environment
**Precondition**: To connect to Cooperative Smile Bank, an application needs to be created with the bank. Registration with the bank is a manual process; email with details of TPP authorisation needs to be sent to cooperative requesting registration for Cooperative Smile Bank.
1. Upload your OBWAC (Transport) and OBSEAL (Signing) certificates created in the Open Banking directory, along with the private keys into Yapily's [certificate vault](https://console.yapily.com/#!certificates).
2. Navigate to your application's **Connected Institutions** tab and click **Add institutions**.
3. Add **Cooperative Smile** from the **Live** tab to your Dashboard application and add your `Signing key Id`, which can be obtained from the Open Banking Directory.
4. In your application's **Not registered** tab, you should now see **cooperative-smile**. Click on **Register**.
5. Select the certificates you uploaded in Step 1, and fill in the rest of the form with credentials obtained from the bank in **Prerequisite** step.
6. Click **Save Registration**.
## Sandbox Environment
**Precondition**: To connect to Cooperative Smile Sandbox Bank, an application needs to be created with the bank. Registration with the bank is a manual process; email with details of TPP authorisation needs to be sent to cooperative requesting registration for Cooperative Smile Sandbox Bank.
1. Upload your OBWAC (Transport) and OBSEAL (Signing) certificates created in the Open Banking directory, along with the private keys into Yapily's [certificate vault](https://console.yapily.com/#!certificates).
2. Navigate to your application's **Connected Institutions** tab and click **Add institutions**.
3. Add **Cooperative Smile Sandbox** from the **Live** tab to your Dashboard application and add your `Signing key Id`, which can be obtained from the Open Banking Directory.
4. In your application's **Not registered** tab, you should now see **cooperative-smile-sandbox**. Click on **Register**.
5. Select the certificates you uploaded in Step 1, and fill in the rest of the form with credentials obtained from the bank in **Prerequisite** step.
6. Click **Save Registration**.
## Support
If you require technical support with certificate management, please contact [Support](/resources/support).
# ThinkMoney
Source: https://docs.yapily.com/institution-configurations/uk/ThinkMoney
## Links
* [Developer Portal](https://tmg.dashboard.sandbox.token.io/)
## Scopes
* Account Information 🔒
## Preconditions
* Access to the ThinkMoney Sandbox environment must be requested and granted **before** requesting access to the ThinkMoney Production environment
* ThinkMoney Sandbox environment requires manual registration with the [ThinkMoney Token Sandbox Dashboard](https://unitytrust.dashboard.sandbox.token.io/signin)
* ThinkMoney Production environment requires manual registration with the [ThinkMoney Token Production Dashboard](https://unitytrust.dashboard.token.io/signin)
* Both Sandbox and Production access requires active eIDAS Certificates
## Sandbox Environment
1. Create an account on the [ThinkMoney Sandbox Token Dashboard](https://tmg.dashboard.sandbox.token.io/signin).
2. Upload your *Live* eIDAS transport and signing certificates (PEMs) on the ThinkMoney Sandbox Token Dashboard.
3. Your dashboard should now show that your access permissions are under review. Once approved, you will be able to select `Go Live` to request production access.
## Live Environment
1. From the [ThinkMoney Sandbox Token Dashboard](https://tmg.dashboard.sandbox.token.io/signin), select `Go Live`. You will be prompted to log in or create an account for the [ThinkMoney Production environment dashboard](https://tmg.dashboard.token.io/signin).
2. Upload your *Live* eIDAS transport and signing certificates (PEMs) on the ThinkMoney Token Production Dashboard.
3. Once your certificates have been approved by Token, you will be granted a `Member ID` and `Alias`, found on the ThinkMoney Token Dashboard under `Settings` -> `Member Information`. Following this, you will need to generate an API key, which can be done under `Settings` -> `Authentication Keys`. Save this key.
4. Add *ThinkMoney* from the *Live* tab on your Yapily Dashboard application then click **Next**.
5. Configure *ThinkMoney* by selecting the **edit icon**.
6. Add your ThinkMoney `Member ID`, `Alias`, and `API Key` retrieved in step 3 above. Click **Save** to complete registration and preserve these credentials.
## Notes
* Support for ThinkMoney is provided by Token via their [support desk](https://tokenio.atlassian.net/servicedesk/customer/portals).
* The ThinkMoney Sandbox environment is inconsistent with the performance of the ThinkMoney Production environment. Therefore, Yapily has elected not to support the sandbox environment. However, you must still register for the ThinkMoney Sandbox environment in order to be granted access to the production environment, as outlined above.
* International payments are not available at this time.
## Support
If you require technical support with certificate management, please contact [Support](/resources/support).
# Tide
Source: https://docs.yapily.com/institution-configurations/uk/Tide
## Links
* [Developer Portal](https://bitbucket.org/tideaccount/developer-portal/src/master)
## Scopes
* Account Information 🔒
* Payment Initiation 🔒
## Live Environment
**Precondition**: To connect to live Open Banking entities, whether you are accessing account information or initiating payments, your business must have the right regulatory permissions as per the [Open Banking Guide](/tools-and-services/open-banking/enrolment-guide).
1. Upload your transport and signing certificates (PEMs) created in the Open Banking directory, along with the keys into Yapily's [certificate vault](https://console.yapily.com/certificates).
2. Add **Tide** from the **Live** environments to your Dashboard application and add your `Signing key Id`, which can be obtained from the Open Banking Directory.
3. Select your Open Banking transport and signing certificates from the relevant drop-downs lists then click *Next*.
4. **Click to register** to auto-register with *Tide* API. If the registration is successful, the key will be populated from the institution's response.
5. Make sure to click *Save* in order not to lose these credentials, as a further registration attempt with the same Open Banking software statement is likely to fail.
## Support
If you require technical support with certificate management, please contact [Support](/resources/support).
# Ulster Bank
Source: https://docs.yapily.com/institution-configurations/uk/Ulster-Bank
## Links
* [Developer Portal](https://www.bankofapis.com/)
## Scopes
* Open Data 🌐
* Account Information 🔒
* Payment Initiation 🔒
* VRP 🔒
## Institutions
* `ulsterbank_uk`
* `ulsterbankbusiness_uk`
* `ulsterbank_ie`
* `ulsterbankbusiness_ie`
* `ulsterbank-clearspend_ie`
* `ulsterbank-clearspend_uk`
## Live Environment
If you have completed the steps below for any of the other institutions in Natwest Group (`natwest`, `natwestbusiness`, `rbs`, `rbsbusiness`) then you can use their existing registration credentials and manually copy them on the Yapily Console for the Ulster banks listed above. Please note that you cannot share Irish institution credentials with the UK institutions.
**Precondition**: To connect to live Open Banking entities, whether you are accessing account information or initiating payments, your business must have the right regulatory permissions as per the [Open Banking Guide](/tools-and-services/open-banking/enrolment-guide).
1. Upload your transport and signing certificates (PEMs) created in the Open Banking directory, along with the keys into Yapily's [certificate vault](https://console.yapily.com/#!certificates).
2. Add one of the institutions from the above list from the **Live** tab to your Dashboard application and add your `Signing key Id`, which can be obtained from the Open Banking Directory.
3. Select your Open Banking transport and signing certificates from the relevant drop-downs lists then click *Next*.
4. **Click to register** to auto-register with the bank. If registration is successful, the key and secret will be populated from the institution's response.
5. Make sure to click *Save* in order not to lose these credentials, as a further registration attempt with the same Open Banking software statement is likely to fail.
## VRP Sweeping Access
In order to access the VRP endpoints we have to grant your Yapily application additional scopes. If you do not have these scopes then please contact your customer success manager to get them added.
The following steps are not intended for Yapily Connect customers.
Precondition: To use VRP on `ulsterbank_uk` a manual registration via API is required.
Pre-requisites for Manual registration:
* Valid OBWAC / OBSEAL certificates
* PIS registration details for `ulsterbank_uk`
You can use existing PIS registration details for this institution to gain VRP sweeping access. The registration details can be found on the Yapily Console for the given application. If a new registration is required (e.g. if you are using a new redirectUri for VRP and it is not covered in the existing registration) then you can perform a DCR request using the steps outlined in `Live Environment`. The existing or new registration credentials from the Yapily Console will be used in the steps below.
### Steps Required for Manual registration
1. Upload the signing (OBSEAL) and transport (OBWAC) certificates if not already present
You can check if the certificate is present already by navigating to the Console -> Certificates. If absent please upload the certificate.
Once confirmed, we need the UUID of the certificate which can be found in the Console -> Certificates -> Certificate; the UUID will appear in the browser URL bar as follows:
`https://console.yapily.com/certificates/`
Save the `UUID` and remember for which kind of key it corresponds to:
e.g. `SIGNING_KEY_UUID = d16f87d3-4222-4173-b8b9-44aeccacae7d`
Once you have done it for the signing key, repeat the process for your transport certificate.
2. Call the manual registration endpoint
The final step is to call the manual registration endpoint with the certificate UUIDs and credentials from your application created on the portal.
The `apiTypes` field in the example has both types but if the registration in question grants PIS access only then only provide `PISP`.
If a custom redirect URI (not Yapily's) is used for the registration then you can provide it in the `redirectUri` field.
The `clientId` field corresponds to the `key` field on the Yapily Console.
Request
```shell theme={null}
curl --location --request POST 'https://api.yapily.com/institutions/ulsterbank_uk/manual/register' \
--header 'Content-Type: application/json' \
--header 'Authorization: Basic ...' \
--data-raw '{
"signingKeyID": "$SIGNING_KEY_UUID",
"transportKeyID": "$TRANSPORT_KEY_UUID",
"clientId": "$CLIENT_ID",
"softwareStatementId": "$SSA_ID",
"organisationId": "$ORGANISATION_ID",
"apiTypes" : ["AISP", "PISP"],
"redirectUri" : ""
}'
```
Response
```shell theme={null}
{
"id": "a0460a91-4b4c-422a-bbe6-bebe0b92e308"
}
```
This is the Yapily registration `id` which can be used to Get, Modify, Delete the registration.
## Sandbox Environment
To connect to the Ulster Bank Sandbox, select **Ulster Bank Sandbox** from the pre-configured institutions.
Or if you like to register with your own credentials, please follow the steps below:
**Prerequisite:**
1. Register on the [Ulster Bank developer portal](https://developer.ulster.useinfinite.io/).
2. Select your teams and enter your open banking organisation ID.
After entering your open banking organisation ID, you can now follow the same steps above of the live environment.
[Test Account Credentials](/resources/sandbox/sandbox-credentials)
## Support
If you require technical support with certificate management, please contact [Support](/resources/support).
# Unity Trust Bank
Source: https://docs.yapily.com/institution-configurations/uk/Unity-Trust-Bank
## Links
* [Developer Portal](https://unitytrust.dashboard.token.io/signin)
## Scopes
* Account Information 🔒
## Preconditions
* Access to the Unity Trust Sandbox environment must be requested and granted **before** requesting access to the Unity Trust Production environment
* Unity Trust Sandbox environment requires manual registration with the [Unity Trust Token Sandbox Dashboard](https://unitytrust.dashboard.sandbox.token.io/signin)
* Unity Trust Production environment requires manual registration with the [Unity Trust Token Production Dashboard](https://unitytrust.dashboard.token.io/signin)
* Both Sandbox and Production access requires active eIDAS Certificates
## Sandbox Environment
1. Create an account on the [Unity Trust Sandbox Token Dashboard](https://unitytrust.dashboard.sandbox.token.io/signin).
2. Upload your *Live* eIDAS transport and signing certificates (PEMs) on the Unity Trust Sandbox Token Dashboard.
3. Your dashboard should now show that your access permissions are under review. Once approved, you will be able to select `Go Live` to request production access.
## Live Environment
1. From the [Unity Trust Sandbox Token Dashboard](https://unitytrust.dashboard.sandbox.token.io/signin), select `Go Live`. You will be prompted to log in or create an account for the [Unity Trust Production environment dashboard](https://unitytrust.dashboard.token.io/signin).
2. Upload your *Live* eIDAS transport and signing certificates (PEMs) on the Unity Trust Token Production Dashboard.
3. Once your certificates have been approved by Token, you will be granted a `Member ID` and `Alias`, found on the Unity Trust Token Dashboard under `Settings` -> `Member Information`. Following this, you will need to generate an API key, which can be done under `Settings` -> `Authentication Keys`. Save this key.
4. Add *Unity Trust* from the *Live* tab on your Yapily Dashboard application then click **Next**.
5. Configure *Unity Trust* by selecting the **edit icon**.
6. Add your Unity Trust `Member ID`, `Alias`, and `API Key` retrieved in step 3 above. Click **Save** to complete registration and preserve these credentials.
## Notes
* Support for Unity Trust is provided by Token via their [support desk](https://tokenio.atlassian.net/servicedesk/customer/portals).
* The Unity Trust Sandbox environment is inconsistent with the performance of the Unity Trust Production environment. Therefore, Yapily has elected not to support the sandbox environment. However, you must still register for the Unity Trust Sandbox environment in order to be granted access to the production environment, as outlined above.
* International payments are not available at this time.
## Support
If you require technical support with certificate management, please contact [Support](/resources/support).
# Vanquis Bank
Source: https://docs.yapily.com/institution-configurations/uk/Vanquis-Bank
## Links
* [Developer Portal](https://www.vanquis.co.uk/developer-portal)
## Scopes
* Open Data 🌐
* Account Information 🔒
* Payment Initiation 🔒
## Live Environment
**Precondition**: To connect to live Open Banking entities, whether you are accessing account information or initiating payments, your business must have the right regulatory permissions as per the [Open Banking Guide](/tools-and-services/open-banking/enrolment-guide).
1. Upload your transport and signing certificates (PEMs) created in the Open Banking directory, along with the keys into Yapily's [certificate vault](https://console.yapily.com/certificates).
2. Add **Vanquis Bank** from the **Live** tab to your Dashboard application and add your `Signing key Id`, which can be obtained from the Open Banking Directory.
3. Select your Open Banking transport and signing certificates from the relevant drop-downs lists then click *Next*.
4. **Click to register** to auto-register with the bank. If registration is successful, the key and secret will be populated from the institution's response.
5. Make sure to click *Save* in order not to lose these credentials, as a further registration attempt with the same Open Banking software statement is likely to fail.
## Sandbox Environment
To connect to the Vanquis Bank Sandbox, select **Vanquis Bank Sandbox** from the pre-configured institutions.
Or if you like to register with your own credentials, please follow the steps below:
**Prerequisite:**
1. Register on the [Vanquis Bank developer portal](https://developer.Vanquis.useinfinite.io/).
2. Select your teams and enter your open banking organisation ID.
After entering your open banking organisation ID, you can now follow the same steps above of the live environment.
[Test Account Credentials](/resources/sandbox/sandbox-credentials)
## Support
If you require technical support with certificate management, please contact [Support](/resources/support).
# Wise
Source: https://docs.yapily.com/institution-configurations/uk/Wise
## Links
* [Developer Portal](https://api-docs.transferwise.com/banks#transferwise-for-banks-api-integration-guide-api-access)
## Scopes
* Account Information 🔒
* Payment Information 🔒
## Supported ASPSPs
| ASPSP | Link | Supported | Institution ID |
| -------------------- | -------------------------------------------------------------------------------------------------------------------------------------------------------------------------------------------------- | --------- | ------------------------------- |
| Wise and its Sandbox | [https://api-docs.transferwise.com/banks#transferwise-for-banks-api-integration-guide-api-access](https://api-docs.transferwise.com/banks#transferwise-for-banks-api-integration-guide-api-access) | Yes | `wise-live`
`wise-sandbox` |
## Features Supported
### Accounts
* accounts
* transactions
### Payments
* Domestic Single Payment
* International Single Payment
## Registration Process
Wise supports both OB certificates and eiDAS certificates. Each has their own registration process; for OB certificates a dynamic registration request (DCR) is needed, for eIDAS certificates manual registration is required. See below onboarding sections for respective steps.
## Onboarding ASPSP's to Yapily Application
### OB Certificates
**Precondition**: To connect to Wise institutions with OB certs a dynamic registration request (DCR) is needed.
**Pre-requisites for DCR:**
* Valid OBWAC / OBSEAL certificates
* SSA (downloaded from OBIE directory)
#### Steps Required for DCR registration
1. **Download your SSA from the OBIE directory**
Open the OBIE Directory for your organisation, navigate to the SSA you want to use for the registration and generate the SSA. The downloaded SSA has to be passed as is to the registration endpoint; **do not alter the contents or format**.
2. **Upload the signing (OBSEAL) and transport (OBWAC) certificates into V2 services**
**Request**
```shell theme={null}
curl --location --request POST 'https://api.yapily.com/certificates/keys/' \
--header 'Authorization: Basic YOUR_APPLICATION_CREDENTIALS_AS_BASIC_AUTH' \
--header 'Content-Type: application/json' \
--data-raw '[{
"pem": "$YOUR_PUBLIC_KEY_AS_PEM",
"key": "$YOUR_PRIVATE_KEY",
"kid" : "$CERT_KID",
"name" : "$CERTIFICATE_NAME"
}]'
```
**Response**
```json theme={null}
{
"id": "d16f87d3-4222-4173-b8b9-44aeccacae7d",
....
}
```
Save the id and remember for which kind of key it corresponds:
e.g. `SIGNING_KEY_UUID = d16f87d3-4222-4173-b8b9-44aeccacae7d`
Once you have done it for the signing key, do the same request for your transport key.
3. **Call the registration endpoint**
The final step is to call the registration endpoint with the certificate UUIDs and the downloaded SSA:
**Request**
Do not alter the downloaded SSA. Pass directly to the register endpoint in its JWS format.
```shell theme={null}
curl --location --request POST 'https://api.yapily.com/institutions/wise-live/register' \
--header 'Content-Type: application/json' \
--header 'Authorization: Bearer YOUR_APPLICATION_CREDENTIALS_AS_BASIC_AUTH' \
--data-raw '{
"signingKeyID": "$SIGNING_KEY_UUID",
"transportKeyID": "$TRANSPORT_KEY_UUID"
"ssa": "$DOWNLOADED_SSA"
}'
```
**Response**
```json theme={null}
{
"id": "a0460a91-4b4c-422a-bbe6-bebe0b92e308"`
}
```
Note above ID, this will be the clientId which can be further used to Get, Modify, Delete registrations with Yapily
### eIDAS Certificates
**Precondition**: To connect to Wise institutions with eIDAS certs a manual registration is needed.
**Pre-requisites for DCR:**
* Valid QWAC / QSEAL certificates
* SSA (downloaded from OBIE directory)
#### Steps Required for manual registration
1. **Download your SSA from the OBIE directory**
Open the OBIE Directory for your organisation, navigate to the SSA you want to use for the registration and generate the SSA.
2. **Email [openbanking@wise.com](mailto:openbanking@transferwise.com) with your SSA and a message along the lines of:**
Hello Wise OpenBanking team!
We would be interested to register to both your sandbox and production environment using our eIDAS certificates. For your information, we use Yapily as a TSP and should be able to use your production API straight away.
We generated an SSA from the production OBIE directory: \$SSA
Let us know if you need anything else from us.
Following their process, you should at some point receive a client ID. This is needed for step 4.
3. **Upload the signing (QSEAL) and transport (QWAC) certificates into V2 services**
**Request**
```shell theme={null}
curl --location --request POST 'https://api.yapily.com/certificates/keys/' \
--header 'Authorization: Basic YOUR_APPLICATION_CREDENTIALS_AS_BASIC_AUTH' \
--header 'Content-Type: application/json' \
--data-raw '[{
"pem": "$YOUR_PUBLIC_KEY_AS_PEM",
"key": "$YOUR_PRIVATE_KEY",
"kid" : "$CERT_KID",
"name" : "$CERTIFICATE_NAME"
}]'
```
**Response**
```json theme={null}
{
"id": "d16f87d3-4222-4173-b8b9-44aeccacae7d",
....
}
```
Save the id and remember for which kind of key it corresponds:
e.g. `SIGNING_KEY_UUID = d16f87d3-4222-4173-b8b9-44aeccacae7d`
Once you have done it for the signing key, do the same request for your transport key.
4. **Call the manual registration endpoint**
The final step is to call the manual registration endpoint with the certificate UUIDs and the client ID directly obtained from wise in step 2:
**Request**
```shell theme={null}
curl --location --request POST 'https://api.yapily.com/institutions/wise-live/manual/register' \
--header 'Content-Type: application/json' \
--header 'Authorization: Bearer YOUR_APPLICATION_CREDENTIALS_AS_BASIC_AUTH' \
--data-raw '{
"signingKeyID": "$SIGNING_KEY_UUID",
"transportKeyID": "$TRANSPORT_KEY_UUID"`
"clientId": "$CLIENT_ID"
}'
```
**Response**
```json theme={null}
{
"id": "a0460a91-4b4c-422a-bbe6-bebe0b92e308"`
}
```
Note above ID, this will be the clientId which can be further used to Get, Modify, Delete registrations with Yapily
## Support
If you require technical support with certificate management, please contact [Support](/resources/support).
# Yorkshire Bank
Source: https://docs.yapily.com/institution-configurations/uk/Yorkshire-Bank
## Links
* [Developer Portal](https://developer.cybonline.co.uk/)
## Scopes
* Account Information 🔒
* Payment Initiation 🔒
## Live Environment
**Precondition**: To connect to live Open Banking entities, whether you are accessing account information or initiating payments, your business must have the right regulatory permissions as per the [Open Banking Guide](/tools-and-services/open-banking/enrolment-guide).
**Note:** Yorkshire Bank requires eIDAS (QWAC/QSEAL) certificates in an Open Banking Software Statement and no longer accepts OBIE certificates. In the event unacceptable certificates are presented the error message will contain "*Access was denied by security policy: 003*".
1. Upload your transport and signing certificates (PEMs) created in the Open Banking directory, along with the keys into Yapily's [certificate vault](https://console.yapily.com/certificates).
2. Add **Yorkshire Bank** from the **Live** tab to your Dashboard application and add your `Signing key Id`, which can be obtained from the Open Banking Directory.
3. Select your Open Banking transport and signing certificates from the relevant drop-downs lists then click *Next*.
4. **Click to register** to auto-register with the bank. If registration is successful, the key and secret will be populated from the institution's response.
5. Make sure to click *Save* in order not to lose these credentials, as a further registration attempt with the same Open Banking software statement is likely to fail.
## Support
If you require technical support with certificate management, please contact [Support](/resources/support).
# Yorkshire Building Society
Source: https://docs.yapily.com/institution-configurations/uk/Yorkshire-Building-Society
## Links
* [Developer Portal](https://developers.ybs.co.uk/)
## Scopes
* Account Information 🔒
* Payment Initiation 🔒
**Note**: If you first register with Chelsea Building Society use the same credentials to connect to Yorkshire Building Society by just copying the key and secret
## Live Environment
**Precondition**: To connect to live Open Banking entities, whether you are accessing account information or initiating payments, your business must have the right regulatory permissions as per the [Open Banking Guide](/tools-and-services/open-banking/enrolment-guide).
1. Upload your transport and signing certificates (PEMs) created in the Open Banking directory, along with the keys into Yapily's [certificate vault](https://console.yapily.com/certificates).
2. Add **Yorkshire Building Society** from the **Live** tab to your Dashboard application and add your `Signing key Id`, which can be obtained from the Open Banking Directory.
3. Select your Open Banking transport and signing certificates from the relevant drop-downs lists then click *Next*.
4. **Click to register** to auto-register with the bank. If registration is successful, the key and secret will be populated from the institution's response.
5. Make sure to click *Save* in order not to lose these credentials, as a further registration attempt with the same Open Banking software statement is likely to fail.
## Support
If you require technical support with certificate management, please contact [Support](/resources/support).
# Coutts and Company
Source: https://docs.yapily.com/institution-configurations/uk/coutts-and-company
## Links
* [Developer Portal](https://www.bankofapis.com/)
## Scopes
* Open Data 🌐
* Account Information 🔒
* Payment Initiation 🔒
## Institutions
* `coutts`
* `coutts-clearspend`
## Live Environment
**Precondition**: To connect to live Open Banking entities, whether you are accessing account information or initiating payments, your business must have the right regulatory permissions as per the [Open Banking Guide](/tools-and-services/open-banking/enrolment-guide).
1. Upload the certificates & keys (transport, signing) from Open Banking into Yapily's [certificate vault](https://console.yapily.com/certificates)
2. Add one of the institutions from the above list into your dashboard [app](https://console.yapily.com/applications) and configure the institution by adding `Signing Key ID` from Open Banking & selecting the `certificates` from the drop-down. Then *press next*
3. `Click to register` to auto-register to the bank via Yapily and auto-populate the key & secret; *press save*
## Support
If you require technical support with certificate management, please contact [Support](/resources/support).
# Welcome to Yapily Docs
Source: https://docs.yapily.com/introduction
Complete developer documentation for Yapily's Open Banking API. Build payment and data integrations with step-by-step guides, tutorials, and API references.
Yapily connects your application to 2000+ banks across the UK and Europe through a single integration. Accept payments, access financial data, enrich transactions, and verify account ownership, all through open banking.
Initiate bank-to-bank payments directly from your customer's account. Single, scheduled, or recurring.
Retrieve accounts, balances, and transactions with user consent.
Categorise and analyse transaction data with merchant detection and spending insights.
Confirm account ownership and customer details instantly.
Collect variable recurring payments without re-authorisation each time.
Connect Claude, Cursor, or another AI coding agent directly to these docs via MCP, llms.txt, or Agent Skills.
Learn how open banking works, key roles, and what it means for your integration.
Compare integration approaches, understand licensing, and explore country coverage.
Choose your integration path, set up your environment, and follow step-by-step tutorials.
# Callback URL
Source: https://docs.yapily.com/open-banking-flow/handling-redirects/callback-url
Set up and handle callback URLs in Yapily integrations. Process the authorisation code returned after user consent and exchange it for a consent token.
## Introduction
The callback URL specifies where the user should be redirected after they have been redirected to the redirect URL by the bank.
In addition, it returns query parameters detailing whether the user's authorisation was successful or not.
The callback URL is an optional property. Whether you use the callback URL depends whether you use `https://auth.yapily.com/` as your redirect URL:
* `https://auth.yapily.com/`: You should use the callback URL to redirect the user back to your application server following the initial redirect from the bank.
**Note:** This will be the case if you are a [Yapily Connect](/tools-and-services/yapily-connect/overview) customer.
* Custom [redirect URL](/open-banking-flow/handling-redirects/redirect-url): You shouldn't use the callback URL as the user will be redirected directly to your application server from the bank.
***
## Benefits
There are 2 main benefits of using a callback URL:
1. **Direct access to the user's response.** You don't need to poll the status of the `Consent` after creating the authorisation request.
2. **A better user experience.** You can end the authorisation journey back in your application rather than at Yapily's redirect URL.
**Note:** It is important that the server you point the `callback` to responds quickly, below 100ms. Otherwise, the browser will hang at `https://auth.yapily.com/` for the amount of time that the service on the `callback` takes to process and respond, creating a bad experience for the user.
***
## Specifying the callback URL
You must specify your callback URL in the `callback` field in the body of each [authorisation request](/api-reference/authorisations/create-account-authorisation).
The following diagram shows the authorisation flow using a callback URL:

### Using a OTT
You can optionally specify in the authorisation request to use a `oneTimeToken` when using a `callback`.
In this case, you receive a short lived token which you must exchange using [POST Exchange One Time Token](/api-reference/consents/exchange-one-time-token) to obtain the `consentToken`. This provides an additional level of security as the `consentToken` is not exposed as a query parameter to your `callback`.
The following diagram shows the authorisation flow using a OTT:

### Custom callback parameters
To consume custom data at the callback, you can specify an authorised `callback` value when creating a authorisation request with additional custom query parameters.
For example, if you wanted to pass through the time of the request, you could specify `https://tpp-application/?time=1335` as the `callback` in the authorisation request. This query parameter will be available along with the default ones after the user responds to the request at the bank.
### Sample callback URL
If you don't yet have an front-end application to use for your callback URL, you can specify the utility ([https://display-parameters.com/](https://display-parameters.com)) as your callback.
This utility displays a table containing the query parameters returned to the callback URL.
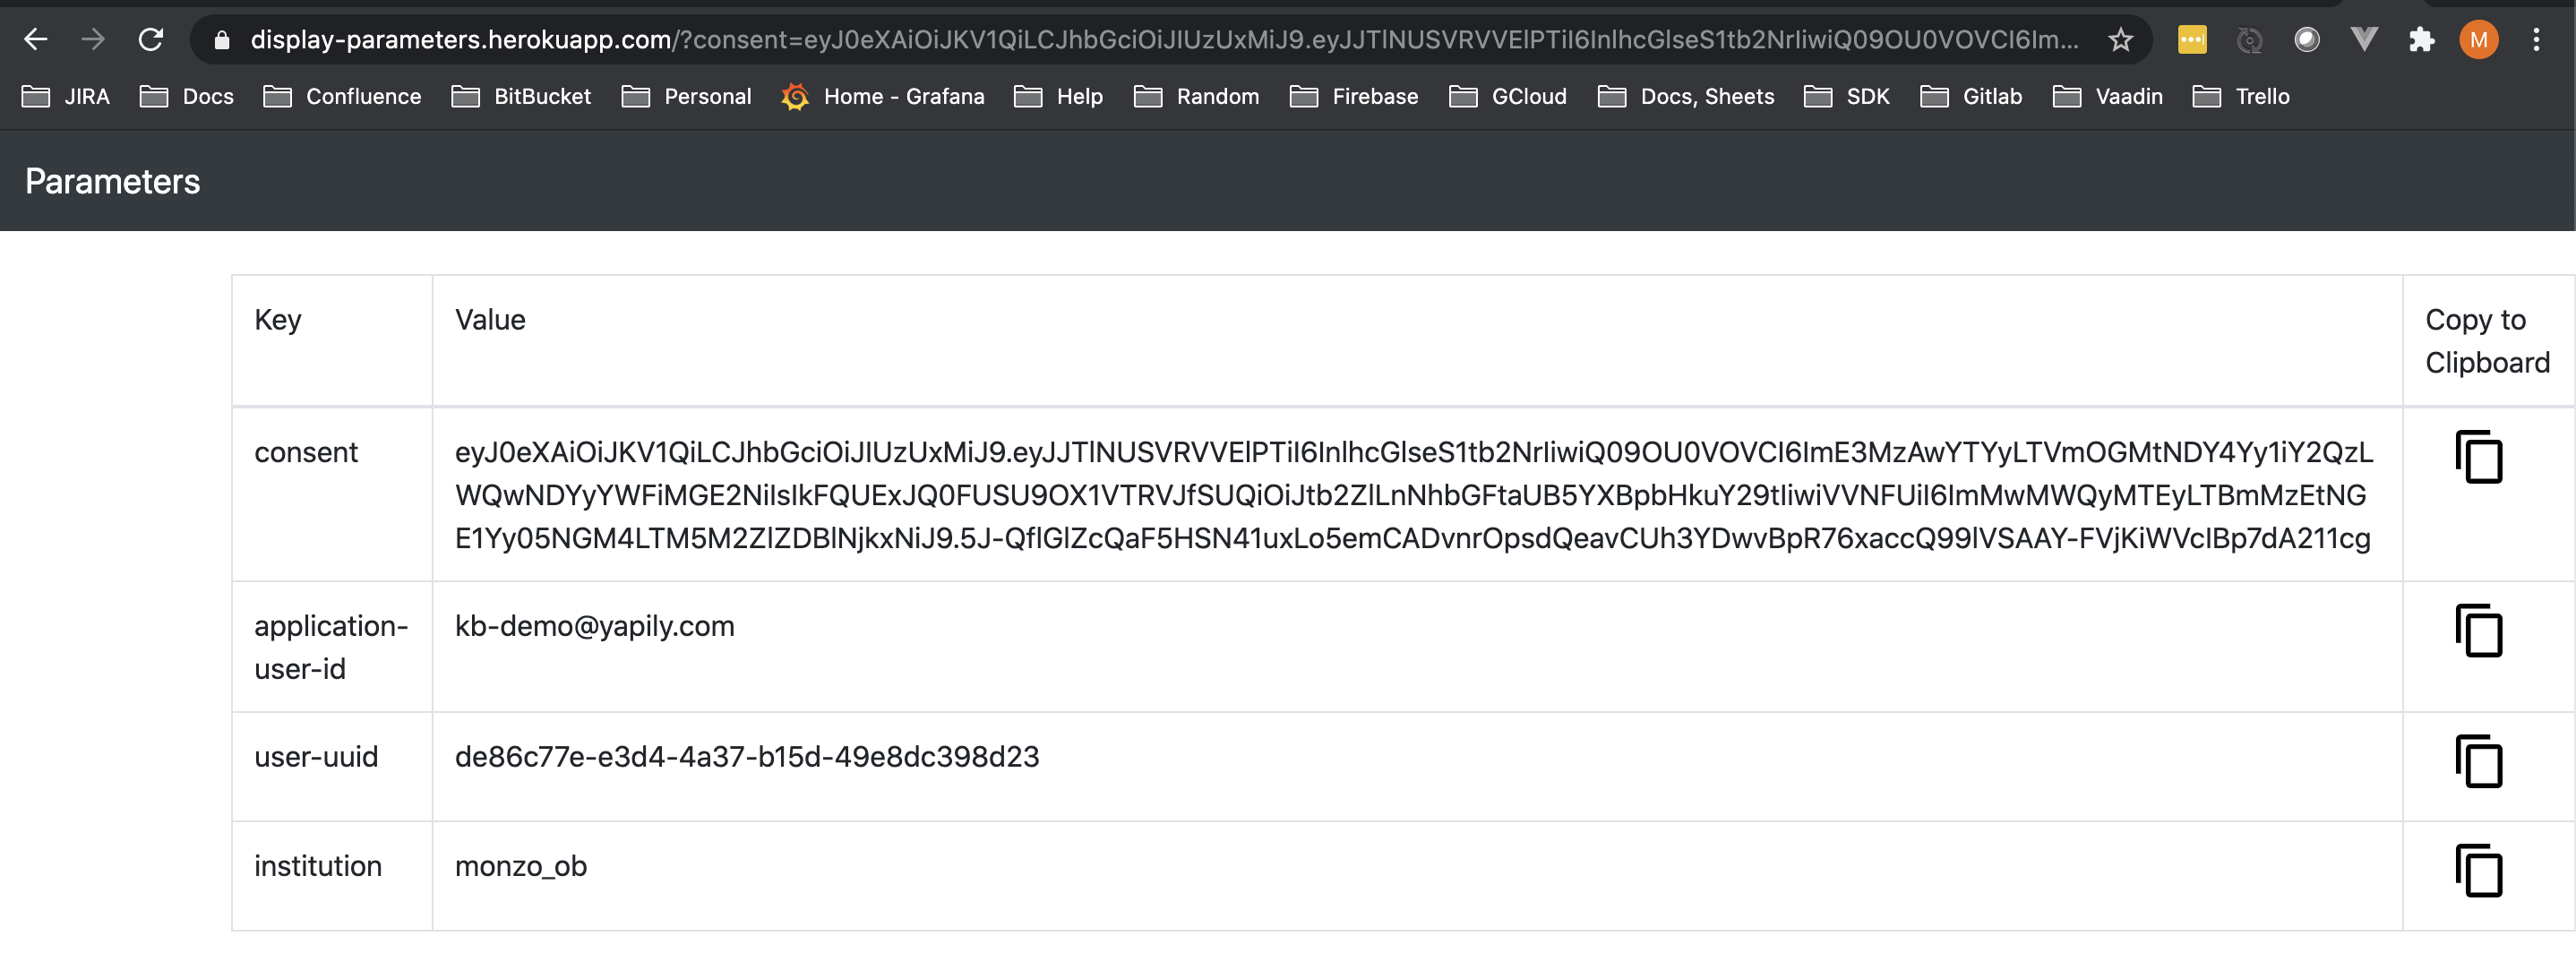
***
## Deep-linking for applications
#### Mobile
On mobile you can specify a [deep link](https://en.wikipedia.org/wiki/Mobile_deep_linking) `callback`. This enables users to open your application after leaving the bank.
**Note:** When a deep link has a custom URI scheme (not `http` or `https`) it will link to
content that can only be accessed if the application is installed on the device.
#### Web and mobile
For journeys including web and mobile, you can use [App Links](https://developer.android.com/training/app-links/index.html#add-app-links) for Android and [Universal Links](https://developer.apple.com/ios/universal-links/) for iOS.
Both are special types of deep links that you can set as your callback, but these must use either the `http` or `https` URI schemes.
The benefit of these deep links is that, in addition to opening your mobile app if it is installed, they also enable deferred deep-linking. This means, if the mobile app is not installed, rather than failing, it redirects the user to where they can install your app and then continues the journey in your app when it is installed.
***
## Handling the callback parameters
#### Success query parameters
If the user successfully authorises the authorisation request, the callback returns the following query parameters:
* `consent` - the `consentToken` which you can use to execute the payment or retrieve the user's account information
* `application-user-id` - the user-friendly ID for the user who receives the authorisation request (if specified)
* `user-uuid` - the Yapily generated ID for the user who receives the authorisation request
* `institution` - the institution that the user used for the authorisation request
#### Failure query parameters
If the authorisation fails a different set of query parameters are returned to help explain what has occurred:
* `application-user-id` - the user-friendly ID for the user who receives the authorisation request (if specified)
* `user-uuid` - the Yapily generated ID for the user who receives the authorisation request
* `institution` - the institution that the user used for the authorisation request
* `error-source` - the high-level source of where the error has occurred
* `error` - the high-level error code summarising what has occurred
* `error-description` - the description of the failure sent by the bank and base64 encoded
| error-source | error | error from the institution |
| ------------ | -------------------------- | ---------------------------- |
| user | access\_denied | access\_denied |
| user | access\_denied | user\_cancelled |
| user | access\_denied | login\_required |
| user | access\_denied | account\_selection\_required |
| user | access\_denied | interaction\_required |
| institution | invalid\_grant | invalid\_grant |
| institution | invalid\_grant | consent\_required |
| institution | invalid\_grant | server\_error |
| institution | invalid\_grant | temporarily\_unavailable |
| institution | invalid\_grant | request\_not\_supported |
| institution | invalid\_grant | request\_uri\_not\_supported |
| institution | institution\_server\_error | invalid\_request |
| institution | institution\_server\_error | registration\_not\_supported |
| institution | institution\_server\_error | unauthorized\_client |
| institution | institution\_server\_error | unsupported\_grant\_type |
| institution | institution\_server\_error | invalid\_scope |
| institution | configuration\_error | invalid\_client |
| institution | uncategorized\_error | - |
# QR code URL
Source: https://docs.yapily.com/open-banking-flow/handling-redirects/qr-code
Use Yapily's QR code URL to handle open banking redirects from desktop to mobile. Ideal for improving the authorisation experience on non-mobile devices.
## Introduction
The QR code URL generates a QR code to provide to the user so they can continue the authorisation flow on a mobile device.
This can create a better user experience as mobile flows are often smoother than web flows.
***
## Using the QR code URL
1. Retrieve the URL
The `qrCodeUrl` is returned in the response body of an [authorisation request](/api-reference/authorisations/create-account-authorisation), in addition to the `authorisationUrl`.
For example:
![YAP_DOCS_QR_CODE_LINK]() 2. Display the QR code
Display the QR code in your application to enable your users to scan the QR code and continue the flow on their mobile device.
You can change the size of the QR code to fit your application by passing the `size` query parameter with the `qrCodeUrl` to set the width and height of the QR code in pixels.
Once scanned, if installed on the device, the QR code will open the corresponding mobile banking application. Otherwise, it will complete the bank flow using the device browser.
# Redirect URL
Source: https://docs.yapily.com/open-banking-flow/handling-redirects/redirect-url
Configure redirect URLs for Yapily open banking flows. Understand how users are returned to your application after authorising access at their bank's interface.
## Introduction
The redirect URL specifies where the bank should redirect the end user to after they have authenticated and authorised an authorisation request in the bank's application.
In addition, if authentication is successful, it obtains the access token from the institution or, if unsuccessful, it returns information to explain the failure.
How you use the redirect URL depends whether you register with institutions directly or through Yapily Connect:
* [Direct registration:](#direct-registration) If you are a regulated entity using your own banking certificates to register with institutions, the redirect URL is supplied and managed by you.
2. Display the QR code
Display the QR code in your application to enable your users to scan the QR code and continue the flow on their mobile device.
You can change the size of the QR code to fit your application by passing the `size` query parameter with the `qrCodeUrl` to set the width and height of the QR code in pixels.
Once scanned, if installed on the device, the QR code will open the corresponding mobile banking application. Otherwise, it will complete the bank flow using the device browser.
# Redirect URL
Source: https://docs.yapily.com/open-banking-flow/handling-redirects/redirect-url
Configure redirect URLs for Yapily open banking flows. Understand how users are returned to your application after authorising access at their bank's interface.
## Introduction
The redirect URL specifies where the bank should redirect the end user to after they have authenticated and authorised an authorisation request in the bank's application.
In addition, if authentication is successful, it obtains the access token from the institution or, if unsuccessful, it returns information to explain the failure.
How you use the redirect URL depends whether you register with institutions directly or through Yapily Connect:
* [Direct registration:](#direct-registration) If you are a regulated entity using your own banking certificates to register with institutions, the redirect URL is supplied and managed by you.
* [Yapily Connect:](#yapily-connect) If you are a Yapily Connect customer, the redirect URL is supplied and managed by Yapily. In this case, you can use the [callback URL](/open-banking-flow/handling-redirects/callback-url) to control the user journey after the redirect.
***
## Direct registration
You must supply at least 1 redirect URL in your software statement when registering with each institution. You should use your application server address as the `redirectUrl` so end users are sent directly back to your application when they have completed the authorisation process with the bank.
### Configuring the redirect URL
This section only applies if you are using your own certificates to register with institutions in the UK.
1. Go to the [Open Banking Directory](https://directory.openbanking.org.uk/s/login/) and select *Login*
2. Login with your email and password
3. Authenticate with PingId
4. Select your entity from the dropdown
5. Once redirected, click on the *Directory* link
6. Scroll to the bottom of the menu to view your software statements
7. Select the software statement you plan to use with each Yapily institution
8. Add a new redirect URL
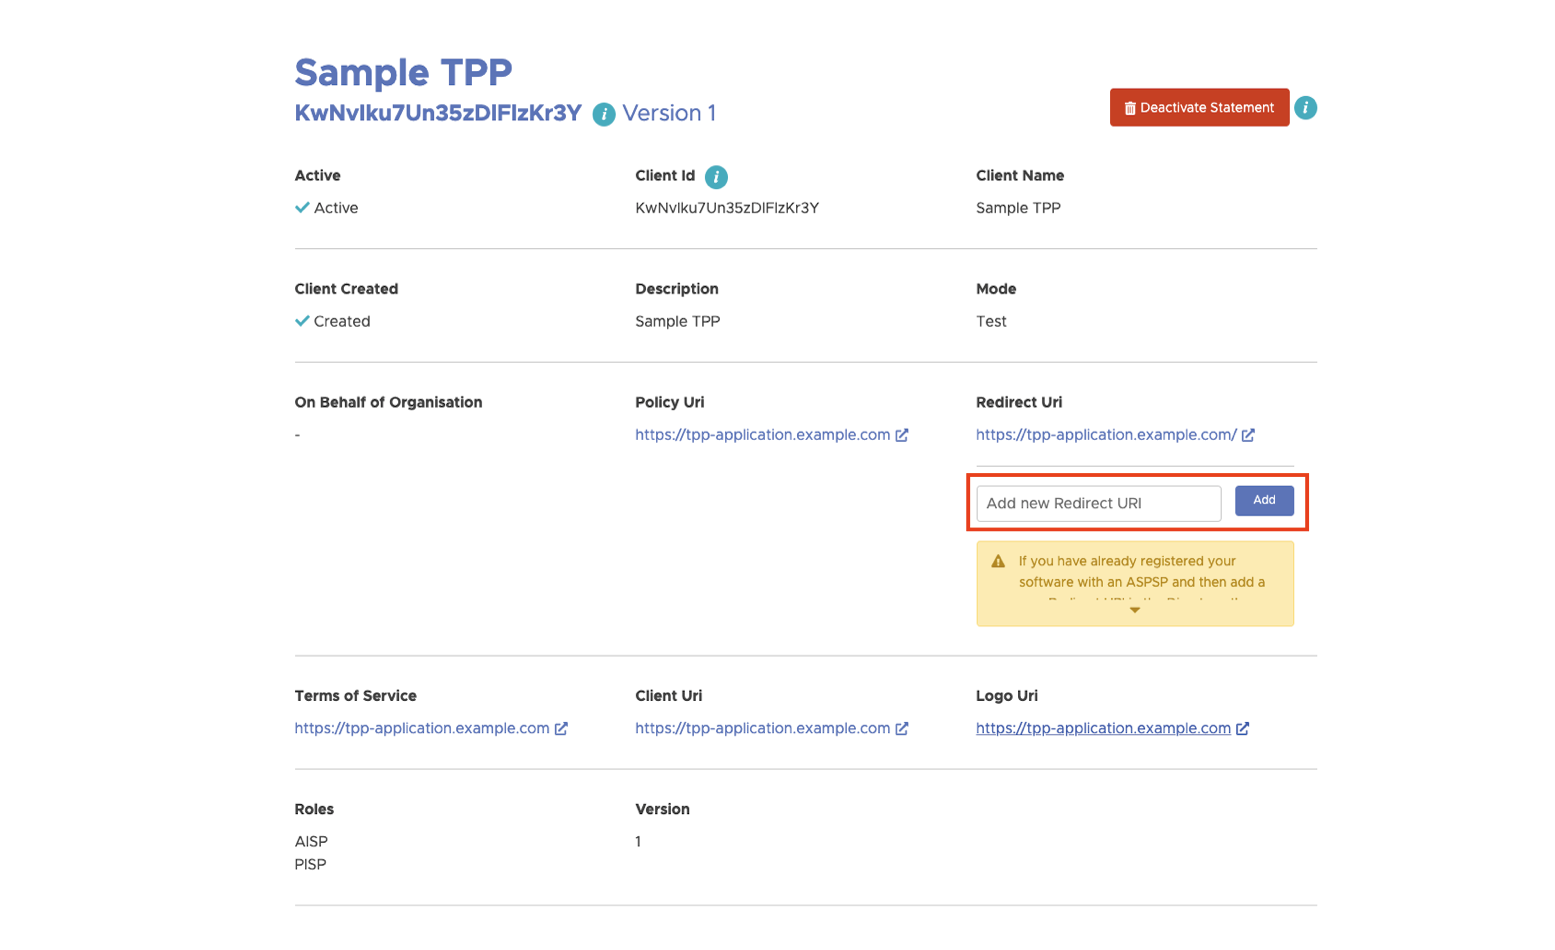
Contact [Support](/resources/support) to confirm that your redirect URL is being used in your application.
**Note:** Open Banking Directory does not allow you to edit or remove unused software statements.
### Modifying redirect URLs
The [Open Banking Directory](https://directory.openbanking.org.uk/s/login/) only allows AISPs and PISPs to add new redirects to an existing software statement.
If you add a new redirect to your software statement that you want an institution to use and you have already registered with that institution, you need to re-register the institution again.
To re-register each institution, you need to repeat the [institution registration process](/getting-started/integration-setup/registration#direct-registration) for the institution.
Re-registering with an institution will result in you losing all existing consents for that institution.
As a result, for account data use cases, you need to request all your users to re-consent. For payments use cases you lose the ability to check the status of any payments with existing consents.
### Deep-linking for applications
#### Mobile
On mobile you can specify a [deep link](https://en.wikipedia.org/wiki/Mobile_deep_linking) `redirectUrl` in your application. This enables users to open your application after leaving the institution.
**Note:** When a deep link has a custom URI scheme (not `http` or `https`) it will link to content that can only be accessed if the application is installed on the device.
#### Web and mobile
For journeys including web and mobile, you can use [App Links](https://developer.android.com/training/app-links/index.html#add-app-links) for Android and [Universal Links](https://developer.apple.com/ios/universal-links/) for iOS.
Both are special types of deep links that you can set as your redirect URL, but these must must use either the `http` or `https` URI schemes.
The benefit of these deep links is that, in addition to opening your mobile app if it is installed, they also enable deferred deep-linking. This means, if the mobile app is not installed, rather than failing, it redirects the user to where they can install your app and then continues the journey in your app when it is installed. This improves user experience.
The Open Banking Directory only supports redirect URLs that use the `http` and `https` schemes so be sure to create deep-links with the appropriate scheme.
### Specifying the redirect URL
When making [authorisation requests](/api-reference/authorisations/create-account-authorisation), you should use the `redirect` property to specify which `url` to use:
```json theme={null}
{
"applicationUserId": "john.doe@company.com",
"institutionId": "modelo-sandbox",
"redirect": {
"url": "https://tpp-application.com/"
}
}
```
### Handling the redirect URL response
When you use a custom redirect URL, Yapily's authorisation service doesn't automatically exchange the access token received by the institution for a `consentToken` which is required to make further calls with the Yapily API.
As a result, you need to make an additional call to [forward the OAuth2 code](/api-reference/consents/exchange-oauth2-code) to Yapily so we can exchange it to obtain a `consentToken` to return to you.
You need:
* a frontend application that can consume uri fragments
* a server to issue the token exchange and any subsequent requests to the Yapily API

#### Success query parameters
You need to forward the `authCode` and `authState` as body parameters in the request to `POST /consent-auth-code`. Both values are obtained as uri fragments from the institution.
If the user successfully authorises the authorisation request, the `redirectUrl` returns the following fragments:
* `state`: this is a unique identifier (UUID) that is controlled by Yapily and sent to the institution to uniquely identify the authorisation. While Yapily controls this parameter, this is also available to you in the response of the authorisation request.
* `code`: the code is the response from the institution that allows Yapily to obtain the access tokens for the authorisation. **Note:** The format is not consistent across each institution.
* `id_token`: this is a JWT that contains more information about the user's request. **Note:** This is not always returned by every institution, especially in Europe.
#### Failure query parameters
If the authorisation fails a different set of fragments are returned on the `redirectUrl` to help explain what has occurred:
* `state`: this is a unique identifier (UUID) that is controlled by Yapily and sent to the institution to uniquely identify the authorisation. While Yapily controls this parameter, this is also available to you in the response of the authorisation request.
* `error`: this is a message sent by the institution explaining the reason for the failure in plain text. **Note:** The level of detail provided depends on the institution.
Possible reasons for failure:
* user rejects the consent request
* issue with the institution
### Masked redirect URL
The masked redirect URL option allows you to use Yapily's auth service `https://auth.yapily.com/` while masking the URL with the URL of your domain.
The benefit of this option is that Yapily handles the institution response. Yapily's auth service automatically retrieves the `consentToken` or provides a failure message and categorisation if there was an issue. Yapily also logs every redirect to the URL.
However, you can't control the UI elements of `https://auth.yapily.com/`.
#### Configuring masked redirect URL
In step 8 of [configuring the redirect URL](#configuring-the-redirect-url), you
need to add a [CNAME record](https://support.google.com/a/answer/112037?hl=en#zippy=%2Cset-up-cname-records-now) `redirectUrl` mapping the URL you want your customers to see to `https://auth-callback.yapily.com`.
Your DevOps team can configure this in your domain provider's DNS settings by adding a new DNS record. For example:
```shell theme={null}
auth.tpp-domain.com CNAME auth-callback.yapily.com
```
You can validate the CNAME is configured correctly, by running the `nslookup` utility using the Terminal application on Mac or Powershell on Windows:
**Successful configuration:**
```shell theme={null}
> nslookup auth.tpp-domain.com
Server: 123.123.123.123
Address: 111.111.111.111#53
Non-authoritative answer:
auth.tpp-domain.com canonical name = auth-callback.yapily.com.
auth-callback.yapily.com canonical name = production-nginx.yapily.com.
Name: production-nginx.yapily.com
Address: 35.189.115.193
```
**Unsuccessful configuration:**
```shell theme={null}
> nslookup auth.tpp-domain.com
Server: 123.123.123.123
Address: 111.111.111.111#53
** server can't find auth.tpp-domain.com: NXDOMAIN
```
Once successfully configured, get in contact with our [Support](/resources/support) team to request the finalisation of the the configuration on Yapily's server and to ensure that your application is configured to use the CNAME.
Adding a new CNAME record to your software statement may result in you losing all existing consents if you are modifying an existing registration and are-registering each `Institution`.
***
## Yapily Connect
Yapily provides a default redirect URL `https://auth.yapily.com/`.
You cannot change the redirect URL. However, we recommend using the callback URL to redirect from `https://auth.yapily.com/` back to your application.
See more information on how to implement the [callback URL](/open-banking-flow/handling-redirects/callback-url).
# Embedded
Source: https://docs.yapily.com/open-banking-flow/user-authorisation/embedded
Guide to Yapily's embedded authorisation flow. Allow users to authorise payments or data access directly within your application without external bank redirects.
## Introduction
In an embedded authorisation flow a user's credentials are captured before the bank sends a Strong Customer Authentication (SCA) code to the user which is also captured in your frontend application and sent back to the institution via Yapily. There is no redirect to the bank itself.
***
## Features
An institution using the embedded flow will support the following features:
**Payments**
* `INITIATE_EMBEDDED_DOMESTIC_SINGLE_PAYMENT`
* `INITIATE_EMBEDDED_BULK_PAYMENT`
**Data**
* `INITIATE_EMBEDDED_ACCOUNT_REQUEST`
***
## Example flow
Embedded flow with multiple SCA methods:
![Embedded flow with multiple SCA methods]() 1. **Initiate the authorisation process**
Make a request to `POST /embedded-account-auth-requests` or `POST /embedded-payment-auth-requests`.
If multiple SCA methods are available, you will receive a list of the SCA methods sent by the bank and the status is `AWAITING_SCA_METHOD`.
* If only 1 `SCA_METHOD` is available, the status will transition directly to `AWAITING_SCA_CODE`. In this case, you don't need to complete step 2 or 3 as the `SCA_CODE` will be sent immediately by the bank to the end user once the embedded account authorisation is initiated.
* For some payments, SCA may be exempted. In such cases, no further SCA steps (such as selecting an SCA method or submitting an SCA code) are required, and the status will transition directly to `AUTHORIZED`.
2. **Present the list of SCA methods to the end user**
You must display the list of available SCA methods to the end user in your frontend application so they can select the method they would like the bank to use to contact them.
1. **Initiate the authorisation process**
Make a request to `POST /embedded-account-auth-requests` or `POST /embedded-payment-auth-requests`.
If multiple SCA methods are available, you will receive a list of the SCA methods sent by the bank and the status is `AWAITING_SCA_METHOD`.
* If only 1 `SCA_METHOD` is available, the status will transition directly to `AWAITING_SCA_CODE`. In this case, you don't need to complete step 2 or 3 as the `SCA_CODE` will be sent immediately by the bank to the end user once the embedded account authorisation is initiated.
* For some payments, SCA may be exempted. In such cases, no further SCA steps (such as selecting an SCA method or submitting an SCA code) are required, and the status will transition directly to `AUTHORIZED`.
2. **Present the list of SCA methods to the end user**
You must display the list of available SCA methods to the end user in your frontend application so they can select the method they would like the bank to use to contact them.
3. **Update the authorisation with the selected SCA method**
Make a request to `PUT /embedded-account-auth-requests/{consentId}` or `PUT /embedded-payment-auth-requests/{consentId}` including the selected SCA method, to update the bank via Yapily. The status is `AWAITING_SCA_CODE`.
The bank will send the SCA code directly to the end user via the preferred method. You need to provide an input field to capture the code in your application.
4. **Update the authorisation with the SCA code**
Make a request to `PUT /embedded-account-auth-requests/{consentId}` or `PUT /embedded-payment-auth-requests/{consentId}` including the SCA code, to update the authorisation via Yapily.
Yapily returns the `consentToken` and the status is `AUTHORIZED`.
# Multiple Consents
Source: https://docs.yapily.com/open-banking-flow/user-authorisation/multiple-consents
Manage multiple open banking consents with Yapily. Handle consent tokens, refresh expired consents, and support multi-bank authorisation in a single integration.
Yapily multiple consents represent the cases where the `Institution` returns more than one authorisation code, for example with AMEX, if the user
authorises their consent to share two or more accounts, AMEX will return a consent for each card.
We do not recommend executing account authorisation requests for AMEX without either using a `callback` or a custom redirect. If done so, if the user
authorises more than one AMEX account, you will only be able to track the first account authorised by the bank using the consent id (returned
in authorisation request response). Any extra consents will be created but you will not be able to receive the consent id for the additional
consents without using the callback or redirect.
## Use with a callback
If you have created an authorisation request with a `callback` and the bank returns multiple consents, you will receive the consents as query parameters
at the `callback` in the format:
`?consent=\{value1\}&consent=\{value2\}...`
e.g.
```shell theme={null}
https://parameter-viewer.yapily.com/?consent=eyJ0eXAiOiJKV1QiLCJhbGciOiJIUzUxMiJ9.eyJJTlNUSVRVVElPTiI6ImFtZXgiLCJDT05TRU5UIjoiNDcyNTY3NjEtMjZhMS00ZmQyLWFkMTktZTcyOGFiMmNjY2Q0IiwiQVBQTElDQVRJT05fVVNFUl9JRCI6Imtpcml4IiwiVVNFUiI6IjgyOTRlMmE2LWNiNGUtNGU4MC1iY2I3LTAyY2JiZjllNDU5YiJ9.13t3DQ2PhIoFt6Cd9_wxf9cozwLsPS5Ejno2xQnzKS2nsDEtGHzNYTV0klqgs_WHGP86iWGY_vRyr2zCgdhO8w&consent=eyJ0eXAiOiJKV1QiLCJhbGciOiJIUzUxMiJ9.eyJJTlNUSVRVVElPTiI6ImFtZXgiLCJDT05TRU5UIjoiYTJkYWEwNDgtOGY3OS00MzEwLWJkNTAtODMwZmM0NzkxMWNmIiwiQVBQTElDQVRJT05fVVNFUl9JRCI6Imtpcml4IiwiVVNFUiI6IjgyOTRlMmE2LWNiNGUtNGU4MC1iY2I3LTAyY2JiZjllNDU5YiJ9.Hk8SfdxtxVqFM5cn6uPTItqtmUMoG4aRS4maF9y9
```
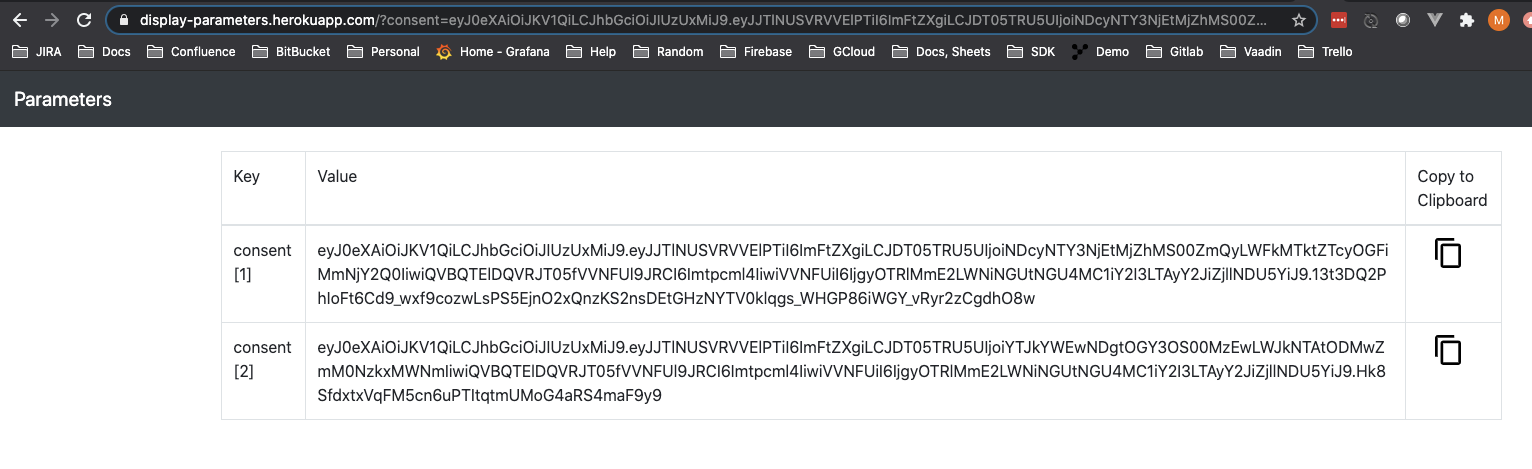
## Use with a redirect url
This section only applies if you have your own Open Banking AISP/PISP licenses and are using your own certificates to register with each Yapily
`Institution`. See [Redirect Url](/open-banking-flow/handling-redirects/redirect-url) for more information.
For AMEX, the response at the redirect will contain multiple comma separated `authToken` values and one `state`:
`?authToken=\{value1\},\{value2\}...&state=\{value\}`
e.g.
```shell theme={null}
https://auth.yapily.com/?authtoken=7e7c7380-a478-4b99-8ed1-c39c366bfe62,15ab2305-744c-41d7-a891-f05dfc2704bc&state=05c6e92e736840c193fcf9c05778a727
```
You will then need to execute (Forwarding) [Send OAuth2 Code](/api-reference/consents/exchange-oauth2-code) for each `authToken` with the
same state to retrieve a `consentToken` for each of the user's accounts that have been authorised for sharing.
## Use with one-time-token
Similarly, when you also specify to use a `one-time-token` in the authorisation request and the bank returns multiple consents, you will get one-time
tokens as query parameters at the `callback` in the format:
`?one-time-token=\{value1\}&one-time-token=\{value2\}...`
e.g.
```shell theme={null}
https://parameter-viewer.yapily.com/?one-time-token=eyJ0eXAiOiJKV1QiLCJhbGciOiJIUzUxMiJ9.eyJJTlNUSVRVVElPTiI6ImFtZXgiLCJVVUlEIjoiNjU4oThmOWEtNjcyNi00OGQxLWI2MTctYmE0NjUwODFkZTY3IiwiZXhwIjoxNjAzMjEwNjUyfQ.uvCCx_DLN2A0SvVNmPdMkfTF7j1q6A_x5VREq5yFzdJO636WPSLvIBNa96AG9rwC8Lb3BVNb4RoJ0RvpAjHntA&one-time-token=eyJ0eXAiOiJKV1QiLCJhbGciOiJIUzUxMiJ9.eyJJTlNUSVRVVElPTiI6ImFtZXgiLCJVVUlEIjoiNzI3ODlmNTAtMjIyMC00MzMxLWFmNmYtODIyMGFiYzYwNGE1IiwiZXhwIjoxNjAzMjEwNjUzfQ.sAeY1VSs2C1EvtMWsFvev_xXwwwrv7K9htqxNe6LfCMnES6tbrkZBrAr2XktsE4En4lGn8qcBjbSb0UgwgL6LA
```

You will then need to execute [Exchange One Time Token](/api-reference/consents/exchange-one-time-token) for each `one-time-token` to retrieve a `consentToken` for
each of the user's accounts that have been authorised for sharing.
# User authorisation flows
Source: https://docs.yapily.com/open-banking-flow/user-authorisation/overview
Understand the user authorisation flows supported by Yapily: single redirect, embedded, pre-authorisation, and QR code — for obtaining open banking consent.
## Introduction
User authorisation flows are the mechanism by which users give consent to a third party provider to access their account information or initiate a payment via open banking.
End users provide consent via their bank and you must retrieve end user consent before accessing financial data or making a payment.
For an overview of consent lifecycle and management, see [Understanding Consents](/concepts/consent-lifecycle).
Banks use different methods to authenticate and collect consent from users. You may need to implement multiple user authorisation flows depending on which institutions you want to integrate with.
***
## Types of authorisation flows
The type of authorisation flow is determined by the bank, not Yapily. You can confirm which authorisation flow a bank supports by calling [GET Institutions](/api-reference/institutions/get-institutions) and checking the features array.
#### Single redirect
A single redirect authorisation flow requires a user to be sent to their bank to authenticate themselves and securely give their consent to make a payment or share their financial data.
[See more details](/open-banking-flow/user-authorisation/single-redirect).
#### Pre-authorisation
A pre-authorisation flow requires 2 separate authorisation steps. Firstly, the user must authenticate themselves with their bank. Secondly, the user gives consent to make a payment or share their financial data.
Pre-authorisation flows mostly require a user to be sent to their bank twice, to authenticate and then give consent.
[See more details](/open-banking-flow/user-authorisation/pre-authorisation).
#### Embedded
An embedded authorisation flow captures credentials (e.g. username and password) to authenticate the user and confirm their consent for a payment or to share financial data and sends them to their bank via Yapily's API. There is no redirect to the bank itself.
[See more details](/open-banking-flow/user-authorisation/embedded).
***
## Payments and account data
The same authorisation flows apply for requesting payments or accessing financial data. The only difference is you must call a specific authorisation endpoint to initiate the correct authorisation request.
***
## Decoupled flows
Decoupled flows occur when the end user and bank interact directly without Yapily as an intermediary, for example via a secondary device such as a mobile phone. This scenario is possible in all authorisation flows, but is most common in embedded flows.
As a result, decoupled authorisation flows require an additional step where you poll the consent status to know whether the user has successfully authorised the request with the bank.
#### Handling a decoupled flow
The following diagram shows the decoupled steps in an authorisation flow:
![Decoupled flow example diagram]() A decoupled flow is indicated by the status `AWAITING_DECOUPLED_AUTHORIZATION`.
In this case, you should poll [GET consent](/api-reference/consents/get-consent) to know whether the user has successfully authorised the request with the bank.
You can also add a prompt in your application for the user to signal when they have authorised the request.
***
## Authorisation status
At each stage in the flow Yapily returns the current status of the authorisation request.
This indicates which stage of the authorisation process the consent is currently in. You can use the status to indicate the next step in the flow.
| Status | Description | Authorisation flow |
| ---------------------------------- | ------------------------------------------------------------------------------------------------------------------------------------------- | ---------------------------------------------- |
| `AWAITING_PRE_AUTHORIZATION` | The end user needs to authenticate with their bank before they can authorise the request. | Pre-authorisation |
| `AWAITING_AUTHORIZATION` | The end user needs to be redirected to their bank to authorise the request. | Single redirect
A decoupled flow is indicated by the status `AWAITING_DECOUPLED_AUTHORIZATION`.
In this case, you should poll [GET consent](/api-reference/consents/get-consent) to know whether the user has successfully authorised the request with the bank.
You can also add a prompt in your application for the user to signal when they have authorised the request.
***
## Authorisation status
At each stage in the flow Yapily returns the current status of the authorisation request.
This indicates which stage of the authorisation process the consent is currently in. You can use the status to indicate the next step in the flow.
| Status | Description | Authorisation flow |
| ---------------------------------- | ------------------------------------------------------------------------------------------------------------------------------------------- | ---------------------------------------------- |
| `AWAITING_PRE_AUTHORIZATION` | The end user needs to authenticate with their bank before they can authorise the request. | Pre-authorisation |
| `AWAITING_AUTHORIZATION` | The end user needs to be redirected to their bank to authorise the request. | Single redirect
Pre-authorisation |
| `AWAITING_SCA_METHOD` | The end user needs to select which SCA method they want to use to authorise with their bank. | Embedded |
| `AWAITING_SCA_CODE` | The bank is sending an SCA code directly to the end user for them to authorise the request. This needs to be collected in your application. | Embedded
Embedded pre-authorisation |
| `AWAITING_DECOUPLED_AUTHORIZATION` | The end user needs to authenticate the request with their bank via a decoupled means, for example another device. | All |
| `AUTHORIZED` | The end user has granted consent for the request. The authorisation process is complete. | All |
# Pre-authorisation
Source: https://docs.yapily.com/open-banking-flow/user-authorisation/pre-authorisation
Guide to Yapily's pre-authorisation flow for obtaining consent before initiating payments or data requests. Ideal for scheduled and future-dated payment scenarios.
## Introduction
A pre-authorisation flow requires 2 separate authorisation steps. Firstly, the user must authenticate themselves with the bank. Secondly, the user gives consent to make a payment or share their financial data.
You must complete both steps of the flow for each new authorisation request to access financial data or make a payment.
Pre-authorisation flows most commonly require a user to be redirected to their bank to authenticate and give consent, however embedded authentication is also possible.
***
## One-time pre-authorisation
One-time pre-authorisation is an improved pre-authorisation flow that enables you to reuse the initial pre-authorisation for multiple authorisation requests.
The pre-authorisation remains valid until the expiry period. This means you can skip the pre-authorisation step when creating subsequent authorisation requests.
Where the `INITIATE_ONETIME_PRE_AUTHORIZATION` feature is supported, it also possible to collect a single pre-authorisation that is valid for both data and payment authorisation requests.
***
## Features
An institution using the pre-authorisation flow will support the following features:
#### Payments
At least 1 of:
* `INITIATE_PRE_AUTHORIZATION`
* `INITIATE_PRE_AUTHORIZATION_PAYMENTS`
* `INITIATE_ONETIME_PRE_AUTHORIZATION`
* `INITIATE_ONETIME_PRE_AUTHORIZATION_PAYMENTS`
AND at least 1 of:
* `INITIATE_DOMESTIC_SINGLE_PAYMENT`
* `INITIATE_DOMESTIC_PERIODIC_PAYMENT`
* `INITIATE_DOMESTIC_SCHEDULED_PAYMENT`
* `INITIATE_DOMESTIC_SINGLE_INSTANT_PAYMENT`
* `INITIATE_INTERNATIONAL_PERIODIC_PAYMENT`
* `INITIATE_INTERNATIONAL_SCHEDULED_PAYMENT`
* `INITIATE_INTERNATIONAL_SINGLE_PAYMENT`
* `INITIATE_BULK_PAYMENT`
#### Data
At least 1 of:
* `INITIATE_PRE_AUTHORIZATION`
* `INITIATE_ONETIME_PRE_AUTHORIZATION`
* `INITIATE_ONETIME_PRE_AUTHORIZATION_ACCOUNTS`
AND
* `INITIATE_ACCOUNT_REQUEST`
***
## Example flows
### Redirect pre-authorisation
Double redirect pre-authorisation flow using the Yapily default [redirect URL](/open-banking-flow/handling-redirects/redirect-url) and a [callback URL](/open-banking-flow/handling-redirects/callback-url):
![Double redirect pre-authorisation flow with callback]() 1. **Initiate pre-authorisation**
Make a request to `POST /pre-auth-requests`.
Yapily will return an `authorisationUrl`. The status of the authorisation is `AWAITING_PRE_AUTHORIZATION`.
1. **Initiate pre-authorisation**
Make a request to `POST /pre-auth-requests`.
Yapily will return an `authorisationUrl`. The status of the authorisation is `AWAITING_PRE_AUTHORIZATION`.
2. **Direct the end user to the `authorisationUrl`**
The end user is redirected to their bank to authenticate.
The bank then redirects the end user to the redirect URL. In this case `auth.yapily.com`. The end user will then be redirected after a few milliseconds to the specified callback URL.
During the redirect to Yapily, Yapily updates the consent object with the `consentToken`. This is returned directly to you in the callback.
The status of the authorisation is `PRE_AUTHORIZED`.
3. **Update the pre-authorisation**
Make a request to `PUT /account-auth-requests` or `PUT /payment-auth-requests`.
Yapily will return another `authorisationUrl`. The status is `AWAITING_AUTHORIZATION`.
4. **Direct the end user to the `authorisationUrl`**
The end user is redirected to their bank to authorise the account data access or payment request.
The bank then redirects the end user to the redirect URL. In this case `auth.yapily.com`. The end user will then be redirected after a few milliseconds to the specified callback URL.
During the redirect to Yapily, Yapily updates the consent object with the `consentToken`. This is returned directly to you in the callback.
The status of the authorisation is `AUTHORIZED`.
### One-time pre-authorisation
One-time pre-authorisation flow using the Yapily default [redirect URL](/open-banking-flow/handling-redirects/redirect-url) and a [callback URL](/open-banking-flow/handling-redirects/callback-url):
![One-time pre-authorisation flow with callback]() If you already have a valid pre-authorisation from the user, you can skip step 1 and 2 and immediately initiate an authorisation request.
1. **Initiate pre-authorisation**
Make a request to `POST /pre-auth-requests`.
Yapily will return an `authorisationUrl`. The status of the authorisation is `AWAITING_PRE_AUTHORIZATION`.
If you already have a valid pre-authorisation from the user, you can skip step 1 and 2 and immediately initiate an authorisation request.
1. **Initiate pre-authorisation**
Make a request to `POST /pre-auth-requests`.
Yapily will return an `authorisationUrl`. The status of the authorisation is `AWAITING_PRE_AUTHORIZATION`.
2. **Direct the end user to the `authorisationUrl`**
The end user is redirected to their bank to authenticate.
The bank then redirects the end user to the redirect URL. In this case `auth.yapily.com`. The end user will then be redirected after a few milliseconds to the specified callback URL.
During the redirect to Yapily, Yapily updates the consent object with the `consentToken`. This is returned directly to you in the callback.
The status of the authorisation is `PRE_AUTHORIZED`.
3. **Initiate the authorisation request**
Make a request to `POST /account-auth-requests` or `POST /payment-auth-requests`.
Yapily will return an `authorisationUrl`. The status is `AWAITING_AUTHORIZATION`.
4. **Direct the end user to the `authorisationUrl`**
The end user is redirected to their bank to authorise the account data access or payment request.
The bank then redirects the end user to the redirect URL. In this case `auth.yapily.com`. The end user will then be redirected after a few milliseconds to the specified callback URL.
During the redirect to Yapily, Yapily updates the consent object with the `consentToken`. This is returned directly to you in the callback.
The status of the authorisation is `AUTHORIZED`.
### Embedded pre-authorisation
This flow is not commonly used by institutions.
![Embedded pre-authorisation flow]() 1. **Initiate pre-authorisation**
Make a request to `POST /pre-auth-requests`.
Yapily will return an `authorisationUrl`. The status of the authorisation is `AWAITING_PRE_AUTHORIZATION`.
1. **Initiate pre-authorisation**
Make a request to `POST /pre-auth-requests`.
Yapily will return an `authorisationUrl`. The status of the authorisation is `AWAITING_PRE_AUTHORIZATION`.
2. **Direct the end user to the `authorisationUrl`**
The end user is redirected to their bank to authenticate.
The bank then redirects the end user to the redirect URL. In this case `auth.yapily.com`. The end user will then be redirected after a few milliseconds to the specified callback URL.
During the redirect to Yapily, Yapily updates the consent object with the `consentToken`. This is returned directly to you in the callback.
The status of the authorisation is `PRE_AUTHORIZED`.
3. **Update the pre-authorisation**
Make a request to `PUT /account-auth-requests` or `PUT /payment-auth-requests`.
The status is `AWAITING_SCA_CODE`.
The bank will send the SCA code directly to the end user. You need to provide an input field to capture the code in your application.
4. **Update the authorisation with the SCA code**
Make a request to `PUT /embedded-account-auth-requests/{consentId}` or `PUT /embedded-payment-auth-requests/{consentId}` including the SCA code, to update the authorisation via Yapily.
Yapily returns the `consentToken` and the status is `AUTHORIZED`.
# PSU Identifiers
Source: https://docs.yapily.com/open-banking-flow/user-authorisation/psu-identifiers
Learn how to use PSU identifiers with the Yapily API to improve user experience and institution compatibility during open banking authorisation consent flows.
As part of the SCA process in authorising any request for user's financial data or to initiate a payment on their behalf, some institutions require extra
information in the form of PSU values in order to successfully authorise the request.
The endpoints which may require these identifiers are all of the [Authorisations](/api-reference/authorisations/create-account-authorisation) endpoints.
For each of these requests, the values `psu-id`, `psu-corporate-id` and `psu-ip-address` will be required in the following cases for the following institutions:
## Institutions
| BANK | PSU-ID | PSU-CORPORATE-ID | PSU-IP-ADDRESS |
| ---------------------------------------------------------------- | --------- | ---------------- | -------------- |
| Alpenbank | Mandatory | - | - |
| Cassa Centrale Raiffeisen Dell Alto Adige | Mandatory | - | - |
| Cassa Raiffeisen Alta Pusteria | Mandatory | - | - |
| Cassa Raiffeisen Alta Venosta | Mandatory | - | - |
| Cassa Raiffeisen Bassa Atesina | Mandatory | - | - |
| Cassa Raiffeisen Bassa Vall Isarco | Mandatory | - | - |
| Cassa Raiffeisen Bassa Venosta | Mandatory | - | - |
| Cassa Raiffeisen Campo Di Trens | Mandatory | - | - |
| Cassa Raiffeisen Castelrotto-Ortisei | Mandatory | - | - |
| Cassa Raiffeisen Della Val Passiria | Mandatory | - | - |
| Cassa Raiffeisen Della Valle Isarco | Mandatory | - | - |
| Cassa Raiffeisen Di Brunico | Mandatory | - | - |
| Cassa Raiffeisen Di Dobbiaco | Mandatory | - | - |
| Cassa Raiffeisen Di Funes | Mandatory | - | - |
| Cassa Raiffeisen Di Lagundo | Mandatory | - | - |
| Cassa Raiffeisen Di Lasa | Mandatory | - | - |
| Cassa Raiffeisen Di Marlengo | Mandatory | - | - |
| Cassa Raiffeisen Di Merano | Mandatory | - | - |
| Cassa Raiffeisen Di Nova Ponente Aldino | Mandatory | - | - |
| Cassa Raiffeisen Di Parcines | Mandatory | - | - |
| Cassa Raiffeisen Di Scena | Mandatory | - | - |
| Cassa Raiffeisen Di Tesimo | Mandatory | - | - |
| Cassa Raiffeisen Di Villabassa | Mandatory | - | - |
| Cassa Raiffeisen Etschtal | Mandatory | - | - |
| Cassa Raiffeisen Gherdeina | Mandatory | - | - |
| Cassa Raiffeisen Laces | Mandatory | - | - |
| Cassa Raiffeisen Lana | Mandatory | - | - |
| Cassa Raiffeisen Monguelfo-Casiestesido | Mandatory | - | - |
| Cassa Raiffeisen Oltradige | Mandatory | - | - |
| Cassa Raiffeisen Prato-Tubre | Mandatory | - | - |
| Cassa Raiffeisen Schlern-Rosengarten | Mandatory | - | - |
| Cassa Raiffeisen Silandro | Mandatory | - | - |
| Cassa Raiffeisen Tirolo | Mandatory | - | - |
| Cassa Raiffeisen Tures-Aurina | Mandatory | - | - |
| Cassa Raiffeisen Ultimo S.Pancrazio-Lauregno | Mandatory | - | - |
| Cassa Raiffeisen Val Badia | Mandatory | - | - |
| Cassa Raiffeisen Val Sarentino | Mandatory | - | - |
| Cassa Raiffeisen Vandoies | Mandatory | - | - |
| Cassa Raiffeisen Wipptal | Mandatory | - | - |
| Cassa Rurale Di Bolzano | Mandatory | - | - |
| Cassa Rurale Di Salorno | Mandatory | - | - |
| Deutsche Bank | Mandatory | - | - |
| DNB | Mandatory | - | - |
| Handelsbanken Business | - | Mandatory | - |
| Intesa Sanpaolo S.p.A | - | - | Mandatory |
| Noris Bank | Mandatory | - | - |
| Postbank | Mandatory | - | - |
| Raiffeisen Bank Croatia | Mandatory | - | - |
| Raiffeisen Landesbank / Casa Centrale Raiffeisen dell Alto Adige | Mandatory | - | - |
| SMBC | Mandatory | - | - |
| Solaris | - | - | Mandatory |
| Clanq | - | - | Mandatory |
| Grover | - | - | Mandatory |
| Helios | - | - | Mandatory |
| Kontist | - | - | Mandatory |
| Tomorrow Bank | - | - | Mandatory |
| Woolsocks France | - | - | Mandatory |
| Woolsocks Germany | - | - | Mandatory |
| Woolsocks Ireland | - | - | Mandatory |
| Woolsocks Italy | - | - | Mandatory |
| Woolsocks Spain | - | - | Mandatory |
Otherwise, for all other institutions, you will not be required to specify any of these PSU values.
In order to accommodate for the listed institutions that require psu values, you will need to build your front-end applications to accept these extra
fields from your customers before executing any of the authorisation requests.
## PSU-ID and PSU-CORPORATE-ID
The `PSU-ID` and the `PSU-CORPORATE-ID` serve the same purpose, the `PSU-ID` is used for personal accounts and the `PSU-CORPORATE-ID` is used for business and corporate accounts.
The banks might use different format in creating these identifiers, below is a list of them per each bank/group.
### Italian Raiffeisen institutions
These being *Alpenbank* plus all of the *Cassa Centrale* and *Cassa Raiffeisen* institutions listed above.
Client ID of the PSU in the ASPSP's (bank) client interface. The user should be familiar with this ID and should follow a similar format to the following: `XXXXXXXXX`. A valid `PSU-ID` must be entered.
### DNB
`PSU-ID` for retail users is their Social security number (SSN), while for corporate users it is their TX-ident. TX-ident is the DNB specific ID for corporate users, which consists of a total of 7 characters, where the first 2 are letters and the remaining 5 are digits. The TX-ident is provided by DNB to the corporate user when becoming a corporate client.
### Raiffeisen Bank Croatia
You will need to request a National Personal Identification Number (OIB), that is a permanent national identification of every Croatian citizen and legal persons domiciled in the Republic of Croatia.
### Deutsche bank and Noris bank
The Deutsche bank and the Noris bank are composing the `PSU-ID` with the format 'branch number' + 'account number', where:
* Branch number - 3 digits
* Account number - 7 digits
```shell theme={null}
curl -L -X POST 'https://api.yapily.com/account-auth-requests' \
-H 'Content-Type: application/json' \
-H 'psu-id: 6154033403' \
-u 'APPLICATION_KEY:APPLICATION_SECRET' \
-d '{
"applicationUserId": "{user-reference}",
"institutionId": "deutschebank-sandbox",
"callback": "https://display-parameters.com/"
}'
```
### Postbank
Postbank requires an alphanumeric PSU ID.
### SMBC
The `PSU-ID` is the username used to sign in to the bank portal.
### Handelsbanken Business UK
If `PSU-CORPORATE-ID` is left blank, the bank will use the default value `UNKNOWN` that is identified as an Individual customer and if they aren't (because they only have access to Corporate accounts), then the signing will return an error.
## PSU-IP-ADDRESS
The `PSU-IP-ADDRESS` is another personal identifier required by certain banks.
You will need to capture the ip address of a PSU (payment service user) that is following this format:
```shell theme={null}
curl -L -X POST 'https://api.yapily.com/account-auth-requests' \
-H 'Content-Type: application/json' \
-H 'psu-ip-address: 35.189.94.5' \
-u 'APPLICATION_KEY:APPLICATION_SECRET' \
-d '{
"applicationUserId": "{user-reference}",
"institutionId": "solaris-sandbox",
"callback": "https://display-parameters.com/"
}'
```
# Single redirect
Source: https://docs.yapily.com/open-banking-flow/user-authorisation/single-redirect
Complete guide to Yapily's single redirect authorisation flow. Initiate consent requests, redirect users to their bank, and handle the authorisation callback.
## Introduction
A single redirect authorisation flow requires a user to be sent to their bank to authenticate themselves and securely give their consent to make a payment or share their financial data.
***
## Features
An institution using the single redirect flow will support the following features:
**Payments**
* `INITIATE_DOMESTIC_PERIODIC_PAYMENT`
* `INITIATE_DOMESTIC_SCHEDULED_PAYMENT`
* `INITIATE_DOMESTIC_SINGLE_INSTANT_PAYMENT`
* `INITIATE_DOMESTIC_SINGLE_PAYMENT`
* `INITIATE_INTERNATIONAL_PERIODIC_PAYMENT`
* `INITIATE_INTERNATIONAL_SCHEDULED_PAYMENT`
* `INITIATE_INTERNATIONAL_SINGLE_PAYMENT`
* `INITIATE_BULK_PAYMENT`
**Data**
* `INITIATE_ACCOUNT_REQUEST`
***
## Example flows
### Callback URL
Single redirect flow using the Yapily default [redirect URL](/open-banking-flow/handling-redirects/redirect-url) and a [callback URL](/open-banking-flow/handling-redirects/callback-url):
![Single redirect authorisation flow with callback]() 1. **Initiate the authorisation process**
Make a request to `POST /account-auth-requests` or `POST /payment-auth-requests`.
Yapily will return an `authorisationUrl`. The status of the authorisation is `AWAITING_AUTHORIZATION`.
1. **Initiate the authorisation process**
Make a request to `POST /account-auth-requests` or `POST /payment-auth-requests`.
Yapily will return an `authorisationUrl`. The status of the authorisation is `AWAITING_AUTHORIZATION`.
2. **Direct the end user to the `authorisationUrl`**
The end user is redirected to their bank to authenticate and authorise the consent request.
The bank then redirects the end user to the redirect URL. In this case `yapily.auth.com`. The end user will then be redirected after a few milliseconds to the specified callback URL.
During the redirect to Yapily, Yapily updates the consent object with the `consentToken`. This is returned directly to you in the callback.
The status of the authorisation is `AUTHORIZED`.
### Custom redirect URL
Single redirect flow using a custom [redirect URL](/open-banking-flow/handling-redirects/redirect-url):
![Single redirect authorisation flow with custom redirect]() 1. **Initiate the authorisation process**
Make a request to `POST /account-auth-requests` or `POST /payment-auth-requests`.
Yapily will return an `authorisationUrl`. The status of the consent is `AWAITING_AUTHORIZATION`.
1. **Initiate the authorisation process**
Make a request to `POST /account-auth-requests` or `POST /payment-auth-requests`.
Yapily will return an `authorisationUrl`. The status of the consent is `AWAITING_AUTHORIZATION`.
2. **Direct the end user to the `authorisationUrl`**
The end user is redirected to their bank to authenticate and authorise the consent request.
The bank then redirects the end user to your custom redirect URL. The bank will also send an authorisation state and code to you.
3. **Forward the authorisation state and code to Yapily**
Make a request to `POST /consent-auth-code`.
Yapily then exchanges this with the bank and returns the `consentToken` to you.
The status of the consent is `AUTHORIZED`.
### Poll for consent
Single redirect flow using the Yapily default [redirect URL](/open-banking-flow/handling-redirects/redirect-url) and polling for consent:
![Single redirect authorisation flow with polling for consent]() If you are using the Yapily default redirect URL, we recommend using a [callback URL](/open-banking-flow/handling-redirects/callback-url) to automatically receive the `consentToken`. However, you may wish to also poll for consent for additional validation.
1. **Initiate the authorisation process**
Make a request to `POST /account-auth-requests` or `POST /payment-auth-requests`.
Yapily will return an `authorisationUrl`. The status of the consent is `AWAITING_AUTHORIZATION`.
If you are using the Yapily default redirect URL, we recommend using a [callback URL](/open-banking-flow/handling-redirects/callback-url) to automatically receive the `consentToken`. However, you may wish to also poll for consent for additional validation.
1. **Initiate the authorisation process**
Make a request to `POST /account-auth-requests` or `POST /payment-auth-requests`.
Yapily will return an `authorisationUrl`. The status of the consent is `AWAITING_AUTHORIZATION`.
2. **Direct the end user to the `authorisationUrl`**
The end user is redirected to their bank to authenticate and authorise the consent request.
The bank then redirects the end user to the redirect URL. In this case, `yapily.auth.com`. During the redirect to Yapily, Yapily updates the consent object with the `consentToken`.
3. **Retrieve the `consentToken` and status**
Poll the result of GET Consent until the consent object is updated with the `consentToken` and the status of the consent transitions to `AUTHORIZED`.
# Additional Information
Source: https://docs.yapily.com/payments/bulk-payments/additional-information
Additional reference for bulk payment creation with Yapily, including payment file formats, amount limits, status tracking, and error handling for batch payments.
Further information on how to create bulk payments with Yapily.
The Bulk Payments product is available as a BETA version.
***
## Bulk payment request
To create a bulk payment with the Yapily API, you specify an array of [Single Payments](/payments/single-payments) and provide them to the `payments` object in the the [BulkPaymentRequest](/api-reference/authorisations/create-bulk-payment-authorisation) when executing any of the bulk payment endpoints.
Depending on the restrictions of each `Institution`, you may have to make specific adjustments to the `payments` array. More information on these types of restrictions are listed below.
## Account beneficiaries
For each `Institution` in the UK that has the limitation where each `Payee` must be a trusted beneficiary for the execution of the bulk payment to occur successfully, Yapily has introduced the `ACCOUNT_BENEFICIARIES` feature to allow TPPs to get all the beneficiaries for the `Payer` account to cross check that each `Payee` is a trusted beneficiary.
To access the beneficiaries of an account, you must obtain a valid AIS consent using [Create Account Authorisation](/api-reference/authorisations/create-account-authorisation) and then use the resultant `consentToken` to execute [Get Account Beneficiaries](/api-reference/financial-data/get-account-beneficiaries).
Unfortunately, it is not in scope for Open Banking to allow the dynamic adding of beneficiaries through Open Banking APIs so the payments service user must do this manually through their bank.
## IdempotencyId
Unique identifier for bulk payment file requests. Ensures idempotency, preventing duplicate processing of files and transactions due to retries or timeouts.
**Requirements for idempotencyId:**
* **Uniqueness:** Each `idempotencyId` should be unique per bulk payment consent. Reusing the same `idempotencyId` with different consents (bulk payment files) can result in duplicate payments, as each consent is treated as a separate transaction.
* **Validity Period:** An `idempotencyId` is valid for 24 hours. Resubmitting a bulk payment file with the same `idempotencyId` and consent after 24 hours may lead to the payment being processed again.
For HSBC Business, the idempotencyId is valid for only 5 minutes.
* **Correct Usage:** When resending a bulk payment file due to issues like timeouts, use the same `idempotencyId` (for the same consent) within 24 hours to ensure the file is processed only once.
* **Format:** The `idempotencydD` must be an alphanumeric string between 1 and 40 characters with no spaces (e.g., `igeRtFGgIk351ImM3rtd`).
## Execution
Once the bank is instructed to execute the payment, the bank will decide whether or not they execute the bulk as a whole, meaning that if one payment fails, the entire bulk may fail.
## Known restrictions
Bank restrictions change frequently, so this information may become out-of-date. If you are aware this is the case, please let us know.
### Barclays
* Only immediate domestic payments are supported
* Maximum 50 payments per request
* Minimum 5 payments per request
* Maximum total payments amount is £50,000
* Minimum payment amount is £0.05
* The `reference` field is mandatory for every payment in the bulk transaction
* The character field length for Debtor Account Name and Creditor Account Name is less than 140 characters
* Please avoid using special characters (such as '.', '#', or '\[ ]') in contact names and references, as this can prevent you from completing bulk payment
### HSBC
* Only immediate domestic and scheduled domestic payments are supported
* Maximum 25 payments per request
* For HSBC Business customers cannot exceed a single payment limit, which is setup by the client
* Domestic scheduled payments must have a payment execution date that is 2-45 days in the future
* Multi-authorisation journey is supported in Bankline. The secondary authoriser(s) would need to approve the payments by logging into Bankline and completing the authorisation
### Lloyds
* Only immediate domestic and scheduled domestic payments are supported
* Maximum 25 payments per request
* Maximum total payments amount is £100,000
* Bulk payment daily limit is £250,000
* The `reference` for every payment is required
* `Payer` object must be specified in the bulk payment
* Maximum 18 characters for `payee.name`
* Maximum 18 characters for `paymentIdempotencyId`
### Natwest
* Only immediate domestic and scheduled domestic payments are supported
* Maximum 50 payments per request
* Minimum 1 payment per request
* Minimum payment amount is £0.01
* Bankline customers have a maximum limit of:
* 3000 payments to multiple payees at once from a single debit account
* 4000 payments to multiple payees at once from multiple debit accounts
* The maximum payment amount will be driven by the customer's daily payment limits on their account
* Customer's daily payment limits are shared across bulk payments and individual payments. For example, if a customer has a daily limit of £1000, the value of bulk and individual payments they make collectively on one day can't exceed £1000
* Each payment in the bulk must have the same payment type
* Bulk payments are only accepted where all the creditors are trusted beneficiaries
* Each payment in the bulk must have maximum of 16 characters for `reference`
* A bulk payment can consist uniquely of either Single immediate Payments or Future Dated Payments
* Maximum 18 characters for `payee.name`
* `Payer` object must be specified in the bulk payment
* Two-factor authentication is always required for bulk payments. Customers will be asked to authenticate themselves using MFA in their mobile app or via card and reader
* Multi-authorisation journey is supported in Bankline. The secondary authoriser(s) would need to approve the payments by logging into Bankline and completing the authorisation
### RBS
* Only immediate domestic and scheduled domestic payments are supported
* Maximum 50 payments per request
* Bankline customers have a maximum limit of:
* 3000 payments to multiple payees at once from a single debit account
* 4000 payments to multiple payees at once from multiple debit accounts
* The maximum payment amount will be driven by the customer's daily payment limits on their account
* Customer's daily payment limits are shared across bulk payments and individual payments
* Each payment in the bulk must have the same payment type
* Bulk payments are only accepted where all the creditors are trusted beneficiaries
* Each payment in the bulk must have maximum of 16 characters for `reference`
* Multi-authorisation journey is supported in Bankline. The secondary authoriser(s) would need to approve the payments by logging into Bankline and completing the authorisation
### Santander
* Only immediate domestic payments are supported
* Maximum 3,500 payments per request
* The maximum payment amount:
* Business accounts - £100,000
* Corporate accounts - £250,000
* Bulk payments are only accepted where all the creditors are trusted beneficiaries
* `Payer` object must be specified in the bulk payment
### Revolut
* Only immediate domestic payments are supported
* Maximum 1,000 payments per request
* Maximum total payments amount is £1,000,000
* Payees must be set up as trusted beneficiaries on the payer account before a bulk payment is attempted
* Payee names must be more than one word
* For bulk payments, `payee.address.country`, `payee.address.postCode` and `payee.address.townName` are mandatory for each payment in the bulk payment request
* Revolut Business users can only authorise bulk payments via the web application and not the mobile app
* If the payee for a payment in a bulk payment file is a business, `paymentRequest.payee.merchantCategoryCode` should be provided
* Faster Payments Scheme can accept only 18 characters for the `reference` field
* The `reference` field is mandatory for every payment in the bulk transaction
### Ulster
* Only immediate domestic and scheduled domestic payments are supported
* Maximum 50 payments per request
* Bankline customers have a maximum limit of:
* 3000 payments to multiple payees at once from a single debit account
* 4000 payments to multiple payees at once from multiple debit accounts
* The maximum payment amount will be driven by the customer's daily payment limits on their account
* Customer's daily payment limits are shared across bulk payments and individual payments
* Each payment in the bulk must have the same payment type
* Bulk payments are only accepted where all the creditors are trusted beneficiaries
* Each payment in the bulk must have maximum of 16 characters for `reference`
* Multi-authorisation journey is supported in Bankline. The secondary authoriser(s) would need to approve the payments by logging into Bankline and completing the authorisation
### Virgin Money
* Only immediate domestic payments are supported
* The bank can accept:
* 750 payments in a single file if they are all from the same debtor account and are all being remitted on the same day (e.g. payroll)
* 150 payments in a single file if they are coming from different debtor accounts and/or are being remitted on different days
* Payment limits for business accounts vary per account and can be set by the customers
* The bank limit for faster payments is £250,000
* The payments with no date would be immediate payments
* `Payer` object must be specified in the bulk payment
* Aggregated value of batch payments must be within the company/user's approval limit
* Virgin Money will usually schedule the payment request immediately, but delays may occur during busy periods or if additional approvals are required
* The initiation section of the payment must match the corresponding sections of the payment consent resource; discrepancies will generate an error response and the request will not be processed
* Bulk payment request response times can be slower than those for other integrations due to a deficiency in the bank's system
### Solaris
* The requested execution date should not be passed in the requests as it will be skipped in the request to institution
* [PSU-IP-ADDRESS](/open-banking-flow/user-authorisation/psu-identifiers#psu-ip-address) is required for bulk payments
# Individual Payment Status
Source: https://docs.yapily.com/payments/bulk-payments/individual-payment-status
Retrieve per-payment statuses for a bulk payment, including status details where available
Bulk Payments are currently available as a BETA version.
***
Use [Get Bulk Payment Status Details](/api-reference/payments/get-bulk-payment-status-details) to retrieve the status of each individual payment within a bulk payment request.
## Supported institutions
This endpoint is currently supported by the following instituions:
* HSBC UK Business
* Lloyds Business
* Bank of Scotland Business
* Revolut
* Virgin Money
To check whether an institution supports this feature, look for `EXISTING_BULK_PAYMENT_DETAILS` in the institution's feature list via [Get Institutions](/api-reference/institutions/get-institutions).
When supported by the institution, `EXISTING_BULK_PAYMENT_DETAILS` is automatically included in the consent scope during authorisation ([Create Bulk Payment Authorisation](/api-reference/authorisations/create-bulk-payment-authorisation)).
## Request
Execute get payment details (`GET /bulk-payments/{bulkPaymentId}/details`), specifying the bulk payment file `Id` in the path.
```bash Request theme={null}
curl -L -X GET 'https://api.yapily.com/bulk-payments/{bulkPaymentId}/details' \
-H 'Consent: {consentToken}' \
-u 'APPLICATION_KEY:APPLICATION_SECRET'
```
```json Response theme={null}
{
"meta": {
"tracingId": "27b47dca-fb0f-4448-b470-1cd2d5516d0f"
},
"data": {
"id": "e75d2c85-08e9-4a48-8d14-f789186f2a19",
"consentId": "5daeb980-5ff5-49db-b7a0-e93dd9c93533",
"Payments": [
{
"id": "payment-w1",
"status": "COMPLETED"
},
{
"id": "payment-w2",
"status": "FAILED",
"statusDetails": {
"code": "B001",
"reason": "Payment has been rejected"
}
},
{
"id": "payment-w3",
"status": "COMPLETED"
}
]
}
}
```
When an individual payment has not completed successfully, the response includes a `statusDetails` object with a `code` and `reason`.
Some institutions do not return a recognisable status code. In that case `statusDetails` will not be present in the payment entry.
## Payment status detail codes
| Code | Description |
| ---- | ---------------------------------------------------- |
| B000 | Unrecognised status reason code from the institution |
| B001 | Payment rejected, no specific reason given |
| B002 | Insufficient funds in debtor account |
| B003 | Incorrect or invalid account number |
| B004 | Payment flagged as fraudulent origin |
| B005 | Duplicate payment detected |
| B006 | Rejected for regulatory or compliance reason |
| B007 | Rejected at customer's own request |
| B008 | Amount is zero, not allowed, or too low |
| B009 | Missed bank cut-off time |
| B010 | Invalid payment format or structure |
| B011 | Technical problem at institution |
| B012 | Payment accepted, pending processing |
| B013 | Payment held by institution for further review |
| B014 | Payment held due to fraud screening |
# Bulk Payments Overview
Source: https://docs.yapily.com/payments/bulk-payments/overview
Initiate multiple simultaneous bank payments in a single API request with Yapily's Bulk Payments. Reduce overhead and streamline batch payment processing workflows.
Bulk Payments are currently available as a BETA version.
***
## Introduction
Yapily Bulk Payments enables you to initiate direct account-to-account bulk payments across the UK through a single API integration.
A bulk payment is a group of payments to be paid to multiple recipients in a single transaction. For a bulk payment the payment must be from the same bank account, on the same date, with the same currency and using the same payment scheme.
**Note:** Yapily does not support batch payments.
***
## Coverage
Bulk payments are currently supported by select banks in the UK for business and corporate integrations.
| Bank | Country |
| -------------------------------- | ------- |
| Allied Irish Bank Business (ROI) | UK |
| Barlcaycard Commercial Payments | UK |
| Bank of Scotland Business | UK |
| Barclays Business | UK |
| Barclays Corporate | UK |
| Coutts | UK |
| HSBC UK Business | UK |
| HSBC Kinetic | UK |
| HSBC Corporate | UK |
| Lloyds (Business) | UK |
| Natwest Bank | UK |
| Natwest Bankline | UK |
| Revolut | UK |
| Royal Bank of Scotland | UK |
| Royal Bank of Scotland Bankline | UK |
| Santander UK Plc Business | UK |
| Silicon Valley Bank | UK |
| Ulster Bank | UK |
| Ulster Bank Bankline | UK |
| Virgin Money | UK |
***
## Advantages
The 3 main advantages of bulk payments:
#### 1. Low cost initiation
Direct account-to-account bulk payments removes payments fees associated with payment processing.
#### 2. Improved efficiency
Supports automated payment runs to reduce operational overhead and improve efficiency.
#### 3. Many currencies supported
Initiate bulk payments in any currency supported by your bank.
***
## Applications
Bulk payments can power:
**Invoice payments:**
Streamline invoice, bill payments and reconciliation with embedded bulk payments.
**Payroll:**
Automate payroll and save time by eliminating manual processing.
Don't see your use case? [Let us know](https://www.yapily.com/company/get-started) how you would like to use Yapily Bulk Payments.
***
## End user journey
The bulk payments experience can be embedded into any application. You build and self-host the user facing screens, giving you full ownership and control over the experience in your application, with the Yapily Bulk Payments API powering the payments behind the scenes.
**Note:** We recommend you follow our PIS UX guidelines for examples of best practices when building the user facing screens.
**Note:** Banks use different methods to authenticate and collect consent from users. Yapily supports all user authorisation flows and you may need to implement multiple user authorisation flows depending on which banks you want to integrate with.
***
## Get started
See our [bulk payments tutorial](/payments/bulk-payments/tutorial-bulk-payment) to explore a sample integration with Yapily Bulk Payments.
# Tutorial: Make a bulk payment
Source: https://docs.yapily.com/payments/bulk-payments/tutorial-bulk-payment
Step-by-step tutorial for completing a UK domestic bulk payment with Yapily's Open Banking API. Covers payment file structure, user consent, and status tracking.
Bulk Payments are currently available as a BETA version.
## Introduction
This tutorial explains how to create a UK domestic bulk payment with the Modelo Sandbox.
**Note:** All requests made to the Yapily API require [basic authentication](/getting-started/integration-setup/api-authentication).
***
To find which banks support bulk payments use [GET institutions](/api-reference/institutions/get-institutions) to retrieve the list of your supported institutions.
```bash Request theme={null}
curl -L -X GET 'https://api.yapily.com/institutions' \
-u 'APPLICATION_KEY:APPLICATION_SECRET'
```
```json Response theme={null}
{
"meta": {
"tracingId": "acbb76db4ab8f4ac7f039d000456c13f",
"count": 1
},
"data": [
{
"id": "modelo-sandbox",
"name": "Modelo Sandbox",
"fullName": "Modelo Sandbox",
"countries": [
{
"displayName": "United Kingdom",
"countryCode2": "GB"
}
],
"environmentType": "SANDBOX",
"credentialsType": "OPEN_BANKING_UK_AUTO",
"media": [
{
"source": "https://images.yapily.com/image/ce2bfdbf-1ae2-4919-ab7b-e8b3d5e93b36?size=0",
"type": "icon"
},
{
"source": "https://images.yapily.com/image/ca502f24-d6df-4785-b4b8-1034b100af77?size=0",
"type": "logo"
}
],
"features": [
"INITIATE_ACCOUNT_REQUEST",
"ACCOUNT_REQUEST_DETAILS",
"EXISTING_PAYMENTS_DETAILS",
"ACCOUNT_BALANCES",
"CREATE_BULK_PAYMENT",
"ACCOUNT_PERIODIC_PAYMENTS",
"ACCOUNT_STATEMENTS",
"INITIATE_BULK_PAYMENT",
"ACCOUNT_STATEMENT",
"ACCOUNT",
"INITIATE_DOMESTIC_PERIODIC_PAYMENT",
"INITIATE_SINGLE_PAYMENT_SORTCODE",
"ACCOUNT_DIRECT_DEBITS",
"ACCOUNTS",
"ACCOUNT_TRANSACTIONS",
"EXISTING_PAYMENT_INITIATION_DETAILS",
"CREATE_DOMESTIC_SINGLE_PAYMENT",
"INITIATE_DOMESTIC_SINGLE_PAYMENT",
"ACCOUNT_STATEMENT_FILE",
"CREATE_INTERNATIONAL_SINGLE_PAYMENT",
"IDENTITY",
"CREATE_DOMESTIC_SCHEDULED_PAYMENT",
"INITIATE_DOMESTIC_SCHEDULED_PAYMENT",
"CREATE_SINGLE_PAYMENT_SORTCODE",
"ACCOUNT_TRANSACTIONS_WITH_MERCHANT",
"INITIATE_INTERNATIONAL_SINGLE_PAYMENT",
"PERIODIC_PAYMENT_FREQUENCY_EXTENDED",
"ACCOUNT_SCHEDULED_PAYMENTS",
"CREATE_DOMESTIC_PERIODIC_PAYMENT"
]
}
]
}
```
Filter the list for all institutions that support the feature `CREATE_BULK_PAYMENT`. Then display these institutions in your application so the user can select which bank to make the payment from.
Once the user selects a bank, store the `id` of the institution to use in step 2.
This example uses a single redirect flow using a callback URL.
Execute [create payment authorisation](/api-reference/authorisations/create-bulk-payment-authorisation) including the institution ID, your callback URL and the `paymentRequest` object.
```bash Request theme={null}
curl -L -X POST 'https://api.yapily.com/bulk-payment-auth-requests' \
-H 'Content-Type: application/json' \
-u 'APPLICATION_KEY:APPLICATION_SECRET' \
-d '{
"applicationUserId": "bulk-payment-tutorial",
"institutionId": "modelo-sandbox",
"callback": "https://display-parameters.com/",
"paymentRequest": {
"payments": [
{
"type": "DOMESTIC_PAYMENT",
"reference": "Payment 1",
"paymentIdempotencyId": "{uniqueValue}",
"amount": {
"amount": 8.70,
"currency": "GBP"
},
"payee": {
"name": "BILLS COFFEE LTD",
"accountIdentifications": [
{
"type": "ACCOUNT_NUMBER",
"identification": "{accountNumber}"
},
{
"type": "SORT_CODE",
"identification": "{sortCode}"
}
],
"address": {
"country": "GB"
}
}
},
{
"type": "DOMESTIC_PAYMENT",
"reference": "Payment 2",
"paymentIdempotencyId": "{uniqueValue}",
"amount": {
"amount": 8.70,
"currency": "GBP"
},
"payee": {
"name": "BILLS COFFEE LTD",
"accountIdentifications": [
{
"type": "ACCOUNT_NUMBER",
"identification": "{accountNumber}"
},
{
"type": "SORT_CODE",
"identification": "{sortCode}"
}
],
"address": {
"country": "GB"
}
}
}
]
}
}'
```
```json Response theme={null}
{
"meta": {
"tracingId": "611f74cb4f3205d983ebb2fca59d0847"
},
"data": {
"id": "af563bac-e50a-42bd-91bc-581813e13733",
"userUuid": "f3be3c23-bd0e-475e-b389-62dd1f5aa6c1",
"applicationUserId": "bulk-payment-tutorial",
"institutionId": "modelo-sandbox",
"status": "AWAITING_AUTHORIZATION",
"createdAt": "2021-03-03T09:23:45.841Z",
"featureScope": [
"EXISTING_PAYMENTS_DETAILS",
"EXISTING_PAYMENT_INITIATION_DETAILS",
"CREATE_BULK_PAYMENT"
],
"state": "6b07bddf9e7746ae8ecb7cbecc00f19a",
"institutionConsentId": "sdp-1-469c63ef-e6b6-4dd2-88b7-3aea0bff4136",
"authorisationUrl": "{authorisationUrl}",
"qrCodeUrl": "https://images.yapily.com/image/55b6b6bc-daa8-490c-89e1-243156868e00/1614763426?size=0"
}
}
```
Redirect the user to the `authorisationUrl` returned in the response.
The user is then asked to login and authorise the payment with their bank. The Modelo sandbox credentials are: `mits` / `mits`.
Upon completion, the user is redirected back to the callback URL supplied in the request. In this example, the callback is `https://display-parameters.com/` which displays the parameters returned with the redirect.
Store the `consentToken` to use when creating the payment in step 3.
[Create the bulk payment](/api-reference/payments/create-bulk-payment) specifying the `consentToken` in the header and the contents of the `paymentRequest` object in step 2 as the body.
```bash Request theme={null}
curl -L -X POST 'https://api.yapily.com/bulk-payments' \
-H 'Content-Type: application/json' \
-H 'Consent: {consentToken}' \
-u 'APPLICATION_KEY:APPLICATION_SECRET' \
-d '{
"payments": [
{
"type": "DOMESTIC_PAYMENT",
"reference": "Payment 1",
"paymentIdempotencyId": "{uniqueValue}",
"amount": {
"amount": 8.70,
"currency": "GBP"
},
"payee": {
"name": "BILLS COFFEE LTD",
"accountIdentifications": [
{
"type": "ACCOUNT_NUMBER",
"identification": "{accountNumber}"
},
{
"type": "SORT_CODE",
"identification": "{sortCode}"
}
],
"address": {
"country": "GB"
}
}
},
{
"type": "DOMESTIC_PAYMENT",
"reference": "Payment 2",
"paymentIdempotencyId": "{uniqueValue}",
"amount": {
"amount": 8.70,
"currency": "GBP"
},
"payee": {
"name": "BILLS COFFEE LTD",
"accountIdentifications": [
{
"type": "ACCOUNT_NUMBER",
"identification": "{accountNumber}"
},
{
"type": "SORT_CODE",
"identification": "{sortCode}"
}
],
"address": {
"country": "GB"
}
}
}
]
}'
```
```json Response theme={null}
{
"meta": {
"tracingId": "0cda48c70f3941148bbee775a65fa3d0"
},
"data": {
"id": "pv3-a1e2ecb0-270c-42e2-8ba5-005261b629d2",
"institutionConsentId": "sdp-6-b06f9a82-c641-4aba-b76d-43e6bc052f75",
"status": "PENDING",
"statusDetails": {
"status": "PENDING",
"statusUpdateDate": "2021-06-09T13:53:28.67Z"
},
"createdAt": "2021-06-09T13:53:28.67Z",
"bulkAmountSum": 7
}
}
```
The payment `status`, which describes the state of the payment, is returned in the response.
If the status is `PENDING`, you can use the payment `id` to poll the payment status until it transitions to `COMPLETED` or `FAILED` as in step 4.
For more information see [payment status](/payments/payment-resources/payment-status).
This is an optional step, however we recommend monitoring the status of the payment when its `PENDING` to confirm if the institution accepts the payment initiation request.
You can confirm the status of the file payment by polling the status using the bulk payment `Id` from step 3.
Execute get payment details (`GET /bulk-payments/{bulkPaymentId}`), specifying the bulk payment file `Id` in the path.
```bash Request theme={null}
curl -L -X GET 'https://api.yapily.com/bulk-payments/{bulkPaymentId}' \
-H 'Content-Type: application/json' \
-H 'Consent: {consentToken}' \
-u 'APPLICATION_KEY:APPLICATION_SECRET'
```
```json Response theme={null}
{
"meta": {
"tracingId": "0cda48c70f3941148bbee775a65fa3d0"
},
"data": {
"id": "pv3-a1e2ecb0-270c-42e2-8ba5-005261b629d2",
"ConsentId": "sdp-6-b06f9a82-c641-4aba-b76d-43e6bc052f75",
"statusDetails": {
"status": "COMPLETED",
"updatedAt": "2021-06-09T13:53:28.67Z"
},
"createdAt": "2021-06-09T13:53:28.67Z"
}
}
```
Some institutions provide individual payment status on top of the file payment status.
To see the status of each individual payment within the bulk, see [Individual Payment Status](/payments/bulk-payments/individual-payment-status).
# Payments Overview
Source: https://docs.yapily.com/payments/overview
Enable direct, account-to-account payments with no intermediaries using Yapily's Open Banking API. Supports single, scheduled, periodic, bulk, and VRP payment types.
Offer and accept secure, direct account-to-account payments.
Not sure whether to use Hosted Pages or the API? See our [decision guide](/concepts/hosted-vs-api).
***
## Introduction
Yapily Payments enables you to access Payment Initiation Services (PIS) across the UK and Europe through a single API integration.
PIS payments allow customers to pay directly from their bank account using their mobile banking app or online banking portal, sending funds straight to the recipient, in a fast and secure way.
New to Yapily payments? Start with [Building a Payment Request](/concepts/payment-request-anatomy).
You can initiate single, scheduled and periodic payments using Yapily's Payments API.
Payments are made via local payment rails including Faster Payments in the UK and SEPA in Europe for fast settlement, and are supported from consumer, business and corporate accounts. You can track the status of each payment via [Webhooks](/tools-and-services/webhooks/get-started) from the Yapily API for visibility of the payment initiation success.
You must be [registered](/getting-started/integration-setup/registration) as a Payment Initiation Service Provider (PISP) to access PIS via Yapily's Payments API. If you aren't regulated by a central authority, you can use [Yapily Connect](/tools-and-services/yapily-connect/overview) to gain simple, easy and fast access without needing to obtain a Third-Party Provider licence.
***
## Supported payment types
### Single payments
Make instant direct payments.
One direct account-to-account payment, which a user can instruct from their bank to pay another account immediately.
[See more details.](/payments/single-payments)
### Scheduled payments
Arrange future payments.
One direct account-to-account payment, which a user can instruct from their bank to pay another account at a specified future date.
[See more details.](/payments/scheduled-payments)
### Periodic payments (BETA)
Set up regular payments.
Multiple direct account-to-account payments, which a user can automate from their bank to pay another account according to the conditions set in the payment request, including frequency, number of payments and payment amount.
[See more details.](/payments/periodic-payments)
***
## Advantages
The 4 main advantages of PIS payments over traditional payment methods, such as card, are:
#### 1. Low cost initiation
PIS removes bank fees associated with payment processing as all payments are direct account-to-account.
#### 2. Improved security
PIS doesn't require any card details to be shared or stored when making a payment. The payment process complies with PSD2 security requirements, including Strong Customer Authentication (SCA).
#### 3. Instant settlement
You can leverage local payment rails such as SEPA Instant in Europe and Faster Payments in the UK for instant payment settlement.
#### 4. Wide coverage
Initiate direct account-to-account payments through any application across the whole UK and European open banking network.
***
## Applications
PIS payments can offer advantages to a range of payment services, and any business that accepts payments from their customers via card or bank transfer.
**Online checkout for e-commerce payments:**
Optimise your online payment experience for your customers and save money on payment processing.
**Wallet top ups:**
Streamline digital wallet top ups with a fully embedded payment experience.
**Invoice payments:**
Collect invoice and bill payments directly from any application.
**Loan settlement:**
Receive instant loan and interest rate payments directly into your bank account.
**Peer to peer payments:**
Send and receive money from others, directly through bank accounts.
**Debt collection:**
Enable flexible payment collections for your customers.
Don't see your use case? [Let us know](https://www.yapily.com/company/get-started) how you would like to use Yapily Payments.
***
## End user journey
For the user, the payment journey consists of 3 steps:
1. The end user wants to make a payment on your application and selects to 'pay by bank'.
2. The user selects their bank and completes the payment authorisation flow to give their permission for the payment.
3. The user is directed back to your application on completion.
The payments experience can be embedded into any application.
You can build and self-host the user facing screens, giving you full ownership and control over the experience in your application, with the Yapily Payments API powering the payments behind the scenes.
Alternatively, for single payments, you can use [Yapily Hosted Pages](#hosted-pages-beta).
We recommend you follow our [PIS UX guidelines](/tools-and-services/yapily-connect/yapilyconnect-ux-pis-guidelines) for examples of best practices when building the user facing screens.
Banks use different methods to authenticate and collect consent from users. Yapily supports all [user authorisation flows](/open-banking-flow/user-authorisation/overview) and you may need to implement multiple user authorisation flows depending on which banks you want to integrate with.
#### Hosted Pages (Beta)
[Yapily Hosted Pages](/tools-and-services/hosted-pages/overview) is a fully out-of-the-box, hosted solution that provides a pre-built user interface (UI) on top of our existing single payments API.
This is our quickest integration option, removing the complexity and time required to build an open banking UI in your own application, to enable you to easily start using Yapily's Payments API to collect payments.
***
## Get started
See our [single payments tutorial](/payments/tutorial-single-payment) to explore a sample integration with Yapily Payments API.
Try our [demo app](https://demo.yapily.com/) to complete the Yapily Payments flow for yourself with your real banking credentials.
***
## Related resources
### Product Resources
* [Bulk Payments](/payments/bulk-payments/overview) - Initiate multiple payments in a single request
* [Variable Recurring Payments (VRPs)](/payments/vrps/introduction) - Set up flexible recurring payment mandates
* [Payment Resources](/payments/payment-resources/payment-features) - Payment features, consents, constraints and limits
### Implementation Resources
For error handling, retry strategies, webhooks, testing, and support, see our [Developer Resources](/resources/overview) guide.
# European Payments
Source: https://docs.yapily.com/payments/payment-resources/european-payments
Guide to European payment schemes supported by Yapily. Covers SEPA Credit Transfer, SEPA Instant, cross-border requirements, and EU-specific payment parameters.
Understand what payment type to use when making payments involving accounts from European institutions.
## Introduction
There are 2 possible payment types: `DOMESTIC_PAYMENT` or `INTERNATIONAL_PAYMENT`.
The type is `DOMESTIC_PAYMENT` if either of the following conditions are met:
* Both the `Payee` and `Payer` accounts are in the same country (and the payment is in a local currency)
* Both the `Payee` and `Payer` accounts are from SEPA member countries **AND** the payment is in euros
Otherwise, it is an `INTERNATIONAL_PAYMENT`.
## SEPA Members
### Eurozone Countries
You can make payments through Yapily's payments API between the following Eurozone countries through SEPA payment schemes when the currency is euros using the payment type `DOMESTIC_PAYMENT`:
* Austria
* Belgium
* Cyprus
* Estonia
* Finland (including Aland Islands)
* France (including French Guiana, Guadeloupe, Martinique, Mayotte, Saint Barthélemy, Saint Martin (French part), Réunion and Saint Pierre and Miquelon)
* Germany
* Greece
* Ireland
* Italy
* Latvia
* Lithuania
* Luxembourg
* Malta
* Monaco (Monaco and San Marino have bilateral agreements with the EU to use the euro as their official currency)
* Netherlands
* Portugal (including Azores and Madeira)
* San Marino (Monaco and San Marino have bilateral agreements with the EU to use the euro as their official currency)
* Slovakia
* Slovenia
* Spain (including Canary Islands and Ceuta en Melilla)
### Non-Eurozone Countries
You can make payments through Yapily's payments API from non-Eurozone countries using the type `DOMESTIC_PAYMENT` through the SEPA payment schemes if the account is euro-denominated. For payments made in the local currency, the appropriate national schemes are used:
* Bulgaria
* Croatia
* Czech Republic
* Denmark
* Hungary
* Iceland
* Liechtenstein
* Norway
* Poland
* Romania
* Sweden
* Switzerland
* United Kingdom (including Gibraltar) \*
\*The UK is a SEPA member country, but to be able to send payments from the UK to other SEPA member countries, the sending or receiving UK account needs to be a euro-denominated account and must offer a GB prefixed IBAN. Most traditional banks do not support this so this option is usually only available using challenger banks e.g. Revolut and Starling.
## SEPA Instant payments
SEPA also has a SEPA Instant variant which executes payments instantly (within 10 seconds).
An institution that supports SEPA Instant payments has the following features:
* `INITIATE_DOMESTIC_SINGLE_INSTANT_PAYMENT`
* `CREATE_DOMESTIC_SINGLE_INSTANT_PAYMENT`
When creating a SEPA Instant payment, you should specify the payment type as `DOMESTIC_INSTANT_PAYMENT` in the [payment request](/api-reference/authorisations/create-payment-authorisation).
An institution may default to using SEPA Instant variant over SEPA. An institution may also decide to charge the customer for SEPA Instant payments.
Yapily provides the option for a customer to choose between using a SEPA or SEPA Instant payment.
## When can SEPA not be used?
**Scenario 1: The payee is a SEPA member but the payer is not a SEPA member:**
* As both `Payer` and `Payee` are not SEPA members, the payment is not eligible for SEPA.
* The `Payer` and `Payee` are not in the same country so to execute the payment you need to use `INTERNATIONAL_PAYMENT` as the payment type.
* The country specific international payment rail will be applied.
**Scenario 2: The payee is not a SEPA member but the payer is a SEPA member:**
* As both `Payer` and `Payee` are not SEPA members, the payment is not eligible for SEPA.
* The `Payer` and `Payee` are not in the same country so to execute the payment you need to use `INTERNATIONAL_PAYMENT` as the payment type.
* The Cross Border rail will be applied.
**Scenario 3: Both the payee and payer are not SEPA members but are in the same country**:
* As both `Payer` and `Payee` are not SEPA members, the payment is not eligible for SEPA.
* The `Payer` and `Payee` are in the same country so to execute the payment you need to use `DOMESTIC_PAYMENT` as the payment type.
* The payment rail supported by the country's domestic payment system will apply e.g. FPS in the UK.
**Scenario 4: Both the payee and payer are not SEPA members and are in different countries**:
* As both `Payer` and `Payee` are not SEPA members, the payment is not eligible for SEPA.
* The `Payer` and `Payee` are not in the same country so to execute the payment you need to use `INTERNATIONAL_PAYMENT` as the payment type.
* Any international payment rail will be applied e.g. SWIFT or Cross Border.
## Known Exceptions
At the moment there is only 1 exception known by Yapily (please be aware that this might change in future. If you see any other exception please let us know.):
* Due to NatWest Group particularities we have integrated them with payment being eligible for SEPA being of payment type `INTERNATIONAL_PAYMENT`. This includes all NatWest Group banking brands (NatWest, Royal Bank of Scotland, Ulster Bank, Coutts, etc).
# Introduction to Payment Execution
Source: https://docs.yapily.com/payments/payment-resources/intro-to-payment-execution
Learn how to construct and send payment requests with the Yapily API. Covers required fields, authentication, idempotency keys, and payment execution best practices.
***
## Introduction
In both the payment authorisation and payment request, you will have to generate the `paymentRequest` payload which defines to who, from where, how much and how to execute the payment. As Yapily is a
platform that allows for multiple types of payments to be executed in and across different countries, the following supplementary information will give more guidance on what options are available.
For a conceptual guide to building payment requests, see [Building a Payment Request](/concepts/payment-request-anatomy).
## Payment Types
The following table shows the different payment types that are currently available in Yapily. The associated features column shows the features that will be created in the payment consent after you
execute [Create Payment Authorisation](/api-reference/authorisations/create-payment-authorisation) and specify one of the payment types.
To create bulk payments, there is no bulk payment type. Instead you use [Create Bulk Payment Authorisation](/api-reference/authorisations/create-bulk-payment-authorisation) which will take an array of `paymentRequest` where
the payment type will be defined per payment.
| Payment Type | Description | Associated Features |
| --------------------------------- | ------------------------------------------------------------------------------------------------------------------------------------------------------------------------------------------------------------------------------------------------------------------------------------------------------------------------------------------------------------------------------------------------------------------------------ | ------------------------------------------------------------------------------------------------------------------------ |
| `DOMESTIC_INSTANT_PAYMENT` | Initiate and create domestic single instant payments.
The `DOMESTIC_INSTANT_PAYMENT` payment type is used to indicate that when sending funds to another account from a participating SEPA country and when the payment is in Euros, SEPA Instant in addition to SEPA is also a viable configuration for the payment.
See [SEPA Payments](/payments/single-payments#sepa-payments) for more information. | `INITIATE_DOMESTIC_SINGLE_INSTANT_PAYMENT`
`CREATE_DOMESTIC_SINGLE_INSTANT_PAYMENT`
`EXISTING_PAYMENT_DETAILS` |
| `DOMESTIC_PAYMENT` | Initiate and create domestic single payments.
Particular payments between accounts from SEPA member countries can be considered a `DOMESTIC_PAYMENT` payment when the payment is in Euros. In these scenarios, funds will be transferred via. SEPA.
See [Domestic Single Payments](/payments/single-payments#domestic-single-payments) for more information. | `INITIATE_DOMESTIC_SINGLE_PAYMENT`
`CREATE_DOMESTIC_SINGLE_PAYMENT`
`EXISTING_PAYMENT_DETAILS` |
| `DOMESTIC_PERIODIC_PAYMENT` | Initiate and create domestic periodic payments. They are known as standing orders in UK.
See [Domestic Periodic Payments](/payments/periodic-payments#domestic-periodic-payments) for more information. | `INITIATE_DOMESTIC_PERIODIC_PAYMENT`
`CREATE_DOMESTIC_PERIODIC_PAYMENT`
`EXISTING_PAYMENT_DETAILS` |
| `DOMESTIC_SCHEDULED_PAYMENT` | Initiate and create domestic scheduled payments.
See [Domestic Scheduled Payments](/payments/scheduled-payments#domestic-scheduled-payments) for more information. | `INITIATE_DOMESTIC_SCHEDULED_PAYMENT`
`CREATE_DOMESTIC_SCHEDULED_PAYMENT`
`EXISTING_PAYMENT_DETAILS` |
| `INTERNATIONAL_PAYMENT` | Initiate and create international single payments.
See [International Single Payments](/payments/single-payments#international-single-payments) for more information. | `INITIATE_INTERNATIONAL_SINGLE_PAYMENT`
`CREATE_INTERNATIONAL_SINGLE_PAYMENT`
`EXISTING_PAYMENT_DETAILS` |
| `INTERNATIONAL_PERIODIC_PAYMENT` | Initiate and create international periodic payments.
See [International Periodic Payments](/payments/periodic-payments#international-periodic-payments) for more information. | `INITIATE_INTERNATIONAL_PERIODIC_PAYMENT`
`CREATE_INTERNATIONAL_PERIODIC_PAYMENT`
`EXISTING_PAYMENT_DETAILS` |
| `INTERNATIONAL_SCHEDULED_PAYMENT` | Initiate and create international scheduled payments.
See [International Scheduled Payments](/payments/scheduled-payments#international-scheduled-payments) for more information. | `INITIATE_INTERNATIONAL_SCHEDULED_PAYMENT`
`CREATE_INTERNATIONAL_SCHEDULED_PAYMENT`
`EXISTING_PAYMENT_DETAILS` |
## Account Identifications
When making a Payment, it is necessary to provide details of the `Payee` account (the account that you would like the payment to be sent to) as well as the `Payer` account (the account that you would
like to make the payment from) when sending payments from a European bank account. This is done by using the nested `AccountIdentification` object in the `PaymentRequest`.
| Type | Description | Format |
| ---------------- | ------------------------------------------------------------------------------------------------- | ------------------------------------------------------------------------------------------------------------------------ |
| `SORT_CODE` | Used only in the UK in conjunction with `ACCOUNT_NUMBER` to uniquely identify account | 6 numerical characters |
| `ACCOUNT_NUMBER` | Used only in the UK in conjunction with `SORT_CODE` to uniquely identify account | 8 numerical characters |
| `IBAN` | National standard for uniquely identifying bank accounts | See [IBAN Formats by countries](https://en.wikipedia.org/wiki/International_Bank_Account_Number#IBAN_formats_by_country) |
| `BBAN` | The Basic Bank Account Number. This forms the first part of the IBAN after the first 4 characters | See [IBAN Formats by countries](https://en.wikipedia.org/wiki/International_Bank_Account_Number#IBAN_formats_by_country) |
| `BIC` | Business Identifier Codes otherwise known as SWIFT Code | No specific format |
| `PAN` | - | - |
| `MASKED_PAN` | - | - |
| `MSISDN` | - | - |
| `BSB` | - | - |
| `NCC` | - | - |
| `ABA` | - | - |
| `ABA_WIRE` | - | - |
| `ABA_ACH` | - | - |
| `EMAIL` | Email address | - |
## Account Identifications Combinations
The following tables show which account identifications are required for different scenarios for domestic and international payments.
#### Domestic Payments
| Payer Country | Payee Country | Currency | Payee Account Identification |
| ------------- | ------------- | -------- | ------------------------------ |
| UK | UK | GBP | `ACCOUNT_NUMBER` + `SORT_CODE` |
| Any SEPA | Any SEPA | EUR | `IBAN` |
#### International Payments
| Payer Country | Payee Country | Currency | Payee Account Identification |
| ------------- | ---------------------------------------------------------------------------------------------------------------------------------------------------------------------------------------------------------------------------------------------------------------------------------------------------------------------------------------------------------------------------------------------------- | -------- | ---------------------------- |
| Any | **All EU and EEA countries:**
Albania, Austria, Belgium, Bosnia and Herzegovina, Bulgaria, Croatia, Cyprus, Czech Republic, Denmark, Estonia, Finland, France, Germany, Greece, Guernsey, Hungary, Iceland, Republic of Ireland, Italy, Jersey, Latvia, Liechtenstein, Lithuania, Luxembourg, Malta, The Netherlands, Norway, Poland, Portugal, Romania, Slovakia, Slovenia, Spain and Sweden | Any | `BBAN` / `IBAN` + `BIC` |
# Payment Consents
Source: https://docs.yapily.com/payments/payment-resources/payment-consents
Manage payment consents in Yapily. Create, use, and revoke consent tokens for single-use and recurring payment authorisations across supported institutions.
For an overview of how consents work across both data access and payments, see [Understanding Consents](/concepts/consent-lifecycle).
***
## Introduction
In order to process a payment on behalf of the user, the user will need to authenticate with their financial institution and give explicit consent. In most cases, this will involve redirecting users
to the bank's authorisation screen either in the web browser or on a mobile device by redirecting to the url provided by the `authorisation-url` or `qr-code-url`. In any case, the goal is to obtain a
`consent-token` which is supplied as the `Consent` header parameter to sign payments requests. Collectively we refer to this process as 'Obtaining a Consent' or 'Authorisation'.
## Consent Validity
A PIS `consent-token` is single use only. Once the `consent-token` has been used to execute the payment, it can only be used to check the payment details.
## Authorisation Status
Depending on which of the [payment authorisation flows](/open-banking-flow/user-authorisation/overview) the `Institution` your user is initiating a payment from, the `Consent` status may transition through a number
of intermediary states. These states indicate an action that must either be performed by the user before you can be issued a `consentToken` to successfully initiate the payment:
![PaymentStatus-Yapily_Auth]() Status `UNKNOWN`: This is just the enumeration's default.
## Multiple Authorisations
For some business and joint accounts, as part of the SCA process for Open Banking, your users may be required to give multiple authorisations to approve the initiation of a payment.
The normal authorisation flow takes place for the first PSU, including getting receipt of the consent token.
When you request payment execution and multiple authorisations are required:
* The payment status will remain at `PENDING`
* Information regarding the additional authorisations is included in the [MultiAuthorisationStatus](/api-reference/payments/get-payment-details#response-data-payments-items-status-details-multi-authorisation-status) object for the payment. This object contains details of how many
authorisations are required and how many more need to be completed
For example:
```json theme={null}
{
"data": {
"id": "pv3-c8eece27-eb1a-4c27-a13c-2f805703dab2",
"paymentIdempotencyId": "1d54cf71bfe44b1b8e67247aed455d96",
"institutionConsentId": "sdp-1-aa9d0941-43ff-4abb-8129-4d56b620b8ee",
"paymentLifecycleId": "69d554dea74276e8b1b44efb17fc45d1",
"status": "PENDING",
"statusDetails": {
"status": "PENDING",
"statusUpdateDate": "2019-09-26T15:38:33.401Z",
"multiAuthorisationStatus": {
"status": "AWAITING_FURTHER_AUTHORIZATION",
"numberOfAuthorisationRequired": 2,
"numberOfAuthorisationReceived": 1,
"lastUpdatedDateTime": "2019-09-26T15:38:33.408Z"
}
}
}
}
```
The extra authorisations take place offline (phone, sms, text, email) and are completed by the owner of the business account or the other account holders of the joint account.
As these are offline authorisations, they do not take place within Yapily's domain.
Once the authorisations are completed, the payment status is updated.
You can monitor the status of the payment using [Get Payment Details](/api-reference/payments/get-payment-details).
# Payment Constraints
Source: https://docs.yapily.com/payments/payment-resources/payment-constraints
Understand payment constraints applied by institutions in Yapily's network. Covers amount limits, currency restrictions, and institution-specific payment rules.
Payment Constraints is currently available in Private Beta. See [Glossary](/getting-started/glossary#private-beta) for more information.
***
## Introduction
The constraints API can help improve your success rates for payment initiation by allowing you to fulfil institution specific requirements and rules.
Examples of institution specific requirements, or constraints, include:
* User credentials (such as their user id and password for the bank's digital channels) must be provided
* The users payment account must be indicated through its IBAN
* The maximum length of a payment reference must be 18 characters
Where requirements, such as those above, are not met then the payment could be rejected by the institution.
Ways you can use the constraint information include:
* As a knowledge base to reference during the build of your application
* To dynamically control behaviour in your application - such as front end validation and data transformation
* To validate that your intended initiation request to the Yapily Payments API meets all of the institution's requirements
## How it works
The constraints API works as follows:
1. You make a request to the payment constraints endpoint specifying the type of payment that you wish to initiate and the institution you wish to initiate it with
2. The response will include a JSON schema that defines all of the data requirements for this institution
This schema is based on the schema for the related payment initiation endpoint (e.g. [Create Payment Authorisation](/api-reference/authorisations/create-payment-authorisation)), as defined in the Open API Specification and API Reference, but is tailored to take into account the specific requirements / validation for the institution
Expressing the data requirements through JSON schema in this way means that:
* The data requirements are expressed in an identical manner as the Yapily Payments API and can be used to directly construct and validate the request messages to it
* It's a standardised solution with many readily-available tools / libraries to help you process the information provided and perform validation against it
## Current Scope
The payment constraints API currently supports Single Domestic Payments (including Instant) for German institutions.
This will later be expanded to include other countries and payment types.
The same mechanism will also be used in future versions to share Yapily Data related constraints.
## Tutorial
### 1. Request Constraint Information
Call Get Constraints to request constraint information for the institution of your user and the operation that you wish to perform.
This is done through the below query parameters:
| Query Parameter | Description | Mandatory? | Example |
| ------------------------ | -------------------------------------------------------------------------------------------------------------------------------------------------- | ---------- | ---------------------- |
| `institutionIds` | The unique id(s) of the Institution(s) that you wish to retrieve the Payment Constraints for. Multiple institutionIds need to be separated by `,` | Yes | commerzbank |
| `institutionCountryCode` | The country code in which the institution(s) operates and that you wish to gain the constraints for | Yes | DE |
| `paymentType` | The payment type that you wish to gain the constraints for | Yes | DOMESTIC\_PAYMENT |
| `endpointPath` | The endpoint path on the Yapily API to which the constraints apply | No | /payment-auth-requests |
| `endpointMethod` | The endpoint method on the Yapily API to which the constraints apply | No | POST |
### 2. Receive Constraint Information
The response provides an array of results with one item for every `institutionId` you have requested.
Each array item includes:
* The key identifiers of the payment scenario (playing back the parameters you have passed in) - e.g. `institutionId` and `paymentType`
* A `request` block that includes a detailed json schema for the request `headers` and another schema for the request `body`. This JSON schema describes what a request to the `endpointPath` needs to conform to in order to be successful
The response example below has been shortened and is to indicate the structure of the response only.
```bash Request theme={null}
curl -L -X GET 'https://api.yapily.com//institutions/constraints/payments?institutionIds=commerzbank&country=DE&paymentType=DOMESTIC_PAYMENT&endpointPath=/payment-auth-requests&endpointMethod=POST' \
-u 'APPLICATION_KEY:APPLICATION_SECRET'
```
```json Response theme={null}
{
"meta": {
"tracingId": "c1342598c42e4ecdab28b802bf9b88bb"
},
"data": [
{
"institutionId": "commerzbank",
"institutionCountryCode": "DE",
"endpointPath": "/payment-auth-requests",
"endpointMethod": "POST",
"paymentType": "DOMESTIC_PAYMENT",
"request": {
"headers": {
"required": [
"psu-ip-address"
],
"type": "object",
"properties": {
"psu-ip-address": {
"title": "User IP Address",
"type": "string",
"x-yapily-annotations": {
"lastUpdatedAt": "2023-04-14T13:48:27.844Z"
}
}
},
"x-yapily-annotations": {
"lastUpdatedAt": "2023-04-14T13:48:27.768Z"
}
},
"body": {
"required": [
"institutionId",
"paymentRequest"
],
"type": "object",
"properties": {
"redirect": {
"required": [
"url"
],
"type": "object",
"properties": {
"url": {
"type": "string",
"x-yapily-annotations": {
"lastUpdatedAt": "2023-04-14T13:48:27.688Z"
}
}
},
"x-yapily-annotations": {
"lastUpdatedAt": "2023-04-14T13:48:27.602Z"
}
},
"institutionId": {
"type": "string",
"x-yapily-annotations": {
"lastUpdatedAt": "2023-04-14T13:48:27.442Z"
}
},
.....
},
"paymentRequest": {
"required": [
"payee",
"reference",
"amount",
"paymentIdempotencyId",
"type",
"payer"
],
"type": "object",
"properties": {
"payee": {
"title": "Payee Details",
"required": [
"accountIdentifications",
"name"
],
"type": "object",
"properties": {
"accountIdentifications": {
"type": "array",
"allOf": [
{
"$ref": "#/$defs/IBAN_REQUIRED"
}
],
"items": {
"required": [
"identification",
"type"
],
"type": "object",
"allOf": [
{
"$ref": "#/$defs/IBAN_FORMAT"
}
],
"properties": {
"identification": {
"title": "Account Identification",
"type": "string",
"x-yapily-annotations": {
"lastUpdatedAt": "2023-07-14T10:32:13.495Z"
}
},
"type": {
"enum": [
"IBAN",
"BBAN",
"PAN",
"MASKED_PAN",
"MSISDN"
],
"title": "Account Identification Type",
"type": "string",
"x-yapily-annotations": {
"lastUpdatedAt": "2023-07-14T10:32:13.336Z"
}
}
}
},
"x-yapily-annotations": {
"lastUpdatedAt": "2023-04-14T13:51:21.164Z"
}
},
"address": {
......
},
......
},
"readRefundAccount": {
......
},
......
},
"$defs": {
"IBAN_FORMAT": {
"if": {
"required": [
"type"
],
"properties": {
"type": {
"pattern": "^IBAN$",
"type": "string"
}
}
},
"title": "IBAN Format Condition",
"then": {
"properties": {
"identification": {
"pattern": "^DE[a-zA-Z0-9]{2}([0-9]{4}){4}([0-9]{2})$"
}
}
},
"description": "__Condition__, IBAN needs to be in the format provided"
},
......
}
}
}
]
}
```
## Constraint Types
### Possible Constraints
JSON schema allows for a large number of keywords to describe the desired structure and validation of data. To provide more predictability & reduce the range of constraints your application will need to handle, the information provided by the constraints API will always:
* Conform to the Yapily API schema (described in the Open API Specification and API reference) for the same endpoint. E.g. The properties included and their types will always align
* Have tighter validation than the Yapily API schema (and never more relaxed). E.g. An optional property may become mandatory, but a mandatory property will not become optional
* Contain only the below validation keywords:
* required
* type
* format
* minimum
* exclusiveMinimum
* maximum
* exclusiveMaximum
* pattern
* enum
In addition, the `allOf` keyword may be used to reference the complex conditions that apply.
### Complex Conditions
Some data requirements are more complex and conditional in nature meaning that they cannot be communicated using the more simple keywords described above.
Where this is the case a condition is used to describe the validation rule.
Each of these conditions has a unique name, which is also used as the name of the sub-schema that defines it. This sub-schema definition (`$defs`) is referenced (`$ref`) from the property to which it applies
This unique name:
* Aids human identification of these complex conditions
* Offers a predictable, limited and documented set of conditions that may be provided (and that you may wish for your application to handle)
#### Example
The below extract includes two named conditions:
1. An `IBAN_REQUIRED` condition that applies to the `accountIdentifications` array
2. An `IBAN_FORMAT` condition that applies to each item within the `accountIdentifications` array
```json theme={null}
"accountIdentifications": {
"type": "array",
"allOf": [
{
"$ref": "#/$defs/IBAN_REQUIRED"
}
],
"items": {
"required": [
"identification",
"type"
],
"type": "object",
"allOf": [
{
"$ref": "#/$defs/IBAN_FORMAT"
}
],
```
Within the response these conditions are defined as sub-schema:
```json theme={null}
"$defs": {
"IBAN_FORMAT": {
"if": {
"required": [
"type"
],
"properties": {
"type": {
"pattern": "^IBAN$",
"type": "string"
}
}
},
"title": "IBAN Format Condition",
"then": {
"properties": {
"identification": {
"pattern": "^DE[a-zA-Z0-9]{2}([0-9]{4}){4}([0-9]{2})$"
}
}
},
"description": "__Condition__, IBAN should be in the format provided"
},
"IBAN_REQUIRED": {
"title": "IBAN Required Condition",
"contains": {
"required": [
"identification",
"type"
],
"type": "object",
"properties": {
"type": {
"pattern": "^IBAN$",
"type": "string"
}
}
},
"description": "__Condition__, IBAN is required"
}
},
```
### Complex Conditions Catalogue
Describes the required format of a provided Account Number.
That is, the required pattern of the identification value for an item in the accountIdentifications array where type = ACCOUNT\_NUMBER
This requirement will be associated with the payer or payee details
```json theme={null}
"ACCOUNT_NUMBER_FORMAT": {
"description":"__Condition__, account number should follow the format given",
"title": "Account Number Format Condition",
"if": {
"required":[
"type"
],
"properties": {
"type": {
"type": "string",
"pattern": "^ACCOUNT_NUMBER$"
}
}
},
"then": {
"properties": {
"identification": {
"pattern": "^[0-9]{8}$"
}
}
}
}
```
Indicates that an Account Number must be provided in the request.
That is, an item must be provided in the accountIdentifications array where type = ACCOUNT\_NUMBER
This requirement will be associated with the payer or payee details
```json theme={null}
"ACCOUNT_NUMBER_REQUIRED": {
"description":"__Condition__, Account number is required",
"title": "Account Number Required Condition",
"contains": {
"type": "object",
"required": [
"type",
"identification"
],
"properties": {
"type": {
"type": "string",
"pattern": "^ACCOUNT_NUMBER$"
}
}
}
}
```
Describes the required format of a provided BBAN.
That is, the required pattern of the identification value for an item in the accountIdentificiations array where type = BBAN
This requirement will be associated with the payer or payee details
```json theme={null}
"BBAN_FORMAT": {
"description":"__Condition__, BBAN format should follow the format given",
"title": "BBAN Format Condition",
"if": {
"required":[
"type"
],
"properties": {
"type": {
"type": "string",
"pattern": "^BBAN$"
}
}
},
"then": {
"properties": {
"identification": {
"pattern":"^d{18}$"
}
}
}
}
```
Describes the required format of a provided IBAN.
That is, the required pattern of the identification value for an item in the accountIdentificiations array where type = IBAN
This requirement will be associated with the payer or payee details
```json theme={null}
"IBAN_FORMAT": {
"description":"__Condition__, IBAN format should follow the format given",
"title": "IBAN Format Condition",
"if": {
"required":[
"type"
],
"properties": {
"type": {
"type": "string",
"pattern": "^IBAN$"
}
}
},
"then": {
"properties": {
"identification": {
"pattern": "^DE[a-zA-Z0-9]{2}([0-9]{4}){4}([0-9]{2})$"
}
}
}
}
```
Indicates that at least one of an IBAN or a BBAN must be provided in the request.
That is, an item must be provided in the accountIdentifications array where type = IBAN or type = BBAN
This requirement will be associated with the payer or payee details
```json theme={null}
"IBAN_OR_BBAN_REQUIRED": {
"description":"__Condition__, IBAN or BBAN is required",
"title": "IBAN or BBAN Required Condition",
"contains": {
"type": "object",
"required":[
"type",
"identification"
],
"properties": {
"type": {
"type": "string",
"pattern":"^(IBAN|BBAN)$"
}
}
}
}
```
Indicates that an IBAN must be provided in the request.
That is, an item must be provided in the accountIdentifications array where type = IBAN
This requirement will be associated with the payer or payee details
```json theme={null}
"IBAN_REQUIRED": {
"description":"__Condition__, IBAN is required",
"title": "IBAN Required Condition",
"contains": {
"type": "object",
"required": [
"type",
"identification"
],
"properties": {
"type": {
"type": "string",
"pattern": "^IBAN$"
}
}
}
}
```
Describes the required format of a provided Sort Code.
That is, the required pattern of the identification value for an item in the accountIdentificiations array where type = SORT\_CODE
This requirement will be associated with the payer or payee details
```json theme={null}
"SORT_CODE_FORMAT": {
"description": "__Condition__, sort code format should follow the format given",
"title": "Sort Code Condition",
"if": {
"required":[
"type"
],
"properties": {
"type": {
"type": "string",
"pattern": "^SORT_CODE$"
}
}
},
"then": {
"properties": {
"identification": {
"pattern": "^[0-9]{6}$"
}
}
}
}
```
Indicates that an Sort Code must be provided in the request.
That is, an item must be provided in the accountIdentifications array where type = SORT\_CODE
This requirement will be associated with the payer or payee details
```json theme={null}
"SORT_CODE_REQUIRED": {
"title": "Sort Code Required Condition",
"contains": {
"required": [
"identification",
"type"
],
"type": "object",
"properties": {
"type": {
"pattern": "^SORT_CODE$",
"type": "string"
}
}
},
"description": "__Condition__, IBAN is required"
}
```
# Payment Features
Source: https://docs.yapily.com/payments/payment-resources/payment-features
Discover which payment features are supported by each institution in Yapily's network. Compare domestic, international, scheduled, and periodic payment capabilities.
***
## Feature List
The following payment features are used to create or use a PIS consent-token:
| Feature | Description | Endpoint |
| --------------------------------------------------- | ----------------------------------------------------------------------------------------- | --------------------------------------------------------------------------------------------------------------------------------- |
| `CREATE_BULK_PAYMENT` | Create a bulk payment request from a business account | [POST Create Bulk Payment](/api-reference/payments/create-bulk-payment) |
| `CREATE_DOMESTIC_PERIODIC_PAYMENT` | Create a domestic periodic payment (known as a standing order in UK) | [POST Create Payment](/api-reference/payments/create-payment) |
| `CREATE_DOMESTIC_SCHEDULED_PAYMENT` | Create a domestic scheduled payment | - |
| `CREATE_DOMESTIC_SINGLE_INSTANT_PAYMENT` | Create a domestic single instant payment | - |
| `CREATE_DOMESTIC_SINGLE_PAYMENT` | Create a domestic single payment | - |
| `CREATE_DOMESTIC_VARIABLE_RECURRING_PAYMENT` | Create a domestic variable recurring payment. Not currently available | - |
| `CREATE_INTERNATIONAL_PERIODIC_PAYMENT` | Create an international periodic payment | - |
| `CREATE_INTERNATIONAL_SCHEDULED_PAYMENT` | Create an international scheduled payment | - |
| `CREATE_INTERNATIONAL_SINGLE_PAYMENT` | Create an international single payment | - |
| `CREATE_INTERNATIONAL_VARIABLE_RECURRING_PAYMENT` | Create an international variable recurring payment | - |
| `CREATE_SINGLE_PAYMENT_SORTCODE` | Deprecated. Initiate a payment request using the account sort code | POST Create Sort Code Payment |
| `EXISTING_PAYMENTS_DETAILS` | Get the payment details of a payment | [GET Payment Details](/api-reference/payments/get-payment-details) |
| `INITIATE_BULK_PAYMENT` | Initiate a bulk payment request from a business account | [POST Create Bulk Payment Authorisation](/api-reference/authorisations/create-bulk-payment-authorisation) |
| `INITIATE_DOMESTIC_PERIODIC_PAYMENT` | Initiate a domestic periodic payment (known as a standing order in UK) | [POST Create Payment Authorisation](/api-reference/authorisations/create-payment-authorisation) |
| `INITIATE_DOMESTIC_SCHEDULED_PAYMENT` | Initiate a domestic scheduled payment | - |
| `INITIATE_DOMESTIC_SINGLE_INSTANT_PAYMENT` | Initiate a domestic single instant payment | - |
| `INITIATE_DOMESTIC_SINGLE_PAYMENT` | Initiate a domestic single payment | - |
| `INITIATE_DOMESTIC_VARIABLE_RECURRING_PAYMENT` | Initiate a domestic variable recurring payment | - |
| `INITIATE_INTERNATIONAL_PERIODIC_PAYMENT` | Initiate an international periodic payment | - |
| `INITIATE_INTERNATIONAL_SCHEDULED_PAYMENT` | Initiate an international scheduled payment | - |
| `INITIATE_INTERNATIONAL_SINGLE_PAYMENT` | Initiate an international single payment | - |
| `INITIATE_INTERNATIONAL_VARIABLE_RECURRING_PAYMENT` | Initiate an international variable recurring payment | - |
| `INITIATE_PRE_AUTHORISATION` | Initiate a generic pre-authorisation request | [POST Create Pre-authorisation](/api-reference/authorisations/create-pre-authorisation) |
| `INITIATE_SINGLE_PAYMENT_SORTCODE` | Deprecated. Initiate a payment authorisation request using the accounts sort code request | POST Create Sort Code Payment Authorisation |
| `PERIODIC_PAYMENT_FREQUENCY_EXTENDED` | - | - |
| `READ_DOMESTIC_PERIODIC_PAYMENT_REFUND` | Get the refund details for a domestic periodic payment (known as a standing order in UK) | [GET Payment Details](/api-reference/payments/get-payment-details), [POST Create Payment](/api-reference/payments/create-payment) |
| `READ_DOMESTIC_SCHEDULED_REFUND` | Get the refund details for a domestic scheduled payment | - |
| `READ_DOMESTIC_SINGLE_REFUND` | Get the refund details for a domestic single payment | - |
| `READ_INTERNATIONAL_SCHEDULED_REFUND` | Get the refund details for an international scheduled payment | - |
| `READ_INTERNATIONAL_SINGLE_REFUND` | Get the refund details for an international single payment | - |
# Payment Limits
Source: https://docs.yapily.com/payments/payment-resources/payment-limits
Reference guide to payment scheme limits in Yapily. Covers maximum transaction amounts, daily limits, and scheme-specific constraints for UK and European payments.
## What is the maximum amount of money that can be sent through Open Banking?
It depends on the payment scheme that will be used by the bank to execute the payment:
* *The Faster Payments Scheme (for Domestic Payments within the UK):* The maximum value threshold for individual payments that can be processed through Faster Payments is currently £250,000, although some Payment Service Providers are now able to offer £1,000,000
* *SEPA Credit Transfer (for Euro payments within SEPA countries):* The maximum value threshold for individual payments that can be processed through SEPA Credit Transfer is currently €999,999,999.99
* *SEPA Credit Transfer Instant (for Euro payments within SEPA countries):* The maximum value threshold for individual payments that can be processed through SEPA Credit Transfer Instant is currently €100,000
Despite these limits, individual banks and building societies set their own limits for their retail and corporate accounts which can be significantly lower. Individuals can also have different limits which can even be different for every account (savings, current, etc).
## What limits does Yapily impose?
Yapily imposes a *£15,000* limit per single payment for *Yapily Connect* customers. *Direct* customers that use their own certificates/Open Banking licenses are unaffected by this limit.
Due to compliance reasons, and since we are liable for the use of our Yapily Connect license by our customers, we have a £15,000 payments limit in place, which can be requested to be waived. If you do *request it to be waived*, we will ask you to *share your KYC/KYB processes* with us so we can make sure that they are secure enough.
# Payment Notifications
Source: https://docs.yapily.com/payments/payment-resources/payment-notifications
Receive real-time payment status notifications with Yapily webhooks. Configure event subscriptions and handle payment lifecycle events in your backend application.
Payment notifications are currently available in Private Beta. See [Glossary](/getting-started/glossary#private-beta) for more information.
## Introduction
You can subscribe to receive [Webhooks](/tools-and-services/webhooks/introduction) when a change occurs on your initiated payments. This removes the need to manually poll the [Get Payment Details](/api-reference/payments/get-payment-details) endpoint to check the status of a payment.
Yapily currently offers payment webhooks based on the [initiation status](/payments/payment-resources/payment-status#initiation-status) of a payment.
You need to [subscribe](/tools-and-services/webhooks/get-started) to the types of the event you wish to receive webhooks for and ensure your application is set up to receive them.
## Events
The following event types are available:
| Event | Description | eventTypeId |
| ---------------------------- | ------------------------------------------------------------------------ | ----------------------------------- |
| Payment Initiation Status | Webhook that the payment status has transitioned to COMPLETED or FAILED. | single\_payment.status.updated |
| Payment Initiation Completed | Webhook that the payment status has transitioned to COMPLETED. | single\_payment.status.completed |
| Payment ISO Status | Webhook that the payment ISO status has changed. | single\_payment.iso\_status.updated |
* Webhooks topics above are for single payments only.
* The payment status only has 1 status transition. The payment ISO status can have multiple status transitions.
* Some exceptional institutions don't provide payment status updates.
## Payload
Upon subscribing to [Webhooks](/tools-and-services/webhooks/introduction), you will receive notifications similar to the example below. These webhooks alert you to changes in the value of the payment status field.
For changes related to the ISO status, the webhook specifically alerts you to updates in the statusDetails.isoStatus field. To learn more about ISO status, please refer to [Processing & Execution Status](/payments/payment-resources/payment-status#processing--execution-status).
For a comprehensive explanation of the event structure, please review the [Webhook Sample Notification](/tools-and-services/webhooks/introduction#sample-notification).
**Example payment notification:**
```json theme={null}
{
"type": "single_payment.status.completed",
"applicationId": "e6d4bd6c-d7a2-4389-9ff7-4b8f95b6eed0",
"id": "14178946-c67c-417f-a773-f4f593d479a3",
"event": {
"amount": 1,
"payeeDetails": {
"name": "Jane Doe",
"accountIdentifications": [
{
"type": "ACCOUNT_NUMBER",
"identification": "12345678"
},
{
"type": "SORT_CODE",
"identification": "123456"
}
]
},
"payer": {
"name": "John Doe",
"accountIdentifications": [
{
"type": "ACCOUNT_NUMBER",
"identification": "87654321"
},
{
"type": "SORT_CODE",
"identification": "121212"
}
]
},
"amountDetails": {
"amount": 1,
"currency": "GBP"
},
"reference": "Test Payment",
"createdAt": "2020-04-30T10:26:44.879Z",
"paymentIdempotencyId": "fa16b196-6fb7-4fdb-84df-6",
"statusDetails": {
"status": "COMPLETED",
"statusUpdateDate": "2020-04-30T10:26:44.876Z",
"isoStatus": {
"code": "ACSC",
"name": "AcceptedSettlementCompleted"
}
},
"currency": "GBP",
"id": "PDC_61d23e99-587a-4b17-ae70-740a9b20bb74",
"paymentLifecycleId": "6-fd48-bdf4-7bf6-691b61af",
"institutionConsentId": "PDC_4e6d9667-baed-4437-b50a-29a24dd1cd56",
"status": "COMPLETED"
},
"metadata": {
"tracingId": "a5ed054e-59c9-4eaf-8a3e-21db0a8ae60f",
"user": {
"key": "value"
}
}
}
```
## Delivery
Yapily guarantees a payment will reach either a COMPLETED or FAILED status and therefore a webhook will be delivered, unless there's an unexpected exception.
Yapily will attempt to send a webhook to you immediately after the institution has updated the payment status.
The exact length of time before the delivery of a webhook depends on how quickly an institution processes a payment and updates the payment status.
**Note:** Yapily currently timeouts webhook at **24** hours. If the payment status has not been updated in this time, a webhook will not be delivered.
Unexpected exceptions could include:
* the institution doesn't update the status of a payment as expected
* the webhook fails to deliver to you after retrying
# Payment Status
Source: https://docs.yapily.com/payments/payment-resources/payment-status
Track payment status updates from institutions using Yapily. Understand each stage of the payment lifecycle and how to handle status transitions in your integration.
***
## Introduction
After initiating a payment, its current status in the processing lifecycle can be monitored.
In order to provide the most comprehensive information on the payment status, but also to overcome limitations in what different institutions report, there are 2 types of status available.
## How long does it take for a single transaction to settle?
Open Banking payments executed through Yapily send the payment instruction to the `Institution`.
As a result, the payment rails used by the `Institution` to execute the payment ultimately
determines how fast the payment settles.
* *The Faster Payments Scheme (for Domestic Payments within the UK)*: Normally, a Faster
Payment arrives within minutes although sometimes they can take up to two hours. Where the
recipient is a Faster Payments Participant Bank, they should generally be able to see the
credit on their account within seconds and also be able to access the funds
* *SEPA Credit Transfer (for Euro payments within SEPA countries)*: SEPA Credit Transfer
takes a maximum of one banking business day.
* *SEPA Credit Transfer Instant (for Euro payments within SEPA countries)*: SEPA Credit Transfer
Instant is available 24 hours a day, 365 days a year and there are no cut-off times. The
maximum execution time for a SCT Instant payment is 10 seconds, and the funds are immediately
available for the recipient. In order to facilitate these payments, there are often
charges associated with these payments averaging €0.002 per transaction but additional charges
by each `Institution` are usually also applied.
## Initiation Status
`status` indicates whether the payment has been successfully initiated with the `Institution` and should be considered as the 'primary' status.
It may be set to one of the following values:
* `PENDING` when the initiation request is still being processed
* `COMPLETED` when the initiation request has passed validation checks and been accepted by the `Institution`. Settlement is expected to happen in due course (or according the the provided schedule for a Periodic or Scheduled payment)
* `FAILED` when the `Institution` has rejected the initiation request and the payment will not be processed further
You may wish to monitor the `status` of a payment until it has reached the `COMPLETED` or `FAILED` state by polling [Get Payment Details](/api-reference/payments/get-payment-details)
Whilst unlikely, there may be an issue in the `Institution` processing of a payment after it has been accepted. In order to provide visibility of when this occurs, a payment initiation request that was `COMPLETED` may subsequently become `FAILED`.
Status `UNKNOWN`: This is just the enumeration's default.
## Multiple Authorisations
For some business and joint accounts, as part of the SCA process for Open Banking, your users may be required to give multiple authorisations to approve the initiation of a payment.
The normal authorisation flow takes place for the first PSU, including getting receipt of the consent token.
When you request payment execution and multiple authorisations are required:
* The payment status will remain at `PENDING`
* Information regarding the additional authorisations is included in the [MultiAuthorisationStatus](/api-reference/payments/get-payment-details#response-data-payments-items-status-details-multi-authorisation-status) object for the payment. This object contains details of how many
authorisations are required and how many more need to be completed
For example:
```json theme={null}
{
"data": {
"id": "pv3-c8eece27-eb1a-4c27-a13c-2f805703dab2",
"paymentIdempotencyId": "1d54cf71bfe44b1b8e67247aed455d96",
"institutionConsentId": "sdp-1-aa9d0941-43ff-4abb-8129-4d56b620b8ee",
"paymentLifecycleId": "69d554dea74276e8b1b44efb17fc45d1",
"status": "PENDING",
"statusDetails": {
"status": "PENDING",
"statusUpdateDate": "2019-09-26T15:38:33.401Z",
"multiAuthorisationStatus": {
"status": "AWAITING_FURTHER_AUTHORIZATION",
"numberOfAuthorisationRequired": 2,
"numberOfAuthorisationReceived": 1,
"lastUpdatedDateTime": "2019-09-26T15:38:33.408Z"
}
}
}
}
```
The extra authorisations take place offline (phone, sms, text, email) and are completed by the owner of the business account or the other account holders of the joint account.
As these are offline authorisations, they do not take place within Yapily's domain.
Once the authorisations are completed, the payment status is updated.
You can monitor the status of the payment using [Get Payment Details](/api-reference/payments/get-payment-details).
# Payment Constraints
Source: https://docs.yapily.com/payments/payment-resources/payment-constraints
Understand payment constraints applied by institutions in Yapily's network. Covers amount limits, currency restrictions, and institution-specific payment rules.
Payment Constraints is currently available in Private Beta. See [Glossary](/getting-started/glossary#private-beta) for more information.
***
## Introduction
The constraints API can help improve your success rates for payment initiation by allowing you to fulfil institution specific requirements and rules.
Examples of institution specific requirements, or constraints, include:
* User credentials (such as their user id and password for the bank's digital channels) must be provided
* The users payment account must be indicated through its IBAN
* The maximum length of a payment reference must be 18 characters
Where requirements, such as those above, are not met then the payment could be rejected by the institution.
Ways you can use the constraint information include:
* As a knowledge base to reference during the build of your application
* To dynamically control behaviour in your application - such as front end validation and data transformation
* To validate that your intended initiation request to the Yapily Payments API meets all of the institution's requirements
## How it works
The constraints API works as follows:
1. You make a request to the payment constraints endpoint specifying the type of payment that you wish to initiate and the institution you wish to initiate it with
2. The response will include a JSON schema that defines all of the data requirements for this institution
This schema is based on the schema for the related payment initiation endpoint (e.g. [Create Payment Authorisation](/api-reference/authorisations/create-payment-authorisation)), as defined in the Open API Specification and API Reference, but is tailored to take into account the specific requirements / validation for the institution
Expressing the data requirements through JSON schema in this way means that:
* The data requirements are expressed in an identical manner as the Yapily Payments API and can be used to directly construct and validate the request messages to it
* It's a standardised solution with many readily-available tools / libraries to help you process the information provided and perform validation against it
## Current Scope
The payment constraints API currently supports Single Domestic Payments (including Instant) for German institutions.
This will later be expanded to include other countries and payment types.
The same mechanism will also be used in future versions to share Yapily Data related constraints.
## Tutorial
### 1. Request Constraint Information
Call Get Constraints to request constraint information for the institution of your user and the operation that you wish to perform.
This is done through the below query parameters:
| Query Parameter | Description | Mandatory? | Example |
| ------------------------ | -------------------------------------------------------------------------------------------------------------------------------------------------- | ---------- | ---------------------- |
| `institutionIds` | The unique id(s) of the Institution(s) that you wish to retrieve the Payment Constraints for. Multiple institutionIds need to be separated by `,` | Yes | commerzbank |
| `institutionCountryCode` | The country code in which the institution(s) operates and that you wish to gain the constraints for | Yes | DE |
| `paymentType` | The payment type that you wish to gain the constraints for | Yes | DOMESTIC\_PAYMENT |
| `endpointPath` | The endpoint path on the Yapily API to which the constraints apply | No | /payment-auth-requests |
| `endpointMethod` | The endpoint method on the Yapily API to which the constraints apply | No | POST |
### 2. Receive Constraint Information
The response provides an array of results with one item for every `institutionId` you have requested.
Each array item includes:
* The key identifiers of the payment scenario (playing back the parameters you have passed in) - e.g. `institutionId` and `paymentType`
* A `request` block that includes a detailed json schema for the request `headers` and another schema for the request `body`. This JSON schema describes what a request to the `endpointPath` needs to conform to in order to be successful
The response example below has been shortened and is to indicate the structure of the response only.
```bash Request theme={null}
curl -L -X GET 'https://api.yapily.com//institutions/constraints/payments?institutionIds=commerzbank&country=DE&paymentType=DOMESTIC_PAYMENT&endpointPath=/payment-auth-requests&endpointMethod=POST' \
-u 'APPLICATION_KEY:APPLICATION_SECRET'
```
```json Response theme={null}
{
"meta": {
"tracingId": "c1342598c42e4ecdab28b802bf9b88bb"
},
"data": [
{
"institutionId": "commerzbank",
"institutionCountryCode": "DE",
"endpointPath": "/payment-auth-requests",
"endpointMethod": "POST",
"paymentType": "DOMESTIC_PAYMENT",
"request": {
"headers": {
"required": [
"psu-ip-address"
],
"type": "object",
"properties": {
"psu-ip-address": {
"title": "User IP Address",
"type": "string",
"x-yapily-annotations": {
"lastUpdatedAt": "2023-04-14T13:48:27.844Z"
}
}
},
"x-yapily-annotations": {
"lastUpdatedAt": "2023-04-14T13:48:27.768Z"
}
},
"body": {
"required": [
"institutionId",
"paymentRequest"
],
"type": "object",
"properties": {
"redirect": {
"required": [
"url"
],
"type": "object",
"properties": {
"url": {
"type": "string",
"x-yapily-annotations": {
"lastUpdatedAt": "2023-04-14T13:48:27.688Z"
}
}
},
"x-yapily-annotations": {
"lastUpdatedAt": "2023-04-14T13:48:27.602Z"
}
},
"institutionId": {
"type": "string",
"x-yapily-annotations": {
"lastUpdatedAt": "2023-04-14T13:48:27.442Z"
}
},
.....
},
"paymentRequest": {
"required": [
"payee",
"reference",
"amount",
"paymentIdempotencyId",
"type",
"payer"
],
"type": "object",
"properties": {
"payee": {
"title": "Payee Details",
"required": [
"accountIdentifications",
"name"
],
"type": "object",
"properties": {
"accountIdentifications": {
"type": "array",
"allOf": [
{
"$ref": "#/$defs/IBAN_REQUIRED"
}
],
"items": {
"required": [
"identification",
"type"
],
"type": "object",
"allOf": [
{
"$ref": "#/$defs/IBAN_FORMAT"
}
],
"properties": {
"identification": {
"title": "Account Identification",
"type": "string",
"x-yapily-annotations": {
"lastUpdatedAt": "2023-07-14T10:32:13.495Z"
}
},
"type": {
"enum": [
"IBAN",
"BBAN",
"PAN",
"MASKED_PAN",
"MSISDN"
],
"title": "Account Identification Type",
"type": "string",
"x-yapily-annotations": {
"lastUpdatedAt": "2023-07-14T10:32:13.336Z"
}
}
}
},
"x-yapily-annotations": {
"lastUpdatedAt": "2023-04-14T13:51:21.164Z"
}
},
"address": {
......
},
......
},
"readRefundAccount": {
......
},
......
},
"$defs": {
"IBAN_FORMAT": {
"if": {
"required": [
"type"
],
"properties": {
"type": {
"pattern": "^IBAN$",
"type": "string"
}
}
},
"title": "IBAN Format Condition",
"then": {
"properties": {
"identification": {
"pattern": "^DE[a-zA-Z0-9]{2}([0-9]{4}){4}([0-9]{2})$"
}
}
},
"description": "__Condition__, IBAN needs to be in the format provided"
},
......
}
}
}
]
}
```
## Constraint Types
### Possible Constraints
JSON schema allows for a large number of keywords to describe the desired structure and validation of data. To provide more predictability & reduce the range of constraints your application will need to handle, the information provided by the constraints API will always:
* Conform to the Yapily API schema (described in the Open API Specification and API reference) for the same endpoint. E.g. The properties included and their types will always align
* Have tighter validation than the Yapily API schema (and never more relaxed). E.g. An optional property may become mandatory, but a mandatory property will not become optional
* Contain only the below validation keywords:
* required
* type
* format
* minimum
* exclusiveMinimum
* maximum
* exclusiveMaximum
* pattern
* enum
In addition, the `allOf` keyword may be used to reference the complex conditions that apply.
### Complex Conditions
Some data requirements are more complex and conditional in nature meaning that they cannot be communicated using the more simple keywords described above.
Where this is the case a condition is used to describe the validation rule.
Each of these conditions has a unique name, which is also used as the name of the sub-schema that defines it. This sub-schema definition (`$defs`) is referenced (`$ref`) from the property to which it applies
This unique name:
* Aids human identification of these complex conditions
* Offers a predictable, limited and documented set of conditions that may be provided (and that you may wish for your application to handle)
#### Example
The below extract includes two named conditions:
1. An `IBAN_REQUIRED` condition that applies to the `accountIdentifications` array
2. An `IBAN_FORMAT` condition that applies to each item within the `accountIdentifications` array
```json theme={null}
"accountIdentifications": {
"type": "array",
"allOf": [
{
"$ref": "#/$defs/IBAN_REQUIRED"
}
],
"items": {
"required": [
"identification",
"type"
],
"type": "object",
"allOf": [
{
"$ref": "#/$defs/IBAN_FORMAT"
}
],
```
Within the response these conditions are defined as sub-schema:
```json theme={null}
"$defs": {
"IBAN_FORMAT": {
"if": {
"required": [
"type"
],
"properties": {
"type": {
"pattern": "^IBAN$",
"type": "string"
}
}
},
"title": "IBAN Format Condition",
"then": {
"properties": {
"identification": {
"pattern": "^DE[a-zA-Z0-9]{2}([0-9]{4}){4}([0-9]{2})$"
}
}
},
"description": "__Condition__, IBAN should be in the format provided"
},
"IBAN_REQUIRED": {
"title": "IBAN Required Condition",
"contains": {
"required": [
"identification",
"type"
],
"type": "object",
"properties": {
"type": {
"pattern": "^IBAN$",
"type": "string"
}
}
},
"description": "__Condition__, IBAN is required"
}
},
```
### Complex Conditions Catalogue
Describes the required format of a provided Account Number.
That is, the required pattern of the identification value for an item in the accountIdentifications array where type = ACCOUNT\_NUMBER
This requirement will be associated with the payer or payee details
```json theme={null}
"ACCOUNT_NUMBER_FORMAT": {
"description":"__Condition__, account number should follow the format given",
"title": "Account Number Format Condition",
"if": {
"required":[
"type"
],
"properties": {
"type": {
"type": "string",
"pattern": "^ACCOUNT_NUMBER$"
}
}
},
"then": {
"properties": {
"identification": {
"pattern": "^[0-9]{8}$"
}
}
}
}
```
Indicates that an Account Number must be provided in the request.
That is, an item must be provided in the accountIdentifications array where type = ACCOUNT\_NUMBER
This requirement will be associated with the payer or payee details
```json theme={null}
"ACCOUNT_NUMBER_REQUIRED": {
"description":"__Condition__, Account number is required",
"title": "Account Number Required Condition",
"contains": {
"type": "object",
"required": [
"type",
"identification"
],
"properties": {
"type": {
"type": "string",
"pattern": "^ACCOUNT_NUMBER$"
}
}
}
}
```
Describes the required format of a provided BBAN.
That is, the required pattern of the identification value for an item in the accountIdentificiations array where type = BBAN
This requirement will be associated with the payer or payee details
```json theme={null}
"BBAN_FORMAT": {
"description":"__Condition__, BBAN format should follow the format given",
"title": "BBAN Format Condition",
"if": {
"required":[
"type"
],
"properties": {
"type": {
"type": "string",
"pattern": "^BBAN$"
}
}
},
"then": {
"properties": {
"identification": {
"pattern":"^d{18}$"
}
}
}
}
```
Describes the required format of a provided IBAN.
That is, the required pattern of the identification value for an item in the accountIdentificiations array where type = IBAN
This requirement will be associated with the payer or payee details
```json theme={null}
"IBAN_FORMAT": {
"description":"__Condition__, IBAN format should follow the format given",
"title": "IBAN Format Condition",
"if": {
"required":[
"type"
],
"properties": {
"type": {
"type": "string",
"pattern": "^IBAN$"
}
}
},
"then": {
"properties": {
"identification": {
"pattern": "^DE[a-zA-Z0-9]{2}([0-9]{4}){4}([0-9]{2})$"
}
}
}
}
```
Indicates that at least one of an IBAN or a BBAN must be provided in the request.
That is, an item must be provided in the accountIdentifications array where type = IBAN or type = BBAN
This requirement will be associated with the payer or payee details
```json theme={null}
"IBAN_OR_BBAN_REQUIRED": {
"description":"__Condition__, IBAN or BBAN is required",
"title": "IBAN or BBAN Required Condition",
"contains": {
"type": "object",
"required":[
"type",
"identification"
],
"properties": {
"type": {
"type": "string",
"pattern":"^(IBAN|BBAN)$"
}
}
}
}
```
Indicates that an IBAN must be provided in the request.
That is, an item must be provided in the accountIdentifications array where type = IBAN
This requirement will be associated with the payer or payee details
```json theme={null}
"IBAN_REQUIRED": {
"description":"__Condition__, IBAN is required",
"title": "IBAN Required Condition",
"contains": {
"type": "object",
"required": [
"type",
"identification"
],
"properties": {
"type": {
"type": "string",
"pattern": "^IBAN$"
}
}
}
}
```
Describes the required format of a provided Sort Code.
That is, the required pattern of the identification value for an item in the accountIdentificiations array where type = SORT\_CODE
This requirement will be associated with the payer or payee details
```json theme={null}
"SORT_CODE_FORMAT": {
"description": "__Condition__, sort code format should follow the format given",
"title": "Sort Code Condition",
"if": {
"required":[
"type"
],
"properties": {
"type": {
"type": "string",
"pattern": "^SORT_CODE$"
}
}
},
"then": {
"properties": {
"identification": {
"pattern": "^[0-9]{6}$"
}
}
}
}
```
Indicates that an Sort Code must be provided in the request.
That is, an item must be provided in the accountIdentifications array where type = SORT\_CODE
This requirement will be associated with the payer or payee details
```json theme={null}
"SORT_CODE_REQUIRED": {
"title": "Sort Code Required Condition",
"contains": {
"required": [
"identification",
"type"
],
"type": "object",
"properties": {
"type": {
"pattern": "^SORT_CODE$",
"type": "string"
}
}
},
"description": "__Condition__, IBAN is required"
}
```
# Payment Features
Source: https://docs.yapily.com/payments/payment-resources/payment-features
Discover which payment features are supported by each institution in Yapily's network. Compare domestic, international, scheduled, and periodic payment capabilities.
***
## Feature List
The following payment features are used to create or use a PIS consent-token:
| Feature | Description | Endpoint |
| --------------------------------------------------- | ----------------------------------------------------------------------------------------- | --------------------------------------------------------------------------------------------------------------------------------- |
| `CREATE_BULK_PAYMENT` | Create a bulk payment request from a business account | [POST Create Bulk Payment](/api-reference/payments/create-bulk-payment) |
| `CREATE_DOMESTIC_PERIODIC_PAYMENT` | Create a domestic periodic payment (known as a standing order in UK) | [POST Create Payment](/api-reference/payments/create-payment) |
| `CREATE_DOMESTIC_SCHEDULED_PAYMENT` | Create a domestic scheduled payment | - |
| `CREATE_DOMESTIC_SINGLE_INSTANT_PAYMENT` | Create a domestic single instant payment | - |
| `CREATE_DOMESTIC_SINGLE_PAYMENT` | Create a domestic single payment | - |
| `CREATE_DOMESTIC_VARIABLE_RECURRING_PAYMENT` | Create a domestic variable recurring payment. Not currently available | - |
| `CREATE_INTERNATIONAL_PERIODIC_PAYMENT` | Create an international periodic payment | - |
| `CREATE_INTERNATIONAL_SCHEDULED_PAYMENT` | Create an international scheduled payment | - |
| `CREATE_INTERNATIONAL_SINGLE_PAYMENT` | Create an international single payment | - |
| `CREATE_INTERNATIONAL_VARIABLE_RECURRING_PAYMENT` | Create an international variable recurring payment | - |
| `CREATE_SINGLE_PAYMENT_SORTCODE` | Deprecated. Initiate a payment request using the account sort code | POST Create Sort Code Payment |
| `EXISTING_PAYMENTS_DETAILS` | Get the payment details of a payment | [GET Payment Details](/api-reference/payments/get-payment-details) |
| `INITIATE_BULK_PAYMENT` | Initiate a bulk payment request from a business account | [POST Create Bulk Payment Authorisation](/api-reference/authorisations/create-bulk-payment-authorisation) |
| `INITIATE_DOMESTIC_PERIODIC_PAYMENT` | Initiate a domestic periodic payment (known as a standing order in UK) | [POST Create Payment Authorisation](/api-reference/authorisations/create-payment-authorisation) |
| `INITIATE_DOMESTIC_SCHEDULED_PAYMENT` | Initiate a domestic scheduled payment | - |
| `INITIATE_DOMESTIC_SINGLE_INSTANT_PAYMENT` | Initiate a domestic single instant payment | - |
| `INITIATE_DOMESTIC_SINGLE_PAYMENT` | Initiate a domestic single payment | - |
| `INITIATE_DOMESTIC_VARIABLE_RECURRING_PAYMENT` | Initiate a domestic variable recurring payment | - |
| `INITIATE_INTERNATIONAL_PERIODIC_PAYMENT` | Initiate an international periodic payment | - |
| `INITIATE_INTERNATIONAL_SCHEDULED_PAYMENT` | Initiate an international scheduled payment | - |
| `INITIATE_INTERNATIONAL_SINGLE_PAYMENT` | Initiate an international single payment | - |
| `INITIATE_INTERNATIONAL_VARIABLE_RECURRING_PAYMENT` | Initiate an international variable recurring payment | - |
| `INITIATE_PRE_AUTHORISATION` | Initiate a generic pre-authorisation request | [POST Create Pre-authorisation](/api-reference/authorisations/create-pre-authorisation) |
| `INITIATE_SINGLE_PAYMENT_SORTCODE` | Deprecated. Initiate a payment authorisation request using the accounts sort code request | POST Create Sort Code Payment Authorisation |
| `PERIODIC_PAYMENT_FREQUENCY_EXTENDED` | - | - |
| `READ_DOMESTIC_PERIODIC_PAYMENT_REFUND` | Get the refund details for a domestic periodic payment (known as a standing order in UK) | [GET Payment Details](/api-reference/payments/get-payment-details), [POST Create Payment](/api-reference/payments/create-payment) |
| `READ_DOMESTIC_SCHEDULED_REFUND` | Get the refund details for a domestic scheduled payment | - |
| `READ_DOMESTIC_SINGLE_REFUND` | Get the refund details for a domestic single payment | - |
| `READ_INTERNATIONAL_SCHEDULED_REFUND` | Get the refund details for an international scheduled payment | - |
| `READ_INTERNATIONAL_SINGLE_REFUND` | Get the refund details for an international single payment | - |
# Payment Limits
Source: https://docs.yapily.com/payments/payment-resources/payment-limits
Reference guide to payment scheme limits in Yapily. Covers maximum transaction amounts, daily limits, and scheme-specific constraints for UK and European payments.
## What is the maximum amount of money that can be sent through Open Banking?
It depends on the payment scheme that will be used by the bank to execute the payment:
* *The Faster Payments Scheme (for Domestic Payments within the UK):* The maximum value threshold for individual payments that can be processed through Faster Payments is currently £250,000, although some Payment Service Providers are now able to offer £1,000,000
* *SEPA Credit Transfer (for Euro payments within SEPA countries):* The maximum value threshold for individual payments that can be processed through SEPA Credit Transfer is currently €999,999,999.99
* *SEPA Credit Transfer Instant (for Euro payments within SEPA countries):* The maximum value threshold for individual payments that can be processed through SEPA Credit Transfer Instant is currently €100,000
Despite these limits, individual banks and building societies set their own limits for their retail and corporate accounts which can be significantly lower. Individuals can also have different limits which can even be different for every account (savings, current, etc).
## What limits does Yapily impose?
Yapily imposes a *£15,000* limit per single payment for *Yapily Connect* customers. *Direct* customers that use their own certificates/Open Banking licenses are unaffected by this limit.
Due to compliance reasons, and since we are liable for the use of our Yapily Connect license by our customers, we have a £15,000 payments limit in place, which can be requested to be waived. If you do *request it to be waived*, we will ask you to *share your KYC/KYB processes* with us so we can make sure that they are secure enough.
# Payment Notifications
Source: https://docs.yapily.com/payments/payment-resources/payment-notifications
Receive real-time payment status notifications with Yapily webhooks. Configure event subscriptions and handle payment lifecycle events in your backend application.
Payment notifications are currently available in Private Beta. See [Glossary](/getting-started/glossary#private-beta) for more information.
## Introduction
You can subscribe to receive [Webhooks](/tools-and-services/webhooks/introduction) when a change occurs on your initiated payments. This removes the need to manually poll the [Get Payment Details](/api-reference/payments/get-payment-details) endpoint to check the status of a payment.
Yapily currently offers payment webhooks based on the [initiation status](/payments/payment-resources/payment-status#initiation-status) of a payment.
You need to [subscribe](/tools-and-services/webhooks/get-started) to the types of the event you wish to receive webhooks for and ensure your application is set up to receive them.
## Events
The following event types are available:
| Event | Description | eventTypeId |
| ---------------------------- | ------------------------------------------------------------------------ | ----------------------------------- |
| Payment Initiation Status | Webhook that the payment status has transitioned to COMPLETED or FAILED. | single\_payment.status.updated |
| Payment Initiation Completed | Webhook that the payment status has transitioned to COMPLETED. | single\_payment.status.completed |
| Payment ISO Status | Webhook that the payment ISO status has changed. | single\_payment.iso\_status.updated |
* Webhooks topics above are for single payments only.
* The payment status only has 1 status transition. The payment ISO status can have multiple status transitions.
* Some exceptional institutions don't provide payment status updates.
## Payload
Upon subscribing to [Webhooks](/tools-and-services/webhooks/introduction), you will receive notifications similar to the example below. These webhooks alert you to changes in the value of the payment status field.
For changes related to the ISO status, the webhook specifically alerts you to updates in the statusDetails.isoStatus field. To learn more about ISO status, please refer to [Processing & Execution Status](/payments/payment-resources/payment-status#processing--execution-status).
For a comprehensive explanation of the event structure, please review the [Webhook Sample Notification](/tools-and-services/webhooks/introduction#sample-notification).
**Example payment notification:**
```json theme={null}
{
"type": "single_payment.status.completed",
"applicationId": "e6d4bd6c-d7a2-4389-9ff7-4b8f95b6eed0",
"id": "14178946-c67c-417f-a773-f4f593d479a3",
"event": {
"amount": 1,
"payeeDetails": {
"name": "Jane Doe",
"accountIdentifications": [
{
"type": "ACCOUNT_NUMBER",
"identification": "12345678"
},
{
"type": "SORT_CODE",
"identification": "123456"
}
]
},
"payer": {
"name": "John Doe",
"accountIdentifications": [
{
"type": "ACCOUNT_NUMBER",
"identification": "87654321"
},
{
"type": "SORT_CODE",
"identification": "121212"
}
]
},
"amountDetails": {
"amount": 1,
"currency": "GBP"
},
"reference": "Test Payment",
"createdAt": "2020-04-30T10:26:44.879Z",
"paymentIdempotencyId": "fa16b196-6fb7-4fdb-84df-6",
"statusDetails": {
"status": "COMPLETED",
"statusUpdateDate": "2020-04-30T10:26:44.876Z",
"isoStatus": {
"code": "ACSC",
"name": "AcceptedSettlementCompleted"
}
},
"currency": "GBP",
"id": "PDC_61d23e99-587a-4b17-ae70-740a9b20bb74",
"paymentLifecycleId": "6-fd48-bdf4-7bf6-691b61af",
"institutionConsentId": "PDC_4e6d9667-baed-4437-b50a-29a24dd1cd56",
"status": "COMPLETED"
},
"metadata": {
"tracingId": "a5ed054e-59c9-4eaf-8a3e-21db0a8ae60f",
"user": {
"key": "value"
}
}
}
```
## Delivery
Yapily guarantees a payment will reach either a COMPLETED or FAILED status and therefore a webhook will be delivered, unless there's an unexpected exception.
Yapily will attempt to send a webhook to you immediately after the institution has updated the payment status.
The exact length of time before the delivery of a webhook depends on how quickly an institution processes a payment and updates the payment status.
**Note:** Yapily currently timeouts webhook at **24** hours. If the payment status has not been updated in this time, a webhook will not be delivered.
Unexpected exceptions could include:
* the institution doesn't update the status of a payment as expected
* the webhook fails to deliver to you after retrying
# Payment Status
Source: https://docs.yapily.com/payments/payment-resources/payment-status
Track payment status updates from institutions using Yapily. Understand each stage of the payment lifecycle and how to handle status transitions in your integration.
***
## Introduction
After initiating a payment, its current status in the processing lifecycle can be monitored.
In order to provide the most comprehensive information on the payment status, but also to overcome limitations in what different institutions report, there are 2 types of status available.
## How long does it take for a single transaction to settle?
Open Banking payments executed through Yapily send the payment instruction to the `Institution`.
As a result, the payment rails used by the `Institution` to execute the payment ultimately
determines how fast the payment settles.
* *The Faster Payments Scheme (for Domestic Payments within the UK)*: Normally, a Faster
Payment arrives within minutes although sometimes they can take up to two hours. Where the
recipient is a Faster Payments Participant Bank, they should generally be able to see the
credit on their account within seconds and also be able to access the funds
* *SEPA Credit Transfer (for Euro payments within SEPA countries)*: SEPA Credit Transfer
takes a maximum of one banking business day.
* *SEPA Credit Transfer Instant (for Euro payments within SEPA countries)*: SEPA Credit Transfer
Instant is available 24 hours a day, 365 days a year and there are no cut-off times. The
maximum execution time for a SCT Instant payment is 10 seconds, and the funds are immediately
available for the recipient. In order to facilitate these payments, there are often
charges associated with these payments averaging €0.002 per transaction but additional charges
by each `Institution` are usually also applied.
## Initiation Status
`status` indicates whether the payment has been successfully initiated with the `Institution` and should be considered as the 'primary' status.
It may be set to one of the following values:
* `PENDING` when the initiation request is still being processed
* `COMPLETED` when the initiation request has passed validation checks and been accepted by the `Institution`. Settlement is expected to happen in due course (or according the the provided schedule for a Periodic or Scheduled payment)
* `FAILED` when the `Institution` has rejected the initiation request and the payment will not be processed further
You may wish to monitor the `status` of a payment until it has reached the `COMPLETED` or `FAILED` state by polling [Get Payment Details](/api-reference/payments/get-payment-details)
Whilst unlikely, there may be an issue in the `Institution` processing of a payment after it has been accepted. In order to provide visibility of when this occurs, a payment initiation request that was `COMPLETED` may subsequently become `FAILED`.
![Payment Status Flow]() The `status` reports on payment initiation only and, as such, `COMPLETED` does not indicate that settlement has occurred. The `isoStatus` should be used (where available) to understand the status of [payment processing and execution](#processing--execution-status), including whether settlement has occurred to the payer or payee account.
## Processing & Execution Status
The `isoStatus` provides more detailed and extensive reporting on the payment status.
It's primary use is after a payment has been successfully initiated (i.e. `status` is `COMPLETED`) when the `Institution` will proceed with executing the payment. The `isoStatus` can be used to track the payment through its execution process through to final settlement to the payee's account.
Yapily cannot guarantee the provision or accuracy of the `isoStatus`. The reporting is limited within some Institutions and they may stop reporting at an intermediate state (e.g. ACTC) even though processing has continued.
Where the `status` is `COMPLETED`, but an issue is experienced with the payment, then this indicates that a problem has occurred with the `Institution`, who should be contacted for further investigation.
The `code` and associated `name` are reported using ISO20022 values, as summarised below.
The `status` reports on payment initiation only and, as such, `COMPLETED` does not indicate that settlement has occurred. The `isoStatus` should be used (where available) to understand the status of [payment processing and execution](#processing--execution-status), including whether settlement has occurred to the payer or payee account.
## Processing & Execution Status
The `isoStatus` provides more detailed and extensive reporting on the payment status.
It's primary use is after a payment has been successfully initiated (i.e. `status` is `COMPLETED`) when the `Institution` will proceed with executing the payment. The `isoStatus` can be used to track the payment through its execution process through to final settlement to the payee's account.
Yapily cannot guarantee the provision or accuracy of the `isoStatus`. The reporting is limited within some Institutions and they may stop reporting at an intermediate state (e.g. ACTC) even though processing has continued.
Where the `status` is `COMPLETED`, but an issue is experienced with the payment, then this indicates that a problem has occurred with the `Institution`, who should be contacted for further investigation.
The `code` and associated `name` are reported using ISO20022 values, as summarised below.
![Payment Status Flow - ISO]() | Code | Name | Description |
| ---- | --------------------------------- | ----------------------------------------------------------------------------------------------------------------------------------------------------------------------------------------------------------------------------------------------------------------------------------------------------------------------- |
| ACSC | AcceptedSettlementCompleted | Settlement on the debtor's account has been completed. |
| ACCC | AcceptedCreditSettlementCompleted | Settlement on the creditor's account has been completed. |
| ACCP | AcceptedCustomerProfile | Preceding checks of technical validation was successful. Customer profile check was also successful. |
| ACSP | AcceptedSettlementInProcess | All preceding checks such as technical validation and customer profile were successful and therefore the payment initiation has been accepted for execution. |
| ACTC | AcceptedTechnicalValidation | Authentication and syntactical and semantical validation are successful |
| ACWC | AcceptedWithChange | Instruction is accepted but a change will be made, such as date or remittance not sent. |
| ACWP | AcceptedWithoutPosting | Payment instruction included in the credit transfer is accepted without being posted to the creditor customer's account. |
| ACFC | AcceptedFundsChecked | Pre-ceeding check of technical validation and customer profile was successful and an automatic funds check was positive . |
| RCVD | Received | Payment initiation has been received by the Institution. |
| PART | PartiallyAccepted | A number of transactions have been accepted, whereas another number of transactions have not yet achieved 'accepted' status. This code may be used only in case of bulk payments, where reporting is performed against the entire file. Yapily reports status against each transaction, so this status is not expected. |
| PATC | PartiallyAcceptedTechnicalCorrect | The payment initiation needs multiple authentications, where some but not yet all have been performed. Syntactical and semantical validations are successful. |
| PDNG | Pending | Payment initiation or individual transaction included in the payment initiation is pending. Further checks and status update will be performed. |
| RJCT | Rejected | Payment initiation or individual transaction included in the payment initiation has been rejected. |
| CANC | Cancelled | Payment initiation has been cancelled before execution |
***
## Monitoring the Payment Status
Not all banks report all `isoStatus` as shown above, and typically we can see two main distinctions:
1. *For UK banks*: Most of the banks report up to `ACSC`.
2. *For EU banks*: Many banks will report up to `ACSC`, but many others will stop reporting at `ACCP`, specially (but not only) German banks such as DB, Commerzbank; several Italian banks; etc. In this scenario (EU Payments in general) the lowest common denominator is the `ACCP` status.
Based on this logic, it is not always possible to receive confirmation from the `Institution` for the settlement of funds on the creditor account or even the debtor's. If this is important for your use case, Yapily recommends using AIS services to monitor the account balance and transactions as a means of confirming settlement.
When building logic to monitor the payment status, Yapily recommends using [Exponential Backoff](https://en.wikipedia.org/wiki/Exponential_backoff) based on the expected settlement of the payment (considering the timings aforementioned, and the `status` limitations described above).
***
## Future Payments
For future dated payments (ie. Scheduled, Periodic, or Bulk Payments) the Open Banking regulatory bodies (ie. OBIE, Berling Group) do not mandate that banks provide the means to check the processing or execution status. It is common for the bank to only provide the initiation status of the payment.
What does this mean for you? You do not have the same visibility of whether a future dated payment settled as you do with single payments through Open Banking APIs.
It is also possible for the user to cancel a future dated payment by going directly to the bank.
The only way to confirm that a future dated payment created through Open Banking had settled would be to verify the payment on the recipient's account transaction list.
# Reverse Payments
Source: https://docs.yapily.com/payments/payment-resources/reverse-payments
Initiate reverse payments (refunds) using the Yapily API. Understand eligibility criteria, required parameters, and institution support for payment reversal operations.
## Introduction
Reverse Payments is a feature from the Open Banking API Specification V3.1.5. Reverse Payments allows a TPP to request that the refund account information be included as part of the payments response. By returning the refund account information (i.e. `name`, `SORT_CODE` and `ACCOUNT_NUMBER`), the TPP is then able to initiate a further payment to refund the original payment, if required.
This feature is available if the `Institution` includes the following `feature`:
* `READ_DOMESTIC_SINGLE_REFUND`
In order to retrieve the refund account information, a TPP must specify `readRefundAccount=true` when executing a [Create Payment Authorisation](/api-reference/authorisations/create-payment-authorisation).
## Coverage
As of 25th January 2021, this feature is supported for payments with the following payment types:
* `DOMESTIC_PAYMENT`
* `DOMESTIC_SCHEDULED_PAYMENT`
* `DOMESTIC_PERIODIC_PAYMENT`
And for the following banks:
* NatWest
* RBS
* Ulster Bank NI
* HSBC UK
* Nationwide
* Danske
* Lloyds
* Bank of Scotland
* Halifax
* Barclays (Single Domestic Payment only)
We will continue to upgrade our support of reverse payments as more institutions release this feature.
## Usage
Any `Institution` that supports reverse payments will first have the feature `READ_DOMESTIC_SINGLE_REFUND` when executing [Get Institution](/api-reference/institutions/get-institution). If an `Institution` supports reverse payments, you may request refund account information by adding an additional parameter, `readRefundAccount` in [Create Payment Authorisation](/api-reference/authorisations/create-payment-authorisation) (see the attribute in the `paymentRequest` object):
```json theme={null}
{
"applicationUserId": "{{application-user-id}}",
"institutionId": "{{institution-id}}",
"callback": "{{callback-url}}",
"paymentRequest": {
"type": "DOMESTIC_PAYMENT",
"readRefundAccount": true,
"paymentIdempotencyId": "{{paymentIdempotencyId}}",
"reference": "{{paymentReference}}",
"contextType": "PERSON_TO_PERSON",
"amount": {
"amount": "{{paymentAmount}}",
"currency": "{{paymentCurrency}}"
},
"payee": { ...
```
The response for the authorisation will confirm that the feature is supported by the `Institution` and is being actively used for this particular payment `Consent` (see line 12 within the `featureScope` property):
```json theme={null}
{
"meta": {
"tracingId": "7e36098c464cad866f01c6e08bf8163f"
},
"data": {
"id": "b81ba80d-cc77-4e78-b90e-7060c0c8254a",
"userUuid": "c3fb97e0-44e2-477b-bfdc-c2534057b5e9",
"institutionId": "rbs",
"status": "AWAITING_AUTHORIZATION",
"createdAt": "2020-10-06T13:27:26.162Z",
"featureScope": [
"READ_DOMESTIC_SINGLE_REFUND",
"CREATE_DOMESTIC_SINGLE_PAYMENT",
"EXISTING_PAYMENTS_DETAILS",
"EXISTING_PAYMENT_INITIATION_DETAILS"
],
"authorisationUrl": "https://personal.secure1.rbs.co.uk/as/authorization.oauth2?client_id=jOWO30rrwG9nwOHWirKXLK&response_type=code+id_token&state=77ef1824ebeb4be784569d07d64bdf34&nonce=77ef1824ebeb4be784569d07d64bdf34&scope=openid+payments&redirect_uri=https%3A%2F%2Fauth.yapily.com%2F&request=eyJraWQiOiJPNWp3ZXpxTlNzeVlacHotZHpfVUhEbkJINHciLCJhbGciOiJQUzI1NiJ9.eyJhdWQiOiJodHRwczovL3NlY3VyZTEucmJzLmNvLnVrIiwic2NvcGUiOiJvcGVuaWQgcGF5bWVudHMiLCJpc3MiOiJqT1dPMzBycndHOW53T0hXaXJLWExLIiwiY2xpZW50X2lkIjoiak9XTzMwcnJ3Rzlud09IV2lyS1hMSyIsInJlc3BvbnNlX3R5cGUiOiJjb2RlIGlkX3Rva2VuIiwicmVkaXJlY3RfdXJpIjoiaHR0cHM6Ly9hdXRoLnlhcGlseS5jb20vIiwic3RhdGUiOiI3N2VmMTgyNGViZWI0YmU3ODQ1NjlkMDdkNjRiZGYzNCIsImNsYWltcyI6eyJpZF90b2tlbiI6eyJhY3IiOnsidmFsdWUiOiJ1cm46b3BlbmJhbmtpbmc6cHNkMjpzY2EiLCJlc3NlbnRpYWwiOnRydWV9LCJvcGVuYmFua2luZ19pbnRlbnRfaWQiOnsidmFsdWUiOiIwNmI4NzBlOTg1NWE0ODdiYWY1NDlkNGU5ZjlhYzU1YyIsImVzc2VudGlhbCI6dHJ1ZX19LCJ1c2VyaW5mbyI6eyJvcGVuYmFua2luZ19pbnRlbnRfaWQiOnsidmFsdWUiOiIwNmI4NzBlOTg1NWE0ODdiYWY1NDlkNGU5ZjlhYzU1YyIsImVzc2VudGlhbCI6dHJ1ZX19fSwibm9uY2UiOiI3N2VmMTgyNGViZWI0YmU3ODQ1NjlkMDdkNjRiZGYzNCIsImp0aSI6IjBiMjA5MjA0LWYxZDEtNDExZS1hMTU1LWE0N2FjNjI0MjFhMSIsImlhdCI6MTYwMTk5MDg0NiwiZXhwIjoxNjAxOTkyNjQ2fQ.siGAJf0HNkp3KwGpasPXWc8iRQjfRV42hYGlURdzgm4LI_ReCzon338e49KiufULn92bGkgwbVRoM_8pBmJMRG7qh7wyjpM4R10FCO4vx6lYiI4uwZgJnmAkeyFEPKk_EDxAqF5wCb6kZPg5hbZGWvQnV4ETP04CVQyCEs3yrGQlhQtAs_fEO_KdcKK3wc7qcahY8kDonV0bj-RJUq-WAEOslo00nK7agCyLlOI22J56S9Wrp6R_h5fu-1YGcHYNvq0BwBtK1PwEVxD8mWfQj5zygHV-5V_Y-_IaZL2hrXsL_Ab8shLZdeq4O1jJ04xdd1j6ZFV3YYvFjHNM8Z-q9A",
"qrCodeUrl": "https://images.yapily.com/image/1724b2f4-9b8e-43e2-9c8a-8a7c06da7915/1601990846?size=0"
}
}
```
If the `readRefundAccount` property is NOT supported for either the payment type or the `Institution`, the following error message will be returned:
```json theme={null}
{
"error": {
"code": 400,
"tracingId": "64efa35a974eeb5107dcbe968b7f8e9b",
"status": "BAD_REQUEST",
"source": "YAPILY",
"message": "Read Refund Account is not supported for this payment type. We can help you on https://support.yapily.com/"
},
"raw": [],
"monitoring": []
}
```
Assuming that the authorisation request is successful and the user provides consent for the payment, use the `consentToken` to execute [Create Payment](/api-reference/payments/create-payment) and the response should also include the `readRefundAccount` object (see below):
```json theme={null}
...,
"createdAt": "2020-08-05T11:02:13.819Z",
"refundAccount": {
"name": "BLOGGS JOE",
"accountIdentifications": [
{
"type": "ACCOUNT_NUMBER",
"identification": "12345678"
},
{
"type": "SORT_CODE",
"identification": "040065"
}
]
}
}, ...
```
`readRefundAccount` should also be present in the response from [Get Payment Details](/api-reference/payments/get-payment-details) if refund account details were requested.
If the `readRefundAccount` parameter is omitted from a payment request, it will be set to false by default and no refund account information will be returned even if the Institution supports reverse payments.
# Verification of Payee (VoP)
Source: https://docs.yapily.com/payments/payment-resources/verification-of-payee
Use Yapily's Verification of Payee (VoP) to confirm bank account ownership before sending payments. Reduce fraud risk and prevent misdirected payment transfers.
## Overview
From **9 October 2025**, new EU rules under the **Instant Payments Regulation (EU 2024/886)** will apply to all euro-denominated SEPA credit transfers. These rules aim to increase payment safety by ensuring that payee details are accurate.
Under the regulation, **Payment Initiation Service Providers (PISPs)** must offer a Verification of Payee (VoP) service:
* **Merchant payments**: where the payee details are pre-populated (e.g. checkout flows, merchant payouts).
* **Peer-to-Peer (P2P) and Bulk payments**: where the payer provides the payee details (e.g. payroll, expenses, family transfers).
***
## How it Works
VoP is enforced differently depending on the **use case**:
* **Merchant (pre-populated payee details)**
You have a contractual relationship with the payee (merchant, partner, supplier). The payee's details must be verified upfront during **application beneficiary onboarding**. Payment authorisations will fail if the details don't match.
* **P2P & Bulk (payer-provided payee details)**
You have a relationship with the payer, but not necessarily the payee. A VoP check is performed when the payer adds a beneficiary. The PSU must be shown the check result and decide whether to proceed. Please note that business payers may choose to opt out of the VoP check for bulk payments.
***
## Flows
### Merchant (Pre-Populated Payee)
* Add payee via **Application Beneficiary API**.
* Yapily performs a **VoP check**.
* If match/exempt → beneficiary verified.
* If no match → payment authorisations using this beneficiary will **fail**.
*Flow diagram:*
| Code | Name | Description |
| ---- | --------------------------------- | ----------------------------------------------------------------------------------------------------------------------------------------------------------------------------------------------------------------------------------------------------------------------------------------------------------------------- |
| ACSC | AcceptedSettlementCompleted | Settlement on the debtor's account has been completed. |
| ACCC | AcceptedCreditSettlementCompleted | Settlement on the creditor's account has been completed. |
| ACCP | AcceptedCustomerProfile | Preceding checks of technical validation was successful. Customer profile check was also successful. |
| ACSP | AcceptedSettlementInProcess | All preceding checks such as technical validation and customer profile were successful and therefore the payment initiation has been accepted for execution. |
| ACTC | AcceptedTechnicalValidation | Authentication and syntactical and semantical validation are successful |
| ACWC | AcceptedWithChange | Instruction is accepted but a change will be made, such as date or remittance not sent. |
| ACWP | AcceptedWithoutPosting | Payment instruction included in the credit transfer is accepted without being posted to the creditor customer's account. |
| ACFC | AcceptedFundsChecked | Pre-ceeding check of technical validation and customer profile was successful and an automatic funds check was positive . |
| RCVD | Received | Payment initiation has been received by the Institution. |
| PART | PartiallyAccepted | A number of transactions have been accepted, whereas another number of transactions have not yet achieved 'accepted' status. This code may be used only in case of bulk payments, where reporting is performed against the entire file. Yapily reports status against each transaction, so this status is not expected. |
| PATC | PartiallyAcceptedTechnicalCorrect | The payment initiation needs multiple authentications, where some but not yet all have been performed. Syntactical and semantical validations are successful. |
| PDNG | Pending | Payment initiation or individual transaction included in the payment initiation is pending. Further checks and status update will be performed. |
| RJCT | Rejected | Payment initiation or individual transaction included in the payment initiation has been rejected. |
| CANC | Cancelled | Payment initiation has been cancelled before execution |
***
## Monitoring the Payment Status
Not all banks report all `isoStatus` as shown above, and typically we can see two main distinctions:
1. *For UK banks*: Most of the banks report up to `ACSC`.
2. *For EU banks*: Many banks will report up to `ACSC`, but many others will stop reporting at `ACCP`, specially (but not only) German banks such as DB, Commerzbank; several Italian banks; etc. In this scenario (EU Payments in general) the lowest common denominator is the `ACCP` status.
Based on this logic, it is not always possible to receive confirmation from the `Institution` for the settlement of funds on the creditor account or even the debtor's. If this is important for your use case, Yapily recommends using AIS services to monitor the account balance and transactions as a means of confirming settlement.
When building logic to monitor the payment status, Yapily recommends using [Exponential Backoff](https://en.wikipedia.org/wiki/Exponential_backoff) based on the expected settlement of the payment (considering the timings aforementioned, and the `status` limitations described above).
***
## Future Payments
For future dated payments (ie. Scheduled, Periodic, or Bulk Payments) the Open Banking regulatory bodies (ie. OBIE, Berling Group) do not mandate that banks provide the means to check the processing or execution status. It is common for the bank to only provide the initiation status of the payment.
What does this mean for you? You do not have the same visibility of whether a future dated payment settled as you do with single payments through Open Banking APIs.
It is also possible for the user to cancel a future dated payment by going directly to the bank.
The only way to confirm that a future dated payment created through Open Banking had settled would be to verify the payment on the recipient's account transaction list.
# Reverse Payments
Source: https://docs.yapily.com/payments/payment-resources/reverse-payments
Initiate reverse payments (refunds) using the Yapily API. Understand eligibility criteria, required parameters, and institution support for payment reversal operations.
## Introduction
Reverse Payments is a feature from the Open Banking API Specification V3.1.5. Reverse Payments allows a TPP to request that the refund account information be included as part of the payments response. By returning the refund account information (i.e. `name`, `SORT_CODE` and `ACCOUNT_NUMBER`), the TPP is then able to initiate a further payment to refund the original payment, if required.
This feature is available if the `Institution` includes the following `feature`:
* `READ_DOMESTIC_SINGLE_REFUND`
In order to retrieve the refund account information, a TPP must specify `readRefundAccount=true` when executing a [Create Payment Authorisation](/api-reference/authorisations/create-payment-authorisation).
## Coverage
As of 25th January 2021, this feature is supported for payments with the following payment types:
* `DOMESTIC_PAYMENT`
* `DOMESTIC_SCHEDULED_PAYMENT`
* `DOMESTIC_PERIODIC_PAYMENT`
And for the following banks:
* NatWest
* RBS
* Ulster Bank NI
* HSBC UK
* Nationwide
* Danske
* Lloyds
* Bank of Scotland
* Halifax
* Barclays (Single Domestic Payment only)
We will continue to upgrade our support of reverse payments as more institutions release this feature.
## Usage
Any `Institution` that supports reverse payments will first have the feature `READ_DOMESTIC_SINGLE_REFUND` when executing [Get Institution](/api-reference/institutions/get-institution). If an `Institution` supports reverse payments, you may request refund account information by adding an additional parameter, `readRefundAccount` in [Create Payment Authorisation](/api-reference/authorisations/create-payment-authorisation) (see the attribute in the `paymentRequest` object):
```json theme={null}
{
"applicationUserId": "{{application-user-id}}",
"institutionId": "{{institution-id}}",
"callback": "{{callback-url}}",
"paymentRequest": {
"type": "DOMESTIC_PAYMENT",
"readRefundAccount": true,
"paymentIdempotencyId": "{{paymentIdempotencyId}}",
"reference": "{{paymentReference}}",
"contextType": "PERSON_TO_PERSON",
"amount": {
"amount": "{{paymentAmount}}",
"currency": "{{paymentCurrency}}"
},
"payee": { ...
```
The response for the authorisation will confirm that the feature is supported by the `Institution` and is being actively used for this particular payment `Consent` (see line 12 within the `featureScope` property):
```json theme={null}
{
"meta": {
"tracingId": "7e36098c464cad866f01c6e08bf8163f"
},
"data": {
"id": "b81ba80d-cc77-4e78-b90e-7060c0c8254a",
"userUuid": "c3fb97e0-44e2-477b-bfdc-c2534057b5e9",
"institutionId": "rbs",
"status": "AWAITING_AUTHORIZATION",
"createdAt": "2020-10-06T13:27:26.162Z",
"featureScope": [
"READ_DOMESTIC_SINGLE_REFUND",
"CREATE_DOMESTIC_SINGLE_PAYMENT",
"EXISTING_PAYMENTS_DETAILS",
"EXISTING_PAYMENT_INITIATION_DETAILS"
],
"authorisationUrl": "https://personal.secure1.rbs.co.uk/as/authorization.oauth2?client_id=jOWO30rrwG9nwOHWirKXLK&response_type=code+id_token&state=77ef1824ebeb4be784569d07d64bdf34&nonce=77ef1824ebeb4be784569d07d64bdf34&scope=openid+payments&redirect_uri=https%3A%2F%2Fauth.yapily.com%2F&request=eyJraWQiOiJPNWp3ZXpxTlNzeVlacHotZHpfVUhEbkJINHciLCJhbGciOiJQUzI1NiJ9.eyJhdWQiOiJodHRwczovL3NlY3VyZTEucmJzLmNvLnVrIiwic2NvcGUiOiJvcGVuaWQgcGF5bWVudHMiLCJpc3MiOiJqT1dPMzBycndHOW53T0hXaXJLWExLIiwiY2xpZW50X2lkIjoiak9XTzMwcnJ3Rzlud09IV2lyS1hMSyIsInJlc3BvbnNlX3R5cGUiOiJjb2RlIGlkX3Rva2VuIiwicmVkaXJlY3RfdXJpIjoiaHR0cHM6Ly9hdXRoLnlhcGlseS5jb20vIiwic3RhdGUiOiI3N2VmMTgyNGViZWI0YmU3ODQ1NjlkMDdkNjRiZGYzNCIsImNsYWltcyI6eyJpZF90b2tlbiI6eyJhY3IiOnsidmFsdWUiOiJ1cm46b3BlbmJhbmtpbmc6cHNkMjpzY2EiLCJlc3NlbnRpYWwiOnRydWV9LCJvcGVuYmFua2luZ19pbnRlbnRfaWQiOnsidmFsdWUiOiIwNmI4NzBlOTg1NWE0ODdiYWY1NDlkNGU5ZjlhYzU1YyIsImVzc2VudGlhbCI6dHJ1ZX19LCJ1c2VyaW5mbyI6eyJvcGVuYmFua2luZ19pbnRlbnRfaWQiOnsidmFsdWUiOiIwNmI4NzBlOTg1NWE0ODdiYWY1NDlkNGU5ZjlhYzU1YyIsImVzc2VudGlhbCI6dHJ1ZX19fSwibm9uY2UiOiI3N2VmMTgyNGViZWI0YmU3ODQ1NjlkMDdkNjRiZGYzNCIsImp0aSI6IjBiMjA5MjA0LWYxZDEtNDExZS1hMTU1LWE0N2FjNjI0MjFhMSIsImlhdCI6MTYwMTk5MDg0NiwiZXhwIjoxNjAxOTkyNjQ2fQ.siGAJf0HNkp3KwGpasPXWc8iRQjfRV42hYGlURdzgm4LI_ReCzon338e49KiufULn92bGkgwbVRoM_8pBmJMRG7qh7wyjpM4R10FCO4vx6lYiI4uwZgJnmAkeyFEPKk_EDxAqF5wCb6kZPg5hbZGWvQnV4ETP04CVQyCEs3yrGQlhQtAs_fEO_KdcKK3wc7qcahY8kDonV0bj-RJUq-WAEOslo00nK7agCyLlOI22J56S9Wrp6R_h5fu-1YGcHYNvq0BwBtK1PwEVxD8mWfQj5zygHV-5V_Y-_IaZL2hrXsL_Ab8shLZdeq4O1jJ04xdd1j6ZFV3YYvFjHNM8Z-q9A",
"qrCodeUrl": "https://images.yapily.com/image/1724b2f4-9b8e-43e2-9c8a-8a7c06da7915/1601990846?size=0"
}
}
```
If the `readRefundAccount` property is NOT supported for either the payment type or the `Institution`, the following error message will be returned:
```json theme={null}
{
"error": {
"code": 400,
"tracingId": "64efa35a974eeb5107dcbe968b7f8e9b",
"status": "BAD_REQUEST",
"source": "YAPILY",
"message": "Read Refund Account is not supported for this payment type. We can help you on https://support.yapily.com/"
},
"raw": [],
"monitoring": []
}
```
Assuming that the authorisation request is successful and the user provides consent for the payment, use the `consentToken` to execute [Create Payment](/api-reference/payments/create-payment) and the response should also include the `readRefundAccount` object (see below):
```json theme={null}
...,
"createdAt": "2020-08-05T11:02:13.819Z",
"refundAccount": {
"name": "BLOGGS JOE",
"accountIdentifications": [
{
"type": "ACCOUNT_NUMBER",
"identification": "12345678"
},
{
"type": "SORT_CODE",
"identification": "040065"
}
]
}
}, ...
```
`readRefundAccount` should also be present in the response from [Get Payment Details](/api-reference/payments/get-payment-details) if refund account details were requested.
If the `readRefundAccount` parameter is omitted from a payment request, it will be set to false by default and no refund account information will be returned even if the Institution supports reverse payments.
# Verification of Payee (VoP)
Source: https://docs.yapily.com/payments/payment-resources/verification-of-payee
Use Yapily's Verification of Payee (VoP) to confirm bank account ownership before sending payments. Reduce fraud risk and prevent misdirected payment transfers.
## Overview
From **9 October 2025**, new EU rules under the **Instant Payments Regulation (EU 2024/886)** will apply to all euro-denominated SEPA credit transfers. These rules aim to increase payment safety by ensuring that payee details are accurate.
Under the regulation, **Payment Initiation Service Providers (PISPs)** must offer a Verification of Payee (VoP) service:
* **Merchant payments**: where the payee details are pre-populated (e.g. checkout flows, merchant payouts).
* **Peer-to-Peer (P2P) and Bulk payments**: where the payer provides the payee details (e.g. payroll, expenses, family transfers).
***
## How it Works
VoP is enforced differently depending on the **use case**:
* **Merchant (pre-populated payee details)**
You have a contractual relationship with the payee (merchant, partner, supplier). The payee's details must be verified upfront during **application beneficiary onboarding**. Payment authorisations will fail if the details don't match.
* **P2P & Bulk (payer-provided payee details)**
You have a relationship with the payer, but not necessarily the payee. A VoP check is performed when the payer adds a beneficiary. The PSU must be shown the check result and decide whether to proceed. Please note that business payers may choose to opt out of the VoP check for bulk payments.
***
## Flows
### Merchant (Pre-Populated Payee)
* Add payee via **Application Beneficiary API**.
* Yapily performs a **VoP check**.
* If match/exempt → beneficiary verified.
* If no match → payment authorisations using this beneficiary will **fail**.
*Flow diagram:*
![Merchant Flow]() ***
### P2P & Bulk (User-Entered Payee)
* Add payee via **User Beneficiary API**.
* Yapily performs a **VoP check**.
* If match/exempt → beneficiary verified, no further PSU action needed.
* If close match / no match / verification not possible → show **mandatory PSU messaging**, capture approve/reject decision.
*Flow diagram:*
***
### P2P & Bulk (User-Entered Payee)
* Add payee via **User Beneficiary API**.
* Yapily performs a **VoP check**.
* If match/exempt → beneficiary verified, no further PSU action needed.
* If close match / no match / verification not possible → show **mandatory PSU messaging**, capture approve/reject decision.
*Flow diagram:*
![P2P Flow]() ***
### Bulk (Opt-In / Opt-Out for Bulk Payments)
* Business PSUs may **opt out** of VoP for bulk payments.
* **Note:** Customers must be shown [prescribed wording](#communicating-results-to-psus) when presenting the opt out.
* You must allow your business customers to opt back in to VoP at any time.
*Flow diagram:*
***
### Bulk (Opt-In / Opt-Out for Bulk Payments)
* Business PSUs may **opt out** of VoP for bulk payments.
* **Note:** Customers must be shown [prescribed wording](#communicating-results-to-psus) when presenting the opt out.
* You must allow your business customers to opt back in to VoP at any time.
*Flow diagram:*
![Bulk Flow]() ***
## Required Steps
### Merchant
1. Implement [Application Management](/getting-started/application-management) and add payees via Application Beneficiary API.
2. Ensure Payee Name & IBAN match exactly.
3. Ensure PSU-facing screens display the exact verified name.
4. You can find our [PIS UX guidelines](/tools-and-services/yapily-connect/yapilyconnect-ux-pis-guidelines) here.
***
### P2P & Bulk
1. Create a **User** for each payer.
2. Add **User Beneficiary** with Account Holder Name & IBAN.
3. Display the result of the VoP check with [prescribed wording](#communicating-results-to-psus).
4. Capture PSU's decision with **Approve** or **Reject**.
5. Payments can only be initiated against approved beneficiaries.
***
## UX Guidelines
### Merchant
* Show the **verified payee name** exactly as stored (no abbreviations).
* PSU sees payee details as part of consent but does not need to approve/reject.
* Errors/mismatches block payments — you should fail gracefully and provide retry instructions.
### P2P & Bulk
* Show PSU the **VoP check result** using the [prescribed wording](#communicating-results-to-psus).
* PSU must be able to approve or reject payees.
* Approvals must be stored against the beneficiary before payments proceed.
* Bulk Business users who Opted out from VoP check, must be able to opt back in to VoP at any time if they choose to do so
***
## Example: Adding a Beneficiary
### Merchant (Application Beneficiary API)
```http Request theme={null}
POST /applications/{applicationId}/beneficiaries
Content-Type: application/json
{
"name": "Robert A",
"accountIdentifier":
{
"type": "IBAN",
"identification": "DE12345123451234512345123"
}
}
```
```json Response theme={null}
{
"beneficiaryId": "e7b7636d-a041-4013-8a1b-34dc85b7d341",
"details": {
"name": "Robert A",
"accountIdentifier": {
"type": "IBAN",
"identification": "DE12345123451234512345123"
}
}
}
```
***
### P2P (User Beneficiary API)
```http Request theme={null}
POST /users/{userId}/beneficiaries
Content-Type: application/json
{
"name": "Robert A",
"accountIdentifier": {
"type": "IBAN",
"identification": "DE89370400440532013000"
}
}
```
```json Response theme={null}
{
"beneficiaryId": "e7b7636d-a041-4013-8a1b-34dc85b7d341",
"status": "PENDING",
"details": {
"name": "Robert A",
"match": {
"status": "CLOSE_MATCH",
"closeMatch": "Robert Albert"
},
"accountIdentifier": {
"type": "IBAN",
"identification": "DE12345123451234512345123"
}
}
}
```
In this case, you must display the correct PSU messaging and capture their decision via the **Approve** or **Reject** endpoints.
For the complete list of endpoints, see the [API Reference](/api-reference).
***
## Communicating Results to PSUs
For P2P and Bulk use cases, you must present results exactly as prescribed:
* **Match (Optional messaging)**
"The name and account type you entered matches the details on the account."
* **Close Match**
"The account name does not exactly match the details you have provided.
Account holder name: ``
You provided: ``
Making a payment to this account may result in money being sent to the wrong person or business, and if you continue, you may have limited rights to a refund."
* **No Match**
"The account name you are paying does not match the details you have provided.
Making a payment to this account may result in money being sent to the wrong person or business, and if you continue, you may have limited rights to a refund."
* **Verification not possible**
"We cannot verify this bank account at this time. You may wish to confirm the details directly with the payee before continuing.
There is a risk your payment could go to the wrong person or business, and if you continue, you may have limited rights to a refund."
* **Opt Out (Bulk payments only)**
"You are choosing to opt out of receiving verification of payee services.
This may result in payments being sent to the wrong person or business, and if you continue, you may have limited rights to claim a refund."
***
## Payment Flow Considerations
* **Merchant**: payment fails if payee not verified.
* **P2P/Bulk**: payment fails if payee not approved.
* **Bulk**: files containing unapproved payees will be rejected.
See [API Reference](/api-reference) for endpoints.
***
## FAQs
**Does VoP apply only to SEPA Instant?**
No, VoP applies to **both SEPA Instant and SEPA Credit transfers** for payments made in EUR.
**Is a VoP check made for every payment request?**
No, checks occur when **adding beneficiaries** (not on each payment).
**Do I need to show the verified name exactly?**
Yes, the **exact Account Holder Name** must be shown; abbreviations or variations are not accepted.
**Can beneficiaries be reused across applications or sub-applications?**
No, beneficiaries must be created separately per application/sub-application.
**Are there exemptions?**
Yes. Payments to **non-eurozone or non-EU countries** are exempt until VoP becomes mandatory in those markets (by **9 July 2027**).
**Can customers opt out of VoP?**
Yes, **business customers** may opt out for bulk payments. Single payments cannot be exempted.
**What happens if a PSU tries to make a bulk payment that contains unapproved payees?**
Yapily will check the file to confirm that all payees are approved prior to initiating payment.
If a bulk payment file contains unapproved payees, we will reject the payment and return a
message specifying which payees need to be verified. Please note that this does not apply
to PSUs that have opted out of VOP.
***
## Next Steps
* Review your payment journeys and determine where VoP applies.
* Implement **Application & Beneficiary Management**.
* Integrate with Yapily's **Beneficiary APIs**.
* Update your PSU-facing messaging in line with regulatory requirements.
* Test using our sandbox environments.
# Periodic Payments
Source: https://docs.yapily.com/payments/periodic-payments
Set up periodic (standing order) payments with Yapily. Configure payment frequency, amounts, and consent management for automated recurring bank payment instructions.
Periodic payments are available as a [Beta version](/getting-started/glossary#beta).
## Introduction
Periodic payments are payments that the user can instruct an `Institution` to perform to an entity based on a schedule. In the UK, this is also known as a standing order.
It's possible to create either domestic or international periodic payments provided that the `Institution` supports the following features in the `feature` array:
* `CREATE_DOMESTIC_PERIODIC_PAYMENT`
* `CREATE_INTERNATIONAL_PERIODIC_PAYMENT`
Open Banking only provides the means to send the payment initiation request to the `Institution` so, it is not possible to modify or cancel a periodic through Open Banking, nor is it possible to receive confirmation of the whether each payment in a periodic payment was successfully credited to the payee bank account.
## Domestic Periodic Payments
A periodic payment can be created by specifying all the mandatory properties of a [Single Payment](/payments/single-payments) including:
* `paymentRequest.paymentDateTime` (mandatory) - Specify the date of the first payment
along with the following [periodicPayment](/api-reference/authorisations/create-payment-authorisation) properties:
* `frequency` (mandatory) - Specify how frequently to make payments. See [payment frequency](#payment-frequency) for more information
* `numberOfPayments` (conditional) - Specify if you plan to make a fixed number of payments as opposed to ending a payment schedule on a given date
* `nextPaymentAmount` (conditional) - If the first amount (defined by `paymentRequest.amount`) is different from the planned scheduled amount, specify this to set the recurring amount.
* `nextPaymentDateTime` (conditional) - If the first date (defined by `paymentDateTime`) does not fall on a date defined by the planned schedule, specify this to set the first recurring payment date.
* `finalPaymentAmount` (conditional) - Specify if the final payment amount differs from the value specified by `paymentRequest.amount`
* `finalPaymentDateTime` (conditional) - Specify if the final payment is to end on a specific day outside the recurring schedule
## International Periodic Payments
While rarely supported by every `Institution`, if the `CREATE_INTERNATIONAL_PERIODIC_PAYMENT` feature is available, it is possible to make international periodic payments.
In addition to the properties required for a [domestic periodic payment](#domestic-periodic-payments), you must specify the additional properties required for an [international payment](/payments/single-payments#international-single-payments).
## Payment Frequency
The `paymentFrequency` should be set for periodic payments. The enumerations available are summarised in the table below.
| Description | executionDay | intervalWeek | intervalMonth | type |
| ------------------------------------------------------------------------ | ------------ | ------------ | ------------- | ------------------- |
| Every day | - | - | - | `DAILY` |
| Every working day | - | - | - | `EVERY_WORKING_DAY` |
| Every 15th day of the month | 15 | - | - | `CALENDAR_DAY` |
| Every week, on the 3rd day of the week | 3 | 1 | - | `WEEKLY` |
| Every 2 weeks, on the 3rd day of the week | 3 | 2 | - | `EVERY_TWO_WEEKS` |
| Every 3 weeks, on the 3rd day of the week | 3 | 3 | - | `WEEKLY` |
| Every month, on the 2nd week of the month and on the 3rd day of the week | 3 | 2 | 1 | `MONTHLY` |
| Every month, on the first day of the month | 1 | - | 1 | `MONTHLY` |
| Every 2 months, on the 15th day of the month | 15 | - | 2 | `EVERY_TWO_MONTHS` |
| Every 3 months, on the 15th day of the month | 15 | - | 3 | `MONTHLY` |
| Every 6 months, on the 15th day of the month | 15 | - | - | `SEMIANNUAL` |
| Every 12 months, on the 3rd day of the month | 3 | - | - | `ANNUAL` |
| Every quarter | - | - | - | `QUARTERLY` |
# Scheduled Payments
Source: https://docs.yapily.com/payments/scheduled-payments
Create future-dated scheduled payments using the Yapily Open Banking API. Learn how to set payment execution dates, manage consents, and handle status updates.
## Introduction
Scheduled payments are payments that the user can instruct an `Institution` to perform to an entity at a future date.
It's possible to create either domestic or international scheduled payments provided that the `Institution` supports the following features in the `feature` array:
* `CREATE_DOMESTIC_SCHEDULED_PAYMENT`
* `CREATE_INTERNATIONAL_SCHEDULED_PAYMENT`
Open Banking only provides the means to send the payment initiation request to the `Institution` so, it is not possible to modify or cancel a scheduled through Open Banking, nor is it mandatory for banks to provide confirmation whether the payment amount was successfully credited to the creditor's account.
## Domestic Scheduled Payments
A scheduled payment can be created by specifying all the mandatory properties of a [Single Payment](/payments/single-payments) along with the following [paymentRequest](/api-reference/authorisations/create-payment-authorisation) properties:
* `paymentDateTime` (mandatory) - Specify the date of the future-dated payment
## International Scheduled Payments
While rarely supported by every `Institution`, if the `CREATE_INTERNATIONAL_SCHEDULED_PAYMENT` feature is available, it is possible to make international scheduled payments.
In addition to the properties required for a domestic scheduled payment, you must specify the additional properties required for an [international payment](/payments/single-payments#international-single-payments).
# Single Payments
Source: https://docs.yapily.com/payments/single-payments
Initiate single domestic and international payments using the Yapily API. Covers payment types, required fields, institution compatibility, and response handling.
## Introduction
A single payment is 1 payment for a specified amount which the end user can configure from an institution to pay an entity.
You can create both domestic and international single payments with the Yapily API.
Looking for our quickest integration option? See [Yapily Hosted Pages](/tools-and-services/hosted-pages/overview) which provides a pre-built and hosted UI to quickly and easily facilitate single payments.
***
## Domestic single payments
Domestic single payments are possible when the institution supports the feature `CREATE_DOMESTIC_SINGLE_PAYMENT`.
To create a single domestic payment, you need to provide the following properties as part of the [paymentRequest object](/api-reference/authorisations/create-payment-authorisation):
| Property | Description |
| --------------------------------------- | ---------------------------------------------------------------------------------------------------------- |
| `type`
***
## Required Steps
### Merchant
1. Implement [Application Management](/getting-started/application-management) and add payees via Application Beneficiary API.
2. Ensure Payee Name & IBAN match exactly.
3. Ensure PSU-facing screens display the exact verified name.
4. You can find our [PIS UX guidelines](/tools-and-services/yapily-connect/yapilyconnect-ux-pis-guidelines) here.
***
### P2P & Bulk
1. Create a **User** for each payer.
2. Add **User Beneficiary** with Account Holder Name & IBAN.
3. Display the result of the VoP check with [prescribed wording](#communicating-results-to-psus).
4. Capture PSU's decision with **Approve** or **Reject**.
5. Payments can only be initiated against approved beneficiaries.
***
## UX Guidelines
### Merchant
* Show the **verified payee name** exactly as stored (no abbreviations).
* PSU sees payee details as part of consent but does not need to approve/reject.
* Errors/mismatches block payments — you should fail gracefully and provide retry instructions.
### P2P & Bulk
* Show PSU the **VoP check result** using the [prescribed wording](#communicating-results-to-psus).
* PSU must be able to approve or reject payees.
* Approvals must be stored against the beneficiary before payments proceed.
* Bulk Business users who Opted out from VoP check, must be able to opt back in to VoP at any time if they choose to do so
***
## Example: Adding a Beneficiary
### Merchant (Application Beneficiary API)
```http Request theme={null}
POST /applications/{applicationId}/beneficiaries
Content-Type: application/json
{
"name": "Robert A",
"accountIdentifier":
{
"type": "IBAN",
"identification": "DE12345123451234512345123"
}
}
```
```json Response theme={null}
{
"beneficiaryId": "e7b7636d-a041-4013-8a1b-34dc85b7d341",
"details": {
"name": "Robert A",
"accountIdentifier": {
"type": "IBAN",
"identification": "DE12345123451234512345123"
}
}
}
```
***
### P2P (User Beneficiary API)
```http Request theme={null}
POST /users/{userId}/beneficiaries
Content-Type: application/json
{
"name": "Robert A",
"accountIdentifier": {
"type": "IBAN",
"identification": "DE89370400440532013000"
}
}
```
```json Response theme={null}
{
"beneficiaryId": "e7b7636d-a041-4013-8a1b-34dc85b7d341",
"status": "PENDING",
"details": {
"name": "Robert A",
"match": {
"status": "CLOSE_MATCH",
"closeMatch": "Robert Albert"
},
"accountIdentifier": {
"type": "IBAN",
"identification": "DE12345123451234512345123"
}
}
}
```
In this case, you must display the correct PSU messaging and capture their decision via the **Approve** or **Reject** endpoints.
For the complete list of endpoints, see the [API Reference](/api-reference).
***
## Communicating Results to PSUs
For P2P and Bulk use cases, you must present results exactly as prescribed:
* **Match (Optional messaging)**
"The name and account type you entered matches the details on the account."
* **Close Match**
"The account name does not exactly match the details you have provided.
Account holder name: ``
You provided: ``
Making a payment to this account may result in money being sent to the wrong person or business, and if you continue, you may have limited rights to a refund."
* **No Match**
"The account name you are paying does not match the details you have provided.
Making a payment to this account may result in money being sent to the wrong person or business, and if you continue, you may have limited rights to a refund."
* **Verification not possible**
"We cannot verify this bank account at this time. You may wish to confirm the details directly with the payee before continuing.
There is a risk your payment could go to the wrong person or business, and if you continue, you may have limited rights to a refund."
* **Opt Out (Bulk payments only)**
"You are choosing to opt out of receiving verification of payee services.
This may result in payments being sent to the wrong person or business, and if you continue, you may have limited rights to claim a refund."
***
## Payment Flow Considerations
* **Merchant**: payment fails if payee not verified.
* **P2P/Bulk**: payment fails if payee not approved.
* **Bulk**: files containing unapproved payees will be rejected.
See [API Reference](/api-reference) for endpoints.
***
## FAQs
**Does VoP apply only to SEPA Instant?**
No, VoP applies to **both SEPA Instant and SEPA Credit transfers** for payments made in EUR.
**Is a VoP check made for every payment request?**
No, checks occur when **adding beneficiaries** (not on each payment).
**Do I need to show the verified name exactly?**
Yes, the **exact Account Holder Name** must be shown; abbreviations or variations are not accepted.
**Can beneficiaries be reused across applications or sub-applications?**
No, beneficiaries must be created separately per application/sub-application.
**Are there exemptions?**
Yes. Payments to **non-eurozone or non-EU countries** are exempt until VoP becomes mandatory in those markets (by **9 July 2027**).
**Can customers opt out of VoP?**
Yes, **business customers** may opt out for bulk payments. Single payments cannot be exempted.
**What happens if a PSU tries to make a bulk payment that contains unapproved payees?**
Yapily will check the file to confirm that all payees are approved prior to initiating payment.
If a bulk payment file contains unapproved payees, we will reject the payment and return a
message specifying which payees need to be verified. Please note that this does not apply
to PSUs that have opted out of VOP.
***
## Next Steps
* Review your payment journeys and determine where VoP applies.
* Implement **Application & Beneficiary Management**.
* Integrate with Yapily's **Beneficiary APIs**.
* Update your PSU-facing messaging in line with regulatory requirements.
* Test using our sandbox environments.
# Periodic Payments
Source: https://docs.yapily.com/payments/periodic-payments
Set up periodic (standing order) payments with Yapily. Configure payment frequency, amounts, and consent management for automated recurring bank payment instructions.
Periodic payments are available as a [Beta version](/getting-started/glossary#beta).
## Introduction
Periodic payments are payments that the user can instruct an `Institution` to perform to an entity based on a schedule. In the UK, this is also known as a standing order.
It's possible to create either domestic or international periodic payments provided that the `Institution` supports the following features in the `feature` array:
* `CREATE_DOMESTIC_PERIODIC_PAYMENT`
* `CREATE_INTERNATIONAL_PERIODIC_PAYMENT`
Open Banking only provides the means to send the payment initiation request to the `Institution` so, it is not possible to modify or cancel a periodic through Open Banking, nor is it possible to receive confirmation of the whether each payment in a periodic payment was successfully credited to the payee bank account.
## Domestic Periodic Payments
A periodic payment can be created by specifying all the mandatory properties of a [Single Payment](/payments/single-payments) including:
* `paymentRequest.paymentDateTime` (mandatory) - Specify the date of the first payment
along with the following [periodicPayment](/api-reference/authorisations/create-payment-authorisation) properties:
* `frequency` (mandatory) - Specify how frequently to make payments. See [payment frequency](#payment-frequency) for more information
* `numberOfPayments` (conditional) - Specify if you plan to make a fixed number of payments as opposed to ending a payment schedule on a given date
* `nextPaymentAmount` (conditional) - If the first amount (defined by `paymentRequest.amount`) is different from the planned scheduled amount, specify this to set the recurring amount.
* `nextPaymentDateTime` (conditional) - If the first date (defined by `paymentDateTime`) does not fall on a date defined by the planned schedule, specify this to set the first recurring payment date.
* `finalPaymentAmount` (conditional) - Specify if the final payment amount differs from the value specified by `paymentRequest.amount`
* `finalPaymentDateTime` (conditional) - Specify if the final payment is to end on a specific day outside the recurring schedule
## International Periodic Payments
While rarely supported by every `Institution`, if the `CREATE_INTERNATIONAL_PERIODIC_PAYMENT` feature is available, it is possible to make international periodic payments.
In addition to the properties required for a [domestic periodic payment](#domestic-periodic-payments), you must specify the additional properties required for an [international payment](/payments/single-payments#international-single-payments).
## Payment Frequency
The `paymentFrequency` should be set for periodic payments. The enumerations available are summarised in the table below.
| Description | executionDay | intervalWeek | intervalMonth | type |
| ------------------------------------------------------------------------ | ------------ | ------------ | ------------- | ------------------- |
| Every day | - | - | - | `DAILY` |
| Every working day | - | - | - | `EVERY_WORKING_DAY` |
| Every 15th day of the month | 15 | - | - | `CALENDAR_DAY` |
| Every week, on the 3rd day of the week | 3 | 1 | - | `WEEKLY` |
| Every 2 weeks, on the 3rd day of the week | 3 | 2 | - | `EVERY_TWO_WEEKS` |
| Every 3 weeks, on the 3rd day of the week | 3 | 3 | - | `WEEKLY` |
| Every month, on the 2nd week of the month and on the 3rd day of the week | 3 | 2 | 1 | `MONTHLY` |
| Every month, on the first day of the month | 1 | - | 1 | `MONTHLY` |
| Every 2 months, on the 15th day of the month | 15 | - | 2 | `EVERY_TWO_MONTHS` |
| Every 3 months, on the 15th day of the month | 15 | - | 3 | `MONTHLY` |
| Every 6 months, on the 15th day of the month | 15 | - | - | `SEMIANNUAL` |
| Every 12 months, on the 3rd day of the month | 3 | - | - | `ANNUAL` |
| Every quarter | - | - | - | `QUARTERLY` |
# Scheduled Payments
Source: https://docs.yapily.com/payments/scheduled-payments
Create future-dated scheduled payments using the Yapily Open Banking API. Learn how to set payment execution dates, manage consents, and handle status updates.
## Introduction
Scheduled payments are payments that the user can instruct an `Institution` to perform to an entity at a future date.
It's possible to create either domestic or international scheduled payments provided that the `Institution` supports the following features in the `feature` array:
* `CREATE_DOMESTIC_SCHEDULED_PAYMENT`
* `CREATE_INTERNATIONAL_SCHEDULED_PAYMENT`
Open Banking only provides the means to send the payment initiation request to the `Institution` so, it is not possible to modify or cancel a scheduled through Open Banking, nor is it mandatory for banks to provide confirmation whether the payment amount was successfully credited to the creditor's account.
## Domestic Scheduled Payments
A scheduled payment can be created by specifying all the mandatory properties of a [Single Payment](/payments/single-payments) along with the following [paymentRequest](/api-reference/authorisations/create-payment-authorisation) properties:
* `paymentDateTime` (mandatory) - Specify the date of the future-dated payment
## International Scheduled Payments
While rarely supported by every `Institution`, if the `CREATE_INTERNATIONAL_SCHEDULED_PAYMENT` feature is available, it is possible to make international scheduled payments.
In addition to the properties required for a domestic scheduled payment, you must specify the additional properties required for an [international payment](/payments/single-payments#international-single-payments).
# Single Payments
Source: https://docs.yapily.com/payments/single-payments
Initiate single domestic and international payments using the Yapily API. Covers payment types, required fields, institution compatibility, and response handling.
## Introduction
A single payment is 1 payment for a specified amount which the end user can configure from an institution to pay an entity.
You can create both domestic and international single payments with the Yapily API.
Looking for our quickest integration option? See [Yapily Hosted Pages](/tools-and-services/hosted-pages/overview) which provides a pre-built and hosted UI to quickly and easily facilitate single payments.
***
## Domestic single payments
Domestic single payments are possible when the institution supports the feature `CREATE_DOMESTIC_SINGLE_PAYMENT`.
To create a single domestic payment, you need to provide the following properties as part of the [paymentRequest object](/api-reference/authorisations/create-payment-authorisation):
| Property | Description |
| --------------------------------------- | ---------------------------------------------------------------------------------------------------------- |
| `type`
*required* | The payment type to use. |
| `paymentIdempotencyId`
*required* | The unique identifier for the payment.
Any alpha-numeric string less than or equal to 35 characters. |
| `amount`
*required* | The monetary value and currency. |
| `payee`
*required* | Details of the beneficiary. |
| `reference`
*optional* | The payment reference or description.
Any string less than 18 characters. |
| `payer`
*conditional* | Details of the benefactor.
See [payer details](#payer-details) for more information. |
```json theme={null}
"paymentRequest": {
"type": "DOMESTIC_PAYMENT",
"paymentIdempotencyId": "4289457hd38djoa783jw9qag3",
"amount": {
"amount": "1.00",
"currency": "GBP"
},
"payee": {
"name": "Jane Doe",
"address": {
"country": "GB"
},
"accountIdentifications": [
{
"type": "SORT_CODE",
"identification": "123456"
},
{
"type": "ACCOUNT_NUMBER",
"identification": "12345678"
}
]
},
"reference": "Bill Payment",
}
```
#### Payer details
Specifying the [payer details](/api-reference/authorisations/create-payment-authorisation#body-payment-request-payer) in the `paymentRequest` object is conditional on the country you are making the payment in.
The **Payer** object is not required in:
| Country | Payer Object Required? | Banking Group | Exceptions/Notes |
| ----------- | ---------------------- | ---------------------------------------------------------------------------------------------- | -------------------------------------------------------------------------------------------------------------------------------------------------------------------------------------- |
| Belgium | No | | |
| France | No | [Arkea Group](/institution-configurations/france/Arkea-Group) | The payer(debtor) name is **required** to make the payment. |
| Ireland | No | | |
| Netherlands | No | [Handelsbanken Netherlands](/institution-configurations/netherlands/Handelsbanken-Netherlands) | The payer(debtor) account identifications with country is **required** to make the payment for [Handelsbanken - Netherlands](https://console.yapily.com/institutions/handelsbanken_nl) |
| Portugal | No | | |
| Spain | No | | |
| UK | No | | |
Some banks may require additional information. Please contact our support for details.
**For all other countries in Europe, you must provide the `Payer` object with details of the benefactor.**
You can obtain the payer details by accessing the user's account information using AIS, requesting the details from the user or providing information you have already gathered from the user.
For countries in Europe, the `accountIdentifications` object should just contain the `IBAN`.
In the UK, the `accountIdentifications` object should contain the `ACCOUNT_NUMBER` and `SORT_CODE`.
```json theme={null}
"paymentRequest": {
...
"payer": {
"name": "John Doe",
"accountIdentifications": [
{
"type": "IBAN",
"identification": "DE12345678901234567890"
}
]
}
}
```
```json theme={null}
"paymentRequest": {
...
"payer": {
"name": "John Doe",
"accountIdentifications": [
{
"type": "ACCOUNT_NUMBER",
"identification": "12345678"
},
{
"type": "SORT_CODE",
"identification": "123456"
}
]
}
}
```
**Note:** If you specify the payer details, this will force the user to make the payment from the specified account.
### SEPA payments
It is also possible to execute SEPA payments as domestic payments.
To find out more, see [European Payments](/payments/payment-resources/european-payments).
***
## International single payments
International payments are currently available as a BETA version.
International single payments are possible when the institution supports the feature `CREATE_INTERNATIONAL_SINGLE_PAYMENT`.
To create an international single payment, you need to provide the properties required for a [domestic single payment](#domestic-single-payments) as well as the following additional properties in the [PaymentRequest](/api-reference/authorisations/create-payment-authorisation).
**Note:** The same additional properties are required for a scheduled or periodic international payment.
| Property | Description |
| ---------------------------------------------------------- | ------------------------------------------------------------------------------------------------------------------------------------------------------------------------------------------------------------------------- |
| `payee.address`
*conditional* | The address of the payee.
Required when the payment type is international. |
| `internationalPayment`
*conditional* | Specifies the properties to define an international payment.
Must be specified when payment `type`:
`INTERNATIONAL_PAYMENT`,
`INTERNATIONAL_SCHEDULED_PAYMENT`,
`INTERNATIONAL_PERIODIC_PAYMENT` |
| `internationalPayment.currencyOfTransfer`
*required* | The 3 letter currency code for the currency of the payment to be transferred to.
This can differ from the currency of the payer's account. |
| `internationalPayment.chargeBearer`
*optional* | Specifies who should bear the charges associated with processing the payment transaction. |
| `internationalPayment.priority`
*optional* | Specifies the priority of the payment. |
| `internationalPayment.purpose`
*optional* | Indicate the external purpose as a [ISO20022 purpose code](https://www.rba.hr/documents/20182/183267/External+purpose+codes+list/8a28f888-1f83-5e29-d6ed-fce05f428689?version=1.1) value. |
For all countries the `payee.accountIdentifications` object must contain an `IBAN` for international payments.
```json theme={null}
"paymentRequest": {
"type": "INTERNATIONAL_PAYMENT",
"paymentIdempotencyId": "4289457hd38djoa783jw9qag2",
"amount": {
"amount": "1.00",
"currency": "GBP"
},
"payee": {
"name": "Jane Doe",
"address": {
"streetName": "Sample Street",
"buildingNumber": "1",
"postCode": "AB1 2CD",
"country": "GB"
},
"accountIdentifications": [
{
"type": "BIC",
"identification": "RBOSGB2109M"
},
{
"type": "IBAN",
"identification": "GB29RBOS83040210126939"
}
]
},
"reference": "Bill Payment",
"internationalPayment": {
"currencyOfTransfer": "USD",
"chargeBearer": "DEBT",
"priority": "NORMAL",
"purpose": "GDDS"
}
}
```
See more information in the [API reference](/api-reference/payments/create-payment).
#### Charges
International payments are executed with cross-border charges. These are passed on to the user and should be displayed by the institution once the user is redirected to give their authorisation.
# Tutorial: Make a single payment
Source: https://docs.yapily.com/payments/tutorial-single-payment
Step-by-step tutorial for completing a domestic UK single payment with Yapily's Open Banking API. Covers institution selection, user consent, and payment execution.
## Introduction
This tutorial explains how to create a UK domestic single payment with the Modelo Sandbox.
**Note:** All requests made to the Yapily API require [basic authentication](/getting-started/integration-setup/api-authentication).
***
## Overview of steps
The following diagram illustrates how to create a UK domestic single payment:
![Create single domestic payment tutorial steps]() ***
To find which banks support single domestic payments use [GET institutions](/api-reference/institutions/get-institutions) to retrieve the list of your supported institutions.
```bash Request theme={null}
curl -L -X GET 'https://api.yapily.com/institutions' \
-u 'APPLICATION_KEY:APPLICATION_SECRET'
```
```json Response theme={null}
{
"meta": {
"tracingId": "acbb76db4ab8f4ac7f039d000456c13f",
"count": 1
},
"data": [
{
"id": "modelo-sandbox",
"name": "Modelo Sandbox",
"fullName": "Modelo Sandbox",
"countries": [
{
"displayName": "United Kingdom",
"countryCode2": "GB"
}
],
"environmentType": "SANDBOX",
"credentialsType": "OPEN_BANKING_UK_AUTO",
"media": [
{
"source": "https://images.yapily.com/image/ce2bfdbf-1ae2-4919-ab7b-e8b3d5e93b36?size=0",
"type": "icon"
},
{
"source": "https://images.yapily.com/image/ca502f24-d6df-4785-b4b8-1034b100af77?size=0",
"type": "logo"
}
],
"features": [
"INITIATE_ACCOUNT_REQUEST",
"ACCOUNT_REQUEST_DETAILS",
"EXISTING_PAYMENTS_DETAILS",
"ACCOUNT_BALANCES",
"CREATE_BULK_PAYMENT",
"ACCOUNT_PERIODIC_PAYMENTS",
"ACCOUNT_STATEMENTS",
"INITIATE_BULK_PAYMENT",
"ACCOUNT_STATEMENT",
"ACCOUNT",
"INITIATE_DOMESTIC_PERIODIC_PAYMENT",
"INITIATE_SINGLE_PAYMENT_SORTCODE",
"ACCOUNT_DIRECT_DEBITS",
"ACCOUNTS",
"ACCOUNT_TRANSACTIONS",
"EXISTING_PAYMENT_INITIATION_DETAILS",
"CREATE_DOMESTIC_SINGLE_PAYMENT",
"INITIATE_DOMESTIC_SINGLE_PAYMENT",
"ACCOUNT_STATEMENT_FILE",
"CREATE_INTERNATIONAL_SINGLE_PAYMENT",
"IDENTITY",
"CREATE_DOMESTIC_SCHEDULED_PAYMENT",
"INITIATE_DOMESTIC_SCHEDULED_PAYMENT",
"CREATE_SINGLE_PAYMENT_SORTCODE",
"ACCOUNT_TRANSACTIONS_WITH_MERCHANT",
"INITIATE_INTERNATIONAL_SINGLE_PAYMENT",
"PERIODIC_PAYMENT_FREQUENCY_EXTENDED",
"ACCOUNT_SCHEDULED_PAYMENTS",
"CREATE_DOMESTIC_PERIODIC_PAYMENT"
]
}
]
}
```
Filter the list for all institutions that support the feature `CREATE_DOMESTIC_SINGLE_PAYMENT`. Then display these institutions in your application so the user can select which bank to make the payment from.
Once the user selects a bank, store the `id` of the institution to use in step 2.
This example uses a single redirect flow using a [callback URL](/open-banking-flow/handling-redirects/callback-url).
Execute [create payment authorisation](/api-reference/authorisations/create-payment-authorisation) including the institution ID, your callback URL and the `paymentRequest` object.
For a detailed explanation of every field in the payment request, see [Building a Payment Request](/concepts/payment-request-anatomy).
```bash Request theme={null}
curl -L -X POST 'https://api.yapily.com/payment-auth-requests' \
-H 'Content-Type: application/json' \
-u 'APPLICATION_KEY:APPLICATION_SECRET' \
-d '{
"applicationUserId": "single-payment-tutorial",
"institutionId": "modelo-sandbox",
"callback": "https://display-parameters.com/",
"paymentRequest": {
"type": "DOMESTIC_PAYMENT",
"reference": "Bills Coffee Shop",
"paymentIdempotencyId": "{uniqueValue}",
"amount": {
"amount": 8.70,
"currency": "GBP"
},
"payee": {
"name": "BILLS COFFEE LTD",
"accountIdentifications": [
{
"type": "ACCOUNT_NUMBER",
"identification": "{accountNumber}"
},
{
"type": "SORT_CODE",
"identification": "{sortCode}"
}
]
}
}
}'
```
```json Response theme={null}
{
"meta": {
"tracingId": "611f74cb4f3205d983ebb2fca59d0847"
},
"data": {
"id": "af563bac-e50a-42bd-91bc-581813e13733",
"userUuid": "f3be3c23-bd0e-475e-b389-62dd1f5aa6c1",
"applicationUserId": "single-payment-tutorial",
"institutionId": "modelo-sandbox",
"status": "AWAITING_AUTHORIZATION",
"createdAt": "2021-03-03T09:23:45.841Z",
"featureScope": [
"EXISTING_PAYMENTS_DETAILS",
"CREATE_DOMESTIC_SINGLE_PAYMENT",
"EXISTING_PAYMENT_INITIATION_DETAILS"
],
"state": "6b07bddf9e7746ae8ecb7cbecc00f19a",
"institutionConsentId": "sdp-1-469c63ef-e6b6-4dd2-88b7-3aea0bff4136",
"authorisationUrl": "{authorisationUrl}",
"qrCodeUrl": "https://images.yapily.com/image/55b6b6bc-daa8-490c-89e1-243156868e00/1614763426?size=0"
}
}
```
Redirect the user to the `authorisationUrl` returned in the response.
The user is then asked to login and authorise the payment with their bank. The [Modelo sandbox credentials](/resources/sandbox/sandbox-credentials) are: `mits` / `mits`.
Upon completion, the user is redirected back to the callback URL supplied in the request. In this example, the callback is `https://display-parameters.com/` which displays the parameters returned with the redirect.
Store the `consentToken` to use when creating the payment in step 3.
[Create the payment](/api-reference/payments/create-payment) specifying the `consentToken` in the header and the contents of the `paymentRequest` object in step 2 as the body.
```bash Request theme={null}
curl -L -X POST 'https://api.yapily.com/payments' \
-H 'Content-Type: application/json' \
-H 'Consent: {consentToken}' \
-u 'APPLICATION_KEY:APPLICATION_SECRET' \
-d '{
"type": "DOMESTIC_PAYMENT",
"reference": "Bills Coffee Shop",
"paymentIdempotencyId": "{uniqueValue}",
"amount": {
"amount": 8.70,
"currency": "GBP"
},
"payee": {
"name": "BILLS COFFEE LTD",
"accountIdentifications": [
{
"type": "ACCOUNT_NUMBER",
"identification": "{accountNumber}"
},
{
"type": "SORT_CODE",
"identification": "{sortCode}"
}
]
}
}'
```
```json Response theme={null}
{
"meta": {
"tracingId": "0f07ebe9be5fbec0dd660c4e091bd181"
},
"data": {
"id": "pv3-6c0f031d-6786-4845-9799-bdd2e89ba362",
"institutionConsentId": "sdp-1-469c63ef-e6b6-4dd2-88b7-3aea0bff4136",
"paymentIdempotencyId": "{uniqueValue}",
"paymentLifecycleId": "69d55454ea74546e8b1b44efb17fc45",
"status": "PENDING",
"statusDetails": {
"status": "PENDING",
"isoStatus": {
"code": "PDNG",
"name": "Pending"
}
"statusUpdateDate": "2021-03-03T09:41:48.253Z"
},
"payeeDetails": {
"name": "BILLS COFFEE LTD",
"accountIdentifications": [
{
"type": "ACCOUNT_NUMBER",
"identification": "{accountNumber}"
},
{
"type": "SORT_CODE",
"identification": "{sortCode}"
}
]
},
"reference": "Bills Coffee Shop",
"amount": 8.70,
"currency": "GBP",
"amountDetails": {
"amount": 8.70,
"currency": "GBP"
},
"createdAt": "2021-03-03T09:41:48.253Z"
}
}
```
The payment `status`, which describes the state of the payment, is returned in the response.
If the status is `PENDING`, you can use the payment `id` to poll the payment status until it transitions to `COMPLETED` or `FAILED` as in step 4.
For more information see [payment status](/payments/payment-resources/payment-status).
This is an optional step, however we recommend monitoring the status of the payment when its `PENDING` to confirm if the institution accepts the payment initiation request.
Our recommended implementation in order to receive the latest payment status is to subscribe for single payment [Webhooks Events](/tools-and-services/webhooks/introduction) and process the events as they arrive in your system, please follow the guides bellow:
* [Webhook Requirements](/tools-and-services/webhooks/introduction)
* [Webhook API Guide](/tools-and-services/webhooks/get-started)
we do **not** recommend polling [get payment details](/api-reference/payments/get-payment-details) as it is protected by the rate limit and might affect your integration at scale.
***
Looking for our quickest integration option? Learn how to make a single payment with [Yapily Hosted Pages](/tools-and-services/hosted-pages/overview) which provides a pre-built and hosted UI to quickly and easily facilitate single payments.
# Additional Information
Source: https://docs.yapily.com/payments/vrps/additional-information
Additional guidance for implementing Variable Recurring Payments with Yapily, including edge cases, error handling, and best practices for VRP API integrations.
Commercial VRP (cVRP) is available as a Private Beta version. Please contact your Customer Success Manager if you would like to access it.
## Scope
There are two types of VRP available through Yapily, each with their own scope and restrictions.
Sweeping VRP is mandated by the CMA Order and is limited to sweeping services.
Sweeping VRP is subject to the following restrictions:
* The payments must be between two accounts held by the same person or business
* The payments must be domestic to the UK and deal in GBP
* The source account must be a current account
* Sweeping between current account providers, including to move funds between current accounts to avoid falling into overdraft on another current account
* Sweeping to destination accounts which are used for unbundling overdrafts from a current account and other alternative forms of credit that closely compete with overdrafts
* Sweeping to destination accounts which are used for loan repayments as part of a service that provides alternative forms of credit to an overdraft
* Sweeping to a credit card account
* Sweeping to cash savings accounts that are capable of paying interest
* E-money accounts that are used by consumers and SMEs as substitutes for current accounts alternatives to savings accounts
* Sweeping to make e-commerce purchases (including sweeping money to an e-money "me-to-me-to-business" account, in order to purchase goods or pay for services or pay for utility bills)
* Sweeping to destination accounts used for the purchase of cryptocurrency
* Sweeping in order to use online gambling and gaming services.
* Sweeping to destination accounts used for foreign exchange or international money transfer services.
* Investment products (including pensions) that may be used by consumers as alternatives to savings accounts
Commercial VRP is governed by the UKPI Multi-Lateral Agreement (MLA) and is available for a defined set of approved use cases. Using cVRP for anything outside those use cases is a breach of the MLA.
* The payments must be domestic to the UK and deal in GBP
* The source account must be a personal current account
* cVRP is only available for In-Scope Use Cases as defined in the UKPI MLA
* Mandate parameters (maximum amount, frequency, and period limits) must be set proportionately to the use case - reflecting what a payer would reasonably expect to pay for the relevant goods or service. Setting parameters broader than necessary may constitute a breach of the MLA.
* **Utilities & telecoms** - recipient must hold the appropriate licence from the relevant regulator
* Electricity providers licensed by Ofgem
* Gas providers licensed by Ofgem
* Water providers licensed by Ofwat
* Broadband, fixed phone line, and mobile phone service providers licensed by Ofcom
* **Transport** - recipient must be a Train Company to which the National Rail Conditions of Travel apply
* Rail tickets and season passes from National Rail train operators
* **Regulated financial services** - recipient must be regulated by the FCA or The Pensions Regulator; payments must be from a UK account to a UK account
* Mortgage repayments to an FCA-regulated mortgage provider
* Contributions to a pension scheme with master trust authorisation from The Pensions Regulator
* Payments into financial products and accounts eligible for FSCS protection (e.g. savings accounts, ISAs, investment accounts)
Regulated financial services use cases also cover payments made on behalf of a payer's spouse, civil partner, or children. cVRP cannot be used to change or credit a payment method for a purchase that has already occurred, and no automatic forwarding arrangement may be set up on the destination account.
* **E-money accounts** - recipient must be an Electronic Money Institution authorised by the FCA
* Topping up an FCA-authorised e-money account, such as a digital wallet or prepaid card
As with regulated financial services, cVRP cannot be used where automatic forwarding is set up on the destination account, or to credit a payment method for a purchase that has already occurred.
* **Charities** - recipient must be a registered charity receiving donations via a charity platform provider
* Donations to registered charities via charity platform providers
* Any use case not explicitly listed as an In-Scope Use Case under the MLA
* Payments from business accounts (consumer personal current accounts only at Wave 1)
* Sweeping use cases mandated under the CMA Order
The list of supported use cases and participating banks will expand over time. Contact Yapily to confirm whether your use case is in scope before building.
***
## Compliance Requirements
VRPs are considered to be an ongoing relationship with the end user, meaning there are extra Know Your Customer (KYC) and transaction monitoring obligations on Yapily Connect Ltd.
As a result, Yapily Connect customers using Yapily Connect's PIS license for VRPs are required to provide extra fields about the end user who is making the payment.
These details must be placed under the `complianceData` object when authorising a VRP payment. Refer to the [endpoint's API specification](/api-reference) for details, and note that the required details will vary between a consumer and a business payer.
Customers with their own PISP license don't need to provide these extra fields.
If you don't provide the `complianceData` object in the request, you will receive an error and the request will not be processed.
### Additional requirements for Commercial VRP
For cVRP, there are additional technical fields required beyond the standard `complianceData` object. These must be provided when initiating cVRP payments.
* **Transaction Risk Indicators (TRIs):** TRIs are mandatory data fields attached to each cVRP payment initiation that help banks assess transaction risk. These are provided within the `complianceData` object. Key TRI fields include Payment Purpose Code, Payment Context Code, Contract Present Indicator, Beneficiary Pre-Populated, Beneficiary Account Type, and Merchant Category Code.
* **Ultimate Payee:** Where the ultimate recipient of funds is different from the named Payee (for example, where a collections account is used), the `UltimatePayee` field must be provided.
* **PSU Interaction Type:** The `PSUInteractionType` field must be provided in both the payment message, indicating whether the payer is present or the payment is biller-initiated.
* **Out-of-scope use case monitoring:** You must only use cVRP for approved In-Scope Use Cases. If you become aware of any out-of-scope activity, notify Yapily immediately.
Refer to the [endpoint's API specification](/api-reference) for the full list of required fields within the `complianceData` object for cVRP.
# Institution Coverage
Source: https://docs.yapily.com/payments/vrps/coverage
Check which UK banks support Variable Recurring Payments (VRP) through Yapily's Open Banking API. Updated institution coverage list for VRP integrations.
This page is a quick reference for institutions that are currently supported by Yapily VRP.
Commercial VRP (cVRP) is available as a Private Beta version. Please contact your Customer Success Manager if you would like to access it.
The Yapily VRP API is currently only available in the UK.
## Coverage
| Institution | Available | Supported account types |
| ---------------------------- | --------- | ------------------------------------- |
| HSBC | Yes | Personal, Business |
| Natwest | Yes | Personal, Business |
| Royal Bank of Scotland (RBS) | Yes | Personal |
| Santander | Yes | Personal, Business, Corporate |
| Lloyds | Yes | Personal, Business |
| Ulster Bank | Yes | Personal |
| Halifax | Yes | Personal |
| Bank of Scotland | Yes | Personal, Business |
| Nationwide | Yes | Personal |
| Barclays | Yes | Personal, Business, Corporate, Wealth |
| First Direct | Yes | Personal |
| Monzo | Yes | Personal |
### Institution Specifics
Some institutions impose limitations on the Sweeping VRP flow or have non-standard capabilities.
| Institution | ID | Notes |
| ----------- | ---------- | --------------------------------------------------------------------------------------------------- |
| Monzo | `monzo_ob` | The period alignment for payment limits (`periodicLimits.alignment`) can be of type `CONSENT` only. |
| Institution | Available | Supported account types |
| ---------------------------- | --------- | ----------------------- |
| HSBC | Yes | Personal |
| Natwest | Yes | Personal |
| Royal Bank of Scotland (RBS) | Yes | Personal |
| Santander | Yes | Personal |
| Lloyds | Yes | Personal |
| Ulster Bank | Yes | Personal |
| Halifax | Yes | Personal |
| Bank of Scotland | Yes | Personal |
| Nationwide | Yes | Personal |
| Barclays | Yes | Personal |
| First Direct | Yes | Personal |
# Get Started
Source: https://docs.yapily.com/payments/vrps/get-started
Getting started guide for Yapily Variable Recurring Payments. Learn how to create VRP consents, configure mandates, and initiate recurring payments programmatically.
A tutorial for Yapily VRP.
Commercial VRP (cVRP) is available as a Private Beta version. Please contact your Customer Success Manager if you would like to access it.
All requests made to the Yapily API require [basic authentication](/getting-started/integration-setup/api-authentication).
Select a VRP type to get started:
This section will get you familiarised with Yapily's **Sweeping VRP** flow.
Select a supported institution, either:
* See our [Institution Coverage](/payments/vrps/coverage) or
* Search for the institutions that support the sweeping VRP feature via `GET /institutions`
The first and most important step of the VRP flow is authorisation, but Yapily makes it very straightforward:
1. Call `POST /variable-recurring-payments/sweeping/consents`
* Specify the correct payee and payer details
* Specify the appropriate limits (e.g. time period when the consent is valid, maximum amounts per payment and per time period)
* See the [endpoint's API specification](/api-reference/variable-recurring-payments/create-sweeping-vrp-authorisation) for details
2. Retrieve the Authorisation URL from the response and redirect the user to it
* There, the user will have to authorise the payment with their bank
* For testing purposes, you may use Natwest Sandbox credentials
3. If the user successfully authorised, then you should retrieve the Consent Token for later
* For more details on this authorisation flow, see Redirect Payment flow
Yapily Connect customers must also provide payer details in the `complianceData` object to meet [compliance requirements](/payments/vrps/additional-information#compliance-requirements).
Prior to executing a payment, it's best practice to ensure the availability of funds from the payer's side. This will guard you against potentially vague error response messages during the payment execution call later.
This is an optional but recommended step which serves to improve error handling and increase payment success rates.
1. Call `POST /variable-recurring-payments/funds-confirmation`
* Specify the expected payment amount
2. Verify from the response whether the payer has sufficient funds to execute the payment
* See the [endpoint's API specification](/api-reference/variable-recurring-payments/confirm-funds-for-vrp-payment) for details
1. Call `POST /variable-recurring-payments/payments`
* Specify the wanted payment amount (which should be within the limits specified at authorisation, otherwise an error response will be returned)
* See the [endpoint's API specification](/api-reference/variable-recurring-payments/create-vrp-payment) for details
You can now execute any number of payments subject to the established limits at authorisation, which is the core strength of VRP. Note that it is recommended to confirm funds availability before each payment.
It is possible to receive a [Webhook](/tools-and-services/webhooks/introduction) notification when a payment reaches a terminal status.
**Register a Webhook**
To receive a Webhook notification, it is necessary to register a Webhook first.
Currently, there are two event categories for VRP payments:
* `sweeping_vrp.payment_status.completed.v1` for successfully completed payments
* `sweeping_vrp.payment_status.failed.v1` for failed payments
**Receive a Webhook Notification**
After a Webhook is registered and a payment is executed, the following notification will be sent whenever a VRP payment reaches a terminal status:
```json theme={null}
{
"id": "4ac33edc-352e-ed04-dcd3-2cb58c01b2c0",
"applicationId": "b54d2403-3b41-fd74-4b53-2d0c9609d275",
"type": "sweeping_vrp.payment_status.completed.v1",
"event": {
"paymentId": "1b8b3528-b0f5-bc84-870b-377b966448ef",
"statusDetails": {
"status": "COMPLETED",
"isoStatus": {
"code": "ACSC",
"name": "AcceptedSettlementCompleted"
},
"statusUpdateDate": "2025-06-06T15:30:45.000Z"
}
},
"metadata": {
"tracingId": "6cf5ef06-9f96-4f24-8bab-32ab09128010",
"user": {
"key": "value"
}
}
}
```
| Property | Value Type | Description |
| ------------------------------------ | ---------- | ------------------------------------------------------------------------ |
| id | String | The Webhook ID used for delivering the event |
| applicationId | String | The Application ID that registered this webhook |
| type | String | The triggered event's type |
| event.paymentId | String | The VRP Payment ID the event was triggered for |
| event.statusDetails.status | String | The VRP Payment's terminal status |
| event.statusDetails.isoStatus.code | String | The VRP Payment's ISO 20022 status code (as provided by the institution) |
| event.statusDetails.isoStatus.name | String | The VRP Payment's ISO 20022 status name (as provided by the institution) |
| event.statusDetails.statusUpdateDate | Date-Time | The time when the VRP Payment's status was last updated |
| metadata.tracingId | String | The Tracing ID of the event |
| metadata.user | Object | **Optional.** The metadata provided at Webhook registration |
More details on status format and meaning can be found on the [Payment Status](/payments/payment-resources/payment-status) page.
### Get Consent Details
Call `GET /variable-recurring-payments/sweeping/consents/{consentId}` to retrieve details about a particular VRP payment Consent.
See [API specification](/api-reference/variable-recurring-payments/get-sweeping-vrp-consent-details)
This section will get you familiarised with Yapily's **Commercial VRP (cVRP)** flow.
Select a supported institution, either:
* See our [Institution Coverage](/payments/vrps/coverage) or
* Search for the institutions that support the commercial VRP feature via `GET /institutions`
cVRP institution coverage differs from Sweeping VRP. Not all banks that support Sweeping VRP support cVRP. Check the cVRP coverage page before building.
cVRP consent and mandate setup is delivered via **Yapily Hosted Pages**, ensuring all regulatory disclosure requirements under the UKPI scheme are met automatically.
1. Call `POST /hosted/vrp-requests/commercial`
* Specify the correct payee (biller) and payer details
* Specify the appropriate limits (e.g. time period when the consent is valid, maximum individual payment amount, and per time period)
* Provide `UltimatePayee` if the recipient of funds differs from the named Payee
* Provide payer details in the `complianceData` object, including all required Transaction Risk Indicators (e.g. PaymentContextCode, PaymentPurposeCode). See [compliance requirements](/payments/vrps/additional-information#compliance-requirements).
* See the [endpoint's API specification](/api-reference/hosted-vrp-pages/create-hosted-commercial-vrp-request) for details
2. Retrieve the Hosted Page URL from the response and redirect the payer to it
* Yapily will display all required pre-mandate disclosures to the payer on your behalf
* The payer will authorise the mandate with their bank using Strong Customer Authentication (SCA)
3. If the payer successfully authorises, retrieve the Consent Token for later use
Prior to executing a payment, it's best practice to ensure the availability of funds from the payer's side. This will guard you against potentially vague error response messages during the payment execution call later.
This is an optional but recommended step which serves to improve error handling and increase payment success rates.
1. Call `POST /variable-recurring-payments/funds-confirmation`
* Specify the expected payment amount
2. Verify from the response whether the payer has sufficient funds to execute the payment
* See the [endpoint's API specification](/api-reference/variable-recurring-payments/confirm-funds-for-vrp-payment) for details
1. Call `POST /variable-recurring-payments/payments`
* Specify the payment amount (which must be within the mandate limits established at authorisation)
* Provide `PSUInteractionType` to indicate whether the payer is present or the payment is biller-initiated
* See the [endpoint's API specification](/api-reference/variable-recurring-payments/create-vrp-payment) for details
You can now execute any number of payments subject to the mandate limits established at authorisation. It is recommended to confirm funds availability before each payment.
Payments must only be initiated for approved In-Scope Use Cases under the UKPI MLA. See [Additional Information](/payments/vrps/additional-information#scope) for the full list of supported use cases.
It is possible to receive a [Webhook](/tools-and-services/webhooks/introduction) notification when a payment reaches a terminal status.
**Register a Webhook**
To receive a Webhook notification, it is necessary to register a Webhook first.
Currently, there are two event categories for cVRP payments:
* `commercial_vrp.payment_status.completed.v1` for successfully completed payments
* `commercial_vrp.payment_status.failed.v1` for failed payments
**Receive a Webhook Notification**
After a Webhook is registered and a payment is executed, the following notification will be sent whenever a Commercial VRP payment reaches a terminal status:
```json theme={null}
{
"id": "4ac33edc-352e-ed04-dcd3-2cb58c01b2c0",
"applicationId": "b54d2403-3b41-fd74-4b53-2d0c9609d275",
"type": "commercial_vrp.payment_status.completed.v1",
"event": {
"paymentId": "1b8b3528-b0f5-bc84-870b-377b966448ef",
"statusDetails": {
"status": "COMPLETED",
"isoStatus": {
"code": "ACSC",
"name": "AcceptedSettlementCompleted"
},
"statusUpdateDate": "2025-06-06T15:30:45.000Z"
}
},
"metadata": {
"tracingId": "6cf5ef06-9f96-4f24-8bab-32ab09128010",
"user": {
"key": "value"
}
}
}
```
| Property | Value Type | Description |
| ------------------------------------ | ---------- | ------------------------------------------------------------------------ |
| id | String | The Webhook ID used for delivering the event |
| applicationId | String | The Application ID that registered this webhook |
| type | String | The triggered event's type |
| event.paymentId | String | The VRP Payment ID the event was triggered for |
| event.statusDetails.status | String | The VRP Payment's terminal status |
| event.statusDetails.isoStatus.code | String | The VRP Payment's ISO 20022 status code (as provided by the institution) |
| event.statusDetails.isoStatus.name | String | The VRP Payment's ISO 20022 status name (as provided by the institution) |
| event.statusDetails.statusUpdateDate | Date-Time | The time when the VRP Payment's status was last updated |
| metadata.tracingId | String | The Tracing ID of the event |
| metadata.user | Object | **Optional.** The metadata provided at Webhook registration |
More details on status format and meaning can be found on the [Payment Status](/payments/payment-resources/payment-status) page.
### Get Mandate Details
Call `GET /variable-recurring-payments/commercial/consents/{consentId}` to retrieve details about a particular cVRP mandate.
See [API specification](/api-reference/variable-recurring-payments/get-commercial-vrp-consent-details)
### Cancel a Mandate
As part of cVRP you will need to provide your payers the active consents visibility. Payers must have ability to cancel a cVRP long lived consent at any time, either through their bank or through the merchant's interface.
Call `DELETE /consents/{consentId}` to revoke a chosen consent.
See [API specification](/api-reference/consents/delete-consent)
Mandates that have not been used for 13 consecutive months must be cancelled. Yapily will notify you when a mandate approaches this threshold.
## Get VRP Payment Details
Call `GET /variable-recurring-payments/payments/{paymentId}/details` to retrieve details about a particular VRP payment.
See [API specification](/api-reference/variable-recurring-payments/get-vrp-payment-details)
It is highly advised to use the Webhook notifications described above to receive updates on VRP payment status changes instead of polling on this endpoint, because there are rate limits imposed on all endpoints.
## Further Reading
For your next steps, you may want to review the following documentation pages:
* [cVRP Institution Coverage](/payments/vrps/coverage#commercial-vrp)
* [Mandate Details](/payments/vrps/mandate-details)
* [Additional Information](/payments/vrps/additional-information)
* [Webhooks](/tools-and-services/webhooks/introduction)
# Introduction
Source: https://docs.yapily.com/payments/vrps/introduction
Introduction to Variable Recurring Payments (VRPs) with Yapily. Enable flexible, automated bank payments with customer-defined limits for open banking use cases.
Authorise once and collect payments over time.
Commercial VRP (cVRP) is available as a Private Beta version. Please contact your Customer Success Manager if you would like to access it.
## Introduction
Yapily Variable Recurring Payments (VRP) enable you to carry-out any number of payments over time, subject to the limits agreed by the payee at authorisation.
The limits agreed at authorisation include:
* time period during which the payments can be carried out
* maximum amount per payment
* maximum amount over a time period (such as week or year)
### VRP Mandate
The **VRP Mandate** is the core agreement that the user approves during the authorisation. It is tied to the Consent generated after authorisation, detailing the limits that will govern all VRP payments that are made with said Consent.
See details about the [VRP Mandate](/payments/vrps/mandate-details).
### VRP Types
There are two types of Variable Recurring Payments available through Yapily:
**Sweeping VRP**, mandated by the CMA Order, allows transferring money between two accounts belonging to the same person or business. Yapily supports Sweeping VRP for both consumer and business accounts.
**Commercial VRP (cVRP)** enables the payer to set up recurring payments from their bank account to a business, for example, for energy bills, mobile phone contracts, rail season tickets, mortgage repayments, or payments into savings and investment accounts — without re-authorising each payment. Yapily offers cVRP through its participation in the UK Payments Initiative (UKPI) scheme. cVRP scheme currently supports consumer accounts only.
See additional information on the [current scope of VRP](/payments/vrps/additional-information#scope).
### Use-Cases
The utility of VRP payments lies in their flexibility. Many recurring payments aren't for a fixed amount, and requiring fresh authorization for every small variation creates unnecessary friction. The VRP flow solves this by letting a user authorise a payment instruction just once with built-in protections via the limits described above.
* Automatically move money to a savings account whenever another account's balance is high
* Automatically clearing a credit card balance
* Topping up an account based on some rules
#### Wave 1 Scope
**Utilities & telecoms**
* Paying electricity, gas, or water bills that vary each month
* Paying broadband, fixed phone line, or mobile phone service contracts
**Transport**
* Purchasing rail tickets or season passes from National Rail train operators
**Regulated financial services**
* Making mortgage repayments to an FCA-regulated provider
* Contributing to a pension scheme authorised by The Pensions Regulator
* Paying into savings, ISAs, or investment accounts protected by the FSCS
**E-money accounts**
* Topping up an FCA-authorised e-money account, such as a digital wallet or prepaid card
**Charities**
* Making donations to registered charities via charity platform providers
#### Wave 2 and beyond
The cVRP scheme is expected to expand significantly, with e-commerce, variable subscription services, and further use case categories planned for future waves.
Don't see your use case? [Let us know](https://www.yapily.com/company/get-started) how you would like to use Yapily VRP.
## Advantages
There are a few benefits of using VRP payments over direct debit, standing orders, or card continuous payment authority (CPA):
* VRPs are direct account-to-account payments, so they **avoid payment fees** associated with payment processing.
* VRPs use Faster Payment Service, so the payment **arrives instantly**.
* VRPs provide **transparency and flexibility** to the user. They only need to authorise once, and then they can change or revoke the VRP mandate terms at any time.
* VRP mandates are created and authorised **using Strong Customer Authentication** (SCA).
* Commercial VRP includes **built-in payer protections** under the UKPI scheme, including a formal dispute process
## End User Journey
**The sweeping payments experience** can be embedded into any application. You build and self-host the user-facing screens, giving you full ownership and control over the experience in your application, with the Yapily VRP Payments API powering the payments behind the scenes.
**Note:** We recommend you follow our PIS UX guidelines for examples of best practices when building the user-facing screens.
**Note:** Banks use different methods to authenticate and collect consent from users. Yapily supports all user authorisation flows and you may need to implement multiple user authorisation flows depending on which banks you want to integrate with.
**For Commercial Variable Recurring Payments**, Yapily provides hosted consent and mandate setup pages for cVRP. This ensures all regulatory disclosure and requirements under the UKPI scheme are met out of the box.
## Get Started
Next, see the [Get Started](/payments/vrps/get-started) page to get familiarised with the details of our **Sweeping and Commercial VRP** flows.
***
## Related resources
### Product Resources
* [VRP Mandate Details](/payments/vrps/mandate-details) - Understanding VRP mandates
* [VRP Coverage](/payments/vrps/coverage) - Supported institutions
* [Payment Resources](/payments/payment-resources/payment-features) - Payment features and constraints
### Implementation Resources
For error handling, retry strategies, webhooks, testing, and support, see our [Developer Resources](/resources/overview) guide.
# Mandate Details
Source: https://docs.yapily.com/payments/vrps/mandate-details
Technical reference for VRP mandate parameters in the Yapily API. Covers maximum amount, frequency, date ranges, and merchant category codes for recurring mandates.
Technical details about our handling of VRP mandates for payment validation.
Commercial VRP (cVRP) is available as a Private Beta version. Please contact your Customer Success Manager if you would like to access it.
All VRP periods reset **at midnight (UTC time)**, so consent-aligned periods do not take into account the time that the consent was created. In other words, the smallest relevant unit of time is a day.
## Calendar Alignment
* `DAILY`
* Period resets at midnight (UTC time).
* `WEEKLY`
* Period resets **every Monday**.
* `EVERY_TWO_WEEKS`
* **Not available**: the OBUK standard prohibits calendar-aligned fortnightly frequency, as the ISO calendar does not support or provide any guidance on when a fortnight should start.
* `MONTHLY`
* Period resets **every 1st of every month**.
* `YEARLY`
* Period resets **every 1st of January**.
## Consent Alignment
* `DAILY`
* Period resets at midnight (UTC time).
* This is *identical* to the calendar-aligned daily period.
* `WEEKLY`
* Period resets on the **weekday** that the consent was created.
* `EVERY_TWO_WEEKS`
* Period resets on the **weekday** that the consent was created on **every other week**.
* `MONTHLY`
* Period resets on the **day of the month** that the consent was created
* e.g. if consent was created on the 16th, then the period resets every 16th of every month
* If consent was created on a day that is not present in all months (e.g. on the 31st),
***
To find which banks support single domestic payments use [GET institutions](/api-reference/institutions/get-institutions) to retrieve the list of your supported institutions.
```bash Request theme={null}
curl -L -X GET 'https://api.yapily.com/institutions' \
-u 'APPLICATION_KEY:APPLICATION_SECRET'
```
```json Response theme={null}
{
"meta": {
"tracingId": "acbb76db4ab8f4ac7f039d000456c13f",
"count": 1
},
"data": [
{
"id": "modelo-sandbox",
"name": "Modelo Sandbox",
"fullName": "Modelo Sandbox",
"countries": [
{
"displayName": "United Kingdom",
"countryCode2": "GB"
}
],
"environmentType": "SANDBOX",
"credentialsType": "OPEN_BANKING_UK_AUTO",
"media": [
{
"source": "https://images.yapily.com/image/ce2bfdbf-1ae2-4919-ab7b-e8b3d5e93b36?size=0",
"type": "icon"
},
{
"source": "https://images.yapily.com/image/ca502f24-d6df-4785-b4b8-1034b100af77?size=0",
"type": "logo"
}
],
"features": [
"INITIATE_ACCOUNT_REQUEST",
"ACCOUNT_REQUEST_DETAILS",
"EXISTING_PAYMENTS_DETAILS",
"ACCOUNT_BALANCES",
"CREATE_BULK_PAYMENT",
"ACCOUNT_PERIODIC_PAYMENTS",
"ACCOUNT_STATEMENTS",
"INITIATE_BULK_PAYMENT",
"ACCOUNT_STATEMENT",
"ACCOUNT",
"INITIATE_DOMESTIC_PERIODIC_PAYMENT",
"INITIATE_SINGLE_PAYMENT_SORTCODE",
"ACCOUNT_DIRECT_DEBITS",
"ACCOUNTS",
"ACCOUNT_TRANSACTIONS",
"EXISTING_PAYMENT_INITIATION_DETAILS",
"CREATE_DOMESTIC_SINGLE_PAYMENT",
"INITIATE_DOMESTIC_SINGLE_PAYMENT",
"ACCOUNT_STATEMENT_FILE",
"CREATE_INTERNATIONAL_SINGLE_PAYMENT",
"IDENTITY",
"CREATE_DOMESTIC_SCHEDULED_PAYMENT",
"INITIATE_DOMESTIC_SCHEDULED_PAYMENT",
"CREATE_SINGLE_PAYMENT_SORTCODE",
"ACCOUNT_TRANSACTIONS_WITH_MERCHANT",
"INITIATE_INTERNATIONAL_SINGLE_PAYMENT",
"PERIODIC_PAYMENT_FREQUENCY_EXTENDED",
"ACCOUNT_SCHEDULED_PAYMENTS",
"CREATE_DOMESTIC_PERIODIC_PAYMENT"
]
}
]
}
```
Filter the list for all institutions that support the feature `CREATE_DOMESTIC_SINGLE_PAYMENT`. Then display these institutions in your application so the user can select which bank to make the payment from.
Once the user selects a bank, store the `id` of the institution to use in step 2.
This example uses a single redirect flow using a [callback URL](/open-banking-flow/handling-redirects/callback-url).
Execute [create payment authorisation](/api-reference/authorisations/create-payment-authorisation) including the institution ID, your callback URL and the `paymentRequest` object.
For a detailed explanation of every field in the payment request, see [Building a Payment Request](/concepts/payment-request-anatomy).
```bash Request theme={null}
curl -L -X POST 'https://api.yapily.com/payment-auth-requests' \
-H 'Content-Type: application/json' \
-u 'APPLICATION_KEY:APPLICATION_SECRET' \
-d '{
"applicationUserId": "single-payment-tutorial",
"institutionId": "modelo-sandbox",
"callback": "https://display-parameters.com/",
"paymentRequest": {
"type": "DOMESTIC_PAYMENT",
"reference": "Bills Coffee Shop",
"paymentIdempotencyId": "{uniqueValue}",
"amount": {
"amount": 8.70,
"currency": "GBP"
},
"payee": {
"name": "BILLS COFFEE LTD",
"accountIdentifications": [
{
"type": "ACCOUNT_NUMBER",
"identification": "{accountNumber}"
},
{
"type": "SORT_CODE",
"identification": "{sortCode}"
}
]
}
}
}'
```
```json Response theme={null}
{
"meta": {
"tracingId": "611f74cb4f3205d983ebb2fca59d0847"
},
"data": {
"id": "af563bac-e50a-42bd-91bc-581813e13733",
"userUuid": "f3be3c23-bd0e-475e-b389-62dd1f5aa6c1",
"applicationUserId": "single-payment-tutorial",
"institutionId": "modelo-sandbox",
"status": "AWAITING_AUTHORIZATION",
"createdAt": "2021-03-03T09:23:45.841Z",
"featureScope": [
"EXISTING_PAYMENTS_DETAILS",
"CREATE_DOMESTIC_SINGLE_PAYMENT",
"EXISTING_PAYMENT_INITIATION_DETAILS"
],
"state": "6b07bddf9e7746ae8ecb7cbecc00f19a",
"institutionConsentId": "sdp-1-469c63ef-e6b6-4dd2-88b7-3aea0bff4136",
"authorisationUrl": "{authorisationUrl}",
"qrCodeUrl": "https://images.yapily.com/image/55b6b6bc-daa8-490c-89e1-243156868e00/1614763426?size=0"
}
}
```
Redirect the user to the `authorisationUrl` returned in the response.
The user is then asked to login and authorise the payment with their bank. The [Modelo sandbox credentials](/resources/sandbox/sandbox-credentials) are: `mits` / `mits`.
Upon completion, the user is redirected back to the callback URL supplied in the request. In this example, the callback is `https://display-parameters.com/` which displays the parameters returned with the redirect.
Store the `consentToken` to use when creating the payment in step 3.
[Create the payment](/api-reference/payments/create-payment) specifying the `consentToken` in the header and the contents of the `paymentRequest` object in step 2 as the body.
```bash Request theme={null}
curl -L -X POST 'https://api.yapily.com/payments' \
-H 'Content-Type: application/json' \
-H 'Consent: {consentToken}' \
-u 'APPLICATION_KEY:APPLICATION_SECRET' \
-d '{
"type": "DOMESTIC_PAYMENT",
"reference": "Bills Coffee Shop",
"paymentIdempotencyId": "{uniqueValue}",
"amount": {
"amount": 8.70,
"currency": "GBP"
},
"payee": {
"name": "BILLS COFFEE LTD",
"accountIdentifications": [
{
"type": "ACCOUNT_NUMBER",
"identification": "{accountNumber}"
},
{
"type": "SORT_CODE",
"identification": "{sortCode}"
}
]
}
}'
```
```json Response theme={null}
{
"meta": {
"tracingId": "0f07ebe9be5fbec0dd660c4e091bd181"
},
"data": {
"id": "pv3-6c0f031d-6786-4845-9799-bdd2e89ba362",
"institutionConsentId": "sdp-1-469c63ef-e6b6-4dd2-88b7-3aea0bff4136",
"paymentIdempotencyId": "{uniqueValue}",
"paymentLifecycleId": "69d55454ea74546e8b1b44efb17fc45",
"status": "PENDING",
"statusDetails": {
"status": "PENDING",
"isoStatus": {
"code": "PDNG",
"name": "Pending"
}
"statusUpdateDate": "2021-03-03T09:41:48.253Z"
},
"payeeDetails": {
"name": "BILLS COFFEE LTD",
"accountIdentifications": [
{
"type": "ACCOUNT_NUMBER",
"identification": "{accountNumber}"
},
{
"type": "SORT_CODE",
"identification": "{sortCode}"
}
]
},
"reference": "Bills Coffee Shop",
"amount": 8.70,
"currency": "GBP",
"amountDetails": {
"amount": 8.70,
"currency": "GBP"
},
"createdAt": "2021-03-03T09:41:48.253Z"
}
}
```
The payment `status`, which describes the state of the payment, is returned in the response.
If the status is `PENDING`, you can use the payment `id` to poll the payment status until it transitions to `COMPLETED` or `FAILED` as in step 4.
For more information see [payment status](/payments/payment-resources/payment-status).
This is an optional step, however we recommend monitoring the status of the payment when its `PENDING` to confirm if the institution accepts the payment initiation request.
Our recommended implementation in order to receive the latest payment status is to subscribe for single payment [Webhooks Events](/tools-and-services/webhooks/introduction) and process the events as they arrive in your system, please follow the guides bellow:
* [Webhook Requirements](/tools-and-services/webhooks/introduction)
* [Webhook API Guide](/tools-and-services/webhooks/get-started)
we do **not** recommend polling [get payment details](/api-reference/payments/get-payment-details) as it is protected by the rate limit and might affect your integration at scale.
***
Looking for our quickest integration option? Learn how to make a single payment with [Yapily Hosted Pages](/tools-and-services/hosted-pages/overview) which provides a pre-built and hosted UI to quickly and easily facilitate single payments.
# Additional Information
Source: https://docs.yapily.com/payments/vrps/additional-information
Additional guidance for implementing Variable Recurring Payments with Yapily, including edge cases, error handling, and best practices for VRP API integrations.
Commercial VRP (cVRP) is available as a Private Beta version. Please contact your Customer Success Manager if you would like to access it.
## Scope
There are two types of VRP available through Yapily, each with their own scope and restrictions.
Sweeping VRP is mandated by the CMA Order and is limited to sweeping services.
Sweeping VRP is subject to the following restrictions:
* The payments must be between two accounts held by the same person or business
* The payments must be domestic to the UK and deal in GBP
* The source account must be a current account
* Sweeping between current account providers, including to move funds between current accounts to avoid falling into overdraft on another current account
* Sweeping to destination accounts which are used for unbundling overdrafts from a current account and other alternative forms of credit that closely compete with overdrafts
* Sweeping to destination accounts which are used for loan repayments as part of a service that provides alternative forms of credit to an overdraft
* Sweeping to a credit card account
* Sweeping to cash savings accounts that are capable of paying interest
* E-money accounts that are used by consumers and SMEs as substitutes for current accounts alternatives to savings accounts
* Sweeping to make e-commerce purchases (including sweeping money to an e-money "me-to-me-to-business" account, in order to purchase goods or pay for services or pay for utility bills)
* Sweeping to destination accounts used for the purchase of cryptocurrency
* Sweeping in order to use online gambling and gaming services.
* Sweeping to destination accounts used for foreign exchange or international money transfer services.
* Investment products (including pensions) that may be used by consumers as alternatives to savings accounts
Commercial VRP is governed by the UKPI Multi-Lateral Agreement (MLA) and is available for a defined set of approved use cases. Using cVRP for anything outside those use cases is a breach of the MLA.
* The payments must be domestic to the UK and deal in GBP
* The source account must be a personal current account
* cVRP is only available for In-Scope Use Cases as defined in the UKPI MLA
* Mandate parameters (maximum amount, frequency, and period limits) must be set proportionately to the use case - reflecting what a payer would reasonably expect to pay for the relevant goods or service. Setting parameters broader than necessary may constitute a breach of the MLA.
* **Utilities & telecoms** - recipient must hold the appropriate licence from the relevant regulator
* Electricity providers licensed by Ofgem
* Gas providers licensed by Ofgem
* Water providers licensed by Ofwat
* Broadband, fixed phone line, and mobile phone service providers licensed by Ofcom
* **Transport** - recipient must be a Train Company to which the National Rail Conditions of Travel apply
* Rail tickets and season passes from National Rail train operators
* **Regulated financial services** - recipient must be regulated by the FCA or The Pensions Regulator; payments must be from a UK account to a UK account
* Mortgage repayments to an FCA-regulated mortgage provider
* Contributions to a pension scheme with master trust authorisation from The Pensions Regulator
* Payments into financial products and accounts eligible for FSCS protection (e.g. savings accounts, ISAs, investment accounts)
Regulated financial services use cases also cover payments made on behalf of a payer's spouse, civil partner, or children. cVRP cannot be used to change or credit a payment method for a purchase that has already occurred, and no automatic forwarding arrangement may be set up on the destination account.
* **E-money accounts** - recipient must be an Electronic Money Institution authorised by the FCA
* Topping up an FCA-authorised e-money account, such as a digital wallet or prepaid card
As with regulated financial services, cVRP cannot be used where automatic forwarding is set up on the destination account, or to credit a payment method for a purchase that has already occurred.
* **Charities** - recipient must be a registered charity receiving donations via a charity platform provider
* Donations to registered charities via charity platform providers
* Any use case not explicitly listed as an In-Scope Use Case under the MLA
* Payments from business accounts (consumer personal current accounts only at Wave 1)
* Sweeping use cases mandated under the CMA Order
The list of supported use cases and participating banks will expand over time. Contact Yapily to confirm whether your use case is in scope before building.
***
## Compliance Requirements
VRPs are considered to be an ongoing relationship with the end user, meaning there are extra Know Your Customer (KYC) and transaction monitoring obligations on Yapily Connect Ltd.
As a result, Yapily Connect customers using Yapily Connect's PIS license for VRPs are required to provide extra fields about the end user who is making the payment.
These details must be placed under the `complianceData` object when authorising a VRP payment. Refer to the [endpoint's API specification](/api-reference) for details, and note that the required details will vary between a consumer and a business payer.
Customers with their own PISP license don't need to provide these extra fields.
If you don't provide the `complianceData` object in the request, you will receive an error and the request will not be processed.
### Additional requirements for Commercial VRP
For cVRP, there are additional technical fields required beyond the standard `complianceData` object. These must be provided when initiating cVRP payments.
* **Transaction Risk Indicators (TRIs):** TRIs are mandatory data fields attached to each cVRP payment initiation that help banks assess transaction risk. These are provided within the `complianceData` object. Key TRI fields include Payment Purpose Code, Payment Context Code, Contract Present Indicator, Beneficiary Pre-Populated, Beneficiary Account Type, and Merchant Category Code.
* **Ultimate Payee:** Where the ultimate recipient of funds is different from the named Payee (for example, where a collections account is used), the `UltimatePayee` field must be provided.
* **PSU Interaction Type:** The `PSUInteractionType` field must be provided in both the payment message, indicating whether the payer is present or the payment is biller-initiated.
* **Out-of-scope use case monitoring:** You must only use cVRP for approved In-Scope Use Cases. If you become aware of any out-of-scope activity, notify Yapily immediately.
Refer to the [endpoint's API specification](/api-reference) for the full list of required fields within the `complianceData` object for cVRP.
# Institution Coverage
Source: https://docs.yapily.com/payments/vrps/coverage
Check which UK banks support Variable Recurring Payments (VRP) through Yapily's Open Banking API. Updated institution coverage list for VRP integrations.
This page is a quick reference for institutions that are currently supported by Yapily VRP.
Commercial VRP (cVRP) is available as a Private Beta version. Please contact your Customer Success Manager if you would like to access it.
The Yapily VRP API is currently only available in the UK.
## Coverage
| Institution | Available | Supported account types |
| ---------------------------- | --------- | ------------------------------------- |
| HSBC | Yes | Personal, Business |
| Natwest | Yes | Personal, Business |
| Royal Bank of Scotland (RBS) | Yes | Personal |
| Santander | Yes | Personal, Business, Corporate |
| Lloyds | Yes | Personal, Business |
| Ulster Bank | Yes | Personal |
| Halifax | Yes | Personal |
| Bank of Scotland | Yes | Personal, Business |
| Nationwide | Yes | Personal |
| Barclays | Yes | Personal, Business, Corporate, Wealth |
| First Direct | Yes | Personal |
| Monzo | Yes | Personal |
### Institution Specifics
Some institutions impose limitations on the Sweeping VRP flow or have non-standard capabilities.
| Institution | ID | Notes |
| ----------- | ---------- | --------------------------------------------------------------------------------------------------- |
| Monzo | `monzo_ob` | The period alignment for payment limits (`periodicLimits.alignment`) can be of type `CONSENT` only. |
| Institution | Available | Supported account types |
| ---------------------------- | --------- | ----------------------- |
| HSBC | Yes | Personal |
| Natwest | Yes | Personal |
| Royal Bank of Scotland (RBS) | Yes | Personal |
| Santander | Yes | Personal |
| Lloyds | Yes | Personal |
| Ulster Bank | Yes | Personal |
| Halifax | Yes | Personal |
| Bank of Scotland | Yes | Personal |
| Nationwide | Yes | Personal |
| Barclays | Yes | Personal |
| First Direct | Yes | Personal |
# Get Started
Source: https://docs.yapily.com/payments/vrps/get-started
Getting started guide for Yapily Variable Recurring Payments. Learn how to create VRP consents, configure mandates, and initiate recurring payments programmatically.
A tutorial for Yapily VRP.
Commercial VRP (cVRP) is available as a Private Beta version. Please contact your Customer Success Manager if you would like to access it.
All requests made to the Yapily API require [basic authentication](/getting-started/integration-setup/api-authentication).
Select a VRP type to get started:
This section will get you familiarised with Yapily's **Sweeping VRP** flow.
Select a supported institution, either:
* See our [Institution Coverage](/payments/vrps/coverage) or
* Search for the institutions that support the sweeping VRP feature via `GET /institutions`
The first and most important step of the VRP flow is authorisation, but Yapily makes it very straightforward:
1. Call `POST /variable-recurring-payments/sweeping/consents`
* Specify the correct payee and payer details
* Specify the appropriate limits (e.g. time period when the consent is valid, maximum amounts per payment and per time period)
* See the [endpoint's API specification](/api-reference/variable-recurring-payments/create-sweeping-vrp-authorisation) for details
2. Retrieve the Authorisation URL from the response and redirect the user to it
* There, the user will have to authorise the payment with their bank
* For testing purposes, you may use Natwest Sandbox credentials
3. If the user successfully authorised, then you should retrieve the Consent Token for later
* For more details on this authorisation flow, see Redirect Payment flow
Yapily Connect customers must also provide payer details in the `complianceData` object to meet [compliance requirements](/payments/vrps/additional-information#compliance-requirements).
Prior to executing a payment, it's best practice to ensure the availability of funds from the payer's side. This will guard you against potentially vague error response messages during the payment execution call later.
This is an optional but recommended step which serves to improve error handling and increase payment success rates.
1. Call `POST /variable-recurring-payments/funds-confirmation`
* Specify the expected payment amount
2. Verify from the response whether the payer has sufficient funds to execute the payment
* See the [endpoint's API specification](/api-reference/variable-recurring-payments/confirm-funds-for-vrp-payment) for details
1. Call `POST /variable-recurring-payments/payments`
* Specify the wanted payment amount (which should be within the limits specified at authorisation, otherwise an error response will be returned)
* See the [endpoint's API specification](/api-reference/variable-recurring-payments/create-vrp-payment) for details
You can now execute any number of payments subject to the established limits at authorisation, which is the core strength of VRP. Note that it is recommended to confirm funds availability before each payment.
It is possible to receive a [Webhook](/tools-and-services/webhooks/introduction) notification when a payment reaches a terminal status.
**Register a Webhook**
To receive a Webhook notification, it is necessary to register a Webhook first.
Currently, there are two event categories for VRP payments:
* `sweeping_vrp.payment_status.completed.v1` for successfully completed payments
* `sweeping_vrp.payment_status.failed.v1` for failed payments
**Receive a Webhook Notification**
After a Webhook is registered and a payment is executed, the following notification will be sent whenever a VRP payment reaches a terminal status:
```json theme={null}
{
"id": "4ac33edc-352e-ed04-dcd3-2cb58c01b2c0",
"applicationId": "b54d2403-3b41-fd74-4b53-2d0c9609d275",
"type": "sweeping_vrp.payment_status.completed.v1",
"event": {
"paymentId": "1b8b3528-b0f5-bc84-870b-377b966448ef",
"statusDetails": {
"status": "COMPLETED",
"isoStatus": {
"code": "ACSC",
"name": "AcceptedSettlementCompleted"
},
"statusUpdateDate": "2025-06-06T15:30:45.000Z"
}
},
"metadata": {
"tracingId": "6cf5ef06-9f96-4f24-8bab-32ab09128010",
"user": {
"key": "value"
}
}
}
```
| Property | Value Type | Description |
| ------------------------------------ | ---------- | ------------------------------------------------------------------------ |
| id | String | The Webhook ID used for delivering the event |
| applicationId | String | The Application ID that registered this webhook |
| type | String | The triggered event's type |
| event.paymentId | String | The VRP Payment ID the event was triggered for |
| event.statusDetails.status | String | The VRP Payment's terminal status |
| event.statusDetails.isoStatus.code | String | The VRP Payment's ISO 20022 status code (as provided by the institution) |
| event.statusDetails.isoStatus.name | String | The VRP Payment's ISO 20022 status name (as provided by the institution) |
| event.statusDetails.statusUpdateDate | Date-Time | The time when the VRP Payment's status was last updated |
| metadata.tracingId | String | The Tracing ID of the event |
| metadata.user | Object | **Optional.** The metadata provided at Webhook registration |
More details on status format and meaning can be found on the [Payment Status](/payments/payment-resources/payment-status) page.
### Get Consent Details
Call `GET /variable-recurring-payments/sweeping/consents/{consentId}` to retrieve details about a particular VRP payment Consent.
See [API specification](/api-reference/variable-recurring-payments/get-sweeping-vrp-consent-details)
This section will get you familiarised with Yapily's **Commercial VRP (cVRP)** flow.
Select a supported institution, either:
* See our [Institution Coverage](/payments/vrps/coverage) or
* Search for the institutions that support the commercial VRP feature via `GET /institutions`
cVRP institution coverage differs from Sweeping VRP. Not all banks that support Sweeping VRP support cVRP. Check the cVRP coverage page before building.
cVRP consent and mandate setup is delivered via **Yapily Hosted Pages**, ensuring all regulatory disclosure requirements under the UKPI scheme are met automatically.
1. Call `POST /hosted/vrp-requests/commercial`
* Specify the correct payee (biller) and payer details
* Specify the appropriate limits (e.g. time period when the consent is valid, maximum individual payment amount, and per time period)
* Provide `UltimatePayee` if the recipient of funds differs from the named Payee
* Provide payer details in the `complianceData` object, including all required Transaction Risk Indicators (e.g. PaymentContextCode, PaymentPurposeCode). See [compliance requirements](/payments/vrps/additional-information#compliance-requirements).
* See the [endpoint's API specification](/api-reference/hosted-vrp-pages/create-hosted-commercial-vrp-request) for details
2. Retrieve the Hosted Page URL from the response and redirect the payer to it
* Yapily will display all required pre-mandate disclosures to the payer on your behalf
* The payer will authorise the mandate with their bank using Strong Customer Authentication (SCA)
3. If the payer successfully authorises, retrieve the Consent Token for later use
Prior to executing a payment, it's best practice to ensure the availability of funds from the payer's side. This will guard you against potentially vague error response messages during the payment execution call later.
This is an optional but recommended step which serves to improve error handling and increase payment success rates.
1. Call `POST /variable-recurring-payments/funds-confirmation`
* Specify the expected payment amount
2. Verify from the response whether the payer has sufficient funds to execute the payment
* See the [endpoint's API specification](/api-reference/variable-recurring-payments/confirm-funds-for-vrp-payment) for details
1. Call `POST /variable-recurring-payments/payments`
* Specify the payment amount (which must be within the mandate limits established at authorisation)
* Provide `PSUInteractionType` to indicate whether the payer is present or the payment is biller-initiated
* See the [endpoint's API specification](/api-reference/variable-recurring-payments/create-vrp-payment) for details
You can now execute any number of payments subject to the mandate limits established at authorisation. It is recommended to confirm funds availability before each payment.
Payments must only be initiated for approved In-Scope Use Cases under the UKPI MLA. See [Additional Information](/payments/vrps/additional-information#scope) for the full list of supported use cases.
It is possible to receive a [Webhook](/tools-and-services/webhooks/introduction) notification when a payment reaches a terminal status.
**Register a Webhook**
To receive a Webhook notification, it is necessary to register a Webhook first.
Currently, there are two event categories for cVRP payments:
* `commercial_vrp.payment_status.completed.v1` for successfully completed payments
* `commercial_vrp.payment_status.failed.v1` for failed payments
**Receive a Webhook Notification**
After a Webhook is registered and a payment is executed, the following notification will be sent whenever a Commercial VRP payment reaches a terminal status:
```json theme={null}
{
"id": "4ac33edc-352e-ed04-dcd3-2cb58c01b2c0",
"applicationId": "b54d2403-3b41-fd74-4b53-2d0c9609d275",
"type": "commercial_vrp.payment_status.completed.v1",
"event": {
"paymentId": "1b8b3528-b0f5-bc84-870b-377b966448ef",
"statusDetails": {
"status": "COMPLETED",
"isoStatus": {
"code": "ACSC",
"name": "AcceptedSettlementCompleted"
},
"statusUpdateDate": "2025-06-06T15:30:45.000Z"
}
},
"metadata": {
"tracingId": "6cf5ef06-9f96-4f24-8bab-32ab09128010",
"user": {
"key": "value"
}
}
}
```
| Property | Value Type | Description |
| ------------------------------------ | ---------- | ------------------------------------------------------------------------ |
| id | String | The Webhook ID used for delivering the event |
| applicationId | String | The Application ID that registered this webhook |
| type | String | The triggered event's type |
| event.paymentId | String | The VRP Payment ID the event was triggered for |
| event.statusDetails.status | String | The VRP Payment's terminal status |
| event.statusDetails.isoStatus.code | String | The VRP Payment's ISO 20022 status code (as provided by the institution) |
| event.statusDetails.isoStatus.name | String | The VRP Payment's ISO 20022 status name (as provided by the institution) |
| event.statusDetails.statusUpdateDate | Date-Time | The time when the VRP Payment's status was last updated |
| metadata.tracingId | String | The Tracing ID of the event |
| metadata.user | Object | **Optional.** The metadata provided at Webhook registration |
More details on status format and meaning can be found on the [Payment Status](/payments/payment-resources/payment-status) page.
### Get Mandate Details
Call `GET /variable-recurring-payments/commercial/consents/{consentId}` to retrieve details about a particular cVRP mandate.
See [API specification](/api-reference/variable-recurring-payments/get-commercial-vrp-consent-details)
### Cancel a Mandate
As part of cVRP you will need to provide your payers the active consents visibility. Payers must have ability to cancel a cVRP long lived consent at any time, either through their bank or through the merchant's interface.
Call `DELETE /consents/{consentId}` to revoke a chosen consent.
See [API specification](/api-reference/consents/delete-consent)
Mandates that have not been used for 13 consecutive months must be cancelled. Yapily will notify you when a mandate approaches this threshold.
## Get VRP Payment Details
Call `GET /variable-recurring-payments/payments/{paymentId}/details` to retrieve details about a particular VRP payment.
See [API specification](/api-reference/variable-recurring-payments/get-vrp-payment-details)
It is highly advised to use the Webhook notifications described above to receive updates on VRP payment status changes instead of polling on this endpoint, because there are rate limits imposed on all endpoints.
## Further Reading
For your next steps, you may want to review the following documentation pages:
* [cVRP Institution Coverage](/payments/vrps/coverage#commercial-vrp)
* [Mandate Details](/payments/vrps/mandate-details)
* [Additional Information](/payments/vrps/additional-information)
* [Webhooks](/tools-and-services/webhooks/introduction)
# Introduction
Source: https://docs.yapily.com/payments/vrps/introduction
Introduction to Variable Recurring Payments (VRPs) with Yapily. Enable flexible, automated bank payments with customer-defined limits for open banking use cases.
Authorise once and collect payments over time.
Commercial VRP (cVRP) is available as a Private Beta version. Please contact your Customer Success Manager if you would like to access it.
## Introduction
Yapily Variable Recurring Payments (VRP) enable you to carry-out any number of payments over time, subject to the limits agreed by the payee at authorisation.
The limits agreed at authorisation include:
* time period during which the payments can be carried out
* maximum amount per payment
* maximum amount over a time period (such as week or year)
### VRP Mandate
The **VRP Mandate** is the core agreement that the user approves during the authorisation. It is tied to the Consent generated after authorisation, detailing the limits that will govern all VRP payments that are made with said Consent.
See details about the [VRP Mandate](/payments/vrps/mandate-details).
### VRP Types
There are two types of Variable Recurring Payments available through Yapily:
**Sweeping VRP**, mandated by the CMA Order, allows transferring money between two accounts belonging to the same person or business. Yapily supports Sweeping VRP for both consumer and business accounts.
**Commercial VRP (cVRP)** enables the payer to set up recurring payments from their bank account to a business, for example, for energy bills, mobile phone contracts, rail season tickets, mortgage repayments, or payments into savings and investment accounts — without re-authorising each payment. Yapily offers cVRP through its participation in the UK Payments Initiative (UKPI) scheme. cVRP scheme currently supports consumer accounts only.
See additional information on the [current scope of VRP](/payments/vrps/additional-information#scope).
### Use-Cases
The utility of VRP payments lies in their flexibility. Many recurring payments aren't for a fixed amount, and requiring fresh authorization for every small variation creates unnecessary friction. The VRP flow solves this by letting a user authorise a payment instruction just once with built-in protections via the limits described above.
* Automatically move money to a savings account whenever another account's balance is high
* Automatically clearing a credit card balance
* Topping up an account based on some rules
#### Wave 1 Scope
**Utilities & telecoms**
* Paying electricity, gas, or water bills that vary each month
* Paying broadband, fixed phone line, or mobile phone service contracts
**Transport**
* Purchasing rail tickets or season passes from National Rail train operators
**Regulated financial services**
* Making mortgage repayments to an FCA-regulated provider
* Contributing to a pension scheme authorised by The Pensions Regulator
* Paying into savings, ISAs, or investment accounts protected by the FSCS
**E-money accounts**
* Topping up an FCA-authorised e-money account, such as a digital wallet or prepaid card
**Charities**
* Making donations to registered charities via charity platform providers
#### Wave 2 and beyond
The cVRP scheme is expected to expand significantly, with e-commerce, variable subscription services, and further use case categories planned for future waves.
Don't see your use case? [Let us know](https://www.yapily.com/company/get-started) how you would like to use Yapily VRP.
## Advantages
There are a few benefits of using VRP payments over direct debit, standing orders, or card continuous payment authority (CPA):
* VRPs are direct account-to-account payments, so they **avoid payment fees** associated with payment processing.
* VRPs use Faster Payment Service, so the payment **arrives instantly**.
* VRPs provide **transparency and flexibility** to the user. They only need to authorise once, and then they can change or revoke the VRP mandate terms at any time.
* VRP mandates are created and authorised **using Strong Customer Authentication** (SCA).
* Commercial VRP includes **built-in payer protections** under the UKPI scheme, including a formal dispute process
## End User Journey
**The sweeping payments experience** can be embedded into any application. You build and self-host the user-facing screens, giving you full ownership and control over the experience in your application, with the Yapily VRP Payments API powering the payments behind the scenes.
**Note:** We recommend you follow our PIS UX guidelines for examples of best practices when building the user-facing screens.
**Note:** Banks use different methods to authenticate and collect consent from users. Yapily supports all user authorisation flows and you may need to implement multiple user authorisation flows depending on which banks you want to integrate with.
**For Commercial Variable Recurring Payments**, Yapily provides hosted consent and mandate setup pages for cVRP. This ensures all regulatory disclosure and requirements under the UKPI scheme are met out of the box.
## Get Started
Next, see the [Get Started](/payments/vrps/get-started) page to get familiarised with the details of our **Sweeping and Commercial VRP** flows.
***
## Related resources
### Product Resources
* [VRP Mandate Details](/payments/vrps/mandate-details) - Understanding VRP mandates
* [VRP Coverage](/payments/vrps/coverage) - Supported institutions
* [Payment Resources](/payments/payment-resources/payment-features) - Payment features and constraints
### Implementation Resources
For error handling, retry strategies, webhooks, testing, and support, see our [Developer Resources](/resources/overview) guide.
# Mandate Details
Source: https://docs.yapily.com/payments/vrps/mandate-details
Technical reference for VRP mandate parameters in the Yapily API. Covers maximum amount, frequency, date ranges, and merchant category codes for recurring mandates.
Technical details about our handling of VRP mandates for payment validation.
Commercial VRP (cVRP) is available as a Private Beta version. Please contact your Customer Success Manager if you would like to access it.
All VRP periods reset **at midnight (UTC time)**, so consent-aligned periods do not take into account the time that the consent was created. In other words, the smallest relevant unit of time is a day.
## Calendar Alignment
* `DAILY`
* Period resets at midnight (UTC time).
* `WEEKLY`
* Period resets **every Monday**.
* `EVERY_TWO_WEEKS`
* **Not available**: the OBUK standard prohibits calendar-aligned fortnightly frequency, as the ISO calendar does not support or provide any guidance on when a fortnight should start.
* `MONTHLY`
* Period resets **every 1st of every month**.
* `YEARLY`
* Period resets **every 1st of January**.
## Consent Alignment
* `DAILY`
* Period resets at midnight (UTC time).
* This is *identical* to the calendar-aligned daily period.
* `WEEKLY`
* Period resets on the **weekday** that the consent was created.
* `EVERY_TWO_WEEKS`
* Period resets on the **weekday** that the consent was created on **every other week**.
* `MONTHLY`
* Period resets on the **day of the month** that the consent was created
* e.g. if consent was created on the 16th, then the period resets every 16th of every month
* If consent was created on a day that is not present in all months (e.g. on the 31st),
then months without that day will reset on the *last day* of the month:
* e.g. 31st Aug -> 30th Sep -> 31st Oct -> ... -> 28th Feb -> 31st Mar -> ...
* e.g. 30th Aug -> 30th Sep -> 30th Oct -> ... -> 28th Feb -> 30th Mar -> ...
* `YEARLY`
* Period resets on the **day of the specific month** that the consent was created
* e.g. if consent was created on March 16th, then the period resets every March 16th
* If consent was created on 29th of February, then during *non-leap* years the period will reset on the 28th of February.
## Pro-Rata Calculation
The **very first calendar-aligned period** is subject to a pro-rata calculation. That is, if a calendar-aligned consent is created in the middle of the relevant calendar period, then its periodic limit will be reduced proportionally to the remaining days in this period.
The specific pro-rata formula is `(t - c + 1) / t` where
* `t` is the *Total number of days* in the first period
* `c` is the *number of the Current day* within the period
* the `+1` term accounts for the current day being inside the periodic limit
The pro-rata adjusted limit is **rounded down to the nearest cent** or equivalent (e.g. a pro-rata adjusted limit of `33.6789` will be rounded to `33.67`).
Examples, assuming a periodic limit of `5`:
* a weekly calendar-aligned consent created on Tuesday
* `(7 - 2 + 1) / 7 = 0.8571`
* i.e. \~86% of the Weekly limit (`4.28`) available until the end of the first week
* a monthly calendar-aligned consent created on the 16th of April
* `(30 - 16 + 1) / 30 = 0.5` (note that April has 30 days)
* i.e. 50% of the Monthly limit (`2.50`) available until the end of the first month
* a yearly calendar-aligned consent created on the 5th of October during a non-leap year
* `(365 - 278 + 1) / 365 = 0.2411` (note that 5th of October is the 278th day of a non-leap year)
* i.e. \~24% of the Yearly limit (`1.20`) available until the end of the first year
# Austria
Source: https://docs.yapily.com/registration-configurations/countries/austria
Below is the process for updating certificates for specific groups in Austria.
If you have any questions or require further assistance, please contact [Support](/resources/support).
This applies to **all Austrian Bank Groups**:
### Update Process:
To renew certificates for Austrian Groups, follow the steps below in the Yapily Console UI:
1. Navigate to your application in the Yapily Console.
2. Click the **"Edit"** button for the institution you wish to update the certificates for.
3. Assign the new certificates from the dropdown menu.
4. Click the **"Save Existing Registration"** button.
You have successfully renewed your certificates!
### Downtime
No downtime is anticipated during this process.
### Consent Impact:
As long as your Organisation Identifier remains unchanged, there will be no impact on existing consents.
# Baltics
Source: https://docs.yapily.com/registration-configurations/countries/baltics
(Estonia, Latvia, Lithuania)
Below is the process for updating certificates for specific groups in the Baltics.
If you have any questions or require further assistance, please contact [Support](/resources/support).
## SEB Baltics
### Update Process:
To renew certificates for SEB Baltics, follow the steps below in the Yapily Console UI:
1. Navigate to your application in the Yapily Console.
2. Click the **"Edit"** button for the institution you wish to update the certificates for.
3. Assign the new certificates from the dropdown menu.
4. Click the **"Save Existing Registration"** button.
You have successfully renewed your certificates!
### Downtime
No downtime is anticipated during this process.
### Consent Impact:
No impact on existing consents is anticipated.
# Belgium
Source: https://docs.yapily.com/registration-configurations/countries/belgium
Below is the process for updating certificates for specific groups in the Belgium.
If you have any questions or require further assistance, please contact [Support](/resources/support).
## Belfius
### Update Process:
To renew certificates for Belfius, follow the steps below:
1. To renew the certificates, you will need to send an email to Belfius and attach the public part of the certificates to the email.
2. They will enable the new certificates on their side, and you will be able to use the old certificates until they expire,
3. You will be able to use the new certificates once they inform you that it has been added on their side.
4. When confirmation is received, follow the below steps.
5. Navigate to your application in the Yapily Console.
6. Click the **"Edit"** button for the institution you wish to update the certificates for.
7. Assign the new certificates from the dropdown menu.
8. Click the **"Save Existing Registration"** button.
You have successfully renewed your certificates!
**Note**: The bank takes 1-3 business days to action this request. Belfius email to send the request: **[psd@belfius.be](mailto:psd@belfius.be)**
### Downtime
No downtime is anticipated during this process.
### Consent Impact:
No impact on existing consents is anticipated.
## KBC Belgium
### Update Process:
To renew certificates for KBC Belgium, follow the steps below in the Yapily Console UI:
1. Navigate to your application in the Yapily Console.
2. Click the **"Edit"** button for the institution you wish to update the certificates for.
3. Assign the new certificates from the dropdown menu.
4. Click the **"Save Existing Registration"** button.
You have successfully renewed your certificates!
### Downtime
No downtime is anticipated during this process.
### Consent Impact:
No impact on existing consents is anticipated.
## BNP Paribas
### Update Process:
To renew certificates for BNP Paribas, follow the steps below in the Yapily Console UI:
1. Navigate to your application in the Yapily Console.
2. Click the **"Edit"** button for the institution you wish to update the certificates for.
3. Assign the new certificates from the dropdown menu.
4. Click the **"Save Existing Registration"** button.
You have successfully renewed your certificates!
### Downtime
No downtime is anticipated during this process.
### Consent Impact:
No impact on existing consents is anticipated, if the DN of the certificate remains the same on both certificates.
# Finland
Source: https://docs.yapily.com/registration-configurations/countries/finland
Below is the process for updating certificates for specific groups in Finland.
If you have any questions or require further assistance, please contact [Support](/resources/support).
### Update Process:
To renew certificates for Finland Banking Groups, follow the steps below in the Yapily Console UI:
1. Navigate to your application in the Yapily Console.
2. Click the **"Edit"** button for the institution you wish to update the certificates for.
3. Assign the new certificates from the dropdown menu.
4. Click the **"Save Existing Registration"** button.
You have successfully renewed your certificates!
### Downtime:
No downtime is anticipated during this process.
### Consent Impact:
No impact on existing consents is anticipated.
# France
Source: https://docs.yapily.com/registration-configurations/countries/france
Below is the process for updating certificates for specific groups in France..
If you have any questions or require further assistance, please contact [Support](/resources/support).
## BPCE
### Update Process:
To renew certificates for BPCE, follow the steps below in the Yapily Console UI:
1. Navigate to your application in the Yapily Console.
2. Click the **"Edit"** button for the institution you wish to update the certificates for.
3. Assign the new certificates from the dropdown menu.
4. Click the **"Save Existing Registration"** button.
You have successfully renewed your certificates!
\*\*Note: \*\*The above steps need to be done for every institution separately that is in the BPCE group.
### Downtime:
No downtime is anticipated during this process.
### Consent Impact:
No impact on existing consents is anticipated if the Organisation Identifier remains the same.
## Arkea
### Update Process:
To renew certificates for Arkea, follow the steps below:
1. Navigate to the Arkea Developer portal: [https://getarkea.com/en/](https://getarkea.com/en/)
2. To renew the certificates, you will need to update all the applications that you have created on the developer portal, by adding in the new certificate chain.
3. Once you have updated the developer portal application, you can follow the below steps on Yapily UI.
4. Navigate to your application in the Yapily Console.
5. Click the **"Edit"** button for the institution you wish to update the certificates for.
6. Assign the new certificates from the dropdown menu.
7. Click the **"Save Existing Registration"** button.
You have successfully renewed your certificates!
\*\*Note: \*\*The above steps need to be done for every institution separately that is in the Arkea group.
### Downtime:
\~15-30 Min Downtime, until all the steps are completed, and the changes take effect.
### Consent Impact:
No impact on existing consents is anticipated if the client credentials remain the same.
## Societe Generale
### Update Process:
To renew certificates for Societe Generale, follow the steps below:
1. Navigate to the Societe Generale Developer portal: [https://developer.societegenerale.fr/en/sb](https://developer.societegenerale.fr/en/sb)
2. To renew the certificates, you will need to update the applications that you have created on the developer portal, by adding in the new certificate chain.
3. Once you have updated the developer portal application, you can follow the below steps on Yapily UI.
4. Navigate to your application in the Yapily Console.
5. Click the **"Edit"** button for the institution you wish to update the certificates for.
6. Assign the new certificates from the dropdown menu.
7. Click the **"Save Existing Registration"** button.
You have successfully renewed your certificates!
### Downtime:
\~15-30 Min Downtime, until all the steps are completed, and the changes take effect.
### Consent Impact:
No impact on existing consents is anticipated if the client credentials remain the same.
## Credit Agricole France
### Update Process:
1. Navigate to your application in the Yapily Console.
2. Select a Credit Agricole institution for example: **credit\_agricole\_paris**
3. Click the **"Edit"** button for the institution you wish to update the certificates for.
4. Assign the new certificates from the dropdown menu.
5. A re-register button will appear.
6. Click the **"Re-Register"** button.
7. This will update the certificate for the bank.
8. Once the above steps are completed, you can continue to update all the other Credit Agricole institutions, but instead of pressing "Re-Register", press the **"Save Existing Registration"** button.
You have successfully renewed your certificates!
\*\*Note: \*\*The **RE-REGISTER** button only needs to be done for one Credit Agricole institution, once it has been done, continue editing the other institutions and pressing **"Save Existing Registration"**
### Downtime:
No downtime is anticipated during this process.
### Consent Impact:
No impact on existing consents is anticipated if the client credentials remain the same.
## Labanque Postale
### Update Process:
To renew certificates for Labanque Postale, follow the steps below in the Yapily Console UI:
1. Navigate to your application in the Yapily Console.
2. Click the **"Edit"** button for the institution you wish to update the certificates for.
3. Assign the new certificates from the dropdown menu.
4. Click the **"Save Existing Registration"** button.
You have successfully renewed your certificates!
\*\*Note: \*\*You do not have to take any specific action with La Banque Postale as long as the following elements remain unchanged:
* providerLegalId (accreditation number / global URN)
* certificate authority (eIDAS certificate provider)
### Downtime:
No downtime is anticipated during this process.
### Consent Impact:
No impact on existing consents is anticipated if the credentials and the certificate provider remains the same.
## BNP
### Update Process:
To renew certificates for BNP group, follow the steps below in the Yapily Console UI:
1. Navigate to your application in the Yapily Console.
2. Click the **"Edit"** button for the institution you wish to update the certificates for.
3. Assign the new certificates from the dropdown menu.
4. Click the **"Save Existing Registration"** button.
You have successfully renewed your certificates!
### Downtime:
No downtime is anticipated during this process.
### Consent Impact:
No impact on existing consents is anticipated if the DN of the certificates remains the same.
# Germany
Source: https://docs.yapily.com/registration-configurations/countries/germany
Below is the process for updating certificates for specific groups in Germany.
If you have any questions or require further assistance, please contact [Support](/resources/support).
### Update Process:
To renew certificates for German Banking Groups, follow the steps below in the Yapily Console UI:
1. Navigate to your application in the Yapily Console.
2. Click the **"Edit"** button for the institution you wish to update the certificates for.
3. Assign the new certificates from the dropdown menu.
4. Click the **"Save Existing Registration"** button.
You have successfully renewed your certificates!.
### Downtime:
No downtime is anticipated during this process.
### Consent Impact:
No impact on existing consents is anticipated.
# Ireland
Source: https://docs.yapily.com/registration-configurations/countries/ireland
Below is the process for updating certificates for specific groups in Ireland.
If you have any questions or require further assistance, please contact [Support](/resources/support).
## AIB
### Update Process:
To renew certificates for AIB, follow the steps below:
1. Assign the new certificates to the existing Software Statement in the OBL directory, that was used for the initial registration.
2. Navigate to your application in the Yapily Console.
3. Click the **"Edit"** button for the institution you wish to update the certificates for.
4. Assign the new certificates from the dropdown menu.
5. Click the **"Save Existing Registration"** button.
You have successfully renewed your certificates!.
### Downtime:
No downtime is anticipated during this process.
### Consent Impact:
No impact on existing consents is anticipated, if the client credentials and the Software Statement ID remains the same.
## PTSB
### Update Process:
To renew certificates for PTSB, follow the steps below:
6. Assign the new certificates to the existing Software Statement in the OBL directory, that was used for the initial registration.
7. Navigate to your application in the Yapily Console.
8. Click the **"Edit"** button for the institution you wish to update the certificates for.
9. Assign the new certificates from the dropdown menu.
10. Click the **"Save Existing Registration"** button.
You have successfully renewed your certificates!.
### Downtime:
No downtime is anticipated during this process.
### Consent Impact:
No impact on existing consents is anticipated, if the client credentials and the Software Statement ID remains the same.
# Italy
Source: https://docs.yapily.com/registration-configurations/countries/italy
Below is the process for updating certificates for specific groups in Italy.
If you have any questions or require further assistance, please contact [Support](/resources/support).
## Update Process:
To renew certificates for Italy Banking Groups, follow the steps below:
1. Navigate to your application in the Yapily Console.
2. Click the **"Edit"** button for the institution you wish to update the certificates for.
3. Assign the new certificates from the dropdown menu.
4. Click the **"Save Existing Registration"** button.
You have successfully renewed your certificates!.
### Downtime:
No downtime is anticipated during this process.
### Consent Impact:
No impact on existing consents is anticipated.
# Netherlands
Source: https://docs.yapily.com/registration-configurations/countries/netherlands
Below is the process for updating certificates for specific groups inNetherlands.
If you have any questions or require further assistance, please contact [Support](/resources/support).
## ABN Amro
### Update Process:
To renew certificates for ABN Amro, follow the steps below:
1. Login to the developer portal: [https://developer.abnamro.com/](https://developer.abnamro.com/)
2. Raise a support ticket for ABN Amro with a change request for the certificates
3. ABN Amro will contact you to agree on a date and time when the certificates should be changed.
4. When confirmation from the bank is received, that the certificates were changed, you can proceed to the below steps.
5. Navigate to your application in the Yapily Console.
6. Click the **"Edit"** button for the institution you wish to update the certificates for.
7. Assign the new certificates from the dropdown menu.
8. Click the **"Save Existing Registration"** button.
You have successfully renewed your certificates!.
\*\*Note: IMPORTANT \*\*- Please make sure to agree on a time that you would be available to make the change on Yapily UI Immediately once confirmation of the change is received , as when ABN Amro changes the certificates, the current ones will no longer be available, and API calls using the old certificates will fail.
### Downtime:
\~15-30 min downtime is anticipated during this process.
### Consent Impact:
No impact on existing consents is anticipated.
## Rabobank
### Update Process:
To renew certificates for Rabobank, follow the steps below:
1. Login to the developer portal: [https://developer.rabobank.nl/](https://developer.rabobank.nl/)
2. Navigate to the developer portal application where your registration credentials were created.
3. Change the certificate chains on the application to the new certificates.
4. Once the certificate chains are changed, you can proceed to the below steps.
5. Navigate to your application in the Yapily Console.
6. Click the **"Edit"** button for the institution you wish to update the certificates for.
7. Assign the new certificates from the dropdown menu.
8. Click the **"Save Existing Registration"** button.
You have successfully renewed your certificates!.
\*\*Note: IMPORTANT \*\*- Please make sure to immediately change the certificates on Yapily UI also, as when you change the certificates on the developer portal, the old ones on Yapily UI will no longer be accepted by Rabobank, and API calls using the old certificates will fail.
### Downtime:
\~15-30 min downtime is anticipated during this process.
### Consent Impact:
No impact on existing consents is anticipated.
## Devolksbank
### Update Process:
To renew certificates for Devolksbank, follow the steps below:
1. Navigate to your application in the Yapily Console.
2. Click the **"Edit"** button for the institution you wish to update the certificates for.
3. Assign the new certificates from the dropdown menu.
4. Click the **"Save Existing Registration"** button.
You have successfully renewed your certificates!.
### Downtime:
No downtime is anticipated during this process.
### Consent Impact:
No impact on existing consents is anticipated.
# Nordics
Source: https://docs.yapily.com/registration-configurations/countries/nordics
Below is the process for updating certificates for specific groups in the Nordics.
If you have any questions or require further assistance, please contact [Support](/resources/support).
## BankData
### Update Process:
To renew certificates for BankData, follow the steps below:
1. To renew the certificates, you will need to send an email to BankData: [api-dev-support@bankdata.dk](mailto:api-dev-support@bankdata.dk)
2. To the email you will need to attach you new QWAC public certificate part, and agree on a time with them, when the change should be made
3. When confirmation is received from BankData that the certificates were changed on their side, follow the below steps.
4. Navigate to your application in the Yapily Console.
5. Click the **"Edit"** button for the institution you wish to update the certificates for.
6. Assign the new certificates from the dropdown menu.
7. Click the **"Save Existing Registration"** button.
You have successfully renewed your certificates!.
**Note**: If your new QWAC eIDAS is issued by another QTSP than your current QWAC eIDAS, please inform them as soon as possible as they might have to install a full certificate chain with their IT partners.
### Downtime:
No downtime is anticipated during this process.
### Consent Impact:
No impact on existing consents is anticipated.
## BEC
### Update Process:
To renew certificates for BEC, follow the steps below:
1. To renew the certificates, you will need to do a Dynamic registration for all of the institutions that are a part of BEC group.
2. Navigate to your application in the Yapily Console.
3. Click the **"Edit"** button for the institution you wish to update the certificates for.
4. Assign the new certificates from the dropdown menu.
5. Click the **"Complete Bank Registration"** button.
You have successfully renewed your certificates!.
**Note**: The above process needs to be done for all BEC institutions separately.
### Downtime:
No downtime is anticipated during this process.
### Consent Impact:
Consents will be lost during this renewal. New consents will need to be generated for the new certificates, active consents will still be usable while using old certificates..
## DNB
### Update Process:
To renew certificates for DNB, follow the steps below:
1. Navigate to your application in the Yapily Console.
2. Click the **"Edit"** button for the institution you wish to update the certificates for.
3. Assign the new certificates from the dropdown menu.
4. Click the **"Save Existing Registration"** button.
You have successfully renewed your certificates!.
### Downtime:
No downtime is anticipated during this process.
### Consent Impact:
No impact on existing consents is anticipated
## Luminor
### Update Process:
To renew certificates for Luminor, follow the steps below:
1. Navigate to your application in the Yapily Console.
2. Click the **"Edit"** button for the institution you wish to update the certificates for.
3. Assign the new certificates from the dropdown menu.
4. Click the **"Save Existing Registration"** button.
You have successfully renewed your certificates!.
### Downtime:
No downtime is anticipated during this process.
### Consent Impact:
No impact on existing consents is anticipated.
## Nordea
### Update Process:
To renew certificates for Nordea, follow the steps below:
1. Navigate to your application in the Yapily Console.
2. Click the **"Edit"** button for the institution you wish to update the certificates for.
3. Assign the new certificates from the dropdown menu.
4. Click the **"Save Existing Registration"** button.
You have successfully renewed your certificates!.
### Downtime:
No downtime is anticipated during this process.
### Consent Impact:
No impact on existing consents is anticipated.
## SEB Sweden
### Update Process:
To renew certificates for SEB Sweden, follow the steps below:
1. To renew the certificates for SEB, an email needs to be sent to them: [openbanking@seb.lt](mailto:openbanking@seb.lt)
2. The public parts of both certificates need to be attached to the email.
3. Wait for confirmation if any additional steps are needed to renew the certificates with them.
4. Once confirmation is received from SEB, proceed with the below steps.
5. Navigate to your application in the Yapily Console.
6. Click the **"Edit"** button for the institution you wish to update the certificates for.
7. Assign the new certificates from the dropdown menu.
8. Click the **"Save Existing Registration"** button.
You have successfully renewed your certificates!.
**Note:** Make sure to agree a time window with SEB when the certificates would be updated on their side, so that you could update the certificates on Yapily UI, this might cause possible downtime. A response from SEB might take 1-3 business days.
### Downtime:
Possible \~30 Min downtime is anticipated during this process, while the certificates are being updated on SEB side, and Yapily UI.
### Consent Impact:
No impact on existing consents is anticipated.
## Swedbank (Sweden, Lithuania, Latvia, Estonia)
### Update Process:
To renew certificates for Swedbank, follow the steps below:
1. Navigate to your application in the Yapily Console.
2. Click the **"Edit"** button for the institution you wish to update the certificates for.
3. Assign the new certificates from the dropdown menu.
4. Click the **"Save Existing Registration"** button.
You have successfully renewed your certificates!.
### Downtime:
No downtime is anticipated during this process.
### Consent Impact:
No impact on existing consents is anticipated.
# Portugal
Source: https://docs.yapily.com/registration-configurations/countries/portugal
Below is the process for updating certificates for specific groups in Portugal.
If you have any questions or require further assistance, please contact [Support](/resources/support).
### Update Process:
To renew certificates for Portugal Banking Groups, follow the steps below:
1. Navigate to your application in the Yapily Console.
2. Click the **"Edit"** button for the institution you wish to update the certificates for.
3. Assign the new certificates from the dropdown menu.
4. Click the **"Save Existing Registration"** button.
You have successfully renewed your certificates!.
### Downtime:
No downtime is anticipated during this process.
### Consent Impact:
No impact on existing consents is anticipated.
# Spain
Source: https://docs.yapily.com/registration-configurations/countries/spain
Below is the process for updating certificates for specific groups in Spain.
If you have any questions or require further assistance, please contact [Support](/resources/support).
### Update Process:
To renew certificates for Spain Banking Groups, follow the steps below:
1. Navigate to your application in the Yapily Console.
2. Click the **"Edit"** button for the institution you wish to update the certificates for.
3. Assign the new certificates from the dropdown menu.
4. Click the **"Save Existing Registration"** button.
You have successfully renewed your certificates!.
### Downtime:
No downtime is anticipated during this process.
### Consent Impact:
No impact on existing consents is anticipated.
# Sweden
Source: https://docs.yapily.com/registration-configurations/countries/sweden
Below is the process for updating certificates for specific groups in Sweden.
If you have any questions or require further assistance, please contact [Support](/resources/support).
## Skandia
### Update Process:
To renew certificates for Sweden Banking Group, follow the steps below:
1. Navigate to your application in the Yapily Console.
2. Click the **"Edit"** button for the institution you wish to update the certificates for.
3. Assign the new certificates from the dropdown menu.
4. Click the **"Save Existing Registration"** button.
You have successfully renewed your certificates!.
### Downtime:
No downtime is anticipated during this process.
### Consent Impact:
No impact on existing consents is anticipated.
# United Kingdom
Source: https://docs.yapily.com/registration-configurations/countries/uk
Below is the process for updating certificates for specific groups in the UK.
If you have any questions or require further assistance, please contact [Support](/resources/support).
## AIB
### Update Process:
To renew certificates for AIB, follow the steps below:
1. Make sure that the new certificates are uploaded to the OBL directory.
2. Associate the new certificates to the existing registration Software Statement ID.
3. Navigate to your application in the Yapily Console.
4. Click the **"Edit"** button for the institution you wish to update the certificates for.
5. Assign the new certificates from the dropdown menu.
6. Click the **"Save Existing Registration"** button.
You have successfully renewed your certificates!.
### Downtime:
No downtime is anticipated during this process.
### Consent Impact:
No impact on existing consents is anticipated, if the registration details remain the same. If new credentials or Software Statement are used, the old consents will not be available, as it would be considered a different registration.
## Barclays
### Update Process:
To renew certificates for Barclays, follow the steps below:
1. Make sure that the new certificates are uploaded to the OBL directory.
2. Associate the new certificates to the existing registration Software Statement ID.
3. Navigate to your application in the Yapily Console.
4. Click the **"Edit"** button for the institution you wish to update the certificates for.
5. Assign the new certificates from the dropdown menu.
6. Click the **"Save Existing Registration"** button.
You have successfully renewed your certificates!.
### Downtime:
No downtime is anticipated during this process.
### Consent Impact:
No impact on existing consents is anticipated, if the registration details remain the same. If new credentials or Software Statement are used, the old consents will not be available, as it would be considered a different registration.
## Bank of Ireland
### Update Process:
To renew certificates for Bank of Ireland, follow the steps below:
1. Make sure that the new certificates are uploaded to the OBL directory.
2. Associate the new certificates to the existing registration Software Statement ID.
3. Navigate to your application in the Yapily Console.
4. Click the **"Edit"** button for the institution you wish to update the certificates for.
5. Assign the new certificates from the dropdown menu.
6. Click the **"Save Existing Registration"** button.
You have successfully renewed your certificates!.
### Downtime:
No downtime is anticipated during this process.
### Consent Impact:
No impact on existing consents is anticipated, if the registration details remain the same. If new credentials or Software Statement are used, the old consents will not be available, as it would be considered a different registration.
## Capital One
### Update Process:
To renew certificates for Capital One, follow the steps below:
1. Make sure that the new certificates are uploaded to the OBL directory.
2. Associate the new certificates to the existing registration Software Statement ID.
3. Navigate to your application in the Yapily Console.
4. Click the **"Edit"** button for the institution you wish to update the certificates for.
5. Assign the new certificates from the dropdown menu.
6. Click the **"Save Existing Registration"** button.
You have successfully renewed your certificates!.
### Downtime:
No downtime is anticipated during this process.
### Consent Impact:
No impact on existing consents is anticipated, if the registration details remain the same. If new credentials or Software Statement are used, the old consents will not be available, as it would be considered a different registration.
## Cash Plus
### Update Process:
To renew certificates for Cash Plus, follow the steps below:
1. Make sure that the new certificates are uploaded to the OBL directory.
2. Associate the new certificates to the existing registration Software Statement ID.
3. Navigate to your application in the Yapily Console.
4. Click the **"Edit"** button for the institution you wish to update the certificates for.
5. Assign the new certificates from the dropdown menu.
6. Click the **"Save Existing Registration"** button.
You have successfully renewed your certificates!.
### Downtime:
No downtime is anticipated during this process.
### Consent Impact:
No impact on existing consents is anticipated, if the registration details remain the same. If new credentials or Software Statement are used, the old consents will not be available, as it would be considered a different registration.
## Yorkshire Building Society
### Update Process:
To renew certificates for YBS, follow the steps below:
1. Make sure that the new certificates are uploaded to the OBL directory.
2. Associate the new certificates to the existing registration Software Statement ID.
3. Navigate to your application in the Yapily Console.
4. Click the **"Edit"** button for the institution you wish to update the certificates for.
5. Assign the new certificates from the dropdown menu.
6. Click the **"Save Existing Registration"** button.
You have successfully renewed your certificates!.
### Downtime:
No downtime is anticipated during this process.
### Consent Impact:
No impact on existing consents is anticipated, if the registration details remain the same. If new credentials or Software Statement are used, the old consents will not be available, as it would be considered a different registration.
## Cumberland Building Society
### Update Process:
To renew certificates for Cumberland Building Society, follow the steps below:
1. Make sure that the new certificates are uploaded to the OBL directory.
2. Associate the new certificates to the existing registration Software Statement ID.
3. Navigate to your application in the Yapily Console.
4. Click the **"Edit"** button for the institution you wish to update the certificates for.
5. Assign the new certificates from the dropdown menu.
6. Click the **"Save Existing Registration"** button.
You have successfully renewed your certificates!.
### Downtime:
No downtime is anticipated during this process.
### Consent Impact:
No impact on existing consents is anticipated, if the registration details remain the same. If new credentials or Software Statement are used, the old consents will not be available, as it would be considered a different registration.
## Virgin Money
### Update Process:
To renew certificates for Virgin Money, follow the steps below:
1. Make sure that the new certificates are uploaded to the OBL directory.
2. Associate the new certificates to the existing registration Software Statement ID.
3. Navigate to your application in the Yapily Console.
4. Click the **"Edit"** button for the institution you wish to update the certificates for.
5. Assign the new certificates from the dropdown menu.
6. Click the **"Save Existing Registration"** button.
You have successfully renewed your certificates!.
### Downtime:
No downtime is anticipated during this process.
### Consent Impact:
No impact on existing consents is anticipated, if the registration details remain the same. If new credentials or Software Statement are used, the old consents will not be available, as it would be considered a different registration.
## Danske Bank
### Update Process:
To renew certificates for Danske Bank, follow the steps below:
1. Make sure that the new certificates are uploaded to the OBL directory.
2. Associate the new certificates to the existing registration Software Statement ID.
3. Navigate to your application in the Yapily Console.
4. Click the **"Edit"** button for the institution you wish to update the certificates for.
5. Assign the new certificates from the dropdown menu.
6. Click the **"Save Existing Registration"** button.
You have successfully renewed your certificates!.
### Downtime:
No downtime is anticipated during this process.
### Consent Impact:
No impact on existing consents is anticipated, if the registration details remain the same. If new credentials or Software Statement are used, the old consents will not be available, as it would be considered a different registration.
## Handelsbanken UK
### Update Process:
To renew certificates for Handelsbanken UK, follow the steps below:
1. Make sure that the new certificates are uploaded to the OBL directory.
2. Associate the new certificates to the existing registration Software Statement ID.
3. Navigate to your application in the Yapily Console.
4. Click the **"Edit"** button for the institution you wish to update the certificates for.
5. Assign the new certificates from the dropdown menu.
6. Click the **"Save Existing Registration"** button.
You have successfully renewed your certificates!.
### Downtime:
No downtime is anticipated during this process.
### Consent Impact:
No impact on existing consents is anticipated, if the registration details remain the same. If new credentials or Software Statement are used, the old consents will not be available, as it would be considered a different registration.
## Hoare
### Update Process:
To renew certificates for Hoare, follow the steps below:
1. Make sure that the new certificates are uploaded to the OBL directory.
2. Associate the new certificates to the existing registration Software Statement ID.
3. Navigate to your application in the Yapily Console.
4. Click the **"Edit"** button for the institution you wish to update the certificates for.
5. Assign the new certificates from the dropdown menu.
6. Click the **"Save Existing Registration"** button.
You have successfully renewed your certificates!.
### Downtime:
No downtime is anticipated during this process.
### Consent Impact:
No impact on existing consents is anticipated, if the registration details remain the same. If new credentials or Software Statement are used, the old consents will not be available, as it would be considered a different registration.
## HSBC
### Update Process:
To renew certificates for HSBC, follow the steps below:
1. Make sure that the new certificates are uploaded to the OBL directory.
2. Associate the new certificates to the existing registration Software Statement ID.
3. Navigate to your application in the Yapily Console.
4. Click the **"Edit"** button for the institution you wish to update the certificates for.
5. Assign the new certificates from the dropdown menu.
6. Click the **"Save Existing Registration"** button.
You have successfully renewed your certificates!.
### Downtime:
No downtime is anticipated during this process.
### Consent Impact:
No impact on existing consents is anticipated, if the registration details remain the same. If new credentials or Software Statement are used, the old consents will not be available, as it would be considered a different registration.
## Lloyds Banking Group
### Update Process:
To renew certificates for Lloyds, follow the steps below:
1. Make sure that the new certificates are uploaded to the OBL directory.
2. Associate the new certificates to the existing registration Software Statement ID.
3. Navigate to your application in the Yapily Console.
4. Click the **"Edit"** button for the institution you wish to update the certificates for.
5. Assign the new certificates from the dropdown menu.
6. Click the **"Save Existing Registration"** button.
You have successfully renewed your certificates!.
### Downtime:
No downtime is anticipated during this process.
### Consent Impact:
No impact on existing consents is anticipated, if the registration details remain the same. If new credentials or Software Statement are used, the old consents will not be available, as it would be considered a different registration.
## Monzo
### Update Process:
To renew certificates for Monzo, follow the steps below:
1. Make sure that the new certificates are uploaded to the OBL directory.
2. Associate the new certificates to the existing registration Software Statement ID.
3. Navigate to your application in the Yapily Console.
4. Click the **"Edit"** button for the institution you wish to update the certificates for.
5. Assign the new certificates from the dropdown menu.
6. Click the **"Save Existing Registration"** button.
You have successfully renewed your certificates!.
### Downtime:
No downtime is anticipated during this process.
### Consent Impact:
No impact on existing consents is anticipated, if the registration details remain the same. If new credentials or Software Statement are used, the old consents will not be available, as it would be considered a different registration.
## Nationwide
### Update Process:
To renew certificates for Nationwide, follow the steps below:
1. Make sure that the new certificates are uploaded to the OBL directory.
2. Associate the new certificates to the existing registration Software Statement ID.
3. Navigate to your application in the Yapily Console.
4. Click the **"Edit"** button for the institution you wish to update the certificates for.
5. Assign the new certificates from the dropdown menu.
6. Click the **"Save Existing Registration"** button.
You have successfully renewed your certificates!.
### Downtime:
No downtime is anticipated during this process.
### Consent Impact:
No impact on existing consents is anticipated, if the registration details remain the same. If new credentials or Software Statement are used, the old consents will not be available, as it would be considered a different registration.
## Payoneer
### Update Process:
To renew certificates for Payoneer, follow the steps below:
1. Make sure that the new certificates are uploaded to the OBL directory.
2. Associate the new certificates to the existing registration Software Statement ID.
3. Navigate to your application in the Yapily Console.
4. Click the **"Edit"** button for the institution you wish to update the certificates for.
5. Assign the new certificates from the dropdown menu.
6. Click the **"Save Existing Registration"** button.
You have successfully renewed your certificates!.
### Downtime:
No downtime is anticipated during this process.
### Consent Impact:
No impact on existing consents is anticipated, if the registration details remain the same. If new credentials or Software Statement are used, the old consents will not be available, as it would be considered a different registration.
## PayPal
### Update Process:
To renew certificates for Paypal, follow the steps below:
1. Make sure that the new certificates are uploaded to the OBL directory.
2. Associate the new certificates to the existing registration Software Statement ID.
3. Navigate to your application in the Yapily Console.
4. Click the **"Edit"** button for the institution you wish to update the certificates for.
5. Assign the new certificates from the dropdown menu.
6. Click the **"Save Existing Registration"** button.
You have successfully renewed your certificates!.
### Downtime:
No downtime is anticipated during this process.
### Consent Impact:
No impact on existing consents is anticipated, if the registration details remain the same. If new credentials or Software Statement are used, the old consents will not be available, as it would be considered a different registration.
## Natwest Group
### Update Process:
To renew certificates for Natwest Group, follow the steps below:
1. Make sure that the new certificates are uploaded to the OBL directory.
2. Associate the new certificates to the existing registration Software Statement ID.
3. Navigate to your application in the Yapily Console.
4. Click the **"Edit"** button for the institution you wish to update the certificates for.
5. Assign the new certificates from the dropdown menu.
6. Click the **"Save Existing Registration"** button.
You have successfully renewed your certificates!.
### Downtime:
No downtime is anticipated during this process.
### Consent Impact:
No impact on existing consents is anticipated, if the registration details remain the same. If new credentials or Software Statement are used, the old consents will not be available, as it would be considered a different registration.
## Revolut
### Update Process:
To renew certificates for Revolut, follow the steps below:
1. Make sure that the new certificates are uploaded to the OBL directory.
2. Associate the new certificates to the existing registration Software Statement ID.
3. Navigate to your application in the Yapily Console.
4. Click the **"Edit"** button for the institution you wish to update the certificates for.
5. Assign the new certificates from the dropdown menu.
6. Click the **"Save Existing Registration"** button.
You have successfully renewed your certificates!.
### Downtime:
No downtime is anticipated during this process.
### Consent Impact:
No impact on existing consents is anticipated, if the registration details remain the same. If new credentials or Software Statement are used, the old consents will not be available, as it would be considered a different registration.
## Sainsbury's Bank
### Update Process:
To renew certificates for Sainsbury's Bank, follow the steps below:
1. Make sure that the new certificates are uploaded to the OBL directory.
2. Associate the new certificates to the existing registration Software Statement ID.
3. Navigate to your application in the Yapily Console.
4. Click the **"Edit"** button for the institution you wish to update the certificates for.
5. Assign the new certificates from the dropdown menu.
6. Click the **"Save Existing Registration"** button.
You have successfully renewed your certificates!.
### Downtime:
No downtime is anticipated during this process.
### Consent Impact:
No impact on existing consents is anticipated, if the registration details remain the same. If new credentials or Software Statement are used, the old consents will not be available, as it would be considered a different registration.
## Santander
### Update Process:
To renew certificates for Santander, follow the steps below:
1. Make sure that the new certificates are uploaded to the OBL directory.
2. Associate the new certificates to the existing registration Software Statement ID.
3. Navigate to your application in the Yapily Console.
4. Click the **"Edit"** button for the institution you wish to update the certificates for.
5. Assign the new certificates from the dropdown menu.
6. Click the **"Save Existing Registration"** button.
You have successfully renewed your certificates!.
### Downtime:
No downtime is anticipated during this process.
### Consent Impact:
No impact on existing consents is anticipated, if the registration details remain the same. If new credentials or Software Statement are used, the old consents will not be available, as it would be considered a different registration.
## Starling Bank
### Update Process:
To renew certificates for Starling, follow the steps below:
1. Make sure that the new certificates are uploaded to the OBL directory.
2. Associate the new certificates to the existing registration Software Statement ID.
3. Navigate to your application in the Yapily Console.
4. Click the **"Edit"** button for the institution you wish to update the certificates for.
5. Assign the new certificates from the dropdown menu.
6. Click the **"Save Existing Registration"** button.
You have successfully renewed your certificates!.
### Downtime:
No downtime is anticipated during this process.
### Consent Impact:
No impact on existing consents is anticipated, if the registration details remain the same. If new credentials or Software Statement are used, the old consents will not be available, as it would be considered a different registration.
## Tesco Bank
### Update Process:
To renew certificates for Tesco, follow the steps below:
1. Make sure that the new certificates are uploaded to the OBL directory.
2. Associate the new certificates to the existing registration Software Statement ID.
3. Navigate to your application in the Yapily Console.
4. Click the **"Edit"** button for the institution you wish to update the certificates for.
5. Assign the new certificates from the dropdown menu.
6. Click the **"Save Existing Registration"** button.
You have successfully renewed your certificates!.
### Downtime:
No downtime is anticipated during this process.
### Consent Impact:
No impact on existing consents is anticipated, if the registration details remain the same. If new credentials or Software Statement are used, the old consents will not be available, as it would be considered a different registration.
## Amex
### Update Process:
To renew certificates for Amex, follow the steps below:
1. Make sure that the new certificates are uploaded to the OBL directory.
2. Associate the new certificates to the existing registration Software Statement ID.
3. Navigate to your application in the Yapily Console.
4. Click the **"Edit"** button for the institution you wish to update the certificates for.
5. Assign the new certificates from the dropdown menu.
6. Click the **"Save Existing Registration"** button.
You have successfully renewed your certificates!.
### Downtime:
No downtime is anticipated during this process.
### Consent Impact:
No impact on existing consents is anticipated, if the registration details remain the same. If new credentials or Software Statement are used, the old consents will not be available, as it would be considered a different registration.
## Tide
### Update Process:
To renew certificates for Tide, follow the steps below:
1. Make sure that the new certificates are uploaded to the OBL directory.
2. Associate the new certificates to the existing registration Software Statement ID.
3. Navigate to your application in the Yapily Console.
4. Click the **"Edit"** button for the institution you wish to update the certificates for.
5. Assign the new certificates from the dropdown menu.
6. Click the **"Save Existing Registration"** button.
You have successfully renewed your certificates!.
### Downtime:
No downtime is anticipated during this process.
### Consent Impact:
No impact on existing consents is anticipated, if the registration details remain the same. If new credentials or Software Statement are used, the old consents will not be available, as it would be considered a different registration.
## ThinkMoney
### Update Process:
To renew certificates for ThinkMoney, follow the steps below:
1. Make sure that the new certificates are uploaded to the OBL directory.
2. Associate the new certificates to the existing registration Software Statement ID.
3. Navigate to ThinkMoney developer portal: [https://tmg.dashboard.token.io/](https://tmg.dashboard.token.io/)
4. Upload the new OBSEAL certificate to the developer portal.
5. Validate the registration details like memberID, to make sure that they have not changed.
6. If the details are the same as on your current registration, no further action is needed.
7. If the details on the developer portal have changed, make sure to change them on Yapily Console registration as well.
You have successfully renewed your certificates!.
### Downtime:
No downtime is anticipated during this process.
### Consent Impact:
Possible impact to consents, as the registration is tied to the certificates, but are also validated separately on the bank side.
## TSB
### Update Process:
To renew certificates for TSB, follow the steps below:
1. Make sure that the new certificates are uploaded to the OBL directory.
2. Associate the new certificates to the existing registration Software Statement ID.
3. Navigate to your application in the Yapily Console.
4. Click the **"Edit"** button for the institution you wish to update the certificates for.
5. Assign the new certificates from the dropdown menu.
6. Click the **"Save Existing Registration"** button.
You have successfully renewed your certificates!.
### Downtime:
No downtime is anticipated during this process.
### Consent Impact:
No impact on existing consents is anticipated, if the registration details remain the same. If new credentials or Software Statement are used, the old consents will not be available, as it would be considered a different registration.
## Unity Trust Bank
### Update Process:
To renew certificates for Unity Trust, follow the steps below:
1. Make sure that the new certificates are uploaded to the OBL directory.
2. Associate the new certificates to the existing registration Software Statement ID.
3. Navigate to Unity Trust developer portal: [https://unitytrust.dashboard.token.io/](https://unitytrust.dashboard.token.io/)
4. Upload the new OBSEAL certificate to the developer portal.
5. Validate the registration details like memberID, to make sure that they have not changed.
6. If the details are the same as on your current registration, no further action is needed.
7. If the details on the developer portal have changed, make sure to change them on Yapily Console registration as well.
You have successfully renewed your certificates!.
### Downtime:
No downtime is anticipated during this process.
### Consent Impact:
Possible impact to consents, as the registration is tied to the certificates, but are also validated separately on the bank side.
## Vanquis Bank
### Update Process:
To renew certificates for Vanquis, follow the steps below:
1. Make sure that the new certificates are uploaded to the OBL directory.
2. Associate the new certificates to the existing registration Software Statement ID.
3. Navigate to your application in the Yapily Console.
4. Click the **"Edit"** button for the institution you wish to update the certificates for.
5. Assign the new certificates from the dropdown menu.
6. Click the **"Save Existing Registration"** button.
You have successfully renewed your certificates!.
### Downtime:
No downtime is anticipated during this process.
### Consent Impact:
No impact on existing consents is anticipated, if the registration details remain the same. If new credentials or Software Statement are used, the old consents will not be available, as it would be considered a different registration.
## Wise
### Update Process:
To renew certificates for Wise, follow the steps below:
1. Make sure that the new certificates are uploaded to the OBL directory.
2. Associate the new certificates to the existing registration Software Statement ID.
3. Navigate to your application in the Yapily Console.
4. Click the **"Edit"** button for the institution you wish to update the certificates for.
5. Assign the new certificates from the dropdown menu.
6. Click the **"Save Existing Registration"** button.
You have successfully renewed your certificates!.
### Downtime:
No downtime is anticipated during this process.
### Consent Impact:
No impact on existing consents is anticipated, if the registration details remain the same. If new credentials or Software Statement are used, the old consents will not be available, as it would be considered a different registration.
## Cooperative Bank Token
### Update Process:
To renew certificates for Cooperative, follow the steps below:
1. Make sure that the new certificates are uploaded to the OBL directory.
2. Associate the new certificates to the existing registration Software Statement ID.
3. Navigate to Cooperative developer portal: [https://coop.dashboard.token.io/signin](https://coop.dashboard.token.io/signin)
4. Upload the new OBSEAL certificate to the developer portal.
5. Validate the registration details like memberID, to make sure that they have not changed.
6. If the details are the same as on your current registration, no further action is needed.
7. If the details on the developer portal have changed, make sure to change them on Yapily Console registration as well.
You have successfully renewed your certificates!.
### Downtime:
No downtime is anticipated during this process.
### Consent Impact:
Possible impact to consents, as the registration is tied to the certificates, but are also validated separately on the bank side.
## Soldo
### Update Process:
To renew certificates for Soldo, follow the steps below:
1. Make sure that the new certificates are uploaded to the OBL directory.
2. Associate the new certificates to the existing registration Software Statement ID.
3. Navigate to Soldo developer portal: [https://soldo.dashboard.token.io/](https://soldo.dashboard.token.io/)
4. Upload the new OBSEAL certificate to the developer portal.
5. Validate the registration details like memberID, to make sure that they have not changed.
6. If the details are the same as on your current registration, no further action is needed.
7. If the details on the developer portal have changed, make sure to change them on Yapily Console registration as well.
You have successfully renewed your certificates!.
### Downtime:
No downtime is anticipated during this process.
### Consent Impact:
Possible impact to consents, as the registration is tied to the certificates, but are also validated separately on the bank side.
## Mettle
### Update Process:
To renew certificates for Mettle, follow the steps below:
1. Make sure that the new certificates are uploaded to the OBL directory.
2. Associate the new certificates to the existing registration Software Statement ID.
3. Navigate to your application in the Yapily Console.
4. Click the **"Edit"** button for the institution you wish to update the certificates for.
5. Assign the new certificates from the dropdown menu.
6. Click the **"Save Existing Registration"** button.
You have successfully renewed your certificates!.
### Downtime:
No downtime is anticipated during this process.
### Consent Impact:
No impact on existing consents is anticipated, if the registration details remain the same. If new credentials or Software Statement are used, the old consents will not be available, as it would be considered a different registration.
## Chase UK
### Update Process:
To renew certificates for Chase UK, follow the steps below:
1. Make sure that the new certificates are uploaded to the OBL directory.
2. Associate the new certificates to the existing registration Software Statement ID.
3. Navigate to your application in the Yapily Console.
4. Click the **"Edit"** button for the institution you wish to update the certificates for.
5. Assign the new certificates from the dropdown menu.
6. Click the **"Save Existing Registration"** button.
You have successfully renewed your certificates!.
### Downtime:
No downtime is anticipated during this process.
### Consent Impact:
No impact on existing consents is anticipated, if the registration details remain the same. If new credentials or Software Statement are used, the old consents will not be available, as it would be considered a different registration.
# Registration Configurations
Source: https://docs.yapily.com/registration-configurations/index
Looking for a specific bank or country? Beta institutions aren't listed here. [Get in touch with our team](/resources/support) for the full picture.
# Registration Maintenance
Maintaining an up-to-date registration certificate is essential for ensuring that the registered institution is working and usable. The process involves regularly reviewing, updating, and renewing certificates when their expiry date approaches. This page provides detailed information on how to update your registration certificates, key steps to follow, and the potential impact to consents when updating a certificate or registration details.
To renew your PSD2 certificates, the process varies depending on whether you are renewing UK (OB\_Seal, OB\_Wac) or EU (Q\_Seal, Q\_Wac) certificates.
## UK Certificates
* **OB\_Seal, OB\_Wac**: These certificates can be generated through the Open Banking portal, provided your organisation is registered within the platform.
## EU Certificates
* **Q\_Seal, Q\_Wac**: These certificates must be purchased from a qualified and trusted QTSP (Qualified Trust Service Provider).
Ensuring you have valid and up-to-date certificates is essential for maintaining compliance with PSD2 regulations.
## Getting Started
Prior to updating your certificates, we strongly recommend creating a test application within the Yapily Console. This allows you to thoroughly test the registration process for each banking group, minimising the risk of unforeseen impacts on your live application. Testing one institution per banking group is sufficient to ensure a smooth transition and prevent disruptions in your live environment.
Please refer to the registration update process and its impact on consents outlined on the side menu for each country, onceyou select a country, you'll be shown the update processes for the groups of that country.
# Building with AI Agents
Source: https://docs.yapily.com/resources/ai-agents
Connect Claude, Cursor, and other AI coding agents directly to Yapily's documentation using MCP, llms.txt, and Agent Skills.
Your AI coding agent can connect directly to this documentation and look up endpoints, request parameters, and integration guidance on demand, rather than from what it already knows.
Pick whichever fits your workflow: a live connection over MCP, a plain-text copy of the docs, or an installable Agent Skill.
Every page also has a contextual menu, top right, with one-click actions to copy the page as Markdown, open it in Claude or Google AI Studio, open it in VS Code, or connect over MCP. None of them need manual setup. The sections below cover the manual path for each.
## Connect over MCP
Connecting over MCP gives your agent a live, searchable connection to this documentation.
To connect manually, add the Yapily docs MCP server to your agent's configuration. The file and field names vary slightly by tool:
```bash theme={null}
claude mcp add --transport http yapily-docs https://docs.yapily.com/mcp
```
Add to `.cursor/mcp.json`:
```json theme={null}
{
"mcpServers": {
"yapily-docs": {
"url": "https://docs.yapily.com/mcp"
}
}
}
```
Add to `.vscode/mcp.json`. VS Code uses `servers` rather than `mcpServers`, and requires an explicit `type`:
```json theme={null}
{
"servers": {
"yapily-docs": {
"type": "http",
"url": "https://docs.yapily.com/mcp"
}
}
}
```
Add to `~/.gemini/settings.json` (or `.gemini/settings.json` for a single project). Gemini CLI uses `httpUrl` rather than `url`:
```json theme={null}
{
"mcpServers": {
"yapily-docs": {
"httpUrl": "https://docs.yapily.com/mcp"
}
}
}
```
Once connected, your agent can search this documentation, fetch specific pages, and cite what it finds. No authentication is required.
## Reference the full docs as text
If your workflow doesn't support MCP, you can point an agent directly at a plain-text version of this site:
* [`/llms.txt`](/llms.txt): an index of every page with a short description, useful for agents that want to find the right page before reading it
* [`/llms-full.txt`](/llms-full.txt): the complete content of this documentation in a single file, useful when you want to give an agent full context in one request
## Agent Skills
This site also publishes a [`/skill.md`](/skill.md) file describing what Yapily's API does, its core authorisation workflow, and key constraints such as consent token lifetimes and payment reference limits. Agents and tools that support the [Agent Skills](https://agentskills.io/specification) format can discover it automatically, or install it directly:
```bash theme={null}
npx skills add https://docs.yapily.com
```
## Example prompts
Once your agent is connected, try prompts like:
* "Using the Yapily docs, show me how to create a single payment authorisation request."
* "Look up the Yapily error codes for a 500 response from the payments API."
* "What's the consent token expiry for UK accounts, according to the Yapily docs?"
Agents should treat the [OpenAPI specification](/resources/client-libraries) as the source of truth for exact request and response shapes, and this documentation for integration guidance and context.
# Changelog
Source: https://docs.yapily.com/resources/changelog
Latest updates, new features, bug fixes, and breaking changes to the Yapily Open Banking API and documentation. Subscribe to the RSS feed to stay current.
**Commercial VRP (cVRP): Barclays and Nationwide Added**
We have added **Barclays** and **Nationwide** to our Commercial VRP (cVRP) bank coverage for personal current accounts in the UK.
[View full cVRP bank coverage →](/payments/vrps/coverage)
**Categorisation List: Minor Update**
We've updated the [Data Plus categorisation list](/data/data-plus/categorisation-list) for consistency — the `credit - gambling - gambling income` category is now listed for business accounts as well as consumer accounts.
No changes to existing category values or behaviour.
**New Bank Integrations: ANNA Money & Yonder (UK)**
We have expanded our UK AIS coverage by integrating with ANNA Money and Yonder, two prominent business and consumer fintech challengers. This update provides instant Account Information Services (AIS) access to customers across the United Kingdom:
* **ANNA Money:** Expands our SME and business banking data coverage, allowing corporate clients to securely share transactional and account insights.
* **Yonder:** Introduces dedicated coverage for this rapidly growing premium lifestyle credit card provider, strengthening our retail credit card data access.
Please visit our [institution configuration](/institution-configurations/uk/Tell-Money) page to know more.
**🇪🇸 Institution Update: Cajasur Merged into Kutxabank**
Following the legal merger of Cajasur Banco into Kutxabank S.A., both entities completed their final operational and technological integration in February 2026.
As a result, Cajasur's standalone API infrastructure has been decommissioned, and all affected user flows have transitioned to Kutxabank.
**🛠️ What is changing?**
* **API Infrastructure Migration:** All end-users originating from Cajasur Banco are now routed exclusively through Kutxabank’s Open Banking APIs.
* **Token & Consent Expiry:** Legacy access tokens and active consents for Cajasur users are now invalid. Users must re-authenticate through the Kutxabank flow to generate new access tokens and establish fresh consents.
* **Payment Status Limitations:** It is no longer possible to fetch the status of historical international and SEPA payments initiated via legacy Cajasur endpoints. For outstanding historical inquiries, Third-Party Providers (TPPs) must consult Kutxabank directly using the Kutxabank TPP Support Tool.
**⚠️ Action Required**
If your application still attempts to connect to legacy Cajasur accounts, you must update your integration to route these users through the Kutxabank institution endpoint to initiate a new consent authorization flow.
**New Bank Integration: Bunq Bank (EU)**
We have expanded our European AIS coverage by integrating with Bunq, a leading mobile-first neobank based in the Netherlands. This integration provides instant Account Information Services (AIS) access to Bunq users across the following 16 countries:
* **Western Europe:** Belgium, France, Ireland, Luxembourg, Netherlands
* **DACH Region:** Austria, Germany
* **Southern Europe:** Spain, Italy, Portugal
* **Nordics:** Denmark, Estonia, Finland, Lithuania, Latvia, Sweden
Please visit our [Bunq institution configuration](/institution-configurations/netherlands/Bunq) page to know more.
**Commercial VRP (cVRP) Launch & Bulk Payments Individual Status**
Yapily has launched **Commercial VRP (cVRP)** for a defined set of approved use cases as one of the Founding Shareholders of the UK Payments Initiative (UKPI). cVRP extends variable recurring payments beyond sweeping, opening up new payment flows for your applications.
Alongside this, we've released the **Bulk Payments Individual Status** feature for enhanced bulk payment tracking.
**Commercial VRP (cVRP) - New Product:**
* Available for In-Scope Wave 1 Use Cases: Utilities & Telecoms, Railway Transport, Regulated Financial Services, E-money Instituions, and Charities
* UK-only, GBP payments from personal current accounts
* Governed by UKPI Multi-Lateral Agreement (MLA)
* Full documentation and integration guides now available
[Get started with cVRP →](/payments/vrps/get-started)
**Bulk Payments Individual Status - New Feature:**
* Track the status of individual payments within bulk payment submissions
* Monitor each payment's progress independently
[Learn about individual payment status →](/payments/bulk-payments/individual-payment-status)
**Updated Categorisation: New Category Structure for New Clients**
We have introduced an updated categorisation model for all new Yapily Data Plus clients. The new model replaces the previous flat category list with a structured three-tier hierarchy, providing greater granularity and consistency in transaction data.
**What's changing?**
* New clients will be onboarded to the updated category structure, organised as `tier1 - tier2 - tier3` (e.g. `credit - income - salary and wages`)
* The updated categories cover both **Consumer** and **Business** accounts, with expanded coverage across credit and debit transaction types
* The previous category list remains available as a legacy reference for existing clients
**Impact**
| Client type | Impact |
| -------------------- | --------------------------------------------------------------------------- |
| **Existing clients** | No changes — your integration continues to use the existing category values |
| **New clients** | Will receive the updated category format in API responses |
[View the full category reference →](/data/data-plus/categorisation-list)
**New Bank Integration: Airwallex EU (AIS)**
We have expanded our European market coverage with the addition of **Airwallex EU**, now available for **Account Information Services (AIS)**. This complements our existing Airwallex UK integration and broadens Yapily's reach across EU markets.
This integration enables you to:
* Retrieve account details and balances
* Access transaction history
* Authenticate users via standard Yapily authorisation flows
**Supported countries:** Austria, Denmark, Estonia, Finland, France, Germany, Hungary, Italy, Latvia, Lithuania, Luxembourg, Netherlands, Norway, Portugal, Romania, Sweden
Coverage varies by country. In some markets, only multi-country institutions are available alongside Airwallex EU. Check the Yapily Console for a full view of institution coverage in your target market.
**Available via:** Hosted and API integrations
**Hosted Pages — Most Popular Banks on Bank Selection Screen**
The bank selection screen on Hosted Pages now features a **Most Popular Banks** section at the top, displaying the most frequently selected banks first. All remaining banks appear under **Other Banks A–Z**, sorted alphabetically.
![Most Popular Banks]() **What's changed:**
* Most frequently used banks are promoted to the top of the list
* Remaining banks are grouped alphabetically under "Other Banks A–Z"
* Faster bank selection with less scrolling
**Applies to:** Hosted Payments (PIS) and Hosted Data (AIS)
This feature is being rolled out gradually to selected customers. If you'd like to enable it for your account, please contact your Customer Success Manager.
No changes required to your integration.
**New Bank Integration: C24 Bank (Germany)**
We have expanded our German market coverage with the addition of **C24 Bank**, now available for both **AIS (Account Information Services)** and **PIS (Payment Initiation Services)**.
This integration allows you to:
* Fetch account details, balances, and transaction history
* Initiate domestic SEPA and SEPA Instant payments
* Authenticate via standard embedded flow
For setup instructions, visit our [C24 institution configuration](/institution-configurations/germany/C24) page.
**Hosted Pages - Bank Grouping by Brand**
Banks are now grouped by brand on the bank selection screen, reducing scrolling and making it faster for users to find their institution.
**What's improved:**
* Banks grouped by brand (e.g., Sparkasse, Volksbank)
* Faster bank selection with less scrolling
* More intuitive user experience
**Available in:** Germany, France, Austria
**Applies to:** Hosted Payments (PIS) and Hosted Data (AIS)
**What's changed:**
* Most frequently used banks are promoted to the top of the list
* Remaining banks are grouped alphabetically under "Other Banks A–Z"
* Faster bank selection with less scrolling
**Applies to:** Hosted Payments (PIS) and Hosted Data (AIS)
This feature is being rolled out gradually to selected customers. If you'd like to enable it for your account, please contact your Customer Success Manager.
No changes required to your integration.
**New Bank Integration: C24 Bank (Germany)**
We have expanded our German market coverage with the addition of **C24 Bank**, now available for both **AIS (Account Information Services)** and **PIS (Payment Initiation Services)**.
This integration allows you to:
* Fetch account details, balances, and transaction history
* Initiate domestic SEPA and SEPA Instant payments
* Authenticate via standard embedded flow
For setup instructions, visit our [C24 institution configuration](/institution-configurations/germany/C24) page.
**Hosted Pages - Bank Grouping by Brand**
Banks are now grouped by brand on the bank selection screen, reducing scrolling and making it faster for users to find their institution.
**What's improved:**
* Banks grouped by brand (e.g., Sparkasse, Volksbank)
* Faster bank selection with less scrolling
* More intuitive user experience
**Available in:** Germany, France, Austria
**Applies to:** Hosted Payments (PIS) and Hosted Data (AIS)
![Bank Grouping]() No changes required to your integration.
**Error Documentation Consolidation**
We've consolidated error documentation into a single comprehensive guide that clearly explains Yapily's two error formats:
* **Enhanced format** with structured issue codes (Data Plus, Webhooks, Application Management, etc.)
* **HTTP status code format** (Financial Data, Payments, VRPs, Hosted Pages, etc.)
The new documentation includes:
* Clear product mapping showing which format each product uses
* Complete error code catalog with explanations and recommended actions
* Improved troubleshooting guidance
* Quick links from product pages to relevant error documentation
[View Error Documentation →](/resources/errors)
**Hosted Pages Expansion**: Hosted Pages (Data) is now available in Ireland and Denmark.
**Hosted Payments**: United Kingdom, Germany, Lithuania, Netherlands, Belgium, Spain, France, Austria, Portugal
**Hosted Data**: United Kingdom, Germany, Lithuania, Netherlands, Belgium, Spain, France, Austria, Portugal, Sweden, Norway, Denmark, Ireland
**Hosted Pages Now Support Sub-Applications**
Hosted Pages have been enhanced to support **sub-applications**, aligning with our broader **application management strategy**. This improvement enables greater flexibility and control across multi-merchant setups.
With this update, customers can now create and manage sub-apps for their merchants, each with its own branding and configuration, delivering a more tailored and scalable experience.
**iOS App-to-App Redirection Enhancement on Hosted Pages**
Recent iOS updates have impacted the reliability of app-to-app redirection from hosted pages. To resolve this, we've added an intermediate screen to the hosted journey for **iOS mobile users.**
Now, after the user selects their bank, they will be redirected to this new screen, which ensures a smooth transition directly to the **banking app**, rather than opening in the browser.
This update helps maintain a smooth and consistent experience for users on iOS devices. The new screen will appear as shown below:
No changes required to your integration.
**Error Documentation Consolidation**
We've consolidated error documentation into a single comprehensive guide that clearly explains Yapily's two error formats:
* **Enhanced format** with structured issue codes (Data Plus, Webhooks, Application Management, etc.)
* **HTTP status code format** (Financial Data, Payments, VRPs, Hosted Pages, etc.)
The new documentation includes:
* Clear product mapping showing which format each product uses
* Complete error code catalog with explanations and recommended actions
* Improved troubleshooting guidance
* Quick links from product pages to relevant error documentation
[View Error Documentation →](/resources/errors)
**Hosted Pages Expansion**: Hosted Pages (Data) is now available in Ireland and Denmark.
**Hosted Payments**: United Kingdom, Germany, Lithuania, Netherlands, Belgium, Spain, France, Austria, Portugal
**Hosted Data**: United Kingdom, Germany, Lithuania, Netherlands, Belgium, Spain, France, Austria, Portugal, Sweden, Norway, Denmark, Ireland
**Hosted Pages Now Support Sub-Applications**
Hosted Pages have been enhanced to support **sub-applications**, aligning with our broader **application management strategy**. This improvement enables greater flexibility and control across multi-merchant setups.
With this update, customers can now create and manage sub-apps for their merchants, each with its own branding and configuration, delivering a more tailored and scalable experience.
**iOS App-to-App Redirection Enhancement on Hosted Pages**
Recent iOS updates have impacted the reliability of app-to-app redirection from hosted pages. To resolve this, we've added an intermediate screen to the hosted journey for **iOS mobile users.**
Now, after the user selects their bank, they will be redirected to this new screen, which ensures a smooth transition directly to the **banking app**, rather than opening in the browser.
This update helps maintain a smooth and consistent experience for users on iOS devices. The new screen will appear as shown below:
![iOS Mobile Screen]() **Hosted Pages - New Consent Screen Design**
We're excited to announce the launch of a refreshed consent screen experience for our **Hosted AIS & PIS journeys across the UK and EU**.
The new bottom sheet design now appears directly on the bank selection screen creating a smoother, faster and more mobile-optimised user journey.
**What's New:**
* Increased visible space on the bank list: users can now see 9–10 banks at once (up from 4–5)
* Reduced need to scroll, making bank selection easier—especially on mobile devices
* More intuitive and streamlined consent flow in a single screen
Updated designs and details are available on [Yapily Hosted Pages UI screens](/tools-and-services/hosted-pages/ui-screens)
**This update applies to:**
* Hosted AIS and Hosted PIS journeys
* Yapily Connect and Direct customers
* All users in the UK and EU
If you have any questions or concerns, please reach out to the [Support](/resources/support) Team.
**🇩🇪 Sparda München: Update to Open Banking Flow**
Sparda München has changed its Open Banking technology provider, resulting in a shift from the redirect flow to an embedded flow. Please update the integration accordingly.
**Fineco institution in Italy**
The **'UNKNOWN'** account type for AIS/Data requests from Fineco (Italy) will be replaced with specific account types per [Yapily API specifications](/data/tutorial-account-and-trans-data#3-return-data), Please see [Get Account](/api-reference/financial-data/get-account).
Please review your current usage of the **'UNKNOWN'** account type and prepare to use the new, specific account types per your business needs.
**🇳🇱 New Bank Integration: Knab Netherlands**
We're excited to announce a new integration in Netherlands — **Knab** is now available!
You can now **connect to and initiate payments** with Knab. This connection supports both **AIS (Account Information Services) and PIS (Payment Initiation Services).**
**Deprecation Notice: Legacy Endpoints Now Deprecated**
As previously communicated, the following **legacy endpoints have now been officially deprecated** and are scheduled for removal from **Production**:
* **/features** – This endpoint, which listed all features supported by Yapily, is deprecated. Please use [Get Institutions](/api-reference/institutions/get-institutions) instead, which provides institution-specific features and geographic coverage.
* **/me** – This endpoint, used to retrieve application metadata and institution details, is no longer supported. For metadata, use [Get application details](/api-reference/application-management/get-application-details). For institution information, refer to [Get Institutions](/api-reference/institutions/get-institutions).
Please update your integrations as soon as possible to avoid any disruption. For guidance on transitioning to the updated endpoints, feel free to contact our [support](/resources/support) team.
**DataPlus Enrichment Only**
DataPlus Enrichment Only API - this API enhancement allows customers to submit their own transaction data and categorise them useful links:
* [Yapily Data Plus](/data/data-plus/overview)
* [Tutorial: Getting Enrichment Only](/data/data-plus/tutorial-enrichment)
* [Enrichment](/api-reference/data-plus/enrichment)
**⚡️ SEPA Instant Enabled for Deutsche Bank Group**
We're pleased to announce that **SEPA Instant payments** are now supported for the **Deutsche Bank Group.**
You can now initiate real-time payments with the following institutions:
* **Deutsche Bank**
* **Norisbank**
* **Postbank**
Payments are processed instantly, ensuring faster and more efficient transactions
**🇦🇹 New Bank Connection: Volksbank Austria**
We're excited to announce a new integration in Austria — **Volksbank Austria** is now available!
You can now **connect to and initiate payments** with Volksbank Austria. This connection supports both **AIS (Account Information Services)** and **PIS (Payment Initiation Services)**.
For the full list of supported institutions within this group, please visit our [Institution configuration](/institution-configurations/austria/volksbank) page.
**Hosted Payments**: We've introduced a key enhancement to our **hosted payment journey**, streamlining the process for banks that require **Payer IBAN and Name**. Previously, the PSU (Payment Service User) was always prompted to provide this information. With our latest update, when the **Payer IBAN and Name are included in the payload**, they will no longer be requested from the PSU.
**Intesa Sanpaolo introduced a change on their open banking API: retail and corporate accounts were split out to two separate API endpoints.**
As a result, Yapily API now has two separate Intesa Sanpaolo institutions:
The existing institution **Intesa Sanpaolo** from now on will provide access only to **retail accounts.**
New institution **Intesa Sanpaolo (Corporate)** will provide access to corporate accounts. For new consents, Yapily customers will need to redirect their corporate account PSUs to the new institution.
Valid consents can be still be used against the existing institution until their expiry.
**Hosted Pages Expanded - New countries**: Hosted Pages now available in these additional countries:
**Hosted Payments & Data**: Netherlands, Belgium, Spain, Lithuania, Austria, France, Portugal
**Hosted Data**: Netherlands, Belgium, Spain, Lithuania, Austria, France, Portugal, Norway, Sweden
**Data Plus - New Error Code for Transaction Retrieval Process (16002)**: This error occurs when there are no available transactions for the selected time period.
**Action Required when receiving this error:**
Adjust the from and before date parameters in your request and try again.
**Hosted Pages - Bank Pre-selected Page and Yapily Connect regulatory wording**:
* **Change 1**: An updated consent wording is now on the Hosted Pages for those using the Yapily Connect Ltd or Yapily Connect UAB AISP or PISP license, which was a regulatory requirement change.
* **Change 2**: The layout of the bank selection page when an institution is pre-selected. The user will only see the pre-selected bank, and no longer see the search bar.
**Data Plus: 'categorisationType' Field Now Mandatory**: the `categorisationType` field in the API endpoint `POST /accounts/{accountId}/transactions/categorisation` will become mandatory. Previously, this field was optional and allowed customers to choose between business and consumer categorization hierarchies
**Hosted Pages - Change to use bank "Short Name"**: The bank selection page in the Hosted Payments and Consent product has been updated to utilise the "Short Name" of the banks within an application. This change aims to present a given PSU with the more recognised name of a given bank when choosing to complete a given payment of granting consent to bank account information.
Ex: UK bank "National Westminster Bank" will now be presented as "Natwest".
**Hosted Pages - Consent Initiation Page**: We have updated the design for the Authorisation Pages in the Hosted Payments and Hosted Data UI. This release aims to provide the PSU with clearer instructions on what is required to initiate the provisioning of their consent.
**Hosted Pages - New Consent Screen Design**
We're excited to announce the launch of a refreshed consent screen experience for our **Hosted AIS & PIS journeys across the UK and EU**.
The new bottom sheet design now appears directly on the bank selection screen creating a smoother, faster and more mobile-optimised user journey.
**What's New:**
* Increased visible space on the bank list: users can now see 9–10 banks at once (up from 4–5)
* Reduced need to scroll, making bank selection easier—especially on mobile devices
* More intuitive and streamlined consent flow in a single screen
Updated designs and details are available on [Yapily Hosted Pages UI screens](/tools-and-services/hosted-pages/ui-screens)
**This update applies to:**
* Hosted AIS and Hosted PIS journeys
* Yapily Connect and Direct customers
* All users in the UK and EU
If you have any questions or concerns, please reach out to the [Support](/resources/support) Team.
**🇩🇪 Sparda München: Update to Open Banking Flow**
Sparda München has changed its Open Banking technology provider, resulting in a shift from the redirect flow to an embedded flow. Please update the integration accordingly.
**Fineco institution in Italy**
The **'UNKNOWN'** account type for AIS/Data requests from Fineco (Italy) will be replaced with specific account types per [Yapily API specifications](/data/tutorial-account-and-trans-data#3-return-data), Please see [Get Account](/api-reference/financial-data/get-account).
Please review your current usage of the **'UNKNOWN'** account type and prepare to use the new, specific account types per your business needs.
**🇳🇱 New Bank Integration: Knab Netherlands**
We're excited to announce a new integration in Netherlands — **Knab** is now available!
You can now **connect to and initiate payments** with Knab. This connection supports both **AIS (Account Information Services) and PIS (Payment Initiation Services).**
**Deprecation Notice: Legacy Endpoints Now Deprecated**
As previously communicated, the following **legacy endpoints have now been officially deprecated** and are scheduled for removal from **Production**:
* **/features** – This endpoint, which listed all features supported by Yapily, is deprecated. Please use [Get Institutions](/api-reference/institutions/get-institutions) instead, which provides institution-specific features and geographic coverage.
* **/me** – This endpoint, used to retrieve application metadata and institution details, is no longer supported. For metadata, use [Get application details](/api-reference/application-management/get-application-details). For institution information, refer to [Get Institutions](/api-reference/institutions/get-institutions).
Please update your integrations as soon as possible to avoid any disruption. For guidance on transitioning to the updated endpoints, feel free to contact our [support](/resources/support) team.
**DataPlus Enrichment Only**
DataPlus Enrichment Only API - this API enhancement allows customers to submit their own transaction data and categorise them useful links:
* [Yapily Data Plus](/data/data-plus/overview)
* [Tutorial: Getting Enrichment Only](/data/data-plus/tutorial-enrichment)
* [Enrichment](/api-reference/data-plus/enrichment)
**⚡️ SEPA Instant Enabled for Deutsche Bank Group**
We're pleased to announce that **SEPA Instant payments** are now supported for the **Deutsche Bank Group.**
You can now initiate real-time payments with the following institutions:
* **Deutsche Bank**
* **Norisbank**
* **Postbank**
Payments are processed instantly, ensuring faster and more efficient transactions
**🇦🇹 New Bank Connection: Volksbank Austria**
We're excited to announce a new integration in Austria — **Volksbank Austria** is now available!
You can now **connect to and initiate payments** with Volksbank Austria. This connection supports both **AIS (Account Information Services)** and **PIS (Payment Initiation Services)**.
For the full list of supported institutions within this group, please visit our [Institution configuration](/institution-configurations/austria/volksbank) page.
**Hosted Payments**: We've introduced a key enhancement to our **hosted payment journey**, streamlining the process for banks that require **Payer IBAN and Name**. Previously, the PSU (Payment Service User) was always prompted to provide this information. With our latest update, when the **Payer IBAN and Name are included in the payload**, they will no longer be requested from the PSU.
**Intesa Sanpaolo introduced a change on their open banking API: retail and corporate accounts were split out to two separate API endpoints.**
As a result, Yapily API now has two separate Intesa Sanpaolo institutions:
The existing institution **Intesa Sanpaolo** from now on will provide access only to **retail accounts.**
New institution **Intesa Sanpaolo (Corporate)** will provide access to corporate accounts. For new consents, Yapily customers will need to redirect their corporate account PSUs to the new institution.
Valid consents can be still be used against the existing institution until their expiry.
**Hosted Pages Expanded - New countries**: Hosted Pages now available in these additional countries:
**Hosted Payments & Data**: Netherlands, Belgium, Spain, Lithuania, Austria, France, Portugal
**Hosted Data**: Netherlands, Belgium, Spain, Lithuania, Austria, France, Portugal, Norway, Sweden
**Data Plus - New Error Code for Transaction Retrieval Process (16002)**: This error occurs when there are no available transactions for the selected time period.
**Action Required when receiving this error:**
Adjust the from and before date parameters in your request and try again.
**Hosted Pages - Bank Pre-selected Page and Yapily Connect regulatory wording**:
* **Change 1**: An updated consent wording is now on the Hosted Pages for those using the Yapily Connect Ltd or Yapily Connect UAB AISP or PISP license, which was a regulatory requirement change.
* **Change 2**: The layout of the bank selection page when an institution is pre-selected. The user will only see the pre-selected bank, and no longer see the search bar.
**Data Plus: 'categorisationType' Field Now Mandatory**: the `categorisationType` field in the API endpoint `POST /accounts/{accountId}/transactions/categorisation` will become mandatory. Previously, this field was optional and allowed customers to choose between business and consumer categorization hierarchies
**Hosted Pages - Change to use bank "Short Name"**: The bank selection page in the Hosted Payments and Consent product has been updated to utilise the "Short Name" of the banks within an application. This change aims to present a given PSU with the more recognised name of a given bank when choosing to complete a given payment of granting consent to bank account information.
Ex: UK bank "National Westminster Bank" will now be presented as "Natwest".
**Hosted Pages - Consent Initiation Page**: We have updated the design for the Authorisation Pages in the Hosted Payments and Hosted Data UI. This release aims to provide the PSU with clearer instructions on what is required to initiate the provisioning of their consent.
![Hosted Auth Payment UI]() **Natwest Transaction Status Change**: From March 2024 NatWest will introduce the transaction status of "booked" for intra-day transactions that have not yet been posted, in order to align with Mobile Banking.
The change will be implemented across NatWest, Royal Bank of Scotland, Ulster Bank NI and NatWest/RBS International for personal and business banking customers who use Mobile or Online Banking.
Transaction types affected:
| Code | Description |
| ---- | ---------------------- |
| BAC | Automated Credit |
| BSP | Branch Single Payment |
| CDM | Cash & Deposit Machine |
# Client Libraries
Source: https://docs.yapily.com/resources/client-libraries
Generate API client libraries for Yapily in your preferred language using the OpenAPI specification. Supports code generation for Java, Python, Node.js, and more.
To help developers quickly create their client-side libraries in any language of their choice, we provide an OpenAPI Specification (OAS) version 3 file.
This is the same OAS that we consume ourselves to generate our server-side libraries and we are happy to share as the most accurate and complete representation of the Yapily API.
The latest version of the API definition is available [here](https://api.yapily.com/docs/v3/openapi.json).
You can find all versions in our GitHub repo [yapily-openapi](https://github.com/yapily/yapily-openapi).
This includes a **readme** explaining how to autogenerate libraries in the languages that are most popular with our customers.
# Error Handling
Source: https://docs.yapily.com/resources/errors
Handle Yapily API errors effectively. Covers error response structure, HTTP status codes, retry strategies, and solutions for the most common error scenarios.
Yapily uses two error response formats. Check which format your product uses below.
## Which Error Format Does My Product Use?
**Products using enhanced error format with structured issue codes:**
* Hosted Pages
* Data Plus
* Webhooks
* User & Application Beneficiaries
* VRP (only for payload validation)
* Bulk Payment (only for payload validation)
Scroll down to the [Enhanced Error Format Documentation](#enhanced-error-format-documentation) section for details.
**Products using HTTP status code error format:**
* Financial Data (Accounts, Transactions, Balances)
* Single Payments
* Bulk Payments
* Authorisations
* Consents
* Institutions & Users
* Variable Recurring Payments (VRPs)
Scroll down to the [HTTP Status Code Format Documentation](#http-status-code-format-documentation) section for details.
***
## Enhanced Error Format Documentation
**Used by:** Hosted Pages, Data Plus, Webhooks, User & Application Beneficiaries, VRP (payload validation), Bulk Payment (payload validation)
This format provides detailed error information with structured issue codes. For other operations, see [HTTP Status Code Format Documentation](#http-status-code-format-documentation).
### Introduction
When you make an API call to Yapily and there is an error, you will receive an error response including error codes and message fields to help you diagnose and solve the error.
We recommend building your error handling logic around the `Error Codes` and `Message` properties in the response, as these provide the most specific information about the underlying issue.
### Response Structure
When receiving an error response, it is important to note that there might be multiple error codes included. To effectively troubleshoot the problem, you need to consider all of these error codes.
When an error occurs, you'll receive a response with an `error` object containing an `issues` array:
```json theme={null}
{
"error": {
"tracingId": "0c2d0973bdd24224a65e5d0f7d1b6154",
"code": 400,
"status": "BAD_REQUEST",
"supportUrl": "https://support.yapily.com/",
"source": "YAPILY",
"issues": [
{
"type": "INVALID_PAYLOAD",
"code": "11001",
"message": "Timeout error"
},
{
"type": "INVALID_PAYLOAD",
"code": "11003",
"message": "Failed third party dependency"
}
]
}
}
```
| Field | Type | Required | Description |
| ---------------- | ---------------- | -------- | ------------------------------------------------------------------------------------------------------------------------------------------------ |
| `tracingId` | string | Yes | A unique ID assigned by Yapily to use as a reference. Provide this if you contact our support team for assistance |
| `code` | integer | Yes | Numeric HTTP status code associated with the error |
| `status` | string | Yes | Description of the HTTP status error type |
| `supportUrl` | string | Yes | The Yapily support URL where further help and support can be accessed |
| `source` | string | Yes | Indicates who triggered the failure and therefore can take action to correct it. One of: USER (the PSU), INSTITUTION (bank side error) or YAPILY |
| `issues` | array of objects | No | All issues that have been experienced whilst processing the request |
| `issues.type` | string | Yes | Identifies the error category |
| `issues.code` | string | Yes | Identifies the specific error that has occurred. See [error code catalog](#error-catalogue) |
| `issues.message` | string | No | Message associated with the error |
If you need to [contact support](/resources/support), we advise you share the error response with us, or if not possible include the tracingId and the error codes so we can identify your request and trace the origin of the issue.
### Error Code Structure
The error codes are structured as follows:
* **First 2 digits**: Represent the group of the error
* **Last 3 digits**: Represent the specific error within the group
### Error Catalogue
Below is a list of possible error issue codes, along with additional information about how to resolve them.
#### Unknown Error
We will be sending this error if we encountered an error we haven't seen yet and does not have a handler on our side. If you see this error please [contact support](/resources/support).
| Code | Http Status Code | Text | Explanation | Action |
| ---- | ---------------- | ------------- | ------------------------- | --------------- |
| 0 | 400 | Unknown error | An unknown error occurred | Try again later |
#### 10xxx Pre-Flight Checks
This error group represents issues that occur either before payload and header validation, or during third-party calls that use the data from the original request.
| Code | Http Status Code | Text | Explanation | Action |
| ----- | ---------------- | ----------------------------- | ----------------------------------------------------------- | --------------------------------------------- |
| 10001 | 408 | Timeout error | The request timed out as it took too long to respond | Try again |
| 10002 | 429 | Unattended limit | Too many requests in a given amount of time | Wait before retrying |
| 10003 | 424 | Failed third party dependency | An error occurred with a third party | Try again later |
| 10004 | 500 | Internal server error | Internal server error | Reach out to support |
| 10005 | 422 | Retry limit reached | Maximum number of retries reached | Check our API documentation on retry handling |
| 10006 | 422 | Unprocessable entity | Unable to process the instructions contained in the request | Check our API documentation |
#### 11xxx Payload Validation
| Code | Http Status Code | Text | Explanation | Action |
| ----- | ---------------- | --------------------------------------------------------------------------- | ----------------------------------------------------------------------- | ------------------------------------------------------------------------------- |
| 11001 | 400 | The server could not understand the request due to invalid format or syntax | Something in the request is not specified correctly | Check our API documentation |
| 11002 | 400 | Invalid parameter | A parameter is not specified correctly, for example too many characters | Check our API documentation for the field requirements for the request |
| 11003 | 400 | Missing parameter | A required parameter is not included in the request | Check our API documentation to identify the required parameters for the request |
#### 12xxx Request Header Validation
| Code | Http Status Code | Text | Explanation | Action |
| ----- | ---------------- | ----------------------------- | --------------------------------------------- | ----------------------------------------------------------------------------- |
| 12001 | 400 | Invalid header type or syntax | A header is not specified correctly | Check our API documentation for the header requirements for the request |
| 12002 | 400 | Missing mandatory header | A required header is missing from the request | Check our API documentation to see which headers are required for the request |
#### 13xxx Authorisation Process
| Code | Http Status Code | Text | Explanation | Action |
| ----- | ---------------- | ------------------------------- | ------------------------------------------------------------------------------------------- | --------------------------------------------------------------------------------------------------------------------------------------------------- |
| 13001 | 401 | Authorisation header is missing | The authorisation header is missing from the request | All requests to Yapily API require basic authentication, provide your application username and password in the authorisation header for the request |
| 13002 | 403 | Authorisation header is invalid | The authorisation header is invalid | Check our API documentation to see how to provide the authorisation header |
| 13003 | 401 | Authorisation failed | You don't have permissions to make this request. For example, your credentials have expired | View and manage your credentials in the Yapily Console |
| 13004 | 403 | Forbidden | You aren't permitted to make this request | Don't try again |
#### 14xxx Resource Operation
| Code | Http Status Code | Text | Explanation | Action |
| ----- | ---------------- | --------------------------- | ----------------------------------------------------------------------------------------------- | --------------------------------------------------------------------------- |
| 14001 | 404 | Resource not found | It's not possible to retrieve the resource you requested | The resource likely doesn't exist or the ID you provided is incorrect |
| 14002 | 400 | Resource not matching | It's not possible to update the resource as the information provided doesn't match the resource | Check the information supplied in the request is accurate for that resource |
| 14003 | 400 | Resource not valid | The resource request is incomplete or holds invalid data | Check our API documentation to see how to submit data for the resource |
| 14004 | 400 | Resource cannot be modified | The resource cannot be updated | Don't try again |
| 14005 | 409 | Resource conflict | The resource has already been created | Don't try again |
| 14006 | 409 | Resource duplication | A resource with the same ID already exists | Use a different, unique value for ID and try again |
| 14007 | 406 | Resource limit reached | Maximum number of resources that can be created has been reached | Don't try again |
#### 15xxx Payment Process
| Code | Http Status Code | Text | Explanation | Action |
| ----- | ---------------- | --------------------------------------------------------------------------- | ----------------------------------------------------------------------------- | ------------------------------------------------------------------------------------------------------------------------------------------------------------------------------------------- |
| 15001 | 400 | Payment authorisation is declined | The payment failed user authorisation | Ask your end user to re-authorise |
| 15002 | 400 | Destination and source account currency must match | The benefactor and beneficiary account must be of the same currency type | Use a different payment scheme that allows for different currency types |
| 15003 | 400 | Source account has insufficient funds to complete transfer | The benefactor's account doesn't have enough funds to process the transfer | Alert the benefactor that they have insufficient funds. Try again after funds have been increased |
| 15004 | 400 | Client must be the parent client for this application | The application is not a child of the parent application submitted | Check the application used before trying again |
| 15005 | 400 | Exceeded payment limit | The request is higher than the specified payment limit | Reduce the payment value to below the payment limit and try again |
| 15006 | 400 | Unsupported scheme | The payment scheme is unsupported | Check our documentation for the supported payment schemes. Select a supported payment scheme and try again |
| 15007 | 400 | Destination account must be different from the source account | The benefactor and beneficiary account details cannot be the same | Check the payer and payee account details and make sure they are different |
| 15008 | 400 | The payment you wish to return must be of type PAYOUT with status COMPLETED | You can only refund payments of type PAYOUT and status COMPLETED | Check our documentation on refunds. If type PAYOUT, try again when the status is COMPLETED |
| 15009 | 400 | Verification of payee rejected | The beneficiary or beneficiaries failed the Verification of Payee (VOP) check | Verify that all payment recipients have successfully passed the VOP check before resubmitting. See [Verification of Payee documentation](/payments/payment-resources/verification-of-payee) |
#### 16xxx Transactions Retrieval Process
| Code | Http Status Code | Text | Explanation | Action |
| ----- | ---------------- | ---------------------------------------------------------------- | ------------------------------------------------------------------------ | ----------------------------------------- |
| 16001 | 424 | Institution historical data retrieve timeout | The request timed out when fetching historical data from the Institution | Limit the requested transaction period |
| 16002 | 204 | There are no transactions available for the selected time period | No transactions were found for the time period specified | Adjust date parameters and try again |
| 16003 | 424 | The provided dates are outside the consent fetch window | The dates provided are outside of the consent fetch window | Narrow your date parameters and try again |
#### 17xxx Institution Interaction
| Code | Http Status Code | Text | Explanation | Action |
| ----- | ---------------- | ------------------------------------------------------------ | ------------------------------------------------------------------------------------------------------------------------------------------------------- | ------------------------------------------------------------------------------------------------------------------------------------------------------------------------------------------------------------------------------------------------------- |
| 17001 | 404 | The institution is not active in provided country | The institution is not currently available in the country you requested | You are not able to access the institution in this country at this time |
| 17002 | 404 | The institution is not registered against your application | You must register your application with each institution before you can use Yapily's API to access data or make a payment with that institution | You can manage and register with institutions in your Yapily Console. Check our documentation on registration. If you are a Yapily Connect customer, get in touch with [Support](/resources/support) and we can add the institution to your application |
| 17003 | 404 | The institution does not match the payment initiation values | There is a mismatch between institution data submitted at payment initiation and data we hold about the institution | Check your submission data and try again |
| 17004 | 424 | Institution credentials error | The institution does not recognise credentials provided | Check your credentials and try again |
| 17005 | 424 | Unsupported resource | The institution resource is not supported | Check our documentation for the supported resource. Select a supported resource and try again |
| 17006 | 424 | Institution Operation Timeout | There was a timeout due to a slow bank response. This is related to how long the financial institution takes to process our requests, hence the timeout | Try again |
#### 18xxx Query Parameters
| Code | Http Status Code | Text | Explanation | Action |
| ----- | ---------------- | ----------------------- | --------------------------------------------- | ---------------------------------------------------------------------------------- |
| 18001 | 400 | Invalid query parameter | A query parameter is not specified correctly | Check our API documentation for how to specify the query parameter for the request |
| 18002 | 400 | Missing query parameter | A query parameter is missing from the request | Check our API documentation to see the required query parameter for the request |
#### 19xxx Consent Processing
| Code | Http Status Code | Text | Explanation | Action |
| ----- | ---------------- | --------------------------------- | -------------------------------------------------------------- | -------------------------------------------------------------------------------------------------------- |
| 19001 | 400 | Consent authorisation is declined | Consent provided is not authorised for the triggered operation | Check if the consent is authorised for the triggered operation or if the consent has an authorised state |
#### 20xxx Webhook Validation
| Code | Http Status Code | Text | Explanation | Action |
| ----- | ---------------- | --------------------------- | -------------------------------------------------- | ----------------------------------------------------------------- |
| 20001 | 400 | Invalid callback URL syntax | The callback URL must not contain query parameters | Provide the query parameters in the metadata field of the request |
#### 21xxx VRP Mandate Validation
| Code | Http Status Code | Text | Explanation | Action |
| ----- | ---------------- | -------------------------------------------------------- | ------------------------------------------------------------------------------------- | --------------------------------------------------------------------------------------------------------------------------------------- |
| 21001 | 400 | Mandate either not yet active or already expired | Payment not authorised at this time | Check mandate control parameters, then either wait until mandate becomes active or request new VRP authorisation from the user |
| 21002 | 500 | Mandate not found | Payment could not be validated because its mandate was not found | Reach out to support |
| 21003 | 400 | Payment amount exceeds authorised limit per payment | Payment will exceed maximum amount per payment, specified at VRP authorisation | Submit a smaller payment amount or request new VRP authorisation from the user with greater limits |
| 21004 | 400 | Payment amount exceeds authorised limit over some period | Payment will exceed some maximum amount per frequency, specified at VRP authorisation | Submit a smaller payment amount or wait until the next period starts or request new VRP authorisation from the user with greater limits |
***
## HTTP Status Code Format Documentation
**Used by:** Financial Data (Accounts, Transactions, Balances), Single Payments, Bulk Payments, Authorisations, Consents, Institutions & Users, Variable Recurring Payments (VRPs)
### Introduction
After sending an API request, you may receive a response back including an error object. You should build logic to account for any API errors that a request or the system may return.
You may also receive an authorisation error after the end user's redirection to the bank. You should log the query parameters returned from the redirect to understand any failures that occur.
### Error Response Fields
All errors are returned with the same structure. The response object contains the following fields for 4XX errors:
| Field | Type | Required | Description |
| ------------------ | ------- | -------- | ------------------------------------------------------------------------------------------------------------------------------------------------ |
| `code` | integer | Yes | Numeric HTTP status code associated with the error |
| `status` | string | Yes | Description of the HTTP status error type |
| `message` | string | Yes | Description of the exact error, including Yapily support URL |
| `institutionError` | object | No | Error details provided by the institution when the institution is the source of the error |
| `source` | string | No | Indicates who triggered the failure and therefore can take action to correct it. One of: USER (the PSU), INSTITUTION (bank side error) or YAPILY |
| `tracingId` | string | No | A unique ID assigned by Yapily to use as a reference. Provide this if you contact our support team for assistance |
**500 Internal Server Errors** return a simplified structure containing only the `message` field and `tracingId`:
```json theme={null}
{
"error": {
"tracingId": "8f3c6d2a1b4e5f9g0h1i2j3k",
"message": "Internal server error. Please contact support with this tracing ID."
}
}
```
**Example 4XX error response:**
```json theme={null}
{
"error": {
"tracingId": "74b13ce8ed51419f92c5d609e04532de",
"code": 424,
"status": "FAILED_DEPENDENCY",
"message": "The requested resource has not been found in the institution. We can help you on https://support.yapily.com/",
"source": "INSTITUTION",
"institutionError": {
"errorMessage": "{\"Code\":\"400 BadRequest\",\"Id\":\"3517bfc2-c3ee-4f2f-b4f8-12f62478e0d1\",\"Message\":\"No Resource found\",\"Errors\":[{\"ErrorCode\":\"UK.OBIE.Resource.NotFound\",\"Message\":\"No resource found corresponding to the consent id\"}]}",
"httpStatusCode": 400
}
}
}
```
If you need to [contact support](/resources/support), include the tracingId so we can identify your request.
### HTTP Response Codes
Yapily uses standard HTTP response codes to indicate the success or failure of an API request.
| HTTP status code | HTTP status message | Description | Action |
| ---------------- | --------------------- | ------------------------------------------------------------------------------------------------------------------------------------------ | ------------------------------------------------------------------------------------------------------------------------------------ |
| 200 | OK | Everything worked as expected | - |
| 201 | Created | A resource was created successfully | - |
| 400 | Bad Request | The receiving server cannot understand the request because of malformed syntax or a missing field | Check and modify the request before repeating |
| 401 | Unauthorised | Missing, incomplete or invalid credentials (e.g. key, secret, auth token, certificate) | Input valid and complete authentication credentials |
| 403 | Forbidden | Insufficient permissions to process the request | You don't have permissions to perform the request |
| 404 | Not Found | Resource not found | It's not possible to retrieve the resource you requested. This could be the result of an incorrect URL or the resource doesn't exist |
| 406 | Not Acceptable | Unacceptable response content | Include JSON in the list of accepted response values for your application |
| 409 | Conflict | Request couldn't be completed due to conflict with current state of target resource (e.g. attempting to create a user that already exists) | Consult the message returned in the response body to find the source of conflict |
| 424 | Failed Dependency | Unable to complete the required operations with the institution | This indicates a bank side error |
| 429 | Too Many Requests | Too many requests in a given amount of time | Wait before retrying |
| 500 | Internal Server Error | Server could not process the request | Something went wrong on Yapily's end |
| 501 | Not Implemented | The requested feature is unavailable for the specified institution | Confirm which features are supported by each institution |
### Authorisation Errors
Authorisation errors can occur when the user is redirected to the institution to provide their consent. If the user doesn't provide their consent or there is an issue with the institution, the failure response is returned as query parameters.
We recommend you log the query parameters received on your [callback URL](/open-banking-flow/handling-redirects/callback-url) or [redirect URL](/open-banking-flow/handling-redirects/redirect-url) for all requests so you have access to the information explaining what has occurred.
For more information see:
* [Callback URL failure query parameters](/open-banking-flow/handling-redirects/callback-url#failure-query-parameters)
* [Redirect URL failure query parameters](/open-banking-flow/handling-redirects/redirect-url#failure-query-parameters)
### Handling Missing Callbacks
Callbacks may not reach your application due to network issues, browser restrictions, or bank-side errors. When this happens, users can become stuck in incomplete flows. To prevent this, poll the consent or payment status endpoint to check if the authorisation completed successfully.
**Implementation Steps:**
1. **Set a timeout**: Wait 10-15 minutes after redirecting the user to the bank
2. **Start polling**: If no callback is received, poll at increasing intervals: 1s, 2s, 3s, 5s, 8s, 13s, 21s, 34s. Stop after 8 attempts (\~1.5 minutes total).
3. **Handle the result** based on the status returned:
* `AUTHORIZED` - Continue your flow
* `REJECTED` - Show error message to user
* `AWAITING_AUTHORIZATION` - User may still be completing authorisation on the bank screen or app
* `FAILED` - Show error details
**Example Implementation:**
```typescript theme={null}
async function pollConsentStatus(consentId: string, maxAttempts: number = 9): Promise {
const delays = [1000, 1000, 2000, 3000, 5000, 8000, 13000, 21000, 34000]; // Fibonacci sequence in milliseconds
for (let attempt = 0; attempt < maxAttempts; attempt++) {
await sleep(delays[attempt]);
const status = await getConsentStatus(consentId);
// If authorisation complete, return status
if (status !== 'AWAITING_AUTHORIZATION') {
return status;
}
}
// Final check after all attempts
return await getConsentStatus(consentId);
}
```
**If Using Yapily Connect** (`https://auth.yapily.com/`):
Contact [Yapily Support](/resources/support) with your consent or payment ID if you receive no callback. We log all redirects to our URL and can investigate.
**If Using Your Own Redirect URL**:
You must implement the polling strategy above. Yapily cannot log redirects to your URL, so ensure your endpoint has comprehensive logging to diagnose failures.
***
## When to Contact Support
If you encounter errors that you cannot resolve:
1. **Collect the error details:**
* `tracingId` from the error response
* Full error response body
* Request details (endpoint, parameters)
2. **Review the documentation:**
* Check the error code catalog above
* Verify your request format matches our [API Reference](/api-reference)
* Review product-specific documentation
3. **Contact support:**
* Visit our [Support page](/resources/support)
* Include the `tracingId` in your message
* Provide context about what you're trying to accomplish
Our support team can help investigate issues and provide guidance on resolving errors.
# Overview
Source: https://docs.yapily.com/resources/overview
Essential resources for building with Yapily API
## Implementation Resources
Essential resources for building with Yapily API.
Understand error codes, formats, and troubleshooting
Real-time notifications for payment and data events
Test your integration safely with sandbox credentials
SDKs and code samples for popular languages
Get help from Yapily support team
## Additional Resources
Product updates and release notes
Open Banking terminology reference
# Sandbox Overview
Source: https://docs.yapily.com/resources/sandbox/overview
Explore Yapily's sandbox environment for testing open banking integrations without live bank connections. Access test institutions, simulate payment flows, and validate consents.
***
## Introduction
A sandbox is a test environment that allows you to connect your application to a bank and access test accounts to simulate the real Open Banking experience.
You can add sandboxes to your application in the Yapily Console. See our [Get Started guide](/getting-started/get-started) for more information.
You must be [registered](/getting-started/integration-setup/registration) to access to the Open Banking network, including sandbox.
***
## Sandbox testing
There are 2 types of sandbox available:
1. Preconfigured sandbox
2. Sandbox
### Preconfigured sandbox
Preconfigured sandboxes can be added to your application and accessed immediately, without requiring registration or any bank-specific configurations. They are configured to automatically grant you access using Yapily's credentials.
Preconfigured sandboxes are available for a number of major banks. You can filter for the **PRECONFIGURED SANDBOX** environment when selecting institutions to add to your application on the Yapily Console. This will display all the available banks with a preconfigured sandbox.
We recommend testing using the preconfigured sandbox Modelo Sandbox, which is provided by the Open Banking regulators and is actively maintained. Follow our [Get Started guide](/getting-started/get-started) for step by step instructions to add and test Yapily using the preconfigured Modelo Sandbox.
### Sandbox
Non-preconfigured sandboxes are also available, however, they require you to submit your registration certificates and bank-specific credentials manually in order to be accessed. You may also need to create a developer account with the specific bank.
Sandboxes are available for a number of major banks. You can filter for the **SANDBOX** environment when selecting institutions to add to your application on the Yapily Console. This will display all the available banks with a sandbox.
If you have your own license and certificates, you can use these. You'll also be required to submit the necessary bank-specific credentials. The way you obtain the credentials and configure the sandbox varies across institutions. See [sandbox credentials](/resources/sandbox/sandbox-credentials) for the list of credentials for testing the Yapily API with institutions' sandboxes. The relevant documentation is also linked on the credentials page in the Console when registering an institution.
If you don't have your own license and certificates, please contact [Support](/resources/support), specifying your application ID and the institution IDs of the sandboxes you would like to access, and we can configure this for you.
***
## Sandbox quality and functionality
Transactional data in sandboxes might not behave as they would in live banks. For example, payments may transition to `COMPLETED` immediately, transactions might be identical or transactions may not change their status.
The Yapily Mock sandbox is provided by Yapily, and includes features to help with automated testing.
Yapily is not responsible for the quality or functionality of sandboxes belonging to external entities.
The Modelo (Ozone) sandbox is provided by the Open Banking regulators and is actively maintained.
# Sandbox Credentials
Source: https://docs.yapily.com/resources/sandbox/sandbox-credentials
Sandbox test credentials for Yapily institution integrations. Find test usernames, passwords, and OTP codes for each supported sandbox bank institution.
***
## Introduction
We have shortlisted some sandbox banks for you to test different authorisation flows using our Mock TPP application, which you can use to simulate your users' consent. Once authorised you
will be able to access mock financial data and make mock payments.
Transactional data in sandboxes might not behave as they would in live banks. For example, payments may transition to `COMPLETED` immediately, transactions might be identical, transactions may not change their status, and so on.
***
### Natwest Sandbox
* How to login:
CustomerNumber: 123456789012
When prompted to enter your PIN and Password, Natwest Sandbox will display the values to enter above each text box.
Please enter these values in each box before selecting 'Continue'.
***
### Modelo Sandbox
Modelo Sandbox follows the [OBIE OAS](https://openbankinguk.github.io/read-write-api-site3/v3.1.9/profiles/) (OpenAPI Specification).
* How to login: use the below credentials
| user | password |
| ---- | -------- |
| mits | mits |
***
### Lloyds Banking Group Sandboxes
* How to login: use one of the below credentials, password: **Password123**
| brand | retail | commercial | business |
| ---------------- | ------ | ---------- | -------- |
| Lloyds Bank | llr001 | llr001 | llr001 |
| Halifax | har001 | N/A | N/A |
| Bank of Scotland | bar001 | bar001 | bar001 |
| MBNA | mbr001 | N/A | N/A |
***
### Unicaja Banco Sandbox
* How to login: use one of the below credentials
| user | password | Security key | Payee IBAN |
| ----- | -------- | ------------ | ------------------ |
| user1 | 1234 | 123456 | NL25TEST1209063889 |
***
### SNS Bank Sandbox
* How to login: click on "Give permission" button
***
### Modelo Sandbox
* How to login: use the below credentials
| user | password | Payee IBAN |
| ---- | -------- | ------------------ |
| mits | mits | NL25TEST1209063889 |
***
### Deutsche Bank Sandbox
* How to login: There are no login credentials for this sandbox. In the bank, select SCA-OK (for the successful authorised use case) or SCA-NOK (for the failed authorisation use case)
* For Hosted, enter:
* **Branch**: 615
* **Account**: 4033403 (OK) or 4033411 (RJCT)
| Payee IBAN | Payer IBAN | PSU-ID (OK) | PSU-ID (RJCT) |
| ---------------------- | ---------------------- | ----------- | ------------- |
| DE25648730420109480400 | DE17215730140403340300 | 6154033403 | 6154033411 |
The `psu-id` must be provided for:
* All POST account authorisation requests
* All POST payment authorisation requests
* The Payment does not go beyond the `PENDING` status.
***
### Postbank Bank Sandbox
* How to login: There are no login credentials for this sandbox. In the bank, select SCA-OK (for the successful authorised use case) or SCA-NOK (for the failed authorisation use case)
* For Hosted enter Branch: 615 Account: 4033403 (OK) or Branch: 615 Account: 4033411 (RJCT)
| Payee IBAN | Payer IBAN | PSU-ID (OK) | PSU-ID (RJCT) |
| ---------------------- | ---------------------- | ----------- | ------------- |
| DE25648730420109480400 | DE17215730140403340300 | 6154033403 | 6154033411 |
The `psu-id` must be provided for:
* All POST account authorisation requests
* All POST payment authorisation requests
***
### Fineco Sandbox
* How to login: Use the credentials below
| User ID | Password | PIN dispositivo | SMS PIN | Payee IBAN | Payer IBAN |
| -------- | -------- | --------------- | ------- | ------------------ | --------------------------- |
| 00000000 | 11111111 | 11111111 | 222222 | NL25TEST1209063889 | IT31X0301503200000003517230 |
***
### BAWAG PSK / Easybank Sandbox
* How to login: Use the credentials below and select SMS method
| PSU-ID | Password | SMS-OTP | Payer IBAN 1 | Currency | Payer IBAN 2 | Currency |
| --------------- | -------- | ------- | ---------------------- | -------- | ---------------------- | -------- |
| demo | 1111 | 1111 | DE86466500050019001551 | EUR | DE75512108001245126199 | EUR |
| justin-heinrich | 123456 | 123456 | DE12500105170648489890 | EUR | DE90500105170648489844 | PLN |
| jmaib | 9999 | 9999 | DE32590500000003001112 | EUR | | |
| sandy\_bodas | 1111 | 1111 | DE26144792004484484484 | EUR | | |
***
### Commerzbank AG Sandbox
* How to login: Login doesn't require credentials
***
### Oberbank Sandbox
* How to login: Use the credentials below
| userCredentials.id | userCredentials.password | Payer IBAN |
| ------------------ | ------------------------ | ---------------------- |
| aspsp1 | aspsp1 | DE54500105173424724776 |
**SCA code depends on selected SCA method:**
| SCA method | Test case | SCA code |
| ---------- | ---------------- | ------------------------------------------------------- |
| sms | SCA code | HHmm (HH - 24 hour format; mm - current minutes) |
| push | decoupled (push) | none |
| chip | SCA code | ddmm (dd - current day in a month mm - current minutes) |
***
### Fiducia Sandbox
* How to login: Use the credentials below
`userCredentials.id` can be a range of values based on the scenario you wish to test:
| userCredentials.id | Test case | SCA method |
| ------------------ | ------------------------------------------------ | --------------------------------------------- |
| VRK1234567890ALL | Multi SCA (selecting 946 triggers decoupled SCA) | psuIdWith(ALL) |
| VRK1234567890SMS | Single SCA | psuIdWith(mobile Tan / SMS\_OTP) |
| VRK1234567890HHD | Single SCA | psuIdWith(Smart Tan Plus HHD 1.4 / CHIP\_OTP) |
| userCredentials.password | scaCode | Payer IBAN |
| ------------------------ | ------- | ---------------------- |
| password | 123456 | DE39499999600000005111 |
***
### Luminor Sandbox
* How to login: use the below credentials
| user | Country |
| ------ | --------- |
| 111111 | Lithuania |
| 222222 | Latvia |
| 333333 | Estonia |
***
### Intesa group Sandbox
* How to login: use the below credentials on the login page. Those are only valid in the development environment
* SCA validation autocompletes after a few seconds, so no further action is required.
* Same credentials can be used for corporate institution, but the product code submitted is different.
| user | password |
| -------- | -------- |
| 06642666 | 20897 |
***
### Mock ASPSP (UK)
* Test case: Redirect
* How to login: not required
There is no UI, excellent for automated tests
***
### Mock ASPSP STET
* Test case: Redirect
* How to login: not required
There is no UI, excellent for automated tests
***
### Mock ASPSP Berlin Group (Redirect)
* How to login: not required
There is no UI, excellent for automated tests
***
### Mock ASPSP Berlin Group (Embedded)
* How to login: use the below credentials
| user | password | scaCode |
| ---------- | -------- | ------- |
| any string | 123456 | 987654 |
Note: To be able to start Decoupled Embedded flow, the authenticationMethodId must be sent as 946 in the second step (start authorisation).
# Test cases
Source: https://docs.yapily.com/resources/sandbox/test-cases
Recommended test cases for validating your Yapily integration in the sandbox environment. Covers payment flows, data access scenarios, and error conditions to verify.
We have grouped the recommended sandboxes for testing specific scenarios and authorisation flows.
***
# **Single redirect**
Below, you will discover the suggested sandboxes tailored for executing [single redirect](/open-banking-flow/user-authorisation/single-redirect) authorisation flow
## **United Kingdom**
UK banks do not require the providing payer details; therefore, only the following properties are required:
```json theme={null}
{
"applicationUserId": "single-payment-tutorial",
"institutionId": "modelo-sandbox",
"callback": "https://display-parameters.com/",
"paymentRequest": {
"type": "DOMESTIC_PAYMENT",
"reference": "Bills Coffee Shop", //maximum of 18 characters
"paymentIdempotencyId": "c0ab9b09c20c4ec7a77e", //maximum of 35 characters
"amount": {
"amount": 8.70,
"currency": "GBP"
},
"payee": {
"name": "BILLS COFFEE LTD",
"accountIdentifications": [
{
"type": "ACCOUNT_NUMBER",
"identification": "{accountNumber}"
},
{
"type": "SORT_CODE",
"identification": "{sortCode}"
}
]
}
}
}
```
### Natwest Sandbox
#### Payments and Data
Institution ID: natwest-sandbox
Supported Features:
* Payments:
* Single payment
* Periodic payments
* Data:
* Accounts
* Transactions
[Natwest Sandbox login credentials](/resources/sandbox/sandbox-credentials#natwest-sandbox)
#### Variable Recurring Payments
Institution ID: natwest-sandbox-vrp
Supported Features:
* Sweeping Variable Recurring Payments
* Commercial Variable Recurring Payments
[Natwest Sandbox login credentials](/resources/sandbox/sandbox-credentials#natwest-sandbox)
***
### Modelo Sandbox
Modelo Sandbox follows the [OBIE OAS](https://openbankinguk.github.io/read-write-api-site3/v3.1.9/profiles/) (OpenAPI Specification).
Institution ID: modelo-sandbox
Supported Features:
* Payments:
* Single payment
* Scheduled payments
* Periodic payments
* Bulk payments
* Data:
* Accounts
* Identity
* Transactions
[Modelo Sandbox login credentials](/resources/sandbox/sandbox-credentials#modelo-sandbox)
**Note**: AIS Consents expire after 10 minutes
***
### Mock ASPSP
Institution IDs:
* mock-sandbox
* mock-sandbox-v1
Supported Features:
* Payments:
* Single payment
* Scheduled payments
* Periodic payments
* Bulk payments
* Commercial Variable Recurring Payments
* Data:
* Accounts
* Transactions
[Mock ASPSP login credentials](/resources/sandbox/sandbox-credentials#modelo-sandbox)
***
### Lloyds Banking Group Sandboxes
Institution IDs:
* lloyds-sandbox
* halifax-sandbox
* bankofscotland-sandbox
* mbna-sandbox
Supported Features:
* Payments:
* Single payment
* Scheduled payments
* Periodic payments
* [readRefund](/payments/payment-resources/reverse-payments) supported
* Data:
* Accounts
* Transactions
[Lloyds Banking Group Sandboxes credentials](/resources/sandbox/sandbox-credentials#lloyds-banking-group-sandboxes)
***
## **European (without payer)**
Institutions outside the UK usually require to provide payer details, however it is not currently required in the following EU countries:
* France
* Spain
* Portugal
* Ireland
The API request in these countries require the following properties:
```json theme={null}
{
"applicationUserId": "single-payment-tutorial",
"institutionId": "unicajabanco-sandbox",
"callback": "https://display-parameters.com/",
"paymentRequest": {
"type": "DOMESTIC_PAYMENT",
"reference": "Bill Payment", //maximum of 140 characters
"paymentIdempotencyId": "c0ab9b09c20c4ec7a77e", //maximum of 35 characters
"amount": {
"amount": 5,
"currency": "EUR"
},
"payee": {
"name": "Jane Doe",
"address": {
"country": "ES",
"postCode": "48310",
"townName": "Elantxobe",
"addressLines": ["Avenida Cervantes 5"]
},
"accountIdentifications": [
{
"type": "IBAN",
"identification": "ES2621030001350000000001"
}
]
}
}
}
```
### Unicaja Banco Sandbox
Institution ID: unicajabanco-sandbox
Supported Features:
* Payments:
* Single payment
* Scheduled payments
* Periodic payments
* Data:
* Accounts
* Transactions
[Unicaja Banco Sandbox credentials](/resources/sandbox/sandbox-credentials#unicaja-banco-sandbox)
***
### SNS Bank Sandbox
Institution ID: snsbank-sandbox
Supported Features:
* Payments:
* Single payment
* Scheduled payments
* Periodic payments
* Data:
* Accounts
* Transactions
[SNS Bank Sandbox credentials](/resources/sandbox/sandbox-credentials#sns-bank-sandbox)
***
### Modelo Sandbox
Institution ID: modelo-sandbox
Supported Features:
* Payments:
* Single payment
* Scheduled payments
* Periodic payments
* Data:
* Accounts
* Identity
* Transactions
[Modelo Sandbox credentials](/resources/sandbox/sandbox-credentials#modelo-sandbox)
**Note**: AIS Consents expire after 10 minutes
***
## **European (with payer)**
Initiating payments outside of UK, France, Spain, Portugal and Ireland requires specifying payer details, therefore the request should include payer name and their IBAN.
Additionally, some of the institutions require [PSU Identifier](/open-banking-flow/user-authorisation/psu-identifiers) that has to be obtained from the customer:
```json theme={null}
curl -L -X POST 'https://api.yapily.com/payment-auth-requests' \
-H 'Content-Type: application/json' \
-H 'psu-id: 6154033403' \
-u 'APPLICATION_KEY:APPLICATION_SECRET' \
-d '{
"applicationUserId": "single-payment-tutorial",
"institutionId": "deutschebank-sandbox",
"callback": "https://display-parameters.com/",
"paymentRequest": {
"type": "DOMESTIC_PAYMENT",
"reference": "Bill Payment", //maximum of 140 characters
"paymentIdempotencyId": "c0ab9b09c20c4ec7a77e", //maximum of 35 characters
"amount": {
"amount": 5,
"currency": "EUR"
},
"payee": {
"name": "Jane Doe",
"address": {
"country": "DE",
"postCode": "83458",
"townName": "Schneizlreuth",
"addressLines": ["Langenhorner Chaussee 27"]
},
"accountIdentifications": [
{
"type": "IBAN",
"identification": "DE25648730420109480400"
}
]
},
"payer": {
"name": "John Doe",
"accountIdentifications": [
{
"type": "IBAN",
"identification": "DE17215730140403340300"
}
]
}
}
}'
```
### Deutsche Bank Sandbox
Institution ID: deutschebank-sandbox
Supported Features:
* Payments:
* Single payment
* Periodic payments
* Data:
* Accounts
* Transactions
**Note**: Payments above 50 EUR will fail.
[Deutsche Bank Sandbox credentials](/resources/sandbox/sandbox-credentials#deutsche-bank-sandbox)
***
### Postbank Bank Sandbox
Institution ID: postbank-sandbox
Supported Features:
* Payments:
* Single payment
* Periodic payments
* Data:
* Accounts
* Transactions
**Note**: Payments above 50 EUR will fail.
[Postbank Bank Sandbox credentials](/resources/sandbox/sandbox-credentials#postbank-bank-sandbox)
***
### Fineco Sandbox
* Institution ID: fineco-sandbox
Supported Features:
* Payments:
* Single payment
* Periodic payments
* Data:
* Accounts
* Transactions
**Note**: Sandbox returns static responses
[Fineco Sandbox credentials](/resources/sandbox/sandbox-credentials#fineco-sandbox)
***
### BAWAG PSK / Easybank Sandbox
Institution ID: bawag-sandbox
Supported Features:
* Payments:
* Single payment
* Scheduled payments
* Periodic payments
* Data:
* Accounts
* Transactions
**Note**: AIS endpoints limited to 4 calls a day
[BAWAG PSK Sandbox credentials](/resources/sandbox/sandbox-credentials#bawag-psk-/-easybank-sandbox)
***
### Commerzbank AG Sandbox
Institution ID: commerzbank-sandbox
Supported Features:
* Payments:
* Single payment
* Periodic payments
- Data: Transactions not available
[Commerzbank Sandbox credentials](/resources/sandbox/sandbox-credentials#commerzbank-ag-sandbox)
***
# **Embedded authorisation**
Below, you will discover the suggested sandboxes tailored for executing [embedded authorisation](/open-banking-flow/user-authorisation/embedded) authorisation flow.
The initial embedded request should include the following properties:
```json theme={null}
{
"applicationUserId": "single-payment-tutorial",
"institutionId": "fiducia-sandbox",
"userCredentials": {
"id": "VRK1234567890ALL", //online banking username/id
"password": "password" //online banking password
},
"paymentRequest": {
"type": "DOMESTIC_PAYMENT",
"reference": "Bill Payment", //maximum of 140 characters
"paymentIdempotencyId": "c0ab9b09c20c4ec7a77e", //maximum of 35 characters
"amount": {
"amount": 5,
"currency": "EUR"
},
"payee": {
"name": "Jane Doe",
"address": {
"country": "DE",
"postCode": "83458",
"townName": "Schneizlreuth",
"addressLines": ["Langenhorner Chaussee 27"]
},
"accountIdentifications": [
{
"type": "IBAN",
"identification": "DE58648730420109499400"
}
]
},
"payer": {
"name": "John Doe",
"accountIdentifications": [
{
"type": "IBAN",
"identification": "DE39499999600000005111"
}
]
}
}
}
```
After that, the `userCredentials` object should be replaced with either `scaCode` or `selectedScaMethod.id` property depending on the returned consent status:
* `AWAITING_SCA_CODE` - provide `scaCode` when executing `PUT` method
* `AWAITING_SCA_METHOD` - provide `selectedScaMethod.id` when executing `PUT`. The options will be returned via the API
* `AWAITING_DECOUPLED_AUTHORIZATION` - poll [GET /consents/\{consent-id}](/api-reference/consents/get-consent) endpoint until the status changes.
### Oberbank Sandbox
Institution ID: oberbank-sandbox
Supported Features:
* Payments:
* Single payment
* Scheduled payments
* Periodic payments
* Data:
* Accounts
* transactions
[Oberbank Sandbox credentials](/resources/sandbox/sandbox-credentials#oberbank-sandbox)
### Fiducia Sandbox
Institution ID: fiducia-sandbox
Supported Features:
* Payments:
* Single payment
* Data: only authorisation flow - data endpoints are not available
[Fiducia Sandbox credentials](/resources/sandbox/sandbox-credentials#fiducia-sandbox)
**Note**:
Accounts and Transactions
* Support for both [Created Embedded Account Authorisation](/api-reference/authorisations/create-embedded-account-authorisation) and
[Update Embedded Account Authorisation](/api-reference/authorisations/update-embedded-account-authorisation) authorisation endpoints
* No support for [Financial Data Endpoints](/api-reference/financial-data/get-accounts)
Consents created using [Created Embedded Account Authorisation](/api-reference/authorisations/create-embedded-account-authorisation)
or [Update Embedded Account Authorisation](/api-reference/authorisations/update-embedded-account-authorisation) with the Fiducia sandbox will
not be able to access any of the [Financial Data Endpoints](/api-reference/financial-data/get-accounts) due to a
[restriction with the sandbox](https://storage.googleapis.com/static.yapily.com/images/documentation/2021/20210116_FGI_Documentation_XS2A_Test_Environment_V6.pdf).
Fiducia Sandbox returns `ACCP` as the final payment status. As a result, this is mapped to `COMPLETED` in the Yapily API response for Fiducia Sandbox.
This is different from the Live institution.
For more information about this sandbox, see the
[FGI Documentation](https://storage.googleapis.com/static.yapily.com/images/documentation/2021/20210116_FGI_Documentation_XS2A_Test_Environment_V6.pdf).
# Support
Source: https://docs.yapily.com/resources/support
Get help with your Yapily integration. Access documentation, raise a support ticket, or contact the team directly for technical assistance with the Yapily API.
## Raising issues/Questions
You can open a ticket with our support team via our [support portal](http://support-portal.yapily.com/).
In your request please provide the following information:
1. The **Title/Subject** of the Issue - ensuring clarity
2. The **Description** including the detail and error (see error handling references), and any additional context
3. The **Priority** in-line with our agreed priority levels
4. The **Application ID**
5. The **Product** that you're using specific to the issue/request
6. The **[Tracing ID](/resources/errors#error-response-fields)** for the relevant requests (or if you don't store the tracingId the timestamp of the request and other unique IDs in the path or body that will identify your requests) - Include in the `Description` field
7. The **Environment**, i.e. Production or Sandbox, or both
8. The **Country** in which you are seeing the issue
Yapily Support works in order of priority for our customer base. Raising tickets via the portal above is more optimal and recommended.
## Need another team?
Our teams are ready to help:
1. If you are seeking to **Get Started with Yapily** you can submit a request to our commercial team here: [Get Started](https://www.yapily.com/company/get-started) and they will contact you
2. If you are an end user and have a concern or **Complaint about Yapily** as a service you can contact: [Complaints](https://www.yapily.com/company/complaints) or email: [complaints@yapily.com](mailto:complaints@yapily.com?subject=Complaint%20Query)
## Status Pages
Yapily strives to provide clear and timely service messaging to our status pages. We highly recommend that you subscribe to these status pages to ensure that you receive an update if there is a service disruption.
Monitor the Yapily platform status and uptime
Check status of individual financial institutions
## Contact Information
You can expect to receive email replies from: [support@yapily.com](mailto:support@yapily.com?subject=Documentation%20Query)
# Commercial VRP tutorial using Yapily Hosted Pages
Source: https://docs.yapily.com/tools-and-services/hosted-pages/cvrp-tutorial-hosted-pages
Tutorial for setting up a Commercial VRP (cVRP) mandate using Yapily Hosted Pages. Generate a consent session URL and guide users through the complete VRP authorization journey.
Commercial VRP (cVRP) is available as a [Private Beta version](/getting-started/overview#private-beta). Please contact your Customer Success Manager if you would like to access it.
## Introduction
This tutorial explains how to use Yapily Hosted Pages to set up a UK domestic Commercial VRP (cVRP) mandate.
**Note:** All requests made to the Yapily API require [basic authentication](/getting-started/integration-setup/api-authentication).
***
Make a request to `POST /hosted/vrp/commercial/consents`, including the consent request details, institution country code, redirect URL and user ID.
You must provide the `institutionIdentifiers.institutionCountryCode` field. This controls the country of the institution the user can set up the mandate with.
In addition, you can optionally provide the ID of a specific institution in `institutionIdentifiers.institutionId` field to only allow mandate setup with this institution. This skips the bank selection screen in the hosted flow.
You can optionally provide `userSettings` to set the user's preferred language and location.
Yapily Connect customers must provide payer details in the `complianceData` object, including Transaction Risk Indicators (TRIs) such as `PaymentContextCode`, `PaymentPurposeCode`, and `MerchantCategoryCode`. If the ultimate recipient of funds differs from the named Creditor, also provide the `UltimateCreditor` field. See [compliance requirements](/payments/vrps/additional-information#compliance-requirements) for the full list of required fields.
```bash Request theme={null}
curl -L -X POST 'https://api.yapily.com/hosted/vrp/commercial/consents' \
-H 'Content-Type: application/json' \
-u 'APPLICATION_KEY:APPLICATION_SECRET' \
-d '{
"applicationUserId": "john.doe@company.com",
"institutionIdentifiers": {
"institutionCountryCode": "GB"
},
"userSettings": {
"language": "en",
"location": "GB"
},
"redirectUrl": "https://tpp-application.com/",
"mandateDetails": {
"mandateIdentification": "mandate-001",
"creditor": {
"name": "Utility Provider",
"accountIdentifications": [
{
"type": "SORT_CODE",
"identification": "123456"
},
{
"type": "ACCOUNT_NUMBER",
"identification": "12345678"
}
]
},
"maximumAmount": 500,
"currency": "GBP",
"periodicLimits": {
"alignment": "CALENDAR",
"frequency": "MONTHLY",
"maxAmount": 500
}
},
"complianceData": {
"psuIdentifiers": {
"name": "John Doe"
},
"transactionRiskIndicators": {
"paymentContextCode": "BillingGoodsAndServicesInAdvance",
"paymentPurposeCode": "BONU",
"contractPresentIndicator": true,
"beneficiaryPrePopulated": true,
"beneficiaryAccountType": "PersonalCurrentAccount",
"merchantCategoryCode": "4900"
}
},
"psuInteractionType": "PRESENT"
}'
```
```json Response theme={null}
{
"meta": {
"tracingId": "2dbfd85b4f2940c6a206e96dd90e52d0"
},
"data": {
"consentRequestId": "eb39f8ae-aeff-4ffa-a23d-d4a5b3eff406",
"userId": "3ddf5dd0-aa48-4d0f-baa7-fa057e9e911d",
"applicationUserId": "john.doe@company.com",
"applicationId": "64949de6-6510-4d70-9500-d4aa094c506c",
"institutionIdentifiers": {
"institutionId": "modelo-sandbox",
"institutionCountryCode": "GB"
},
"userSettings": {
"language": "en",
"location": "GB"
},
"redirectUrl": "https://tpp-application.com/",
"mandateDetails": {
"mandateIdentification": "mandate-001",
"creditor": {
"name": "Utility Provider",
"accountIdentifications": [
{
"type": "SORT_CODE",
"identification": "123456"
},
{
"type": "ACCOUNT_NUMBER",
"identification": "12345678"
}
]
},
"maximumAmount": 500,
"currency": "GBP",
"periodicLimits": {
"alignment": "CALENDAR",
"frequency": "MONTHLY",
"maxAmount": 500
}
},
"hostedUrl": "https://prototypes.yapily.com/auth-link1.html",
"authToken": "eyJhbGciOiJIUzI1NiIsInR5cCI6IkpXVCJ9.eyJzdWIiOiIxMjM0NTY3ODkwIiwibmFtZSI6IkpvaG4gRG9lIiwiaWF0IjoxNTE2MjM5MDIyfQ.SflKxwRJSMeKKF2QT4fwpMeJf36POk6yJV_adQssw5c",
"createdAt": "2021-06-10T11:26:54.887Z",
"authorisationExpiresAt": "2021-06-10T11:36:54.887Z",
"status": "ACTIVE"
}
}
```
Store the `hostedUrl` returned in the response to use in step 2.
Redirect the end user from your application to the Yapily Hosted Pages URL. This initiates the user journey for the cVRP mandate request.
The end user follows the Yapily hosted screens to complete the cVRP mandate setup.
A typical journey includes bank selection, a limits confirmation screen, redirection to their chosen bank, mandate authorization confirmation, and redirection back to your application.
Yapily Hosted Pages automatically handles all pre-mandate disclosure requirements under the UKPI scheme on your behalf. No additional implementation is needed to meet regulatory obligations.
See [UI screens](/tools-and-services/hosted-pages/ui-screens) for more details.
The user will be automatically redirected to the `redirectUrl` specified in the initial consent request in Step 1 once the authorization flow is complete. We recommend you redirect the user back to your application to create a good user experience.
The `consentRequestId` is returned as part of the `redirectUrl`. You can use this to check the status of the consent in step 4.
On an end user's completion of the hosted pages flow, you should check the consent status to confirm the mandate has been authorized successfully before proceeding with any further actions.
You can retrieve details of the consent request using `GET /hosted/vrp/commercial/consents/{consentRequestId}`, specifying the `consentRequestId` in the path.
```bash Request theme={null}
curl -L -X GET 'https://api.yapily.com/hosted/vrp/commercial/consents/{consentRequestId}' \
-H 'Content-Type: application/json' \
-u 'APPLICATION_KEY:APPLICATION_SECRET'
```
```json Response theme={null}
{
"meta": {
"tracingId": "2dbfd85b4f2940c6a206e96dd90e52d0"
},
"data": {
"consentRequestId": "eb39f8ae-aeff-4ffa-a23d-d4a5b3eff406",
"userId": "3ddf5dd0-aa48-4d0f-baa7-fa057e9e911d",
"applicationUserId": "john.doe@company.com",
"applicationId": "64949de6-6510-4d70-9500-d4aa094c506c",
"institutionIdentifiers": {
"institutionId": "modelo-sandbox",
"institutionCountryCode": "GB"
},
"userSettings": {
"language": "en",
"location": "GB"
},
"redirectUrl": "https://tpp-application.com/",
"mandateDetails": {
"mandateIdentification": "mandate-001",
"creditor": {
"name": "Utility Provider",
"accountIdentifications": [
{
"type": "SORT_CODE",
"identification": "123456"
},
{
"type": "ACCOUNT_NUMBER",
"identification": "12345678"
}
]
},
"maximumAmount": 500,
"currency": "GBP",
"periodicLimits": {
"alignment": "CALENDAR",
"frequency": "MONTHLY",
"maxAmount": 500
}
},
"createdAt": "2021-06-10T11:26:54.887Z",
"authorisationExpiresAt": "2021-06-10T11:36:54.887Z",
"status": "AUTHORISED",
"consentToken": "3fa85f64-5717-4562-b3fc-2c963f66afa6"
}
}
```
Store the `consentToken` from the response — you will need it to execute payments against this mandate.
### Monitoring Consent Status
We recommend using [webhooks](/tools-and-services/hosted-pages/payment-webhooks) to receive real-time notifications when your consent is authorized or fails. This provides:
* **Immediate status updates** - No polling delay
* **Reduced API calls** - Cost savings for both parties
* **Better user experience** - Faster feedback to customers
If you cannot use webhooks, you can monitor the consent status by repeatedly calling the GET endpoint above until the `status` field transitions to `AUTHORISED` or `FAILED`.
**Note:** Polling increases API usage and may delay status updates compared to webhooks.
***
## Further Reading
* [VRP Get Started](/payments/vrps/get-started) - Full cVRP flow including payment execution
* [VRP Mandate Details](/payments/vrps/mandate-details) - Mandate parameter reference
* [VRP Institution Coverage](/payments/vrps/coverage) - Supported institutions for cVRP
* [VRP Additional Information](/payments/vrps/additional-information) - Compliance requirements and use case scope
* [Webhooks](/tools-and-services/webhooks/introduction) - Real-time payment notifications
# Hosted Data Consent Statuses and Phases
Source: https://docs.yapily.com/tools-and-services/hosted-pages/data-consent-statuses
Introduction to Yapily Hosted Pages data consent statuses and phases
Hosted Pages is available as a [Beta version](/getting-started/overview#yapily-hosted-pages-beta).
Please contact your Customer Success Manager if you would like to access it.
***
## Introduction
Hosted data consent statuses and phases are used to track the progress of a consent request made using Yapily Hosted Pages for data access.
This guide explains the differences between the `status` and `phases` fields in the [GET /hosted/consent-requests response](/api-reference/hosted-consent-pages/get-hosted-consent-request).
## Related Fields in Response
The following example shows the key fields from a response of the [GET /hosted/consent-requests/](/api-reference/hosted-consent-pages/get-hosted-consent-request) endpoint.
For brevity, only the `phases` and `consentStatus` fields are included.
```json theme={null}
{
...
"data": {
...
"consentStatus": "AUTHORIZED",
"phases": [
{
"phaseName": "INITIATED",
"phaseCreatedAt": "2023-05-10T07:56:54.887Z"
},
{
"phaseName": "INSTITUTION_SUBMITTED",
"phaseCreatedAt": "2023-05-10T07:57:02.123Z"
},
{
"phaseName": "AUTHORISATION_INITIATED",
"phaseCreatedAt": "2023-05-10T07:57:05.123Z"
},
{
"phaseName": "AUTHORISATION_CREATED",
"phaseCreatedAt": "2023-05-10T07:57:06.637Z"
},
{
"phaseName": "CONSENT_POLLING_STARTED",
"phaseCreatedAt": "2023-05-10T07:57:07.654Z"
},
{
"phaseName": "CONSENT_POLLING_ENDED",
"phaseCreatedAt": "2023-05-10T07:57:10.288Z"
},
{
"phaseName": "AUTHORISED",
"phaseCreatedAt": "2023-05-10T07:57:10.637Z"
},
{
"phaseName": "FINISHED",
"phaseCreatedAt": "2023-05-10T07:57:11.867Z"
}
]
...
}
}
```
The `phases` array records the chronological sequence of phases that the consent request has gone through. The `consentStatus` field indicates the current status of the consent.
## Mapping Between Status and Phases
As phases are recorded for every step that a consent request goes through, they provide a more detailed view of the progress. Therefore, multiple phases can map to a single status.
The table below provides a mapping of the phases to the consent statuses:
| Phase Name | Phase Description | Status |
| ------------------------------- | ------------------------------------------------------------------------------------------------------------------------------------ | ------------------------- |
| INITIATED | Process initiated | PENDING |
| INSTITUTION\_SUBMITTED | Consent institution submitted | PENDING |
| AUTHORISATION\_INITIATED | All details required for consent initiation have been collected | PENDING |
| AUTHORISATION\_CREATED | Consent authorisation request created with Institution, awaiting authorisation completion | PENDING |
| AUTHORISATION\_FAILED | Consent authorisation failed and will not proceed further | FAILED |
| AUTHORISATION\_REJECTED | Consent Authorisation request rejected by Institution and will not proceed further | FAILED |
| DECOUPLED\_AUTHORISATION | For embedded banks, decoupled authorisation was initiated by the bank | PENDING |
| EMBEDDED\_CREDENTIAL\_REQUESTED | For embedded banks, a UI element to collect user credentials was displayed | PENDING |
| EMBEDDED\_CODE\_REQUESTED | For embedded banks, a UI element to collect SCA for initiated consent was displayed | PENDING |
| EMBEDDED\_TYPE\_REQUESTED | For embedded banks, a UI element to allow the user to select their preferred SCA method for this consent authorisation was displayed | PENDING |
| EMBEDDED\_CODE\_COLLECTED | For embedded banks, SCA code was collected for consent authorisation | PENDING |
| EMBEDDED\_TYPE\_SELECTED | For embedded banks, preferred SCA method was selected for consent authorisation | PENDING |
| CONSENT\_POLLING\_STARTED | Polling the bank for consent authorisation status started | PENDING |
| CONSENT\_POLLING\_ENDED | Polling the bank for consent authorisation status finished | PENDING |
| AUTHORISED | Consent authorisation completed | AUTHORIZED |
| REVOKED | Consent has been revoked and is no longer active | REVOKED |
| FINISHED | Flow finished | AUTHORIZED/PENDING/FAILED |
***
## Related Resources
### Hosted Pages Resources
* [Data Tutorial](/tools-and-services/hosted-pages/payment-tutorial-hosted-data) - Complete data access integration guide
* [UI Screens](/tools-and-services/hosted-pages/ui-screens) - Visual guide to the hosted flow
### API Resources
* [GET /hosted/consent-requests](/api-reference/hosted-consent-pages/get-hosted-consent-request) - Retrieve consent request details
* [Consent Management](/data/financial-data-resources/financial-data-consents) - Managing data consents
### Implementation Resources
* [Error Handling](/resources/errors) - Handle consent failures gracefully
* [Support](/resources/support) - Get help with implementation
# Yapily Hosted Pages
Source: https://docs.yapily.com/tools-and-services/hosted-pages/overview
Yapily Hosted Pages provides a fully managed open banking UI for payments and data access. Launch quickly without building institution selection or consent screens yourself.
Hosted Pages is available as a [Beta version](/getting-started/overview#yapily-hosted-pages-beta).
Please contact your Customer Success Manager if you would like to access it.
***
## Introduction
Yapily Hosted Pages is a fully out-of-the-box, hosted solution that provides a pre-built user interface (UI) on top of our existing single payments API.
It enables you to quickly and easily use Yapily's API to accept open banking payments from users, as well as test and experience Yapily's open banking services.
See [Hosted vs API](/concepts/hosted-vs-api) for a comparison of integration approaches.
Hosted Pages guides your users through the payment authorisation process, collects the necessary information to make a payment and executes the payment once consent is granted by the user.
The UI is available on web and mobile browsers, optimised for a seamless user experience and compatible with all supported institutions. It is fully hosted and maintained by Yapily.
We currently support Yapily Hosted pages in: **United Kingdom, Germany, Lithuania, Netherlands, Belgium, Spain, France, Austria and Portugal** for **Single Payments**.
**United Kingdom, Germany, Lithuania, Netherlands, Belgium, Spain, France, Austria and Portugal, Sweden, Norway, Denmark and Ireland** are currently available for **Data**.
Currently only single payments are supported.
***
## Advantages
#### Pre-built UI
* Quick to implement
* No development effort
* Compliant by default
#### Simple integration process
* 1 API call
* Low development effort
* Real-time webhook notifications for payment status
#### Customisable
* Match your brand
***
## End user journey
Yapily Hosted Pages provides a pre-built UI to manage the entire user journey once the user decides to use open banking in your application.
A typical user journey is:
1. The end user wants to top up their account on your application.
2. The user clicks 'pay by bank' at checkout.
3. The user is redirected to Yapily's hosted pages.
4. The user completes the payment authorisation flow and is redirected back to your application on completion.
### Authorisation flow
The payment authorisation flow varies depending on the institution. The end user journey and [UI screens](/tools-and-services/hosted-pages/ui-screens) vary depending on the flow. Yapily Hosted Pages supports both redirect and embedded flows.
You can read more about [user authorisation flows](/open-banking-flow/user-authorisation/overview).
#### Redirect authorisation flow
**Natwest Transaction Status Change**: From March 2024 NatWest will introduce the transaction status of "booked" for intra-day transactions that have not yet been posted, in order to align with Mobile Banking.
The change will be implemented across NatWest, Royal Bank of Scotland, Ulster Bank NI and NatWest/RBS International for personal and business banking customers who use Mobile or Online Banking.
Transaction types affected:
| Code | Description |
| ---- | ---------------------- |
| BAC | Automated Credit |
| BSP | Branch Single Payment |
| CDM | Cash & Deposit Machine |
# Client Libraries
Source: https://docs.yapily.com/resources/client-libraries
Generate API client libraries for Yapily in your preferred language using the OpenAPI specification. Supports code generation for Java, Python, Node.js, and more.
To help developers quickly create their client-side libraries in any language of their choice, we provide an OpenAPI Specification (OAS) version 3 file.
This is the same OAS that we consume ourselves to generate our server-side libraries and we are happy to share as the most accurate and complete representation of the Yapily API.
The latest version of the API definition is available [here](https://api.yapily.com/docs/v3/openapi.json).
You can find all versions in our GitHub repo [yapily-openapi](https://github.com/yapily/yapily-openapi).
This includes a **readme** explaining how to autogenerate libraries in the languages that are most popular with our customers.
# Error Handling
Source: https://docs.yapily.com/resources/errors
Handle Yapily API errors effectively. Covers error response structure, HTTP status codes, retry strategies, and solutions for the most common error scenarios.
Yapily uses two error response formats. Check which format your product uses below.
## Which Error Format Does My Product Use?
**Products using enhanced error format with structured issue codes:**
* Hosted Pages
* Data Plus
* Webhooks
* User & Application Beneficiaries
* VRP (only for payload validation)
* Bulk Payment (only for payload validation)
Scroll down to the [Enhanced Error Format Documentation](#enhanced-error-format-documentation) section for details.
**Products using HTTP status code error format:**
* Financial Data (Accounts, Transactions, Balances)
* Single Payments
* Bulk Payments
* Authorisations
* Consents
* Institutions & Users
* Variable Recurring Payments (VRPs)
Scroll down to the [HTTP Status Code Format Documentation](#http-status-code-format-documentation) section for details.
***
## Enhanced Error Format Documentation
**Used by:** Hosted Pages, Data Plus, Webhooks, User & Application Beneficiaries, VRP (payload validation), Bulk Payment (payload validation)
This format provides detailed error information with structured issue codes. For other operations, see [HTTP Status Code Format Documentation](#http-status-code-format-documentation).
### Introduction
When you make an API call to Yapily and there is an error, you will receive an error response including error codes and message fields to help you diagnose and solve the error.
We recommend building your error handling logic around the `Error Codes` and `Message` properties in the response, as these provide the most specific information about the underlying issue.
### Response Structure
When receiving an error response, it is important to note that there might be multiple error codes included. To effectively troubleshoot the problem, you need to consider all of these error codes.
When an error occurs, you'll receive a response with an `error` object containing an `issues` array:
```json theme={null}
{
"error": {
"tracingId": "0c2d0973bdd24224a65e5d0f7d1b6154",
"code": 400,
"status": "BAD_REQUEST",
"supportUrl": "https://support.yapily.com/",
"source": "YAPILY",
"issues": [
{
"type": "INVALID_PAYLOAD",
"code": "11001",
"message": "Timeout error"
},
{
"type": "INVALID_PAYLOAD",
"code": "11003",
"message": "Failed third party dependency"
}
]
}
}
```
| Field | Type | Required | Description |
| ---------------- | ---------------- | -------- | ------------------------------------------------------------------------------------------------------------------------------------------------ |
| `tracingId` | string | Yes | A unique ID assigned by Yapily to use as a reference. Provide this if you contact our support team for assistance |
| `code` | integer | Yes | Numeric HTTP status code associated with the error |
| `status` | string | Yes | Description of the HTTP status error type |
| `supportUrl` | string | Yes | The Yapily support URL where further help and support can be accessed |
| `source` | string | Yes | Indicates who triggered the failure and therefore can take action to correct it. One of: USER (the PSU), INSTITUTION (bank side error) or YAPILY |
| `issues` | array of objects | No | All issues that have been experienced whilst processing the request |
| `issues.type` | string | Yes | Identifies the error category |
| `issues.code` | string | Yes | Identifies the specific error that has occurred. See [error code catalog](#error-catalogue) |
| `issues.message` | string | No | Message associated with the error |
If you need to [contact support](/resources/support), we advise you share the error response with us, or if not possible include the tracingId and the error codes so we can identify your request and trace the origin of the issue.
### Error Code Structure
The error codes are structured as follows:
* **First 2 digits**: Represent the group of the error
* **Last 3 digits**: Represent the specific error within the group
### Error Catalogue
Below is a list of possible error issue codes, along with additional information about how to resolve them.
#### Unknown Error
We will be sending this error if we encountered an error we haven't seen yet and does not have a handler on our side. If you see this error please [contact support](/resources/support).
| Code | Http Status Code | Text | Explanation | Action |
| ---- | ---------------- | ------------- | ------------------------- | --------------- |
| 0 | 400 | Unknown error | An unknown error occurred | Try again later |
#### 10xxx Pre-Flight Checks
This error group represents issues that occur either before payload and header validation, or during third-party calls that use the data from the original request.
| Code | Http Status Code | Text | Explanation | Action |
| ----- | ---------------- | ----------------------------- | ----------------------------------------------------------- | --------------------------------------------- |
| 10001 | 408 | Timeout error | The request timed out as it took too long to respond | Try again |
| 10002 | 429 | Unattended limit | Too many requests in a given amount of time | Wait before retrying |
| 10003 | 424 | Failed third party dependency | An error occurred with a third party | Try again later |
| 10004 | 500 | Internal server error | Internal server error | Reach out to support |
| 10005 | 422 | Retry limit reached | Maximum number of retries reached | Check our API documentation on retry handling |
| 10006 | 422 | Unprocessable entity | Unable to process the instructions contained in the request | Check our API documentation |
#### 11xxx Payload Validation
| Code | Http Status Code | Text | Explanation | Action |
| ----- | ---------------- | --------------------------------------------------------------------------- | ----------------------------------------------------------------------- | ------------------------------------------------------------------------------- |
| 11001 | 400 | The server could not understand the request due to invalid format or syntax | Something in the request is not specified correctly | Check our API documentation |
| 11002 | 400 | Invalid parameter | A parameter is not specified correctly, for example too many characters | Check our API documentation for the field requirements for the request |
| 11003 | 400 | Missing parameter | A required parameter is not included in the request | Check our API documentation to identify the required parameters for the request |
#### 12xxx Request Header Validation
| Code | Http Status Code | Text | Explanation | Action |
| ----- | ---------------- | ----------------------------- | --------------------------------------------- | ----------------------------------------------------------------------------- |
| 12001 | 400 | Invalid header type or syntax | A header is not specified correctly | Check our API documentation for the header requirements for the request |
| 12002 | 400 | Missing mandatory header | A required header is missing from the request | Check our API documentation to see which headers are required for the request |
#### 13xxx Authorisation Process
| Code | Http Status Code | Text | Explanation | Action |
| ----- | ---------------- | ------------------------------- | ------------------------------------------------------------------------------------------- | --------------------------------------------------------------------------------------------------------------------------------------------------- |
| 13001 | 401 | Authorisation header is missing | The authorisation header is missing from the request | All requests to Yapily API require basic authentication, provide your application username and password in the authorisation header for the request |
| 13002 | 403 | Authorisation header is invalid | The authorisation header is invalid | Check our API documentation to see how to provide the authorisation header |
| 13003 | 401 | Authorisation failed | You don't have permissions to make this request. For example, your credentials have expired | View and manage your credentials in the Yapily Console |
| 13004 | 403 | Forbidden | You aren't permitted to make this request | Don't try again |
#### 14xxx Resource Operation
| Code | Http Status Code | Text | Explanation | Action |
| ----- | ---------------- | --------------------------- | ----------------------------------------------------------------------------------------------- | --------------------------------------------------------------------------- |
| 14001 | 404 | Resource not found | It's not possible to retrieve the resource you requested | The resource likely doesn't exist or the ID you provided is incorrect |
| 14002 | 400 | Resource not matching | It's not possible to update the resource as the information provided doesn't match the resource | Check the information supplied in the request is accurate for that resource |
| 14003 | 400 | Resource not valid | The resource request is incomplete or holds invalid data | Check our API documentation to see how to submit data for the resource |
| 14004 | 400 | Resource cannot be modified | The resource cannot be updated | Don't try again |
| 14005 | 409 | Resource conflict | The resource has already been created | Don't try again |
| 14006 | 409 | Resource duplication | A resource with the same ID already exists | Use a different, unique value for ID and try again |
| 14007 | 406 | Resource limit reached | Maximum number of resources that can be created has been reached | Don't try again |
#### 15xxx Payment Process
| Code | Http Status Code | Text | Explanation | Action |
| ----- | ---------------- | --------------------------------------------------------------------------- | ----------------------------------------------------------------------------- | ------------------------------------------------------------------------------------------------------------------------------------------------------------------------------------------- |
| 15001 | 400 | Payment authorisation is declined | The payment failed user authorisation | Ask your end user to re-authorise |
| 15002 | 400 | Destination and source account currency must match | The benefactor and beneficiary account must be of the same currency type | Use a different payment scheme that allows for different currency types |
| 15003 | 400 | Source account has insufficient funds to complete transfer | The benefactor's account doesn't have enough funds to process the transfer | Alert the benefactor that they have insufficient funds. Try again after funds have been increased |
| 15004 | 400 | Client must be the parent client for this application | The application is not a child of the parent application submitted | Check the application used before trying again |
| 15005 | 400 | Exceeded payment limit | The request is higher than the specified payment limit | Reduce the payment value to below the payment limit and try again |
| 15006 | 400 | Unsupported scheme | The payment scheme is unsupported | Check our documentation for the supported payment schemes. Select a supported payment scheme and try again |
| 15007 | 400 | Destination account must be different from the source account | The benefactor and beneficiary account details cannot be the same | Check the payer and payee account details and make sure they are different |
| 15008 | 400 | The payment you wish to return must be of type PAYOUT with status COMPLETED | You can only refund payments of type PAYOUT and status COMPLETED | Check our documentation on refunds. If type PAYOUT, try again when the status is COMPLETED |
| 15009 | 400 | Verification of payee rejected | The beneficiary or beneficiaries failed the Verification of Payee (VOP) check | Verify that all payment recipients have successfully passed the VOP check before resubmitting. See [Verification of Payee documentation](/payments/payment-resources/verification-of-payee) |
#### 16xxx Transactions Retrieval Process
| Code | Http Status Code | Text | Explanation | Action |
| ----- | ---------------- | ---------------------------------------------------------------- | ------------------------------------------------------------------------ | ----------------------------------------- |
| 16001 | 424 | Institution historical data retrieve timeout | The request timed out when fetching historical data from the Institution | Limit the requested transaction period |
| 16002 | 204 | There are no transactions available for the selected time period | No transactions were found for the time period specified | Adjust date parameters and try again |
| 16003 | 424 | The provided dates are outside the consent fetch window | The dates provided are outside of the consent fetch window | Narrow your date parameters and try again |
#### 17xxx Institution Interaction
| Code | Http Status Code | Text | Explanation | Action |
| ----- | ---------------- | ------------------------------------------------------------ | ------------------------------------------------------------------------------------------------------------------------------------------------------- | ------------------------------------------------------------------------------------------------------------------------------------------------------------------------------------------------------------------------------------------------------- |
| 17001 | 404 | The institution is not active in provided country | The institution is not currently available in the country you requested | You are not able to access the institution in this country at this time |
| 17002 | 404 | The institution is not registered against your application | You must register your application with each institution before you can use Yapily's API to access data or make a payment with that institution | You can manage and register with institutions in your Yapily Console. Check our documentation on registration. If you are a Yapily Connect customer, get in touch with [Support](/resources/support) and we can add the institution to your application |
| 17003 | 404 | The institution does not match the payment initiation values | There is a mismatch between institution data submitted at payment initiation and data we hold about the institution | Check your submission data and try again |
| 17004 | 424 | Institution credentials error | The institution does not recognise credentials provided | Check your credentials and try again |
| 17005 | 424 | Unsupported resource | The institution resource is not supported | Check our documentation for the supported resource. Select a supported resource and try again |
| 17006 | 424 | Institution Operation Timeout | There was a timeout due to a slow bank response. This is related to how long the financial institution takes to process our requests, hence the timeout | Try again |
#### 18xxx Query Parameters
| Code | Http Status Code | Text | Explanation | Action |
| ----- | ---------------- | ----------------------- | --------------------------------------------- | ---------------------------------------------------------------------------------- |
| 18001 | 400 | Invalid query parameter | A query parameter is not specified correctly | Check our API documentation for how to specify the query parameter for the request |
| 18002 | 400 | Missing query parameter | A query parameter is missing from the request | Check our API documentation to see the required query parameter for the request |
#### 19xxx Consent Processing
| Code | Http Status Code | Text | Explanation | Action |
| ----- | ---------------- | --------------------------------- | -------------------------------------------------------------- | -------------------------------------------------------------------------------------------------------- |
| 19001 | 400 | Consent authorisation is declined | Consent provided is not authorised for the triggered operation | Check if the consent is authorised for the triggered operation or if the consent has an authorised state |
#### 20xxx Webhook Validation
| Code | Http Status Code | Text | Explanation | Action |
| ----- | ---------------- | --------------------------- | -------------------------------------------------- | ----------------------------------------------------------------- |
| 20001 | 400 | Invalid callback URL syntax | The callback URL must not contain query parameters | Provide the query parameters in the metadata field of the request |
#### 21xxx VRP Mandate Validation
| Code | Http Status Code | Text | Explanation | Action |
| ----- | ---------------- | -------------------------------------------------------- | ------------------------------------------------------------------------------------- | --------------------------------------------------------------------------------------------------------------------------------------- |
| 21001 | 400 | Mandate either not yet active or already expired | Payment not authorised at this time | Check mandate control parameters, then either wait until mandate becomes active or request new VRP authorisation from the user |
| 21002 | 500 | Mandate not found | Payment could not be validated because its mandate was not found | Reach out to support |
| 21003 | 400 | Payment amount exceeds authorised limit per payment | Payment will exceed maximum amount per payment, specified at VRP authorisation | Submit a smaller payment amount or request new VRP authorisation from the user with greater limits |
| 21004 | 400 | Payment amount exceeds authorised limit over some period | Payment will exceed some maximum amount per frequency, specified at VRP authorisation | Submit a smaller payment amount or wait until the next period starts or request new VRP authorisation from the user with greater limits |
***
## HTTP Status Code Format Documentation
**Used by:** Financial Data (Accounts, Transactions, Balances), Single Payments, Bulk Payments, Authorisations, Consents, Institutions & Users, Variable Recurring Payments (VRPs)
### Introduction
After sending an API request, you may receive a response back including an error object. You should build logic to account for any API errors that a request or the system may return.
You may also receive an authorisation error after the end user's redirection to the bank. You should log the query parameters returned from the redirect to understand any failures that occur.
### Error Response Fields
All errors are returned with the same structure. The response object contains the following fields for 4XX errors:
| Field | Type | Required | Description |
| ------------------ | ------- | -------- | ------------------------------------------------------------------------------------------------------------------------------------------------ |
| `code` | integer | Yes | Numeric HTTP status code associated with the error |
| `status` | string | Yes | Description of the HTTP status error type |
| `message` | string | Yes | Description of the exact error, including Yapily support URL |
| `institutionError` | object | No | Error details provided by the institution when the institution is the source of the error |
| `source` | string | No | Indicates who triggered the failure and therefore can take action to correct it. One of: USER (the PSU), INSTITUTION (bank side error) or YAPILY |
| `tracingId` | string | No | A unique ID assigned by Yapily to use as a reference. Provide this if you contact our support team for assistance |
**500 Internal Server Errors** return a simplified structure containing only the `message` field and `tracingId`:
```json theme={null}
{
"error": {
"tracingId": "8f3c6d2a1b4e5f9g0h1i2j3k",
"message": "Internal server error. Please contact support with this tracing ID."
}
}
```
**Example 4XX error response:**
```json theme={null}
{
"error": {
"tracingId": "74b13ce8ed51419f92c5d609e04532de",
"code": 424,
"status": "FAILED_DEPENDENCY",
"message": "The requested resource has not been found in the institution. We can help you on https://support.yapily.com/",
"source": "INSTITUTION",
"institutionError": {
"errorMessage": "{\"Code\":\"400 BadRequest\",\"Id\":\"3517bfc2-c3ee-4f2f-b4f8-12f62478e0d1\",\"Message\":\"No Resource found\",\"Errors\":[{\"ErrorCode\":\"UK.OBIE.Resource.NotFound\",\"Message\":\"No resource found corresponding to the consent id\"}]}",
"httpStatusCode": 400
}
}
}
```
If you need to [contact support](/resources/support), include the tracingId so we can identify your request.
### HTTP Response Codes
Yapily uses standard HTTP response codes to indicate the success or failure of an API request.
| HTTP status code | HTTP status message | Description | Action |
| ---------------- | --------------------- | ------------------------------------------------------------------------------------------------------------------------------------------ | ------------------------------------------------------------------------------------------------------------------------------------ |
| 200 | OK | Everything worked as expected | - |
| 201 | Created | A resource was created successfully | - |
| 400 | Bad Request | The receiving server cannot understand the request because of malformed syntax or a missing field | Check and modify the request before repeating |
| 401 | Unauthorised | Missing, incomplete or invalid credentials (e.g. key, secret, auth token, certificate) | Input valid and complete authentication credentials |
| 403 | Forbidden | Insufficient permissions to process the request | You don't have permissions to perform the request |
| 404 | Not Found | Resource not found | It's not possible to retrieve the resource you requested. This could be the result of an incorrect URL or the resource doesn't exist |
| 406 | Not Acceptable | Unacceptable response content | Include JSON in the list of accepted response values for your application |
| 409 | Conflict | Request couldn't be completed due to conflict with current state of target resource (e.g. attempting to create a user that already exists) | Consult the message returned in the response body to find the source of conflict |
| 424 | Failed Dependency | Unable to complete the required operations with the institution | This indicates a bank side error |
| 429 | Too Many Requests | Too many requests in a given amount of time | Wait before retrying |
| 500 | Internal Server Error | Server could not process the request | Something went wrong on Yapily's end |
| 501 | Not Implemented | The requested feature is unavailable for the specified institution | Confirm which features are supported by each institution |
### Authorisation Errors
Authorisation errors can occur when the user is redirected to the institution to provide their consent. If the user doesn't provide their consent or there is an issue with the institution, the failure response is returned as query parameters.
We recommend you log the query parameters received on your [callback URL](/open-banking-flow/handling-redirects/callback-url) or [redirect URL](/open-banking-flow/handling-redirects/redirect-url) for all requests so you have access to the information explaining what has occurred.
For more information see:
* [Callback URL failure query parameters](/open-banking-flow/handling-redirects/callback-url#failure-query-parameters)
* [Redirect URL failure query parameters](/open-banking-flow/handling-redirects/redirect-url#failure-query-parameters)
### Handling Missing Callbacks
Callbacks may not reach your application due to network issues, browser restrictions, or bank-side errors. When this happens, users can become stuck in incomplete flows. To prevent this, poll the consent or payment status endpoint to check if the authorisation completed successfully.
**Implementation Steps:**
1. **Set a timeout**: Wait 10-15 minutes after redirecting the user to the bank
2. **Start polling**: If no callback is received, poll at increasing intervals: 1s, 2s, 3s, 5s, 8s, 13s, 21s, 34s. Stop after 8 attempts (\~1.5 minutes total).
3. **Handle the result** based on the status returned:
* `AUTHORIZED` - Continue your flow
* `REJECTED` - Show error message to user
* `AWAITING_AUTHORIZATION` - User may still be completing authorisation on the bank screen or app
* `FAILED` - Show error details
**Example Implementation:**
```typescript theme={null}
async function pollConsentStatus(consentId: string, maxAttempts: number = 9): Promise {
const delays = [1000, 1000, 2000, 3000, 5000, 8000, 13000, 21000, 34000]; // Fibonacci sequence in milliseconds
for (let attempt = 0; attempt < maxAttempts; attempt++) {
await sleep(delays[attempt]);
const status = await getConsentStatus(consentId);
// If authorisation complete, return status
if (status !== 'AWAITING_AUTHORIZATION') {
return status;
}
}
// Final check after all attempts
return await getConsentStatus(consentId);
}
```
**If Using Yapily Connect** (`https://auth.yapily.com/`):
Contact [Yapily Support](/resources/support) with your consent or payment ID if you receive no callback. We log all redirects to our URL and can investigate.
**If Using Your Own Redirect URL**:
You must implement the polling strategy above. Yapily cannot log redirects to your URL, so ensure your endpoint has comprehensive logging to diagnose failures.
***
## When to Contact Support
If you encounter errors that you cannot resolve:
1. **Collect the error details:**
* `tracingId` from the error response
* Full error response body
* Request details (endpoint, parameters)
2. **Review the documentation:**
* Check the error code catalog above
* Verify your request format matches our [API Reference](/api-reference)
* Review product-specific documentation
3. **Contact support:**
* Visit our [Support page](/resources/support)
* Include the `tracingId` in your message
* Provide context about what you're trying to accomplish
Our support team can help investigate issues and provide guidance on resolving errors.
# Overview
Source: https://docs.yapily.com/resources/overview
Essential resources for building with Yapily API
## Implementation Resources
Essential resources for building with Yapily API.
Understand error codes, formats, and troubleshooting
Real-time notifications for payment and data events
Test your integration safely with sandbox credentials
SDKs and code samples for popular languages
Get help from Yapily support team
## Additional Resources
Product updates and release notes
Open Banking terminology reference
# Sandbox Overview
Source: https://docs.yapily.com/resources/sandbox/overview
Explore Yapily's sandbox environment for testing open banking integrations without live bank connections. Access test institutions, simulate payment flows, and validate consents.
***
## Introduction
A sandbox is a test environment that allows you to connect your application to a bank and access test accounts to simulate the real Open Banking experience.
You can add sandboxes to your application in the Yapily Console. See our [Get Started guide](/getting-started/get-started) for more information.
You must be [registered](/getting-started/integration-setup/registration) to access to the Open Banking network, including sandbox.
***
## Sandbox testing
There are 2 types of sandbox available:
1. Preconfigured sandbox
2. Sandbox
### Preconfigured sandbox
Preconfigured sandboxes can be added to your application and accessed immediately, without requiring registration or any bank-specific configurations. They are configured to automatically grant you access using Yapily's credentials.
Preconfigured sandboxes are available for a number of major banks. You can filter for the **PRECONFIGURED SANDBOX** environment when selecting institutions to add to your application on the Yapily Console. This will display all the available banks with a preconfigured sandbox.
We recommend testing using the preconfigured sandbox Modelo Sandbox, which is provided by the Open Banking regulators and is actively maintained. Follow our [Get Started guide](/getting-started/get-started) for step by step instructions to add and test Yapily using the preconfigured Modelo Sandbox.
### Sandbox
Non-preconfigured sandboxes are also available, however, they require you to submit your registration certificates and bank-specific credentials manually in order to be accessed. You may also need to create a developer account with the specific bank.
Sandboxes are available for a number of major banks. You can filter for the **SANDBOX** environment when selecting institutions to add to your application on the Yapily Console. This will display all the available banks with a sandbox.
If you have your own license and certificates, you can use these. You'll also be required to submit the necessary bank-specific credentials. The way you obtain the credentials and configure the sandbox varies across institutions. See [sandbox credentials](/resources/sandbox/sandbox-credentials) for the list of credentials for testing the Yapily API with institutions' sandboxes. The relevant documentation is also linked on the credentials page in the Console when registering an institution.
If you don't have your own license and certificates, please contact [Support](/resources/support), specifying your application ID and the institution IDs of the sandboxes you would like to access, and we can configure this for you.
***
## Sandbox quality and functionality
Transactional data in sandboxes might not behave as they would in live banks. For example, payments may transition to `COMPLETED` immediately, transactions might be identical or transactions may not change their status.
The Yapily Mock sandbox is provided by Yapily, and includes features to help with automated testing.
Yapily is not responsible for the quality or functionality of sandboxes belonging to external entities.
The Modelo (Ozone) sandbox is provided by the Open Banking regulators and is actively maintained.
# Sandbox Credentials
Source: https://docs.yapily.com/resources/sandbox/sandbox-credentials
Sandbox test credentials for Yapily institution integrations. Find test usernames, passwords, and OTP codes for each supported sandbox bank institution.
***
## Introduction
We have shortlisted some sandbox banks for you to test different authorisation flows using our Mock TPP application, which you can use to simulate your users' consent. Once authorised you
will be able to access mock financial data and make mock payments.
Transactional data in sandboxes might not behave as they would in live banks. For example, payments may transition to `COMPLETED` immediately, transactions might be identical, transactions may not change their status, and so on.
***
### Natwest Sandbox
* How to login:
CustomerNumber: 123456789012
When prompted to enter your PIN and Password, Natwest Sandbox will display the values to enter above each text box.
Please enter these values in each box before selecting 'Continue'.
***
### Modelo Sandbox
Modelo Sandbox follows the [OBIE OAS](https://openbankinguk.github.io/read-write-api-site3/v3.1.9/profiles/) (OpenAPI Specification).
* How to login: use the below credentials
| user | password |
| ---- | -------- |
| mits | mits |
***
### Lloyds Banking Group Sandboxes
* How to login: use one of the below credentials, password: **Password123**
| brand | retail | commercial | business |
| ---------------- | ------ | ---------- | -------- |
| Lloyds Bank | llr001 | llr001 | llr001 |
| Halifax | har001 | N/A | N/A |
| Bank of Scotland | bar001 | bar001 | bar001 |
| MBNA | mbr001 | N/A | N/A |
***
### Unicaja Banco Sandbox
* How to login: use one of the below credentials
| user | password | Security key | Payee IBAN |
| ----- | -------- | ------------ | ------------------ |
| user1 | 1234 | 123456 | NL25TEST1209063889 |
***
### SNS Bank Sandbox
* How to login: click on "Give permission" button
***
### Modelo Sandbox
* How to login: use the below credentials
| user | password | Payee IBAN |
| ---- | -------- | ------------------ |
| mits | mits | NL25TEST1209063889 |
***
### Deutsche Bank Sandbox
* How to login: There are no login credentials for this sandbox. In the bank, select SCA-OK (for the successful authorised use case) or SCA-NOK (for the failed authorisation use case)
* For Hosted, enter:
* **Branch**: 615
* **Account**: 4033403 (OK) or 4033411 (RJCT)
| Payee IBAN | Payer IBAN | PSU-ID (OK) | PSU-ID (RJCT) |
| ---------------------- | ---------------------- | ----------- | ------------- |
| DE25648730420109480400 | DE17215730140403340300 | 6154033403 | 6154033411 |
The `psu-id` must be provided for:
* All POST account authorisation requests
* All POST payment authorisation requests
* The Payment does not go beyond the `PENDING` status.
***
### Postbank Bank Sandbox
* How to login: There are no login credentials for this sandbox. In the bank, select SCA-OK (for the successful authorised use case) or SCA-NOK (for the failed authorisation use case)
* For Hosted enter Branch: 615 Account: 4033403 (OK) or Branch: 615 Account: 4033411 (RJCT)
| Payee IBAN | Payer IBAN | PSU-ID (OK) | PSU-ID (RJCT) |
| ---------------------- | ---------------------- | ----------- | ------------- |
| DE25648730420109480400 | DE17215730140403340300 | 6154033403 | 6154033411 |
The `psu-id` must be provided for:
* All POST account authorisation requests
* All POST payment authorisation requests
***
### Fineco Sandbox
* How to login: Use the credentials below
| User ID | Password | PIN dispositivo | SMS PIN | Payee IBAN | Payer IBAN |
| -------- | -------- | --------------- | ------- | ------------------ | --------------------------- |
| 00000000 | 11111111 | 11111111 | 222222 | NL25TEST1209063889 | IT31X0301503200000003517230 |
***
### BAWAG PSK / Easybank Sandbox
* How to login: Use the credentials below and select SMS method
| PSU-ID | Password | SMS-OTP | Payer IBAN 1 | Currency | Payer IBAN 2 | Currency |
| --------------- | -------- | ------- | ---------------------- | -------- | ---------------------- | -------- |
| demo | 1111 | 1111 | DE86466500050019001551 | EUR | DE75512108001245126199 | EUR |
| justin-heinrich | 123456 | 123456 | DE12500105170648489890 | EUR | DE90500105170648489844 | PLN |
| jmaib | 9999 | 9999 | DE32590500000003001112 | EUR | | |
| sandy\_bodas | 1111 | 1111 | DE26144792004484484484 | EUR | | |
***
### Commerzbank AG Sandbox
* How to login: Login doesn't require credentials
***
### Oberbank Sandbox
* How to login: Use the credentials below
| userCredentials.id | userCredentials.password | Payer IBAN |
| ------------------ | ------------------------ | ---------------------- |
| aspsp1 | aspsp1 | DE54500105173424724776 |
**SCA code depends on selected SCA method:**
| SCA method | Test case | SCA code |
| ---------- | ---------------- | ------------------------------------------------------- |
| sms | SCA code | HHmm (HH - 24 hour format; mm - current minutes) |
| push | decoupled (push) | none |
| chip | SCA code | ddmm (dd - current day in a month mm - current minutes) |
***
### Fiducia Sandbox
* How to login: Use the credentials below
`userCredentials.id` can be a range of values based on the scenario you wish to test:
| userCredentials.id | Test case | SCA method |
| ------------------ | ------------------------------------------------ | --------------------------------------------- |
| VRK1234567890ALL | Multi SCA (selecting 946 triggers decoupled SCA) | psuIdWith(ALL) |
| VRK1234567890SMS | Single SCA | psuIdWith(mobile Tan / SMS\_OTP) |
| VRK1234567890HHD | Single SCA | psuIdWith(Smart Tan Plus HHD 1.4 / CHIP\_OTP) |
| userCredentials.password | scaCode | Payer IBAN |
| ------------------------ | ------- | ---------------------- |
| password | 123456 | DE39499999600000005111 |
***
### Luminor Sandbox
* How to login: use the below credentials
| user | Country |
| ------ | --------- |
| 111111 | Lithuania |
| 222222 | Latvia |
| 333333 | Estonia |
***
### Intesa group Sandbox
* How to login: use the below credentials on the login page. Those are only valid in the development environment
* SCA validation autocompletes after a few seconds, so no further action is required.
* Same credentials can be used for corporate institution, but the product code submitted is different.
| user | password |
| -------- | -------- |
| 06642666 | 20897 |
***
### Mock ASPSP (UK)
* Test case: Redirect
* How to login: not required
There is no UI, excellent for automated tests
***
### Mock ASPSP STET
* Test case: Redirect
* How to login: not required
There is no UI, excellent for automated tests
***
### Mock ASPSP Berlin Group (Redirect)
* How to login: not required
There is no UI, excellent for automated tests
***
### Mock ASPSP Berlin Group (Embedded)
* How to login: use the below credentials
| user | password | scaCode |
| ---------- | -------- | ------- |
| any string | 123456 | 987654 |
Note: To be able to start Decoupled Embedded flow, the authenticationMethodId must be sent as 946 in the second step (start authorisation).
# Test cases
Source: https://docs.yapily.com/resources/sandbox/test-cases
Recommended test cases for validating your Yapily integration in the sandbox environment. Covers payment flows, data access scenarios, and error conditions to verify.
We have grouped the recommended sandboxes for testing specific scenarios and authorisation flows.
***
# **Single redirect**
Below, you will discover the suggested sandboxes tailored for executing [single redirect](/open-banking-flow/user-authorisation/single-redirect) authorisation flow
## **United Kingdom**
UK banks do not require the providing payer details; therefore, only the following properties are required:
```json theme={null}
{
"applicationUserId": "single-payment-tutorial",
"institutionId": "modelo-sandbox",
"callback": "https://display-parameters.com/",
"paymentRequest": {
"type": "DOMESTIC_PAYMENT",
"reference": "Bills Coffee Shop", //maximum of 18 characters
"paymentIdempotencyId": "c0ab9b09c20c4ec7a77e", //maximum of 35 characters
"amount": {
"amount": 8.70,
"currency": "GBP"
},
"payee": {
"name": "BILLS COFFEE LTD",
"accountIdentifications": [
{
"type": "ACCOUNT_NUMBER",
"identification": "{accountNumber}"
},
{
"type": "SORT_CODE",
"identification": "{sortCode}"
}
]
}
}
}
```
### Natwest Sandbox
#### Payments and Data
Institution ID: natwest-sandbox
Supported Features:
* Payments:
* Single payment
* Periodic payments
* Data:
* Accounts
* Transactions
[Natwest Sandbox login credentials](/resources/sandbox/sandbox-credentials#natwest-sandbox)
#### Variable Recurring Payments
Institution ID: natwest-sandbox-vrp
Supported Features:
* Sweeping Variable Recurring Payments
* Commercial Variable Recurring Payments
[Natwest Sandbox login credentials](/resources/sandbox/sandbox-credentials#natwest-sandbox)
***
### Modelo Sandbox
Modelo Sandbox follows the [OBIE OAS](https://openbankinguk.github.io/read-write-api-site3/v3.1.9/profiles/) (OpenAPI Specification).
Institution ID: modelo-sandbox
Supported Features:
* Payments:
* Single payment
* Scheduled payments
* Periodic payments
* Bulk payments
* Data:
* Accounts
* Identity
* Transactions
[Modelo Sandbox login credentials](/resources/sandbox/sandbox-credentials#modelo-sandbox)
**Note**: AIS Consents expire after 10 minutes
***
### Mock ASPSP
Institution IDs:
* mock-sandbox
* mock-sandbox-v1
Supported Features:
* Payments:
* Single payment
* Scheduled payments
* Periodic payments
* Bulk payments
* Commercial Variable Recurring Payments
* Data:
* Accounts
* Transactions
[Mock ASPSP login credentials](/resources/sandbox/sandbox-credentials#modelo-sandbox)
***
### Lloyds Banking Group Sandboxes
Institution IDs:
* lloyds-sandbox
* halifax-sandbox
* bankofscotland-sandbox
* mbna-sandbox
Supported Features:
* Payments:
* Single payment
* Scheduled payments
* Periodic payments
* [readRefund](/payments/payment-resources/reverse-payments) supported
* Data:
* Accounts
* Transactions
[Lloyds Banking Group Sandboxes credentials](/resources/sandbox/sandbox-credentials#lloyds-banking-group-sandboxes)
***
## **European (without payer)**
Institutions outside the UK usually require to provide payer details, however it is not currently required in the following EU countries:
* France
* Spain
* Portugal
* Ireland
The API request in these countries require the following properties:
```json theme={null}
{
"applicationUserId": "single-payment-tutorial",
"institutionId": "unicajabanco-sandbox",
"callback": "https://display-parameters.com/",
"paymentRequest": {
"type": "DOMESTIC_PAYMENT",
"reference": "Bill Payment", //maximum of 140 characters
"paymentIdempotencyId": "c0ab9b09c20c4ec7a77e", //maximum of 35 characters
"amount": {
"amount": 5,
"currency": "EUR"
},
"payee": {
"name": "Jane Doe",
"address": {
"country": "ES",
"postCode": "48310",
"townName": "Elantxobe",
"addressLines": ["Avenida Cervantes 5"]
},
"accountIdentifications": [
{
"type": "IBAN",
"identification": "ES2621030001350000000001"
}
]
}
}
}
```
### Unicaja Banco Sandbox
Institution ID: unicajabanco-sandbox
Supported Features:
* Payments:
* Single payment
* Scheduled payments
* Periodic payments
* Data:
* Accounts
* Transactions
[Unicaja Banco Sandbox credentials](/resources/sandbox/sandbox-credentials#unicaja-banco-sandbox)
***
### SNS Bank Sandbox
Institution ID: snsbank-sandbox
Supported Features:
* Payments:
* Single payment
* Scheduled payments
* Periodic payments
* Data:
* Accounts
* Transactions
[SNS Bank Sandbox credentials](/resources/sandbox/sandbox-credentials#sns-bank-sandbox)
***
### Modelo Sandbox
Institution ID: modelo-sandbox
Supported Features:
* Payments:
* Single payment
* Scheduled payments
* Periodic payments
* Data:
* Accounts
* Identity
* Transactions
[Modelo Sandbox credentials](/resources/sandbox/sandbox-credentials#modelo-sandbox)
**Note**: AIS Consents expire after 10 minutes
***
## **European (with payer)**
Initiating payments outside of UK, France, Spain, Portugal and Ireland requires specifying payer details, therefore the request should include payer name and their IBAN.
Additionally, some of the institutions require [PSU Identifier](/open-banking-flow/user-authorisation/psu-identifiers) that has to be obtained from the customer:
```json theme={null}
curl -L -X POST 'https://api.yapily.com/payment-auth-requests' \
-H 'Content-Type: application/json' \
-H 'psu-id: 6154033403' \
-u 'APPLICATION_KEY:APPLICATION_SECRET' \
-d '{
"applicationUserId": "single-payment-tutorial",
"institutionId": "deutschebank-sandbox",
"callback": "https://display-parameters.com/",
"paymentRequest": {
"type": "DOMESTIC_PAYMENT",
"reference": "Bill Payment", //maximum of 140 characters
"paymentIdempotencyId": "c0ab9b09c20c4ec7a77e", //maximum of 35 characters
"amount": {
"amount": 5,
"currency": "EUR"
},
"payee": {
"name": "Jane Doe",
"address": {
"country": "DE",
"postCode": "83458",
"townName": "Schneizlreuth",
"addressLines": ["Langenhorner Chaussee 27"]
},
"accountIdentifications": [
{
"type": "IBAN",
"identification": "DE25648730420109480400"
}
]
},
"payer": {
"name": "John Doe",
"accountIdentifications": [
{
"type": "IBAN",
"identification": "DE17215730140403340300"
}
]
}
}
}'
```
### Deutsche Bank Sandbox
Institution ID: deutschebank-sandbox
Supported Features:
* Payments:
* Single payment
* Periodic payments
* Data:
* Accounts
* Transactions
**Note**: Payments above 50 EUR will fail.
[Deutsche Bank Sandbox credentials](/resources/sandbox/sandbox-credentials#deutsche-bank-sandbox)
***
### Postbank Bank Sandbox
Institution ID: postbank-sandbox
Supported Features:
* Payments:
* Single payment
* Periodic payments
* Data:
* Accounts
* Transactions
**Note**: Payments above 50 EUR will fail.
[Postbank Bank Sandbox credentials](/resources/sandbox/sandbox-credentials#postbank-bank-sandbox)
***
### Fineco Sandbox
* Institution ID: fineco-sandbox
Supported Features:
* Payments:
* Single payment
* Periodic payments
* Data:
* Accounts
* Transactions
**Note**: Sandbox returns static responses
[Fineco Sandbox credentials](/resources/sandbox/sandbox-credentials#fineco-sandbox)
***
### BAWAG PSK / Easybank Sandbox
Institution ID: bawag-sandbox
Supported Features:
* Payments:
* Single payment
* Scheduled payments
* Periodic payments
* Data:
* Accounts
* Transactions
**Note**: AIS endpoints limited to 4 calls a day
[BAWAG PSK Sandbox credentials](/resources/sandbox/sandbox-credentials#bawag-psk-/-easybank-sandbox)
***
### Commerzbank AG Sandbox
Institution ID: commerzbank-sandbox
Supported Features:
* Payments:
* Single payment
* Periodic payments
- Data: Transactions not available
[Commerzbank Sandbox credentials](/resources/sandbox/sandbox-credentials#commerzbank-ag-sandbox)
***
# **Embedded authorisation**
Below, you will discover the suggested sandboxes tailored for executing [embedded authorisation](/open-banking-flow/user-authorisation/embedded) authorisation flow.
The initial embedded request should include the following properties:
```json theme={null}
{
"applicationUserId": "single-payment-tutorial",
"institutionId": "fiducia-sandbox",
"userCredentials": {
"id": "VRK1234567890ALL", //online banking username/id
"password": "password" //online banking password
},
"paymentRequest": {
"type": "DOMESTIC_PAYMENT",
"reference": "Bill Payment", //maximum of 140 characters
"paymentIdempotencyId": "c0ab9b09c20c4ec7a77e", //maximum of 35 characters
"amount": {
"amount": 5,
"currency": "EUR"
},
"payee": {
"name": "Jane Doe",
"address": {
"country": "DE",
"postCode": "83458",
"townName": "Schneizlreuth",
"addressLines": ["Langenhorner Chaussee 27"]
},
"accountIdentifications": [
{
"type": "IBAN",
"identification": "DE58648730420109499400"
}
]
},
"payer": {
"name": "John Doe",
"accountIdentifications": [
{
"type": "IBAN",
"identification": "DE39499999600000005111"
}
]
}
}
}
```
After that, the `userCredentials` object should be replaced with either `scaCode` or `selectedScaMethod.id` property depending on the returned consent status:
* `AWAITING_SCA_CODE` - provide `scaCode` when executing `PUT` method
* `AWAITING_SCA_METHOD` - provide `selectedScaMethod.id` when executing `PUT`. The options will be returned via the API
* `AWAITING_DECOUPLED_AUTHORIZATION` - poll [GET /consents/\{consent-id}](/api-reference/consents/get-consent) endpoint until the status changes.
### Oberbank Sandbox
Institution ID: oberbank-sandbox
Supported Features:
* Payments:
* Single payment
* Scheduled payments
* Periodic payments
* Data:
* Accounts
* transactions
[Oberbank Sandbox credentials](/resources/sandbox/sandbox-credentials#oberbank-sandbox)
### Fiducia Sandbox
Institution ID: fiducia-sandbox
Supported Features:
* Payments:
* Single payment
* Data: only authorisation flow - data endpoints are not available
[Fiducia Sandbox credentials](/resources/sandbox/sandbox-credentials#fiducia-sandbox)
**Note**:
Accounts and Transactions
* Support for both [Created Embedded Account Authorisation](/api-reference/authorisations/create-embedded-account-authorisation) and
[Update Embedded Account Authorisation](/api-reference/authorisations/update-embedded-account-authorisation) authorisation endpoints
* No support for [Financial Data Endpoints](/api-reference/financial-data/get-accounts)
Consents created using [Created Embedded Account Authorisation](/api-reference/authorisations/create-embedded-account-authorisation)
or [Update Embedded Account Authorisation](/api-reference/authorisations/update-embedded-account-authorisation) with the Fiducia sandbox will
not be able to access any of the [Financial Data Endpoints](/api-reference/financial-data/get-accounts) due to a
[restriction with the sandbox](https://storage.googleapis.com/static.yapily.com/images/documentation/2021/20210116_FGI_Documentation_XS2A_Test_Environment_V6.pdf).
Fiducia Sandbox returns `ACCP` as the final payment status. As a result, this is mapped to `COMPLETED` in the Yapily API response for Fiducia Sandbox.
This is different from the Live institution.
For more information about this sandbox, see the
[FGI Documentation](https://storage.googleapis.com/static.yapily.com/images/documentation/2021/20210116_FGI_Documentation_XS2A_Test_Environment_V6.pdf).
# Support
Source: https://docs.yapily.com/resources/support
Get help with your Yapily integration. Access documentation, raise a support ticket, or contact the team directly for technical assistance with the Yapily API.
## Raising issues/Questions
You can open a ticket with our support team via our [support portal](http://support-portal.yapily.com/).
In your request please provide the following information:
1. The **Title/Subject** of the Issue - ensuring clarity
2. The **Description** including the detail and error (see error handling references), and any additional context
3. The **Priority** in-line with our agreed priority levels
4. The **Application ID**
5. The **Product** that you're using specific to the issue/request
6. The **[Tracing ID](/resources/errors#error-response-fields)** for the relevant requests (or if you don't store the tracingId the timestamp of the request and other unique IDs in the path or body that will identify your requests) - Include in the `Description` field
7. The **Environment**, i.e. Production or Sandbox, or both
8. The **Country** in which you are seeing the issue
Yapily Support works in order of priority for our customer base. Raising tickets via the portal above is more optimal and recommended.
## Need another team?
Our teams are ready to help:
1. If you are seeking to **Get Started with Yapily** you can submit a request to our commercial team here: [Get Started](https://www.yapily.com/company/get-started) and they will contact you
2. If you are an end user and have a concern or **Complaint about Yapily** as a service you can contact: [Complaints](https://www.yapily.com/company/complaints) or email: [complaints@yapily.com](mailto:complaints@yapily.com?subject=Complaint%20Query)
## Status Pages
Yapily strives to provide clear and timely service messaging to our status pages. We highly recommend that you subscribe to these status pages to ensure that you receive an update if there is a service disruption.
Monitor the Yapily platform status and uptime
Check status of individual financial institutions
## Contact Information
You can expect to receive email replies from: [support@yapily.com](mailto:support@yapily.com?subject=Documentation%20Query)
# Commercial VRP tutorial using Yapily Hosted Pages
Source: https://docs.yapily.com/tools-and-services/hosted-pages/cvrp-tutorial-hosted-pages
Tutorial for setting up a Commercial VRP (cVRP) mandate using Yapily Hosted Pages. Generate a consent session URL and guide users through the complete VRP authorization journey.
Commercial VRP (cVRP) is available as a [Private Beta version](/getting-started/overview#private-beta). Please contact your Customer Success Manager if you would like to access it.
## Introduction
This tutorial explains how to use Yapily Hosted Pages to set up a UK domestic Commercial VRP (cVRP) mandate.
**Note:** All requests made to the Yapily API require [basic authentication](/getting-started/integration-setup/api-authentication).
***
Make a request to `POST /hosted/vrp/commercial/consents`, including the consent request details, institution country code, redirect URL and user ID.
You must provide the `institutionIdentifiers.institutionCountryCode` field. This controls the country of the institution the user can set up the mandate with.
In addition, you can optionally provide the ID of a specific institution in `institutionIdentifiers.institutionId` field to only allow mandate setup with this institution. This skips the bank selection screen in the hosted flow.
You can optionally provide `userSettings` to set the user's preferred language and location.
Yapily Connect customers must provide payer details in the `complianceData` object, including Transaction Risk Indicators (TRIs) such as `PaymentContextCode`, `PaymentPurposeCode`, and `MerchantCategoryCode`. If the ultimate recipient of funds differs from the named Creditor, also provide the `UltimateCreditor` field. See [compliance requirements](/payments/vrps/additional-information#compliance-requirements) for the full list of required fields.
```bash Request theme={null}
curl -L -X POST 'https://api.yapily.com/hosted/vrp/commercial/consents' \
-H 'Content-Type: application/json' \
-u 'APPLICATION_KEY:APPLICATION_SECRET' \
-d '{
"applicationUserId": "john.doe@company.com",
"institutionIdentifiers": {
"institutionCountryCode": "GB"
},
"userSettings": {
"language": "en",
"location": "GB"
},
"redirectUrl": "https://tpp-application.com/",
"mandateDetails": {
"mandateIdentification": "mandate-001",
"creditor": {
"name": "Utility Provider",
"accountIdentifications": [
{
"type": "SORT_CODE",
"identification": "123456"
},
{
"type": "ACCOUNT_NUMBER",
"identification": "12345678"
}
]
},
"maximumAmount": 500,
"currency": "GBP",
"periodicLimits": {
"alignment": "CALENDAR",
"frequency": "MONTHLY",
"maxAmount": 500
}
},
"complianceData": {
"psuIdentifiers": {
"name": "John Doe"
},
"transactionRiskIndicators": {
"paymentContextCode": "BillingGoodsAndServicesInAdvance",
"paymentPurposeCode": "BONU",
"contractPresentIndicator": true,
"beneficiaryPrePopulated": true,
"beneficiaryAccountType": "PersonalCurrentAccount",
"merchantCategoryCode": "4900"
}
},
"psuInteractionType": "PRESENT"
}'
```
```json Response theme={null}
{
"meta": {
"tracingId": "2dbfd85b4f2940c6a206e96dd90e52d0"
},
"data": {
"consentRequestId": "eb39f8ae-aeff-4ffa-a23d-d4a5b3eff406",
"userId": "3ddf5dd0-aa48-4d0f-baa7-fa057e9e911d",
"applicationUserId": "john.doe@company.com",
"applicationId": "64949de6-6510-4d70-9500-d4aa094c506c",
"institutionIdentifiers": {
"institutionId": "modelo-sandbox",
"institutionCountryCode": "GB"
},
"userSettings": {
"language": "en",
"location": "GB"
},
"redirectUrl": "https://tpp-application.com/",
"mandateDetails": {
"mandateIdentification": "mandate-001",
"creditor": {
"name": "Utility Provider",
"accountIdentifications": [
{
"type": "SORT_CODE",
"identification": "123456"
},
{
"type": "ACCOUNT_NUMBER",
"identification": "12345678"
}
]
},
"maximumAmount": 500,
"currency": "GBP",
"periodicLimits": {
"alignment": "CALENDAR",
"frequency": "MONTHLY",
"maxAmount": 500
}
},
"hostedUrl": "https://prototypes.yapily.com/auth-link1.html",
"authToken": "eyJhbGciOiJIUzI1NiIsInR5cCI6IkpXVCJ9.eyJzdWIiOiIxMjM0NTY3ODkwIiwibmFtZSI6IkpvaG4gRG9lIiwiaWF0IjoxNTE2MjM5MDIyfQ.SflKxwRJSMeKKF2QT4fwpMeJf36POk6yJV_adQssw5c",
"createdAt": "2021-06-10T11:26:54.887Z",
"authorisationExpiresAt": "2021-06-10T11:36:54.887Z",
"status": "ACTIVE"
}
}
```
Store the `hostedUrl` returned in the response to use in step 2.
Redirect the end user from your application to the Yapily Hosted Pages URL. This initiates the user journey for the cVRP mandate request.
The end user follows the Yapily hosted screens to complete the cVRP mandate setup.
A typical journey includes bank selection, a limits confirmation screen, redirection to their chosen bank, mandate authorization confirmation, and redirection back to your application.
Yapily Hosted Pages automatically handles all pre-mandate disclosure requirements under the UKPI scheme on your behalf. No additional implementation is needed to meet regulatory obligations.
See [UI screens](/tools-and-services/hosted-pages/ui-screens) for more details.
The user will be automatically redirected to the `redirectUrl` specified in the initial consent request in Step 1 once the authorization flow is complete. We recommend you redirect the user back to your application to create a good user experience.
The `consentRequestId` is returned as part of the `redirectUrl`. You can use this to check the status of the consent in step 4.
On an end user's completion of the hosted pages flow, you should check the consent status to confirm the mandate has been authorized successfully before proceeding with any further actions.
You can retrieve details of the consent request using `GET /hosted/vrp/commercial/consents/{consentRequestId}`, specifying the `consentRequestId` in the path.
```bash Request theme={null}
curl -L -X GET 'https://api.yapily.com/hosted/vrp/commercial/consents/{consentRequestId}' \
-H 'Content-Type: application/json' \
-u 'APPLICATION_KEY:APPLICATION_SECRET'
```
```json Response theme={null}
{
"meta": {
"tracingId": "2dbfd85b4f2940c6a206e96dd90e52d0"
},
"data": {
"consentRequestId": "eb39f8ae-aeff-4ffa-a23d-d4a5b3eff406",
"userId": "3ddf5dd0-aa48-4d0f-baa7-fa057e9e911d",
"applicationUserId": "john.doe@company.com",
"applicationId": "64949de6-6510-4d70-9500-d4aa094c506c",
"institutionIdentifiers": {
"institutionId": "modelo-sandbox",
"institutionCountryCode": "GB"
},
"userSettings": {
"language": "en",
"location": "GB"
},
"redirectUrl": "https://tpp-application.com/",
"mandateDetails": {
"mandateIdentification": "mandate-001",
"creditor": {
"name": "Utility Provider",
"accountIdentifications": [
{
"type": "SORT_CODE",
"identification": "123456"
},
{
"type": "ACCOUNT_NUMBER",
"identification": "12345678"
}
]
},
"maximumAmount": 500,
"currency": "GBP",
"periodicLimits": {
"alignment": "CALENDAR",
"frequency": "MONTHLY",
"maxAmount": 500
}
},
"createdAt": "2021-06-10T11:26:54.887Z",
"authorisationExpiresAt": "2021-06-10T11:36:54.887Z",
"status": "AUTHORISED",
"consentToken": "3fa85f64-5717-4562-b3fc-2c963f66afa6"
}
}
```
Store the `consentToken` from the response — you will need it to execute payments against this mandate.
### Monitoring Consent Status
We recommend using [webhooks](/tools-and-services/hosted-pages/payment-webhooks) to receive real-time notifications when your consent is authorized or fails. This provides:
* **Immediate status updates** - No polling delay
* **Reduced API calls** - Cost savings for both parties
* **Better user experience** - Faster feedback to customers
If you cannot use webhooks, you can monitor the consent status by repeatedly calling the GET endpoint above until the `status` field transitions to `AUTHORISED` or `FAILED`.
**Note:** Polling increases API usage and may delay status updates compared to webhooks.
***
## Further Reading
* [VRP Get Started](/payments/vrps/get-started) - Full cVRP flow including payment execution
* [VRP Mandate Details](/payments/vrps/mandate-details) - Mandate parameter reference
* [VRP Institution Coverage](/payments/vrps/coverage) - Supported institutions for cVRP
* [VRP Additional Information](/payments/vrps/additional-information) - Compliance requirements and use case scope
* [Webhooks](/tools-and-services/webhooks/introduction) - Real-time payment notifications
# Hosted Data Consent Statuses and Phases
Source: https://docs.yapily.com/tools-and-services/hosted-pages/data-consent-statuses
Introduction to Yapily Hosted Pages data consent statuses and phases
Hosted Pages is available as a [Beta version](/getting-started/overview#yapily-hosted-pages-beta).
Please contact your Customer Success Manager if you would like to access it.
***
## Introduction
Hosted data consent statuses and phases are used to track the progress of a consent request made using Yapily Hosted Pages for data access.
This guide explains the differences between the `status` and `phases` fields in the [GET /hosted/consent-requests response](/api-reference/hosted-consent-pages/get-hosted-consent-request).
## Related Fields in Response
The following example shows the key fields from a response of the [GET /hosted/consent-requests/](/api-reference/hosted-consent-pages/get-hosted-consent-request) endpoint.
For brevity, only the `phases` and `consentStatus` fields are included.
```json theme={null}
{
...
"data": {
...
"consentStatus": "AUTHORIZED",
"phases": [
{
"phaseName": "INITIATED",
"phaseCreatedAt": "2023-05-10T07:56:54.887Z"
},
{
"phaseName": "INSTITUTION_SUBMITTED",
"phaseCreatedAt": "2023-05-10T07:57:02.123Z"
},
{
"phaseName": "AUTHORISATION_INITIATED",
"phaseCreatedAt": "2023-05-10T07:57:05.123Z"
},
{
"phaseName": "AUTHORISATION_CREATED",
"phaseCreatedAt": "2023-05-10T07:57:06.637Z"
},
{
"phaseName": "CONSENT_POLLING_STARTED",
"phaseCreatedAt": "2023-05-10T07:57:07.654Z"
},
{
"phaseName": "CONSENT_POLLING_ENDED",
"phaseCreatedAt": "2023-05-10T07:57:10.288Z"
},
{
"phaseName": "AUTHORISED",
"phaseCreatedAt": "2023-05-10T07:57:10.637Z"
},
{
"phaseName": "FINISHED",
"phaseCreatedAt": "2023-05-10T07:57:11.867Z"
}
]
...
}
}
```
The `phases` array records the chronological sequence of phases that the consent request has gone through. The `consentStatus` field indicates the current status of the consent.
## Mapping Between Status and Phases
As phases are recorded for every step that a consent request goes through, they provide a more detailed view of the progress. Therefore, multiple phases can map to a single status.
The table below provides a mapping of the phases to the consent statuses:
| Phase Name | Phase Description | Status |
| ------------------------------- | ------------------------------------------------------------------------------------------------------------------------------------ | ------------------------- |
| INITIATED | Process initiated | PENDING |
| INSTITUTION\_SUBMITTED | Consent institution submitted | PENDING |
| AUTHORISATION\_INITIATED | All details required for consent initiation have been collected | PENDING |
| AUTHORISATION\_CREATED | Consent authorisation request created with Institution, awaiting authorisation completion | PENDING |
| AUTHORISATION\_FAILED | Consent authorisation failed and will not proceed further | FAILED |
| AUTHORISATION\_REJECTED | Consent Authorisation request rejected by Institution and will not proceed further | FAILED |
| DECOUPLED\_AUTHORISATION | For embedded banks, decoupled authorisation was initiated by the bank | PENDING |
| EMBEDDED\_CREDENTIAL\_REQUESTED | For embedded banks, a UI element to collect user credentials was displayed | PENDING |
| EMBEDDED\_CODE\_REQUESTED | For embedded banks, a UI element to collect SCA for initiated consent was displayed | PENDING |
| EMBEDDED\_TYPE\_REQUESTED | For embedded banks, a UI element to allow the user to select their preferred SCA method for this consent authorisation was displayed | PENDING |
| EMBEDDED\_CODE\_COLLECTED | For embedded banks, SCA code was collected for consent authorisation | PENDING |
| EMBEDDED\_TYPE\_SELECTED | For embedded banks, preferred SCA method was selected for consent authorisation | PENDING |
| CONSENT\_POLLING\_STARTED | Polling the bank for consent authorisation status started | PENDING |
| CONSENT\_POLLING\_ENDED | Polling the bank for consent authorisation status finished | PENDING |
| AUTHORISED | Consent authorisation completed | AUTHORIZED |
| REVOKED | Consent has been revoked and is no longer active | REVOKED |
| FINISHED | Flow finished | AUTHORIZED/PENDING/FAILED |
***
## Related Resources
### Hosted Pages Resources
* [Data Tutorial](/tools-and-services/hosted-pages/payment-tutorial-hosted-data) - Complete data access integration guide
* [UI Screens](/tools-and-services/hosted-pages/ui-screens) - Visual guide to the hosted flow
### API Resources
* [GET /hosted/consent-requests](/api-reference/hosted-consent-pages/get-hosted-consent-request) - Retrieve consent request details
* [Consent Management](/data/financial-data-resources/financial-data-consents) - Managing data consents
### Implementation Resources
* [Error Handling](/resources/errors) - Handle consent failures gracefully
* [Support](/resources/support) - Get help with implementation
# Yapily Hosted Pages
Source: https://docs.yapily.com/tools-and-services/hosted-pages/overview
Yapily Hosted Pages provides a fully managed open banking UI for payments and data access. Launch quickly without building institution selection or consent screens yourself.
Hosted Pages is available as a [Beta version](/getting-started/overview#yapily-hosted-pages-beta).
Please contact your Customer Success Manager if you would like to access it.
***
## Introduction
Yapily Hosted Pages is a fully out-of-the-box, hosted solution that provides a pre-built user interface (UI) on top of our existing single payments API.
It enables you to quickly and easily use Yapily's API to accept open banking payments from users, as well as test and experience Yapily's open banking services.
See [Hosted vs API](/concepts/hosted-vs-api) for a comparison of integration approaches.
Hosted Pages guides your users through the payment authorisation process, collects the necessary information to make a payment and executes the payment once consent is granted by the user.
The UI is available on web and mobile browsers, optimised for a seamless user experience and compatible with all supported institutions. It is fully hosted and maintained by Yapily.
We currently support Yapily Hosted pages in: **United Kingdom, Germany, Lithuania, Netherlands, Belgium, Spain, France, Austria and Portugal** for **Single Payments**.
**United Kingdom, Germany, Lithuania, Netherlands, Belgium, Spain, France, Austria and Portugal, Sweden, Norway, Denmark and Ireland** are currently available for **Data**.
Currently only single payments are supported.
***
## Advantages
#### Pre-built UI
* Quick to implement
* No development effort
* Compliant by default
#### Simple integration process
* 1 API call
* Low development effort
* Real-time webhook notifications for payment status
#### Customisable
* Match your brand
***
## End user journey
Yapily Hosted Pages provides a pre-built UI to manage the entire user journey once the user decides to use open banking in your application.
A typical user journey is:
1. The end user wants to top up their account on your application.
2. The user clicks 'pay by bank' at checkout.
3. The user is redirected to Yapily's hosted pages.
4. The user completes the payment authorisation flow and is redirected back to your application on completion.
### Authorisation flow
The payment authorisation flow varies depending on the institution. The end user journey and [UI screens](/tools-and-services/hosted-pages/ui-screens) vary depending on the flow. Yapily Hosted Pages supports both redirect and embedded flows.
You can read more about [user authorisation flows](/open-banking-flow/user-authorisation/overview).
#### Redirect authorisation flow
![Redirect authorisation flow user journey]() #### Embedded authorisation flow
#### Embedded authorisation flow
![Embedded authorisation flow user journey]() ***
## Get started
See our [single payments tutorial](/tools-and-services/hosted-pages/payment-tutorial-hosted-pages) to explore a sample integration with Yapily Hosted Pages.
Try our [demo app](https://demo.yapily.com/) to complete the Yapily Hosted Pages flow for yourself with your real banking credentials.
***
## Related resources
### Payments Resources
* [Payment Tutorial](/tools-and-services/hosted-pages/payment-tutorial-hosted-pages) - Step-by-step payment integration guide
* [Payment Status & Phase](/tools-and-services/hosted-pages/payment-status-and-phase) - Understanding payment lifecycle
* [Payment Webhooks](/tools-and-services/hosted-pages/payment-webhooks) - Real-time payment notifications
### Data Resources
* [Data Tutorial](/tools-and-services/hosted-pages/payment-tutorial-hosted-data) - Step-by-step data access guide
* [Data Consent Statuses](/tools-and-services/hosted-pages/data-consent-statuses) - Understanding consent lifecycle
### UI Resources
* [UI Screens](/tools-and-services/hosted-pages/ui-screens) - Visual guide to the hosted flow
### Implementation Resources
For error handling, retry strategies, testing, and support, see our [Developer Resources](/resources/overview) guide.
# Hosted Payment Statuses and Phases
Source: https://docs.yapily.com/tools-and-services/hosted-pages/payment-status-and-phase
Understand payment status and phase values for Yapily Hosted Pages. Track payment lifecycle from initiation through completion, including all intermediate states.
Hosted Pages is available as a [Beta version](/getting-started/overview#yapily-hosted-pages-beta).
Please contact your Customer Success Manager if you would like to access it.
***
## Introduction
Hosted payment statuses and phases are used to track the progress of a payment made using Yapily Hosted Pages.
We explain the differences among status fields and the phases field in the get hosted payment request response below.
## Related fields in get payment request response
Given below is an example from a response of the get hosted payment request endpoint.
For brevity, only the `phases`, `paymentStatus`, and `statusDetails` fields are included.
**Note:** `statusDetails` will get populated after the payment gets accepted by the institution and it will also contain the iso status and states of the payment.
```json theme={null}
{
...
"data":{
...
"payments": [
{
...
"phases": [
{
"phaseName": "INITIATED",
"phaseCreatedAt": "2021-06-10T11:26:54.887Z"
},
{
"phaseName": "INSTITUTION_SUBMITTED",
"phaseCreatedAt": "2021-06-10T11:26:55.123Z"
},
{
"phaseName": "AUTHORISATION_INITIATED",
"phaseCreatedAt": "2021-06-10T11:27:05.123Z"
},
{
"phaseName": "VALIDATION_COMPLETED",
"phaseCreatedAt": "2021-06-10T11:27:05.223Z"
},
{
"phaseName": "AUTHORISATION_CREATED",
"phaseCreatedAt": "2021-06-10T11:27:06.637Z"
},
{
"phaseName": "AUTHORISED",
"phaseCreatedAt": "2021-06-10T11:27:10.637Z"
},
{
"phaseName": "SUBMITTED",
"phaseCreatedAt": "2021-06-10T11:27:10.654Z"
},
{
"phaseName": "ACCEPTED",
"phaseCreatedAt": "2021-06-10T11:27:11.867Z"
},
{
"phaseName": "SETTLEMENT_COMPLETED",
"phaseCreatedAt": "2021-06-10T11:27:13.887Z"
}
],
"paymentStatus": "COMPLETED",
"statusDetails": [
{
"status": "PENDING",
"statusUpdateDate": "2021-06-10T11:27:11.867Z",
"isoStatus": {
"code": "PDNG",
"name": "Pending"
}
},
{
"status": "COMPLETED",
"statusUpdateDate": "2021-06-10T11:27:13.887Z",
"isoStatus": {
"code": "ACSC",
"name": "AcceptedSettlementCompleted"
}
}
]
...
```
The `phases` is an array that records the chronological sequence of phases that the payment has gone through;
the `paymentStatus` field indicates the current status of the payment request
and the `statusDetails` field is an array that provides the statuses the payment has gone through,
including each status's specific details such as corresponding ISO status code and name.
## Mapping between status and phases
As phases are recorded by every step that a payment goes through, it provides a more detailed view of the payment's progress.
Therefore, multiple phases can map to a single status. We provide a mapping of the phases to the payment statuses below.
| Phase Name | Phase Description | Status |
| ------------------------------- | --------------------------------------------------------------------------------------------------------- | --------- |
| INITIATED | Payment process initiated | PENDING |
| DECLINED | Payment process failed and will not proceed further | FAILED |
| INSTITUTION\_SUBMITTED | Payment institution submitted | PENDING |
| AUTHORISATION\_INITIATED | Authorisation of payment initiated | PENDING |
| VALIDATION\_COMPLETED | Payer successfully validated | PENDING |
| VALIDATION\_FAILED | Failed to validate additional input attributes | FAILED |
| EMBEDDED\_CREDENTIAL\_REQUESTED | Payment Institution submitted and embedded credentials are requested for further processing | PENDING |
| EMBEDDED\_TYPE\_REQUESTED | SCA method requested for embedded payment authorisation | PENDING |
| EMBEDDED\_TYPE\_SELECTED | SCA method selected for embedded payment authorisation | PENDING |
| EMBEDDED\_CODE\_COLLECTED | SCA code collected from psu | PENDING |
| DECOUPLED\_AUTHORISATION | Authorisation for payment that is known to follow the decoupled flow | PENDING |
| EMBEDDED\_CODE\_REQUESTED | Expecting user to provide a code | PENDING |
| AUTHORISATION\_CREATED | Payment authorisation request created with Institution, awaiting authorisation completion | PENDING |
| PRE\_AUTHORISED | Payment pre authorisation request created with Institution, awaiting pre authorisation completion | PENDING |
| AUTHORISED | Payment authorisation completed | PENDING |
| AUTHORISATION\_FAILED | Payment authorisation failed and will not proceed further | FAILED |
| AUTHORISATION\_REJECTED | Payment authorisation rejected and will not proceed further | FAILED |
| SUBMITTED | Payment execution created and submitted to Institution | PENDING |
| SUBMITTED\_AUTO | Payment execution created and submitted to Institution automatically after polling consent status success | PENDING |
| ACCEPTED | Payment execution accepted by Institution and awaiting settlement | PENDING |
| REJECTED | Payment or Authorisation request rejected by Institution and will not proceed further | FAILED |
| SETTLEMENT\_COMPLETED | Payment settlement completed | COMPLETED |
| STATUS\_POLLING\_STARTED | Payment status polling started | PENDING |
| STATUS\_POLLING\_ENDED | Payment status polling ended | PENDING |
| MERCHANT\_ACKNOWLEDGED | Payment acknowledgement received from merchant | COMPLETED |
| FINISHED | Payment process completed | - |
***
## Related Resources
### Hosted Pages Resources
* [Payment Tutorial](/tools-and-services/hosted-pages/payment-tutorial-hosted-pages) - Complete payment integration guide
* [Payment Webhooks](/tools-and-services/hosted-pages/payment-webhooks) - Receive real-time payment status notifications
### Implementation Resources
* [Error Handling](/resources/errors) - Handle payment failures gracefully
* [Support](/resources/support) - Get help with implementation
# Data tutorial using Yapily Hosted Pages
Source: https://docs.yapily.com/tools-and-services/hosted-pages/payment-tutorial-hosted-data
Tutorial for accessing financial data using Yapily Hosted Pages. Create a data session and retrieve account information through the hosted open banking UI.
Hosted Pages is available as a [Beta version](/getting-started/overview#yapily-hosted-pages-beta).
Please contact your Customer Success Manager if you would like to access it.
## Introduction
This tutorial explains how to use Yapily Hosted Pages to access data.
**Note:** All requests made to the Yapily API require [basic authentication](/getting-started/integration-setup/api-authentication).
***
Make a request to [POST /hosted/consent-requests](/api-reference/hosted-consent-pages/create-hosted-consent-request), including the institution country code, redirect URL and user ID or application User ID.
You must provide the `institutionIdentifiers.institutionCountryCode` field. This controls the country of the institution to access the account data.
In addition, you can optionally provide the ID of a specific institution in `institutionIdentifiers.institutionId` field to only allow data access from this institution. This skips the bank selection screen in the hosted flow.
You can optionally provide `userSettings` to set the user's preferred language and location.
```bash Request theme={null}
curl --location 'https://api.yapily.com/hosted/consent-requests' \
--header 'Content-Type: application/json;charset=UTF-8' \
--header 'Accept: application/json;charset=UTF-8' \
--header 'Authorization: Basic VXNlcm5hbWU6UGFzc3dvcmQ=' \
--data '{
"redirectUrl": "https://tpp-application.com/",
"institutionIdentifiers": {
"institutionCountryCode": "GB"
},
"applicationUserId": "john.doe@company.com",
"userSettings": {
"language": "EN",
"location": "GB"
}
}'
```
```json Response theme={null}
{
"meta": {
"tracingId": "bffd676d6f804357b54eab07f1f41448"
},
"data": {
"consentRequestId": "fd19a5f3-b5ea-4cf0-8035-7e853a264f36",
"userId": "034b2e9c-0b16-4b60-b948-ff3c49d50741",
"applicationUserId": "john.doe@company.com",
"applicationId": "2e760724-289f-43ef-8bd7-d54dbf9dd5b1",
"institutionIdentifiers": {
"institutionCountryCode": "GB"
},
"userSettings": {
"language": "EN",
"location": "GB"
},
"redirectUrl": "https://tpp-application.com",
"hostedUrl": "https://consents.yapily.com?consentRequestId=fd19a5f3-b5ea-4cf0-8035-7e853a264f36&applicationId=2e760724-289f-43ef-8bd7-d54dbf9dd5b1#authToken=eyJraWQiOiIwNmViZTQ1Yy1hYzU5LTRiM2MtOWY5NC03MDljMDM5ZTQxYWIiLCJhbGciOiJFUzI1NiJ9.eyJhdWQiOiJwcm9kdWN0aW9uIiwic3ViIjoiMmU3NjA3MjQtMjg5Zi00M2VmLThiZDctZDU0ZGJmOWRkNWIxIiwib3JnIjoiMTg0ZTNiMTktY2YyMC00OTJiLTg5NWItOGRjYTFiYjFkNWE5IiwiY29uc2VudFJlcXVlc3RJZCI6ImZkMTlhNWYzLWI1ZWEtNGNmMC04MDM1LTdlODUzYTI2NGYzNiIsImlzcyI6Imhvc3RlZC1jb25zZW50IiwidHlwIjoiQVBQTElDQVRJT04iLCJleHAiOjE3MjgwNTA0NjgsImlhdCI6MTcyODA0OTg2OCwianRpIjoiNjk5YWFiOWQtOTJkMi00NjQ3LWE1ODktMjQxOTFhMjQzZjc0In0._DigB_vpIZOr3X7uR3KZb5lPGICVx96QwPH9XqGW1UnjY8XH0iVoGHr4y2Z1030psFOIaVq_HyU1OfMU8Hbb2g",
"createdAt": "2024-10-04T13:51:08.703Z",
"authorisationExpiresAt": "2024-10-04T14:01:08.000Z"
}
}
```
Store the `hostedUrl` returned in the response to use in step 2.
Redirect the end user from your application to the Yapily Hosted Pages URL. This initiates the user journey for the account consent request.
The end user follows the Yapily hosted screens to complete the account consent request.
A typical journey includes bank selection, redirection to their chosen bank, account consent confirmation and redirection back to your application.
See [UI screens](/tools-and-services/hosted-pages/ui-screens) for more details.
The user will be automatically redirected to the `redirectUrl` specified in the initial consent request in Step 1 once the consent flow is complete. We recommend you redirect the user back to your application to create a good user experience.
The `consentRequestId` is returned as part of the `redirectUrl`. You can use this to check the status of the account consent in step 4.
On an end user's completion of the hosted pages flow, you should check the consent status to confirm the consent has initiated successfully before proceeding with any further actions.
You can retrieve details of the account consent request using [GET /hosted/consent-requests/](/api-reference/hosted-consent-pages/get-hosted-consent-request) specifying the `consentRequestId` in the path.
```bash Request theme={null}
curl --location 'https://api.yapily.com/hosted/consent-requests/consentRequestId' \
--header 'Accept: application/json;charset=UTF-8' \
--header 'Authorization: Basic VXNlcm5hbWU6UGFzc3dvcmQ'
```
```json Response theme={null}
{
"meta": {
"tracingId": "e8cf92170a22496799ec6e8e7a4bedb3"
},
"data": {
"consentRequestId": "b6c28cea-5544-46c6-ba3b-8a20adfce636",
"consentId": "2e2848b9-a838-4759-a259-6a3915f81902",
"userId": "034b2e9c-0b16-4b60-b948-ff3c49d50741",
"applicationUserId": "john.doe@company.com",
"applicationId": "2e760724-289f-43ef-8bd7-d54dbf9dd5b1",
"institutionIdentifiers": {
"institutionId": "modelo-sandbox",
"institutionCountryCode": "GB"
},
"userSettings": {
"language": "EN",
"location": "GB"
},
"redirectUrl": "https://display-parameters.com",
"createdAt": "2024-10-04T14:08:05.104Z",
"authorisationExpiresAt": "2024-10-04T14:18:05.000Z",
"status": "AUTHORIZED",
"phases": [
{
"phaseName": "INITIATED",
"phaseCreatedAt": "2024-10-04T14:08:05.104Z"
},
{
"phaseName": "INSTITUTION_SUBMITTED",
"phaseCreatedAt": "2024-10-04T14:08:11.686Z"
},
{
"phaseName": "AUTHORISATION_INITIATED",
"phaseCreatedAt": "2024-10-04T14:08:12.030Z"
},
{
"phaseName": "AUTHORISATION_CREATED",
"phaseCreatedAt": "2024-10-04T14:08:12.367Z"
},
{
"phaseName": "CONSENT_POLLING_STARTED",
"phaseCreatedAt": "2024-10-04T14:08:28.404Z"
},
{
"phaseName": "CONSENT_POLLING_ENDED",
"phaseCreatedAt": "2024-10-04T14:08:28.892Z"
},
{
"phaseName": "AUTHORISED",
"phaseCreatedAt": "2024-10-04T14:08:28.893Z"
},
{
"phaseName": "FINISHED",
"phaseCreatedAt": "2024-10-04T14:08:28.893Z"
}
],
"consentToken": "eyJraWQiOiIwNmViZTQ1Yy1hYzU5LTRiM2MtOWY5NC03MDljMDM5ZTQxYWIiLCJhbGciOiJFUzI1NiJ9.eyJJTlNUSVRVVElPTiI6Im1vZGVsby1zYW5kYm94IiwiQ09OU0VOVCI6IjJlMjg0OGI5LWE4MzgtNDc1OS1hMjU5LTZhMzkxNWY4MTkwMiIsIkFQUExJQ0FUSU9OX1VTRVJfSUQiOiJqb2huLmRvZUBjb21wYW55LmNvbSIsIlVTRVIiOiIwMzRiMmU5Yy0wYjE2LTRiNjAtYjk0OC1mZjNjNDlkNTA3NDEifQ.OsSU5Jr7W6L-k0c3MRpX8M-ASwGyAaf-vrgbrFJD2oz4bpWm2eE-58gzd3nO50RS7zEYCUmrGt2PTkJEgagZOQ"
}
}
```
[Retrieve account information](/api-reference/financial-data/get-accounts), specifying the `consentToken` in the header.
# Single Payment tutorial using Yapily Hosted Pages
Source: https://docs.yapily.com/tools-and-services/hosted-pages/payment-tutorial-hosted-pages
Tutorial for initiating a single payment using Yapily Hosted Pages. Generate a payment session URL and guide users through the complete open banking payment journey.
Hosted Pages is available as a [Beta version](/getting-started/overview#yapily-hosted-pages-beta).
Please contact your Customer Success Manager if you would like to access it.
## Introduction
This tutorial explains how to use Yapily Hosted Pages to make a UK domestic single payment.
**Note:** All requests made to the Yapily API require [basic authentication](/getting-started/integration-setup/api-authentication).
***
Make a request to [POST /hosted/payment-requests](/api-reference/hosted-payment-pages/create-hosted-payment-request), including the payment request details, institution country code, redirect URL and user ID.
You must provide the `institutionIdentifiers.institutionCountryCode` field. This controls the country of the institution the user can pay from.
In addition, you can optionally provide the ID of a specific institution in `institutionIdentifiers.institutionId` field to only allow payment from this institution. This skips the bank selection screen in the hosted flow.
You can optionally provide `userSettings` to set the user's preferred language and location.
```bash Request theme={null}
curl -L -X POST 'https://api.yapily.com/hosted/payment-requests' \
-H 'Content-Type: application/json' \
-u 'APPLICATION_KEY:APPLICATION_SECRET' \
-d '{
"applicationUserId": "john.doe@company.com",
"institutionIdentifiers": {
"institutionCountryCode": "GB"
},
"userSettings": {
"language": "en",
"location": "GB"
},
"redirectUrl": "https://tpp-application.com/",
"paymentRequestDetails": {
"paymentIdempotencyId": "4289457hd38djoa783jw9qag3",
"amountDetails": {
"amountToPay": 10,
"currency": "GBP"
},
"reference": "Test Payment",
"type": "DOMESTIC_PAYMENT",
"payee": {
"name": "Jane Doe",
"accountIdentifications": [
{
"type": "SORT_CODE",
"identification": "123456"
},
{
"type": "ACCOUNT_NUMBER",
"identification": "12345678"
}
]
}
}
}'
```
```json Response theme={null}
{
"meta": {
"tracingId": "2dbfd85b4f2940c6a206e96dd90e52d0"
},
"data": {
"paymentRequestId": "eb39f8ae-aeff-4ffa-a23d-d4a5b3eff406",
"userId": "3ddf5dd0-aa48-4d0f-baa7-fa057e9e911d",
"applicationUserId": "john.doe@company.com",
"applicationId": "64949de6-6510-4d70-9500-d4aa094c506c",
"institutionIdentifiers": {
"institutionId": "modelo-sandbox",
"institutionCountryCode": "GB"
},
"userSettings": {
"language": "en",
"location": "GB"
},
"redirectUrl": "https://tpp-application.com/",
"paymentRequestDetails": {
"paymentIdempotencyId": "4289457hd38djoa783jw9qag3",
"amountDetails": {
"amountToPay": 1,
"currency": "GBP"
},
"reference": "Test Payment",
"contextType": "OTHER",
"type": "DOMESTIC_PAYMENT",
"payee": {
"name": "Jane Doe",
"accountIdentifications": [
{
"type": "SORT_CODE",
"identification": "123456"
},
{
"type": "ACCOUNT_NUMBER",
"identification": "12345678"
}
]
}
},
"hostedUrl": "https://prototypes.yapily.com/auth-link1.html",
"authToken": "eyJhbGciOiJIUzI1NiIsInR5cCI6IkpXVCJ9.eyJzdWIiOiIxMjM0NTY3ODkwIiwibmFtZSI6IkpvaG4gRG9lIiwiaWF0IjoxNTE2MjM5MDIyfQ.SflKxwRJSMeKKF2QT4fwpMeJf36POk6yJV_adQssw5c",
"createdAt": "2021-06-10T11:26:54.887Z",
"authorisationExpiresAt": "2021-06-10T11:36:54.887Z",
"status": "ACTIVE"
}
}
```
Store the `hostedUrl` returned in the response to use in step 2.
Redirect the end user from your application to the Yapily Hosted Pages URL. This initiates the user journey for the payment request.
The end user follows the Yapily hosted screens to complete the payment request.
A typical journey includes bank selection, redirection to their chosen bank, payment initiation confirmation and redirection back to your application.
See [UI screens](/tools-and-services/hosted-pages/ui-screens) for more details.
The user will be automatically redirected to the `redirectUrl` specified in the initial payment request in Step 1 once the payment flow is complete. We recommend you redirect the user back to your application to create a good user experience.
The `paymentRequestId` is returned as part of the `redirectUrl`. You can use this to check the status of the payment in step 4.
On an end user's completion of the hosted pages flow, you should check the payment status to confirm the payment has initiated successfully before proceeding with any further actions.
You can retrieve details of the payment request using [GET /hosted/payment-requests/](/api-reference/hosted-payment-pages/get-hosted-payment-request) specifying the `paymentRequestId` in the path.
```bash Request theme={null}
curl -L -X GET 'https://api.yapily.com/hosted/payment-requests/{paymentRequestId}' \
-H 'Content-Type: application/json' \
-u 'APPLICATION_KEY:APPLICATION_SECRET'
```
```json Response theme={null}
{
"meta": {
"tracingId": "2dbfd85b4f2940c6a206e96dd90e52d0"
},
"data": {
"paymentRequestId": "eb39f8ae-aeff-4ffa-a23d-d4a5b3eff406",
"userId": "3ddf5dd0-aa48-4d0f-baa7-fa057e9e911d",
"applicationUserId": "john.doe@company.com",
"applicationId": "64949de6-6510-4d70-9500-d4aa094c506c",
"institutionIdentifiers": {
"institutionId": "modelo-sandbox",
"institutionCountryCode": "GB"
},
"userSettings": {
"language": "en",
"location": "GB"
},
"redirectUrl": "https://tpp-application.com/",
"paymentRequestDetails": {
"amountDetails": {
"amountToPay": 1,
"currency": "GBP"
},
"reference": "Test Payment",
"contextType": "OTHER",
"type": "DOMESTIC_PAYMENT",
"payee": {
"name": "Jane Doe",
"accountIdentifications": [
{
"type": "SORT_CODE",
"identification": "123456"
},
{
"type": "ACCOUNT_NUMBER",
"identification": "12345678"
}
]
}
},
"createdAt": "2021-06-10T11:26:54.887Z",
"authorisationExpiresAt": "2021-06-10T11:36:54.887Z",
"status": "ACTIVE",
"payments": [
{
"paymentId": "3fa85f64-5717-4562-b3fc-2c963f66afa6",
"institutionIdentifiers": {
"institutionId": "string",
"institutionCountryCode": "GB"
},
"phases": [
{
"phaseName": "INITIATED",
"phaseCreatedAt": "2021-06-10T11:26:54.887Z"
},
{
"phaseName": "INSTITUTION_SUBMITTED",
"phaseCreatedAt": "2021-06-10T11:26:55.123Z"
},
{
"phaseName": "AUTHORISATION_INITIATED",
"phaseCreatedAt": "2021-06-10T11:27:05.123Z"
},
{
"phaseName": "VALIDATION_COMPLETED",
"phaseCreatedAt": "2021-06-10T11:27:05.223Z"
},
{
"phaseName": "AUTHORISATION_CREATED",
"phaseCreatedAt": "2021-06-10T11:27:06.637Z"
},
{
"phaseName": "AUTHORISED",
"phaseCreatedAt": "2021-06-10T11:27:10.637Z"
},
{
"phaseName": "SUBMITTED",
"phaseCreatedAt": "2021-06-10T11:27:10.654Z"
},
{
"phaseName": "ACCEPTED",
"phaseCreatedAt": "2021-06-10T11:27:11.867Z"
},
{
"phaseName": "SETTLEMENT_COMPLETED",
"phaseCreatedAt": "2021-06-10T11:27:13.887Z"
}
],
"paymentStatus": "COMPLETED",
"statusDetails": [
{
"status": "PENDING",
"statusUpdateDate": "2021-06-10T11:27:11.867Z",
"isoStatus": {
"code": "PDNG",
"name": "Pending"
}
},
{
"status": "COMPLETED",
"statusUpdateDate": "2021-06-10T11:27:13.887Z",
"isoStatus": {
"code": "ACSC",
"name": "AcceptedSettlementCompleted"
}
}
],
"institutionPaymentId": "string",
"paymentLifecycleId": "string",
"paymentIdempotencyId": "04ab4536gaerfc0e1f93c4f4",
"reference": "Bill payment",
"contextType": "OTHER",
"type": "DOMESTIC_PAYMENT",
"payee": {
"name": "Jane Doe",
"accountIdentifications": [
{
"identification": "401016",
"type": "SORT_CODE"
},
{
"identification": "71518920",
"type": "ACCOUNT_NUMBER"
}
],
"address": {
"country": "GB"
},
"merchantId": "24589303",
"merchantCategoryCode": "5551"
},
"payer": {
"name": "John Doe",
"accountIdentifications": [
{
"type": "SORT_CODE",
"identification": "401016"
}
],
"address": {
"country": "GB"
}
},
"amount": {
"amount": 10,
"currency": "GBP"
}
}
]
}
}
```
### Monitoring Payment Status
We recommend using [webhooks](/tools-and-services/hosted-pages/payment-webhooks) to receive real-time notifications when your payment completes or fails. This provides:
* **Immediate status updates** - No polling delay
* **Reduced API calls** - Cost savings for both parties
* **Better user experience** - Faster feedback to customers
If you cannot use webhooks, you can monitor the payment status by repeatedly calling the GET endpoint above until the `paymentStatus` field transitions to `COMPLETED` or `FAILED`.
**Note:** Polling increases API usage and may delay status updates compared to webhooks.
# Hosted Payment Webhooks
Source: https://docs.yapily.com/tools-and-services/hosted-pages/payment-webhooks
Receive real-time notifications on the status of hosted payments
Hosted Pages is available as a [Beta version](/getting-started/overview#yapily-hosted-pages-beta).
Please contact your Customer Success Manager if you would like to access it.
## Introduction
Webhooks are the recommended approach for monitoring the status of hosted payments. They provide real-time HTTP notifications when a payment completes successfully or fails, enabling you to reliably update your internal systems and customer journeys.
**Benefits of using webhooks:**
* **Immediate status updates** - Receive notifications as soon as the payment reaches a terminal state
* **Reduced API calls** - No need to poll the GET endpoint repeatedly, resulting in cost savings for both parties
* **Better user experience** - Provide faster feedback to your customers
While you can monitor payment status by [polling the GET endpoint](/tools-and-services/hosted-pages/payment-tutorial-hosted-pages#retrieve-details-of-the-payment-request), webhooks provide a more efficient and scalable solution.
## Webhook Registration
Before receiving webhook events, you must register a webhook for your application and subscribe to the relevant Hosted PIS webhook event types.
Please follow the [Webhook Registration Guide](/tools-and-services/webhooks/get-started) to:
* Register your webhook URL
* Configure authentication and security
* Subscribe to the Hosted PIS event types listed below
## Supported Event Types
To be notified when a hosted payment reaches a terminal state, subscribe to the following events:
| Event Type | Description |
| ---------------------------------------- | ------------------------------------------------------------------------- |
| `hosted_pis.payment_status.completed.v1` | Triggered when a hosted payment has completed successfully |
| `hosted_pis.payment_status.failed.v1` | Triggered when a hosted payment fails to execute and an error is received |
## Success Event Example
The following example shows a webhook payload delivered when a hosted payment completes successfully:
```json theme={null}
{
"type": "hosted_pis.payment_status.completed.v1",
"applicationId": "a75620ec-8a74-408d-b13f-84227036cf43",
"id": "b59e9533-24a0-4fd0-afc8-0c0c1a186f34",
"event": {
"consentId": "2427faa9-08e2-404e-90f1-4a312dc5f80d",
"institutionId": "mock-sandbox",
"paymentId": "9c5f7701-5275-442f-9d86-80d3ddc5cccc",
"paymentRequestId": "dedcc4f9-7d6d-451c-accc-8a322f153a56",
"isoStatus": {
"code": "ACSC",
"name": "AcceptedSettlementCompleted"
},
"status": "COMPLETED"
},
"metadata": {
"tracingId": "6cf5ef06-9f96-4f24-8bab-32ab09128010",
"user": {
"key": "value"
}
}
}
```
### Success Event Fields
| Property | Type | Description |
| ------------------------ | ------ | -------------------------------------------------- |
| `id` | String | The webhook delivery ID |
| `applicationId` | String | The application that registered the webhook |
| `type` | String | The triggered event type |
| `event.consentId` | String | Consent ID associated with the payment |
| `event.institutionId` | String | Institution from which the payment was initiated |
| `event.paymentId` | String | Payment ID (typically provided by the institution) |
| `event.paymentRequestId` | String | Payment Request ID created at payment initiation |
| `event.status` | String | Final payment status (`COMPLETED`) |
| `event.isoStatus.code` | String | Optional ISO 20022 status code |
| `event.isoStatus.name` | String | Human-readable ISO status name |
| `metadata.tracingId` | String | Tracing ID for observability and debugging |
| `metadata.user` | Object | Optional metadata provided at webhook registration |
## Failure Event Example
The following example shows a webhook payload delivered when a hosted payment fails:
```json theme={null}
{
"type": "hosted_pis.payment_status.failed.v1",
"applicationId": "a75620ec-8a74-408d-b13f-84227036cf43",
"id": "b59e9533-24a0-4fd0-afc8-0c0c1a186f34",
"event": {
"consentId": "2427faa9-08e2-404e-90f1-4a312dc5f80d",
"institutionId": "mock-sandbox",
"paymentId": "9c5f7701-5275-442f-9d86-80d3ddc5cccc",
"paymentRequestId": "dedcc4f9-7d6d-451c-accc-8a322f153a56",
"isoStatus": {
"code": "RJCT",
"name": "Rejected"
},
"status": "FAILED"
},
"metadata": {
"tracingId": "6cf5ef06-9f96-4f24-8bab-32ab09128010",
"user": {
"key": "value"
}
}
}
```
### Failure Event Fields
| Property | Type | Description |
| ------------------------ | ------ | -------------------------------------------------- |
| `id` | String | The webhook delivery ID |
| `applicationId` | String | The application that registered the webhook |
| `type` | String | The triggered event type |
| `event.consentId` | String | Consent ID associated with the payment |
| `event.institutionId` | String | Institution from which the payment was initiated |
| `event.paymentId` | String | Payment ID (typically provided by the institution) |
| `event.paymentRequestId` | String | Payment Request ID created at payment initiation |
| `event.status` | String | Final payment status (`FAILED`) |
| `event.isoStatus.code` | String | Optional ISO 20022 status code |
| `event.isoStatus.name` | String | Human-readable ISO status name |
| `metadata.tracingId` | String | Tracing ID for observability and debugging |
| `metadata.user` | Object | Optional metadata provided at webhook registration |
## Delivery
Yapily attempts to send webhooks immediately after the hosted payment reaches a terminal state (COMPLETED or FAILED).
**Delivery guarantees:**
* Yapily guarantees that a payment will reach either a COMPLETED or FAILED status, and therefore a webhook will be delivered, unless there's an unexpected exception
* The exact timing depends on how quickly the institution processes the payment and updates the payment status
* Include the `tracingId` when contacting support to help identify your specific webhook delivery
**Unexpected exceptions** that may prevent webhook delivery include:
* The institution doesn't update the status of a payment as expected
* The webhook fails to deliver to your endpoint after retrying
For more information on webhook reliability, timeout handling, and retry logic, see the [Webhooks Introduction](/tools-and-services/webhooks/introduction#your-callback-server).
***
## Related Resources
### Hosted Pages Resources
* [Payment Tutorial](/tools-and-services/hosted-pages/payment-tutorial-hosted-pages) - Complete payment integration guide
* [Payment Statuses & Phases](/tools-and-services/hosted-pages/payment-status-and-phase) - Understanding payment lifecycle
### Webhook Resources
* [Get Started with Webhooks](/tools-and-services/webhooks/get-started) - Register and configure webhooks
* [Webhooks Introduction](/tools-and-services/webhooks/introduction) - Webhook infrastructure overview
### Implementation Resources
* [Error Handling](/resources/errors) - Handle payment failures gracefully
* [Support](/resources/support) - Get help with webhook integration
# Yapily Hosted Pages UI screens
Source: https://docs.yapily.com/tools-and-services/hosted-pages/ui-screens
Visual guide to Yapily Hosted Pages UI screens for payment and data flows. See institution picker, consent, confirmation, and payment status screens shown to end users.
Hosted Pages is available as a [Beta version](/getting-started/overview#yapily-hosted-pages-beta).
Please contact your Customer Success Manager if you would like to access it.
***
## UI screens
Yapily Hosted Pages includes the following out-of-the-box screens.
### Bank selection
Displays the list of supported banks to the end user so they can select which bank they want to pay from.
***
## Get started
See our [single payments tutorial](/tools-and-services/hosted-pages/payment-tutorial-hosted-pages) to explore a sample integration with Yapily Hosted Pages.
Try our [demo app](https://demo.yapily.com/) to complete the Yapily Hosted Pages flow for yourself with your real banking credentials.
***
## Related resources
### Payments Resources
* [Payment Tutorial](/tools-and-services/hosted-pages/payment-tutorial-hosted-pages) - Step-by-step payment integration guide
* [Payment Status & Phase](/tools-and-services/hosted-pages/payment-status-and-phase) - Understanding payment lifecycle
* [Payment Webhooks](/tools-and-services/hosted-pages/payment-webhooks) - Real-time payment notifications
### Data Resources
* [Data Tutorial](/tools-and-services/hosted-pages/payment-tutorial-hosted-data) - Step-by-step data access guide
* [Data Consent Statuses](/tools-and-services/hosted-pages/data-consent-statuses) - Understanding consent lifecycle
### UI Resources
* [UI Screens](/tools-and-services/hosted-pages/ui-screens) - Visual guide to the hosted flow
### Implementation Resources
For error handling, retry strategies, testing, and support, see our [Developer Resources](/resources/overview) guide.
# Hosted Payment Statuses and Phases
Source: https://docs.yapily.com/tools-and-services/hosted-pages/payment-status-and-phase
Understand payment status and phase values for Yapily Hosted Pages. Track payment lifecycle from initiation through completion, including all intermediate states.
Hosted Pages is available as a [Beta version](/getting-started/overview#yapily-hosted-pages-beta).
Please contact your Customer Success Manager if you would like to access it.
***
## Introduction
Hosted payment statuses and phases are used to track the progress of a payment made using Yapily Hosted Pages.
We explain the differences among status fields and the phases field in the get hosted payment request response below.
## Related fields in get payment request response
Given below is an example from a response of the get hosted payment request endpoint.
For brevity, only the `phases`, `paymentStatus`, and `statusDetails` fields are included.
**Note:** `statusDetails` will get populated after the payment gets accepted by the institution and it will also contain the iso status and states of the payment.
```json theme={null}
{
...
"data":{
...
"payments": [
{
...
"phases": [
{
"phaseName": "INITIATED",
"phaseCreatedAt": "2021-06-10T11:26:54.887Z"
},
{
"phaseName": "INSTITUTION_SUBMITTED",
"phaseCreatedAt": "2021-06-10T11:26:55.123Z"
},
{
"phaseName": "AUTHORISATION_INITIATED",
"phaseCreatedAt": "2021-06-10T11:27:05.123Z"
},
{
"phaseName": "VALIDATION_COMPLETED",
"phaseCreatedAt": "2021-06-10T11:27:05.223Z"
},
{
"phaseName": "AUTHORISATION_CREATED",
"phaseCreatedAt": "2021-06-10T11:27:06.637Z"
},
{
"phaseName": "AUTHORISED",
"phaseCreatedAt": "2021-06-10T11:27:10.637Z"
},
{
"phaseName": "SUBMITTED",
"phaseCreatedAt": "2021-06-10T11:27:10.654Z"
},
{
"phaseName": "ACCEPTED",
"phaseCreatedAt": "2021-06-10T11:27:11.867Z"
},
{
"phaseName": "SETTLEMENT_COMPLETED",
"phaseCreatedAt": "2021-06-10T11:27:13.887Z"
}
],
"paymentStatus": "COMPLETED",
"statusDetails": [
{
"status": "PENDING",
"statusUpdateDate": "2021-06-10T11:27:11.867Z",
"isoStatus": {
"code": "PDNG",
"name": "Pending"
}
},
{
"status": "COMPLETED",
"statusUpdateDate": "2021-06-10T11:27:13.887Z",
"isoStatus": {
"code": "ACSC",
"name": "AcceptedSettlementCompleted"
}
}
]
...
```
The `phases` is an array that records the chronological sequence of phases that the payment has gone through;
the `paymentStatus` field indicates the current status of the payment request
and the `statusDetails` field is an array that provides the statuses the payment has gone through,
including each status's specific details such as corresponding ISO status code and name.
## Mapping between status and phases
As phases are recorded by every step that a payment goes through, it provides a more detailed view of the payment's progress.
Therefore, multiple phases can map to a single status. We provide a mapping of the phases to the payment statuses below.
| Phase Name | Phase Description | Status |
| ------------------------------- | --------------------------------------------------------------------------------------------------------- | --------- |
| INITIATED | Payment process initiated | PENDING |
| DECLINED | Payment process failed and will not proceed further | FAILED |
| INSTITUTION\_SUBMITTED | Payment institution submitted | PENDING |
| AUTHORISATION\_INITIATED | Authorisation of payment initiated | PENDING |
| VALIDATION\_COMPLETED | Payer successfully validated | PENDING |
| VALIDATION\_FAILED | Failed to validate additional input attributes | FAILED |
| EMBEDDED\_CREDENTIAL\_REQUESTED | Payment Institution submitted and embedded credentials are requested for further processing | PENDING |
| EMBEDDED\_TYPE\_REQUESTED | SCA method requested for embedded payment authorisation | PENDING |
| EMBEDDED\_TYPE\_SELECTED | SCA method selected for embedded payment authorisation | PENDING |
| EMBEDDED\_CODE\_COLLECTED | SCA code collected from psu | PENDING |
| DECOUPLED\_AUTHORISATION | Authorisation for payment that is known to follow the decoupled flow | PENDING |
| EMBEDDED\_CODE\_REQUESTED | Expecting user to provide a code | PENDING |
| AUTHORISATION\_CREATED | Payment authorisation request created with Institution, awaiting authorisation completion | PENDING |
| PRE\_AUTHORISED | Payment pre authorisation request created with Institution, awaiting pre authorisation completion | PENDING |
| AUTHORISED | Payment authorisation completed | PENDING |
| AUTHORISATION\_FAILED | Payment authorisation failed and will not proceed further | FAILED |
| AUTHORISATION\_REJECTED | Payment authorisation rejected and will not proceed further | FAILED |
| SUBMITTED | Payment execution created and submitted to Institution | PENDING |
| SUBMITTED\_AUTO | Payment execution created and submitted to Institution automatically after polling consent status success | PENDING |
| ACCEPTED | Payment execution accepted by Institution and awaiting settlement | PENDING |
| REJECTED | Payment or Authorisation request rejected by Institution and will not proceed further | FAILED |
| SETTLEMENT\_COMPLETED | Payment settlement completed | COMPLETED |
| STATUS\_POLLING\_STARTED | Payment status polling started | PENDING |
| STATUS\_POLLING\_ENDED | Payment status polling ended | PENDING |
| MERCHANT\_ACKNOWLEDGED | Payment acknowledgement received from merchant | COMPLETED |
| FINISHED | Payment process completed | - |
***
## Related Resources
### Hosted Pages Resources
* [Payment Tutorial](/tools-and-services/hosted-pages/payment-tutorial-hosted-pages) - Complete payment integration guide
* [Payment Webhooks](/tools-and-services/hosted-pages/payment-webhooks) - Receive real-time payment status notifications
### Implementation Resources
* [Error Handling](/resources/errors) - Handle payment failures gracefully
* [Support](/resources/support) - Get help with implementation
# Data tutorial using Yapily Hosted Pages
Source: https://docs.yapily.com/tools-and-services/hosted-pages/payment-tutorial-hosted-data
Tutorial for accessing financial data using Yapily Hosted Pages. Create a data session and retrieve account information through the hosted open banking UI.
Hosted Pages is available as a [Beta version](/getting-started/overview#yapily-hosted-pages-beta).
Please contact your Customer Success Manager if you would like to access it.
## Introduction
This tutorial explains how to use Yapily Hosted Pages to access data.
**Note:** All requests made to the Yapily API require [basic authentication](/getting-started/integration-setup/api-authentication).
***
Make a request to [POST /hosted/consent-requests](/api-reference/hosted-consent-pages/create-hosted-consent-request), including the institution country code, redirect URL and user ID or application User ID.
You must provide the `institutionIdentifiers.institutionCountryCode` field. This controls the country of the institution to access the account data.
In addition, you can optionally provide the ID of a specific institution in `institutionIdentifiers.institutionId` field to only allow data access from this institution. This skips the bank selection screen in the hosted flow.
You can optionally provide `userSettings` to set the user's preferred language and location.
```bash Request theme={null}
curl --location 'https://api.yapily.com/hosted/consent-requests' \
--header 'Content-Type: application/json;charset=UTF-8' \
--header 'Accept: application/json;charset=UTF-8' \
--header 'Authorization: Basic VXNlcm5hbWU6UGFzc3dvcmQ=' \
--data '{
"redirectUrl": "https://tpp-application.com/",
"institutionIdentifiers": {
"institutionCountryCode": "GB"
},
"applicationUserId": "john.doe@company.com",
"userSettings": {
"language": "EN",
"location": "GB"
}
}'
```
```json Response theme={null}
{
"meta": {
"tracingId": "bffd676d6f804357b54eab07f1f41448"
},
"data": {
"consentRequestId": "fd19a5f3-b5ea-4cf0-8035-7e853a264f36",
"userId": "034b2e9c-0b16-4b60-b948-ff3c49d50741",
"applicationUserId": "john.doe@company.com",
"applicationId": "2e760724-289f-43ef-8bd7-d54dbf9dd5b1",
"institutionIdentifiers": {
"institutionCountryCode": "GB"
},
"userSettings": {
"language": "EN",
"location": "GB"
},
"redirectUrl": "https://tpp-application.com",
"hostedUrl": "https://consents.yapily.com?consentRequestId=fd19a5f3-b5ea-4cf0-8035-7e853a264f36&applicationId=2e760724-289f-43ef-8bd7-d54dbf9dd5b1#authToken=eyJraWQiOiIwNmViZTQ1Yy1hYzU5LTRiM2MtOWY5NC03MDljMDM5ZTQxYWIiLCJhbGciOiJFUzI1NiJ9.eyJhdWQiOiJwcm9kdWN0aW9uIiwic3ViIjoiMmU3NjA3MjQtMjg5Zi00M2VmLThiZDctZDU0ZGJmOWRkNWIxIiwib3JnIjoiMTg0ZTNiMTktY2YyMC00OTJiLTg5NWItOGRjYTFiYjFkNWE5IiwiY29uc2VudFJlcXVlc3RJZCI6ImZkMTlhNWYzLWI1ZWEtNGNmMC04MDM1LTdlODUzYTI2NGYzNiIsImlzcyI6Imhvc3RlZC1jb25zZW50IiwidHlwIjoiQVBQTElDQVRJT04iLCJleHAiOjE3MjgwNTA0NjgsImlhdCI6MTcyODA0OTg2OCwianRpIjoiNjk5YWFiOWQtOTJkMi00NjQ3LWE1ODktMjQxOTFhMjQzZjc0In0._DigB_vpIZOr3X7uR3KZb5lPGICVx96QwPH9XqGW1UnjY8XH0iVoGHr4y2Z1030psFOIaVq_HyU1OfMU8Hbb2g",
"createdAt": "2024-10-04T13:51:08.703Z",
"authorisationExpiresAt": "2024-10-04T14:01:08.000Z"
}
}
```
Store the `hostedUrl` returned in the response to use in step 2.
Redirect the end user from your application to the Yapily Hosted Pages URL. This initiates the user journey for the account consent request.
The end user follows the Yapily hosted screens to complete the account consent request.
A typical journey includes bank selection, redirection to their chosen bank, account consent confirmation and redirection back to your application.
See [UI screens](/tools-and-services/hosted-pages/ui-screens) for more details.
The user will be automatically redirected to the `redirectUrl` specified in the initial consent request in Step 1 once the consent flow is complete. We recommend you redirect the user back to your application to create a good user experience.
The `consentRequestId` is returned as part of the `redirectUrl`. You can use this to check the status of the account consent in step 4.
On an end user's completion of the hosted pages flow, you should check the consent status to confirm the consent has initiated successfully before proceeding with any further actions.
You can retrieve details of the account consent request using [GET /hosted/consent-requests/](/api-reference/hosted-consent-pages/get-hosted-consent-request) specifying the `consentRequestId` in the path.
```bash Request theme={null}
curl --location 'https://api.yapily.com/hosted/consent-requests/consentRequestId' \
--header 'Accept: application/json;charset=UTF-8' \
--header 'Authorization: Basic VXNlcm5hbWU6UGFzc3dvcmQ'
```
```json Response theme={null}
{
"meta": {
"tracingId": "e8cf92170a22496799ec6e8e7a4bedb3"
},
"data": {
"consentRequestId": "b6c28cea-5544-46c6-ba3b-8a20adfce636",
"consentId": "2e2848b9-a838-4759-a259-6a3915f81902",
"userId": "034b2e9c-0b16-4b60-b948-ff3c49d50741",
"applicationUserId": "john.doe@company.com",
"applicationId": "2e760724-289f-43ef-8bd7-d54dbf9dd5b1",
"institutionIdentifiers": {
"institutionId": "modelo-sandbox",
"institutionCountryCode": "GB"
},
"userSettings": {
"language": "EN",
"location": "GB"
},
"redirectUrl": "https://display-parameters.com",
"createdAt": "2024-10-04T14:08:05.104Z",
"authorisationExpiresAt": "2024-10-04T14:18:05.000Z",
"status": "AUTHORIZED",
"phases": [
{
"phaseName": "INITIATED",
"phaseCreatedAt": "2024-10-04T14:08:05.104Z"
},
{
"phaseName": "INSTITUTION_SUBMITTED",
"phaseCreatedAt": "2024-10-04T14:08:11.686Z"
},
{
"phaseName": "AUTHORISATION_INITIATED",
"phaseCreatedAt": "2024-10-04T14:08:12.030Z"
},
{
"phaseName": "AUTHORISATION_CREATED",
"phaseCreatedAt": "2024-10-04T14:08:12.367Z"
},
{
"phaseName": "CONSENT_POLLING_STARTED",
"phaseCreatedAt": "2024-10-04T14:08:28.404Z"
},
{
"phaseName": "CONSENT_POLLING_ENDED",
"phaseCreatedAt": "2024-10-04T14:08:28.892Z"
},
{
"phaseName": "AUTHORISED",
"phaseCreatedAt": "2024-10-04T14:08:28.893Z"
},
{
"phaseName": "FINISHED",
"phaseCreatedAt": "2024-10-04T14:08:28.893Z"
}
],
"consentToken": "eyJraWQiOiIwNmViZTQ1Yy1hYzU5LTRiM2MtOWY5NC03MDljMDM5ZTQxYWIiLCJhbGciOiJFUzI1NiJ9.eyJJTlNUSVRVVElPTiI6Im1vZGVsby1zYW5kYm94IiwiQ09OU0VOVCI6IjJlMjg0OGI5LWE4MzgtNDc1OS1hMjU5LTZhMzkxNWY4MTkwMiIsIkFQUExJQ0FUSU9OX1VTRVJfSUQiOiJqb2huLmRvZUBjb21wYW55LmNvbSIsIlVTRVIiOiIwMzRiMmU5Yy0wYjE2LTRiNjAtYjk0OC1mZjNjNDlkNTA3NDEifQ.OsSU5Jr7W6L-k0c3MRpX8M-ASwGyAaf-vrgbrFJD2oz4bpWm2eE-58gzd3nO50RS7zEYCUmrGt2PTkJEgagZOQ"
}
}
```
[Retrieve account information](/api-reference/financial-data/get-accounts), specifying the `consentToken` in the header.
# Single Payment tutorial using Yapily Hosted Pages
Source: https://docs.yapily.com/tools-and-services/hosted-pages/payment-tutorial-hosted-pages
Tutorial for initiating a single payment using Yapily Hosted Pages. Generate a payment session URL and guide users through the complete open banking payment journey.
Hosted Pages is available as a [Beta version](/getting-started/overview#yapily-hosted-pages-beta).
Please contact your Customer Success Manager if you would like to access it.
## Introduction
This tutorial explains how to use Yapily Hosted Pages to make a UK domestic single payment.
**Note:** All requests made to the Yapily API require [basic authentication](/getting-started/integration-setup/api-authentication).
***
Make a request to [POST /hosted/payment-requests](/api-reference/hosted-payment-pages/create-hosted-payment-request), including the payment request details, institution country code, redirect URL and user ID.
You must provide the `institutionIdentifiers.institutionCountryCode` field. This controls the country of the institution the user can pay from.
In addition, you can optionally provide the ID of a specific institution in `institutionIdentifiers.institutionId` field to only allow payment from this institution. This skips the bank selection screen in the hosted flow.
You can optionally provide `userSettings` to set the user's preferred language and location.
```bash Request theme={null}
curl -L -X POST 'https://api.yapily.com/hosted/payment-requests' \
-H 'Content-Type: application/json' \
-u 'APPLICATION_KEY:APPLICATION_SECRET' \
-d '{
"applicationUserId": "john.doe@company.com",
"institutionIdentifiers": {
"institutionCountryCode": "GB"
},
"userSettings": {
"language": "en",
"location": "GB"
},
"redirectUrl": "https://tpp-application.com/",
"paymentRequestDetails": {
"paymentIdempotencyId": "4289457hd38djoa783jw9qag3",
"amountDetails": {
"amountToPay": 10,
"currency": "GBP"
},
"reference": "Test Payment",
"type": "DOMESTIC_PAYMENT",
"payee": {
"name": "Jane Doe",
"accountIdentifications": [
{
"type": "SORT_CODE",
"identification": "123456"
},
{
"type": "ACCOUNT_NUMBER",
"identification": "12345678"
}
]
}
}
}'
```
```json Response theme={null}
{
"meta": {
"tracingId": "2dbfd85b4f2940c6a206e96dd90e52d0"
},
"data": {
"paymentRequestId": "eb39f8ae-aeff-4ffa-a23d-d4a5b3eff406",
"userId": "3ddf5dd0-aa48-4d0f-baa7-fa057e9e911d",
"applicationUserId": "john.doe@company.com",
"applicationId": "64949de6-6510-4d70-9500-d4aa094c506c",
"institutionIdentifiers": {
"institutionId": "modelo-sandbox",
"institutionCountryCode": "GB"
},
"userSettings": {
"language": "en",
"location": "GB"
},
"redirectUrl": "https://tpp-application.com/",
"paymentRequestDetails": {
"paymentIdempotencyId": "4289457hd38djoa783jw9qag3",
"amountDetails": {
"amountToPay": 1,
"currency": "GBP"
},
"reference": "Test Payment",
"contextType": "OTHER",
"type": "DOMESTIC_PAYMENT",
"payee": {
"name": "Jane Doe",
"accountIdentifications": [
{
"type": "SORT_CODE",
"identification": "123456"
},
{
"type": "ACCOUNT_NUMBER",
"identification": "12345678"
}
]
}
},
"hostedUrl": "https://prototypes.yapily.com/auth-link1.html",
"authToken": "eyJhbGciOiJIUzI1NiIsInR5cCI6IkpXVCJ9.eyJzdWIiOiIxMjM0NTY3ODkwIiwibmFtZSI6IkpvaG4gRG9lIiwiaWF0IjoxNTE2MjM5MDIyfQ.SflKxwRJSMeKKF2QT4fwpMeJf36POk6yJV_adQssw5c",
"createdAt": "2021-06-10T11:26:54.887Z",
"authorisationExpiresAt": "2021-06-10T11:36:54.887Z",
"status": "ACTIVE"
}
}
```
Store the `hostedUrl` returned in the response to use in step 2.
Redirect the end user from your application to the Yapily Hosted Pages URL. This initiates the user journey for the payment request.
The end user follows the Yapily hosted screens to complete the payment request.
A typical journey includes bank selection, redirection to their chosen bank, payment initiation confirmation and redirection back to your application.
See [UI screens](/tools-and-services/hosted-pages/ui-screens) for more details.
The user will be automatically redirected to the `redirectUrl` specified in the initial payment request in Step 1 once the payment flow is complete. We recommend you redirect the user back to your application to create a good user experience.
The `paymentRequestId` is returned as part of the `redirectUrl`. You can use this to check the status of the payment in step 4.
On an end user's completion of the hosted pages flow, you should check the payment status to confirm the payment has initiated successfully before proceeding with any further actions.
You can retrieve details of the payment request using [GET /hosted/payment-requests/](/api-reference/hosted-payment-pages/get-hosted-payment-request) specifying the `paymentRequestId` in the path.
```bash Request theme={null}
curl -L -X GET 'https://api.yapily.com/hosted/payment-requests/{paymentRequestId}' \
-H 'Content-Type: application/json' \
-u 'APPLICATION_KEY:APPLICATION_SECRET'
```
```json Response theme={null}
{
"meta": {
"tracingId": "2dbfd85b4f2940c6a206e96dd90e52d0"
},
"data": {
"paymentRequestId": "eb39f8ae-aeff-4ffa-a23d-d4a5b3eff406",
"userId": "3ddf5dd0-aa48-4d0f-baa7-fa057e9e911d",
"applicationUserId": "john.doe@company.com",
"applicationId": "64949de6-6510-4d70-9500-d4aa094c506c",
"institutionIdentifiers": {
"institutionId": "modelo-sandbox",
"institutionCountryCode": "GB"
},
"userSettings": {
"language": "en",
"location": "GB"
},
"redirectUrl": "https://tpp-application.com/",
"paymentRequestDetails": {
"amountDetails": {
"amountToPay": 1,
"currency": "GBP"
},
"reference": "Test Payment",
"contextType": "OTHER",
"type": "DOMESTIC_PAYMENT",
"payee": {
"name": "Jane Doe",
"accountIdentifications": [
{
"type": "SORT_CODE",
"identification": "123456"
},
{
"type": "ACCOUNT_NUMBER",
"identification": "12345678"
}
]
}
},
"createdAt": "2021-06-10T11:26:54.887Z",
"authorisationExpiresAt": "2021-06-10T11:36:54.887Z",
"status": "ACTIVE",
"payments": [
{
"paymentId": "3fa85f64-5717-4562-b3fc-2c963f66afa6",
"institutionIdentifiers": {
"institutionId": "string",
"institutionCountryCode": "GB"
},
"phases": [
{
"phaseName": "INITIATED",
"phaseCreatedAt": "2021-06-10T11:26:54.887Z"
},
{
"phaseName": "INSTITUTION_SUBMITTED",
"phaseCreatedAt": "2021-06-10T11:26:55.123Z"
},
{
"phaseName": "AUTHORISATION_INITIATED",
"phaseCreatedAt": "2021-06-10T11:27:05.123Z"
},
{
"phaseName": "VALIDATION_COMPLETED",
"phaseCreatedAt": "2021-06-10T11:27:05.223Z"
},
{
"phaseName": "AUTHORISATION_CREATED",
"phaseCreatedAt": "2021-06-10T11:27:06.637Z"
},
{
"phaseName": "AUTHORISED",
"phaseCreatedAt": "2021-06-10T11:27:10.637Z"
},
{
"phaseName": "SUBMITTED",
"phaseCreatedAt": "2021-06-10T11:27:10.654Z"
},
{
"phaseName": "ACCEPTED",
"phaseCreatedAt": "2021-06-10T11:27:11.867Z"
},
{
"phaseName": "SETTLEMENT_COMPLETED",
"phaseCreatedAt": "2021-06-10T11:27:13.887Z"
}
],
"paymentStatus": "COMPLETED",
"statusDetails": [
{
"status": "PENDING",
"statusUpdateDate": "2021-06-10T11:27:11.867Z",
"isoStatus": {
"code": "PDNG",
"name": "Pending"
}
},
{
"status": "COMPLETED",
"statusUpdateDate": "2021-06-10T11:27:13.887Z",
"isoStatus": {
"code": "ACSC",
"name": "AcceptedSettlementCompleted"
}
}
],
"institutionPaymentId": "string",
"paymentLifecycleId": "string",
"paymentIdempotencyId": "04ab4536gaerfc0e1f93c4f4",
"reference": "Bill payment",
"contextType": "OTHER",
"type": "DOMESTIC_PAYMENT",
"payee": {
"name": "Jane Doe",
"accountIdentifications": [
{
"identification": "401016",
"type": "SORT_CODE"
},
{
"identification": "71518920",
"type": "ACCOUNT_NUMBER"
}
],
"address": {
"country": "GB"
},
"merchantId": "24589303",
"merchantCategoryCode": "5551"
},
"payer": {
"name": "John Doe",
"accountIdentifications": [
{
"type": "SORT_CODE",
"identification": "401016"
}
],
"address": {
"country": "GB"
}
},
"amount": {
"amount": 10,
"currency": "GBP"
}
}
]
}
}
```
### Monitoring Payment Status
We recommend using [webhooks](/tools-and-services/hosted-pages/payment-webhooks) to receive real-time notifications when your payment completes or fails. This provides:
* **Immediate status updates** - No polling delay
* **Reduced API calls** - Cost savings for both parties
* **Better user experience** - Faster feedback to customers
If you cannot use webhooks, you can monitor the payment status by repeatedly calling the GET endpoint above until the `paymentStatus` field transitions to `COMPLETED` or `FAILED`.
**Note:** Polling increases API usage and may delay status updates compared to webhooks.
# Hosted Payment Webhooks
Source: https://docs.yapily.com/tools-and-services/hosted-pages/payment-webhooks
Receive real-time notifications on the status of hosted payments
Hosted Pages is available as a [Beta version](/getting-started/overview#yapily-hosted-pages-beta).
Please contact your Customer Success Manager if you would like to access it.
## Introduction
Webhooks are the recommended approach for monitoring the status of hosted payments. They provide real-time HTTP notifications when a payment completes successfully or fails, enabling you to reliably update your internal systems and customer journeys.
**Benefits of using webhooks:**
* **Immediate status updates** - Receive notifications as soon as the payment reaches a terminal state
* **Reduced API calls** - No need to poll the GET endpoint repeatedly, resulting in cost savings for both parties
* **Better user experience** - Provide faster feedback to your customers
While you can monitor payment status by [polling the GET endpoint](/tools-and-services/hosted-pages/payment-tutorial-hosted-pages#retrieve-details-of-the-payment-request), webhooks provide a more efficient and scalable solution.
## Webhook Registration
Before receiving webhook events, you must register a webhook for your application and subscribe to the relevant Hosted PIS webhook event types.
Please follow the [Webhook Registration Guide](/tools-and-services/webhooks/get-started) to:
* Register your webhook URL
* Configure authentication and security
* Subscribe to the Hosted PIS event types listed below
## Supported Event Types
To be notified when a hosted payment reaches a terminal state, subscribe to the following events:
| Event Type | Description |
| ---------------------------------------- | ------------------------------------------------------------------------- |
| `hosted_pis.payment_status.completed.v1` | Triggered when a hosted payment has completed successfully |
| `hosted_pis.payment_status.failed.v1` | Triggered when a hosted payment fails to execute and an error is received |
## Success Event Example
The following example shows a webhook payload delivered when a hosted payment completes successfully:
```json theme={null}
{
"type": "hosted_pis.payment_status.completed.v1",
"applicationId": "a75620ec-8a74-408d-b13f-84227036cf43",
"id": "b59e9533-24a0-4fd0-afc8-0c0c1a186f34",
"event": {
"consentId": "2427faa9-08e2-404e-90f1-4a312dc5f80d",
"institutionId": "mock-sandbox",
"paymentId": "9c5f7701-5275-442f-9d86-80d3ddc5cccc",
"paymentRequestId": "dedcc4f9-7d6d-451c-accc-8a322f153a56",
"isoStatus": {
"code": "ACSC",
"name": "AcceptedSettlementCompleted"
},
"status": "COMPLETED"
},
"metadata": {
"tracingId": "6cf5ef06-9f96-4f24-8bab-32ab09128010",
"user": {
"key": "value"
}
}
}
```
### Success Event Fields
| Property | Type | Description |
| ------------------------ | ------ | -------------------------------------------------- |
| `id` | String | The webhook delivery ID |
| `applicationId` | String | The application that registered the webhook |
| `type` | String | The triggered event type |
| `event.consentId` | String | Consent ID associated with the payment |
| `event.institutionId` | String | Institution from which the payment was initiated |
| `event.paymentId` | String | Payment ID (typically provided by the institution) |
| `event.paymentRequestId` | String | Payment Request ID created at payment initiation |
| `event.status` | String | Final payment status (`COMPLETED`) |
| `event.isoStatus.code` | String | Optional ISO 20022 status code |
| `event.isoStatus.name` | String | Human-readable ISO status name |
| `metadata.tracingId` | String | Tracing ID for observability and debugging |
| `metadata.user` | Object | Optional metadata provided at webhook registration |
## Failure Event Example
The following example shows a webhook payload delivered when a hosted payment fails:
```json theme={null}
{
"type": "hosted_pis.payment_status.failed.v1",
"applicationId": "a75620ec-8a74-408d-b13f-84227036cf43",
"id": "b59e9533-24a0-4fd0-afc8-0c0c1a186f34",
"event": {
"consentId": "2427faa9-08e2-404e-90f1-4a312dc5f80d",
"institutionId": "mock-sandbox",
"paymentId": "9c5f7701-5275-442f-9d86-80d3ddc5cccc",
"paymentRequestId": "dedcc4f9-7d6d-451c-accc-8a322f153a56",
"isoStatus": {
"code": "RJCT",
"name": "Rejected"
},
"status": "FAILED"
},
"metadata": {
"tracingId": "6cf5ef06-9f96-4f24-8bab-32ab09128010",
"user": {
"key": "value"
}
}
}
```
### Failure Event Fields
| Property | Type | Description |
| ------------------------ | ------ | -------------------------------------------------- |
| `id` | String | The webhook delivery ID |
| `applicationId` | String | The application that registered the webhook |
| `type` | String | The triggered event type |
| `event.consentId` | String | Consent ID associated with the payment |
| `event.institutionId` | String | Institution from which the payment was initiated |
| `event.paymentId` | String | Payment ID (typically provided by the institution) |
| `event.paymentRequestId` | String | Payment Request ID created at payment initiation |
| `event.status` | String | Final payment status (`FAILED`) |
| `event.isoStatus.code` | String | Optional ISO 20022 status code |
| `event.isoStatus.name` | String | Human-readable ISO status name |
| `metadata.tracingId` | String | Tracing ID for observability and debugging |
| `metadata.user` | Object | Optional metadata provided at webhook registration |
## Delivery
Yapily attempts to send webhooks immediately after the hosted payment reaches a terminal state (COMPLETED or FAILED).
**Delivery guarantees:**
* Yapily guarantees that a payment will reach either a COMPLETED or FAILED status, and therefore a webhook will be delivered, unless there's an unexpected exception
* The exact timing depends on how quickly the institution processes the payment and updates the payment status
* Include the `tracingId` when contacting support to help identify your specific webhook delivery
**Unexpected exceptions** that may prevent webhook delivery include:
* The institution doesn't update the status of a payment as expected
* The webhook fails to deliver to your endpoint after retrying
For more information on webhook reliability, timeout handling, and retry logic, see the [Webhooks Introduction](/tools-and-services/webhooks/introduction#your-callback-server).
***
## Related Resources
### Hosted Pages Resources
* [Payment Tutorial](/tools-and-services/hosted-pages/payment-tutorial-hosted-pages) - Complete payment integration guide
* [Payment Statuses & Phases](/tools-and-services/hosted-pages/payment-status-and-phase) - Understanding payment lifecycle
### Webhook Resources
* [Get Started with Webhooks](/tools-and-services/webhooks/get-started) - Register and configure webhooks
* [Webhooks Introduction](/tools-and-services/webhooks/introduction) - Webhook infrastructure overview
### Implementation Resources
* [Error Handling](/resources/errors) - Handle payment failures gracefully
* [Support](/resources/support) - Get help with webhook integration
# Yapily Hosted Pages UI screens
Source: https://docs.yapily.com/tools-and-services/hosted-pages/ui-screens
Visual guide to Yapily Hosted Pages UI screens for payment and data flows. See institution picker, consent, confirmation, and payment status screens shown to end users.
Hosted Pages is available as a [Beta version](/getting-started/overview#yapily-hosted-pages-beta).
Please contact your Customer Success Manager if you would like to access it.
***
## UI screens
Yapily Hosted Pages includes the following out-of-the-box screens.
### Bank selection
Displays the list of supported banks to the end user so they can select which bank they want to pay from.
![Bank selection screen]() ### Limits confirmation and How it works
Commercial VRP (cVRP) only.
After bank selection, cVRP payers are shown a limits confirmation screen displaying the mandate parameters they are agreeing to, followed by a "How it works" disclosure overlay before they are redirected to their bank.
### Limits confirmation and How it works
Commercial VRP (cVRP) only.
After bank selection, cVRP payers are shown a limits confirmation screen displaying the mandate parameters they are agreeing to, followed by a "How it works" disclosure overlay before they are redirected to their bank.
![cVRP limits confirmation and How it works screens]() **Presented limits**
The consent screen displays the parameters the payer is agreeing to: per payment limit, periodic limit, and expiry date (or "Ongoing" for open-ended mandates). These must be proportionate to your actual billing pattern and use case - setting limits significantly above what you'll collect is a Damaging Practice under cVRP scheme rules. A good rule of thumb is 20–25% above your highest expected charge.
**How it works**
This overlay covers the mandatory pre-mandate disclosure obligations (cancellation rights, how payments are initiated, and dispute options).
The on-screen "How it works" display is not a durable medium. You must still send the payer a post-setup confirmation (email, SMS, or stored in-app message) containing the key mandate parameters.
### Consent
If you are a [Yapily Connect](/tools-and-services/yapily-connect/overview) customer, your users will be shown a consent screen before being redirected to their bank.
This screen states that you are partnering with Yapily Connect as a TPP and includes Yapily Connect's Terms and Conditions and Privacy Notice. By selecting "continue" the end user is consenting to Yapily Connect initiating a payment from their account and the associated terms.
**Note:** If you use your own licences the consent page will not be displayed. You should ensure to meet any necessary consent requirements before directing your users to the Hosted Pages flow.
**Presented limits**
The consent screen displays the parameters the payer is agreeing to: per payment limit, periodic limit, and expiry date (or "Ongoing" for open-ended mandates). These must be proportionate to your actual billing pattern and use case - setting limits significantly above what you'll collect is a Damaging Practice under cVRP scheme rules. A good rule of thumb is 20–25% above your highest expected charge.
**How it works**
This overlay covers the mandatory pre-mandate disclosure obligations (cancellation rights, how payments are initiated, and dispute options).
The on-screen "How it works" display is not a durable medium. You must still send the payer a post-setup confirmation (email, SMS, or stored in-app message) containing the key mandate parameters.
### Consent
If you are a [Yapily Connect](/tools-and-services/yapily-connect/overview) customer, your users will be shown a consent screen before being redirected to their bank.
This screen states that you are partnering with Yapily Connect as a TPP and includes Yapily Connect's Terms and Conditions and Privacy Notice. By selecting "continue" the end user is consenting to Yapily Connect initiating a payment from their account and the associated terms.
**Note:** If you use your own licences the consent page will not be displayed. You should ensure to meet any necessary consent requirements before directing your users to the Hosted Pages flow.
![Consent screen]() ### Redirect to bank
Redirect authorisation flow only.
Redirects the user to their selected bank to authenticate and authorise the payment request.
The QR code allows desktop users to continue the payment on their mobile bank app.
Mobile bank apps usually offer a more streamlined user experience, enhancing security and reducing the number of steps needed to provide a consent.
### Redirect to bank
Redirect authorisation flow only.
Redirects the user to their selected bank to authenticate and authorise the payment request.
The QR code allows desktop users to continue the payment on their mobile bank app.
Mobile bank apps usually offer a more streamlined user experience, enhancing security and reducing the number of steps needed to provide a consent.
![Redirect to bank screen]() ### Bank login
Embedded authorisation flow only.
Provides input fields for the user to submit their bank login username and password.
### Bank login
Embedded authorisation flow only.
Provides input fields for the user to submit their bank login username and password.
![Bank login screen]() ### Additional details
Embedded authorisation flow only.
Provides input fields for the user to provide additional information to complete the payment. For example, IBAN number.
**Note:** This screen is only displayed if the details are required by the bank when confirming user consent for the payment.
### Additional details
Embedded authorisation flow only.
Provides input fields for the user to provide additional information to complete the payment. For example, IBAN number.
**Note:** This screen is only displayed if the details are required by the bank when confirming user consent for the payment.
![Additional details screen]() ### SCA selection
Embedded authorisation flow only.
Allows the user to select their preferred strong customer authentication (SCA) method. The available methods depend on what the user has configured with their bank.
**Note:** This screen is only displayed if the details are required by the bank when confirming user consent for the payment.
### SCA selection
Embedded authorisation flow only.
Allows the user to select their preferred strong customer authentication (SCA) method. The available methods depend on what the user has configured with their bank.
**Note:** This screen is only displayed if the details are required by the bank when confirming user consent for the payment.
![SCA selection screen]() ### SCA code entry
Embedded authorisation flow only.
Provides an input field for the user to submit the SCA code sent directly to them by the bank.
**Note:** This screen is only displayed if the details are required by the bank when confirming user consent for the payment.
### SCA code entry
Embedded authorisation flow only.
Provides an input field for the user to submit the SCA code sent directly to them by the bank.
**Note:** This screen is only displayed if the details are required by the bank when confirming user consent for the payment.
![SCA code entry screen]() ### Loading
Embedded authorisation flow only.
Displays a loading screen to the user while the consent authorisation is being confirmed in the background.
### Loading
Embedded authorisation flow only.
Displays a loading screen to the user while the consent authorisation is being confirmed in the background.
![Loading screen]() ### Success and redirection
Displays confirmation of the payment initiation to the user. Redirects the user back to your application.
### Success and redirection
Displays confirmation of the payment initiation to the user. Redirects the user back to your application.
![Success screen]() All Yapily's UI screens are compliant with the OBIE guidelines and regulations.
***
## UI customisation
Customisation is available on all screens to create a more consistent experience for your end users as they transition between your application and Yapily Hosted Pages.
The following customisation options are available:
* Custom logo
* Primary colour
* Background colour
* Page background colour
* Primary text colour
* Secondary text colour
Currently, the implementation of customisation requests is managed by Yapily. Please let us know what customisation you would like.
**Customisation can be applied at both the application and sub-application level**, allowing you to tailor the user experience for individual merchants or use cases.
#### Example customisation options:
All Yapily's UI screens are compliant with the OBIE guidelines and regulations.
***
## UI customisation
Customisation is available on all screens to create a more consistent experience for your end users as they transition between your application and Yapily Hosted Pages.
The following customisation options are available:
* Custom logo
* Primary colour
* Background colour
* Page background colour
* Primary text colour
* Secondary text colour
Currently, the implementation of customisation requests is managed by Yapily. Please let us know what customisation you would like.
**Customisation can be applied at both the application and sub-application level**, allowing you to tailor the user experience for individual merchants or use cases.
#### Example customisation options:
![Image showing the customisation options available in the Hosted Pages screen]()
![Image showing the customisation options available in the Hosted Pages screen]()
![Image showing the customisation options available in the Hosted Pages screen]()
![Image showing the customisation options available in the Hosted Pages screen]() # Open Banking Enrolment Guide
Source: https://docs.yapily.com/tools-and-services/open-banking/enrolment-guide
To connect to an Open Banking Institution you will need to enrol onto the Open Banking Directory. Find out more here.
Currently, if you wish to connect to user-authorised bank accounts belonging to Open Banking UK institutions, you will need to enrol onto the [Open Banking Directory](https://directory.openbanking.org.uk/).
To access Open Banking institutions using the Yapily API there are some requirements:
* You must [apply](https://www.fca.org.uk/firms/authorisation/how-to-apply) for your company to be FCA regulated
* [Enrol](https://directory.openbanking.org.uk/s/login/SelfRegister) in the Open Banking Directory as an AISP/PISP
* Nominate Yapily as your technical contact when enrolling with Open Banking. Yapily will handle the technical requirements to provide authorisation flows and to facilitate subsequent API calls
The directory issues credentials that institutions will use to verify your application. Once you have registered and successfully generated a software statement assertion (SSA), you can use these to configure Open Banking institutions for your Yapily application. The exact credentials required for the institution that you are interested in will be displayed in the institution configuration window. Refer to the configuration guide for details on setting up each institution.
# Yapily Pay By Link
Source: https://docs.yapily.com/tools-and-services/pay-by-link/overview
Generate shareable open banking payment links with Yapily Pay By Link. Accept payments without a checkout integration — ideal for invoices, requests, and pay-by-demand.
Pay By Link is available as a [Private Beta version](/getting-started/overview#private-beta).
Please contact your Customer Success Manager if you would like to access it.
***
## Introduction
Pay By Link enables you to generate a 'request to pay' link that you can send to a customer to initiate payment collection. When the user clicks the link, [Yapily Hosted Pages](/tools-and-services/hosted-pages/overview) facilitates the payment capture, authorisation and initiation process for a PIS payment.
It provides a convenient and secure way to send a 'request to pay' link for a fixed amount to your end users.
You can send the link you generate to your end user via any method, such as email or SMS.
The link acts as a long lived payment request, allowing your users to click the link in their own time to start the payment journey. By default, the link expires after 7 days but this is customisable to a maximum of 30 days.
Pay by Link can only be used to collect 1 single payment from the user.
If the user accesses the link after already successfully authorising a payment, they will receive a warning and not be able to initiate another payment.
***
## Applications
You can use Pay By Link in multiple payment scenarios.
**Missed payments:** Recover missed payments and direct debit failures by sending a link to collect the payment.
**Cart abandonment:** Send follow-up links to the user to reduce cart abandonment.
**Payment reminders:** Send reminders with the flexibility to pay later.
**Pay now or later:** Provide the option to pay or top-up now or in the near future via pay by link or a QR code.
Don't see your use case? [Let us know](https://www.yapily.com/company/get-started) how you would like to use Pay By Link.
***
## End user journey
Pay By Link provides a 'request to pay' link, and a pre-built UI to manage the entire user journey from asking the user to make a payment through to initiating the payment request.
A typical user journey is:
1. The end user receives a request for a payment from you via email or SMS.
2. The user clicks the link in the SMS (or other delivery method).
3. The user is redirected to Yapily's Pay By Link landing page that includes a summary of the payment request.
4. The user confirms the request by clicking 'Pay by bank'.
5. The user proceeds to complete the payment authorisation flow on [Yapily Hosted Pages](/tools-and-services/hosted-pages/overview). The user completes the payment authorisation flow and is redirected back to your application on completion.
# Open Banking Enrolment Guide
Source: https://docs.yapily.com/tools-and-services/open-banking/enrolment-guide
To connect to an Open Banking Institution you will need to enrol onto the Open Banking Directory. Find out more here.
Currently, if you wish to connect to user-authorised bank accounts belonging to Open Banking UK institutions, you will need to enrol onto the [Open Banking Directory](https://directory.openbanking.org.uk/).
To access Open Banking institutions using the Yapily API there are some requirements:
* You must [apply](https://www.fca.org.uk/firms/authorisation/how-to-apply) for your company to be FCA regulated
* [Enrol](https://directory.openbanking.org.uk/s/login/SelfRegister) in the Open Banking Directory as an AISP/PISP
* Nominate Yapily as your technical contact when enrolling with Open Banking. Yapily will handle the technical requirements to provide authorisation flows and to facilitate subsequent API calls
The directory issues credentials that institutions will use to verify your application. Once you have registered and successfully generated a software statement assertion (SSA), you can use these to configure Open Banking institutions for your Yapily application. The exact credentials required for the institution that you are interested in will be displayed in the institution configuration window. Refer to the configuration guide for details on setting up each institution.
# Yapily Pay By Link
Source: https://docs.yapily.com/tools-and-services/pay-by-link/overview
Generate shareable open banking payment links with Yapily Pay By Link. Accept payments without a checkout integration — ideal for invoices, requests, and pay-by-demand.
Pay By Link is available as a [Private Beta version](/getting-started/overview#private-beta).
Please contact your Customer Success Manager if you would like to access it.
***
## Introduction
Pay By Link enables you to generate a 'request to pay' link that you can send to a customer to initiate payment collection. When the user clicks the link, [Yapily Hosted Pages](/tools-and-services/hosted-pages/overview) facilitates the payment capture, authorisation and initiation process for a PIS payment.
It provides a convenient and secure way to send a 'request to pay' link for a fixed amount to your end users.
You can send the link you generate to your end user via any method, such as email or SMS.
The link acts as a long lived payment request, allowing your users to click the link in their own time to start the payment journey. By default, the link expires after 7 days but this is customisable to a maximum of 30 days.
Pay by Link can only be used to collect 1 single payment from the user.
If the user accesses the link after already successfully authorising a payment, they will receive a warning and not be able to initiate another payment.
***
## Applications
You can use Pay By Link in multiple payment scenarios.
**Missed payments:** Recover missed payments and direct debit failures by sending a link to collect the payment.
**Cart abandonment:** Send follow-up links to the user to reduce cart abandonment.
**Payment reminders:** Send reminders with the flexibility to pay later.
**Pay now or later:** Provide the option to pay or top-up now or in the near future via pay by link or a QR code.
Don't see your use case? [Let us know](https://www.yapily.com/company/get-started) how you would like to use Pay By Link.
***
## End user journey
Pay By Link provides a 'request to pay' link, and a pre-built UI to manage the entire user journey from asking the user to make a payment through to initiating the payment request.
A typical user journey is:
1. The end user receives a request for a payment from you via email or SMS.
2. The user clicks the link in the SMS (or other delivery method).
3. The user is redirected to Yapily's Pay By Link landing page that includes a summary of the payment request.
4. The user confirms the request by clicking 'Pay by bank'.
5. The user proceeds to complete the payment authorisation flow on [Yapily Hosted Pages](/tools-and-services/hosted-pages/overview). The user completes the payment authorisation flow and is redirected back to your application on completion.
![Pay By Link user journey]() ***
## Get started
See our [single payments tutorial](/tools-and-services/pay-by-link/payment-tutorial-pay-by-link) to explore a sample integration with Yapily Pay By Link.
Try our [demo app](https://demo.yapily.com/) to complete the Yapily Hosted Pages flow for yourself with your real banking credentials.
# Payment tutorial using Pay By Link
Source: https://docs.yapily.com/tools-and-services/pay-by-link/payment-tutorial-pay-by-link
Tutorial for creating and sharing a Yapily Pay By Link payment request. Generate a payment link, customise parameters, share with payers, and track payment status.
Pay By Link is available as a [Private Beta version](/getting-started/overview#private-beta).
Please contact your Customer Success Manager if you would like to access it.
## Introduction
This tutorial explains how to use Pay By Link to make a UK domestic single payment.
**Note:** All requests made to the Yapily API require [basic authentication](/getting-started/integration-setup/api-authentication).
***
Make a request to [POST /hosted/payment-requests/links](/api-reference/hosted-payment-pages/create-pay-by-link), including the payment request details, institution country code, redirect URL and user ID.
You must provide the `institutionIdentifiers.institutionCountryCode` field. This controls the country of the institution the user can pay from.
In addition, you can optionally provide the ID of a specific institution in `institutionIdentifiers.institutionId` field to only allow payment from this institution. This skips the bank selection screen in the hosted flow.
You can optionally provide the due date of the payment `paymentRequestDetails.paymentDueDate`. If provided, this is displayed to the user on the landing page after clicking the link.
You can optionally provide the link expiry date, `authorisationExpiresAt`. The value can be up to 30 days in the future. If not provided, the expiry date defaults to 7 days.
You can optionally provide `userSettings` to set the user's preferred language and location.
```bash Request theme={null}
curl -L -X GET 'https://api.yapily.com/hosted/payment-requests/links' \
-H 'Content-Type: application/json' \
-u 'APPLICATION_KEY:APPLICATION_SECRET' \
-d '{
"userId": "3ddf5dd0-aa48-4d0f-baa7-fa057e9e911d",
"applicationUserId": "john.doe@company.com",
"institutionIdentifiers": {
"institutionCountryCode": "GB"
},
"userSettings": {
"language": "en",
"location": "GB"
},
"redirectUrl": "https://tpp-application.com/",
"authorisationExpiresAt": "28-07-2022 21:05:00",
"paymentRequestDetails": {
"amountDetails": {
"amountToPay": 1,
"currency": "GBP"
},
"reference": "Test Payment",
"type": "DOMESTIC_PAYMENT",
"payee": {
"name": "Jane Doe",
"accountIdentifications": [
{
"type": "SORT_CODE",
"identification": "123456"
},
{
"type": "ACCOUNT_NUMBER",
"identification": "12345678"
}
]
},
"paymentDueDate": "28-07-2022"
}
}'
```
```json Response theme={null}
{
"meta": {
"tracingId": "2dbfd85b4f2940c6a206e96dd90e52d0"
},
"data": {
"paymentRequestId": "eb39f8ae-aeff-4ffa-a23d-d4a5b3eff406",
"userId": "3ddf5dd0-aa48-4d0f-baa7-fa057e9e911d",
"applicationUserId": "john.doe@company.com",
"applicationId": "64949de6-6510-4d70-9500-d4aa094c506c",
"institutionIdentifiers": {
"institutionId": "modelo-sandbox",
"institutionCountryCode": "GB"
},
"userSettings": {
"language": "en",
"location": "GB"
},
"redirectUrl": "https://tpp-application.com/",
"paymentRequestDetails": {
"amountDetails": {
"amountToPay": 10,
"currency": "GBP"
},
"reference": "Test Payment",
"contextType": "OTHER",
"type": "DOMESTIC_PAYMENT",
"paymentDueDate": "28-07-2022",
"payee": {
"name": "Jane Doe",
"accountIdentifications": [
{
"type": "SORT_CODE",
"identification": "123456"
},
{
"type": "ACCOUNT_NUMBER",
"identification": "12345678"
}
]
}
},
"hostedUrl": "https://prototypes.yapily.com/auth-link1.html",
"authToken": "eyJhbGciOiJIUzI1NiIsInR5cCI6IkpXVCJ9.eyJzdWIiOiIxMjM0NTY3ODkwIiwibmFtZSI6IkpvaG4gRG9lIiwiaWF0IjoxNTE2MjM5MDIyfQ.SflKxwRJSMeKKF2QT4fwpMeJf36POk6yJV_adQssw5c",
"createdAt": "2021-06-10T11:26:54.887Z",
"authorisationExpiresAt": "2021-06-10T11:36:54.887Z",
"status": "ACTIVE"
}
}
```
Store the `hostedUrl` returned in the response to use in step 2.
Send the hostedUrl link to the end user, for example via email or SMS.
The link is single use for a fixed payment amount and will expire at the date specified in the request in Step 1, or if not specified, after 7 days.
Once the user clicks the link they are redirected to the [Yapily Hosted Pages landing page](/tools-and-services/pay-by-link/ui-screens#landing-page). The landing page confirms the payment details and allows the user to 'Pay by bank'.
Once the user selects 'Pay by bank' they proceed to complete the payment flow.
The end user follows the Yapily hosted screens to complete the payment request.
A typical journey includes bank selection, redirection to their chosen bank, payment initiation confirmation and redirection back to your application.
See [UI screens](/tools-and-services/hosted-pages/ui-screens) for more details.
The user will be automatically redirected to the `redirectUrl` specified in the initial payment request in Step 1 once the payment flow is complete. We recommend you redirect the user back to your application to create a good user experience.
The `paymentRequestId` is returned as part of the `redirectUrl`. You can use this to check the status of the payment in step 4.
On an end user's completion of the hosted pages flow, you should check the payment status to confirm the payment has initiated successfully before proceeding with any further actions.
You can retrieve details of the payment request using [GET /hosted/payment-requests/](/api-reference/hosted-payment-pages/get-hosted-payment-request) specifying the `paymentRequestId` in the path.
```bash Request theme={null}
curl -L -X GET 'https://api.yapily.com/hosted/payment-requests/{paymentRequestId}' \
-H 'Content-Type: application/json' \
-u 'APPLICATION_KEY:APPLICATION_SECRET'
```
```json Response theme={null}
{
"meta": {
"tracingId": "2dbfd85b4f2940c6a206e96dd90e52d0"
},
"data": {
"paymentRequestId": "eb39f8ae-aeff-4ffa-a23d-d4a5b3eff406",
"userId": "3ddf5dd0-aa48-4d0f-baa7-fa057e9e911d",
"applicationUserId": "john.doe@company.com",
"applicationId": "64949de6-6510-4d70-9500-d4aa094c506c",
"institutionIdentifiers": {
"institutionId": "modelo-sandbox",
"institutionCountryCode": "GB"
},
"userSettings": {
"language": "en",
"location": "GB"
},
"redirectUrl": "https://tpp-application.com/",
"paymentRequestDetails": {
"amountDetails": {
"amountToPay": 1,
"currency": "GBP"
},
"reference": "Test Payment",
"contextType": "OTHER",
"type": "DOMESTIC_PAYMENT",
"payee": {
"name": "Jane Doe",
"accountIdentifications": [
{
"type": "SORT_CODE",
"identification": "123456"
},
{
"type": "ACCOUNT_NUMBER",
"identification": "12345678"
}
]
}
},
"createdAt": "2021-06-10T11:26:54.887Z",
"authorisationExpiresAt": "2021-06-10T11:36:54.887Z",
"status": "ACTIVE",
"payments": [
{
"paymentId": "3fa85f64-5717-4562-b3fc-2c963f66afa6",
"institutionIdentifiers": {
"institutionId": "string",
"institutionCountryCode": "GB"
},
"phases": [
{
"phaseName": "INITIATED",
"phaseCreatedAt": "2021-06-10T11:26:54.887Z"
},
{
"phaseName": "INSTITUTION_SUBMITTED",
"phaseCreatedAt": "2021-06-10T11:26:55.123Z"
},
{
"phaseName": "AUTHORISATION_INITIATED",
"phaseCreatedAt": "2021-06-10T11:27:05.123Z"
},
{
"phaseName": "VALIDATION_COMPLETED",
"phaseCreatedAt": "2021-06-10T11:27:05.223Z"
},
{
"phaseName": "AUTHORISATION_CREATED",
"phaseCreatedAt": "2021-06-10T11:27:06.637Z"
},
{
"phaseName": "AUTHORISED",
"phaseCreatedAt": "2021-06-10T11:27:10.637Z"
},
{
"phaseName": "SUBMITTED",
"phaseCreatedAt": "2021-06-10T11:27:10.654Z"
},
{
"phaseName": "ACCEPTED",
"phaseCreatedAt": "2021-06-10T11:27:11.867Z"
},
{
"phaseName": "SETTLEMENT_COMPLETED",
"phaseCreatedAt": "2021-06-10T11:27:13.887Z"
}
],
"statusDetails": [
{
"status": "PENDING",
"statusUpdateDate": "2021-06-10T11:27:11.867Z",
"isoStatus": {
"code": "PDNG",
"name": "Pending"
}
},
{
"status": "COMPLETED",
"statusUpdateDate": "2021-06-10T11:27:13.887Z",
"isoStatus": {
"code": "ACSC",
"name": "AcceptedSettlementCompleted"
}
}
],
"institutionPaymentId": "string",
"paymentLifecycleId": "string",
"paymentIdempotencyId": "04ab4536gaerfc0e1f93c4f4",
"reference": "Bill payment",
"contextType": "OTHER",
"type": "DOMESTIC_PAYMENT",
"payee": {
"name": "Jane Doe",
"accountIdentifications": [
{
"identification": "401016",
"type": "SORT_CODE"
},
{
"identification": "71518920",
"type": "ACCOUNT_NUMBER"
}
],
"address": {
"country": "GB"
},
"merchantId": "24589303",
"merchantCategoryCode": "5551"
},
"payer": {
"name": "John Doe",
"accountIdentifications": [
{
"type": "SORT_CODE",
"identification": "401016"
}
],
"address": {
"country": "GB"
}
},
"amount": {
"amount": 10,
"currency": "GBP"
}
}
]
}
}
```
In addition, we recommend you continue to monitor the payment status until the status transitions to COMPLETED indicating the payment has been processed successfully.
# Yapily Pay By Link UI screens
Source: https://docs.yapily.com/tools-and-services/pay-by-link/ui-screens
Visual reference for Yapily Pay By Link screens. See the payment link landing page, institution selection, authorisation, and payment confirmation screens.
Pay By Link is available as a [Private Beta version](/getting-started/overview#private-beta).
Please contact your Customer Success Manager if you would like to access it.
***
## UI screens
Pay By Link includes 1 additional UI screen. All remaining UI screens when the user has selected to 'pay by bank' are the same as for [Hosted Pages](/tools-and-services/hosted-pages/ui-screens).
### Landing page
Displays a summary of the payment details and allows the user to 'Pay by Bank'.
***
## Get started
See our [single payments tutorial](/tools-and-services/pay-by-link/payment-tutorial-pay-by-link) to explore a sample integration with Yapily Pay By Link.
Try our [demo app](https://demo.yapily.com/) to complete the Yapily Hosted Pages flow for yourself with your real banking credentials.
# Payment tutorial using Pay By Link
Source: https://docs.yapily.com/tools-and-services/pay-by-link/payment-tutorial-pay-by-link
Tutorial for creating and sharing a Yapily Pay By Link payment request. Generate a payment link, customise parameters, share with payers, and track payment status.
Pay By Link is available as a [Private Beta version](/getting-started/overview#private-beta).
Please contact your Customer Success Manager if you would like to access it.
## Introduction
This tutorial explains how to use Pay By Link to make a UK domestic single payment.
**Note:** All requests made to the Yapily API require [basic authentication](/getting-started/integration-setup/api-authentication).
***
Make a request to [POST /hosted/payment-requests/links](/api-reference/hosted-payment-pages/create-pay-by-link), including the payment request details, institution country code, redirect URL and user ID.
You must provide the `institutionIdentifiers.institutionCountryCode` field. This controls the country of the institution the user can pay from.
In addition, you can optionally provide the ID of a specific institution in `institutionIdentifiers.institutionId` field to only allow payment from this institution. This skips the bank selection screen in the hosted flow.
You can optionally provide the due date of the payment `paymentRequestDetails.paymentDueDate`. If provided, this is displayed to the user on the landing page after clicking the link.
You can optionally provide the link expiry date, `authorisationExpiresAt`. The value can be up to 30 days in the future. If not provided, the expiry date defaults to 7 days.
You can optionally provide `userSettings` to set the user's preferred language and location.
```bash Request theme={null}
curl -L -X GET 'https://api.yapily.com/hosted/payment-requests/links' \
-H 'Content-Type: application/json' \
-u 'APPLICATION_KEY:APPLICATION_SECRET' \
-d '{
"userId": "3ddf5dd0-aa48-4d0f-baa7-fa057e9e911d",
"applicationUserId": "john.doe@company.com",
"institutionIdentifiers": {
"institutionCountryCode": "GB"
},
"userSettings": {
"language": "en",
"location": "GB"
},
"redirectUrl": "https://tpp-application.com/",
"authorisationExpiresAt": "28-07-2022 21:05:00",
"paymentRequestDetails": {
"amountDetails": {
"amountToPay": 1,
"currency": "GBP"
},
"reference": "Test Payment",
"type": "DOMESTIC_PAYMENT",
"payee": {
"name": "Jane Doe",
"accountIdentifications": [
{
"type": "SORT_CODE",
"identification": "123456"
},
{
"type": "ACCOUNT_NUMBER",
"identification": "12345678"
}
]
},
"paymentDueDate": "28-07-2022"
}
}'
```
```json Response theme={null}
{
"meta": {
"tracingId": "2dbfd85b4f2940c6a206e96dd90e52d0"
},
"data": {
"paymentRequestId": "eb39f8ae-aeff-4ffa-a23d-d4a5b3eff406",
"userId": "3ddf5dd0-aa48-4d0f-baa7-fa057e9e911d",
"applicationUserId": "john.doe@company.com",
"applicationId": "64949de6-6510-4d70-9500-d4aa094c506c",
"institutionIdentifiers": {
"institutionId": "modelo-sandbox",
"institutionCountryCode": "GB"
},
"userSettings": {
"language": "en",
"location": "GB"
},
"redirectUrl": "https://tpp-application.com/",
"paymentRequestDetails": {
"amountDetails": {
"amountToPay": 10,
"currency": "GBP"
},
"reference": "Test Payment",
"contextType": "OTHER",
"type": "DOMESTIC_PAYMENT",
"paymentDueDate": "28-07-2022",
"payee": {
"name": "Jane Doe",
"accountIdentifications": [
{
"type": "SORT_CODE",
"identification": "123456"
},
{
"type": "ACCOUNT_NUMBER",
"identification": "12345678"
}
]
}
},
"hostedUrl": "https://prototypes.yapily.com/auth-link1.html",
"authToken": "eyJhbGciOiJIUzI1NiIsInR5cCI6IkpXVCJ9.eyJzdWIiOiIxMjM0NTY3ODkwIiwibmFtZSI6IkpvaG4gRG9lIiwiaWF0IjoxNTE2MjM5MDIyfQ.SflKxwRJSMeKKF2QT4fwpMeJf36POk6yJV_adQssw5c",
"createdAt": "2021-06-10T11:26:54.887Z",
"authorisationExpiresAt": "2021-06-10T11:36:54.887Z",
"status": "ACTIVE"
}
}
```
Store the `hostedUrl` returned in the response to use in step 2.
Send the hostedUrl link to the end user, for example via email or SMS.
The link is single use for a fixed payment amount and will expire at the date specified in the request in Step 1, or if not specified, after 7 days.
Once the user clicks the link they are redirected to the [Yapily Hosted Pages landing page](/tools-and-services/pay-by-link/ui-screens#landing-page). The landing page confirms the payment details and allows the user to 'Pay by bank'.
Once the user selects 'Pay by bank' they proceed to complete the payment flow.
The end user follows the Yapily hosted screens to complete the payment request.
A typical journey includes bank selection, redirection to their chosen bank, payment initiation confirmation and redirection back to your application.
See [UI screens](/tools-and-services/hosted-pages/ui-screens) for more details.
The user will be automatically redirected to the `redirectUrl` specified in the initial payment request in Step 1 once the payment flow is complete. We recommend you redirect the user back to your application to create a good user experience.
The `paymentRequestId` is returned as part of the `redirectUrl`. You can use this to check the status of the payment in step 4.
On an end user's completion of the hosted pages flow, you should check the payment status to confirm the payment has initiated successfully before proceeding with any further actions.
You can retrieve details of the payment request using [GET /hosted/payment-requests/](/api-reference/hosted-payment-pages/get-hosted-payment-request) specifying the `paymentRequestId` in the path.
```bash Request theme={null}
curl -L -X GET 'https://api.yapily.com/hosted/payment-requests/{paymentRequestId}' \
-H 'Content-Type: application/json' \
-u 'APPLICATION_KEY:APPLICATION_SECRET'
```
```json Response theme={null}
{
"meta": {
"tracingId": "2dbfd85b4f2940c6a206e96dd90e52d0"
},
"data": {
"paymentRequestId": "eb39f8ae-aeff-4ffa-a23d-d4a5b3eff406",
"userId": "3ddf5dd0-aa48-4d0f-baa7-fa057e9e911d",
"applicationUserId": "john.doe@company.com",
"applicationId": "64949de6-6510-4d70-9500-d4aa094c506c",
"institutionIdentifiers": {
"institutionId": "modelo-sandbox",
"institutionCountryCode": "GB"
},
"userSettings": {
"language": "en",
"location": "GB"
},
"redirectUrl": "https://tpp-application.com/",
"paymentRequestDetails": {
"amountDetails": {
"amountToPay": 1,
"currency": "GBP"
},
"reference": "Test Payment",
"contextType": "OTHER",
"type": "DOMESTIC_PAYMENT",
"payee": {
"name": "Jane Doe",
"accountIdentifications": [
{
"type": "SORT_CODE",
"identification": "123456"
},
{
"type": "ACCOUNT_NUMBER",
"identification": "12345678"
}
]
}
},
"createdAt": "2021-06-10T11:26:54.887Z",
"authorisationExpiresAt": "2021-06-10T11:36:54.887Z",
"status": "ACTIVE",
"payments": [
{
"paymentId": "3fa85f64-5717-4562-b3fc-2c963f66afa6",
"institutionIdentifiers": {
"institutionId": "string",
"institutionCountryCode": "GB"
},
"phases": [
{
"phaseName": "INITIATED",
"phaseCreatedAt": "2021-06-10T11:26:54.887Z"
},
{
"phaseName": "INSTITUTION_SUBMITTED",
"phaseCreatedAt": "2021-06-10T11:26:55.123Z"
},
{
"phaseName": "AUTHORISATION_INITIATED",
"phaseCreatedAt": "2021-06-10T11:27:05.123Z"
},
{
"phaseName": "VALIDATION_COMPLETED",
"phaseCreatedAt": "2021-06-10T11:27:05.223Z"
},
{
"phaseName": "AUTHORISATION_CREATED",
"phaseCreatedAt": "2021-06-10T11:27:06.637Z"
},
{
"phaseName": "AUTHORISED",
"phaseCreatedAt": "2021-06-10T11:27:10.637Z"
},
{
"phaseName": "SUBMITTED",
"phaseCreatedAt": "2021-06-10T11:27:10.654Z"
},
{
"phaseName": "ACCEPTED",
"phaseCreatedAt": "2021-06-10T11:27:11.867Z"
},
{
"phaseName": "SETTLEMENT_COMPLETED",
"phaseCreatedAt": "2021-06-10T11:27:13.887Z"
}
],
"statusDetails": [
{
"status": "PENDING",
"statusUpdateDate": "2021-06-10T11:27:11.867Z",
"isoStatus": {
"code": "PDNG",
"name": "Pending"
}
},
{
"status": "COMPLETED",
"statusUpdateDate": "2021-06-10T11:27:13.887Z",
"isoStatus": {
"code": "ACSC",
"name": "AcceptedSettlementCompleted"
}
}
],
"institutionPaymentId": "string",
"paymentLifecycleId": "string",
"paymentIdempotencyId": "04ab4536gaerfc0e1f93c4f4",
"reference": "Bill payment",
"contextType": "OTHER",
"type": "DOMESTIC_PAYMENT",
"payee": {
"name": "Jane Doe",
"accountIdentifications": [
{
"identification": "401016",
"type": "SORT_CODE"
},
{
"identification": "71518920",
"type": "ACCOUNT_NUMBER"
}
],
"address": {
"country": "GB"
},
"merchantId": "24589303",
"merchantCategoryCode": "5551"
},
"payer": {
"name": "John Doe",
"accountIdentifications": [
{
"type": "SORT_CODE",
"identification": "401016"
}
],
"address": {
"country": "GB"
}
},
"amount": {
"amount": 10,
"currency": "GBP"
}
}
]
}
}
```
In addition, we recommend you continue to monitor the payment status until the status transitions to COMPLETED indicating the payment has been processed successfully.
# Yapily Pay By Link UI screens
Source: https://docs.yapily.com/tools-and-services/pay-by-link/ui-screens
Visual reference for Yapily Pay By Link screens. See the payment link landing page, institution selection, authorisation, and payment confirmation screens.
Pay By Link is available as a [Private Beta version](/getting-started/overview#private-beta).
Please contact your Customer Success Manager if you would like to access it.
***
## UI screens
Pay By Link includes 1 additional UI screen. All remaining UI screens when the user has selected to 'pay by bank' are the same as for [Hosted Pages](/tools-and-services/hosted-pages/ui-screens).
### Landing page
Displays a summary of the payment details and allows the user to 'Pay by Bank'.
![Pay By Link landing screen]() The following payment details are displayed to the user when they are provided when generating the payment request link:
* Customer name
* Collection amount
* Payment due date (optional)
* Payment Reference
The following details can also be displayed to the user for all payments, depending on your UI customisation:
* Customer support details and opening hours
* Terms & Conditions
***
## UI customisation
See [Hosted Pages UI customisation](/tools-and-services/hosted-pages/ui-screens#ui-customisation) for the available options.
# Webhooks Get Started
Source: https://docs.yapily.com/tools-and-services/webhooks/get-started
Get started with Yapily Webhooks. Register webhook endpoints, verify event signatures, and handle payment and consent event notifications in your backend application.
Webhooks is available as a [Private Beta version](/getting-started/overview#private-beta).
Please contact your Customer Success Manager if you would like to access it.
This document explains how to set up a Webhook that will notify you whenever the Event Category you subscribed to is triggered. Once you understand how to set up this Webhook you will know how to set up all Webhooks.
Setting up any Webhook requires you to:
* Create an endpoint on a secure server that can process HTTPS requests.
* Making sure the endpoint is public and can be reached from outside your system.
* Authenticate with Yapily API and receive a Yapily API Token
* if you don't have a Yapily account then please our [Account Setup Guide](/getting-started/get-started)
If you want to understand better how Webhooks work in Yapily Platform then please check our [Webhook Introduction](/tools-and-services/webhooks/introduction) page.
## Retrieve Webhook Event Categories
Before we register a Webhook we need to get a list of available Webhook Event Categories.
* Call endpoint `GET /webhook/events/categories` in order to retrieve all available Event Categories
* Choose the one you want to subscribe to and use them in the [Webhook Registration](/tools-and-services/webhooks/get-started#webhook-registration) call
## Webhook Registration
You can register a Webhook with one or multiple Webhook Event Categories. In order to register a Webhook and to start receiving Webhook Events in your application follow the steps bellow:
* After retrieving all webhook topics, and choosing the ones the webhook should be triggered for
* Build a request using the topics chosen and call `POST /webhook/events`
* From the successful response of the call get the webhook secret
* Store the webhook secret for further validating the payload signature when receiving events
This is the only API call that would display the webhook secret, you will not be able to retrieve the secret using the API after registration call, please store it if you want to use the webhook signature validation feature
### Restrictions
There are a few restrictions to be aware of when registering a new Webhook:
* An application can register up to 10 webhooks, any further attempts will result in a 406 response
* A callback URL must not contain any query parameters, otherwise a 400 response is returned
* The metadata must be under 10kB, otherwise a 400 response is returned
## Retrieving registered webhooks
* Get a Yapily access token
* Call endpoint `GET /webhook/events` it will return all registered webhooks to your current application
## Resetting webhook secret
In situation when the secret gets compromised you have the option to reset it using the API
* Get a Yapily access token
* Reference the webhook id you received when registering the webhook
* Call endpoint `POST /webhook/secrets/{webhook_id}` it will reset the secret and return the secret in the response
You have the option to reset the secret with a delay, meaning that for the time specified in the reset secret request we will be sending both signatures in the event request giving you time to rotate the secret on your side without any downtime
## Deleting a webhook
* Get a Yapily access token
* Call endpoint `DELETE /webhook/events/{webhook_id}` it will return a confirmation that the webhook was deleted
***
## Webhook for Sub-Application
In cases when you are using [Application Management for Reseller & Merchants](/getting-started/application-management) all the steps and limitation remains the same and for each of the request the following changes need to be made:
* Set a `sub-application` header when executing the http request, with the value being sub-application id
* If the request requires an `applicationId` field in the request, then the value of the field should be the sub-application id
***
## Validating an Event signature
To protect your server from unauthorised webhook events, all payloads are signed using HMAC algorithm `HmacSHA256`.
When receiving an event do the following:
* Read the signature from the headers `webhook-signature`. If you are rotating keys you will receive `webhook-rotation-signature` too
* Assuming you saved the key provided to you during webhook registration or key rotation
* Read the incoming request body stream directly into a string
* Use the string to generate the HMAC signature using algorithm `HmacSHA256`
* Compare the hash you got in the headers with the one generated
Do not map it to any structure that may affect the order or structure of the payload before generating the signature
### Code Example
#### 1. java
```java theme={null}
import java.security.InvalidKeyException;
import java.security.NoSuchAlgorithmException;
import java.util.HashMap;
import java.util.Map;
import javax.crypto.Mac;
import javax.crypto.spec.SecretKeySpec;
import org.apache.hc.client5.http.utils.Hex;
public class EvenPayloadValidation {
private static final String ALGORITHM = "HmacSHA256";
private static final String KEY = "somekey"; // key received while registering webhook
public static void main(String[] args) throws NoSuchAlgorithmException, InvalidKeyException {
String eventPayload = "response body"; // response body
Map headers = new HashMap<>(); // response headers
byte[] keyBytes = KEY.getBytes();
SecretKeySpec secretKeySpec = new SecretKeySpec(keyBytes, ALGORITHM);
Mac mac = Mac.getInstance(ALGORITHM);
mac.init(secretKeySpec);
String signedPayload = Hex.encodeHexString(mac.doFinal(eventPayload.getBytes()));
if (headers.get("webhook-signature").equalsIgnoreCase(signedPayload) ||
headers.get("webhook-rotation-signature").equalsIgnoreCase(signedPayload)) {
System.out.println("valid payload");
} else {
System.out.println("invalid payload");
}
}
}
```
#### 2. javascript
```javascript theme={null}
const crypto = require('crypto');
function validateEventPayload(eventPayload, headers) {
const ALGORITHM = 'sha256';
const KEY = 'somekey'; // key received while registering webhook
const keyBytes = Buffer.from(KEY, 'utf-8');
const hmac = crypto.createHmac(ALGORITHM, keyBytes);
hmac.update(eventPayload, 'utf8');
const signedPayload = hmac.digest('hex');
const webhookSignature = (headers['webhook-signature'] || '').toLowerCase();
const rotationSignature = (headers['webhook-rotation-signature'] || '').toLowerCase();
if (webhookSignature === signedPayload || rotationSignature === signedPayload) {
console.log("valid payload");
} else {
console.log("invalid payload");
}
}
// usage
const eventPayload = "response body"; // response body
const headers = { // response headers
"webhook-signature": "expected_signature_here",
"webhook-rotation-signature": "another_signature_here"
};
validateEventPayload(eventPayload, headers);
```
#### 3. python
```python theme={null}
import hmac
import hashlib
def validate_event_payload(event_payload, headers):
ALGORITHM = 'sha256'
KEY = 'somekey' # key received while registering webhook
key_bytes = KEY.encode('utf-8')
mac = hmac.new(key_bytes, event_payload.encode('utf-8'), hashlib.sha256)
signed_payload = mac.hexdigest()
webhook_signature = (headers.get('webhook-signature') or "").lower()
rotation_signature = (headers.get('webhook-rotation-signature') or "").lower()
if webhook_signature == signed_payload or rotation_signature == signed_payload:
print("valid payload")
else:
print("invalid payload")
# usage
event_payload = "response body" # response body
headers = { # response body
"webhook-signature": "expected_signature_here",
"webhook-rotation-signature": "another_signature_here"
}
validate_event_payload(event_payload, headers)
```
# Introduction
Source: https://docs.yapily.com/tools-and-services/webhooks/introduction
Introduction to Yapily Webhooks for real-time event notifications. Receive payment status updates, consent events, and data access notifications via secure HTTP callbacks.
Webhooks is available as a [Private Beta version](/getting-started/overview#private-beta).
Please contact your Customer Success Manager if you would like to access it.
Webhooks allows you to receive real-time HTTP notifications of changes happening in the Yapily Platform. For example, we could send you a notification when any of your payment has change status, another use-case is when you are integrating with our async API you will rely on the webhooks notification to understand when the data is ready to be collected. This prevents you from having to query the Yapily API for changes to objects that may or may not have happened, and helps you avoid reaching your rate limit.
## Webhook Event Categories
There are many event triggers in Yapily, such as Payment Status changes and Async API processing status, so whenever you configure a Webhook you must first **choose an event category**. Since different event categories have different fields, you must then **handle each event in a different way**. Whenever there's **trigger for an event** you have subscribed to, we'll send you a notification.
Notifications are sent to you as HTTP POST requests and contain a JSON payload that describes the change. For example, let's say you set up a Payment Status Change Webhook. If one of your app's initiates a Payment, we'd send you a notification regarding a status change for that Payment that would look like this:
### Sample Notification
```json theme={null}
{
"id": "41285f64-5717-4562-b3fc-2c961236afa6",
"applicationId": "3fa85f64-5717-4562-b3fc-2c963f66afa6",
"type": "event.category.type",
"event": {
"key": "value"
},
"metadata": {
"tracingId": "6cf5ef06-9f96-4f24-8bab-32ab09128010",
"user": {
"key": "value"
}
}
}
```
* `id` - The Webhook ID that triggered this event
* `applicationId` - The Application ID that registered this Webhook
* `type` - The triggered event's type
* `event` - The triggered event's contents
* The structure of this object depends on the event type; for details, please consult the documentation of the product that you are integrating with.
* `metadata`
* `tracingId` - The Yapily Tracing ID
* `user` - **Optional.** The metadata that you provided at Webhook registration. For details, see the metadata section below.
### Webhook Metadata
When registering a Webhook, the API will allow you to specify a `metadata` object the content of which is under your complete control. You can specify any `key : value` pairs in there and we will send back a copy of that data on every Webhook event where your subscription is being called (under the `metadata.user` object).
## Your Callback Server
To enhance the reliability and conversion rates of the events we deliver to your service, please ensure adherence to the guidelines bellow
### Public URL
Ensure that your service callback endpoint is on a public URL so that we can make these requests successfully
### HTTPS Handling
Webhooks are sent using HTTPS, so your server must be able to receive and process HTTPS requests, and it must have a valid TLS/SSL certificate installed. Self-signed certificates are not supported.
### Return 200 OK response
The endpoint must return a `200 OK` response, which tells the Yapily Platform the event has been received and does not need to be resent. Normally, you will not send this response until you have completed processing the notification.
#### Respond to Event Notifications
Your endpoint should respond to all notifications:
* with a `200 OK HTTPS` response
* within 1 or less seconds
## Setup
To use Webhooks, you will need to set up an endpoint on a secure (HTTPS) server, then add and configure the Webhooks product on your end. The rest of these documents explain how to complete these steps.
Ready? [Let's get started!](/tools-and-services/webhooks/get-started)
***
## Related resources
### Webhook Setup
* [Get Started with Webhooks](/tools-and-services/webhooks/get-started) - Set up your first webhook
* [Webhook Migration Guide](/tools-and-services/webhooks/webhook-migration) - Migrating to new webhook system
### Product-Specific Webhooks
* [Payment Notifications](/payments/payment-resources/payment-notifications) - Webhooks for single payment status updates
* [Hosted Payment Webhooks](/tools-and-services/hosted-pages/payment-webhooks) - Webhooks for Hosted Pages payments
* [Data Plus Webhooks](/data/data-plus/tutorial-categorisation) - Webhooks for transaction categorisation
### Implementation Resources
For error handling, retry strategies, testing, and support, see our [Developer Resources](/resources/overview) guide.
# Migration Guide Notification API to Webhook API
Source: https://docs.yapily.com/tools-and-services/webhooks/webhook-migration
This guide provides a comprehensive walkthrough of the necessary steps to seamlessly migrate from the deprecated Notification API to the enhanced Webhook API.
Webhooks is available as a [Private Beta version](/getting-started/overview#private-beta).
Please contact your Customer Success Manager if you would like to access it.
## Introduction
This guide provides instructions on how to migrate from the deprecated **Notification API** to the enhanced **Webhook API**. The Webhook API offers improvements, such as the ability to subscribe to multiple event categories within a single webhook. The steps outlined here facilitate a smooth migration process.
***
## Prerequisites
Before proceeding with the migration, it is necessary to:
* Obtain a Yapily Access Token.
* Review the [Notification API Documentation](/api-reference/notifications).
* Review the [Webhook API Documentation](/api-reference/webhooks).
* Familiarize with the [Webhook Introduction Guide](/tools-and-services/webhooks/introduction).
* Refer to the [Webhook Get Started Guide](/tools-and-services/webhooks/get-started).
***
## Steps to Migrate
### 1. Remove Existing Subscriptions from Notification API
The Notification API allows only one subscription per event type. To migrate to the Webhook API, any existing subscriptions must be removed first.
* **Retrieve existing subscriptions:** Call the following endpoint: `GET /notifications/event-subscriptions`. Locate the `eventTypeId` in the response under `response.data[].eventTypeId`.
* **Remove subscriptions:** For each `eventTypeId`, call: `DELETE /notifications/event-subscriptions/{eventTypeId}`.
#### 1.1 Remove a Sub-Application Subscription
Follow the instructions outlined in [step 1](/tools-and-services/webhooks/webhook-migration#1-remove-existing-subscriptions-from-notification-api) and add the following changes to the request:
* for all the http request set a request header `sub-application` with the value being sub-application id
### 2. Retrieve Event Categories from Webhook API
Once the existing subscriptions are removed, begin setting up webhook subscriptions in the Webhook API.
* **Retrieve available event categories:** Use the following endpoint to see all available event categories: `GET /webhook/events/categories`. The Webhook API allows multiple event categories to be subscribed to within a single webhook, unlike the Notification API.
### 3. Register for New Webhook Subscriptions
After identifying the desired event categories, follow the steps to register the webhook.
* **Register the webhook:** Call the following endpoint: `POST /webhook/events`. This API call allows the registration of multiple event categories in a single request.
#### 3.1 Webhook Sub-Application Migration
Follow the instructions outlined in [step 3](/tools-and-services/webhooks/webhook-migration#3-register-for-new-webhook-subscriptions) and add the following changes to the request:
* add a request header `sub-application` with the value being the **sub-application id**
* in the request body set the `applicationId` field with the same **sub-application id** that was set in the headers
A detailed explanation of registration steps can be found in the [Webhook Registration](/tools-and-services/webhooks/get-started#webhook-registration) page.
***
## Signature Validation Changes
For integrations that validate event signatures using the Notification API, note that the signature process has been updated with the Webhook API.
* After the webhook registration call, a `webhookSecret` will be provided in the response body.
* **Important:** Record the `webhookSecret` immediately, as it will only be displayed once.
* This secret is required for validating incoming events. Detailed steps on how to perform validation can be found in the [Webhook Documentation](/tools-and-services/webhooks/get-started#webhook-registration).
***
## Conclusion
The steps provided in this guide facilitate a seamless migration from Yapily's Notification API to the Webhook API. The Webhook API offers greater flexibility with event subscriptions and improved signature validation. Refer to the documentation links for additional guidance and examples.
# Yapily Connect Overview
Source: https://docs.yapily.com/tools-and-services/yapily-connect/overview
Yapily Connect provides a ready-built, white-label open banking UI for AIS and PIS flows. Reduce development effort with pre-built institution selection and consent screens.
***
For an introduction to licensing options and how they fit into your integration, see [Licensing & Registration](/concepts/licensing-and-registration).
## Introduction
Yapily Connect is Yapily's Financial Conduct Authority (FCA) registered entity. Yapily Connect grants you simple, easy and quick access to open banking data and payments without the need to obtain a Third-Party Provider (TPP) license.
As a TPP, Yapily Connect can provide Account Information Service Provider (AISP) and Payment Initiation Service Provider (PISP) licenses on your behalf to access the Open Banking network.
This removes the complexity and cost of acquiring the necessary license to access the open banking network if you are not currently registered.
***
## Integration differences
* Yapily handles [institution registration](/getting-started/integration-setup/registration#delegated-registration) for you
* You display **Yapily Connect** as the regulated entity that is requesting your customer's financial data or initiating a payment
* The user sees **Yapily Connect Ltd/UAB** instead of your company's name when they log in to their bank
* You use the [callback URL](/open-banking-flow/handling-redirects/callback-url) to specify the user journey. You must use Yapily's default [redirect URL](/open-banking-flow/handling-redirects/redirect-url)
***
## Yapily Guidelines for User Journey Compliance
These Guidelines for User Journey Compliance ("Guidelines") apply to the user journey
experienced by Payment Service Users ("PSUs") of Yapily Connect Ltd and Yapily Connect UAB (collectively, "Yapily Connect" or "we").
By "user journey", we refer to the process by which a PSU decides to use our open banking services (via our commercial customer) - i.e. the basis upon which they give Yapily Connect their consent to access their account information when we are providing Account Information Service ("AIS") or to initiate a payment when we are providing Payment Initiation Service ("PIS").
These Guidelines should be adhered to Yapily Connect customers. References to "you" and to Yapily Connect customers in these Guidelines are references to any Yapily Connect clients (and any Sub Clients) who incorporate aspects of Yapily Connect's regulated AIS/PIS services into their product propositions with PSUs.
These Guidelines have been prepared taking into account the regulatory requirements that apply in the UK and Lithuania as well as the Customer Experience Guidelines issued by the Open Banking Implementation Entity (OBIE) v 3.1.10. published on the 4th of April 2022 ("OBIE Guidelines") which form part of the Open Banking Standards in the UK.
These Guidelines apply to the design and development of Custom User Journeys. Custom User Journeys are "tailor-made" user flows designed and implemented by you (or Sub Clients) , under Yapily Connect's supervision and according to the requirements set out in these Guidelines.
It is essential that PSUs are clearly informed about the consent they are providing, the service they are receiving and from whom they are receiving regulated services.
Yapily Connect focuses on the specific "pieces" of the user journey in column 1 and 3 below, taking into account the roles of all participants from the perspective of the user journey being one overall experience.
The following payment details are displayed to the user when they are provided when generating the payment request link:
* Customer name
* Collection amount
* Payment due date (optional)
* Payment Reference
The following details can also be displayed to the user for all payments, depending on your UI customisation:
* Customer support details and opening hours
* Terms & Conditions
***
## UI customisation
See [Hosted Pages UI customisation](/tools-and-services/hosted-pages/ui-screens#ui-customisation) for the available options.
# Webhooks Get Started
Source: https://docs.yapily.com/tools-and-services/webhooks/get-started
Get started with Yapily Webhooks. Register webhook endpoints, verify event signatures, and handle payment and consent event notifications in your backend application.
Webhooks is available as a [Private Beta version](/getting-started/overview#private-beta).
Please contact your Customer Success Manager if you would like to access it.
This document explains how to set up a Webhook that will notify you whenever the Event Category you subscribed to is triggered. Once you understand how to set up this Webhook you will know how to set up all Webhooks.
Setting up any Webhook requires you to:
* Create an endpoint on a secure server that can process HTTPS requests.
* Making sure the endpoint is public and can be reached from outside your system.
* Authenticate with Yapily API and receive a Yapily API Token
* if you don't have a Yapily account then please our [Account Setup Guide](/getting-started/get-started)
If you want to understand better how Webhooks work in Yapily Platform then please check our [Webhook Introduction](/tools-and-services/webhooks/introduction) page.
## Retrieve Webhook Event Categories
Before we register a Webhook we need to get a list of available Webhook Event Categories.
* Call endpoint `GET /webhook/events/categories` in order to retrieve all available Event Categories
* Choose the one you want to subscribe to and use them in the [Webhook Registration](/tools-and-services/webhooks/get-started#webhook-registration) call
## Webhook Registration
You can register a Webhook with one or multiple Webhook Event Categories. In order to register a Webhook and to start receiving Webhook Events in your application follow the steps bellow:
* After retrieving all webhook topics, and choosing the ones the webhook should be triggered for
* Build a request using the topics chosen and call `POST /webhook/events`
* From the successful response of the call get the webhook secret
* Store the webhook secret for further validating the payload signature when receiving events
This is the only API call that would display the webhook secret, you will not be able to retrieve the secret using the API after registration call, please store it if you want to use the webhook signature validation feature
### Restrictions
There are a few restrictions to be aware of when registering a new Webhook:
* An application can register up to 10 webhooks, any further attempts will result in a 406 response
* A callback URL must not contain any query parameters, otherwise a 400 response is returned
* The metadata must be under 10kB, otherwise a 400 response is returned
## Retrieving registered webhooks
* Get a Yapily access token
* Call endpoint `GET /webhook/events` it will return all registered webhooks to your current application
## Resetting webhook secret
In situation when the secret gets compromised you have the option to reset it using the API
* Get a Yapily access token
* Reference the webhook id you received when registering the webhook
* Call endpoint `POST /webhook/secrets/{webhook_id}` it will reset the secret and return the secret in the response
You have the option to reset the secret with a delay, meaning that for the time specified in the reset secret request we will be sending both signatures in the event request giving you time to rotate the secret on your side without any downtime
## Deleting a webhook
* Get a Yapily access token
* Call endpoint `DELETE /webhook/events/{webhook_id}` it will return a confirmation that the webhook was deleted
***
## Webhook for Sub-Application
In cases when you are using [Application Management for Reseller & Merchants](/getting-started/application-management) all the steps and limitation remains the same and for each of the request the following changes need to be made:
* Set a `sub-application` header when executing the http request, with the value being sub-application id
* If the request requires an `applicationId` field in the request, then the value of the field should be the sub-application id
***
## Validating an Event signature
To protect your server from unauthorised webhook events, all payloads are signed using HMAC algorithm `HmacSHA256`.
When receiving an event do the following:
* Read the signature from the headers `webhook-signature`. If you are rotating keys you will receive `webhook-rotation-signature` too
* Assuming you saved the key provided to you during webhook registration or key rotation
* Read the incoming request body stream directly into a string
* Use the string to generate the HMAC signature using algorithm `HmacSHA256`
* Compare the hash you got in the headers with the one generated
Do not map it to any structure that may affect the order or structure of the payload before generating the signature
### Code Example
#### 1. java
```java theme={null}
import java.security.InvalidKeyException;
import java.security.NoSuchAlgorithmException;
import java.util.HashMap;
import java.util.Map;
import javax.crypto.Mac;
import javax.crypto.spec.SecretKeySpec;
import org.apache.hc.client5.http.utils.Hex;
public class EvenPayloadValidation {
private static final String ALGORITHM = "HmacSHA256";
private static final String KEY = "somekey"; // key received while registering webhook
public static void main(String[] args) throws NoSuchAlgorithmException, InvalidKeyException {
String eventPayload = "response body"; // response body
Map headers = new HashMap<>(); // response headers
byte[] keyBytes = KEY.getBytes();
SecretKeySpec secretKeySpec = new SecretKeySpec(keyBytes, ALGORITHM);
Mac mac = Mac.getInstance(ALGORITHM);
mac.init(secretKeySpec);
String signedPayload = Hex.encodeHexString(mac.doFinal(eventPayload.getBytes()));
if (headers.get("webhook-signature").equalsIgnoreCase(signedPayload) ||
headers.get("webhook-rotation-signature").equalsIgnoreCase(signedPayload)) {
System.out.println("valid payload");
} else {
System.out.println("invalid payload");
}
}
}
```
#### 2. javascript
```javascript theme={null}
const crypto = require('crypto');
function validateEventPayload(eventPayload, headers) {
const ALGORITHM = 'sha256';
const KEY = 'somekey'; // key received while registering webhook
const keyBytes = Buffer.from(KEY, 'utf-8');
const hmac = crypto.createHmac(ALGORITHM, keyBytes);
hmac.update(eventPayload, 'utf8');
const signedPayload = hmac.digest('hex');
const webhookSignature = (headers['webhook-signature'] || '').toLowerCase();
const rotationSignature = (headers['webhook-rotation-signature'] || '').toLowerCase();
if (webhookSignature === signedPayload || rotationSignature === signedPayload) {
console.log("valid payload");
} else {
console.log("invalid payload");
}
}
// usage
const eventPayload = "response body"; // response body
const headers = { // response headers
"webhook-signature": "expected_signature_here",
"webhook-rotation-signature": "another_signature_here"
};
validateEventPayload(eventPayload, headers);
```
#### 3. python
```python theme={null}
import hmac
import hashlib
def validate_event_payload(event_payload, headers):
ALGORITHM = 'sha256'
KEY = 'somekey' # key received while registering webhook
key_bytes = KEY.encode('utf-8')
mac = hmac.new(key_bytes, event_payload.encode('utf-8'), hashlib.sha256)
signed_payload = mac.hexdigest()
webhook_signature = (headers.get('webhook-signature') or "").lower()
rotation_signature = (headers.get('webhook-rotation-signature') or "").lower()
if webhook_signature == signed_payload or rotation_signature == signed_payload:
print("valid payload")
else:
print("invalid payload")
# usage
event_payload = "response body" # response body
headers = { # response body
"webhook-signature": "expected_signature_here",
"webhook-rotation-signature": "another_signature_here"
}
validate_event_payload(event_payload, headers)
```
# Introduction
Source: https://docs.yapily.com/tools-and-services/webhooks/introduction
Introduction to Yapily Webhooks for real-time event notifications. Receive payment status updates, consent events, and data access notifications via secure HTTP callbacks.
Webhooks is available as a [Private Beta version](/getting-started/overview#private-beta).
Please contact your Customer Success Manager if you would like to access it.
Webhooks allows you to receive real-time HTTP notifications of changes happening in the Yapily Platform. For example, we could send you a notification when any of your payment has change status, another use-case is when you are integrating with our async API you will rely on the webhooks notification to understand when the data is ready to be collected. This prevents you from having to query the Yapily API for changes to objects that may or may not have happened, and helps you avoid reaching your rate limit.
## Webhook Event Categories
There are many event triggers in Yapily, such as Payment Status changes and Async API processing status, so whenever you configure a Webhook you must first **choose an event category**. Since different event categories have different fields, you must then **handle each event in a different way**. Whenever there's **trigger for an event** you have subscribed to, we'll send you a notification.
Notifications are sent to you as HTTP POST requests and contain a JSON payload that describes the change. For example, let's say you set up a Payment Status Change Webhook. If one of your app's initiates a Payment, we'd send you a notification regarding a status change for that Payment that would look like this:
### Sample Notification
```json theme={null}
{
"id": "41285f64-5717-4562-b3fc-2c961236afa6",
"applicationId": "3fa85f64-5717-4562-b3fc-2c963f66afa6",
"type": "event.category.type",
"event": {
"key": "value"
},
"metadata": {
"tracingId": "6cf5ef06-9f96-4f24-8bab-32ab09128010",
"user": {
"key": "value"
}
}
}
```
* `id` - The Webhook ID that triggered this event
* `applicationId` - The Application ID that registered this Webhook
* `type` - The triggered event's type
* `event` - The triggered event's contents
* The structure of this object depends on the event type; for details, please consult the documentation of the product that you are integrating with.
* `metadata`
* `tracingId` - The Yapily Tracing ID
* `user` - **Optional.** The metadata that you provided at Webhook registration. For details, see the metadata section below.
### Webhook Metadata
When registering a Webhook, the API will allow you to specify a `metadata` object the content of which is under your complete control. You can specify any `key : value` pairs in there and we will send back a copy of that data on every Webhook event where your subscription is being called (under the `metadata.user` object).
## Your Callback Server
To enhance the reliability and conversion rates of the events we deliver to your service, please ensure adherence to the guidelines bellow
### Public URL
Ensure that your service callback endpoint is on a public URL so that we can make these requests successfully
### HTTPS Handling
Webhooks are sent using HTTPS, so your server must be able to receive and process HTTPS requests, and it must have a valid TLS/SSL certificate installed. Self-signed certificates are not supported.
### Return 200 OK response
The endpoint must return a `200 OK` response, which tells the Yapily Platform the event has been received and does not need to be resent. Normally, you will not send this response until you have completed processing the notification.
#### Respond to Event Notifications
Your endpoint should respond to all notifications:
* with a `200 OK HTTPS` response
* within 1 or less seconds
## Setup
To use Webhooks, you will need to set up an endpoint on a secure (HTTPS) server, then add and configure the Webhooks product on your end. The rest of these documents explain how to complete these steps.
Ready? [Let's get started!](/tools-and-services/webhooks/get-started)
***
## Related resources
### Webhook Setup
* [Get Started with Webhooks](/tools-and-services/webhooks/get-started) - Set up your first webhook
* [Webhook Migration Guide](/tools-and-services/webhooks/webhook-migration) - Migrating to new webhook system
### Product-Specific Webhooks
* [Payment Notifications](/payments/payment-resources/payment-notifications) - Webhooks for single payment status updates
* [Hosted Payment Webhooks](/tools-and-services/hosted-pages/payment-webhooks) - Webhooks for Hosted Pages payments
* [Data Plus Webhooks](/data/data-plus/tutorial-categorisation) - Webhooks for transaction categorisation
### Implementation Resources
For error handling, retry strategies, testing, and support, see our [Developer Resources](/resources/overview) guide.
# Migration Guide Notification API to Webhook API
Source: https://docs.yapily.com/tools-and-services/webhooks/webhook-migration
This guide provides a comprehensive walkthrough of the necessary steps to seamlessly migrate from the deprecated Notification API to the enhanced Webhook API.
Webhooks is available as a [Private Beta version](/getting-started/overview#private-beta).
Please contact your Customer Success Manager if you would like to access it.
## Introduction
This guide provides instructions on how to migrate from the deprecated **Notification API** to the enhanced **Webhook API**. The Webhook API offers improvements, such as the ability to subscribe to multiple event categories within a single webhook. The steps outlined here facilitate a smooth migration process.
***
## Prerequisites
Before proceeding with the migration, it is necessary to:
* Obtain a Yapily Access Token.
* Review the [Notification API Documentation](/api-reference/notifications).
* Review the [Webhook API Documentation](/api-reference/webhooks).
* Familiarize with the [Webhook Introduction Guide](/tools-and-services/webhooks/introduction).
* Refer to the [Webhook Get Started Guide](/tools-and-services/webhooks/get-started).
***
## Steps to Migrate
### 1. Remove Existing Subscriptions from Notification API
The Notification API allows only one subscription per event type. To migrate to the Webhook API, any existing subscriptions must be removed first.
* **Retrieve existing subscriptions:** Call the following endpoint: `GET /notifications/event-subscriptions`. Locate the `eventTypeId` in the response under `response.data[].eventTypeId`.
* **Remove subscriptions:** For each `eventTypeId`, call: `DELETE /notifications/event-subscriptions/{eventTypeId}`.
#### 1.1 Remove a Sub-Application Subscription
Follow the instructions outlined in [step 1](/tools-and-services/webhooks/webhook-migration#1-remove-existing-subscriptions-from-notification-api) and add the following changes to the request:
* for all the http request set a request header `sub-application` with the value being sub-application id
### 2. Retrieve Event Categories from Webhook API
Once the existing subscriptions are removed, begin setting up webhook subscriptions in the Webhook API.
* **Retrieve available event categories:** Use the following endpoint to see all available event categories: `GET /webhook/events/categories`. The Webhook API allows multiple event categories to be subscribed to within a single webhook, unlike the Notification API.
### 3. Register for New Webhook Subscriptions
After identifying the desired event categories, follow the steps to register the webhook.
* **Register the webhook:** Call the following endpoint: `POST /webhook/events`. This API call allows the registration of multiple event categories in a single request.
#### 3.1 Webhook Sub-Application Migration
Follow the instructions outlined in [step 3](/tools-and-services/webhooks/webhook-migration#3-register-for-new-webhook-subscriptions) and add the following changes to the request:
* add a request header `sub-application` with the value being the **sub-application id**
* in the request body set the `applicationId` field with the same **sub-application id** that was set in the headers
A detailed explanation of registration steps can be found in the [Webhook Registration](/tools-and-services/webhooks/get-started#webhook-registration) page.
***
## Signature Validation Changes
For integrations that validate event signatures using the Notification API, note that the signature process has been updated with the Webhook API.
* After the webhook registration call, a `webhookSecret` will be provided in the response body.
* **Important:** Record the `webhookSecret` immediately, as it will only be displayed once.
* This secret is required for validating incoming events. Detailed steps on how to perform validation can be found in the [Webhook Documentation](/tools-and-services/webhooks/get-started#webhook-registration).
***
## Conclusion
The steps provided in this guide facilitate a seamless migration from Yapily's Notification API to the Webhook API. The Webhook API offers greater flexibility with event subscriptions and improved signature validation. Refer to the documentation links for additional guidance and examples.
# Yapily Connect Overview
Source: https://docs.yapily.com/tools-and-services/yapily-connect/overview
Yapily Connect provides a ready-built, white-label open banking UI for AIS and PIS flows. Reduce development effort with pre-built institution selection and consent screens.
***
For an introduction to licensing options and how they fit into your integration, see [Licensing & Registration](/concepts/licensing-and-registration).
## Introduction
Yapily Connect is Yapily's Financial Conduct Authority (FCA) registered entity. Yapily Connect grants you simple, easy and quick access to open banking data and payments without the need to obtain a Third-Party Provider (TPP) license.
As a TPP, Yapily Connect can provide Account Information Service Provider (AISP) and Payment Initiation Service Provider (PISP) licenses on your behalf to access the Open Banking network.
This removes the complexity and cost of acquiring the necessary license to access the open banking network if you are not currently registered.
***
## Integration differences
* Yapily handles [institution registration](/getting-started/integration-setup/registration#delegated-registration) for you
* You display **Yapily Connect** as the regulated entity that is requesting your customer's financial data or initiating a payment
* The user sees **Yapily Connect Ltd/UAB** instead of your company's name when they log in to their bank
* You use the [callback URL](/open-banking-flow/handling-redirects/callback-url) to specify the user journey. You must use Yapily's default [redirect URL](/open-banking-flow/handling-redirects/redirect-url)
***
## Yapily Guidelines for User Journey Compliance
These Guidelines for User Journey Compliance ("Guidelines") apply to the user journey
experienced by Payment Service Users ("PSUs") of Yapily Connect Ltd and Yapily Connect UAB (collectively, "Yapily Connect" or "we").
By "user journey", we refer to the process by which a PSU decides to use our open banking services (via our commercial customer) - i.e. the basis upon which they give Yapily Connect their consent to access their account information when we are providing Account Information Service ("AIS") or to initiate a payment when we are providing Payment Initiation Service ("PIS").
These Guidelines should be adhered to Yapily Connect customers. References to "you" and to Yapily Connect customers in these Guidelines are references to any Yapily Connect clients (and any Sub Clients) who incorporate aspects of Yapily Connect's regulated AIS/PIS services into their product propositions with PSUs.
These Guidelines have been prepared taking into account the regulatory requirements that apply in the UK and Lithuania as well as the Customer Experience Guidelines issued by the Open Banking Implementation Entity (OBIE) v 3.1.10. published on the 4th of April 2022 ("OBIE Guidelines") which form part of the Open Banking Standards in the UK.
These Guidelines apply to the design and development of Custom User Journeys. Custom User Journeys are "tailor-made" user flows designed and implemented by you (or Sub Clients) , under Yapily Connect's supervision and according to the requirements set out in these Guidelines.
It is essential that PSUs are clearly informed about the consent they are providing, the service they are receiving and from whom they are receiving regulated services.
Yapily Connect focuses on the specific "pieces" of the user journey in column 1 and 3 below, taking into account the roles of all participants from the perspective of the user journey being one overall experience.
![Yapily Connect customer journey]() #### Account information service
* [Yapily Connect AIS UX Guidelines](/tools-and-services/yapily-connect/yapilyconnect-ux-ais-guidelines)
#### Payment initiation service
* [Yapily Connect PIS UX Guidelines](/tools-and-services/yapily-connect/yapilyconnect-ux-pis-guidelines)
The guidance offered here does not constitute legal advice. While guidance has been created with regard to relevant regulatory provisions and best practice, they are not a complete list of the
regulatory or legal obligations that apply to participants. Although intended to be consistent with regulations and laws in the event of any conflict with such regulations and laws, those regulations
and laws will take priority. Participants are responsible for their own compliance with all regulations and laws that apply to them, including without limitation, PSD2, GDPR, consumer protection laws
and anti-money laundering regulations.
### Other resources
* EBA PSD2 Regulatory Technical Standards on SCA
* Open Banking Customer Experience Standards
* OBIE Customer Experience Guidelines
# Yapily Connect AIS UX guidelines
Source: https://docs.yapily.com/tools-and-services/yapily-connect/yapilyconnect-ux-ais-guidelines
UX design guidelines for Yapily Connect AIS flows. Best practices for institution selection, consent screens, and account selection for data access user journeys.
***
## Introduction
An AIS authorisation is any API request to pull the PSU's account information from their bank. AIS requests (or calls) require consent that can last up to 90 days in the UK and 180 days in the EEA. In the UK PSUs are required to reconfirm their consent (SCA not needed) every 90 days so we can still access the data. In the EEA PSUs are required to re-authenticate their consent (SCA needed) with their bank every 180 days so we can still access the data.
Some Yapily Connect customers just require sight of the relevant account information.
Other Yapily Connect customers will wish to share some or all of the account information retrieved via the API call back to the PSU; in the UK, this can require a special agency arrangement to be put in place (see information box "What it means to be an agent for Yapily Connect Ltd" below).
Below are instructions for what steps you should take to ensure a compliant PSU journey.
Although these are described as "steps", they do not need to be performed sequentially as long as each element has been appropriately reflected to support a robust consent. PSU's consent always has to be obtained prior to redirection to the bank.
## Step 1: Introduce the AIS journey to the PSU within your application
Introduce the PSU to the journey by creating an intent within the customer application to permit Yapily Connect to access the PSU's account information on behalf of the customer.
If you're acting as an agent of Yapily Connect (see guidance - 'What it means to be an agent of Yapily Connect Ltd below'), you also need to be explicit about the fact that you will be acting as an agent of Yapily Connect for purposes of showing account information back to the PSU.
## Step 2: Capture the bank
Present the PSU with the option to select which bank they wish to complete an AIS authorisation for.
## Step 3: Display the account information request summary
Present the request for Yapily Connect to access the PSU's account information back to the PSU prior to the redirect to their bank.
The key Yapily Connect requirements are outlined below (depending on whether or not you are acting as an agent).
Everything inside the following "Consent screen" boxes must be displayed to the PSUs. Please replace the text in \[brackets] with your product's information. Any changes to this information must still comply with Yapily Connect's regulatory requirements and will need approval.
The "Terms & Conditions" and "Privacy Notice" links must connect through to Yapily Connect's then current [End User terms](https://www.yapily.com/legal/end-user-terms) and [Privacy Notice](https://www.yapily.com/legal/privacy-policy).
The button to click for confirmation has to be named "Confirm" or "Allow" and it should appear alongside an equally prevalent "Cancel" or "Leave" button at the end of the information displayed. You should make sure that the PSU is provided with the warning / notification message for them to be reminded of the 90 day period approaching, invitation to reconfirm their consent and how their payment account information will be used and whether any other parties will have access to that information.
### Account Information Service (Non-Agency)
**Consent screen**
| We have partnered with Yapily Connect to access your bank data at \[bank].
#### Account information service
* [Yapily Connect AIS UX Guidelines](/tools-and-services/yapily-connect/yapilyconnect-ux-ais-guidelines)
#### Payment initiation service
* [Yapily Connect PIS UX Guidelines](/tools-and-services/yapily-connect/yapilyconnect-ux-pis-guidelines)
The guidance offered here does not constitute legal advice. While guidance has been created with regard to relevant regulatory provisions and best practice, they are not a complete list of the
regulatory or legal obligations that apply to participants. Although intended to be consistent with regulations and laws in the event of any conflict with such regulations and laws, those regulations
and laws will take priority. Participants are responsible for their own compliance with all regulations and laws that apply to them, including without limitation, PSD2, GDPR, consumer protection laws
and anti-money laundering regulations.
### Other resources
* EBA PSD2 Regulatory Technical Standards on SCA
* Open Banking Customer Experience Standards
* OBIE Customer Experience Guidelines
# Yapily Connect AIS UX guidelines
Source: https://docs.yapily.com/tools-and-services/yapily-connect/yapilyconnect-ux-ais-guidelines
UX design guidelines for Yapily Connect AIS flows. Best practices for institution selection, consent screens, and account selection for data access user journeys.
***
## Introduction
An AIS authorisation is any API request to pull the PSU's account information from their bank. AIS requests (or calls) require consent that can last up to 90 days in the UK and 180 days in the EEA. In the UK PSUs are required to reconfirm their consent (SCA not needed) every 90 days so we can still access the data. In the EEA PSUs are required to re-authenticate their consent (SCA needed) with their bank every 180 days so we can still access the data.
Some Yapily Connect customers just require sight of the relevant account information.
Other Yapily Connect customers will wish to share some or all of the account information retrieved via the API call back to the PSU; in the UK, this can require a special agency arrangement to be put in place (see information box "What it means to be an agent for Yapily Connect Ltd" below).
Below are instructions for what steps you should take to ensure a compliant PSU journey.
Although these are described as "steps", they do not need to be performed sequentially as long as each element has been appropriately reflected to support a robust consent. PSU's consent always has to be obtained prior to redirection to the bank.
## Step 1: Introduce the AIS journey to the PSU within your application
Introduce the PSU to the journey by creating an intent within the customer application to permit Yapily Connect to access the PSU's account information on behalf of the customer.
If you're acting as an agent of Yapily Connect (see guidance - 'What it means to be an agent of Yapily Connect Ltd below'), you also need to be explicit about the fact that you will be acting as an agent of Yapily Connect for purposes of showing account information back to the PSU.
## Step 2: Capture the bank
Present the PSU with the option to select which bank they wish to complete an AIS authorisation for.
## Step 3: Display the account information request summary
Present the request for Yapily Connect to access the PSU's account information back to the PSU prior to the redirect to their bank.
The key Yapily Connect requirements are outlined below (depending on whether or not you are acting as an agent).
Everything inside the following "Consent screen" boxes must be displayed to the PSUs. Please replace the text in \[brackets] with your product's information. Any changes to this information must still comply with Yapily Connect's regulatory requirements and will need approval.
The "Terms & Conditions" and "Privacy Notice" links must connect through to Yapily Connect's then current [End User terms](https://www.yapily.com/legal/end-user-terms) and [Privacy Notice](https://www.yapily.com/legal/privacy-policy).
The button to click for confirmation has to be named "Confirm" or "Allow" and it should appear alongside an equally prevalent "Cancel" or "Leave" button at the end of the information displayed. You should make sure that the PSU is provided with the warning / notification message for them to be reminded of the 90 day period approaching, invitation to reconfirm their consent and how their payment account information will be used and whether any other parties will have access to that information.
### Account Information Service (Non-Agency)
**Consent screen**
| We have partnered with Yapily Connect to access your bank data at \[bank].
You will now be securely redirected to \[bank] to give access to the following information:
Account(s) details
Balances
Transaction history
\[Other]
By using the service, you agree to Yapily Connect accessing your bank data, the Terms & Conditions and Privacy Notice *\[Insert links]*.
This consent will be valid until \[dd/mm/yyyy].
*"Confirm" "Cancel" \[insert buttons]* |
| ------------------------------------------------------------------------------------------------------------------------------------------------------------------------------------------------------------------------------------------------------------------------------------------------------------------------------------------------------------------------------------------------------------------------------------------------------------------------------------------------------------------------------- |
### Account Information Service (Agency)
If you are acting as any agent, then you (as agent) must make the PSU aware of this.
**Consent Screen**
| We have partnered with Yapily Connect to access your bank data at \[bank] and act as their agent when we share this information back to you.
You will now be securely redirected to \[bank] to give access to the following information:
Account(s) details
Balances
Transaction history
\[Other]
By using the service, you agree to Yapily Connect accessing your bank data, the Terms & Conditions and Privacy Notice *\[Insert links]*.
This consent will automatically expire on \[dd/mm/yyyy].
*"Confirm" "Cancel" \[Insert buttons]* |
| ---------------------------------------------------------------------------------------------------------------------------------------------------------------------------------------------------------------------------------------------------------------------------------------------------------------------------------------------------------------------------------------------------------------------------------------------------------------------------------------------------------------------------------------------------------------------------------------------------------- |
**What it means to be an agent of Yapily Connect Ltd**
Agency for AIS is only applicable to customers of Yapily Connect Ltd. sharing consolidated account information back to UK-based PSUs. Yapily Connect UAB's customers are allowed to show account information back to EEA-based PSUs without having to become agents of Yapily Connect UAB.
Yapily Connect Ltd AIS customers who need to share "consolidated account information" back to UK-based PSUs must be registered with the FCA as an agent of Yapily Connect Ltd before doing so.
Agency is not required, if:
* the account information returned from the bank is not shown to the PSU (e.g. it only goes to Yapily Connect Ltd's customer for it to make a loan decision); or
* you only show "basic" account information to the PSU (i.e if the only information provided to the PSU is the PSU's name, account number and sort code). This limited data set is not "consolidated account information".
Agency is required if you show more than "basic" account information back to the PSU, e.g. transaction data is shared back via an accounting platform or personal finance management application.
To act as an agent for Yapily Connect Ltd, you must be party to a separate agency agreement with Yapily Connect Ltd and your company must have first been approved to do so both by Yapily Connect Ltd and by the FCA and you must appear on the FCA's register as Yapily Connect Ltd's agent.
It is illegal for you to share consolidated account information to UK-based PSUs without either having the regulatory permissions or being listed on the FCA's register as an agent for a principal who does. This can have serious consequences.
## Step 4: PSU Authenticates with their bank
### Redirection model
The PSU is redirected to their bank (through the browser or the corresponding online banking mobile app) - neither Yapily Connect nor its customer can control this part of the flow. The PSU is asked by their bank to login using the same credentials as their online banking (which can be any combination of SCA e.g. fingerprint scanning, face ID, temporary codes or secure passwords/pass-phrases).
Redirection-based authentication has a range of possible experiences for a PSU based on whether the PSU has a bank's app or not, and the device on which the PSU is consuming the AISP/PISP service. More information about the different authentication methods can be found in the section ["Authentication methods" of the OBIE Guidelines](https://standards.openbanking.org.uk/customer-experience-guidelines/authentication-methods/latest/).
### Embedded flow model
The PSU remains in your application to authenticate with their bank. You need to provide the following additional screens:
1. To collect the PSU's banking credentials (these are the same credentials as their online banking)
2. To present the list of available SCA methods to the PSU so they can select the method they would like the bank to use to contact them (can be skipped if only 1 method available)
3. To collect the SCA code if this option is selected by the PSU. The code is sent directly to the PSU from the bank, and then needs to be captured in your application.
## Step 5: PSU selects accounts
The bank will request the PSU to select all the accounts they want to share information about if this is a new authorisation request. If this is a re-authorisation (where you are requesting the PSU to re-authorise an existing consent), the PSU will typically be taken directly to Step 6.
## Step 6: PSU redirected back to Yapily Connect's customer
Now that the PSU has been authenticated by their bank, they will be prompted to authorise the Yapily Connect consent request. Once the consent has been given (or declined), the bank session will automatically close and the PSU will be redirected to Yapily Connect's redirect URL. Then, within milliseconds, to your callback URL.
## Step 7: Allow revocation of consent
You must ensure that a PSU has the ability to cancel their consent at any time e.g. via a "Consent Dashboard" page containing profile settings etc. The button on the user journey consent screens enabling withdrawal of consent automatically cancels the "Account-access-consent" call to the bank (this is built into the Yapily API functionality).
A more detailed description of how the user journey to revoke the consents should be constructed and what should be presented to the PSU after the revocation are provided in the [OBIE Guidelines, Consent Dashboard and Revocation](https://standards.openbanking.org.uk/customer-experience-guidelines/account-information-services/consent-dashboard-revocation/v3-1-8/#Examples).
# Yapily Connect PIS UX guidelines
Source: https://docs.yapily.com/tools-and-services/yapily-connect/yapilyconnect-ux-pis-guidelines
UX design guidelines for Yapily Connect PIS flows. Best practices for payment initiation UI, institution selection, and confirmation screens for payment user journeys.
***
## Introduction
A PIS authorisation is a request to initiate a payment from the PSU's bank. A single PIS (or bulk payment) authorisation generates a consent that can only be used once and only for the payment request(s) specified in the PIS authorisation. For Variable Recurring Payments, a series of payments can be initiated under a single consent (provided those payments fit within the pre-defined set of parameters defined by the PSU).
Below are instructions for what steps you should take to ensure a compliant PSU journey.
Although these are described as "steps", they do not need to be performed sequentially as long as each element has been appropriately reflected to support a robust consent, provided that a PSU's consent always has to be obtained prior to redirection to the bank.
## Step 1: Introduce PIS journey to the PSU within your application
Introduce the PSU to the journey by creating an intent within your application to permit Yapily Connect to initiate a payment from the PSU's account at the bank, e.g. a button or menu item with the text "pay by bank" or "new payment".
## Step 2: Capture the sending bank
Present the PSU with the option to select which bank they wish to complete a PIS authorisation for. If the PSU has already added an account through the AIS journey and they wish to use this existing account, the bank's selection process can be bypassed. For example, in cases where a returning PSU has already shared account information previously so their bank account is already linked to your platform, the journey can be shortened. However, the "Important Terms" of Yapily Connect T\&Cs and Privacy Notice must be displayed prior to / above the "Allow" button (or equivalent).
## Step 3: Display the payment request summary (if supported)
You should populate the minimum required fields (below) for the PSU.
Everything inside the following "Consent screen" box below must be displayed to PSUs to ensure they give an explicit, unambiguous consent and make an informed decision. Please replace the text in \[brackets] with your product's information. Upon separate approval of Yapily Connect's Compliance Team, you are allowed to make slight changes to how information is presented.
"Yapily Connect Terms & Conditions and Privacy Notice" must link through to Yapily's Connect's then current [End User terms](https://www.yapily.com/legal/end-user-terms) and [Privacy Notice](https://www.yapily.com/legal/privacy-policy). The button to click for confirmation has to be named "Confirm" or "Allow" and it should be presented alongside an equally prevalent "Cancel" or "Leave" button. This should appear beneath / at the end of the information displayed.
### Single PIS payments
**Consent screen**
| We have partnered with Yapily Connect to securely initiate payment from your account at \[bank].
Payment Total
\[amount of payment, currency]
Payee Details
Payee Name: \[Payee Account Name]
Payee Account Identification: Account number and Sort code or additionally roll number or full IBAN]
\[optional] Payment Reference: \[Payment Reference]
By using the service, you agree to Yapily Connect initiating this payment and its Terms & Conditions and Privacy Notice. *\[Insert links]*
*"Confirm"* *"Cancel"* *\[Insert buttons]* |
| ------------------------------------------------------------------------------------------------------------------------------------------------------------------------------------------------------------------------------------------------------------------------------------------------------------------------------------------------------------------------------------------------------------------------------------------------------------------------------------------------------------------------------------------------------------------------------------------------------------ |
### Bulk payments
**Consent screen**
| We have partnered with Yapily Connect to securely initiate bulk payment from your account at \[bank].
*For each payment individually*
Payment Reference: \[reference number]
Amount: \[amount of payment, currency]
Beneficiary: \[name, surname / legal company name]
Date to send: \[dd/mm/yyyy]
By using the service, you agree to Yapily Connect setting up payment and its Terms & Conditions and Privacy Notice. *\[Insert links]*
*"Confirm" "Cancel" \[Insert buttons]* |
| ------------------------------------------------------------------------------------------------------------------------------------------------------------------------------------------------------------------------------------------------------------------------------------------------------------------------------------------------------------------------------------------------------------------------------------------------------------------------------------------------------------------------------------------ |
### Variable Recurring Payments (Sweeping)
PSUs can either specify consent parameters or they can be pre-populated (provided the PSU can amend them).
**Consent screen**
| We have partnered with Yapily Connect to set up a Variable Recurring Payment (VRP) consent to make transfers between your accounts. We will securely transfer you to your \[bank] to authenticate and set up VRPs within the payment rules below:
VRP Consent Parameters
Max per \[time window (Day/Week/Fortnight/MonthHalf Year/Year)]: \[amount, currency (GBP for UK implementations)]
Max per Payment: \[amount, currency (GBP for UK implementations)]
To: \[Payee Account Name]
Account Identification Details: \[account number and sort code OR additionally roll number OR full IBAN]
\[bank]
From:
Option A *(enabling PSUs to enter the details)*
Account Identification Details: \[Account number and sort code - with additional roll number if required, IBAN, PAN, Paym and other formats]
Option B *(enabling PSUs to select the details, assuming they have been saved previously)*
Option C *(enabling PSUs to select their bank in order to select their payment account from there later on in the journey)*
Yapily Connect can make payments until \[dd/mm/yyyy]. *(applicable only if an expiry date is provided on the consent)*
By using the service, you agree to Yapily Connect initiating payments within the above parameters and its Terms & Conditions and Privacy Notice. *\[Insert links]*
You can revoke your consent here or via your banking application.
*"Confirm" "Cancel" \[Insert buttons]* |
| --------------------------------------------------------------------------------------------------------------------------------------------------------------------------------------------------------------------------------------------------------------------------------------------------------------------------------------------------------------------------------------------------------------------------------------------------------------------------------------------------------------------------------------------------------------------------------------------------------------------------------------------------------------------------------------------------------------------------------------------------------------------------------------------------------------------------------------------------------------------------------------------------------------------------------------------------------------------------------------------------------------------------------------------------------------------------------------------------------------------------------------------------------------------------------------------------------------------------------------------------------------------------------------------------------------------------------------------------------------------------------------------------------------------------------------------------------------------------------------------------------------------------------------------------------------------------------------- |
## Step 4: PSU authenticates with the bank
The PSU is redirected to their bank (through the browser or the corresponding online banking mobile app) - neither you nor Yapily Connect control this part of the flow. The PSU is asked by their bank to login using the same credentials as their online banking which can be any combination of SCA e.g. fingerprint scanning, face ID, temporary codes or secure passwords/pass-phrases.
## Step 5: PSU selects an account
The bank will request the PSU to select an account if the payer is not specified. If the payer account is specified, the PSU will typically be taken directly to Step 6.
## Step 6: PSU redirected back to Yapily Connect
Now that the PSU has been authenticated by their bank, they will be prompted to authorise Yapily Connect's consent request. Once the consent has been given (or declined), the bank session will automatically close and the PSU will be redirected to Yapily's redirect URL.
## Step 7: Display payment confirmation
After the initiation of the payment order, you must provide or make available to the PSU and, where applicable, to the payee:
* confirmation of the successful initiation of the payment order with the PSU's bank;
* a reference enabling the PSU and the payee, to identify the payment transaction and, where appropriate, to enable the payee to identify the PSU, and any other information transferred with the payment order;
* the amount of the payment transaction.
You must also provide or make available the reference for the payment transaction to the PSU's bank.
## Step 8: Allow revoking of consent
PSUs cannot revoke payment orders given for single immediate payments (including bulk payments) with the PISP after they have given their consent to the PISP to initiate the payment transaction.
Once the payment has been initiated, the PSU would need to contact their bank to make changes to it. Cancellation of these payments must be consistent with available capabilities on their bank's existing online platform, as well as meeting the requirements of the PSRs relating to revocation of payment orders.
In terms of VRPs, you must provide PSUs with a facility to view and revoke VRP consent(s) as per the [Variable Recurring Payments Consent Screen](#variable-recurring-payments-sweeping).